Rugs take a beating every day—foot traffic, pet accidents, spilled coffee, and tracked-in dirt. Without regular care, they can look dull and worn out fast. The good news?
A few simple habits can keep them looking fresh for years. You don't need expensive equipment or harsh chemicals. Most of these tips use everyday items you already have at home.
And they work on everything from wool to synthetic fibers. Let's dive into 23 rug cleaning tips that will save you time, money, and frustration. Your soft floors will thank you.
1. Vacuum More Often Than You Think
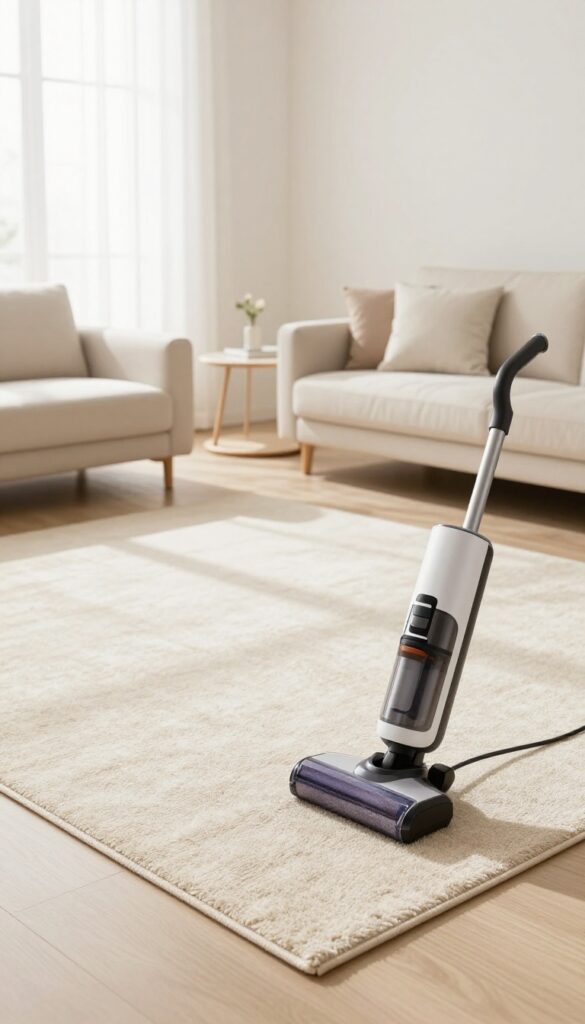
Most people underestimate how much dirt settles into rug fibers. Vacuuming is the single most effective way to keep rugs fresh. High-traffic areas need daily vacuuming, while low-traffic spots can go a few days.
Use a beater bar for deep cleaning, but avoid it on delicate rugs.
Vacuuming regularly prevents dirt from grinding fibers down and keeps colors vibrant. It also removes allergens and pet dander, making your home healthier. The key is consistency: a quick pass every day beats a deep clean once a month.
How Often To Vacuum By Traffic Level
Entryways, hallways, and living rooms see the most foot traffic—vacuum these daily. Guest rooms and low-traffic areas can go 2-3 days between cleanings. If you have pets or kids, bump up the frequency.
Beater Bar Vs. Suction Only
Beater bars agitate fibers to loosen embedded dirt, great for durable rugs. But on delicate rugs like shag or antique wool, switch to suction-only mode to avoid fraying. Always check the manufacturer's label first.
Vacuuming Tips For Different Pile Heights
Low-pile rugs handle aggressive vacuuming well. High-pile and shag rugs need a gentle touch—use a canister vacuum with a brush attachment. Adjust the height setting so the brush barely touches the fibers.
2. Rotate Your Rugs Every Few Months
Rugs don't wear evenly. The spots that get the most foot traffic, sunlight, or furniture pressure will show signs of aging faster than the rest. Rotating them regularly spreads that wear around, so your rug stays looking balanced and fresh for longer.
Rotating your rug is one of the simplest ways to extend its life. Aim to rotate it every 3 to 6 months, depending on how much use it gets. High-traffic areas might need a rotation every 3 months, while low-traffic spaces can go 6 months.
Mark the back of the rug with a small sticker or piece of tape noting the last rotation date. That way, you won't forget when it's time to spin it again. For large rugs, ask a friend to help—you don't want to hurt your back.
If your rug is under furniture, you can still rotate it by temporarily moving the furniture or rotating just the rug and adjusting the furniture placement accordingly.
Why Rotation Matters
Sunlight fades colors unevenly, and foot traffic flattens fibers in specific paths. Over time, this creates visible patterns of wear that make a rug look old before its time. Rotating evens out the exposure, so the entire rug ages at the same rate.
It also prevents one side from getting permanently matted down.
How To Remember
Life gets busy, and rotation can easily slip your mind. Use a calendar reminder or a note on your phone. You can also tie the rotation to a seasonal event—like the start of spring or fall.
That makes it a habit you won't skip.
Tips For Large Or Heavy Rugs
If your rug is too heavy to rotate alone, slide it using a rug gripper or ask a family member for help. For rugs under heavy furniture, you can rotate just the rug by lifting the furniture legs slightly and sliding the rug around. Alternatively, rotate the furniture arrangement to change the pressure points.
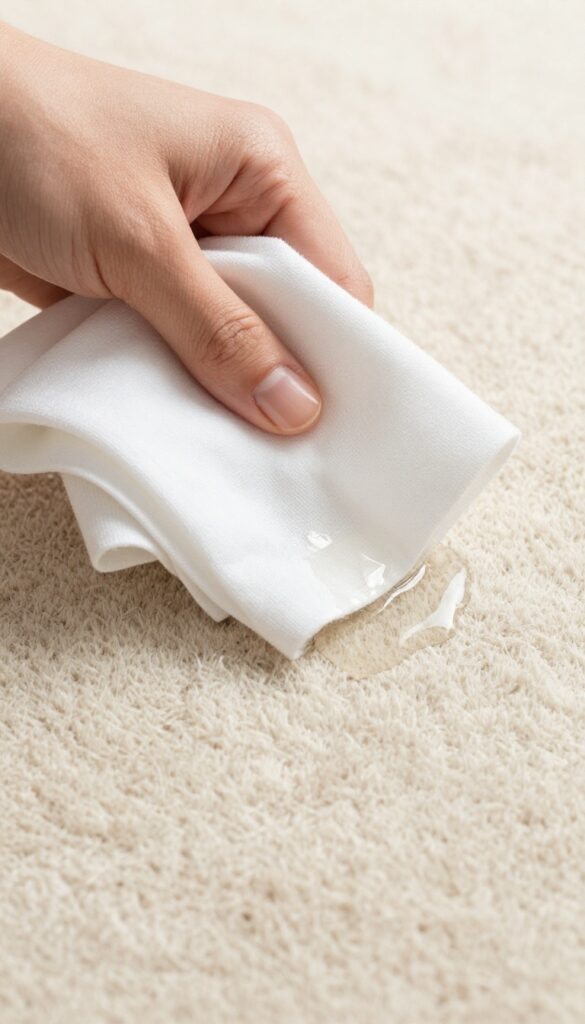
3. Blot Spills Immediately
Spills happen, but how you handle them makes all the difference. The golden rule is simple: blot, don't rub. Rubbing grinds the liquid deep into the fibers, making stains harder to remove and potentially damaging the rug's texture.
Acting fast with the right technique can save your rug from permanent marks.
Why Rubbing Is A No-go
When you rub a spill, you're essentially pushing the liquid deeper into the rug's backing and padding. This not only makes the stain larger but also makes it nearly impossible to fully extract. Rubbing can also fray or distort the fibers, leaving a permanent fuzzy or matted spot.
Always resist the urge to scrub.
The Right Way To Blot
Grab a clean white cloth or paper towel—colored ones can bleed dye onto the rug. Start at the outer edge of the spill and work your way inward. This prevents the stain from spreading.
Press down firmly to absorb as much liquid as possible, then switch to a dry section of the cloth and repeat until the area feels damp, not wet.
What To Do After Blotting
Once you've blotted up the excess, apply a small amount of mild dish soap mixed with water (or a rug-safe cleaner) to a clean cloth and gently dab the spot. Then blot again with a dry cloth to remove the cleaning solution. Let the area air dry completely before walking on it or replacing furniture.
4. Use a Squeegee to Remove Pet Hair
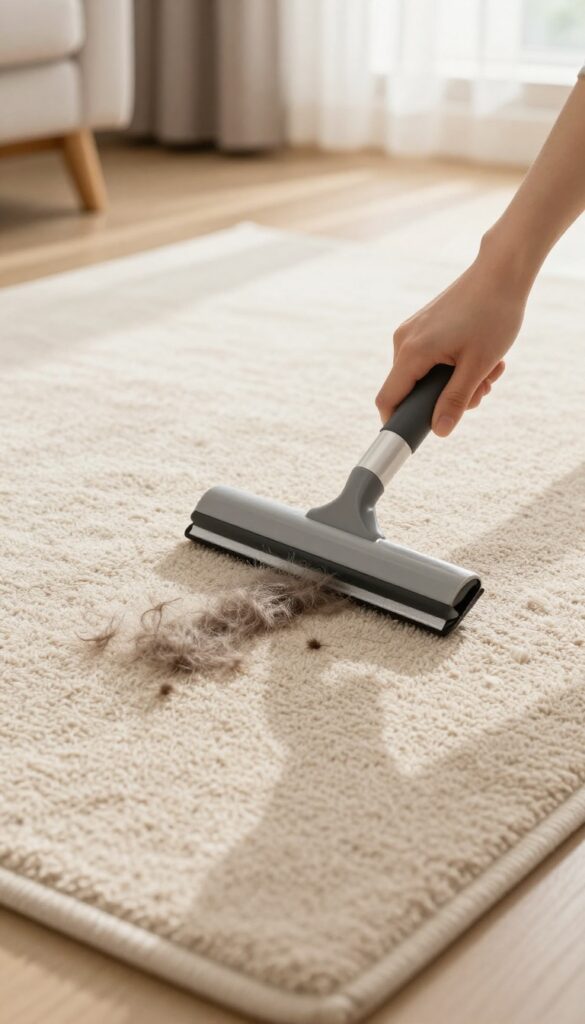
Pet hair can be a nightmare on rugs, especially if you have a heavy shedder. Vacuuming sometimes just pushes the hair deeper into the fibers or leaves it clinging stubbornly. A simple rubber squeegee—the kind you use on windows—can be a game-changer.
It works by creating static electricity that attracts hair, making it clump together for easy cleanup.
Grab a standard rubber squeegee and drag it across the rug in one direction. The hair will gather into rolls or clumps that you can pick up by hand or sweep away. This method is faster than vacuuming for heavy shedding and doesn't clog your vacuum cleaner.
It's also gentle on rug fibers, so you can use it daily without wear.
Why A Squeegee Works
Rubber creates friction that lifts hair from the fibers. Unlike a vacuum, which can sometimes miss embedded hair, the squeegee's edge catches it. The static charge helps hair stick together, so you're not chasing stray strands.
Best Technique For Different Rugs
For low-pile rugs, use long, even strokes. For high-pile or shag rugs, go slowly and use a bit more pressure. Always work in the same direction to avoid tangling the fibers.
If the rug is large, divide it into sections.
When To Combine With Vacuuming
Use the squeegee first to remove the bulk of the hair, then vacuum to pick up any remaining dust or dander. This two-step process leaves your rug cleaner and extends the life of your vacuum filter.
5. Shake Out Small Rugs Outdoors
Small rugs are often the dirtiest because they catch the most foot traffic and get overlooked during cleaning. A simple shake outdoors can dislodge embedded dirt and dust that vacuums miss. This quick habit keeps them fresh between deep cleans and extends their life.
Taking small rugs outside and giving them a vigorous shake is one of the easiest ways to remove loose debris. It works especially well for lightweight rugs that can be handled by one person. Do this weekly or after heavy use to prevent dirt from grinding into fibers.
Why Shaking Works Better Than You Think
Vacuuming is great, but it doesn't always get deep dirt trapped in the base of the rug. Shaking creates a whipping motion that flings particles out. You'll be surprised how much dust flies off even a seemingly clean rug.
Best Practices For Shaking
Pick a dry, breezy day to avoid dust blowing back inside. Hold the rug by one end and snap it downward in a quick motion. Repeat from different sides.
If the rug is large, drape it over a clothesline and beat it with a broom.
When Not To Shake
Avoid shaking delicate or antique rugs—the stress can damage fibers or backing. For those, stick to gentle vacuuming or professional cleaning. Also, skip shaking if the rug is wet or damp, as it can cause mold or mildew.
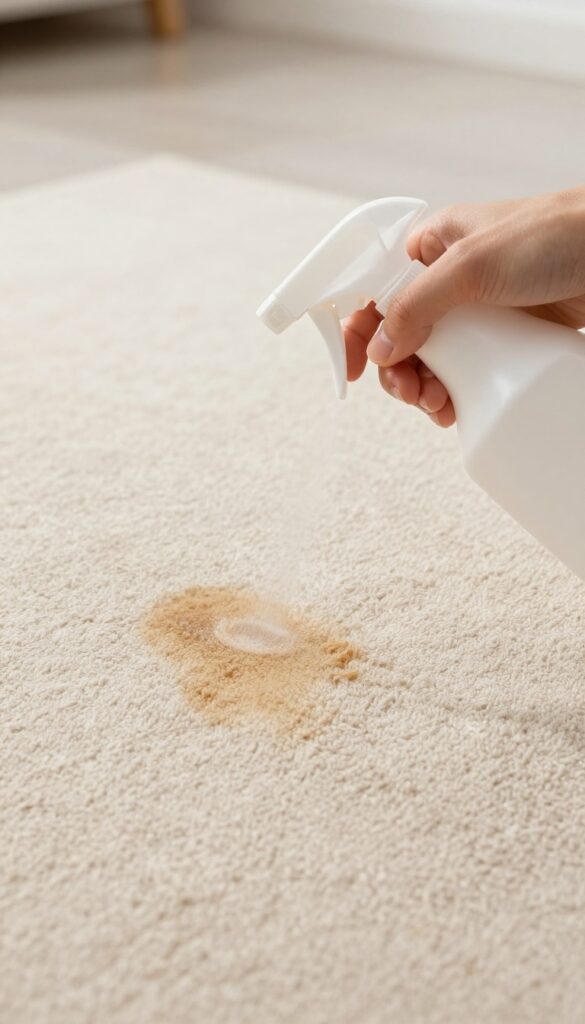
6. Treat Stains with a Homemade Solution
Store-bought stain removers can be pricey and full of chemicals you don't really want in your home. A simple DIY solution works just as well on most fresh stains and costs pennies to make. You probably already have the ingredients in your kitchen.
Mix one part white vinegar with two parts water and add a single drop of dish soap. Shake gently to combine. Always test the solution on a hidden spot of the rug first to make sure it doesn't cause discoloration or damage.
When you're ready to treat the stain, blot—don't rub—the area with a clean cloth dampened with the solution. Rubbing can push the stain deeper into the fibers. After blotting, rinse the spot with a little plain water and blot again with a dry towel until the area is just slightly damp.
Let it air dry completely, then vacuum to restore the texture.
Why Vinegar Works So Well
White vinegar is mildly acidic, which helps break down many common stains like coffee, wine, and pet accidents. It also neutralizes odors without leaving a strong smell behind once it dries. Dish soap cuts through grease and oils, making the combo effective for a wide range of messes.
When To Skip This Method
Avoid using vinegar on natural stone or unsealed grout near rugs, as the acid can etch surfaces. Also, if your rug is made of silk or has a delicate antique fabric, stick to a cleaner specifically designed for that material. When in doubt, consult the rug's care label or a professional.
Blotting Technique Matters
Use a white or light-colored cloth to avoid transferring dye onto the rug. Start from the outer edge of the stain and work inward to prevent spreading. Apply gentle pressure and lift the cloth repeatedly, using a fresh section each time.
Patience here pays off—it may take several rounds to lift the stain completely.
7. Use Baking Soda for Odors
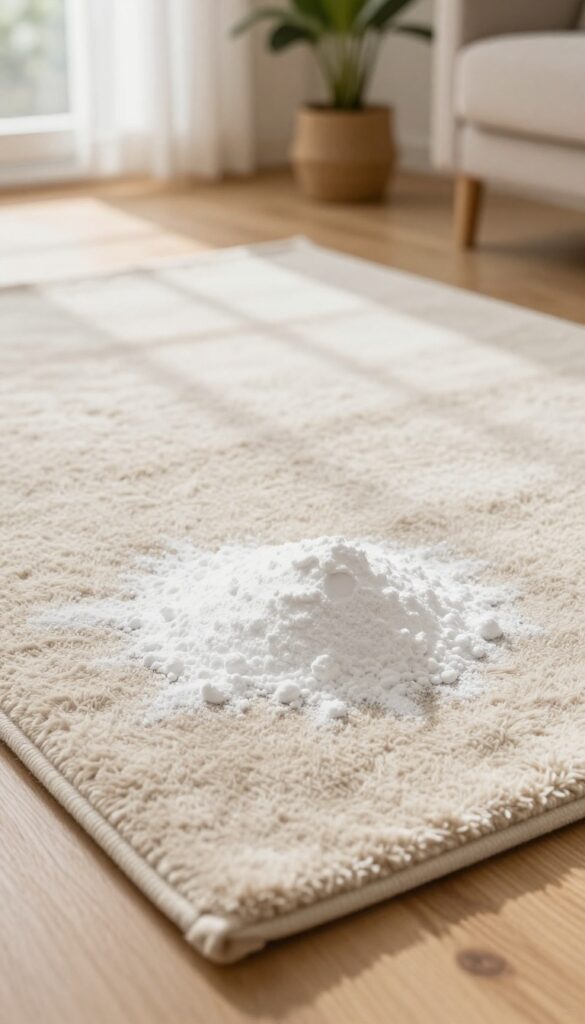
Even the best vacuuming can't always erase smells that get trapped deep in rug fibers. Pet accidents, spilled milk, or just everyday mustiness can linger. Baking soda is a simple, cheap solution that works wonders without any harsh chemicals.
Baking soda naturally absorbs and neutralizes odors rather than just covering them up. It's safe for most rug materials and won't leave a sticky residue. For best results, use it regularly as a preventive measure or as a quick fix when smells pop up.
How To Apply
Sprinkle a generous, even layer of baking soda over the entire rug. Focus extra on areas that see the most traffic or where odors are strongest. Let it sit for at least 15-30 minutes—overnight for really stubborn smells.
Then vacuum thoroughly, making sure to get all the powder out.
When To Use This Method
It's perfect for freshening up rugs between deep cleans. Use it after a pet accident has been properly cleaned, or when you notice a musty smell from humidity. It also works great on rugs that have been stored away for a while.
Tips For Best Results
Make sure the rug is completely dry before applying baking soda, or it can clump. For extra odor-fighting power, mix a few drops of essential oil (like lavender or tea tree) into the baking soda before sprinkling. Always test on a small, hidden area first to check for colorfastness.
8. Avoid Over-Wetting During Cleaning
Water is essential for cleaning rugs, but too much of it can cause serious problems. Excess moisture seeps into the backing and padding, creating a perfect breeding ground for mold and mildew. It can also weaken the rug's backing, leading to premature wear or delamination.
The key is to use just enough water to clean without soaking the rug through.
Spot Cleaning: Damp, Not Drenched
When tackling a stain, resist the urge to pour water directly onto the spot. Instead, dampen a clean white cloth or sponge and blot the stain gently. Work from the outside in to prevent spreading.
After blotting, use a dry cloth to absorb as much moisture as possible. This method lifts dirt without saturating the fibers.
Deep Cleaning: Extract Thoroughly
If you're using a carpet cleaner or steam cleaner, follow the machine's instructions for water-to-solution ratio. After cleaning, go over the rug several times with the extraction tool to remove excess water. You can also place dry towels on the rug and walk over them to soak up leftover moisture.
The goal is to leave the rug just slightly damp, not wet.
Drying Tips To Prevent Moisture Trapping
After any wet cleaning, speed up drying by opening windows, turning on fans, or using a dehumidifier. If possible, lift the rug off the floor slightly to allow air circulation underneath. For area rugs, you can hang them outside on a dry, breezy day.
Never put a damp rug back in place until it's completely dry to the touch.
9. Use a Carpet Rake to Lift Matting
High-traffic areas like hallways and living room paths often get flattened and matted, making even a clean rug look tired. A carpet rake is a simple tool that can revive those compressed fibers and restore the plush feel. It works by gently lifting and separating the pile, which also helps distribute cleaning solutions more evenly and speeds up drying time.
Why Matting Happens
Matting occurs when heavy foot traffic presses fibers down repeatedly, especially on rugs with a dense or cut pile. Dirt and oils get ground into the base, making the fibers stick together. Over time, this creates flat, shiny patches that look worn out.
A carpet rake can reverse this by physically lifting the fibers and breaking up the compacted dirt.
How To Use A Carpet Rake
Always start with a thorough vacuum to remove loose debris. Then, using the carpet rake, work in one direction—usually against the natural grain of the pile—to lift the fibers. Use gentle, even strokes to avoid damaging the backing.
For heavily matted areas, you may need to go over them a few times. Finish by vacuuming again to pick up any loosened dirt.
Best Times To Rake
Raking is most effective after vacuuming and before applying any cleaning solution. It opens up the fibers so the cleaner can penetrate deeper. You can also rake after the rug has dried to fluff it back up.
In high-traffic zones, a quick rake once a week can prevent matting from setting in.
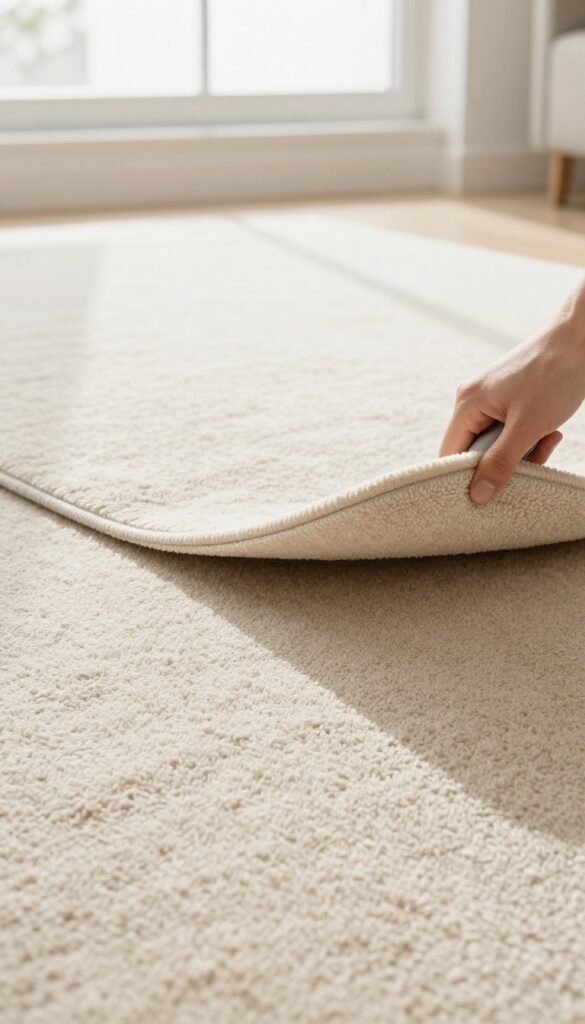
10. Clean Underneath Rugs Regularly
Most people focus on the rug's surface, but what's underneath matters just as much. Dirt, dust, and debris accumulate beneath rugs, grinding into fibers and causing premature wear. Over time, trapped moisture can lead to musty smells or even mold.
Giving the area underneath a quick clean every few months makes a big difference.
Why It Matters
When you walk on a rug, the dirt underneath acts like sandpaper, wearing down the backing and fibers. This is especially true for rugs on hard floors. Regular cleaning underneath prevents that abrasive damage and keeps odors at bay.
It also helps your rug lie flat and stay in place.
How Often To Do It
Aim to lift and clean under area rugs every two to three months. For high-traffic rugs or homes with pets, do it monthly. Larger rugs might need a helper to roll them up.
Mark it on your calendar so it becomes a routine.
The Right Way To Clean
First, vacuum the rug's surface to remove loose dirt. Then roll it up and move it aside. Sweep or vacuum the floor thoroughly.
If it's hard flooring, a damp mop works well—just let it dry completely before putting the rug back. For carpet underneath, vacuum and spot-clean any stains.
Bonus Tip For Large Rugs
If you can't lift a heavy rug entirely, fold back one half at a time. Clean the exposed floor, then flip the rug to do the other side. This method takes longer but saves your back.
Use a rug pad underneath to reduce dirt accumulation and improve airflow.
11. Use Doormats to Reduce Dirt
The easiest way to keep your rugs clean is to stop dirt from getting on them in the first place. Doormats are your first line of defense against mud, dust, and grime. Placing them at every entrance can cut the amount of soil tracked into your home by up to 80%.
Doormats trap dirt, moisture, and debris before they reach your rugs. This simple habit reduces how often you need to deep clean and extends the life of your soft floors. But not all doormats are created equal, and placement matters just as much as the material.
Choose The Right Material
For outdoor mats, go with coarse materials like coir or rubber that scrape off mud and dirt. Indoor mats should be absorbent, like cotton or microfiber, to catch any remaining moisture. Avoid thin mats that curl up or slide around—they won't do the job.
Place Mats At Every Entry Point
Don't just put a mat at the front door. Add them to back doors, garage entrances, and even patio doors. The more mats you have, the more dirt gets trapped.
A mat that's too small is easy to step over, so choose one that's large enough for a few steps.
Clean Your Doormats Regularly
A dirty doormat becomes a dirt source instead of a trap. Shake out outdoor mats weekly and hose them down monthly. Indoor mats can go in the washing machine if they're machine-washable.
Vacuum them in between washes to keep them effective.
12. Test Cleaning Products First
You might be tempted to grab the nearest spray and start scrubbing a stain. But that can backfire big time. Some cleaning products can bleach or discolor rug fibers, especially on natural materials like wool or silk.
A quick patch test saves you from turning a small spot into a permanent eyesore.
A patch test takes just a few minutes and can prevent costly damage. Dab a small amount of your chosen cleaner onto an inconspicuous area—like a corner or under furniture. Blot gently with a white cloth, then let it dry completely.
If the color doesn't change or bleed, the product is safe to use on the rest of the rug.
Why Colorfastness Matters
Rugs are dyed with different types of colorants, and not all hold up to chemicals. Some dyes are water-soluble and can run when exposed to certain cleaners. Testing first helps you spot any reaction before it becomes a visible problem.
How To Do A Simple Patch Test
Mix your cleaning solution according to instructions. Apply a small amount to a hidden area using a clean cloth. Wait at least 10–15 minutes, then blot dry.
Check the cloth for any dye transfer and the rug for color changes. If everything looks good, you're clear to proceed.
What To Avoid On Delicate Fibers
Harsh chemicals like bleach, ammonia, or strong acids can damage wool, silk, or vintage rugs. Stick to pH-neutral cleaners or products specifically labeled for your rug type. When in doubt, consult the manufacturer's care tag or a professional cleaner.
13. Use Ice Cubes for Furniture Dents
That heavy sofa or table leg can leave deep, stubborn dents in your rug's pile. Before you resign yourself to permanent marks, try this surprisingly simple fix: ice cubes. The fibers just need a little moisture and time to bounce back.
Place one or two ice cubes directly on each dent. Let them melt completely—this usually takes a few hours. The water slowly rehydrates the flattened fibers, helping them regain their original shape.
Once melted, blot any excess moisture with a clean towel. Then gently fluff the area with your fingers or a fork to lift the pile. For deeper dents, repeat the process or use a hairdryer on low heat after fluffing to speed drying and further restore volume.
Why It Works
Carpet fibers are often made from materials like nylon or wool that have a natural memory. When compressed for long periods, the fibers lose moisture and become set in a flattened position. The ice cube adds moisture back slowly, allowing the fibers to swell and relax into their original upright state.
Best Rugs For This Trick
This method works best on natural fibers like wool or cotton, and synthetic fibers like nylon or polyester. Avoid using ice on delicate materials like silk or vintage rugs, as excess moisture can cause staining or damage. Always test a small hidden area first.
Speeding Up The Process
If you're in a hurry, you can speed things up by placing a few ice cubes in a plastic bag and setting it on the dent. The bag prevents the water from spreading, and the concentrated moisture works faster. After melting, blot and fluff as usual.
14. Steam Clean Annually
Even with regular vacuuming and spot cleaning, your rug harbors deep-seated dirt, dust mites, and allergens that only high-temperature steam can remove. Professional steam cleaning once a year is the gold standard for a truly deep clean. If you prefer to do it yourself, a rented or owned steam cleaner can work well—just be careful not to over-wet the rug.
Annual steam cleaning revives the fibers, lifts embedded grime, and sanitizes the rug without harsh chemicals. It also helps restore the rug's original texture and color. For best results, schedule it in spring or fall when you can open windows for ventilation.
Why Annual Steam Cleaning Matters
Over time, dirt particles get ground into the base of the rug, causing fibers to wear down faster. Steam cleaning reaches those deep layers, flushing out particles that vacuuming misses. It also kills dust mites and bacteria, making it a must for homes with allergies or pets.
Diy Vs. Professional: Which Is Better?
Professional cleaners use industrial-grade machines that extract more water and dirt, leaving your rug drier and cleaner. DIY machines are more affordable but require careful handling. If you go the DIY route, use a machine with strong suction and follow the manufacturer's instructions closely.
Tips For Safe Steam Cleaning At Home
Always vacuum thoroughly before steaming. Use a cleaning solution designed for your rug type—avoid harsh detergents. Move furniture off the rug and allow 12–24 hours for complete drying.
Never over-wet the rug, as moisture can lead to mold or mildew growth underneath.
15. Use a Lint Roller for Quick Touch-Ups
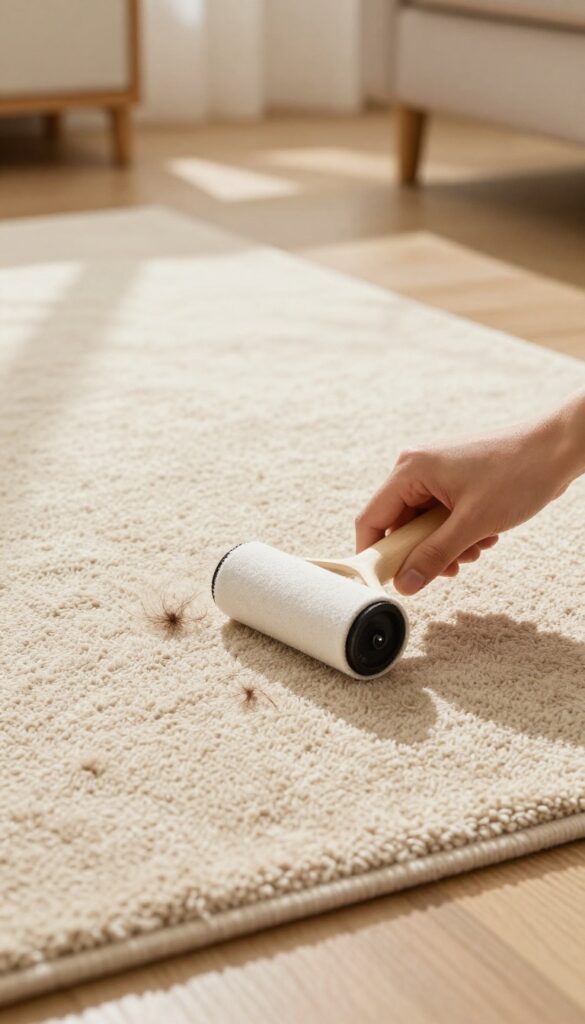
Not every spill or dust patch calls for hauling out the vacuum. A lint roller is a surprisingly effective tool for quick cleanups on rugs, especially low-pile ones. It grabs hair, crumbs, and fine dust in seconds—perfect for high-traffic areas or before guests arrive.
Lint rollers aren't just for clothes. They work wonders on rug surfaces, picking up debris that vacuums sometimes miss. Keep one in a drawer near your living room or entryway for instant touch-ups.
It's especially handy for pet owners who deal with fur tumbleweeds between full cleaning sessions.
Best Rugs For Lint Rollers
Low-pile rugs like flatweaves, sisal, and short synthetic fibers are ideal. The adhesive sheets grab dirt without getting stuck. Avoid using lint rollers on shag or high-pile rugs—they can pull fibers and lose effectiveness.
How To Use It Effectively
Roll firmly in one direction, overlapping each pass slightly. Replace the sheet when it loses stickiness. For larger areas, use a wide lint roller (like the ones for pet hair) to cover more ground quickly.
When To Skip The Lint Roller
If your rug has deep stains, embedded mud, or sticky spills, a lint roller won't cut it. Stick to spot cleaning or full vacuuming for those messes. The roller is best for dry, loose debris only.
16. Dry Rugs Completely After Cleaning
After you've scrubbed and rinsed your rug, the job isn't over yet. Trapped moisture is a breeding ground for mold, mildew, and musty smells. A damp rug can also damage your flooring underneath.
That's why thorough drying is just as important as the cleaning itself.
Drying a rug might seem straightforward, but doing it right prevents future problems. Aim to have your rug completely dry within 24 hours. Any longer and mold spores start to multiply.
Start by removing as much water as possible. If you cleaned the rug in place, blot it with clean, dry towels. Press down firmly to absorb moisture, then switch to fresh towels until they come up barely damp.
For deep-cleaned rugs, use a wet/dry vacuum to extract water—it's much more effective than towels alone.
Speed Up Airflow
Good air circulation is your best friend. Open windows and doors to create cross-ventilation. Point fans directly at the rug—box fans or pedestal fans work great.
If you have ceiling fans, run them on high. The moving air carries moisture away and speeds drying significantly. For thicker rugs, lift the edges occasionally to let air flow underneath.
Use A Dehumidifier
Humidity slows drying. A dehumidifier pulls moisture from the air, making the environment less hospitable for mold. Place it in the same room as the damp rug and run it continuously.
This is especially helpful in basements or during rainy weather when opening windows isn't practical.
Flip And Rotate
Rugs dry unevenly—the top may feel dry while the underside stays wet. Halfway through drying, flip the rug over to expose the damp side. If flipping isn't possible (like with a large area rug), lift and rotate it so different sections face the airflow.
This prevents hidden moisture pockets.
Check For Complete Dryness
Don't guess. Feel the rug with your hand, especially the backing and any thick areas. A moisture meter is handy if you clean rugs often.
Also press a paper towel against the rug—if it picks up any dampness, it's not dry yet. Wait until the rug feels fully dry to the touch before putting furniture back or walking on it.
17. Use a Upholstery Attachment for Edges
The edges of your rug are like magnets for dust bunnies and debris that the main vacuum head simply can't reach. Over time, that buildup can make the borders look dingy and worn. An upholstery attachment is the perfect tool to tackle these tight spots, giving your rug a truly thorough clean.
Why Edges Get Neglected
Standard vacuum heads are wide and flat, designed to cover large areas quickly. But they often leave a gap along baseboards, under furniture, and near rug fringes. That's where dust, pet hair, and crumbs accumulate.
The upholstery attachment's narrow profile lets you get right into those crevices without missing a spot.
How To Use It Effectively
Simply swap your regular head for the upholstery brush and run it along the entire perimeter of the rug. Pay extra attention to corners and areas where furniture legs meet the rug. For fringed edges, use gentle strokes to avoid snagging or pulling threads.
A quick once-over each week keeps those edges looking fresh.
Bonus: Freshen Furniture Feet Too
While you're at it, use the upholstery attachment to clean the floor around furniture legs and the legs themselves. Dust and grime often transfer from furniture onto the rug, so cleaning both surfaces prevents dirt from settling back in. It's a small step that makes a big difference in overall rug appearance.
18. Spot Clean Pet Accidents with Enzymatic Cleaner
Pet accidents happen, and when they do, quick action is key. Enzymatic cleaners are specially formulated to break down the proteins in urine and feces, eliminating odors at the source and discouraging your pet from revisiting the spot. Unlike regular cleaners that just mask smells, these dig deep into carpet fibers to actually remove the problem.
Why Enzymatic Cleaners Work Best
Standard cleaning solutions might make a stain disappear, but they often leave behind trace proteins that smell like a bathroom to your pet. Enzymatic cleaners contain beneficial bacteria and enzymes that literally eat those proteins, turning them into harmless gases and water. This not only removes the odor completely but also stops your pet from re-marking the same area.
Step-by-step Spot Treatment
Start by blotting up as much of the accident as possible with paper towels—don't rub, or you'll push it deeper. Apply the enzymatic cleaner generously, making sure it saturates the stained area and reaches the backing. Let it sit for the time recommended on the bottle (usually 10-15 minutes), then blot again.
For old stains, you may need to repeat the process.
Tips For Best Results
Always test the cleaner on a hidden area first to check for colorfastness. Use a black light to find hidden spots that might still smell. And remember: never mix enzymatic cleaners with other chemicals, especially bleach or ammonia, as that can kill the enzymes and create toxic fumes.
19. Use a Rug Pad for Protection
A rug pad does more than keep your rug from sliding around. It adds cushioning underfoot, reduces wear on the rug fibers, and protects your flooring underneath. Many people skip this simple addition, but it can double the life of your rug and make it feel more luxurious.
Rug pads are an inexpensive investment that pays off quickly. They prevent the rug from bunching up or sliding, which reduces tripping hazards and keeps the rug flat. The cushioning also absorbs some of the impact from foot traffic, so the rug fibers don't get crushed as fast.
Plus, air can circulate between the rug and the floor, preventing moisture from getting trapped and causing mold or mildew.
Choose The Right Pad For Your Floor
Hardwood floors need a pad that won't stain or damage the finish. Look for felt-and-rubber combinations that are pH-neutral and non-staining. For carpet, a thinner, non-slip pad works best to avoid creating bumps.
Avoid pads with PVC or recycled rubber if you have sensitive floors, as they can leave marks or odors.
Measure And Trim Carefully
A pad should be slightly smaller than your rug—about an inch shorter on each side—so it doesn't peek out. Use a sharp utility knife and a straightedge to trim it cleanly. If the pad extends beyond the rug, it can catch dirt or become a tripping hazard.
Replace When Worn
Rug pads wear out over time. If you notice the pad crumbling, sticking to the floor, or losing its grip, replace it. A worn pad can damage your rug or flooring.
Most pads last 3–5 years with regular use.
20. Avoid Direct Sunlight to Prevent Fading
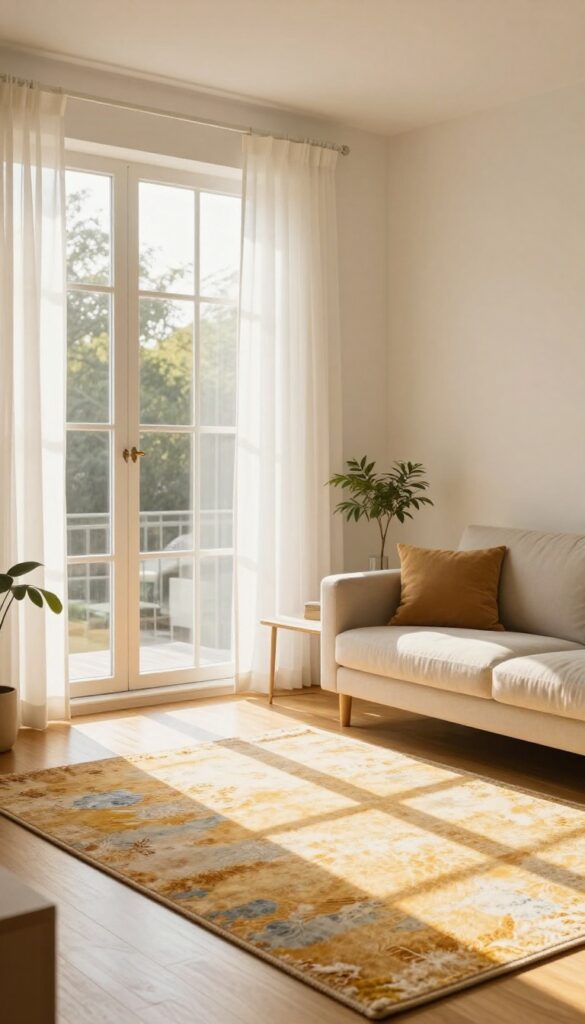
Sunlight does more than brighten a room—it can slowly drain the color from your rug. Over time, UV rays break down the dyes in natural and synthetic fibers, leaving once-vibrant patterns looking washed out. The worst part?
You might not notice until it's too late, especially if the rug sits in a sunny spot for years.
Prolonged sun exposure fades rug colors over time. Use curtains, blinds, or UV-protective window film. Rotate rugs periodically to ensure even fading if you can't avoid sunlight.
How Sunlight Damages Rug Fibers
UV rays penetrate the rug's surface and break chemical bonds in the dye molecules. This happens slowly but steadily, especially in south- or west-facing rooms. Synthetic fibers like polypropylene fade faster than wool, but no material is immune.
Even indirect sunlight can cause noticeable fading over several months.
Simple Ways To Block Uv Rays
Sheer curtains filter some light but aren't enough. Blackout curtains or blinds are best for rooms with direct sun. UV-protective window film is a great middle ground—it blocks up to 99% of harmful rays without darkening the room.
You can also apply a UV-blocking spray made for fabrics, but reapply every few months.
Rotate Rugs To Even Out Fading
If you can't avoid sunlight entirely, rotate your rug every three to six months. This ensures that all areas get similar exposure, so fading happens evenly. For large rugs, swap the head and foot ends.
For smaller rugs, rotate 180 degrees. This trick also helps distribute foot traffic wear.
21. Use a Soft Brush for Delicate Rugs
Not all rugs can handle the aggressive beating of a vacuum cleaner's beater bar. Wool, silk, and antique rugs are especially vulnerable to damage from harsh brushing. That's where a soft-bristled brush comes in handy.
It's a gentle but effective way to lift dirt and dust without harming those delicate fibers.
Switching to a soft brush is one of the simplest ways to extend the life of your high-end or heirloom rugs. The key is to brush in the direction of the nap—the natural lay of the fibers—so you're not forcing dirt deeper or fraying the threads. A short, gentle stroke works best, and you can follow up with a low-suction vacuum if needed.
This method is also great for fringed edges, which can get tangled or torn by a standard vacuum head.
Choosing The Right Brush
Look for a brush with natural bristles, like horsehair or boar, which are soft yet sturdy enough to dislodge dirt. Avoid synthetic bristles that can be too stiff and scratchy. A brush with a wooden handle gives you good control, and a wide head covers more surface area quickly.
Brushing Technique Matters
Start at one corner and work in small sections, brushing in long, even strokes along the nap. For heavily soiled areas, you can use a gentle circular motion first to loosen dirt, then finish with straight strokes. Be extra careful around any loose threads or worn spots.
When To Brush Vs. Vacuum
Use the soft brush for routine maintenance on delicate rugs—once a week is plenty. For deeper cleaning, you can still vacuum, but turn off the beater bar and use only suction. This combo keeps your rug clean without the wear and tear.
22. Remove Gum with Ice
Stepping on a wad of gum is frustrating, and trying to pull it off usually makes a bigger mess. The sticky residue spreads, embeds deeper into the fibers, and can ruin the rug's texture if you use harsh solvents. But there's a simple, chemical-free trick that works like magic—and you probably have the tool in your freezer right now.
Why Ice Works Best
Gum is made of polymers that become soft and sticky at room temperature. When you freeze it, the polymers harden and become brittle, losing their adhesive grip on the rug fibers. This means you can chip or scrape the gum away without pulling on the carpet threads or leaving residue behind.
It's a gentle, non-toxic method that works on nearly every rug material.
Step-by-step: Freeze And Scrape
Grab a few ice cubes and place them in a sealable plastic bag (this prevents water from soaking your rug). Hold the bag against the gum for about 30 seconds to a minute, or until the gum feels rock hard. Then, take a dull knife—a butter knife or a plastic scraper works perfectly—and gently pry the gum off.
Work from the edges inward, and the frozen gum should pop off in one piece. If any small bits remain, repeat the process.
Cleaning Up Any Residue
After the main chunk is gone, you might see a faint sticky spot. Dampen a clean cloth with a little rubbing alcohol or dish soap and water, then blot the area—don't rub. The alcohol breaks down any leftover stickiness without damaging the rug.
Finish by blotting with a dry cloth to absorb moisture, and let the spot air dry. Your rug will look gum-free in minutes.
23. Know When to Call a Professional
Some rugs are beyond what a home cleaning kit can handle. Silk, antique, or large area rugs often require specialized techniques and equipment. If you've tried multiple stain removal methods with no success, or if the rug is heavily soiled, it's time to bring in an expert.
Signs You Need Professional Help
Persistent stains that resist DIY treatments, musty odors that won't go away, or visible damage like fraying edges are clear indicators. Also, if your rug is shedding excessively or the colors are bleeding, professional cleaning can prevent further damage.
What Professionals Do Differently
Professional rug cleaners use specialized equipment like truck-mounted hot water extraction or dry cleaning methods tailored to the rug's fibers. They can also apply protective treatments and repair minor damage. For antique or heirloom rugs, they have the expertise to preserve the material and dyes.
How Often To Call A Pro
For high-traffic areas, consider professional cleaning every 12 to 18 months. For delicate rugs, a yearly deep clean is wise. Even low-traffic rugs benefit from professional attention every two to three years to remove embedded dirt that vacuums miss.
FAQ
How often should I vacuum my rugs?
Vacuum high-traffic areas daily, and low-traffic areas at least once a week. Use a beater bar for most rugs, but avoid it on delicate fibers like silk or antique rugs.
Can I use bleach to clean my rug?
Avoid bleach—it can discolor and damage rug fibers. Instead, use a mild solution of vinegar and water or a rug-specific cleaner. Always test on a hidden area first.
How do I remove pet urine smell from a rug?
Blot up as much urine as possible, then apply an enzymatic cleaner designed for pet stains. Let it sit for the recommended time, then blot dry. Baking soda can also help absorb odors.
Is steam cleaning safe for all rugs?
Steam cleaning is safe for most synthetic and wool rugs, but not for delicate materials like silk or jute. Check the manufacturer's care label. Over-wetting can cause damage, so ensure proper drying.
How do I prevent my rug from shedding?
Shedding is normal for new wool rugs. Vacuum gently with a suction-only attachment, and avoid beater bars. Over time, shedding will decrease.
For excessive shedding, consult the manufacturer.
Conclusion
Keeping your rugs fresh doesn't have to be a chore. With these 23 tips, you can tackle everyday dirt, stains, and odors without breaking a sweat. A little regular maintenance goes a long way in extending the life of your soft floors.
Remember, the key is consistency. Vacuum often, blot spills quickly, and deep clean when needed. Your rugs will stay looking beautiful and feeling soft for years to come.