Hardwood floors add warmth to any home, but keeping them clean without causing damage takes a little know-how. The wrong cleaner or too much water can leave them dull or warped.
You don't need fancy products or a professional—just a few smart techniques that protect your investment. From daily dusting to tackling sticky spots, these 23 methods are practical and budget-friendly.
Whether you're dealing with scuff marks or pet accidents, there's a solution here that works. Let's get your floors looking their best without the stress.
1. Dust Daily with a Microfiber Mop
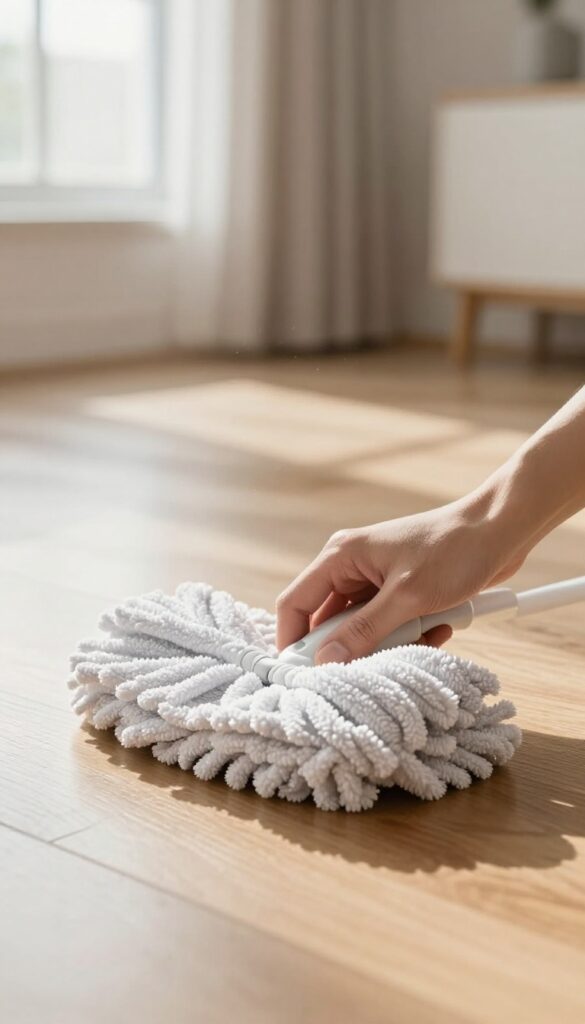
A quick daily dusting prevents grit from scratching the finish. Use a dry microfiber mop or cloth to pick up dust, hair, and debris without pushing them around. This simple habit keeps your floors looking fresh and reduces the need for deeper cleaning.
Dusting might seem like a no-brainer, but doing it daily with the right tool makes a huge difference. Microfiber traps particles instead of scattering them, so you're not just moving dirt around. Plus, it's gentle on the finish—no scratches from abrasive dust bunnies.
Why Microfiber Works Best
Microfiber has tiny fibers that create a static charge, attracting dust like a magnet. Unlike cotton cloths or brooms, it doesn't just push debris—it lifts and holds it. This means fewer passes and less effort for a truly clean floor.
Technique Tips For Best Results
Start at the farthest corner of the room and work your way toward the exit. Use long, overlapping strokes to avoid missing spots. For edges and corners, switch to a microfiber cloth or a dusting attachment on your vacuum.
Avoid Common Mistakes
Never use a dry mop on a wet floor—it will just smear dirt around. Also, wash your microfiber pads after each use; dirty pads can scratch the finish. And skip the spray wax or polish; they leave a residue that attracts more dust.
2. Vacuum with a Hardwood-Friendly Attachment
Vacuuming seems straightforward, but using the wrong attachment can do more harm than good. Hardwood floors need a soft touch to keep their finish intact. The right vacuum setup lifts dirt without scratching the surface.
A vacuum with a soft brush roll or a hardwood floor setting is your best bet. These attachments are designed to glide over wood without leaving marks. Beater bars, on the other hand, are too aggressive—they can dull the finish over time and even gouge softer woods.
If your vacuum has a rotating brush, make sure you can turn it off or switch to a dedicated hard floor mode. For canister vacuums, use the floor brush attachment with soft bristles. Stick vacuums often come with a hardwood setting, so check your model's settings before you start.
And don't forget to vacuum along baseboards and under furniture where dust bunnies hide.
Why Beater Bars Are A No-go
Beater bars are designed for carpets, not wood. They spin and beat the carpet fibers to loosen dirt, but on hardwood, they can scratch and wear down the finish. Even a few passes can leave visible marks over time.
If your vacuum has a beater bar, either disable it or avoid using that vacuum on your floors altogether.
Best Vacuum Types For Hardwood
Canister vacuums with a soft floor brush are ideal because they're gentle and easy to maneuver. Stick vacuums with a hardwood setting are also great for quick cleanups. Upright vacuums can work if they have a hard floor mode that lifts the brush roll.
Whatever you choose, make sure the wheels are soft and non-marking.
Vacuuming Frequency For Best Results
Daily vacuuming in high-traffic areas prevents grit from building up. Weekly vacuuming is enough for less-used rooms. The key is consistency—regular vacuuming keeps dirt from embedding into the wood and causing scratches.
Pair it with a microfiber mop for a complete clean.
3. Damp Mop with a Well-Wrung Cloth
Water and hardwood floors don't mix well. But you can still mop—you just need to be smart about it. The trick is using a cloth that's barely damp, not wet.
Think of it this way: you want to pick up dirt, not leave a puddle. A well-wrung mop or cloth will clean effectively without seeping into the wood grain. This simple habit prevents warping, staining, and long-term damage.
Choose The Right Mop
A flat mop with a microfiber pad is your best bet. Microfiber traps dirt without scratching the finish. Avoid sponge mops—they hold too much water and can leave floors soaked.
If you use a string mop, wring it until no water drips out.
The Wring Test
After dipping your mop or cloth in water, wring it as hard as you can. Then give it another twist. It should feel barely damp to the touch.
If you can squeeze out any water, it's too wet. A good rule: the cloth should not leave a trail of moisture behind.
Work In Small Sections
Damp mop a small area at a time—about 3×3 feet. This way you can dry each section immediately with a clean, dry microfiber cloth. Never let water sit on the floor.
Drying right away prevents moisture from seeping into the seams.
Use The Right Cleaner
Plain water works for light cleaning. For tougher spots, use a pH-neutral hardwood floor cleaner. Avoid vinegar, ammonia, or any harsh chemicals—they can strip the finish.
A few drops of mild dish soap in a bucket of water is safe if needed, but rinse well.
4. Use a pH-Neutral Cleaner
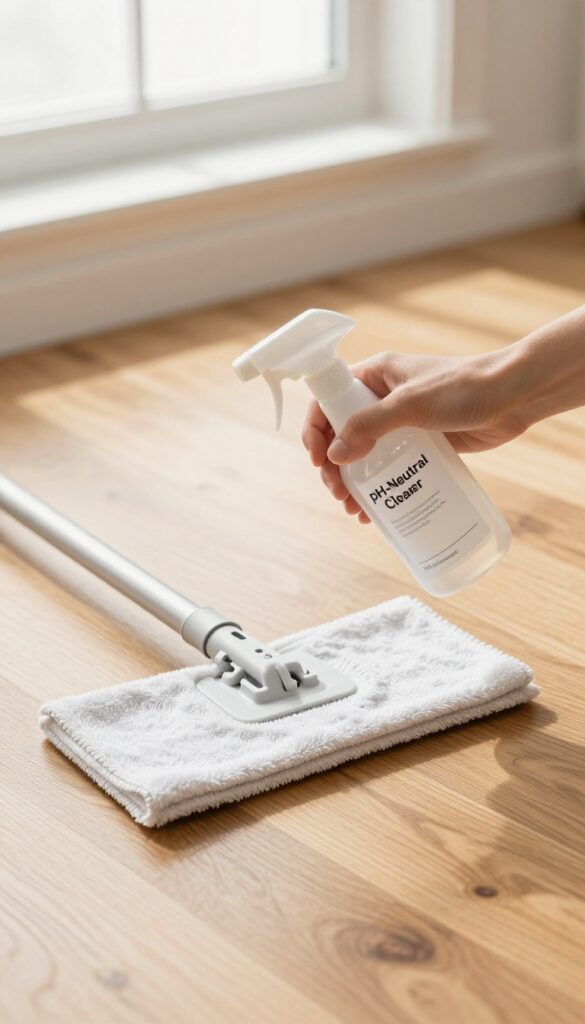
Not all cleaners are safe for hardwood. Many all-purpose sprays contain harsh chemicals that can strip the protective finish over time. The safest bet is a pH-neutral cleaner specifically made for wood floors—or a simple DIY solution that won't cause harm.
Why Ph Matters For Hardwood
Hardwood finishes are sensitive to extreme pH levels. Alkaline cleaners can dull the finish, while acidic ones can etch it. A pH-neutral cleaner (around 7 on the scale) cleans without reacting chemically with the sealant, keeping your floors looking new longer.
Store-bought Vs. Diy Options
Look for products labeled "safe for hardwood" or "pH-neutral. " Brands like Bona and Method offer reliable options. For a DIY version, mix a few drops of mild dish soap (like Dawn) with a gallon of warm water.
Avoid vinegar or baking soda—they're too acidic or alkaline.
How To Apply It Correctly
Dampen a microfiber mop with the solution—never soak it. Wring until it's just barely damp, then mop in the direction of the wood grain. Rinse the mop frequently and change the water if it gets dirty.
Dry the floor immediately with a clean cloth if streaks appear.
5. Try the Vinegar and Water Solution (Carefully)
Vinegar is a popular natural cleaner, but it's not a free-for-all on hardwood. A diluted vinegar solution can cut through grease and grime without harsh chemicals. The key is using the right ratio and not overdoing it.
Mix one part white vinegar with ten parts warm water. Dampen a microfiber mop—never soak the floor—and wipe in the direction of the grain. Work in small sections so the solution doesn't sit too long.
After cleaning, go over the area with a dry cloth to remove any leftover moisture. This helps prevent the vinegar from dulling the finish over time. Use this method only for spot cleaning or occasional deep cleans, not as a daily routine.
Why Dilution Matters
Vinegar is acidic, and undiluted it can eat away at the protective sealant on your floors. A 1: 10 ratio keeps it effective against dirt while being gentle enough for regular use. Always test on an inconspicuous spot first.
Rinse And Dry Thoroughly
Even diluted vinegar can leave a residue if not rinsed. After mopping with the solution, go over the floor with a clean, damp (not wet) cloth to remove any vinegar traces. Then dry with a soft towel or let air dry with good ventilation.
When To Skip This Method
If your floors have a wax finish or are unsealed, skip vinegar entirely—it can damage the surface. Also avoid it if you have oil-finished wood, as it may strip the oil. For those floors, use a cleaner specifically designed for their finish.
6. Tackle Sticky Spots with Rubbing Alcohol
Sticky spots from tape, glue, or spilled soda can be frustrating on hardwood floors. You want them gone, but you don't want to damage the finish. Rubbing alcohol is a gentle yet effective solution that evaporates quickly, leaving no residue behind.
When you encounter a sticky spot, grab a soft cloth and dampen it with a small amount of rubbing alcohol. Gently rub the area in a circular motion until the stickiness lifts. The alcohol evaporates fast, so it won't soak into the wood or harm the finish when used sparingly.
Always test on an inconspicuous area first, especially on older or waxed floors.
Why Rubbing Alcohol Works
Rubbing alcohol is a solvent that dissolves sticky residues without being harsh on wood finishes. It evaporates quickly, reducing the risk of water damage. Unlike some commercial cleaners, it leaves no film or residue behind, making it ideal for spot treatments.
How To Apply It Safely
Dampen a soft, lint-free cloth with rubbing alcohol—don't soak it. Gently rub the sticky spot, applying light pressure. For stubborn residue, let the alcohol sit for a few seconds before rubbing.
Wipe away any excess with a dry cloth immediately. Avoid using on unfinished or waxed floors without testing first.
When To Avoid This Method
If your hardwood has a wax finish or is unsealed, rubbing alcohol may strip the wax or damage the wood. Always test in a hidden area. For large sticky areas, consider a commercial hardwood cleaner designed for your floor type.
7. Remove Scuff Marks with a Tennis Ball
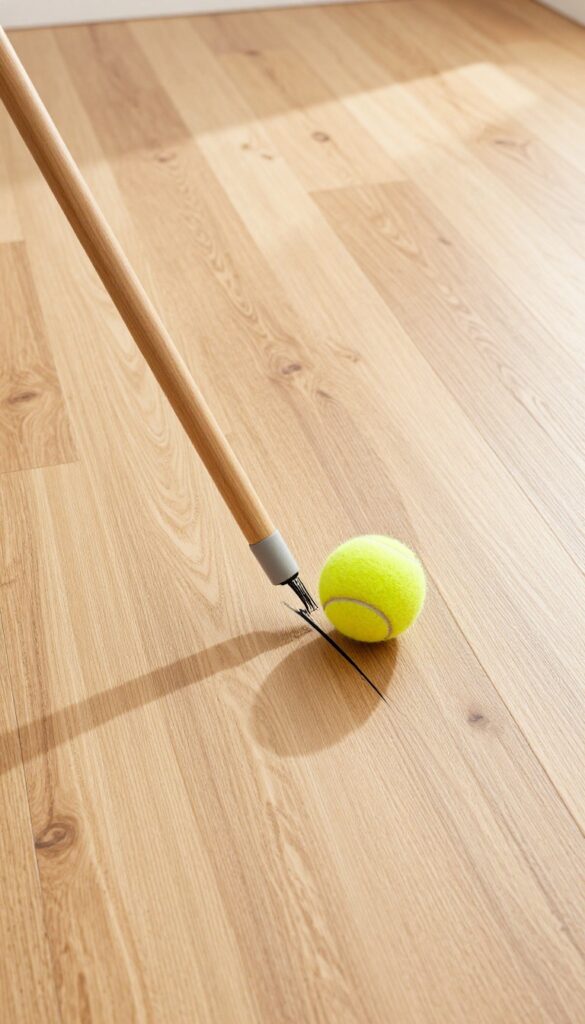
Scuff marks from shoes can make your hardwood floors look worn and messy. Before you reach for harsh cleaners or abrasive pads, try a simple tennis ball. The rubber material lifts black marks without scratching the finish—it's a gentle trick that really works.
Why A Tennis Ball Works
The rubber in a tennis ball is soft enough to avoid scratching but firm enough to grip and lift scuff marks. Unlike erasers or solvents, it won't damage the floor's protective coating. Plus, it's cheap and you probably already have one lying around.
How To Use It
Cut a small slit in the tennis ball and slide it onto a broom handle or mop stick—this gives you better leverage and saves your back. Rub the ball firmly over the scuff mark in a back-and-forth motion. For stubborn marks, apply a little more pressure.
No need for water or cleaner.
When To Skip This Trick
If your floors have a matte or distressed finish, test the tennis ball on an inconspicuous area first. While rare, some delicate finishes can show a slight shine after rubbing. Also, avoid using a dirty tennis ball—make sure it's clean to prevent transferring dirt.
8. Use Baking Soda for Tough Stains
Some stains just won't budge with regular cleaning. That's where baking soda comes in. This gentle abrasive can lift stubborn marks without scratching your floor's finish, as long as you use it right.
Baking soda is a safe, effective option for tackling tough spots like dried food, wine spills, or pet accidents. The key is to avoid scrubbing aggressively, which can damage the protective layer. Instead, let the paste do the work.
Make The Paste
Mix equal parts baking soda and water to form a thick paste. For extra cleaning power, add a few drops of mild dish soap. Apply the paste directly to the stain using a soft cloth or sponge.
Let It Sit
Allow the paste to sit on the stain for 5 to 10 minutes. This gives it time to break down the grime. Don't let it dry completely, as that can make removal harder.
Wipe Gently
Use a damp microfiber cloth to wipe away the paste. Rinse the cloth frequently to avoid spreading residue. If the stain persists, repeat the process instead of scrubbing harder.
Finish With A Dry Cloth
After removing the paste, go over the area with a dry microfiber cloth. This prevents moisture from seeping into the wood and keeps your floor looking pristine.
9. Clean Pet Accidents Immediately
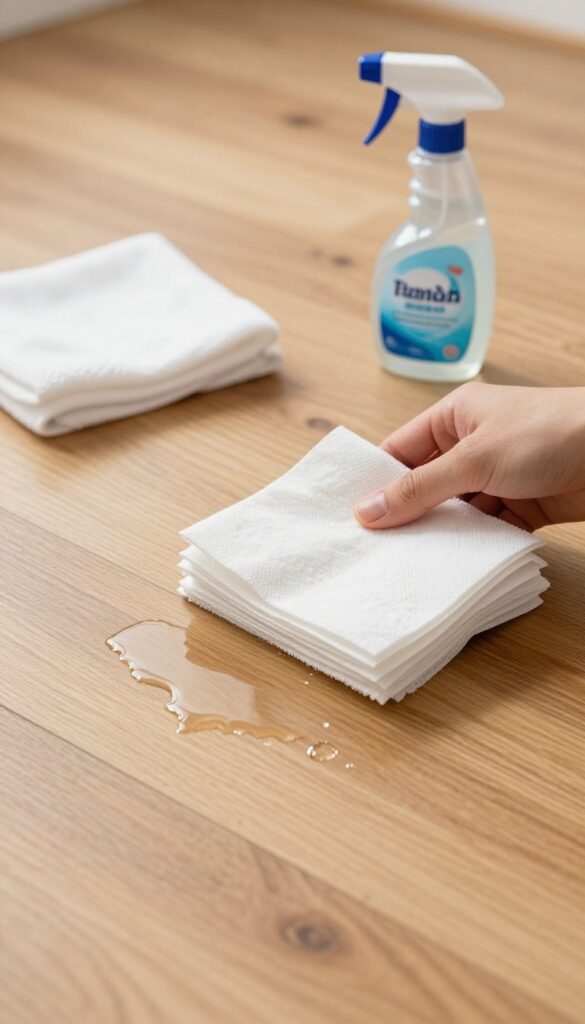
Pet accidents happen, but on hardwood floors, speed is everything. The longer urine or vomit sits, the more it seeps into the wood grain and finish, causing stains, odors, and even warping. A quick, gentle cleanup keeps your floors safe and your home smelling fresh.
Blot up urine or vomit right away with paper towels, then wipe with a damp cloth. Enzymatic cleaners break down residue without damaging the wood.
Blot, Don't Rub
The first rule of pet accident cleanup is to blot—never rub. Rubbing spreads the liquid deeper into the wood grain and can push it into gaps between planks. Use a thick stack of paper towels or a clean cloth, press firmly, and lift.
Repeat until the area feels dry to the touch.
Choose The Right Cleaner
Not all cleaners are safe for hardwood. Avoid ammonia, bleach, or steam cleaners—they can strip the finish or cause moisture damage. Instead, use an enzymatic cleaner specifically designed for pet messes.
These products break down proteins in urine and vomit, eliminating odors and residue without harming the wood.
Finish With A Damp Wipe
After blotting, lightly dampen a microfiber cloth with water or a hardwood-safe cleaner and wipe the area. Then dry immediately with a clean towel. This removes any leftover cleaner or residue and prevents moisture from sitting on the floor.
10. Polish with Olive Oil and Vinegar (Occasionally)
If your hardwood floors are looking a little tired but not quite ready for a full refinish, a homemade polish can bring back some shine. Olive oil and vinegar work together to condition the wood and add a subtle luster, but this isn't something you want to do every week. Overdoing it can leave a greasy film that attracts dust and dulls the finish over time.
This natural polish is best used sparingly—think once every few months or when your floors need a little pick-me-up. It's not a substitute for regular cleaning, but it can help maintain the wood's natural beauty between deeper treatments. Just be careful not to apply too much; a little goes a long way.
Mix It Right
Combine 1 cup of olive oil with 1/2 cup of white vinegar in a spray bottle or bowl. Shake or stir well before each use. The vinegar helps cut any light grime while the oil moisturizes the wood.
Avoid adding water—too much moisture can damage hardwood.
Apply With A Soft Cloth
Dampen a microfiber cloth with the mixture, then wring it out so it's just barely moist. Wipe a small section at a time, following the grain of the wood. Don't pour the polish directly onto the floor, as that can create puddles and uneven coverage.
Buff To A Shine
After applying, grab a dry microfiber cloth and buff the area in circular motions. This removes any excess oil and brings out the shine. Let the floor dry completely before walking on it.
If you notice any sticky spots, you used too much—buff again with a clean cloth.
Use Only Every Few Months
Resist the urge to polish weekly. Olive oil can build up over time, making floors look greasy and attracting dirt. Stick to a schedule of once every 3–4 months, or only when the wood starts to look dry or lackluster.
Regular dusting and damp mopping will handle the day-to-day.
11. Use Area Rugs in High-Traffic Zones
High-traffic areas like entryways and hallways take the brunt of daily wear. Dirt, grit, and moisture get tracked in, scratching the finish and dulling the wood over time. Area rugs act as a first line of defense, catching debris before it reaches the floor.
Placing rugs strategically reduces cleaning frequency and protects the finish. Choose low-pile or flat-weave rugs that won't trap moisture underneath. Vacuum them regularly to prevent dirt from grinding into the hardwood when stepped on.
Where To Place Them
Focus on entry points—front door, back door, and mudroom. Also consider long hallways and areas in front of sinks or kitchen islands. A runner in a high-traffic hallway can save hours of scrubbing.
Rug Pad Essentials
Always use a rug pad designed for hardwood floors. Look for felt or rubber pads labeled non-staining and non-slip. Avoid cheap foam pads that can discolor or trap moisture against the wood.
Cleaning And Rotating Rugs
Shake out rugs weekly and vacuum both sides. Rotate them every few months to distribute wear evenly. If a rug gets wet, dry it thoroughly before placing it back to prevent mold and wood damage.
12. Felt Pads Under Furniture Legs
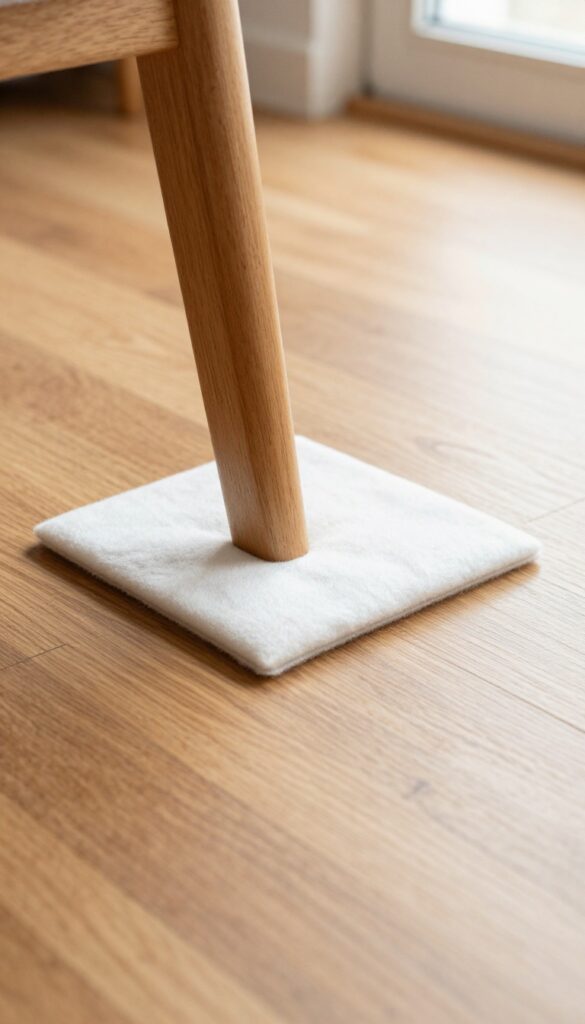
Every time you slide a chair or table across the floor, you risk leaving behind scratches that dull the finish. Felt pads are an inexpensive, low-effort way to protect your hardwood from this kind of daily wear. They stick to the bottom of furniture legs and create a soft buffer between the wood and the floor.
Think about how often you move furniture—pulling out a dining chair, rearranging the sofa, or shifting a coffee table for vacuuming. Without protection, each movement can grind dirt or the leg itself into the wood, leaving permanent marks. Felt pads absorb that friction and keep your floors smooth.
Choosing The Right Pads
Not all felt pads are the same. Look for thick, dense felt with a strong adhesive backing. Avoid thin, cheap pads that peel off or flatten quickly.
Self-adhesive felt pads work well on most furniture, but for heavy pieces like a sofa or china cabinet, consider screw-on glides with felt bottoms for extra durability.
Installation Tips
Clean the bottom of each furniture leg with rubbing alcohol to remove dust and grease before sticking on the pad. Press firmly and let it set for a few hours before moving the furniture. For uneven legs, use felt pads with a slight thickness to level them out.
When To Replace Them
Felt pads wear down over time, especially under heavy furniture or on rough surfaces. Check them every few months. If you see the felt is compressed, torn, or the adhesive is losing grip, swap them out immediately.
Worn pads can trap grit and become abrasive, doing more harm than good.
13. Avoid Steam Mops
Steam mops promise a deep clean, but they're one of the worst things you can use on hardwood. The intense heat and moisture seep into the wood, causing it to swell, cup, or even crack over time. Even if your floors have a thick sealant, repeated steam exposure will break down the finish, leaving them looking dull and unprotected.
Stick to dry or damp methods for safety. A microfiber mop with a light spritz of hardwood-safe cleaner is all you need. If you want that fresh-cleaned feeling without the risk, use a dry mop or a slightly damp cloth—never soaking wet.
Why Steam Is So Damaging
Hardwood is porous, and steam forces moisture deep into the grain. This can lift the finish, cause boards to separate, and lead to permanent warping. Even sealed floors aren't fully waterproof; steam can get through tiny gaps and cause hidden damage.
Better Alternatives For A Deep Clean
Instead of steam, use a pH-neutral hardwood floor cleaner and a microfiber mop. Spray the cleaner lightly onto the mop (not the floor) to control moisture. For sticky spots, a slightly damp cloth works wonders without the risk.
When To Use A Damp Mop
A damp mop is fine for occasional deep cleaning—just wring it out until it's barely moist. Never let water pool on the surface. Dry the floor immediately with a clean, dry microfiber cloth to prevent moisture from sitting.
14. Clean Spills Immediately
A splash of water or a drop of wine might seem harmless, but on hardwood floors, every second counts. Liquids can seep into the wood grain, causing stains, swelling, or warping that's expensive to fix. The key is to act fast and use the right technique—no panic, just a quick response.
The moment a spill happens, grab a dry, clean cloth and blot—don't wipe. Wiping spreads the liquid and pushes it deeper into the cracks. Blotting absorbs the moisture before it can penetrate.
Follow up with a slightly damp cloth to remove any sticky residue, then dry the area with a soft towel. For spills like red wine or juice, a little mild soap on the damp cloth can help, but avoid soaking the wood. Always finish by drying thoroughly.
What Counts As A Spill Emergency
Not all spills are created equal. Water is the most common and still damaging if left too long. But sticky drinks, pet accidents, and oily substances are more urgent because they can stain or attract dirt.
Any liquid that sits more than a few minutes increases the risk of damage. Treat every spill like an emergency, even if it's just water.
The Right Tools For Quick Cleanup
Keep a stack of soft, lint-free cloths in an easy-to-reach spot near your hardwood floors. Microfiber cloths work great because they absorb quickly without scratching. Avoid paper towels with rough textures or colored prints that might transfer dye.
A spray bottle with a gentle wood-safe cleaner can also be handy for sticky spills, but use it sparingly.
What Not To Do When You Spill
Never pour water or cleaner directly onto the spill—that just adds more liquid. Don't scrub aggressively, as that can damage the finish. And avoid using vinegar or bleach on fresh spills; they're too harsh for routine cleanup and can dull the wood over time.
Stick to blotting, gentle wiping, and thorough drying.
15. Use a Spray Bottle for Controlled Dampness

Too much moisture is the enemy of hardwood floors. It seeps into the seams, causes the wood to swell, and can even lead to mold over time. That's why a spray bottle is such a handy tool—it lets you control exactly how wet your mop or cloth gets.
Instead of dunking your mop into a bucket of soapy water, you lightly mist the cleaning surface. This way, you apply just enough moisture to pick up dirt without leaving puddles or saturating the wood. It's a simple switch that makes a big difference in preserving your floor's finish.
Using a spray bottle for dampening your cleaning tool is one of the easiest ways to avoid over-wetting your hardwood floors. The key is to mist the mop head or microfiber cloth—not the floor itself—so you have full control. This method works especially well for spot cleaning or for quick touch-ups between deeper cleanings.
Plus, it uses less cleaning solution, saving you money and reducing chemical residue on your floors.
Why Damp Is Better Than Wet
Hardwood floors are porous, and standing water can seep into the grain, causing warping, cupping, or discoloration. Even a well-sealed floor can be vulnerable if water sits too long. By using a spray bottle, you ensure your mop is only slightly damp—not dripping.
This reduces the risk of water damage while still effectively lifting dirt and grime.
How To Use A Spray Bottle Effectively
Start by filling your spray bottle with a hardwood-safe cleaner diluted according to the manufacturer's instructions. Then, give your mop head or cloth a few light spritzes—just enough to make it feel damp to the touch. You don't want it wet enough to wring out.
Clean in sections, and if the mop starts to dry out, give it another light mist. Always work in the direction of the wood grain to avoid streaks.
Best Practices For Spot Cleaning
For sticky spots or small spills, a spray bottle is perfect. Mist a microfiber cloth lightly and wipe the area gently. Avoid spraying the cleaner directly onto the floor, as that can pool.
Instead, spray the cloth, then apply. This gives you precision and prevents excess moisture from sitting on the wood. For dried-on messes, let the damp cloth sit on the spot for a few seconds to soften it before wiping.
16. Buff with a Soft Cloth for Shine
Buffing is the final step that makes your hardwood floors look professionally cleaned. After washing and drying, a quick buff with a soft cloth removes any leftover residue and brings out the natural luster. It's a simple habit that takes just a couple of minutes but makes a noticeable difference.
Buffing isn't just about shine—it also helps prevent streaks and water spots. Microfiber cloths are ideal because they trap dust and don't scratch the finish. Work in small sections, using a gentle circular motion for an even glow.
Best Cloths For Buffing
Microfiber cloths are the top choice for buffing hardwood. They're soft, lint-free, and effective at picking up any remaining particles. Avoid terry cloth or rough fabrics that could scratch the surface.
A clean, dry microfiber cloth works wonders.
Buffing Technique
Start in a corner and work your way out to avoid stepping on freshly buffed areas. Use light pressure and circular motions to distribute any residual polish evenly. For extra shine, you can add a few drops of hardwood floor polish to the cloth before buffing.
When To Buff
Buffing is best done right after cleaning while the floor is still slightly damp. This helps prevent water spots and ensures a streak-free finish. If you notice dullness between cleanings, a quick dry buff can restore shine without a full wash.
17. Deep Clean with a Hardwood Floor Machine (Rent)
Sometimes your floors need more than a quick wipe. Over time, grime builds up in the grain and finish, making the wood look tired. Renting a hardwood floor machine gives you professional-level results without the professional price tag.
These machines scrub, clean, and buff in one pass, lifting dirt that mops leave behind. They're surprisingly easy to use and can make a decade-old floor look fresh again. Just follow the instructions and use the right cleaner to avoid damaging the finish.
Renting a hardwood floor machine is a game-changer for deep cleaning. Most hardware stores and rental centers carry models specifically designed for wood floors. They use soft brushes or pads that gently scrub without scratching.
The machine applies a fine mist of cleaner, agitates the dirt, and then vacuums up the liquid, leaving the floor almost dry. This prevents water damage while giving a thorough clean. Plan to rent for a half-day or full day, depending on the size of your home.
The cost is usually between $30 and $60, which is a fraction of hiring a pro. Before you start, sweep or vacuum to remove loose debris. Then fill the machine with a manufacturer-recommended hardwood cleaner—never use vinegar, soap, or water alone.
Work in sections, overlapping passes slightly. The machine does most of the work; you just guide it. After cleaning, let the floor dry completely before walking on it or replacing furniture.
You'll notice the difference immediately: brighter, cleaner wood with a smooth feel.
Choosing The Right Machine
Not all floor machines are safe for hardwood. Look for one labeled "hardwood floor cleaner" or "wood floor machine. " Avoid heavy-duty scrubbers meant for concrete or tile—they can damage the finish.
Popular rental options include the Oreck Hardwood Floor Cleaner or the Clarke American Sanders. Ask the rental staff for advice if you're unsure. They can also recommend the best cleaning solution for your floor type.
Prepping Your Room
Clear the room of furniture, rugs, and obstacles. Sweep or vacuum thoroughly to remove dust and grit that could scratch the floor during machine cleaning. Check for loose nails or raised boards that might catch on the machine's pad.
If you have area rugs, lift them completely—don't just push them aside. Also, tape down any cords or cables to avoid tangles.
Step-by-step Cleaning Tips
Start in a corner farthest from the door and work your way out. Fill the machine's tank with the recommended cleaner, not water alone. Move the machine slowly and steadily—rushing leaves streaks.
Overlap each pass by a few inches to ensure even coverage. If the machine has a squeegee, use it to collect excess liquid. Empty the dirty water tank frequently to prevent re-depositing grime.
After finishing, let the floor air-dry for at least an hour before walking on it.
When To Call A Professional
Renting a machine is great for maintenance, but it won't fix deep scratches, water stains, or worn finish. If your floors have significant damage, consider hiring a professional for sanding and refinishing. Also, if your hardwood is very old or has a wax finish, a machine cleaner might not be suitable.
Check with the rental company or a flooring expert before proceeding.
18. Use a Hairdryer for Water Rings
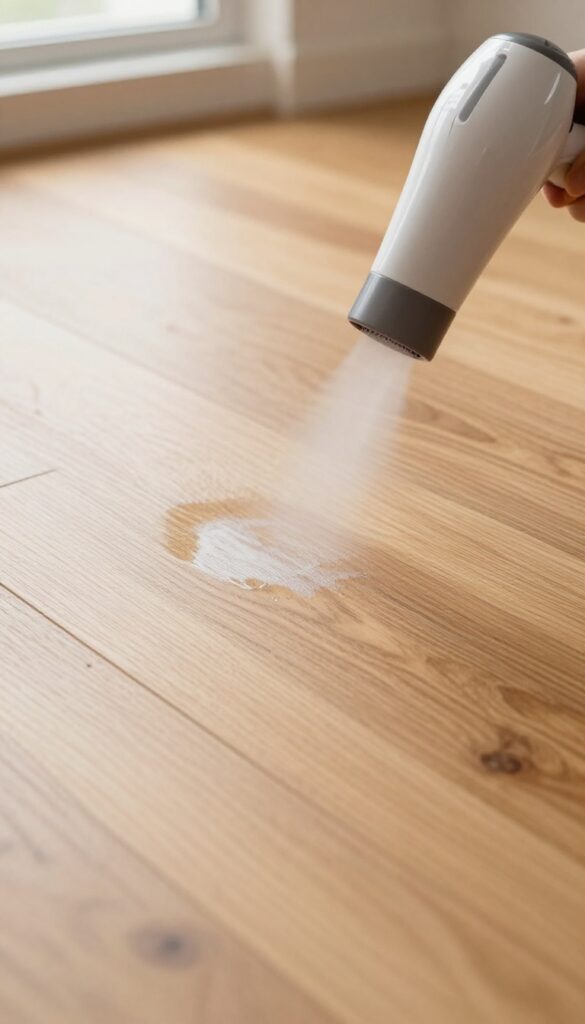
White rings from wet glasses can make your hardwood floors look aged and stained. But you don't need to refinish the whole floor—a hairdryer can fix it in minutes. The heat gently evaporates the moisture trapped in the finish, often restoring the original look.
Why Heat Works
Water rings form when moisture seeps into the finish but not the wood itself. Applying low heat helps the moisture evaporate without damaging the surrounding area. The hairdryer method is safe for most sealed hardwood floors.
Step-by-step Fix
Set your hairdryer to low heat and hold it about 6 inches from the ring. Move it in a circular motion for 30–60 seconds. Wipe the area with a soft cloth.
If the ring persists, repeat once more.
When To Stop
If the ring doesn't fade after two tries, the moisture may have reached the wood. In that case, try a mixture of baking soda and toothpaste or call a professional. Never use high heat—it can blister the finish.
19. Try Mayonnaise for White Rings
White rings from wet glasses or hot dishes can make your hardwood floors look aged and stained. Before you panic or call a pro, check your fridge. A dab of mayonnaise might be all you need to erase those marks.
The oils in mayonnaise penetrate the finish and help lift the trapped moisture that causes white rings. It's a gentle, low-risk method that works surprisingly well on light to moderate marks. Just apply a small amount, let it sit, and wipe clean.
How It Works
White rings form when moisture gets trapped under the finish. Mayonnaise contains oil and egg yolks that slowly seep into the finish, displacing the moisture and reducing the cloudy appearance. It's not a miracle cure for deep damage, but for surface-level rings, it's often effective.
Step-by-step Application
Start by cleaning the area with a dry cloth to remove dust. Apply a small dab of full-fat mayonnaise directly onto the white ring—don't spread it too thin. Let it sit for at least an hour, or overnight for stubborn marks.
Wipe off with a clean, dry cloth and buff gently.
When To Avoid This Method
Mayonnaise is not suitable for unfinished or waxed floors, as the oil can soak in and cause staining. Test on an inconspicuous spot first. If the ring remains after two attempts, the damage may be too deep for this home remedy.
20. Use a Soft Broom for Quick Sweeps

Not every mess calls for a mop or vacuum. A soft-bristle broom is often the fastest way to pick up dust, crumbs, and pet hair without scratching your hardwood. It's gentle enough for daily use and keeps your floors looking great between deeper cleanings.
Sweeping with a soft broom is a simple habit that prevents dirt from grinding into the finish. Choose a broom with flagged or natural bristles, which are soft and flexible. Avoid stiff plastic bristles that can leave fine scratches over time.
Sweep in the direction of the floorboards to trap debris more effectively.
Pick The Right Broom
Look for a broom labeled "soft" or "fine" and made from materials like horsehair, tampico, or nylon with flagged tips. These bristles bend easily and won't scratch even delicate finishes. A wide, flat broom covers more area quickly, while a smaller hand broom is great for corners and under furniture.
Sweep With Purpose
Use short, controlled strokes to gather debris into a pile rather than scattering it. Sweep toward a dustpan, and tilt the dustpan slightly to catch everything. For fine dust, lightly mist the broom with water or use a dust-catching spray to prevent particles from flying into the air.
Maintain Your Broom
Keep your broom clean by removing hair and dust after each use. Wash the bristles with mild soap and water occasionally, then let them dry completely before storing. Store the broom hanging up or with bristles off the floor to preserve their shape.
21. Avoid Wax-Based Products on Urethane Finishes
Many people assume a little wax will make their hardwood floors shine brighter. But if your floors have a urethane finish, wax can actually do more harm than good. It creates a cloudy film that's tough to remove and can even cause the finish to yellow over time.
The key is knowing what type of finish is on your floors before you apply anything. Urethane finishes are common on modern hardwood floors because they're durable and low-maintenance. Wax-based products were designed for older finishes like shellac or varnish, not for today's polyurethane coatings.
Check Your Finish First
Not sure what finish you have? Try the water test: sprinkle a few drops of water on the floor. If it beads up, you likely have a urethane finish.
If it soaks in or darkens the wood, you probably have a wax or oil finish. Only use wax on floors that originally had a wax finish.
The Damage Wax Can Do
Wax sits on top of urethane instead of bonding with it. Over time, it builds up into a hazy layer that dulls the shine. It can also trap dirt and make future cleaning harder.
Removing wax from urethane requires harsh solvents that might damage the finish.
Better Alternatives For Shine
For urethane finishes, stick to cleaners specifically labeled as safe for polyurethane. A simple mix of water and a few drops of dish soap works well for routine cleaning. If you want extra shine, use a hardwood floor polish designed for urethane—never a wax product.
22. Test Cleaners in an Inconspicuous Spot
You might be tempted to grab a new cleaner and go to town on your floors, but that can backfire. Some products react poorly with certain finishes, leaving behind discoloration or a cloudy film. A quick patch test saves you from a costly mistake.
Always test a new cleaner on a hidden area first—like inside a closet or under a rug—to ensure it doesn't discolor or damage the finish. This simple step prevents surprises and keeps your floors looking consistent.
Why Testing Matters
Hardwood finishes vary widely—polyurethane, wax, or oil-based each react differently to cleaners. A product that works on one floor might strip or dull another. Testing helps you spot any adverse reaction before it spreads across the entire room.
How To Test Properly
Dampen a soft cloth with the cleaner and rub a small, hidden section. Let it dry completely, then check for changes in color, shine, or texture. If the area looks the same as before, you're good to go.
Wait at least 24 hours for a full assessment.
What To Look For
Watch for cloudiness, streaks, or a sticky residue after drying. Also check if the finish feels rough or tacky. Any of these signs mean the cleaner isn't safe for your floor.
Stick to products you've already vetted or switch to a gentler option.
23. Schedule Annual Professional Maintenance
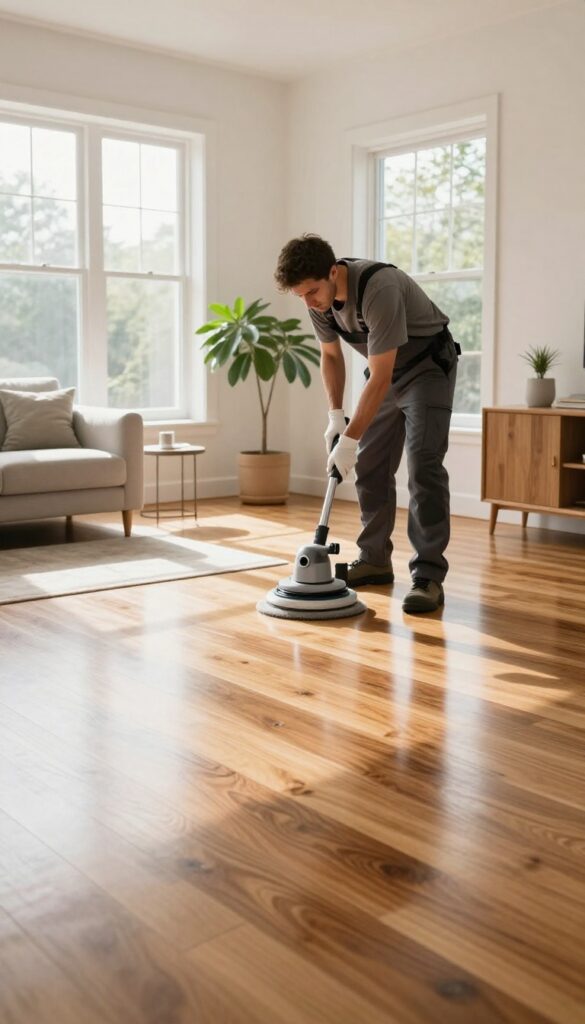
Even the most diligent cleaning routine can't replace what a pro does. Over time, your hardwood floors accumulate micro-scratches, lose their protective finish, and develop dull spots. A professional maintenance visit every year or two can restore that like-new sheen and add years to your floor's life.
Professional maintenance typically includes a deep clean with specialized equipment that removes embedded dirt, followed by a light screening and re-coating of the finish. This process fills in minor scratches and rejuvenates the protective layer without the cost or hassle of a full sand-and-refinish job. For high-traffic areas like kitchens and hallways, annual service is especially beneficial.
Many homeowners are surprised at how much brighter their floors look after just one professional treatment. It's a small investment that prevents major repairs down the road.
What Pros Do Differently
Professional cleaners use industrial-grade buffers and vacuums with HEPA filtration to remove dust and debris that household vacuums miss. They also apply commercial-grade sealants that bond more deeply than retail products, providing longer-lasting protection.
Signs You Need Professional Help
If your floors look cloudy even after cleaning, have visible scratches, or feel rough to the touch, it's time to call a pro. Also, if water no longer beads on the surface, the finish has worn thin and needs reinforcement.
How To Choose A Service
Look for contractors who specialize in hardwood floor maintenance, not general cleaning. Ask about their process—ideally they use a dustless system to minimize mess. Check reviews and request a quote that includes screening, cleaning, and re-coating.
FAQ
Can I use vinegar to clean hardwood floors?
Yes, but sparingly. A 1: 10 vinegar-to-water solution can clean without damaging the finish if used occasionally. Rinse with a damp cloth afterward to avoid buildup.
How often should I mop hardwood floors?
Dust or vacuum daily, and damp mop once a week or as needed. Avoid over-wetting—use a barely damp mop.
What is the best cleaner for hardwood floors?
A pH-neutral cleaner specifically designed for hardwood is safest. You can also use a mild dish soap solution (a few drops in water).
Can I use a steam mop on hardwood floors?
No. Steam mops force moisture into the wood, causing warping and finish damage. Stick to dry or damp methods.
How do I remove white water rings from hardwood?
Try a hairdryer on low heat over the ring for a few seconds, then wipe. Alternatively, apply a dab of mayonnaise, let sit for an hour, then wipe.
Conclusion
Keeping your hardwood floors clean doesn't have to be complicated or expensive. With these 23 smart methods, you can handle everything from daily dusting to stubborn stains without damaging the finish. The key is consistency and using the right tools for the job.
Remember, a little effort each day goes a long way in preserving the beauty of your floors. So pick a few tips that fit your routine and start seeing the difference. Your floors will thank you.