You spend a third of your life in bed, but when's the last time you actually cleaned your mattress? It's easy to forget—out of sight, out of mind. But over time, sweat, dead skin, and dust mites build up, affecting both your sleep quality and health.
A clean mattress doesn't just look better; it feels better and lasts longer. You don't need harsh chemicals or expensive services to get it done. With a few household items and a little effort, you can refresh your mattress in no time.
This guide walks you through 25 actionable steps to tackle everything from fresh stains to lingering odors. No fluff, just practical advice you can start using today.
1. Strip the Bed Completely
Before you can get to the mattress itself, you need to clear the deck. Every layer—sheets, pillowcases, mattress protectors, and bed skirts—traps sweat, skin flakes, and dust mites. Stripping everything off gives you full access to the mattress surface and lets you tackle the real cleaning.
Start by removing all bedding. Don't just pull it off—check for any stains or spots you might want to pre-treat later. Then toss everything into the washing machine.
Use hot water (at least 130°F) to kill dust mites and bacteria. If your fabric care labels allow, add a cup of white vinegar to the rinse cycle for extra freshness.
Why Hot Water Matters
Dust mites thrive in warm, humid environments, but they can't survive temperatures above 130°F. Hot water washing kills them on contact and removes their allergenic waste. Cold water won't do the job, so always check your bedding's care tag and use the hottest setting recommended.
Don't Forget The Pillows
Pillows collect sweat and drool just as much as sheets. Wash them in hot water too, if possible. For memory foam or delicate pillows, spot clean and air them out instead.
Fluff them in the dryer on low heat with a couple of tennis balls to restore shape.
Let Everything Dry Completely
Damp bedding is a breeding ground for mold and mildew. Dry sheets, protectors, and pillowcases on high heat until they're bone-dry. If you air-dry, make sure it's in direct sunlight or a well-ventilated area.
Never put damp bedding back on the mattress.
2. Vacuum the Mattress Surface
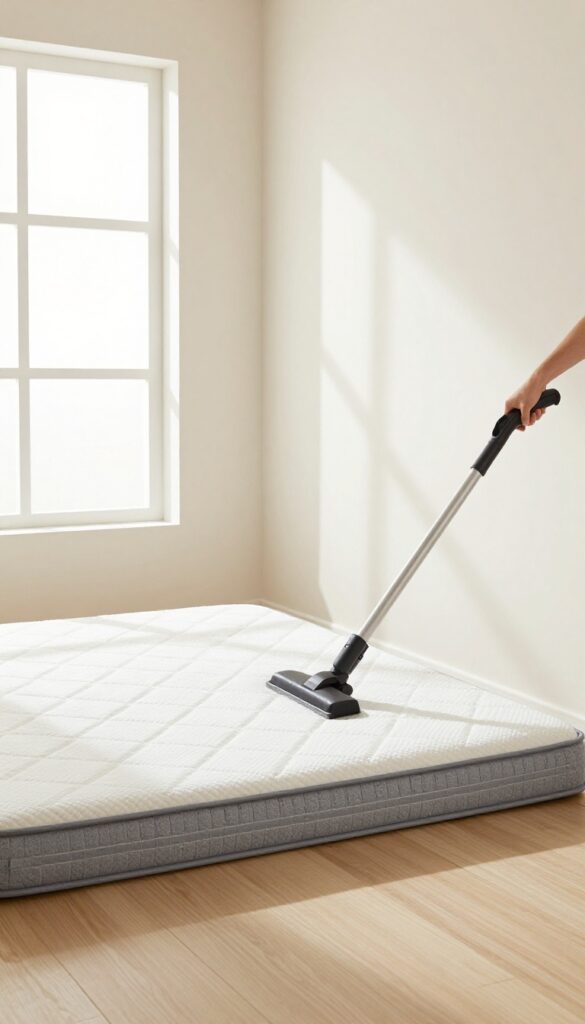
Once the bedding is out of the way, it's time to tackle the surface. Vacuuming might seem basic, but it's the most effective way to remove loose dust, dirt, and allergens from your mattress. Doing this regularly can dramatically improve your sleep environment without any extra cost.
Grab your vacuum cleaner and attach the upholstery tool—it's gentle enough for fabric but strong enough to pull up debris. Work slowly across the entire top surface, overlapping each pass to ensure you don't miss any spots. Pay extra attention to seams, tufts, and crevices where dust and skin flakes tend to accumulate.
For a deeper clean, use the crevice tool along the edges and around any handles or tags. This step alone can make your mattress feel fresher and reduce nighttime sneezing or itching.
Why Vacuuming Matters
Your mattress collects dead skin cells, dust mites, and pet dander over time. Vacuuming removes these particles before they break down further or get ground into the fabric. It's the simplest way to cut down on allergens without using any chemicals.
Best Practices For Effective Vacuuming
Always use a clean vacuum with good suction. Go over each section at least twice—once in one direction and once perpendicular. Don't rush; slow, deliberate passes pick up more debris.
If your vacuum has a HEPA filter, even better—it traps tiny particles that could otherwise recirculate.
How Often To Vacuum
Aim to vacuum your mattress every time you change your sheets, or at least once a month. If you have allergies or pets, increase the frequency to every two weeks. Regular vacuuming prevents buildup and keeps your mattress lasting longer.
3. Flip or Rotate the Mattress
If your mattress is double-sided, flipping it over can give you a fresh sleeping surface and extend its life. For one-sided mattresses, rotating them 180 degrees helps distribute wear more evenly. This simple habit can prevent sagging and keep your mattress comfortable for years.
Most manufacturers recommend flipping or rotating your mattress every three to six months. Check your mattress tag to see if it's flippable—some modern mattresses are designed to be used on one side only. For those, just rotate head to foot.
This evens out the indentations that form where your body rests most.
Why It Matters
Over time, your body weight compresses the foam and fibers in specific spots. Flipping or rotating redistributes that pressure, preventing permanent sagging. It also helps your mattress wear more uniformly, so you don't end up with a lumpy or uneven surface.
How To Do It Right
Start by stripping the bed and removing any mattress protectors. For double-sided mattresses, simply flip it over—get a helper if it's heavy. For one-sided, rotate it 180 degrees so the head becomes the foot.
While you're at it, vacuum both sides before putting the bedding back on.
When To Do It
Mark your calendar for every season change—spring, summer, fall, winter. That way you won't forget. If you have a new mattress, start the routine right away.
For older mattresses, check for signs of uneven wear; if you see sagging, it might be time for a replacement.
4. Vacuum the Other Side
Now that you've vacuumed the top and sides, don't forget the other side—especially if you flipped or rotated your mattress. Dust and allergens can settle on both surfaces, so giving the underside the same treatment ensures a thorough clean. It also helps maintain even wear and keeps your sleeping environment fresher.
Vacuuming the other side is a quick but important step that many people skip. Use the same upholstery attachment and go over the entire surface in overlapping strokes. Pay extra attention to edges and corners where debris tends to accumulate.
If your mattress is too heavy to lift alone, ask for help or use a mattress handle to avoid straining your back.
Why Both Sides Matter
Even if the underside doesn't touch your sheets, it still collects dust from the bed frame and air. Over time, this can work its way back up to the sleeping surface. Vacuuming both sides also helps prevent mold and mildew in humid climates, since trapped moisture can settle on the bottom.
Tips For Hard-to-reach Areas
If your mattress is on a platform bed, you may need to prop it against a wall or use a vacuum with a long hose attachment. For box springs, vacuum the top fabric as well. A crevice tool works great for seams and tufted buttons where dust bunnies hide.
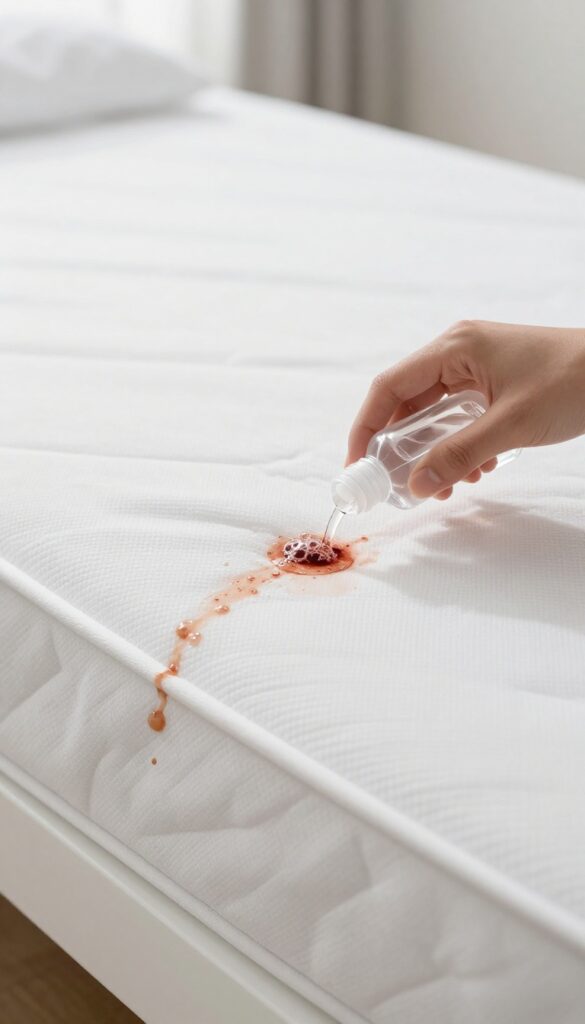
5. Spot Clean Fresh Stains Immediately
Fresh stains are easier to remove than dried ones, so jump on them right away. Blot—don't rub—to avoid spreading the stain deeper into the mattress fibers. A quick response can mean the difference between a spotless mattress and a permanent mark.
When a spill happens, grab a clean, dry cloth and gently blot the area to absorb as much liquid as possible. Then mix a few drops of mild dish soap with cold water, dip a cloth in the solution, and dab the stain. For organic stains like urine, blood, or sweat, an enzyme cleaner works best because it breaks down proteins.
Let the cleaner sit for 10-15 minutes, then blot again with a damp cloth to remove residue. Finally, press a dry towel over the spot to absorb moisture and speed up drying. Avoid soaking the mattress—too much water can lead to mold.
Blot, Don't Rub
Rubbing grinds the stain into the fabric and can damage the mattress fibers. Instead, press a clean cloth onto the stain to lift the liquid. Repeat with fresh sections of the cloth until no more liquid transfers.
Choose The Right Cleaner
For everyday spills, a mild dish soap solution works fine. For biological stains, use an enzyme cleaner—it targets proteins and eliminates odors at the source. Avoid bleach or harsh chemicals that can discolor or weaken the mattress.
Rinse And Dry Thoroughly
After cleaning, dab the area with a cloth dampened with plain water to remove soap residue. Then press a dry towel firmly to extract moisture. Let the mattress air dry completely before putting bedding back on to prevent mildew.
6. Treat Old Stains with Baking Soda Paste
Old stains can feel impossible to remove, but baking soda comes to the rescue again. This gentle abrasive lifts set-in dirt without damaging mattress fibers. You probably already have it in your pantry, making it a zero-cost solution for stubborn spots.
Mix three parts baking soda with one part water to form a thick paste. Apply it directly to the stain, spreading it evenly with a spatula or your fingers. Let it sit for at least 30 minutes—or overnight for tougher stains.
Once dry, vacuum the residue thoroughly. For extra stubborn marks, add a few drops of hydrogen peroxide to the paste.
Why Baking Soda Works
Baking soda is mildly alkaline, which helps break down acidic stains like sweat or urine. Its fine particles act as a gentle scrub that won't scratch mattress fabric. Plus, it absorbs odors as it dries, leaving your mattress fresher.
Application Tips For Best Results
Always test the paste on a hidden area first to check for colorfastness. Use a spoon or butter knife to spread the paste evenly. For deep stains, gently rub the paste into the fabric with a soft brush.
Let it dry completely—moisture left behind can lead to mold.
What To Do If The Stain Remains
If the stain persists after one treatment, repeat the process. For protein-based stains like blood or milk, use cold water in the paste to avoid setting the stain. For tough organic stains, add a splash of white vinegar to the mixture.
7. Use Hydrogen Peroxide for Blood Stains
Blood stains on a mattress can feel alarming, but they don't have to be permanent. Hydrogen peroxide is a gentle yet effective way to break down blood proteins without damaging the fabric. It works by releasing oxygen bubbles that lift the stain from deep within the fibers.
Hydrogen peroxide is a go-to for blood stains because it reacts with the organic compounds in blood, breaking them down safely. Just make sure you're using the standard 3% solution found in drugstores—higher concentrations can bleach your mattress.
How To Apply Hydrogen Peroxide
Pour a small amount directly onto the stain—enough to saturate it but not soak through. You'll see it start to fizz almost immediately. That's the peroxide working.
Let it sit for a few minutes, then blot with a clean, dry cloth. Repeat if the stain is stubborn.
Blot, Don't Rub
Always blot the area instead of rubbing. Rubbing can push the stain deeper into the mattress and spread it around. Blotting lifts the stain out.
Use a white cloth to avoid transferring any dye.
Rinse And Dry
After blotting, dampen a clean cloth with cold water and gently dab the area to remove any leftover peroxide. Then press with a dry towel to absorb moisture. Let the mattress air dry completely before putting sheets back on.
8. Tackle Sweat Stains with Salt and Lemon
Sweat rings and yellow stains are a common eyesore on mattresses. They happen over time as body oils and perspiration soak into the fabric. Instead of reaching for a harsh stain remover, try a simple paste made from salt and lemon juice.
This natural combo lifts stains and deodorizes at the same time.
Salt acts as a gentle abrasive that helps lift the stain, while lemon juice's acidity breaks down the oils in sweat. Together, they create a powerful yet safe cleaning paste. You probably already have both ingredients in your kitchen.
Make The Paste
Mix equal parts salt and fresh lemon juice in a small bowl. Stir until it forms a thick paste. If it's too runny, add more salt; if too dry, add a few more drops of lemon juice.
The consistency should be spreadable but not dripping.
Apply And Wait
Spread the paste directly onto the sweat stain using a spoon or your fingers. Make sure the stain is fully covered. Let it sit for at least an hour.
For older or set-in stains, leave it on for up to two hours. The paste will dry as it works.
Wipe And Dry
After the waiting time, wipe away the dried paste with a damp cloth. You may need to rinse the cloth and repeat a few times to remove all residue. Blot the area with a dry towel to absorb moisture.
Let the mattress air dry completely before making the bed.
9. Deodorize with Baking Soda
Even after a thorough vacuum, your mattress can still hold onto odors from sweat, spills, and everyday use. Baking soda is a natural deodorizer that neutralizes smells without harsh chemicals. This simple step can make a big difference in how fresh your bed feels.
Sprinkle a generous layer of baking soda over the entire mattress surface. Use enough to lightly coat it—about half a box for a queen-size bed. Let it sit for at least 4 hours, but overnight is best for maximum odor absorption.
The longer it sits, the more odors it pulls out. Afterward, vacuum it up thoroughly with your upholstery attachment.
Why Baking Soda Works
Baking soda is alkaline, which helps it react with and neutralize acidic odor molecules. It also absorbs moisture, making it harder for odor-causing bacteria to thrive. Unlike scented sprays that just mask smells, baking soda actually removes them.
Tips For Best Results
For extra odor-fighting power, mix a few drops of your favorite essential oil (like lavender or tea tree) into the baking soda before sprinkling. Let the mixture dry for a few minutes before applying. Also, make sure the mattress is dry before you start—moisture can cause clumping.
How Often To Deodorize
Aim to deodorize your mattress with baking soda every 3 to 6 months. If you have pets or allergies, consider doing it more frequently. It’s a quick, low-effort habit that keeps your sleep space smelling clean.
10. Vacuum Up the Baking Soda
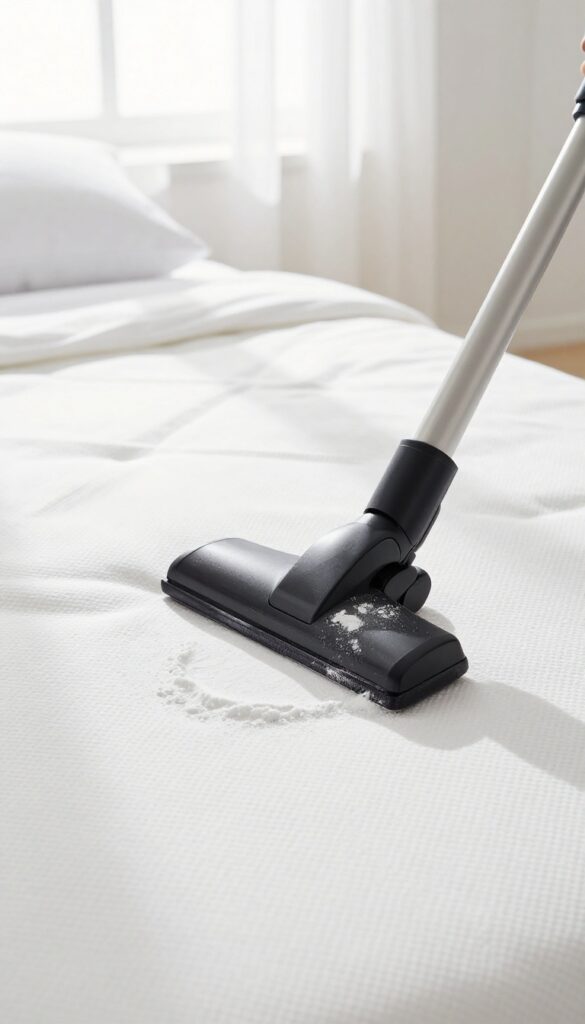
After letting the baking soda sit for several hours or overnight, it's time to remove it. This step is crucial because leftover baking soda can feel gritty and may even irritate your skin. A thorough vacuuming ensures your mattress is fresh, clean, and ready for use.
Attach the upholstery tool to your vacuum cleaner—it's designed for fabric surfaces and won't damage the mattress. Work in slow, overlapping passes, covering every inch of the mattress surface. Pay extra attention to seams and crevices where baking soda tends to settle.
You might need to go over the mattress two or three times to pick up all the powder. If your vacuum has a HEPA filter, even better—it will trap fine particles and allergens.
Use The Right Attachment
The upholstery attachment is your best friend here. It has a wide, flat head with soft bristles that agitate the fabric and lift baking soda without scratching. Avoid using the brush attachment meant for hard floors—it's too stiff and can wear down the mattress fabric over time.
Work In Sections
Divide your mattress into quadrants and vacuum one section at a time. This method ensures you don't miss any spots and helps you stay organized. Start at the top left, move to the top right, then bottom left, and finish with bottom right.
Overlap each pass by a few inches for complete coverage.
Check For Residue
After vacuuming, run your hand over the mattress surface. If you feel any grit or see white dust, vacuum again. A clean, residue-free mattress feels smooth to the touch and won't leave marks on your sheets.
This final check is worth the extra minute.
11. Steam Clean for Deep Disinfection
Steam cleaning takes mattress care to the next level. The high heat penetrates deep into the fabric, killing dust mites, bacteria, and any lingering germs. It's a powerful method that doesn't rely on chemicals, making it safe for you and the environment.
A handheld steamer works best for this job. It gives you control and prevents over-wetting, which can lead to mold. Just remember: your mattress needs to dry completely before you put sheets back on.
A few hours of airing out makes all the difference.
Steam cleaning is a game-changer for mattress hygiene. The heat not only sanitizes but also helps loosen dirt and grime that vacuuming alone can't remove. It's especially useful for allergy sufferers because it neutralizes allergens at the source.
Just be sure your mattress is compatible with steam cleaning—check the care tag first. Memory foam and some hybrid mattresses may not tolerate moisture well.
Why Steam Works So Well
Steam reaches temperatures above 200°F, which is hot enough to kill dust mites, bed bugs, and most bacteria. It also breaks down body oils and sweat residues without harsh scrubbing. Unlike dry cleaning methods, steam penetrates fibers to lift embedded dirt.
Plus, it's chemical-free, so you won't introduce any irritants to your sleep environment.
Step-by-step Steam Cleaning
Start by vacuuming the mattress to remove loose debris. Fill your steamer with distilled water to avoid mineral deposits. Hold the steamer head about an inch above the surface and move it slowly across the mattress in overlapping passes.
Focus on stained or high-traffic areas. Don't saturate the mattress—a light, even application is key. After steaming, blot any excess moisture with a clean towel.
Drying Is Non-negotiable
Moisture is the enemy of a clean mattress. After steam cleaning, let the mattress air dry completely. Open windows, turn on a fan, or use a dehumidifier to speed up the process.
Depending on humidity, this can take 2 to 6 hours. Never put sheets back on a damp mattress—it invites mold and mildew. A fully dry mattress feels fresh and ready for a good night's sleep.
12. Sun-Dry the Mattress Outdoors
Sunlight is one of nature's best disinfectants. On a clear, sunny day, moving your mattress outside for a few hours can work wonders. UV rays naturally kill bacteria, dust mites, and mold spores while helping to evaporate any trapped moisture.
It's a simple, chemical-free step that leaves your mattress feeling fresher.
Before hauling your mattress outside, check the weather forecast to ensure no rain or high humidity. Find a clean, dry spot—like a patio, deck, or driveway. Place the mattress on a clean tarp or old sheet to keep it off the ground.
Let it sunbathe for 2–4 hours, flipping it halfway through so both sides get direct exposure. Afterward, bring it back inside and let it cool down before making the bed. This step not only sanitizes but also helps eliminate musty odors.
Why Uv Light Works
Ultraviolet light from the sun penetrates the mattress surface and damages the DNA of microorganisms, effectively killing them. It's especially effective against dust mites and bacteria that thrive in dark, humid environments. Just a few hours of direct sunlight can significantly reduce their population.
Best Practices For Outdoor Drying
Choose a low-wind day to prevent dust or debris from blowing onto the mattress. If you have allergies, wear a mask while moving the mattress. After sun-drying, give the mattress a quick vacuum to remove any dead mites or particles.
This step pairs perfectly with baking soda deodorizing—do the baking soda treatment before sun-drying for extra freshness.
13. Use Essential Oils for a Fresh Scent
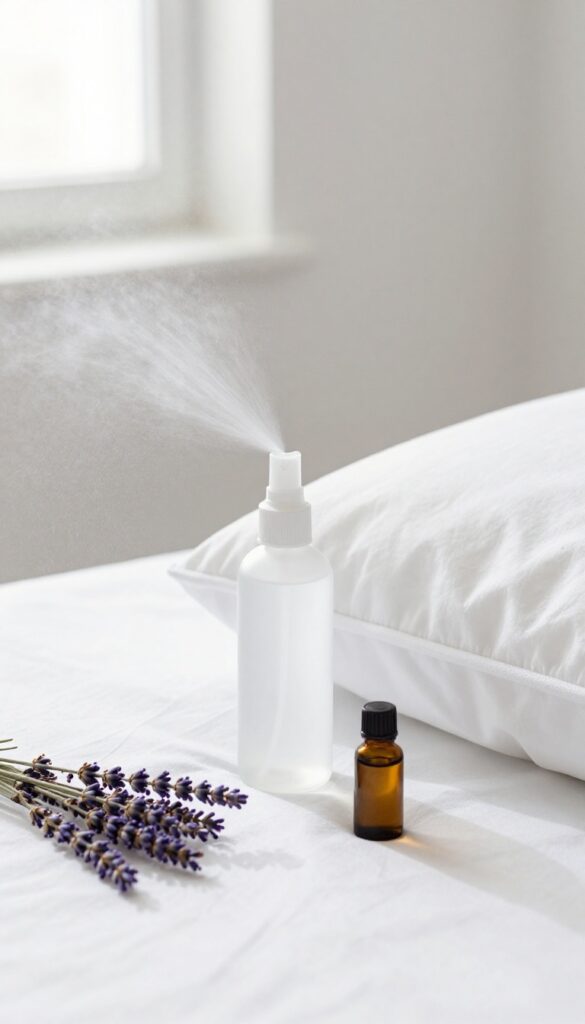
A fresh-smelling mattress can make your bed feel like a sanctuary. Essential oils not only add a pleasant aroma but also offer antimicrobial benefits. Lavender promotes relaxation, while tea tree oil fights bacteria and dust mites naturally.
It's a simple, chemical-free way to keep your sleep space inviting.
Creating a DIY mattress spray is quick and easy. In a spray bottle, combine 10-15 drops of essential oil with 1 cup of distilled water. Shake well and lightly mist the mattress surface.
Avoid soaking the fabric—just a fine spray is enough. Let it air dry for 15-20 minutes before making the bed.
Best Oils For Mattress Care
Lavender oil is a top choice for its calming scent and mild antibacterial properties. Tea tree oil is more potent against microbes but has a stronger smell. You can also use eucalyptus or peppermint for a refreshing twist.
Always dilute essential oils properly to avoid skin irritation.
How To Apply Without Staining
Test the spray on a small, hidden area first to ensure it doesn't stain. Use a fine-mist sprayer and hold it about 12 inches from the mattress. Spray lightly and evenly.
For extra freshness, add a few drops to a cotton ball and tuck it under the mattress cover.
14. Clean the Mattress Edges and Handles
The edges and handles of your mattress are often neglected, but they collect just as much dust and grime as the top surface. Over time, these areas can become discolored or even start to smell. A quick wipe-down keeps them fresh and extends the life of your mattress.
Plus, it's a simple step that makes the whole bed feel cleaner.
Grab a soft cloth or sponge and dampen it with a mixture of mild dish soap and warm water. Wring it out well so it's not dripping. Gently wipe along the sides of the mattress, paying extra attention to any fabric handles.
For handles, you can wrap the cloth around them and pull back and forth to clean all sides. Rinse the cloth frequently and change the water if it gets dirty. After wiping, use a dry cloth to blot away excess moisture.
Let the edges air dry completely before putting on sheets or moving the mattress.
Why Edges Matter
The sides of your mattress are exposed to dust, pet dander, and even spills from nightstands. Fabric handles can trap oils from your hands, leading to yellowing over time. Regular cleaning prevents buildup and keeps the mattress looking newer.
Best Cleaning Solution
A simple mix of mild dish soap and water works great. Avoid harsh chemicals or bleach, which can damage the fabric. For stubborn stains, add a little white vinegar to the solution.
Test on a small hidden area first to ensure no discoloration.
Drying Tips
After cleaning, open windows or use a fan to speed up drying. Moisture left behind can lead to mold or mildew. If your mattress has handles, make sure they are completely dry before lifting or moving the mattress to prevent tearing.
15. Vacuum the Box Spring or Foundation
Your mattress isn't the only thing collecting dust and allergens. The box spring or slatted foundation underneath can harbor just as much debris, and it all gets stirred up every time you shift in bed. A quick vacuum session here prevents that buildup from migrating upward into your sleeping space.
Box springs and foundations often have fabric covers that trap dust, pet dander, and even mold spores. Vacuuming them regularly—at least every three months—keeps the air around your bed cleaner. Use the upholstery attachment to avoid snagging the fabric, and pay special attention to the corners and seams where dirt likes to hide.
If your foundation has slats, vacuum between them too. This step takes just a few minutes but makes a noticeable difference in overall mattress freshness.
Why The Base Matters
Many people focus only on the mattress top, but the base acts like a sponge for airborne particles. Over time, dust mites and allergens settle there and can be kicked up when you move. A clean base means less irritants reaching your nose while you sleep.
How To Vacuum Effectively
Remove all bedding and lift the mattress off the foundation if possible. Use a vacuum with a HEPA filter and the upholstery brush. Go slow, overlapping each pass.
Don't forget the sides and the bottom edge where dust bunnies collect. If your box spring has a removable cover, wash it according to the label.
When To Do More Than Vacuum
If you notice musty smells or visible stains on the foundation, spot-clean with a mild detergent and water. For serious issues, consider replacing the box spring—especially if it's more than eight years old. A clean, sturdy foundation supports both your mattress and your sleep health.
16. Check for Bed Bugs or Dust Mites
You might not see them, but tiny pests could be sharing your bed. Bed bugs and dust mites are common culprits behind itchy nights and allergy symptoms. A quick inspection can save you from a full-blown infestation.
Inspecting your mattress regularly helps catch problems early. Use a flashlight to check seams, tufts, and folds for any signs of bed bugs—look for small rust-colored spots, shed skins, or live bugs. Dust mites are microscopic, but their debris can trigger allergies.
If you spot anything suspicious, treat the area with a bed bug spray or use a mattress encasement to trap existing mites.
What To Look For
Bed bugs leave behind tiny dark spots (excrement), pale yellow skins, and sometimes a musty odor. Check the mattress seams, headboard, and bed frame. Dust mites aren't visible, but if you wake up with a stuffy nose or itchy eyes, they might be the cause.
How To Treat Infestations
For bed bugs, use a spray specifically designed for mattresses—avoid harsh chemicals that could harm you. Vacuum the entire mattress and bed frame thoroughly. For dust mites, washing bedding in hot water (130°F or higher) kills them.
A mattress encasement adds a protective barrier.
Prevention Tips
Reduce humidity in your bedroom to below 50% to discourage dust mites. Use allergen-proof covers on pillows and mattresses. Regularly vacuum your mattress and rotate it to prevent buildup.
And always inspect secondhand furniture before bringing it home.
17. Wash Mattress Protector Regularly
Your mattress protector works hard to keep dust mites, spills, and sweat from reaching the mattress. But over time, it gets dirty too. Washing it regularly keeps it working like new.
Most mattress protectors can go in the washing machine. Check the care label first—some are waterproof and need a gentle cycle. Use hot water (130°F or higher) to kill dust mites and bacteria.
Skip fabric softener; it can ruin the waterproof layer. Tumble dry on low or air dry. Aim to wash every 1–2 months, or more often if you have allergies or pets.
Why Hot Water Matters
Hot water is key for killing dust mites and removing body oils. Cold or warm water won't cut it. If your protector is waterproof, hot water is safe as long as you follow the label.
For delicate fabrics, use warm water and add a sanitizing laundry additive.
Drying Tips For Longevity
Heat can damage waterproof coatings, so use low heat or air dry. If you use a dryer, toss in a couple of tennis balls to help the protector fluff up. Never leave it in the dryer too long—overdrying can crack the backing.
How Often Is Enough?
Every 1–2 months is the sweet spot for most people. If you sleep hot, have allergies, or share your bed with pets, bump it up to every two weeks. A clean protector means a cleaner mattress underneath.
18. Air Out the Mattress After Cleaning
After all that scrubbing, spraying, and blotting, your mattress is probably damp. Tossing the sheets back on right away is a bad idea—moisture trapped inside can lead to mold, mildew, or musty odors. Giving it time to breathe is a simple but crucial final step.
Let the mattress air dry completely before putting sheets back on. Open windows or use a fan to speed up drying.
Why Drying Matters
A damp mattress is a breeding ground for mold and dust mites. Even if you used minimal liquid, the inner layers can stay wet for hours. Proper drying ensures your cleaning efforts don't backfire.
How To Speed Up Drying
Crack open windows to create cross-ventilation. Point a fan directly at the mattress or use a hairdryer on a cool setting. If you have a dehumidifier, run it in the room.
In sunny weather, you can even prop the mattress against a wall near an open window.
How Long To Wait
Aim for at least 2–4 hours of air drying. For deeper cleaning methods like steam or shampooing, wait 6–8 hours or until the surface feels completely dry to the touch. Patience pays off.
19. Use a Mattress Topper for Extra Protection
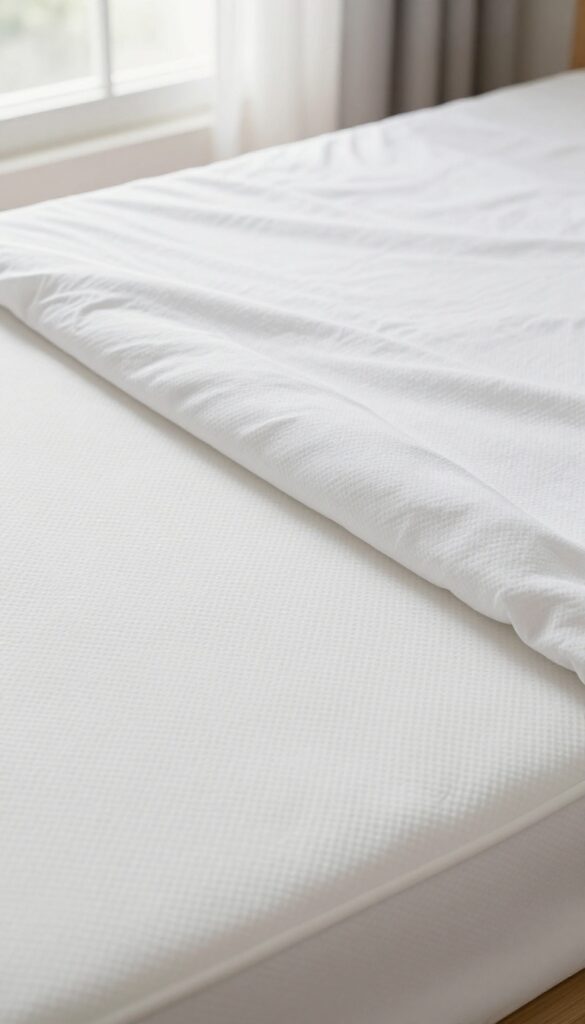
A mattress topper does more than just make your bed feel softer. It acts as a shield, catching sweat, spills, and skin flakes before they reach the mattress. And since most toppers are machine-washable, you can keep your sleep surface fresh with minimal effort.
Think of a mattress topper as a sacrificial layer. It takes the brunt of daily wear and tear, so your mattress stays cleaner longer. Plus, it's much easier to toss a topper in the wash than to deep-clean an entire mattress.
Choose one made from natural materials like cotton or wool for breathability and easy care.
Why A Topper Works As A Barrier
A quality topper creates a physical barrier between you and the mattress. It absorbs moisture from sweat and accidental spills, preventing them from seeping into the mattress core. This reduces the buildup of dust mites and bacteria, which thrive in damp environments.
Washable Vs. Spot-clean Only
Not all toppers are created equal. Look for one labeled machine-washable—ideally with a removable cover. Some toppers require spot-cleaning only, which defeats the purpose of easy maintenance.
Memory foam toppers often can't be submerged, so check the care label before buying.
How Often To Wash Your Topper
Aim to wash your mattress topper every two to three months. If you eat in bed, have pets, or sweat heavily, bump that up to monthly. Always follow the manufacturer's instructions—use gentle detergent and avoid fabric softener, which can break down fibers and reduce breathability.
20. Rotate Seasonally
Your mattress works hard every night, supporting your body through hours of sleep. Over time, that constant pressure in the same spots can lead to sagging and uneven wear. The fix is simple: rotate it regularly.
This small habit can add years to your mattress's life and keep your sleep surface comfortable and supportive.
Rotating your mattress every 3 to 6 months distributes wear more evenly, preventing permanent indentations. It also helps maintain consistent support across the entire surface. Mark your calendar or set a reminder on your phone so you don't forget.
For most mattresses, a simple 180-degree turn does the trick—head to foot. If you have a pillow-top or one-sided mattress, check the manufacturer's instructions; some only allow rotation, not flipping.
Why Rotation Matters
Without rotation, the area where your hips and shoulders rest gets compressed more than the rest of the mattress. Over months and years, that compression becomes a permanent dip. Rotating spreads the load, so all parts of the mattress age at the same rate.
This is especially important for memory foam and hybrid mattresses, which are prone to body impressions.
How To Rotate Without Strain
Rotating a mattress can be awkward, especially if it's heavy. Enlist a partner or use a mattress lifter tool. Start by stripping the bed and removing the protector.
Then, rotate the mattress 180 degrees so the head becomes the foot. If your mattress is flippable, you can also flip it over. For extra protection, vacuum the underside before putting it back.
When To Rotate
A good rule of thumb is to rotate at the start of each season—spring, summer, fall, winter. If you have a new mattress, rotate it after the first 3 months to help it break in evenly. After that, stick to a 6-month schedule.
If you notice sagging or discomfort before then, rotate more frequently.
21. Keep Pets Off the Bed
We love our furry friends, but they bring more than just cuddles to the bed. Pet dander, dirt, and even fleas can settle deep into your mattress, making it a magnet for allergens. Over time, that cute sleeping spot turns into a source of dust mites and odors that are tough to remove.
Training your pet to sleep elsewhere is one of the best things you can do for mattress hygiene. It's not about loving them less—it's about keeping your sleep space cleaner and healthier. If you can't break the habit, at least create a barrier with washable pet blankets.
Why Pet Dander Is A Problem
Pet dander is made of tiny skin flakes that are light enough to float in the air. They settle into mattress fibers and trigger allergies or asthma. Even if you're not allergic, dander builds up and mixes with sweat, creating a breeding ground for dust mites.
How To Train Your Pet To Sleep Elsewhere
Start by making their own bed super cozy—add a favorite blanket or toy. Use positive reinforcement like treats when they choose their spot. Be consistent: if you let them on the bed sometimes, they'll keep trying.
A few weeks of patience pays off with a cleaner mattress.
If You Can't Keep Them Off Completely
Use a waterproof, washable mattress protector and a separate pet blanket on top. Wash the pet blanket weekly and vacuum the mattress surface often. Groom your pet before bedtime to reduce loose fur and dander.
It's not perfect, but it helps a lot.
22. Use a Damp Cloth for Light Dusting
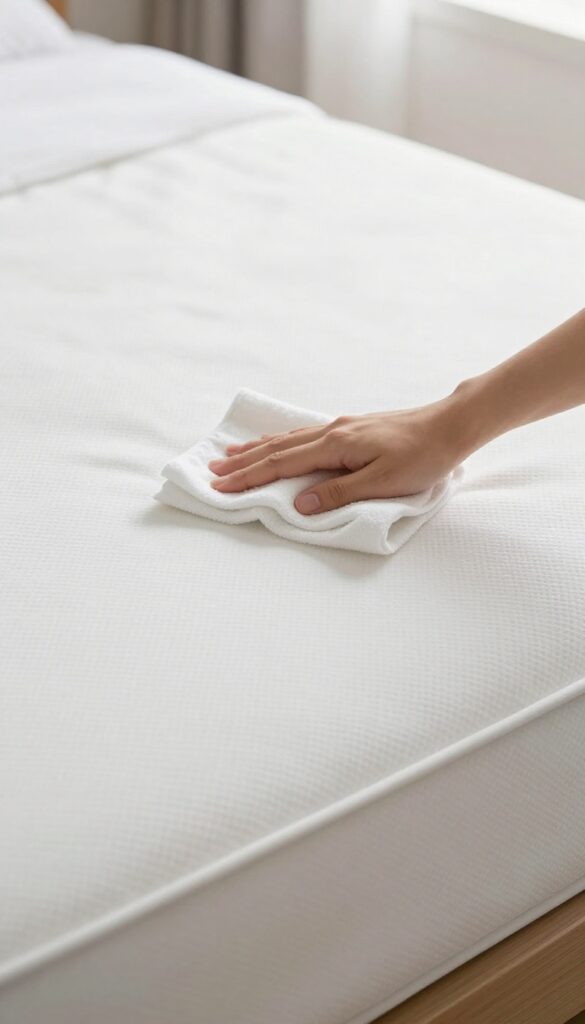
Not every mattress cleaning session needs to be a full-blown production. Sometimes, all your bed needs is a quick once-over to keep surface dust and allergens at bay. Between deep cleans, a lightly damp microfiber cloth can work wonders without soaking your mattress or requiring heavy lifting.
Light dusting is your first line of defense against the daily buildup of skin flakes, dust mites, and fabric fibers. It takes just a few minutes and can be done every time you change your sheets. The key is to use a cloth that's barely damp—think wrung out until no water drips—so you don't introduce moisture that could lead to mold or mildew.
Why Microfiber Works Best
Microfiber cloths have tiny fibers that trap dust and particles rather than pushing them around. They're also gentle on mattress fabric, unlike rough sponges or paper towels that can leave lint or cause fraying. A damp microfiber cloth creates a slight electrostatic charge that lifts dust without needing any cleaning spray.
The Right Technique
Start at the head of the mattress and work your way down in long, straight strokes. Overlap each pass slightly to avoid missing spots. Pay extra attention to seams and tufts where dust tends to collect.
Flip the cloth to a clean side as it gets dirty, and rinse it out if needed. Avoid circular motions, which can grind dust into the fabric.
When To Dust Vs. Deep Clean
Light dusting is perfect for weekly maintenance or when you notice visible dust on the surface. But if you're dealing with stains, odors, or a mattress that hasn't been cleaned in months, a deeper approach is necessary. Think of dusting as the quick tidy-up between thorough scrubs—it keeps your sleep space fresher with minimal effort.
23. Avoid Harsh Chemicals
It's tempting to reach for bleach or ammonia when a stain looks stubborn, but those strong cleaners can do more harm than good. They break down mattress fibers over time and leave behind fumes that stick around long after you've aired the room. Plus, you'll be breathing those residues all night, which isn't great for your health.
Stick to mild, non-toxic cleaners. A simple mix of white vinegar and water works wonders on most stains, and hydrogen peroxide (3%) is great for organic spots like blood or sweat. Baking soda is another hero—sprinkle it on, let it sit, and vacuum it up to neutralize odors without any harsh fumes.
Your mattress will stay fresh, and you won't have to worry about chemical exposure.
Why Bleach And Ammonia Are A No-go
Bleach is too aggressive for mattress fabrics. It can yellow the surface, weaken the fibers, and even create toxic fumes when mixed with other cleaners. Ammonia, on the other hand, can damage foam mattresses and leave a strong smell that's hard to remove.
Neither is worth the risk.
Safe Alternatives That Work
White vinegar diluted with water (1: 1 ratio) is a natural disinfectant and deodorizer. Hydrogen peroxide is excellent for lifting protein-based stains—just test it on a hidden spot first. For a simple all-purpose cleaner, mix a few drops of mild dish soap with water and use a microfiber cloth to spot-clean.
How To Spot-test Any Cleaner
Before you go all in, dab a small amount of your chosen cleaner on an inconspicuous area of the mattress (like the bottom edge). Wait 10 minutes and blot with a white cloth. If any color transfers or the fabric feels damaged, switch to a gentler option.
This step saves you from ruining your mattress.
24. Schedule a Professional Cleaning Annually
Even with regular DIY care, your mattress can harbor deep-seated dirt and allergens that household tools can't fully remove. That's where a professional cleaning service comes in. Once a year, bringing in the experts gives your mattress a reset that goes far beyond surface-level freshening.
What Professionals Do Differently
Professional cleaners use industrial-grade equipment like hot water extraction machines and powerful vacuums that extract deeply embedded dust mites, bacteria, and allergens. They also apply specialized cleaning solutions that are safe for your mattress but far more effective than store-bought sprays. The result is a deeper, more hygienic clean that can extend your mattress's lifespan and improve your sleep environment.
When To Call In The Pros
Schedule your professional cleaning at a time when you can air out the mattress afterward—ideally on a dry, sunny day. Many services offer fast-drying options, but giving it a few hours to fully dry prevents moisture buildup. If you suffer from allergies or asthma, or if your mattress has never been professionally cleaned, don't wait—book a session as soon as possible.
How To Choose A Service
Look for companies that specialize in mattress cleaning and use non-toxic, eco-friendly products. Read reviews and ask about their process—reputable services will walk you through what to expect. Price varies, but think of it as an investment in your health and comfort.
A clean mattress can help you sleep better and breathe easier.
25. Replace Your Mattress When Needed
No matter how diligent you are with cleaning, every mattress has a lifespan. Over years of use, the support core breaks down, and even the best deep clean can't restore lost comfort. If you're waking up with aches or noticing sagging, it's probably time to say goodbye.
Most mattresses last between 7 and 10 years. Beyond that, they harbor allergens and lose structural integrity. Replacing it isn't a failure—it's the final step in maintaining a truly clean sleep space.
Signs It's Time For A New Mattress
Your body gives you clues. If you wake up with stiffness or back pain that fades during the day, your mattress may no longer support your spine. Visible sagging or lumps are obvious red flags.
Also, if your allergies act up at night despite regular cleaning, the mattress could be overloaded with dust mites and dead skin.
How To Choose A Replacement
When shopping, prioritize comfort and support over fancy features. Consider your sleeping position—side sleepers need softer pressure relief, while back and stomach sleepers need firmer support. Look for materials that resist allergens, like latex or high-density foam.
Always test a mattress for at least a few minutes in-store or take advantage of trial periods.
Dispose Of Your Old Mattress Responsibly
Don't just dump it on the curb. Many recycling centers accept mattresses and break them down into metal, foam, and fabric. Some retailers offer removal services when you buy a new one.
Alternatively, donate it if it's still in decent shape—local shelters or furniture banks may take it.
FAQ
How often should I clean my mattress?
Vacuum your mattress every 2-3 months and deep clean (including stain removal and deodorizing) at least twice a year.
Can I use bleach on my mattress?
No, bleach can damage mattress fibers and discolor the fabric. Stick to mild detergents, hydrogen peroxide, or baking soda.
How do I remove urine stains from a mattress?
Blot up as much as possible, then apply a mixture of equal parts white vinegar and water. Let it sit, blot, then sprinkle baking soda to absorb odor.
Does baking soda really remove odors?
Yes, baking soda is a natural deodorizer. It absorbs moisture and neutralizes odors when left on the mattress for several hours.
How long does a mattress need to dry after cleaning?
It depends on the method. Spot cleaning dries in a few hours, but steam cleaning or heavy wet cleaning can take 6-12 hours. Ensure it's completely dry before remaking the bed.
Conclusion
A cleaner mattress isn't just about appearances—it directly impacts your sleep quality and health. By working through these 25 steps, you've tackled everything from surface dust to deep-set stains and allergens.
Now that your mattress is fresh, make it last with a waterproof protector and a quick monthly vacuum. Small habits like these keep your bed feeling like new and ensure you're sleeping on a truly clean surface every night.