Between muddy shoes, sticky spills, and pet paw prints, your floors take a beating every single day. Keeping them clean can feel like a losing battle when you're short on time and energy. But you don't need a professional crew or expensive products to win this fight.
A few smart strategies can cut your cleaning time in half while still giving you floors that look great. The key is working smarter, not harder—and knowing which shortcuts actually deliver.
These 20 floor cleaning ideas are designed for real families with real messes. They're budget-aware, effort-aware, and most importantly, they work.
1. The 5-Minute Daily Sweep

A quick daily sweep is your best defense against ground-in dirt and grime. It takes just five minutes and stops debris from turning into stubborn stains. For hard floors, a microfiber dust mop grabs dust and hair without scattering it.
For carpets, a lightweight vacuum with a bare floor setting works fast.
Getting into the habit of a daily sweep keeps your floors looking fresh without a deep clean every time. It's especially helpful in high-traffic areas like the kitchen and entryway, where dirt accumulates fast.
Why Microfiber Works Best
Microfiber dust mops use static electricity to attract dust and hair, trapping them instead of pushing them around. They're washable and reusable, making them eco-friendly and cost-effective. For best results, use a dry mop on hard floors and a slightly damp one for sticky spots.
Vacuuming Shortcuts For Carpets
If you have carpets, a lightweight stick vacuum or a cordless handheld can make daily sweeping effortless. Focus on the paths where people walk most. You don't need to vacuum the whole room—just the traffic lanes.
This saves time and keeps the carpet from looking matted.
Making It A Family Habit
Turn the daily sweep into a quick family task. Set a timer for five minutes and have everyone sweep their own zone. Kids can handle their rooms, while adults tackle the main areas.
It becomes a game rather than a chore, and the floors stay cleaner longer.
2. Doormat Strategy That Actually Works
Most families have a doormat, but few use them strategically. The truth is, a single mat at the front door isn't enough to stop dirt from traveling through your home. When you upgrade your approach, you can trap the majority of grime before it ever touches your floors.
The right doormat strategy starts with placement and material. You need heavy-duty, scraper-style mats at every entrance—front door, back door, garage entry, and even the mudroom. Look for mats made from coir, rubber, or textured polypropylene that can handle wet and muddy shoes.
Shake them out weekly (or more often during rainy seasons) to keep them effective. A good mat traps up to 80% of dirt, which means less sweeping and mopping for you.
Choose The Right Mat For Each Door
Not all doormats are created equal. For high-traffic entrances, go with a coarse, scraper-style mat that removes mud and debris. For interior doors, a softer, absorbent mat works better for catching moisture.
Avoid thin, decorative mats that slide around—they won't do the job.
The Two-mat System
Place one mat outside the door and another just inside. The outdoor mat removes large debris, while the indoor mat catches finer particles and moisture. This simple setup can cut floor dirt by more than half.
Maintain Your Mats Regularly
Mats lose effectiveness when they're clogged with dirt. Shake them out at least once a week, and vacuum them if possible. For deeper cleaning, hose them down and let them dry completely before putting them back.
3. No-Shoes Policy Without Being a Nag
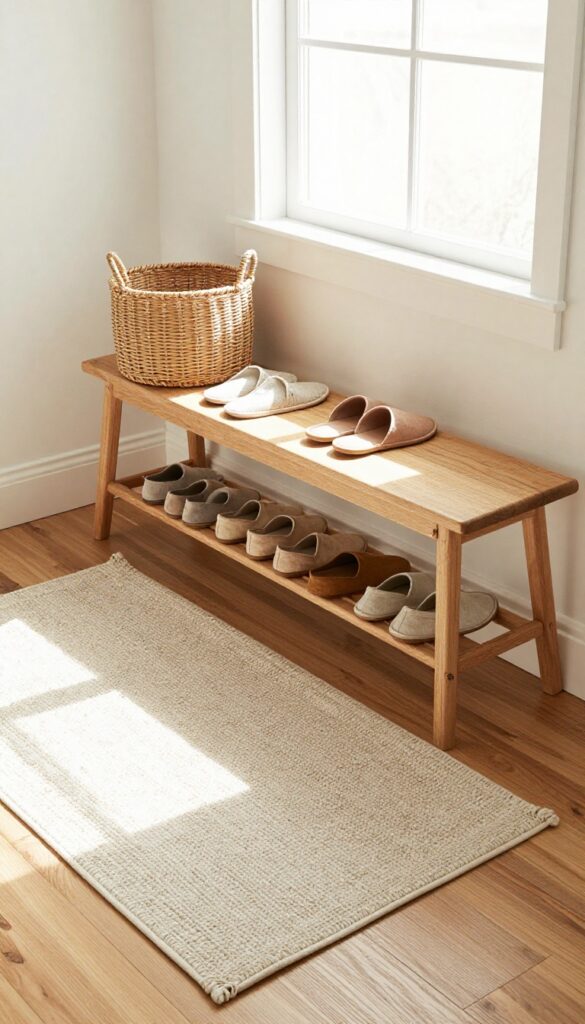
Getting everyone to ditch their shoes at the door is one of the easiest ways to keep floors cleaner. But constantly reminding people can turn you into the family nag. The trick is to make the no-shoes rule so convenient that it becomes automatic.
A well-designed entryway does the reminding for you. When there's a clear, inviting spot for shoes, people naturally use it. No lectures needed.
Build A Drop Zone
Set up a small bench or stool near the door where people can sit to remove shoes. Add a basket or cubby for each family member. Label them if you want—kids love having their own spot.
Keep it simple and accessible.
Make It Comfortable
Hard floors are cold and uninviting. Place a small rug or mat in front of the bench so bare feet don't hit cold tile. A soft landing makes the transition from shoes to slippers much more pleasant.
Add A Shoehorn And Slippers
Keep a shoehorn in the basket so putting shoes back on is easy. Stock a basket of guest slippers or cheap flip-flops for visitors. When you make it easy to go shoeless, people comply without being asked.
4. Spot Clean Spills Immediately
Spills happen—especially when you have kids or pets. The difference between a quick wipe and a permanent stain often comes down to seconds. Waiting even a few minutes can let liquids seep into grout, wood grain, or carpet fibers, making cleanup much harder.
A simple habit of grabbing a cloth right away saves scrubbing later.
Keep a spray bottle of diluted vinegar and a microfiber cloth under the sink. Tackle spills as they happen to prevent stains and sticky residue.
Why Speed Matters
Most floor materials are porous to some degree. Laminate, hardwood, tile grout, and even vinyl can absorb liquids if left sitting. Red wine, juice, and dark sauces are especially aggressive.
A few seconds of action can stop them from bonding with the surface.
What To Keep Handy
Store a small spray bottle with a 50/50 mix of white vinegar and water under every sink in your home. Add a few drops of dish soap for greasy spills. Pair it with a pack of microfiber cloths—they absorb more than paper towels and don't leave lint.
The Right Technique For Different Surfaces
For hard floors, spray the spill lightly and wipe in a circular motion, then dry with a clean cloth section. For carpets, blot—don't rub—to avoid pushing the stain deeper. Use a dry cloth first to soak up excess, then apply the spray and blot again.
Make It A Family Rule
Teach everyone in the household to grab a cloth when they see a spill. Keep a small caddy with supplies in a central spot so kids can reach it. A simple "spill, grab, wipe" routine turns into a habit that protects your floors daily.
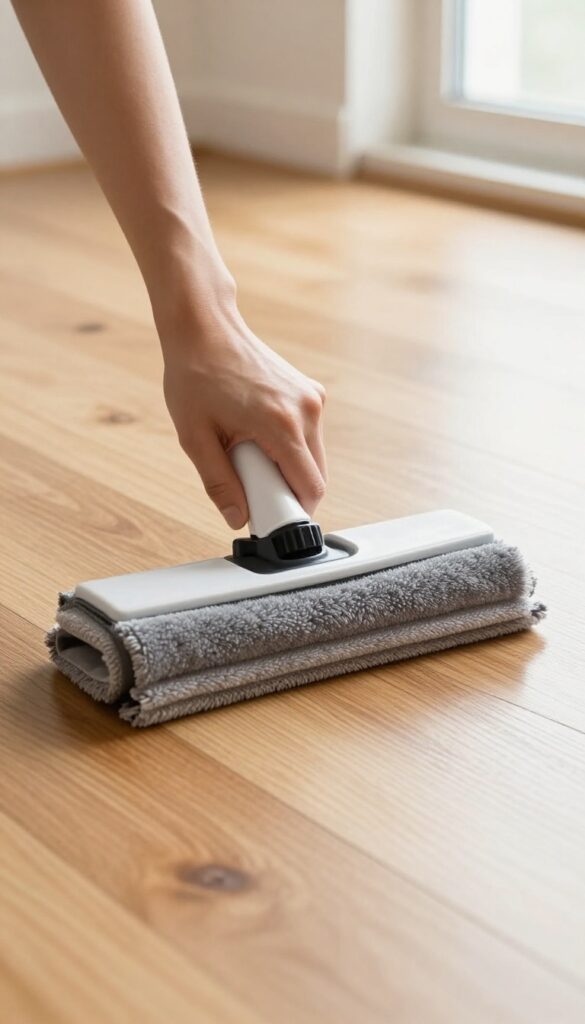
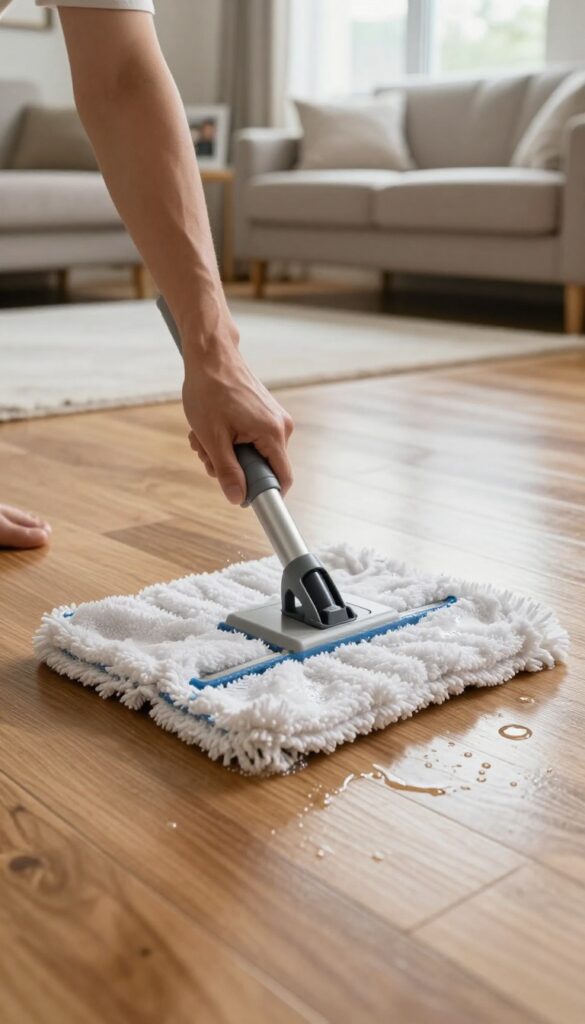
5. The Power of a Dry Mop
Most people reach for a wet mop the second the floor looks dirty. But that extra moisture can actually attract more dust and leave behind streaks. A dry microfiber mop, used daily, picks up the fine particles that a broom misses.
It's a game-changer for busy families who want clean floors without the hassle.
A dry mop isn't just a quick fix—it's a preventive tool. By trapping dust and hair before they get ground into the floor, you reduce the frequency of deep cleaning. Plus, it's safe for all floor types, from hardwood to tile to laminate.
No water means no drying time, no streaks, and no risk of warping. Keep a dry mop in a handy spot and give your floors a once-over each evening. You'll be amazed at how much it collects.
Why Dry Mop First
Wet mopping a dusty floor just pushes the dirt around. Dry mopping first lifts and removes the loose debris, so when you do wet mop, you're actually cleaning the surface. It's a simple one-two punch that makes your floors genuinely clean.
Best Microfiber Pads For The Job
Look for reusable microfiber pads that trap dust electrostatically. Some are washable up to 500 times, saving you money on disposable refills. Brands like Swiffer or generic knockoffs work well—just make sure the pad is thick enough to hold onto dirt without scratching.
Daily Routine For Maximum Effect
Set a timer for five minutes each evening. Run the dry mop over high-traffic areas like the kitchen, entryway, and living room. It's a small habit that prevents buildup and keeps your floors looking fresh with almost zero effort.
6. Vinegar and Water for Most Hard Floors
White vinegar and water is a classic cleaning combo that actually works. It cuts through grease, removes dulling residue, and leaves most hard floors sparkling without harsh chemicals. The best part?
It costs pennies per batch. But vinegar isn't a universal solution. It can damage unsealed wood, natural stone, and certain tile finishes.
Knowing when to use it—and when to skip it—keeps your floors safe while still giving you that deep clean.
Mix 1/2 cup white vinegar with a gallon of warm water for a safe, effective cleaner. Avoid on unsealed wood or stone.
When Vinegar Works Best
Vinegar is ideal for sealed hardwood, laminate, vinyl, and ceramic tile. The mild acidity breaks down soap scum and sticky residues that plain water leaves behind. It also deodorizes, so your floors smell fresh without artificial fragrances.
Floors To Keep Away From Vinegar
Unsealed wood, marble, limestone, and granite are vulnerable to vinegar's acidity. It can etch the surface or strip the finish over time. For these floors, stick to a pH-neutral cleaner or a manufacturer-recommended product.
How To Apply For Best Results
Use a spray mop or a well-wrung microfiber mop—never soak the floor. Work in small sections, and rinse with plain water if the floor looks streaky. Let it air dry completely before walking on it.
7. Baking Soda Paste for Stubborn Spots
Dried-on food, scuff marks, and mystery stains can make even a freshly mopped floor look grimy. Instead of scrubbing until your arm hurts, try a simple baking soda paste. It's gentle enough for most floor types but tough enough to lift stuck-on messes without harsh chemicals.
To make the paste, mix three parts baking soda with one part water until it forms a thick, spreadable consistency. Apply it directly to the stain or scuff mark, let it sit for about 10 minutes, then scrub gently with a soft cloth or sponge. The baking soda acts as a mild abrasive that breaks down grime without scratching.
Rinse the area with a damp cloth and dry it thoroughly. This method works wonders on tile, linoleum, and sealed hardwood—just avoid using it on unsealed wood or delicate surfaces.
When To Use It
Reach for baking soda paste for dried-on ketchup, coffee drips, or sticky residue from stickers. It's also great for light scuff marks from shoes or furniture. For tougher stains, add a splash of white vinegar to the paste—it will fizz and help lift the grime, but test on a hidden area first.
Application Tips
Apply the paste with a spatula or your finger, focusing on the stain. Let it sit for the full 10 minutes so it can soften the gunk. When scrubbing, use circular motions and a non-abrasive pad.
Rinse well to avoid any residue that could dull the floor's finish.
Safety And Precautions
Always test the paste on a small, inconspicuous area first, especially on sealed surfaces. Avoid using it on unsealed wood, laminate, or natural stone like marble, as the abrasiveness can cause damage. For these surfaces, stick to a pH-neutral cleaner instead.
8. Vacuum in a Grid Pattern

Most people vacuum in random, haphazard paths, which leaves behind dirt and dust bunnies. A simple shift in technique can make your vacuuming far more effective without adding extra time. The grid pattern method ensures you cover every inch of your floor, lifting embedded dirt and leaving your carpets looking fresher.
Vacuuming in a grid pattern means moving the vacuum in overlapping rows, first in one direction, then perpendicular. This systematic approach prevents missed spots and helps dislodge dirt from deep within carpet fibers. It also gives you a visual cue of where you've already cleaned, so you don't waste time re-vacuuming the same area.
Why Overlapping Matters
Overlapping each pass by a few inches ensures you don't leave narrow strips of uncleaned carpet. It also helps pick up debris that might have been pushed aside by the vacuum's bristles. This is especially important in high-traffic areas where dirt gets ground in.
How To Do It Efficiently
Start at one corner of the room and vacuum in straight lines, overlapping each row by about 2–3 inches. Once you've done the entire room in one direction, vacuum again perpendicular to your first passes. This cross-hatch pattern lifts dirt from all angles and leaves your carpet noticeably cleaner.
Best For High-traffic Zones
Focus this technique on hallways, living rooms, and other areas that see the most foot traffic. These spots trap the most dirt and benefit the most from a thorough grid pattern. For less-used rooms, a single pass may be enough.
9. Use a Squeegee for Pet Hair on Carpets
Pet hair on carpets can be a constant battle, especially if your vacuum doesn't quite grab everything. A rubber squeegee—the same tool you use on windows—works like a charm. It creates static that pulls hair right out of the fibers, clumping it up for easy cleanup.
Run the squeegee in one direction across the carpet, using firm, even strokes. The hair will gather into visible clumps or lines. Then just vacuum those up with your regular vacuum.
It's faster than going over the same spot multiple times with a brush attachment.
Why A Squeegee Works Better
Rubber has a natural grip that grabs hair rather than pushing it deeper into the carpet. Unlike vacuum brushes that can get tangled, a squeegee stays hair-free. Plus, it's gentle on carpet fibers and won't cause wear.
Best Technique For Different Carpets
For low-pile carpets, use short, quick strokes. For high-pile or shag, use longer, slower pulls to avoid snagging. Always work in the same direction—toward a corner or trash pile—so you can collect the hair efficiently.
Bonus Tips For Pet Owners
Keep a squeegee in each main room for quick touch-ups. You can also use it on upholstery and car seats. After squeegeeing, a quick vacuum pass picks up everything.
This method reduces how often you need to deep-clean your carpets.
10. Steam Mop for a Deep Clean Without Chemicals
If you're tired of rinsing a dirty mop bucket or worried about chemical residue around kids and pets, a steam mop might be your new best friend. It uses only water, heated to a high temperature, to sanitize and clean sealed hard floors. No soap, no harsh fumes, just steam.
Why Steam Works So Well
Steam mops heat water to around 200°F, which is hot enough to kill most bacteria and loosen stuck-on grime. The microfiber pad traps dirt, and you just toss it in the wash when you're done. It's especially effective in kitchens where grease builds up, and in bathrooms where you want to sanitize without bleach.
Floors That Love Steam
Steam mops work best on ceramic tile, vinyl, laminate, and sealed hardwood. But always check your floor's warranty first—some manufacturers warn against steam on unsealed wood or certain laminates. When in doubt, test a small hidden area before going full speed.
Quick Tips For Best Results
Sweep or vacuum before steaming to avoid pushing dirt around. Use distilled water if you have hard tap water—it prevents mineral buildup inside the mop. And don't let the mop sit still on one spot, or you might damage the floor.
Glide it continuously for a streak-free finish.
11. Microfiber Mop Heads Are Washable and Reusable
Disposable mop pads might seem convenient, but they add up in cost and waste. Microfiber mop heads are a smarter choice—they trap dirt and bacteria effectively and can be used over and over again. With proper care, they stay fresh and absorbent for months.
Most microfiber mop heads are machine-washable, making them easy to refresh. Toss them in with your regular laundry using hot water and a small amount of bleach or oxygen cleaner. Avoid fabric softener, as it coats the fibers and reduces their cleaning power.
If your mop head starts to smell or leaves streaks, it's time for a replacement.
How To Wash Microfiber Mop Heads
Shake off loose debris, then machine wash on hot with a gentle detergent. Add a splash of bleach or white vinegar to sanitize and remove odors. Skip the dryer—air dry or tumble on low heat to prevent fiber damage.
When To Replace Them
Replace microfiber mop heads every three to six months, depending on use. Signs of wear include frayed edges, loss of absorbency, or a lingering musty smell even after washing. Keeping a spare on hand means you're never caught without a clean pad.
Why Microfiber Works Better Than Cotton
Microfiber has split fibers that create static electricity, attracting dust and grime like a magnet. It holds more liquid than cotton and lifts dirt without scratching surfaces. Plus, it dries faster, reducing the risk of mildew.
12. Area Rug Shake-Out Routine
Small area rugs trap an unbelievable amount of dust, dirt, and allergens deep in their fibers. Even the best vacuum can't pull out everything. That's where a simple shake-out routine comes in—it's quick, effective, and requires zero fancy equipment.
Taking your small rugs outside for a weekly shake-out can dramatically cut down on indoor dust and extend the life of the rug. The motion dislodges particles that vacuuming misses, especially from thick or shaggy rugs. It's also a great way to freshen up the rug without washing it.
Why Shaking Beats Vacuuming Alone
Vacuuming lifts surface dirt, but it doesn't always reach the base of the fibers. When you beat or shake a rug, gravity and momentum force embedded particles out. This is especially helpful for rugs in high-traffic areas or homes with pets.
How To Do It Without Damaging The Rug
Take the rug outside and hang it over a sturdy railing or clothesline. Use a broom handle or rug beater to firmly tap the back of the rug—starting from the center and working outward. Avoid hitting too hard on delicate or antique rugs.
If hanging isn't possible, lay the rug flat on a clean surface and beat it from the back.
When To Shake Vs. Wash
Shaking is a maintenance step, not a replacement for washing. Do it weekly or biweekly, and wash the rug every few months or when it looks visibly soiled. Shaking helps keep the rug fresh between deep cleans and reduces allergens year-round.
13. Use Furniture Pads to Prevent Scratches
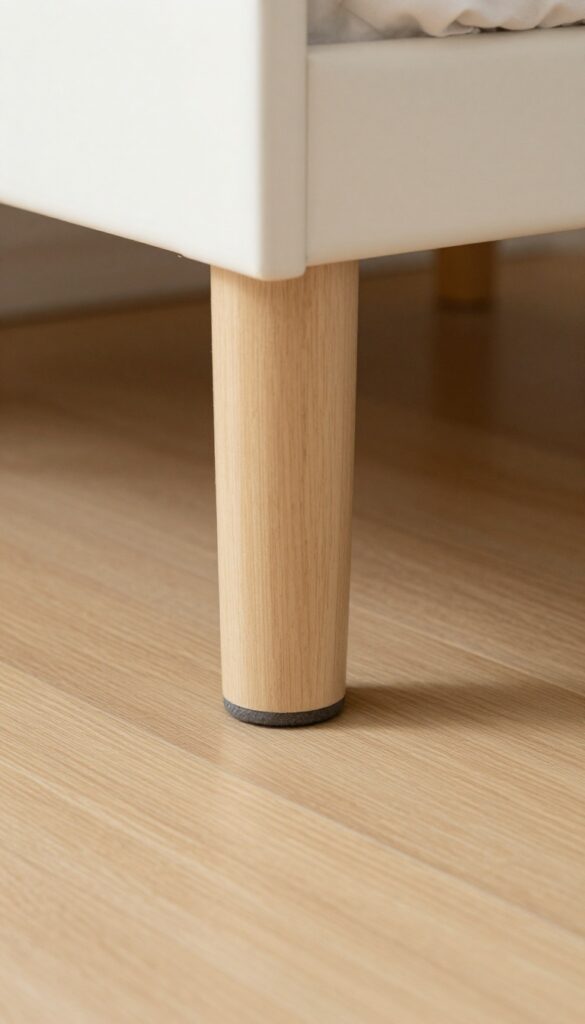
Dragging furniture across the floor is one of the fastest ways to leave scratches, scuffs, and worn spots. Whether you have hardwood, laminate, or tile, those legs and edges can do real damage over time. The fix is simple: attach felt pads to the bottom of chairs, tables, and sofas.
They let furniture glide easily and protect your floors from daily wear.
Furniture pads are a low-cost, high-impact solution that saves your floors from scratches and makes moving furniture quieter and easier. They come in various sizes and shapes to fit different legs, and most stick on in seconds. You'll notice the difference immediately—no more scraping sounds or worrying about rearranging the living room.
Choose The Right Pads
Not all pads are created equal. For hard floors, felt pads are the best choice—they're soft, durable, and won't leave residue. Avoid rubber or plastic pads on hard floors, as they can trap grit and cause scratches.
Measure your furniture legs before buying to ensure a snug fit. Self-adhesive pads are easiest, but nail-on pads work better for heavy items like sofas.
Where To Apply Them
Think beyond just dining chairs. Add pads to coffee tables, nightstands, desk legs, and even the corners of heavy dressers. Don't forget the back legs of sofas and recliners that often get dragged when cleaning.
A good rule: if it touches the floor and moves, it needs a pad.
Maintenance Tips
Felt pads collect dust and debris over time, which can turn them into scratch magnets. Check them every few months and replace any that are worn down or dirty. For high-traffic chairs, consider using thicker pads or replacing them twice a year.
A quick wipe with a damp cloth can extend their life.
14. The 10-Minute Floor Rescue
Some days, you just don't have the energy for a full floor routine. That's where the 10-minute rescue comes in. Set a timer and race against the clock to hit only the spots that matter most.
It's amazing how much you can accomplish when you're not overthinking it.
Focus On High-traffic Zones
Don't try to do the whole house. Pick the areas that see the most action—kitchen, entryway, hallway. A quick sweep or vacuum of these spots removes the grit that gets tracked everywhere.
If you have time, a spot mop over the sticky patches makes a big difference.
Use The Right Tools For Speed
Grab a cordless stick vacuum or a microfiber dust mop that you can whip out in seconds. Avoid anything that requires setup or heavy lifting. The goal is to move fast, so keep your quick-clean tools easily accessible.
Turn It Into A Game
If you have kids, challenge them to a race. Whoever sweeps the most dirt wins. Or just put on an upbeat song and see how much you can finish before the track ends.
The timer keeps you focused and prevents you from getting sidetracked.
15. Enlist Kids with a Floor Cleaning Game

Getting kids to help with floors doesn't have to be a daily negotiation. Turn it into a game and watch them race to tidy up. A little friendly competition can transform a chore into something they actually look forward to.
The 2-minute Toy Takedown
Set a timer for two minutes and challenge each kid to pick up as many toys as possible. The winner gets a small prize or first pick of the next activity. This works great for quick daily cleanups before vacuuming or mopping.
Reward Chart That Sticks
Create a simple chart with a row for each child. Every time they complete a floor task (like sweeping crumbs or putting away shoes), they earn a sticker. After a set number of stickers, they earn a reward like a movie night or extra screen time.
Spin The Wheel Of Chores
Make a spinning wheel with different floor tasks: sweep the kitchen, pick up toys in the living room, wipe up spills. Kids take turns spinning and doing whatever it lands on. It adds an element of surprise and keeps things fresh.
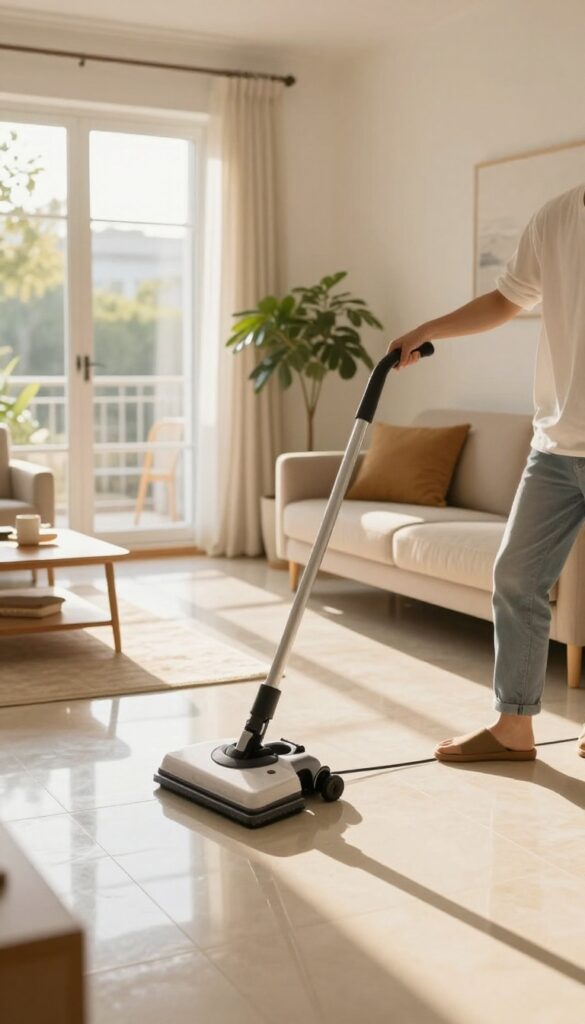
16. Use a Robot Vacuum on a Schedule
A robot vacuum won't replace your deep cleaning sessions, but it can handle the daily grind so you don't have to. Set it to run while you're at work or asleep, and you'll wake up to noticeably cleaner floors without lifting a finger. This one habit can cut your overall cleaning time in half.
Robot vacuums are especially useful in busy homes because they tackle the mess before it piles up. Crumbs, dust, and pet hair get whisked away daily, preventing them from being tracked through the house. You still need to mop and spot-clean, but the robot handles the maintenance layer.
Pick The Right Schedule
Most robot vacuums let you set a daily or even twice-daily schedule. For families, running it in the middle of the day when everyone is out works great. If you have pets, a late-night run catches fur and litter before morning.
Clear The Floor First
To get the best results, do a quick sweep of small objects like toys, cords, and shoes. This prevents the robot from getting stuck or missing spots. Over time, your family will learn to keep floors clearer, which helps the robot do its job.
Pair With A Mop For Deeper Clean
Some robot vacuums also mop, but even a basic model can be paired with a manual mop session once a week. The robot keeps the surface clean, so when you do mop, you're not just pushing dirt around.
17. Deep Clean Carpets with Baking Soda and Vacuum
Carpets can hold onto odors and light stains even when they look clean. Baking soda is a gentle, non-toxic way to freshen them up without harsh chemicals. This simple method works wonders between professional cleanings.
Sprinkle a generous layer of baking soda over your carpet, focusing on high-traffic areas and spots where pets or kids hang out. Let it sit for at least 15 minutes—longer if you have tough odors. Then vacuum thoroughly, using slow passes to lift the powder and trapped dirt.
The baking soda absorbs smells and helps loosen surface stains, leaving your carpets smelling fresh and looking brighter.
Why Baking Soda Works
Baking soda is a mild alkali that neutralizes acidic odors and gently breaks down dirt. It's safe for kids and pets, and it won't damage carpet fibers like some chemical cleaners can. Plus, it's cheap and you probably already have it in your pantry.
Tips For Best Results
For extra stain-fighting power, mix baking soda with a few drops of essential oil (like lavender or tea tree) before sprinkling. Test a small hidden area first to make sure the color won't change. And don't rush the vacuuming—go over each section multiple times to fully remove the powder.
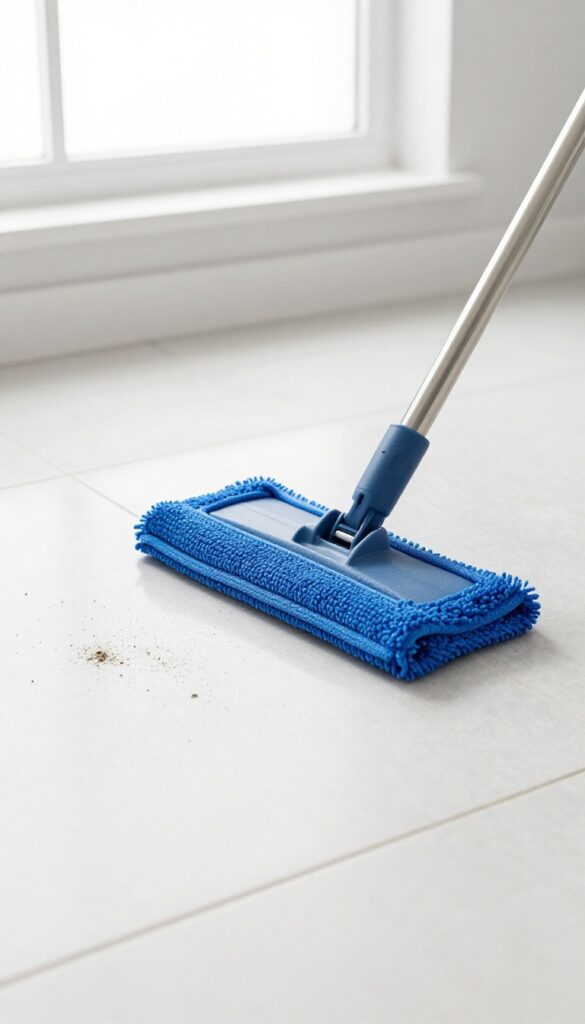
18. Mop in a Figure-Eight Pattern
Most people mop in straight lines or random back-and-forth swipes, but that often just spreads dirty water around. A simple change in your mopping motion can make a big difference in how clean your floors actually get. The figure-eight pattern is a game-changer for busy families because it covers more area with less effort and leaves fewer streaks behind.
The figure-eight technique works by using the natural curve of the mop head to lift dirt and then trap it against the fibers. As you move in a continuous loop, you're constantly bringing clean mop surface into contact with the floor while pushing the dirty water away from the area you just cleaned. This prevents the common problem of re-depositing grime onto already-mopped sections.
For best results, use a flat mop with a microfiber pad and work in small sections, overlapping each figure-eight slightly to ensure full coverage.
Why It Works Better
The figure-eight motion creates a scrubbing action that dislodges stuck-on dirt more effectively than straight lines. It also keeps the mop head wetter longer because you're not dragging it across dry patches, which reduces the need to re-wet frequently. Plus, the continuous movement helps you maintain a steady rhythm, making the task feel less tedious.
How To Do It Right
Start at the farthest corner of the room and work your way toward the exit. Dip your mop in clean water or cleaning solution, wring it out well (damp, not soaking), then trace a sideways figure-eight shape as you walk backward. Overlap each pass by about half the width of the mop head.
Rinse or change the mop pad when it gets visibly dirty—usually after every few passes.
Best Mops For This Technique
Flat mops with swivel heads and microfiber pads are ideal because they glide easily and can pivot for the figure-eight curves. Avoid string mops or sponge mops, which tend to fling water or leave too much moisture. A spray mop can also work if you control the amount of liquid carefully.
19. Keep a Floor Cleaning Caddy Handy
You know the drill: you spot a spill, grab a cloth, then realize you need the spray. By the time you find it, the spill has dried. A floor cleaning caddy solves that by keeping everything you need in one portable spot.
Fill it with your go-to supplies and you can grab it and go—no more hunting for bottles or rags.
A cleaning caddy is a game-changer for busy families. It turns floor cleaning from a scavenger hunt into a quick, efficient task. Choose a caddy with a sturdy handle and compartments to keep bottles upright.
Stock it with your all-purpose floor cleaner, a microfiber mop head, a spray bottle of water, and a few cloths. Keep it in a closet or under the sink, ready to grab whenever a mess appears.
What To Put In Your Caddy
Start with the basics: a multi-surface floor cleaner, a spray bottle of water for light mopping, and microfiber cloths. Add a scrub brush for stuck-on spots and a small squeegee for quick drying. If you have pets, include a pet-safe stain remover.
Keep it simple—you don't want a caddy so full it's hard to carry.
Where To Keep It
Store your caddy in a central location, like a hall closet or the kitchen pantry. The goal is to be able to grab it in seconds. If you have multiple floors, consider a second caddy for upstairs.
That way, you're never hauling supplies up and down stairs.
Weekly Refill Routine
Set a reminder to check your caddy once a week. Refill empty bottles, replace used cloths, and toss any items that are worn out. A quick restock keeps your caddy ready to go at a moment's notice.
It takes two minutes and saves you from mid-cleaning frustration.
20. Schedule a Monthly Deep Clean
Life gets busy, and it's easy to let the deep cleaning slide. But setting aside one day each month for a thorough floor reset makes a huge difference. You'll catch the grime that weekly maintenance misses, and your floors will look and feel fresher longer.
Rotate your deep cleaning tasks to cover all your floor types. One month focus on steam mopping tile and vinyl, the next shampoo carpets, and another scrubbing grout in bathrooms and kitchens. This rotation ensures every surface gets the attention it needs without overwhelming you.
Move Furniture First
Before you start, slide or lift furniture out of the way. This lets you reach dirt that's been hiding under couches, tables, and chairs for weeks. Use furniture sliders to make it easier and protect your floors from scratches.
Choose Your Focus
Decide which deep cleaning task fits your schedule and floor type. Steam mopping is great for sealed hard floors, carpet shampooing lifts embedded dirt, and grout scrubbing restores tile lines. Stick to one main task per month to keep it manageable.
Set A Timer
Deep cleaning doesn't have to take all day. Give yourself 60 to 90 minutes, put on some music, and work through each room. A timer keeps you focused and prevents burnout, so you're more likely to stick with the habit.
FAQ
How often should I mop my floors?
For busy families, mopping once a week is usually enough for hard floors. High-traffic areas like the kitchen may need a quick mop every few days.
Can I use vinegar on all floor types?
No. Vinegar is safe for tile, linoleum, and sealed hardwood, but it can damage unsealed wood, stone, or laminate. Always test in an inconspicuous area first.
What's the best way to remove pet stains from carpet?
Blot up as much as possible, then apply a mixture of white vinegar and water (1: 1). Let it sit for 5 minutes, blot again, and sprinkle baking soda. Vacuum when dry.
How do I keep my floors looking clean between deep cleans?
Use doormats, enforce a no-shoes policy, and do a quick daily sweep or vacuum. Spot-clean spills immediately to prevent buildup.
Is steam mopping safe for all floors?
No. Steam can damage unsealed hardwood, laminate, and some vinyl. Check your floor manufacturer's recommendations before using a steam mop.
Conclusion
Keeping your floors clean doesn't have to be a full-time job. Pick a few of these ideas that fit your family's schedule and stick with them—consistency beats perfection every time. Your home will feel fresher without adding stress to your day.
Start small, stay flexible, and remember that a clean floor is just a tool for more quality time together. You've got this.