Mold in your home isn't just unsightly—it can trigger allergies, asthma, and other health issues. The good news is you don't need harsh chemicals or expensive pros to tackle it. With 13 simple, safe steps, you can remove mold yourself and prevent it from coming back.
This guide walks you through everything from gearing up safely to choosing the right cleaning solution. Each step is practical, easy to follow, and designed for everyday homeowners. No fluff, just actionable advice.
Start by fixing the moisture source—without that, any cleaning is temporary. Then, follow the steps in order for a thorough, lasting result. Your home will be cleaner and healthier in no time.
1. Gear Up for Safety First
Before you start scrubbing, you need to protect yourself. Mold releases tiny spores into the air that can cause respiratory issues, skin irritation, and allergic reactions. The right gear keeps those spores out of your lungs and off your skin.
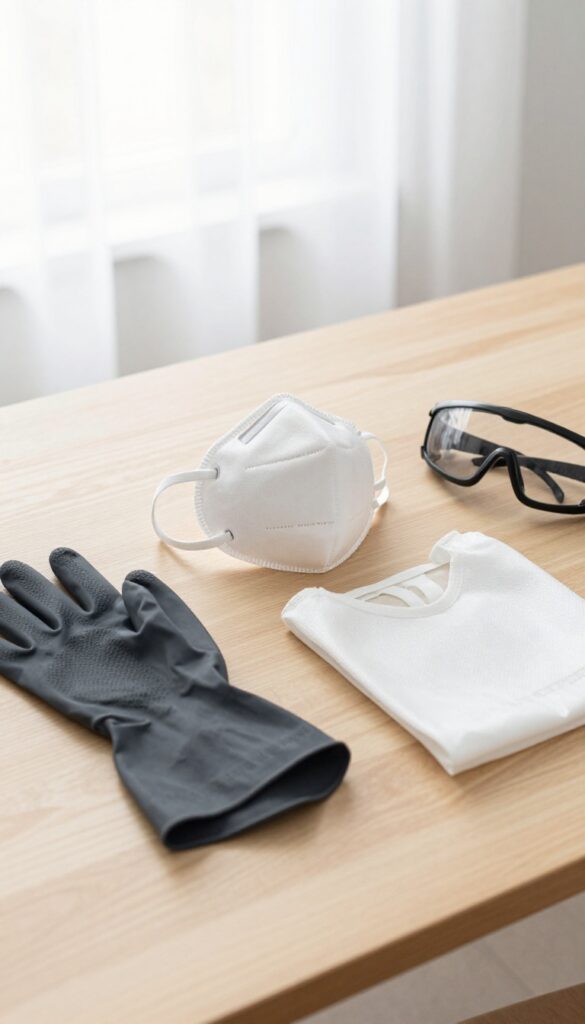
Putting on safety equipment isn't just a suggestion—it's a must. An N95 respirator mask filters out most mold spores, while rubber gloves prevent direct contact. Safety goggles shield your eyes from airborne particles and cleaning splashes.
If you have a large area or heavy mold growth, consider adding disposable coveralls and shoe covers to keep spores from traveling on your clothes.
Why An N95 Mask Matters
Standard dust masks won't cut it. An N95 respirator is designed to filter out at least 95% of airborne particles, including mold spores. Make sure it fits snugly around your nose and mouth—no gaps.
If you have asthma or a compromised immune system, step it up to a half-face respirator with P100 filters for even better protection.
Gloves And Goggles: Your Second Line Of Defense
Mold can irritate your skin, so wear long rubber or nitrile gloves that extend past your wrists. Avoid latex if you have allergies. Goggles with indirect vents keep spores and cleaning solutions out of your eyes without fogging up.
If you wear glasses, look for over-glasses goggles or a full-face respirator.
Don't Forget Ventilation And Cleanup
Open windows and doors to create cross-ventilation while you work. After cleaning, remove your gear carefully to avoid spreading spores. Wash reusable gloves with soap and water, and dispose of any disposable items in a sealed plastic bag.
Shower and wash your clothes immediately after to rinse off any lingering spores.
2. Identify the Mold Type and Extent
Not all mold is the same, and knowing what you're dealing with helps you decide the right approach. A quick visual check can tell you if it's surface-level mold on tiles or grout, or if it's penetrated deeper into drywall or wood. The size of the affected area also matters—small patches under 10 square feet are usually fine for DIY, but anything larger might need a professional.
Before you grab a scrub brush, take a moment to assess the mold. Look for discoloration, musty odors, and any signs of water damage. Surface mold on non-porous materials like glass or metal is easier to clean, while mold on porous surfaces like drywall or carpet may require removal.
If the area is larger than a 3×3 foot patch, or if you suspect hidden mold behind walls, it's best to call in a pro. Also, if you or anyone in your home has respiratory issues or allergies, consider professional help even for smaller patches. Taking this step ensures you choose the right cleaning method and avoid spreading mold spores further.
Surface Vs. Deep Mold
Surface mold sits on top of materials like tile, glass, or painted walls. It's usually easy to wipe away with a cleaner. Deep mold has penetrated into porous materials like drywall, wood, or insulation.
If you see mold on drywall, press gently—if it feels soft or crumbles, the mold has likely gone deep and the material needs to be cut out and replaced.
When To Diy Vs. Call A Pro
As a rule of thumb, mold patches under 10 square feet (about 3 feet by 3 feet) are safe for DIY cleaning. For larger areas, or if mold covers multiple spots, it's smarter to hire a professional. Also, if the mold is from sewage or floodwater, always call a pro—it could contain harmful bacteria.
Professionals have the equipment to contain spores and ensure thorough removal.
3. Fix the Moisture Source
You can scrub mold all day, but if the dampness that feeds it is still there, it'll be back before you know it. That's why step three is all about cutting off the water supply. Once you stop the moisture, the mold stops growing, and your cleaning efforts actually stick.
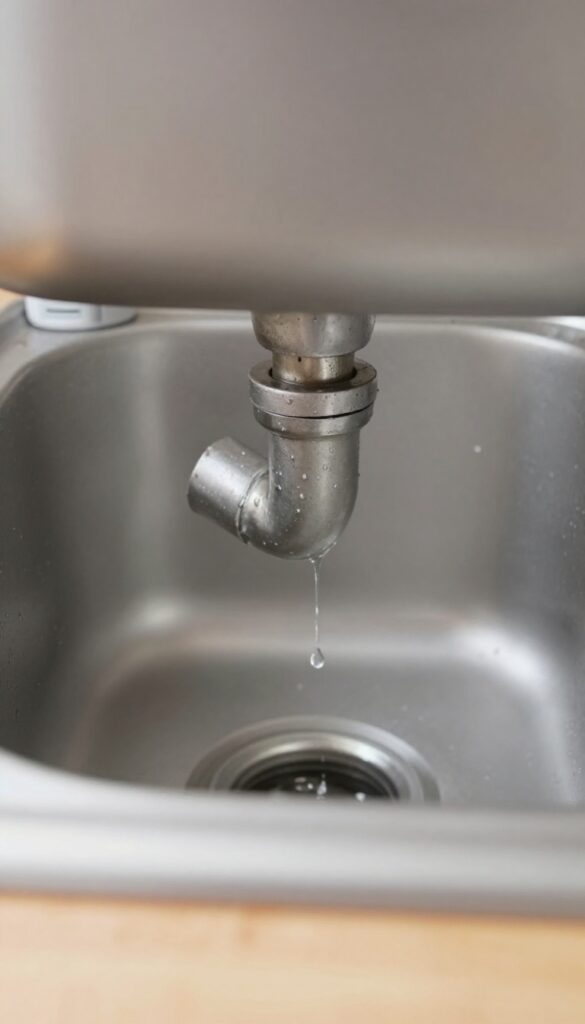
Before you reach for a sponge, take a few minutes to figure out where the moisture is coming from. Common culprits include leaky pipes, a dripping faucet, poor bathroom ventilation, or a humid basement. Fixing the source might be as simple as tightening a connection or as involved as sealing a foundation crack.
Either way, it's the most important step you'll take.
Find The Leak
Start by looking for obvious signs: water stains on ceilings or walls, peeling paint, warped wood, or a musty smell. Check under sinks, around toilets, and behind appliances like the fridge or washing machine. If you can't spot a leak but suspect one, try using a moisture meter or call a plumber for a professional inspection.
Improve Ventilation
Bathrooms, kitchens, and laundry rooms are prime spots for mold because they get steamy. Make sure your exhaust fans work properly and vent to the outside, not just into the attic. Open windows when weather permits, and leave bathroom doors open after showers to let moisture escape.
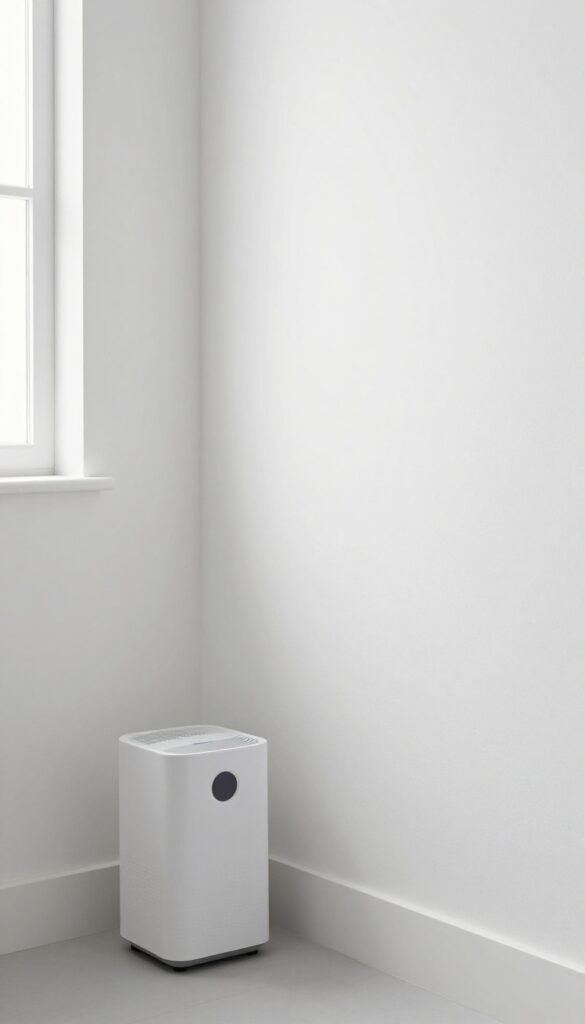
Use A Dehumidifier
If your home has high humidity—especially in basements or crawl spaces—a dehumidifier can make a huge difference. Aim for indoor humidity between 30% and 50%. Empty the water reservoir regularly or connect it to a drain so it runs continuously.
This alone can stop mold before it starts.
4. Ventilate the Area
Mold spores are tiny and lightweight, so they can easily float through the air while you're cleaning. That's why ventilation is a must before you start scrubbing. Opening windows and doors creates cross-breezes that push spores outside instead of letting them settle elsewhere in your home.
Open Windows And Doors
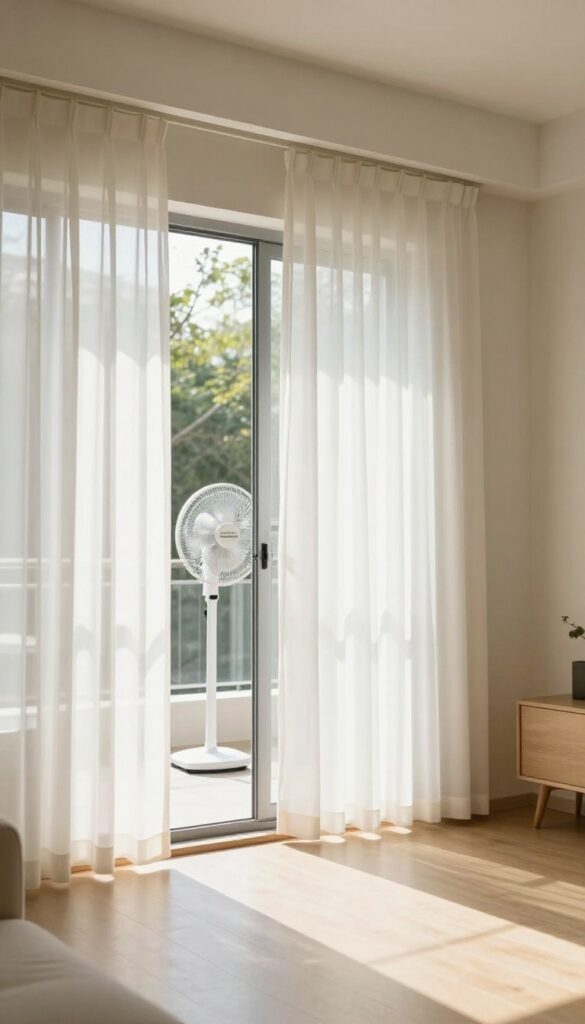
Start by opening all windows and doors in the room where you'll be working. If possible, open windows on opposite sides of the house to create a cross-breeze. This helps carry airborne spores outdoors.
Even if it's cold, a few minutes of airflow makes a big difference.
Use Fans Strategically
Place a box fan in an open window, blowing outward. This pulls stale, spore-filled air out of the room. Avoid pointing fans toward other rooms or hallways, because that can blow spores into clean areas.
If you have an exhaust fan in the room (like in a bathroom), turn it on and leave it running.
Seal Off Adjacent Rooms
To prevent spores from drifting into other parts of your home, close doors to adjacent rooms. You can also place a towel at the bottom of the door to block gaps. This keeps the cleaning zone contained and makes ventilation more effective.
5. Choose Your Cleaning Solution
Not all cleaners are created equal when it comes to mold. The right solution depends on the surface you're cleaning and how porous it is. Using the wrong one can damage materials or even make the problem worse.
White Vinegar For Most Surfaces
White vinegar is a natural, non-toxic option that kills about 82% of mold species. Spray it straight onto the mold, let it sit for an hour, then scrub and wipe. It's safe for most non-porous surfaces like tile, glass, and countertops.
Hydrogen Peroxide For Stubborn Spots
A 3% hydrogen peroxide solution works well on porous surfaces like grout. Spray it on, wait 10 minutes, then scrub. It's a great alternative to bleach because it's less harsh and doesn't produce toxic fumes.
Commercial Mold Cleaners For Tough Jobs
For large or stubborn infestations, a commercial mold cleaner can be effective. Look for products labeled specifically for mold removal. Always follow the instructions and test on a small area first.
Avoid Bleach On Porous Materials
Bleach is often the first thing people reach for, but it's not ideal for porous surfaces like wood, drywall, or fabric. Bleach's water content can soak in and actually feed mold growth underneath the surface. Stick to vinegar or peroxide for those materials.
6. Test a Small Spot First
Before you commit to cleaning a large area, take a moment to test your chosen cleaner on a hidden spot. This simple step can save you from accidentally ruining paint, wallpaper, or finished wood. It only takes a few minutes and gives you peace of mind.
Why Testing Matters
Different surfaces react differently to cleaners. Bleach can discolor fabrics and some paints, while vinegar may etch natural stone. Testing ensures your surface can handle the product without damage.
How To Test Properly
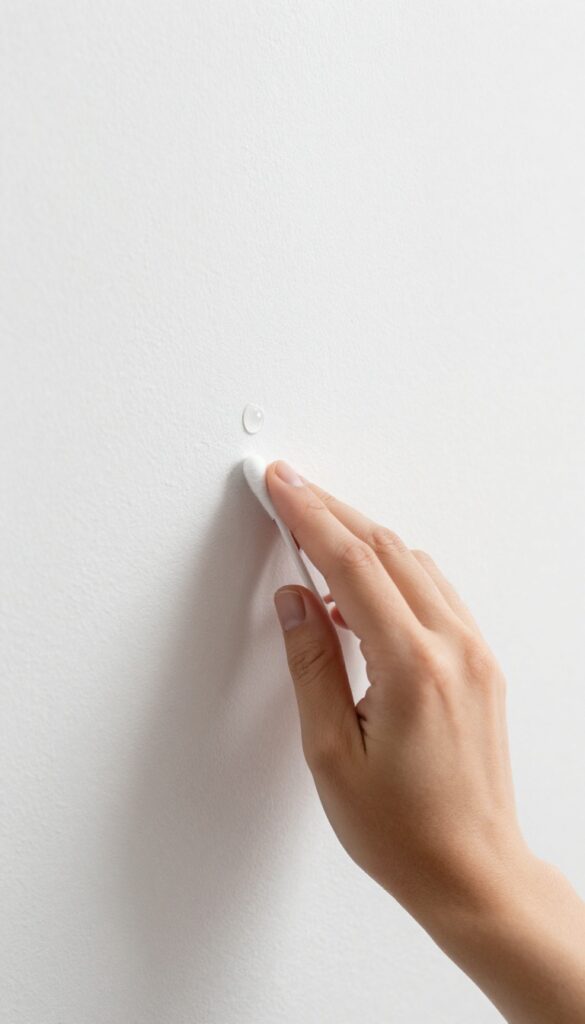
Pick an inconspicuous area, like behind a piece of furniture or inside a closet. Apply a small amount of your cleaner with a cotton swab or cloth. Let it sit for 5–10 minutes, then wipe away.
Check for any color change, dullness, or texture damage.
What To Do If Damage Occurs
If the test spot shows discoloration or damage, switch to a milder cleaner. For example, use dish soap and water instead of bleach. You can also dilute the cleaner further.
Always test again before proceeding.
7. Scrub Gently but Thoroughly
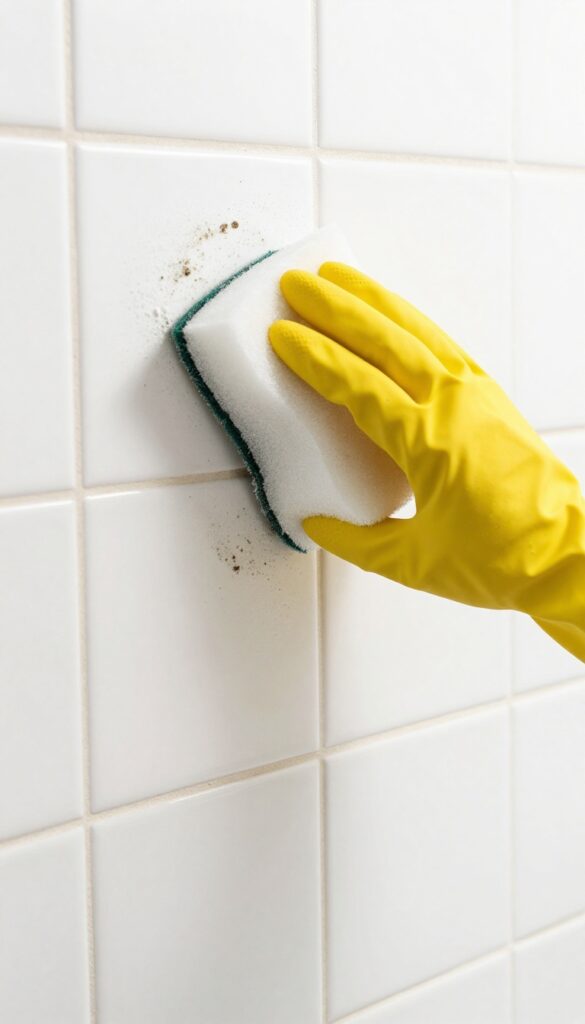
Now that your cleaning solution has had a few minutes to work, it's time to physically remove the mold. Scrubbing is where the real action happens, but technique matters. You want to lift every last spore without damaging the surface underneath or sending spores flying into the air.
Choose The Right Tool
A stiff-bristled brush is ideal for rough surfaces like concrete or wood. For smoother surfaces like tile or glass, a sponge or non-abrasive scrub pad works best. Avoid wire brushes on delicate surfaces—they can scratch and create hiding spots for future mold.
Use Small Circular Motions
Scrub in small circles rather than back-and-forth. This helps dislodge mold from pores and crevices more effectively. Apply even, firm pressure, but don't bear down so hard that you gouge the material.
Work In Sections
Divide the moldy area into manageable sections, about one square foot each. Focus on one section at a time, scrubbing until you see the surface return to its original color. Rinse your brush or sponge frequently in a bucket of clean water to avoid spreading spores.
8. Rinse and Dry Completely
After scrubbing away the mold, you might be tempted to call it done. But leftover cleaning residue and moisture can undo all your hard work. Rinsing and drying thoroughly is the final step that locks in your results and keeps mold from staging a comeback.
Wipe the area with a damp cloth to remove any remaining cleaner and loosened mold particles. Then dry the surface completely using a towel, fan, or dehumidifier. Any lingering moisture gives mold spores a perfect environment to regrow, so don't skip this step.
Why Rinsing Matters
Cleaning solutions, even natural ones like vinegar or baking soda, can leave a residue that attracts dirt and moisture. A simple wipe with a clean, damp cloth removes that residue and leaves the surface neutral. Use a fresh cloth and change the water frequently to avoid spreading mold spores around.
Drying Like A Pro
Once rinsed, grab a dry microfiber towel and blot the area. For porous surfaces like wood or drywall, use a fan or dehumidifier to speed up drying. Aim for bone-dry—touch the surface and make sure there's no coolness or dampness.
In humid areas, run a dehumidifier for a few hours afterward.
Check For Hidden Moisture
Mold often hides behind baseboards, under cabinets, or in corners. After drying, run your hand along edges and crevices. If anything feels damp, direct a fan there until it's fully dry.
This extra check ensures you haven't left a welcome mat for mold to return.
9. Dispose of Contaminated Materials
Once you've scrubbed the mold away, don't let those used cleaning supplies become a new source of contamination. Rags, sponges, and brushes that touched mold are now loaded with spores. If you toss them loosely in the trash, spores can escape into the air and start the problem all over again.
Proper disposal is a simple but critical final step.
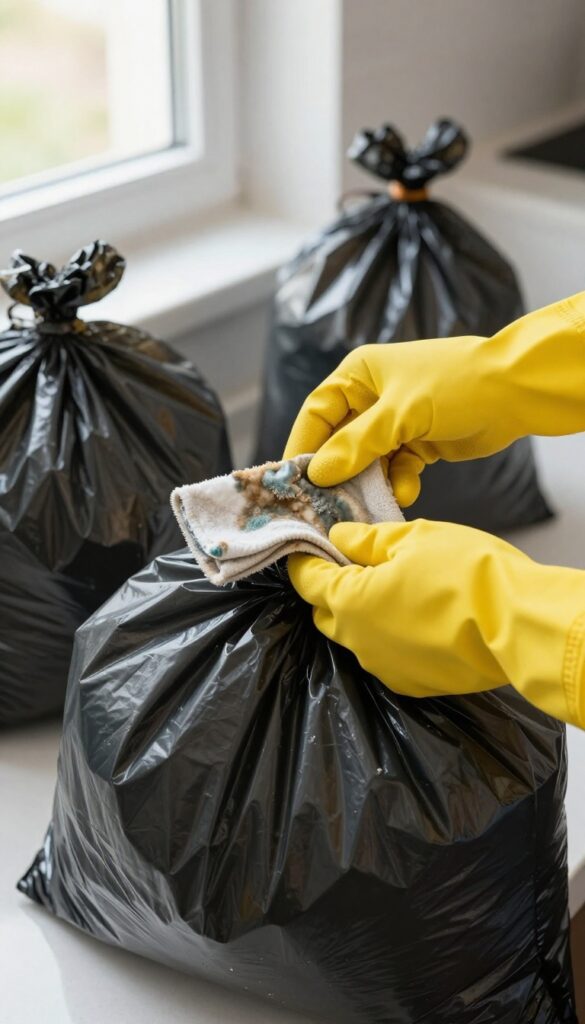
Bag It Immediately
As soon as you finish cleaning, place all used rags, sponges, and disposable brushes into a heavy-duty plastic garbage bag. Don't let them sit out—even for a few minutes. Spores can become airborne and settle on nearby surfaces.
Seal the bag tightly with a knot or twist tie.
Double Bag For Safety
For extra protection, put the sealed bag inside a second bag and seal that one too. This is especially important if you have a large mold area or if anyone in your home has allergies or asthma. Double bagging ensures that even if the first bag gets a small tear, spores stay contained.
Take It Out Right Away
Don't let the bag sit in your kitchen or garage overnight. Take it directly to your outdoor trash bin. The sooner it's out of your living space, the less chance spores have to re-enter your home.
If your bin is far away, wear gloves while carrying the bag and wash your hands afterward.
Clean Reusable Tools
If you used a scrub brush or other non-disposable tool, don't just rinse it in the sink. Wash it with hot water and detergent, then soak it in a diluted bleach solution (1 part bleach to 9 parts water) for at least 10 minutes. Rinse thoroughly and let it air dry completely before storing.
Even better, designate a set of tools just for mold cleaning.
10. Treat Porous Materials with Care
Porous materials like drywall, wood, and carpet are mold's favorite hiding spots. They soak up moisture like a sponge, allowing mold to grow deep inside where cleaning can't reach. Scrubbing the surface might make things look better temporarily, but the mold will keep coming back unless you address the root of the problem.
Know When To Clean Vs. Replace
If mold is on a non-porous surface like tile or glass, you can usually clean it thoroughly. But with porous materials, the rule of thumb is: if the mold covers less than 10 square feet and hasn't penetrated deeply, you might be able to clean it with a biocide. For larger areas or deeper growth, replacement is the safer bet.
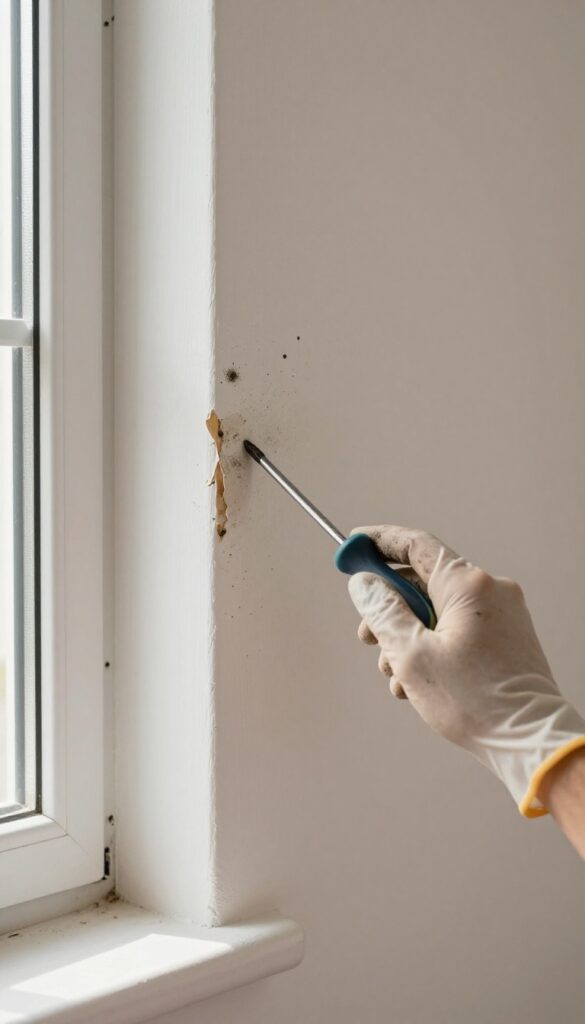
How To Check For Deep Mold
Probe the material gently with a screwdriver or knife. If it feels soft, crumbly, or spongy, mold has likely compromised the structure. On drywall, look for bubbling or peeling paint.
On wood, check for a musty smell even after cleaning. Carpet that's been wet for more than 48 hours should almost always be replaced.
Safe Removal Of Contaminated Materials
When cutting out moldy drywall or wood, wear an N95 mask, gloves, and goggles. Bag the debris in heavy-duty plastic before disposal. Vacuum the area with a HEPA vacuum afterward to catch any spores.
For carpet, roll it up carefully to avoid spreading spores, and seal it in plastic. Always address the moisture source first to prevent recurrence.
11. Apply a Mold Inhibitor
You've scrubbed, dried, and disposed of contaminated materials—now it's time to make sure mold doesn't make an unwelcome return. Applying a mold inhibitor creates a protective barrier that discourages spores from settling and growing. It's a simple extra step that can save you from repeating the whole process in a few weeks.
Choose Your Inhibitor
You have two solid options: a natural solution or a commercial product. For a DIY approach, mix 1 teaspoon of tea tree oil with 1 cup of water in a spray bottle. Tea tree oil is a natural antifungal that's gentle on surfaces and safe for households.
If you prefer something ready-made, look for a mold-inhibiting spray at your local hardware store. Brands like Concrobium or RMR-86 are popular choices. Avoid bleach-based inhibitors—they can damage surfaces and aren't as effective long-term.
How To Apply It
Once the cleaned area is completely dry, spray the inhibitor evenly over the surface. Don't oversaturate—a light, even coat is enough. Let it air dry without wiping.
For porous surfaces like wood or drywall, you might need a second coat after the first dries. Make sure the room is well-ventilated while the inhibitor sets.
When To Reapply
Mold inhibitors aren't permanent. Reapply every few months, especially in high-humidity areas like bathrooms and basements. If you notice any musty smells or visible spots returning, treat the area again sooner.
Regular reapplication keeps your home protected without much effort.
12. Monitor the Area for Regrowth
You've scrubbed, dried, and disposed of contaminated materials—now it's time to make sure mold doesn't make an unwelcome return. Regular monitoring is a simple habit that can save you from repeat deep cleans. By checking the spot weekly, you catch any regrowth early, when it's still easy to remove.
Even after thorough cleaning, microscopic mold spores can linger and regrow if conditions are right. A quick weekly check helps you stay ahead of the problem. Look for discoloration, musty smells, or any dampness in the area.
If you spot a tiny patch, hit it with your cleaning solution right away—don't wait for it to spread.
What To Look For
During your weekly check, look for dark spots, fuzzy patches, or a musty odor. Pay attention to corners, behind furniture, and near windows. If you see any signs, act fast.
A small spot can become a big problem in just a few days.
How To Keep The Area Dry
Mold needs moisture to grow. Use a dehumidifier in damp rooms, fix leaks promptly, and improve ventilation. Wipe down condensation on windows and pipes.
Keeping the area dry is your best defense against regrowth.
When To Call A Professional
If mold keeps coming back despite your efforts, you might have a hidden moisture issue or extensive contamination. Consider hiring a professional for a thorough inspection and remediation. Persistent regrowth is a sign that DIY methods aren't enough.
13. Prevent Future Mold with Routine Checks
After all that scrubbing and cleaning, the last thing you want is mold sneaking back in. The good news is that prevention is straightforward and doesn't take much time. By building a few simple habits into your routine, you can keep your home mold-free for the long haul.
Make it a habit to check humidity levels in your home. A simple hygrometer costs little and tells you if you're in the danger zone. Keep indoor humidity below 50%—run dehumidifiers in damp basements or crawl spaces, and use exhaust fans when cooking or showering.
Fix any leaks as soon as you spot them, even small drips under sinks. Finally, give bathrooms and kitchens a quick weekly wipe-down to remove moisture and soap scum that mold loves. Prevention really is the best long-term strategy.
Monitor Humidity Levels
Buy a hygrometer for each floor of your home. Aim to keep humidity between 30% and 50%. In humid climates, a whole-house dehumidifier can make a big difference.
During summer, run your air conditioner—it naturally removes moisture.
Fix Leaks Immediately
A tiny drip can create a mold-friendly environment in days. Check under sinks, around toilets, and near the water heater. Don't forget to inspect your roof and gutters at least twice a year.
Repair any issues right away.
Clean Problem Areas Weekly
Wipe down shower walls, tubs, and sinks after use. Squeegee glass doors to remove standing water. In the kitchen, clean the sink and countertops daily.
A quick scrub with a mild cleaner keeps mold spores from settling in.
FAQ
Can I use bleach to kill mold?
Bleach can kill surface mold on non-porous surfaces like tile, but it's not effective on porous materials like wood or drywall. It also doesn't prevent regrowth. Vinegar or hydrogen peroxide are safer alternatives.
Is it safe to clean mold myself?
For small patches (under 10 sq ft), DIY cleaning is safe if you wear protective gear. Larger infestations or mold from sewage or floodwater should be handled by professionals.
How do I know if mold is toxic?
All mold can cause health issues, but 'toxic mold' (like Stachybotrys) is especially harmful. If you see black or greenish-black slimy mold, or if you experience severe symptoms, consult a pro.
What kills mold naturally?
White vinegar (undiluted) kills about 82% of mold species. Hydrogen peroxide (3%) is also effective. Tea tree oil mixed with water works as a natural inhibitor.
How long does it take for mold to grow back after cleaning?
If the moisture source isn't fixed, mold can regrow within 24 to 48 hours. Proper drying and prevention steps are crucial to keep it away.
Conclusion
You've now got a solid game plan to kick mold out of your home for good. The trick is staying consistent—regular checks and quick action keep small spots from turning into big problems. Your living space will be healthier, fresher, and much easier to maintain.
Pick the methods that fit your situation and make them part of your routine. A little prevention goes a long way, and your home—and your lungs—will thank you. Enjoy the peace of mind that comes with a mold-free environment.

I’m Pallab Kishore, the owner of Little Pets Realm — an animal lover and pet care enthusiast sharing easy tips, healthy recipes, and honest advice to help every small pet live a happy, healthy, tail-wagging life.


