Resetting your whole house doesn't require a weekend-long marathon or expensive products. A 25-task challenge breaks it into manageable, focused steps that target the dirtiest, most overlooked spots. From the entryway to the bathroom, each task builds momentum and delivers visible results.
You'll tackle clutter, grime, and dust in a logical order that makes the entire home feel fresh. No fluff, just a practical plan to transform your space one task at a time.
Ready to start? Let's dive into the first challenge.
1. Declutter the Entryway
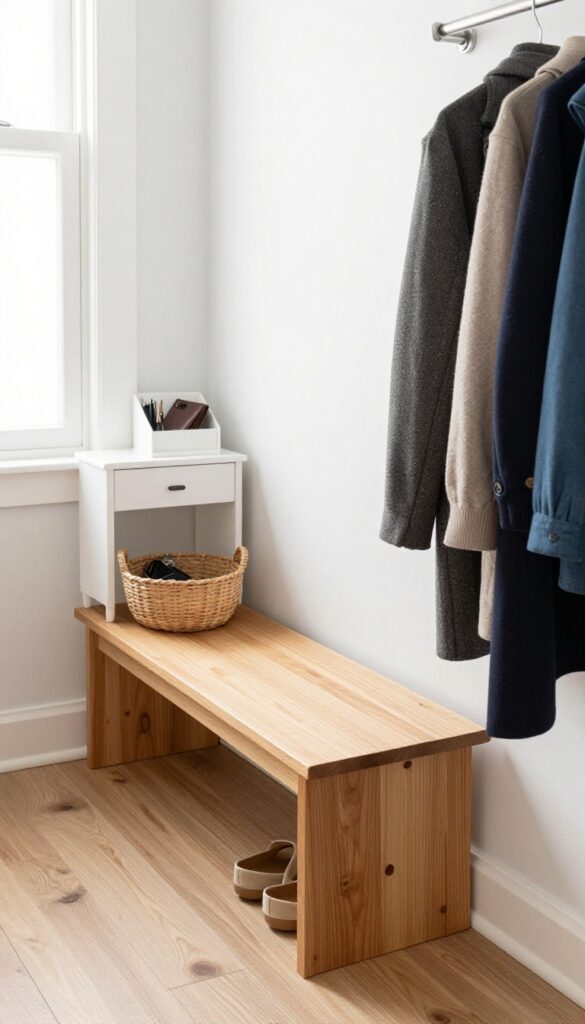
The entryway sets the tone for your whole home. When it's cluttered with shoes, coats, and random mail, you start every day feeling disorganized. Clearing this space first gives you an instant sense of control and a welcoming vibe every time you walk in.
Start by removing everything that doesn't belong. Sort shoes into a basket or rack, hang coats that need to stay, and stash seasonal gear elsewhere. Wipe down all surfaces—bench, console table, hooks—and sweep or vacuum the floor.
Finally, create a simple drop zone for keys, wallets, and mail so daily essentials have a home. This one task takes under 30 minutes but makes coming and going so much smoother.
Clear The Clutter
Take everything off surfaces and the floor. Put away items that belong elsewhere, and toss trash or recycling immediately. Be ruthless—if you haven't used it in a month, move it to a donation box.
Wipe And Freshen
Use an all-purpose cleaner on the console table, bench, and any shelves. Wipe down the front door and light switch plates. A quick vacuum or sweep of the floor removes tracked-in dirt and makes the space look instantly cleaner.
Set Up Your Drop Zone
Designate a tray or small bowl for keys and wallets. Add a mail organizer or a simple wall pocket for bills and school papers. Keep a small basket for outgoing items.
This system keeps the entryway tidy without constant effort.
2. Deep Clean the Kitchen Sink
Your kitchen sink works harder than almost any surface in your home. It catches food scraps, coffee grounds, and greasy residue day after day. But a quick rinse isn't enough to keep it truly clean.
A deep clean removes buildup, eliminates odors, and leaves the sink looking like new. This task takes about 15 minutes and makes a noticeable difference in how your kitchen feels.
Gather Your Supplies
You don't need fancy cleaners. Grab baking soda, white vinegar, a soft sponge, an old toothbrush, and a microfiber cloth. For stainless steel sinks, avoid abrasive pads that can scratch the surface.
If you have a porcelain or composite sink, check that your cleaners are safe for the material.
Scrub With Baking Soda And Vinegar
Start by sprinkling baking soda generously over the wet sink surface. Use a damp sponge to scrub the entire basin, focusing on the corners and around the drain. Then spray or pour vinegar over the baking soda—it will fizz and lift grime.
Let it sit for a few minutes, then scrub again with the toothbrush in tight spots like the rim and drain flange.
Rinse And Polish The Faucet
Rinse the sink thoroughly with warm water. Wipe the faucet with a vinegar-dampened cloth to remove water spots and fingerprints. For extra shine, buff with a dry microfiber cloth.
Don't forget the base of the faucet and the handles—those areas collect grime too.
Finish With A Deodorizing Touch
Pour a cup of baking soda down the drain, followed by a cup of vinegar. Let it fizz for 5 minutes, then flush with hot water. This clears away smelly residue and keeps your sink smelling fresh.
For extra freshness, drop a few lemon peels into the garbage disposal and run it with cold water.
3. Wipe Down Cabinet Fronts
Kitchen cabinet doors and handles are grease magnets. Even if you wipe counters daily, those fronts collect a sticky film from cooking splatters and airborne oils. Tackling this task makes your whole kitchen look cleaner instantly.
Grab a damp microfiber cloth—no harsh chemicals needed unless you're dealing with baked-on grease. Work from top to bottom so drips don't ruin already-clean areas. Pay extra attention to handles and knobs, where grime hides.
Choose The Right Cloth
Microfiber is your best friend here. It lifts grease without scratching surfaces. Avoid abrasive sponges that can dull the finish over time.
Work In Sections
Divide your cabinets into manageable zones: upper doors, lower doors, and hardware. This keeps you from feeling overwhelmed and ensures you don't miss spots.
Don't Forget The Tops
If your cabinets don't reach the ceiling, the tops collect dust and grease too. Wipe them while you're at it—just be careful not to knock anything down.
4. Organize the Pantry
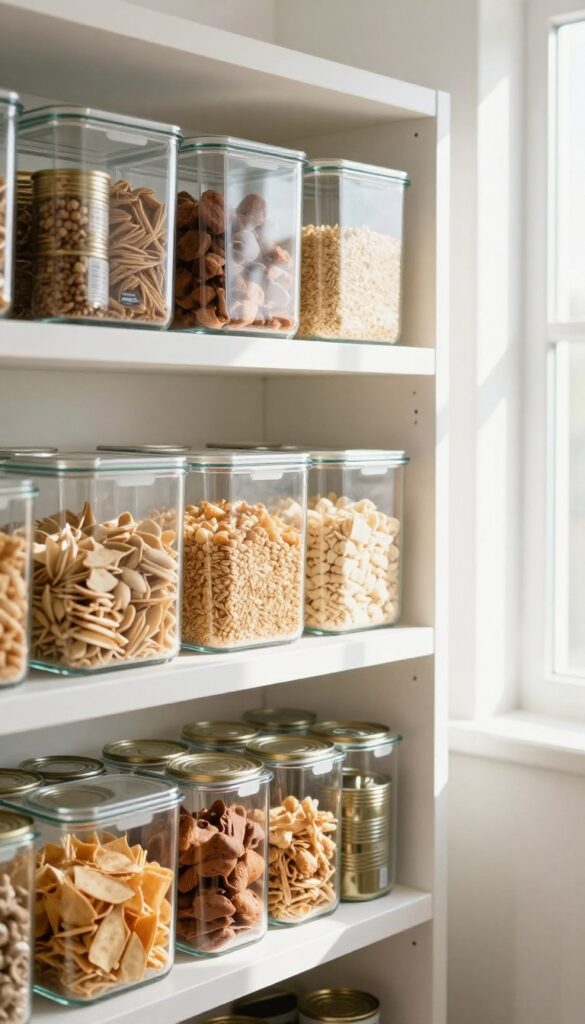
A cluttered pantry makes meal prep stressful and leads to forgotten ingredients. This task resets the space so you can actually see what you have. With everything sorted and stored smartly, you'll save time and reduce food waste.
Pull everything out and group items by type—canned goods, grains, snacks, baking supplies. Check expiration dates and toss anything past its prime. Wipe down shelves before putting things back.
Use clear bins or baskets to keep categories together, and label them for easy identification.
Sort And Purge
Empty the pantry completely. As you go, check each item's expiration date and condition. Donate unopened non-perishables you won't use.
This step instantly frees up space and removes the clutter that hides what you need.
Group Like Items
Arrange items into logical groups: canned vegetables, pasta and rice, spices, breakfast foods, snacks. Keep frequently used items at eye level. This makes grabbing ingredients quick and prevents buying duplicates.
Use Storage Solutions
Invest in clear bins, baskets, or lazy Susans. Bins corral small packets and odd-shaped items, while a lazy Susan makes condiments and oils accessible. Label each container so everyone in the household can return items to the right spot.
5. Clean the Microwave Inside and Out
The microwave is one of the most-used appliances in the kitchen, yet it often gets ignored until something explodes inside. A dirty microwave not only looks unappealing but can also harbor bacteria and cause odors. This task takes less than 10 minutes and leaves your microwave sparkling.
Steam Clean The Interior
Fill a microwave-safe bowl with 1 cup of water and add a few lemon slices or a tablespoon of vinegar. Microwave on high for 2 minutes, then let it sit for another minute without opening the door. The steam loosens all the baked-on food and grease.
Carefully remove the bowl—it will be hot—and wipe down the interior with a damp cloth. Everything should come off easily.
Don't Forget The Turntable And Rollers
Take out the glass turntable and the roller ring. Wash them in warm, soapy water or place them in the dishwasher if they're dishwasher-safe. While they're out, wipe the microwave floor where the rollers sit.
This area collects crumbs and spills that can cause the turntable to stick or make noise.
Wipe Down The Exterior
Use a gentle all-purpose cleaner or a mixture of water and vinegar to wipe the outside of the microwave. Pay attention to the handle, keypad, and door seal—these areas get touched constantly and can be greasy. Dry with a soft cloth to avoid streaks.
Your microwave will look and smell fresh.
6. Refresh the Refrigerator
The refrigerator is the heart of your kitchen, but it's easy to let it become a science experiment. A deep clean not only eliminates odors and spills but also saves you money by preventing food waste. This task will leave your fridge organized, efficient, and ready for fresh groceries.
Start by removing everything and checking expiration dates. Toss anything past its prime or unidentifiable. Then, pull out all removable shelves and drawers and wash them in warm, soapy water.
Wipe down the interior walls and door seals with a gentle cleaner—baking soda and water works great. Dry everything thoroughly before reassembling. As you return items, group similar foods together and use clear bins for small items.
A quick weekly wipe-down will keep it fresh longer.
Purge And Sort
Empty the fridge completely and inspect every item. Check for mold, expired dates, or leftovers you forgot about. Compost or discard anything questionable.
Group remaining items by category: dairy, produce, condiments, etc.
Deep Clean Surfaces
Remove shelves and drawers and wash them in hot, soapy water. Use a microfiber cloth to wipe down the interior, paying attention to corners and door bins. Don't forget the rubber gasket—it can trap grime and affect the seal.
Organize For Visibility
Place frequently used items at eye level. Store raw meat on the bottom shelf to avoid drips. Use clear containers for leftovers and label them.
Keep produce in the crisper drawers with proper humidity settings.
7. Scrub the Stovetop and Oven
The stovetop and oven take the brunt of cooking splatters, spills, and baked-on grease. A thorough scrub here not only makes your kitchen look cleaner but also helps your appliances work better. You don't need harsh chemicals—just a little elbow grease and some pantry staples.
Start With Burner Grates
Remove the burner grates and soak them in hot, soapy water for at least 15 minutes. This loosens stuck-on food. Scrub with a non-abrasive sponge or a brush, then rinse and dry thoroughly before replacing.
For stubborn spots, a paste of baking soda and water works wonders.
Tackle The Stovetop Surface
Wipe down the stovetop with a damp cloth to remove loose debris. For glass or ceramic cooktops, use a dedicated cooktop cleaner or a mixture of vinegar and water. Avoid abrasive pads that can scratch the surface.
Buff dry with a microfiber cloth for a streak-free shine.
Clean The Oven Naturally
Make a paste with baking soda and water, spread it over the interior surfaces (avoid heating elements), and let it sit overnight. The next day, spray with vinegar to create a fizzing action, then wipe clean with a damp cloth. This non-toxic method cuts through grease without fumes.
8. Dust All Surfaces in the Living Room
Living rooms collect dust from every corner—ceiling fans, shelves, electronics, and baseboards. This task works top to bottom so you don't have to re-dust anything. Grab a microfiber duster and get ready to see the difference.
Dusting might seem simple, but doing it the right way makes a huge impact. Start high and work your way down to avoid spreading dust onto already-cleaned areas. Microfiber cloths trap dust instead of pushing it around, and they work on everything from wood to glass.
Start With Ceiling Fans And Light Fixtures
Ceiling fan blades collect thick layers of dust that can fly off when you turn them on. Use a microfiber duster with an extendable handle to reach blades without climbing. Wipe both the top and bottom of each blade, then move to light fixtures and any crown molding.
Move To Shelves, Electronics, And Decor
Dust shelves from top to bottom, removing items on each shelf to wipe the surface completely. For electronics like TVs and speakers, use a dry microfiber cloth to avoid static damage. Dust picture frames, books, and decorative objects before returning them to their spots.
Finish With Baseboards And Floor Vents
Baseboards and floor vents are often forgotten but collect dust just as fast. Wipe baseboards with a damp microfiber cloth to pick up stubborn grime. Vacuum or wipe floor vents to prevent dust from blowing back into the room when the HVAC runs.
9. Vacuum Upholstery and Under Cushions
Your sofa and armchairs see daily use, but how often do you actually clean them? Crumbs, pet hair, and dust settle deep into the fabric and under cushions, creating a breeding ground for allergens and odors. This task targets those hidden spots to refresh your seating and improve indoor air quality.
Start by removing all loose cushions and pillows. Use the crevice tool on your vacuum to reach into every crack and seam where debris hides. Flip removable cushions over and vacuum the underside too—many people forget this step, but it traps just as much dust.
If your cushions are reversible, flip them regularly to even out wear and extend their life. For fabric upholstery, a soft brush attachment helps lift embedded dirt without damaging the fibers. Don't rush; take your time to ensure every inch is clean.
Why Under Cushions Matter
The space between and under cushions collects everything: dropped snacks, loose change, pet fur, and dust bunnies. Over time, this debris can attract pests and cause musty smells. Vacuuming these areas regularly prevents buildup and keeps your furniture fresh longer.
Tools That Make It Easier
A vacuum with a crevice tool and upholstery brush is essential. For stubborn pet hair, a rubber squeegee or a lint roller works wonders. If you have leather furniture, use a soft cloth and a gentle cleaner instead of vacuuming to avoid scratches.
When To Go Deeper
If your upholstery looks dingy or smells despite vacuuming, consider a deeper clean. Spot-test a fabric cleaner on a hidden area first, or hire a professional steam cleaning service once a year. For now, this vacuum session will make a noticeable difference.
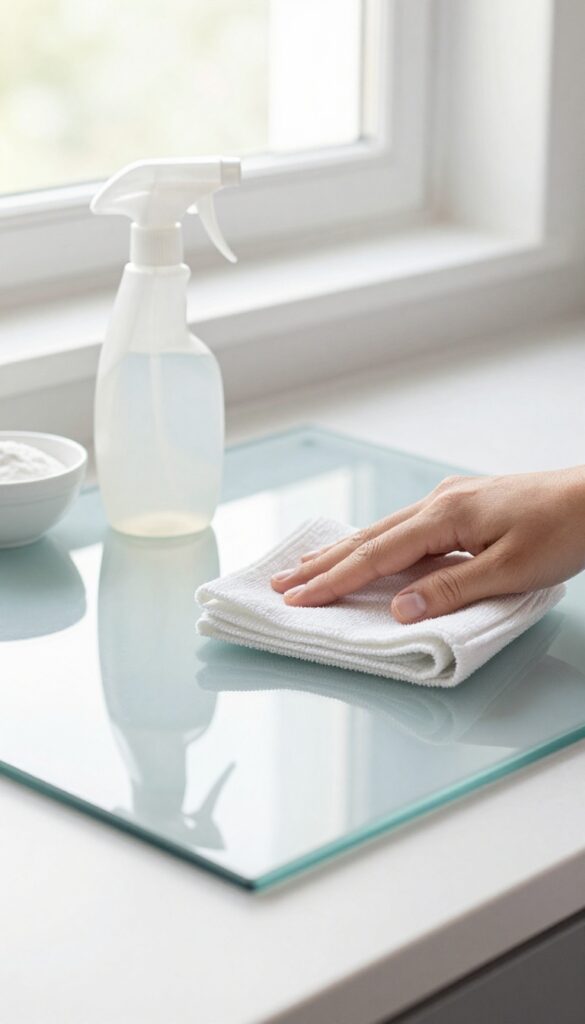
10. Clean Windows and Mirrors

Windows and mirrors are the eyes of your home—when they're smudged or dusty, the whole room feels dim and neglected. A proper streak-free shine can instantly brighten a space and make it feel cleaner than any other single task. This challenge covers both glass surfaces and the often-forgotten frames and sills.
Gather Your Tools
You'll need a squeegee, a microfiber cloth, a bucket of warm water, and a simple vinegar-water solution (1 part white vinegar to 4 parts water). Avoid paper towels—they leave lint. For mirrors, a microfiber cloth alone works wonders, but a squeegee gives the best finish on large windows.
Work From Top To Bottom
Start at the top of the window and pull the squeegee down in a straight line, wiping the blade after each pass. Overlap strokes slightly to avoid streaks. For mirrors, spray the solution directly onto the cloth (not the mirror) to prevent drips that can damage the frame.
Finish by buffing edges with a dry corner of the cloth.
Don't Skip The Sills And Tracks
Window sills collect dust, pollen, and grime that get smeared onto the glass when you clean. Vacuum or wipe them first with a damp cloth. For stubborn buildup in tracks, use an old toothbrush dipped in vinegar solution.
A clean sill makes the whole window look finished.
11. Wipe Down Light Switches and Door Handles
Light switches and door handles are among the most touched surfaces in your home, yet they're often neglected during routine cleaning. A quick wipe with a disinfectant cloth removes grime and germs, making a surprisingly big difference in how fresh your space feels. This task takes just a few minutes but delivers an instant visual and hygienic payoff.
These high-touch areas collect oils, dirt, and bacteria from countless hands throughout the day. Over time, that buildup becomes visible as dark smudges around switches and sticky residue on handles. A simple wipe-down not only restores their appearance but also reduces germ transfer, especially during cold and flu season.
Make this a regular habit, and you'll notice your home feels cleaner overall.
What You’ll Need
Grab a microfiber cloth and a gentle all-purpose cleaner or disinfectant spray. Avoid harsh chemicals that could damage painted surfaces or metal finishes. For switches, a slightly damp cloth works best—too much moisture can seep into the electrical components.
A cotton swab dipped in cleaner helps reach tight crevices around toggle switches.
Step-by-step Process
Start at the top of the switch plate and wipe downward in one smooth motion. For door handles, focus on the areas most frequently gripped—the front face and the back curve. Don’t forget the strike plate and the area around the knob where dirt accumulates.
Use a dry corner of the cloth to buff away any streaks.
Pro Tips For Best Results
Work from the cleanest room to the dirtiest to avoid spreading germs. In high-traffic areas like the kitchen and bathroom, consider using a disinfectant that kills viruses and bacteria. For brass or antique finishes, test a small spot first to prevent tarnishing.
Finally, make this a weekly task—it’s quick enough to become a no-brainer part of your cleaning routine.
12. Deep Clean the Bathroom Toilet
The toilet is often the most dreaded cleaning task, but it's also one of the most rewarding when done thoroughly. A deep clean goes beyond a quick swipe and leaves the bowl, exterior, and hidden crevices spotless and sanitized. With the right approach, you can make this task quick and effective.
Start by applying a quality toilet bowl cleaner under the rim and let it sit for a few minutes to break down stains and mineral deposits. Use a sturdy toilet brush to scrub the entire bowl, paying extra attention to the waterline and under the rim. Flush to rinse.
Next, tackle the exterior: wipe down the lid, seat, base, and the sides with a disinfecting cleaner or all-purpose spray. Don't forget the flush handle—it's one of the most touched surfaces in the bathroom. For a final touch, use a microfiber cloth to dry and buff the porcelain to a shine.
Tools And Supplies
You'll need a toilet bowl cleaner (gel or liquid), a dedicated toilet brush, disinfecting spray or wipes, microfiber cloths, and gloves. A small scrub brush or old toothbrush helps reach tight spots around the base and hinges.
Step-by-step Process
Apply cleaner under the rim and let sit. Scrub bowl thoroughly, then flush. Spray exterior surfaces and wipe from top to bottom: lid, seat, rim, base, and floor around the toilet.
Finish by wiping the flush handle and letting everything air dry.
Pro Tips For A Sparkling Result
For stubborn stains, use a pumice stone (wet it first) to gently rub away deposits. To prevent future buildup, add a toilet cleaning tablet to the tank or use a daily shower spray. Replace your toilet brush every few months for best hygiene.
13. Scrub the Shower and Tub
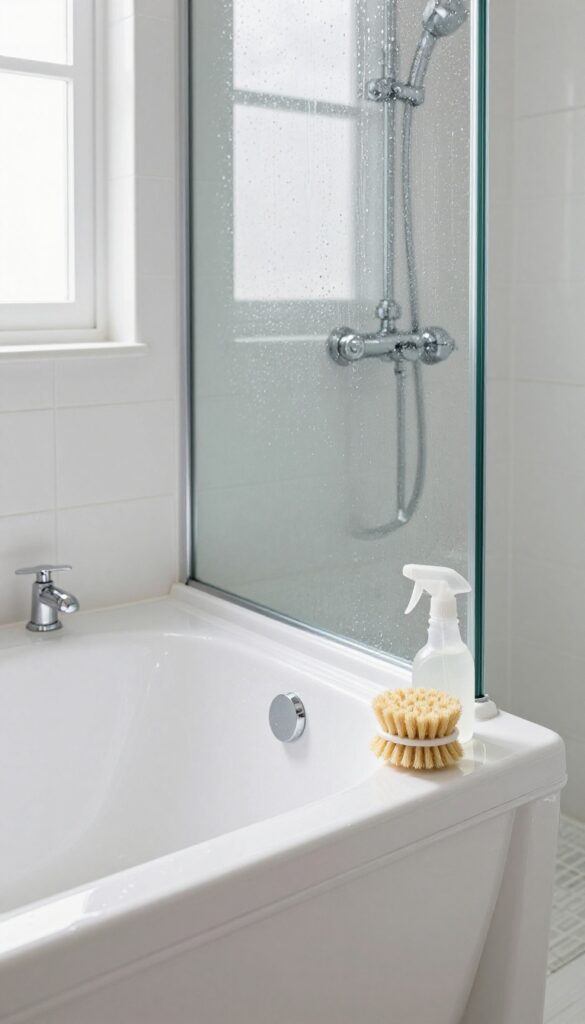
Soap scum, hard water stains, and mildew can make your shower and tub look dingy no matter how often you wipe them down. A deep scrub restores the sparkle and removes buildup that regular cleaning misses. This task takes about 20 minutes but leaves your bathroom feeling brand new.
Choose Your Cleaner
You can use a commercial bathroom spray or make a paste from baking soda and water. For tough soap scum, add a little white vinegar (but don't mix with bleach). Apply the cleaner generously to tiles, grout, and the tub surface.
Let It Sit
Allow the cleaner to dwell for 5–10 minutes. This breaks down grime so you don't have to scrub as hard. Use this time to spray down the shower door or curtain.
Scrub And Rinse
Use a non-abrasive sponge or a scrub brush for grout lines. Work in circular motions, then rinse thoroughly with warm water. Wipe down with a squeegee or microfiber cloth to prevent water spots.
14. Organize Bathroom Cabinets and Drawers
Bathroom cabinets and drawers have a way of collecting half-used bottles, expired medications, and random samples you'll never use. When you can't find your daily moisturizer or have to dig through three layers of clutter, it's time for a reset. This task clears out the old and arranges what's left so everything has a home.
Toss And Donate
Pull everything out and sort into three piles: keep, toss, and donate. Check expiration dates on skincare, sunscreen, and medicine. Throw away anything that's dried out, separated, or past its prime.
Unopened, unexpired products can go to a shelter or women's center.
Group Like Items
Store similar things together: all hair products in one bin, dental care in another, and first-aid supplies in a clear container. This makes grabbing what you need quick and keeps you from buying duplicates. Use small baskets or clear bins to keep categories separate.
Use Drawer Dividers
Drawer dividers are a game-changer for makeup, brushes, and small toiletries. They stop items from sliding around and make it easy to see everything at a glance. Adjustable bamboo or plastic dividers work well and can be cut to fit your drawer size.
15. Wash Shower Curtain and Liner
Your shower curtain and liner take a beating from moisture, soap scum, and mildew. A dingy curtain makes the whole bathroom feel grimy, even if the tiles are spotless. Washing or replacing them is one of the fastest ways to freshen up the space.
Most fabric shower curtains and plastic liners are machine washable, but check the care label first. For fabric curtains, toss them in with a couple of towels and a half cup of baking soda, then wash on gentle with warm water. Add vinegar to the rinse cycle to kill mildew and remove soap residue.
Hang the curtain back up immediately to prevent wrinkles. For plastic liners, wipe them down with a sponge and a mix of vinegar and water, or simply replace them if they're stained or smelly. If you see black mold spots that won't come out, it's time for a new liner.
A fresh curtain makes the bathroom feel noticeably cleaner and brighter.
Machine Washing Fabric Curtains
Remove the curtain and any metal rings or hooks. Wash with a few towels to help scrub the fabric. Use baking soda and a small amount of detergent, then add vinegar during the rinse.
Avoid fabric softener—it can leave a residue that attracts mildew. After washing, hang the curtain back up right away to dry.
Cleaning Plastic Liners
If your liner is still in good shape, scrub it with a soft brush or sponge using a paste of baking soda and water, or spray with a 50/50 vinegar and water solution. Rinse thoroughly and wipe dry. For stubborn soap scum, let the vinegar solution sit for 10 minutes before scrubbing.
When To Replace
If the liner has visible mold that doesn't come off with cleaning, or if it's become brittle or discolored, buy a new one. Fabric curtains can last longer, but if they smell musty after washing, consider replacing them too. A new curtain or liner costs little and instantly upgrades the bathroom.
16. Change and Wash Bedding

There's nothing quite like climbing into a bed with fresh, clean sheets. It instantly makes the whole room feel lighter and more inviting. But beyond that cozy feeling, washing your bedding regularly is essential for hygiene—removing sweat, oils, dust mites, and allergens that build up surprisingly fast.
Start by stripping the bed completely, including pillowcases, fitted sheet, flat sheet, and any decorative pillow covers. Check the care labels on your linens to choose the right water temperature—hot water (130°F or higher) is best for killing dust mites and bacteria, but follow fabric guidelines to avoid shrinkage. Wash sheets and pillowcases together, and avoid overloading the machine so they get a proper clean.
Add a half-cup of baking soda to the wash cycle to boost freshness and soften water naturally. Once washed, dry on high heat if the fabric allows, or tumble dry on medium. While the linens are in the laundry, take a moment to vacuum the mattress and flip or rotate it if needed.
If you have a mattress protector, wash it according to the label—most can go in the machine on a gentle cycle. Remake the bed with fresh, crisply folded sheets, and add a light spritz of linen spray if you like. This simple reset transforms your bedroom into a sanctuary you'll look forward to at the end of the day.
Strip And Sort
Remove all bedding, including pillowcases, sheets, duvet covers, and any decorative shams. Check for stains and treat them with a bit of laundry detergent or stain remover before washing. Sort by color and fabric type if needed—whites can be bleached, but colors and delicates need gentler treatment.
Wash And Dry Smart
Use hot water for cotton and polyester blends to kill germs and dust mites. Add a cup of white vinegar to the rinse cycle to remove soap residue and soften fabric naturally. Dry on high heat for cotton, or low heat for delicate fabrics.
Remove promptly to prevent wrinkles and musty smells.
Refresh The Mattress
While the bedding is washing, vacuum the mattress surface with the upholstery attachment to remove dust, dead skin, and allergens. Sprinkle baking soda over the mattress, let it sit for 15–30 minutes, then vacuum again to deodorize. If you have a mattress protector, wash it on a gentle cycle and air dry.
17. Vacuum and Flip the Mattress
Your mattress works hard every night, absorbing sweat, dead skin cells, and dust mites. Over time, these allergens build up and can affect your sleep quality and even trigger allergies. Giving your mattress a quick vacuum and flip not only extends its life but also makes your bed feel fresher.
Start by stripping all bedding and washing it according to care instructions. Use your vacuum’s upholstery attachment to go over the entire mattress surface, paying extra attention to seams and crevices where debris collects. Then, if your mattress is flippable, turn it over; if it’s a one-sided model, rotate it 180 degrees to promote even wear.
This simple task takes about 10 minutes but pays off in comfort and hygiene.
Why Vacuuming Matters
Dust mites thrive in warm, humid environments like your mattress. Vacuuming removes their food source (dead skin) and reduces allergen levels. It also picks up crumbs, pet dander, and any dust that settles while you sleep.
How To Flip Or Rotate Properly
Check your mattress’s warranty tag—some modern mattresses are not designed to be flipped. If yours is flippable, get a helper to avoid twisting your back. For rotation, simply spin it head-to-foot.
Doing this every 3–6 months prevents sagging and extends mattress life.
18. Declutter Nightstands and Dressers
Nightstands and dressers are prime real estate for clutter. Magazines, loose change, old receipts, and random gadgets pile up fast, turning these surfaces into dumping grounds. Clearing them out not only makes your bedroom look bigger but also helps you sleep better by reducing visual noise.
Start With A Clean Slate
Take everything off your nightstand and dresser tops. Wipe down the surfaces with a gentle cleaner or furniture polish. This gives you a fresh canvas and makes you rethink every item you put back.
Sort Into Three Piles
Create piles for keep, donate, and toss. Be honest about what you actually use. That book you started six months ago?
Either commit to reading it or pass it on. Old phone chargers that don't fit any device? Recycle them.
Organize Essentials Only
Limit yourself to a few functional items: a lamp, a glass of water, a book or e-reader, and maybe a small tray for jewelry or watch. For dressers, keep a minimalist display of a framed photo or a small plant. Use drawer dividers to corral socks, accessories, and other small items.
Maintain The Habit
Set a monthly reminder to do a quick sweep of your nightstand and dresser tops. Spend five minutes returning things to their proper place. This small habit prevents clutter from building up again and keeps your bedroom a calm sanctuary.
19. Clean Under the Bed
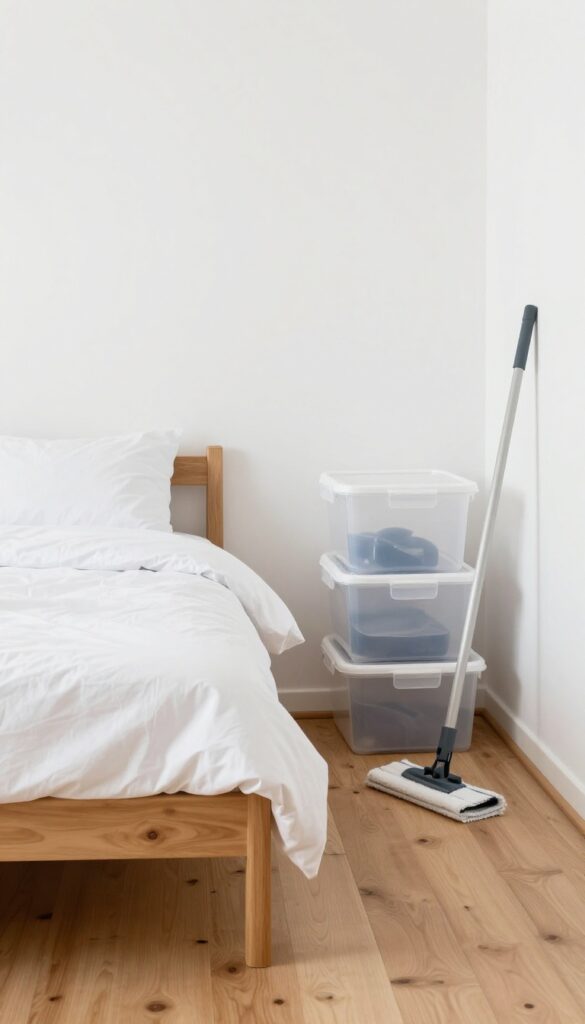
The space under your bed is a magnet for dust bunnies, lost socks, and forgotten storage bins. It's also one of the most neglected areas during a regular cleaning routine. Giving it a thorough reset not only makes the room feel larger but also improves the air quality you breathe while you sleep.
Start by pulling out everything from underneath the bed—storage bins, shoes, dust bunnies, anything that's been hiding. Sort through the items and decide what to keep, donate, or toss. Once the floor is clear, vacuum thoroughly, paying extra attention to the corners and along the baseboards.
Use the crevice tool to reach the edges. Finally, wipe down the bed frame and any exposed surfaces with a damp cloth. This simple task can dramatically reduce allergens in your bedroom.
Declutter First
Before you clean, take everything out. This is your chance to reevaluate what you're storing under the bed. Toss expired items, donate things you no longer need, and relocate anything that belongs elsewhere.
Less stuff means less dust collection.
Vacuum Like A Pro
Use the appropriate attachments to get into every nook. A wide brush head covers large areas quickly, while the crevice tool tackles edges and corners. If you have a low-clearance bed, a flat vacuum head or a microfiber mop can slide underneath easily.
Wipe Down The Frame
Dust and grime cling to the bed frame and slats. Use a microfiber cloth slightly dampened with water or a gentle cleaner to wipe down all surfaces. This step prevents dust from settling back onto the freshly vacuumed floor.
Prevent Future Dust
Consider using under-bed storage containers with lids to keep dust out. If you store items in the open, place a dust cover or a flat sheet over them. Vacuuming under the bed monthly can also keep the area cleaner for longer.
20. Wipe Down Baseboards and Trim
Baseboards and trim are the unsung heroes of a clean room. They frame your floors and walls, but they also catch dust, scuffs, and grime that make a space look dull. Giving them a quick wipe can instantly brighten the entire room without much effort.
Start at one end of the house and work your way through each room. A dry Swiffer or microfiber cloth picks up loose dust, while a damp cloth handles scuffs and sticky spots. For painted trim, a mild all-purpose cleaner works wonders.
Don't forget the top edges where dust settles. This task takes about 10 minutes per room and makes a huge visual difference.
What You'll Need
Grab a microfiber cloth, a Swiffer duster, or an old rag. A bucket of warm water with a splash of vinegar or a gentle cleaner will handle scuffs. For stubborn marks, a magic eraser works like a charm.
Pro Tips For Best Results
Work from top to bottom so dust falls onto areas you haven't cleaned yet. Use a dry cloth first to remove loose dirt, then a damp one for deeper cleaning. Pay extra attention to corners and behind furniture where dust bunnies hide.
21. Vacuum and Mop Hard Floors
Hard floors take a beating daily, but a quick sweep isn't enough to truly reset them. This task is about giving your tile, wood, or laminate a deep clean that removes embedded dirt and restores their natural shine. You'll work methodically, starting with dry removal and finishing with a wet clean that leaves floors looking like new.
Start by clearing the floor of furniture, rugs, and any debris. Then vacuum or sweep thoroughly, paying extra attention to corners and along baseboards where dust accumulates. Use a vacuum with a hard floor setting to avoid scattering dust.
Once the dry dirt is gone, mop with a cleaner appropriate for your floor type—avoid harsh chemicals on wood or laminate. Work in sections, rinsing your mop frequently, and let floors air dry completely before moving furniture back.
Prep The Space
Move small furniture, rugs, and obstacles out of the way. This gives you full access to every inch of flooring. If you have large pieces, slide them aside or work around them, but aim to reach all high-traffic zones.
Sweep Or Vacuum First
Always remove loose dirt before mopping. Use a broom and dustpan or a vacuum with a hard floor attachment. Focus on corners, under cabinets, and along edges where dust bunnies hide.
This step prevents turning dirt into mud when you mop.
Mop With The Right Cleaner
Choose a cleaner that matches your floor type. For tile, a mild all-purpose cleaner works. For wood or laminate, use a pH-neutral or specially formulated product.
Damp mop—not soaking wet—and change water when it gets dirty. Rinse the mop head frequently to avoid spreading grime.
Don't Forget The Details
Once the main areas are done, go back to spots that need extra attention—like sticky patches near the kitchen sink or scuff marks in the hallway. A microfiber cloth or a soft scrub brush can handle stubborn spots without damaging the finish.
22. Clean Ceiling Fans and Light Fixtures
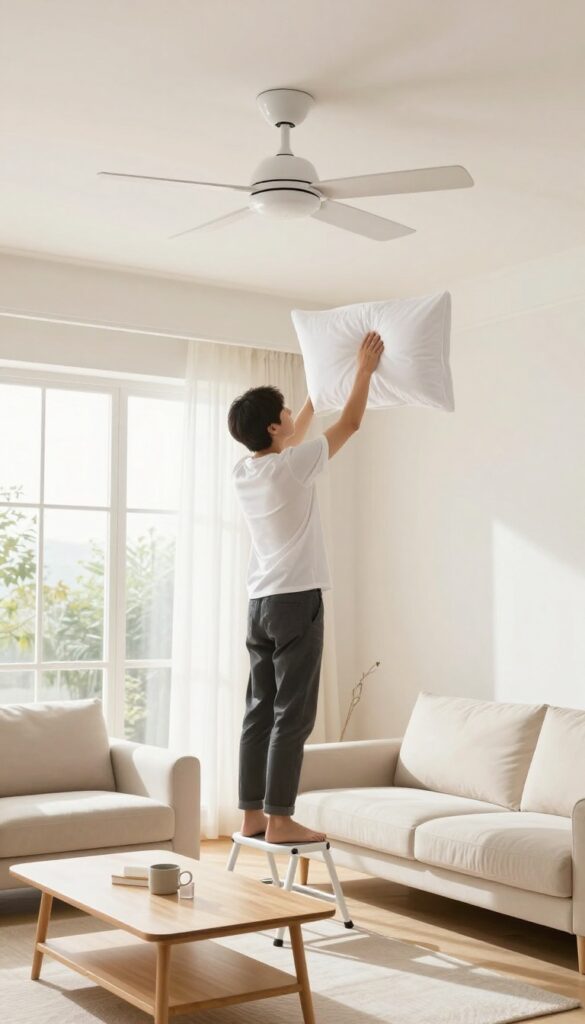
Ceiling fans and light fixtures are dust magnets that often get ignored during routine cleaning. When you flip the switch, that accumulated dust can circulate through the air or dim the brightness of your bulbs. Tackling these overhead spots makes a huge difference in air quality and the overall feel of a room.
Dust Fan Blades Without The Mess
Grab an old pillowcase and slip it over each fan blade one at a time. Gently pull the pillowcase toward you, trapping the dust inside instead of letting it fall onto your furniture or floor. For a deeper clean, use a microfiber duster or a damp cloth, but the pillowcase method is quick and nearly mess-free.
Wipe Down Light Fixtures And Shades
Dust accumulates on lampshades, chandeliers, and flush-mount lights, reducing their brightness. Use a microfiber cloth or a duster attachment on your vacuum to gently remove dust from shades and fixtures. For glass globes, remove them if possible and wash with warm soapy water, then dry thoroughly before reattaching.
Replace Burnt-out Bulbs And Upgrade
While you're up there, check for any bulbs that have burned out and replace them. Consider switching to LED bulbs if you haven't already—they last longer and use less energy. Matching the color temperature (warm vs. cool) across the room creates a more cohesive and pleasant lighting scheme.
23. Organize the Home Office or Desk Area
Your home office or desk area might be the most cluttered spot in the house. Papers pile up, cables tangle, and sticky notes multiply. A messy workspace kills focus and makes you feel overwhelmed before you even start.
This task clears the chaos so you can actually work without distraction.
Paper Triage
Grab a trash bag and a shredder. Sort every piece of paper into three piles: keep, act, and toss. Keep only what's essential—tax documents, contracts, warranties.
Act items need a quick response, like bills or permission slips. Toss junk mail, old receipts, and notes you'll never read. Shred anything with personal info.
Desk Surface Reset
Clear everything off your desk. Wipe the surface with a gentle cleaner—wood polish or all-purpose spray works. Put back only what you use daily: your laptop, a lamp, a pen holder.
Store everything else in drawers or shelves. A bare desk feels calm and makes you want to work.
Cable Management
Unplug every cable and label both ends with masking tape and a marker. Use velcro straps, cable clips, or a cable box to bundle and hide wires. Route cables along the desk leg or behind the monitor.
Tidy cables reduce visual noise and make vacuuming easier.
24. Tidy Up the Laundry Room
The laundry room works hard but rarely gets the attention it deserves. It's easy to let lint, dust, and stray detergent spills pile up when you're focused on getting clothes clean. A quick reset here makes the whole chore feel less like a drag and more like a fresh start.
Start by wiping down the washer and dryer inside and out. A damp microfiber cloth handles most grime, and a little vinegar or mild cleaner fights odors. Don't forget the door seal and detergent drawer—they trap moisture and mildew.
Then clean the lint trap thoroughly with warm soapy water and let it dry completely. A clean trap improves dryer efficiency and reduces fire risk. Finally, sweep or vacuum the floor to catch dust and stray lint.
Organize your detergent, dryer sheets, and stain removers in a caddy or on a shelf so everything has a place.
Wipe Down Appliances
Use a microfiber cloth and all-purpose cleaner to wipe the exterior of the washer and dryer. Pay extra attention to the control panels and around the door. For the washer drum, run a cleaning cycle with a washer cleaner or vinegar.
Wipe the rubber gasket and remove any debris.
Clean The Lint Trap And Vent
Remove the lint screen and wash it with warm water and a drop of dish soap. Scrub gently with a soft brush, rinse, and let it dry. Check the dryer vent hose for lint buildup and vacuum it out if needed.
This step boosts dryer performance and prevents fire hazards.
Organize Supplies
Go through your detergent, fabric softener, stain removers, and other laundry products. Toss empty bottles and consolidate half-full ones. Use a caddy, shelf bin, or wall-mounted organizer to keep everything accessible and tidy.
Group similar items together.
Sweep And Mop The Floor
Sweep or vacuum the floor to remove lint, dust, and dirt. If the floor is tile or vinyl, mop with a gentle cleaner. Don't forget corners and behind the appliances if you can move them.
A clean floor makes the whole room feel fresh.
25. Reset the Entryway and Final Touches
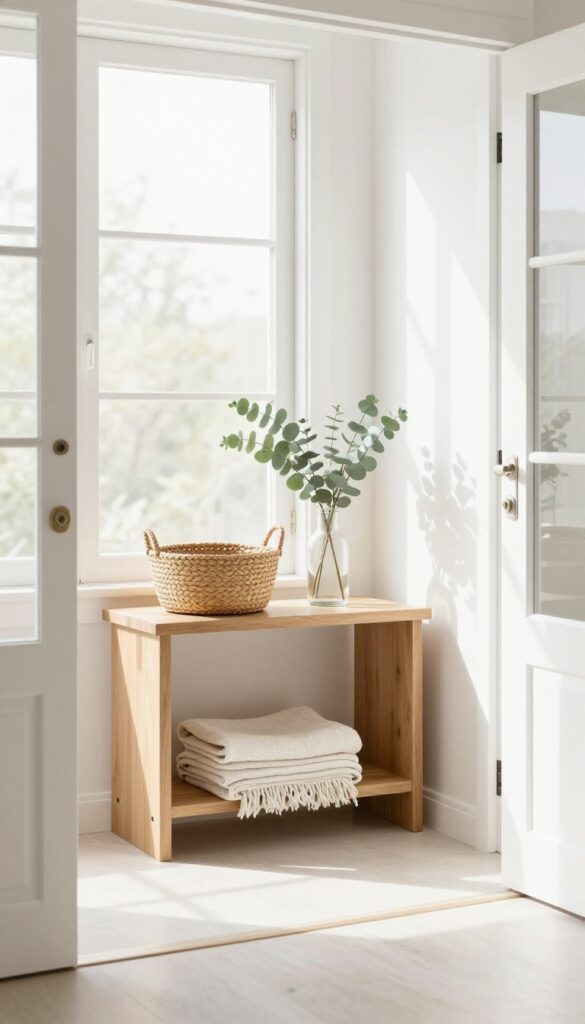
The entryway sets the tone for your entire home, but it’s easy to overlook during a deep clean. This final task focuses on making that first impression shine while adding those last details that make your house feel truly refreshed. You’ll tackle clutter, refresh surfaces, and add a subtle sensory touch that signals the cleaning marathon is complete.
Clear The Clutter
Start by removing everything from the entryway—shoes, coats, mail, keys, and any random items that have accumulated. Wipe down the console table, bench, or hooks with a damp cloth. Only put back what you actually use daily; donate or store the rest.
A streamlined entryway instantly feels more welcoming.
Wash The Floor And Door
The entry floor takes a beating from outdoor dirt. Sweep or vacuum thoroughly, then mop with a gentle cleaner. Don’t forget the front door—both sides—especially the handle and glass if applicable.
A clean door and floor make the whole space look crisp.
Final Walk-through And Ambiance
Do a slow lap through each room you’ve cleaned. Fluff pillows, straighten rugs, and wipe any smudges on mirrors or windows. Light a candle or diffuse an essential oil for a subtle, fresh scent.
Step back and enjoy your reset home—you’ve earned it.
FAQ
How long does it take to complete all 25 cleaning tasks?
Depending on your pace and home size, the full list can take anywhere from 4 to 8 hours. You can spread tasks over a weekend or tackle a few each day.
Do I need special cleaning products?
Not at all. Most tasks can be done with basic supplies like vinegar, baking soda, microfiber cloths, and a good all-purpose cleaner. Budget-friendly options work great.
Can I skip tasks if I'm short on time?
Absolutely. The challenge is flexible—pick the tasks that matter most to you. Even completing 10 will make a noticeable difference.
How often should I do a full house reset?
A deep reset like this is ideal once a season or whenever you feel your home needs a fresh start. Regular maintenance between resets keeps it manageable.
What's the best order to tackle the tasks?
Start with high-impact areas like the kitchen and bathroom, then move to living spaces and bedrooms. Save finishing touches for last to avoid re-cleaning.
Conclusion
A whole-house reset doesn't have to happen in a single weekend. Pick three or four tasks from this list that target your biggest pain points and start there.
Even tackling one challenge a day keeps momentum going without burning you out. Before you know it, your home will feel lighter, cleaner, and more organized—and you'll have a system that actually sticks.