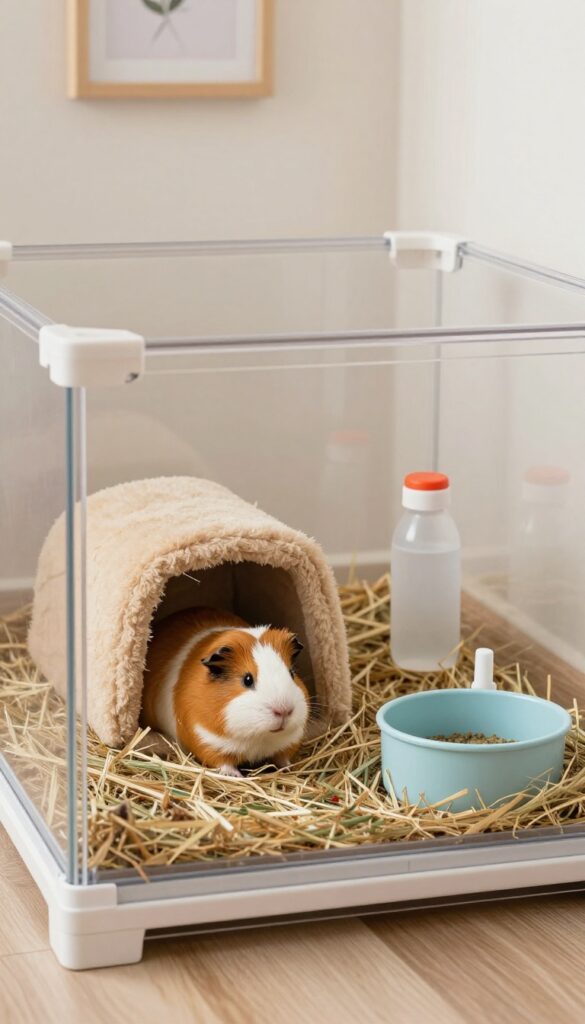
Guinea pigs need space to roam and play, but not everyone has a large room for a big cage. If you’re working with a small corner, these DIY projects will help you create a comfortable and stimulating home for your cavy.
From corner cages to hanging tunnels, each project is designed to maximize space while keeping your pet happy and healthy.
Let’s dive into 10 guinea pig house DIY projects perfect for small pet corners.
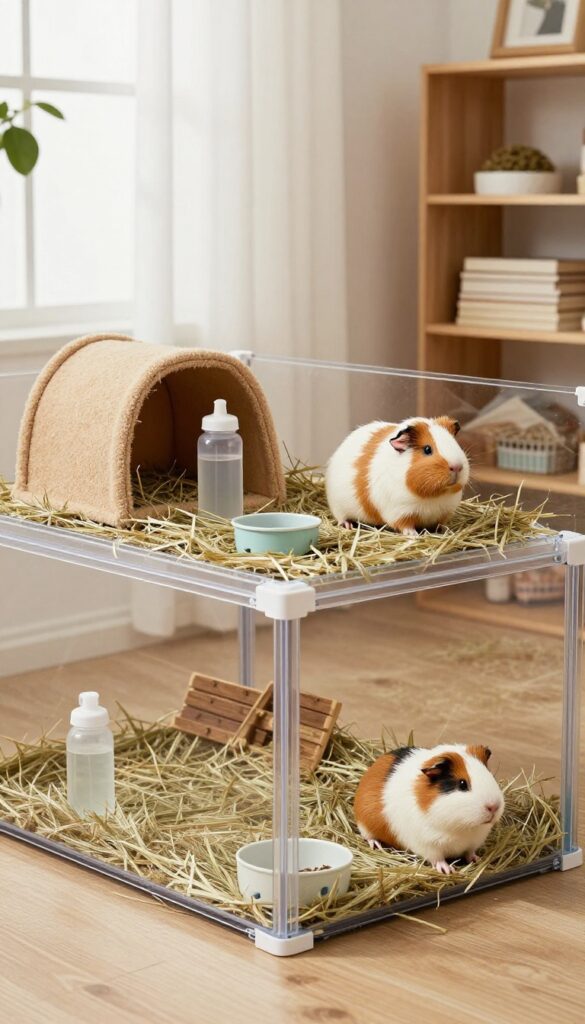
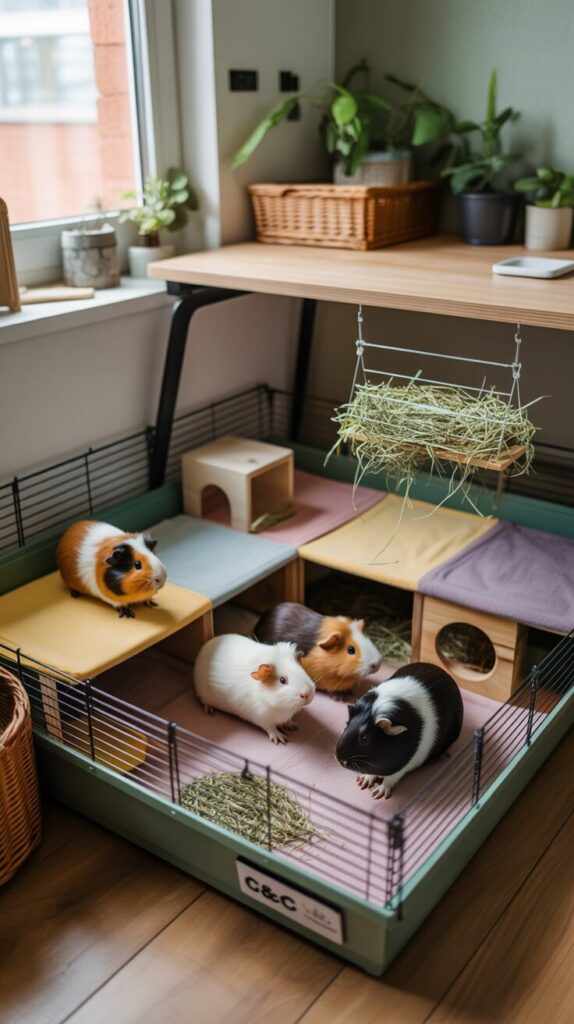
1. Corner C&C Cage with Storage Base
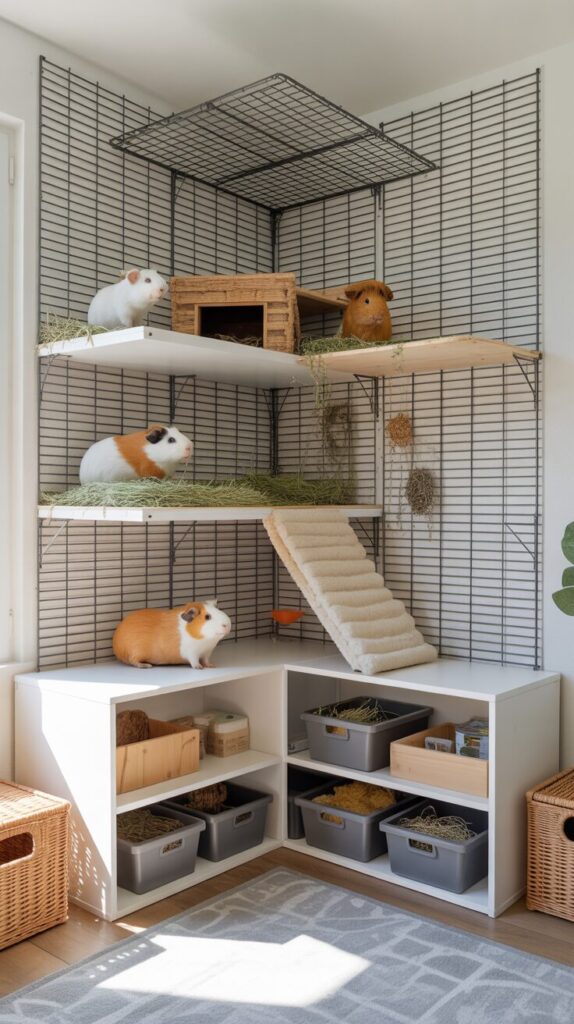
Maximize your small pet corner with a custom C&C cage that fits snugly into the room’s angle. This design uses coroplast and wire grid cubes to create a spacious, affordable home, with a built-in storage base underneath for hay, bedding, and supplies.
C&C (cube and coroplast) cages are a favorite among guinea pig owners because they are customizable, easy to clean, and provide excellent ventilation. By building one that fits into a corner, you can reclaim valuable floor space while giving your piggies a roomy enclosure. The key is to use grid cubes to form two walls that meet at a 90-degree angle, then line the interior with coroplast cut to match the L-shape.
What You’ll Need
- Wire grid cubes (at least 12–16 panels for a 2×3 grid)
- Coroplast sheet (4×8 feet, white or colored)
- Zip ties or connectors
- Storage bins or a wooden frame for the base
- Ramp and loft materials (optional)
Start by assembling the grid panels into an L-shaped frame using zip ties. Make sure the grids are securely fastened to prevent any gaps. Next, measure and cut the coroplast to fit the floor and lower walls of the cage.
The coroplast should extend about 4–6 inches up the sides to contain bedding and mess. For the storage base, you can either place the cage on top of sturdy storage bins or build a simple wooden platform with drawers underneath. This keeps hay, pellets, and extra fleece within easy reach.
Add a Loft for Extra Space
If your corner has enough height, consider adding a lofted area. Use additional grid cubes to create a second level, and attach a ramp made from a grid panel or a piece of wood covered in fleece. The loft gives your guinea pigs more room to explore and can hold a hidey house or food bowl.
This project is perfect for small apartments or rooms where floor space is limited. The corner fit means the cage doesn’t stick out into the room, and the storage base eliminates the need for a separate shelving unit. Your guinea pigs will love the extra square footage, and you’ll appreciate the organized storage.
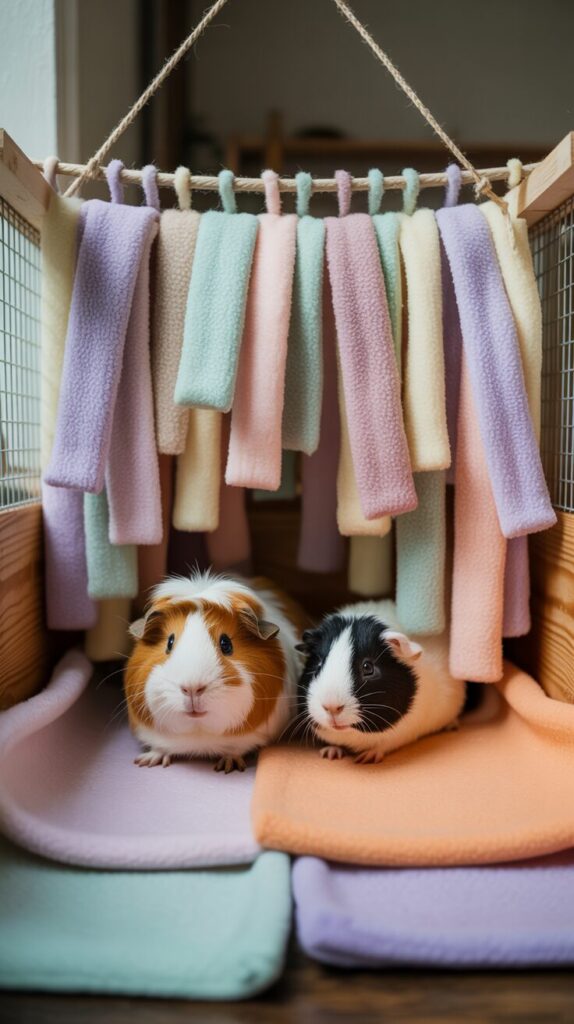
2. Fleece Forest Hideaway
Create a soft, washable hideaway that mimics a cozy burrow for your guinea pig. This fleece forest is easy to make and even easier to clean.
Guinea pigs love to burrow and hide, and a fleece forest gives them a safe, soft space to do just that. This DIY project uses pet-safe fleece and a simple frame to create a hanging or floor hideaway that fits perfectly in a small pet corner.
What You’ll Need
- Pet-safe fleece fabric (avoid anti-pill or non-fleece materials)
- PVC pipe or sturdy wire frame (to maintain shape)
- Scissors, sewing machine or needle and thread
- Optional: zipper or Velcro for easy removal and washing
Building the Hideaway
Cut fleece strips about 2 inches wide and 12 inches long. Sew or tie them onto a base piece of fleece, spacing them closely to create a dense “forest.” Attach the base to a PVC or wire frame to keep the hideaway open and structured. You can hang it from the cage top or place it on the floor.
Key Tips
- Use only high-quality, non-pilling fleece to prevent ingestion of loose fibers.
- Make the hideaway large enough for your guinea pig to turn around inside.
- Machine wash on a gentle cycle and air dry to keep it fresh and hygienic.
Why It Works for Small Spaces
This fleece forest takes up minimal floor space and can be hung in a corner or attached to the cage wall. It provides essential enrichment and a sense of security, all while being fully washable—perfect for busy pet owners.
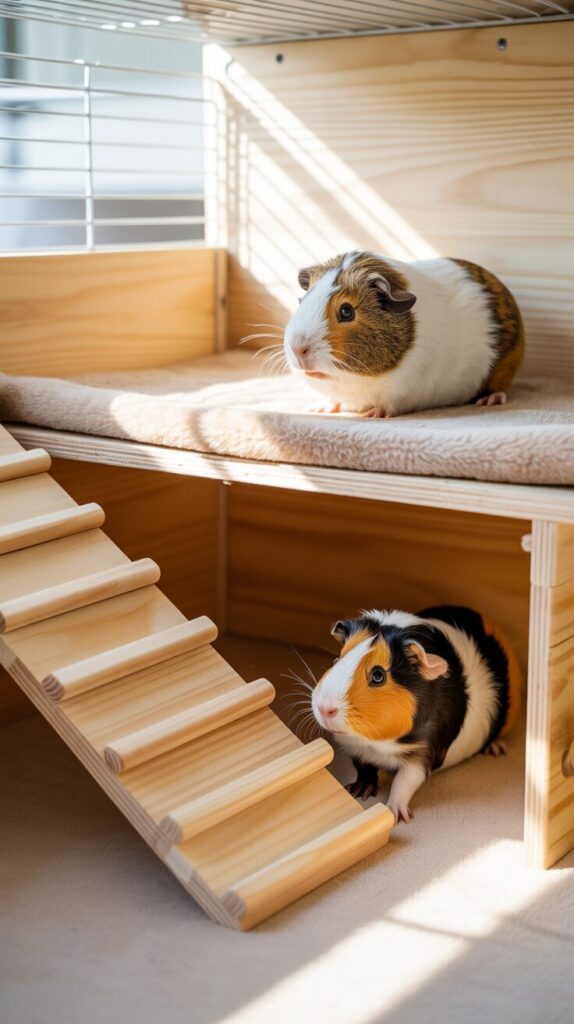
3. Stackable Loft Bed with Ramp
Maximize vertical space in your guinea pig’s corner with a stackable loft bed. This DIY project adds a second level for sleeping or exploring without taking up extra floor space.
Start by measuring your cage’s interior to determine loft dimensions. Cut a piece of plywood or melamine board to size for the loft floor. Attach wooden legs or use metal brackets to support the loft at a height that allows your guinea pigs to stand underneath comfortably.
Cover the loft with a soft fleece liner or a small pet bed.
Key Points
- Build a sturdy wooden loft that sits above the main cage floor.
- Include a gentle ramp with side guards for safety.
- Use non-toxic paint or sealant on all wood surfaces.
Ramp Safety
The ramp should have a gentle slope (no steeper than 45 degrees) and side rails to prevent falls. Attach strips of non-slip shelf liner or carpet to the ramp surface for traction. Ensure there are no gaps where a guinea pig’s foot could get caught.
Non-Toxic Materials
Use only pet-safe, non-toxic paints, stains, or sealants. Allow the loft to air out for at least 48 hours before introducing your guinea pigs. Avoid pressure-treated wood or any materials that could be harmful if chewed.
4. DIY Hay Rack from a Magazine File

A magazine file isn’t just for organizing papers—it can become a tidy hay rack that keeps hay off the cage floor and within easy reach of your guinea pigs.
Start with a cardboard or plastic magazine file (the kind that sits on a desk). Choose one that’s sturdy enough to hold hay without collapsing. Using a utility knife, cut a large rectangular opening on one side—leave a border of about 1 inch around the edges for strength.
The opening should be big enough for your guinea pigs to pull hay through easily, but not so large that hay spills out.
What you’ll need
- Cardboard or plastic magazine file
- Utility knife or scissors
- Zip ties (at least 4–6)
- Sandpaper (to smooth rough edges)
- Hay (timothy, orchard, or meadow)
Attaching the rack
Once the opening is cut, sand any rough edges to prevent injury. Position the magazine file against the cage bars with the opening facing inward. Use zip ties to secure it firmly to the bars—thread each zip tie through the back of the file and around a cage bar, then tighten.
Make sure the rack is stable and won’t tip when your guinea pigs jump on it.
Reducing hay waste
Because the hay is contained in the rack, less gets trampled or soiled. Your guinea pigs can nibble what they need without burying their food. Refilling is simple: just open the top of the magazine file and stuff fresh hay inside.
This design also keeps the hay elevated, which improves airflow and reduces mold risk.
Safety tip
Avoid using magazine files with metal clips or sharp staples. If you use a plastic file, check for any sharp edges after cutting. Always supervise your pets after introducing new DIY items to ensure they don’t chew on the zip ties.
5. Corner Litter Box with High Back
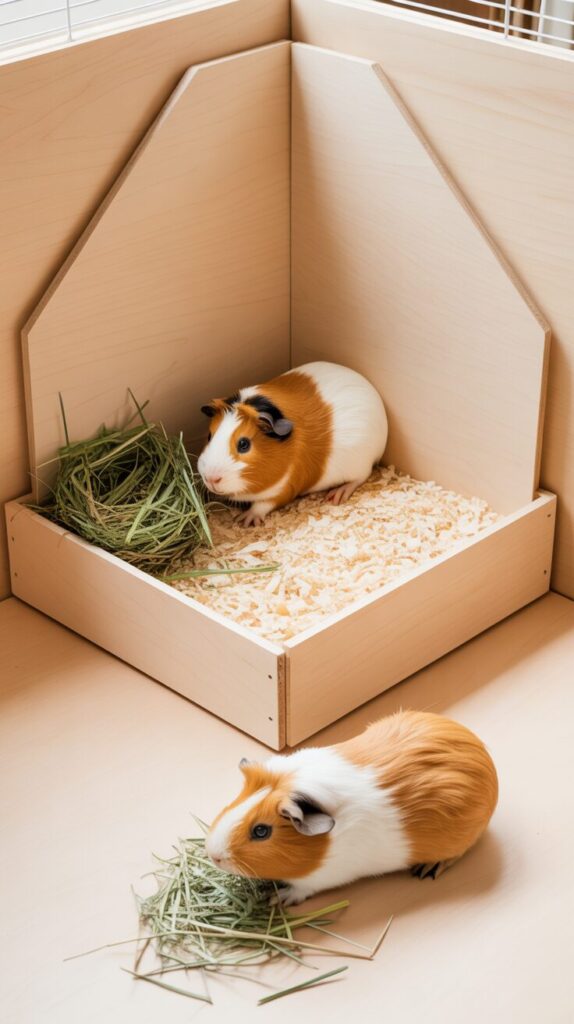
Keeping the cage clean is easier when your guinea pigs have a designated bathroom spot. A corner litter box with a high back fits neatly into small spaces and helps contain mess, making daily spot-cleaning a breeze.
You can buy a triangular corner litter box from a pet store, or make one from a small plastic storage container. Cut it to a triangular shape if needed, ensuring the back wall is at least 6 inches tall to prevent litter from being kicked out. The high back also gives shy guinea pigs a sense of privacy while they do their business.
Tips for a successful corner litter box
- Use a corner shape to maximize floor space and fit snugly into the cage corner.
- Add a high back (6–8 inches) to contain litter and bedding scatter.
- Line the box with newspaper or puppy pads, then top with paper bedding for absorption.
- Place a small pile of hay in the box to encourage use—guinea pigs like to eat and poop at the same time.
- Clean the box daily by removing soiled bedding and replacing with fresh material.
This project takes less than 30 minutes and costs next to nothing if you repurpose a container. Your guinea pigs will quickly learn to use the corner box, keeping the rest of their cage cleaner and reducing the time you spend on full cage changes.
6. Hanging Tunnel from Fleece and Wire
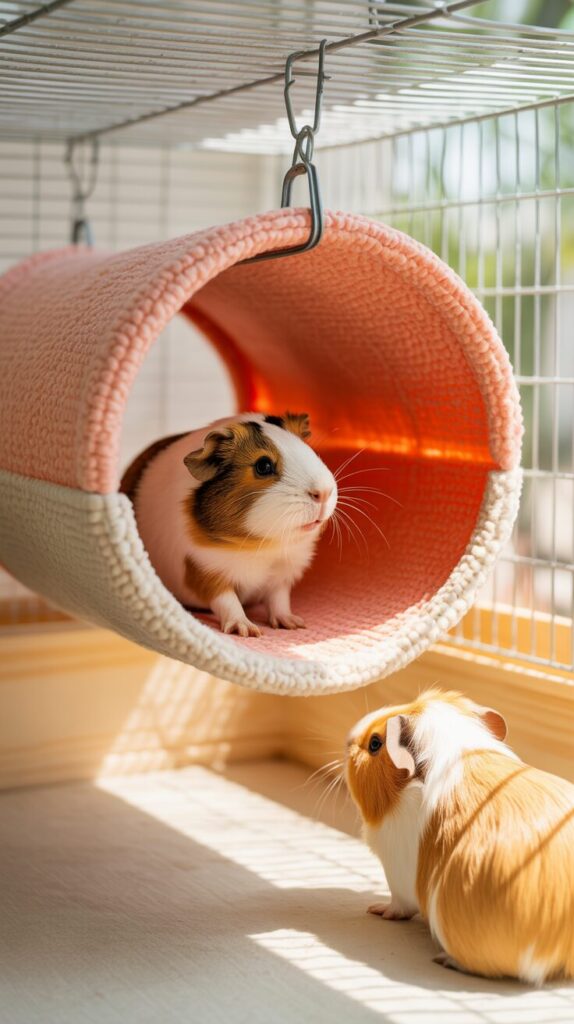
A hanging tunnel is a fantastic way to add vertical enrichment to your guinea pig’s small corner without taking up floor space. This project uses wire mesh and fleece to create a cozy, suspended hideaway that your pigs will love to explore and nap in.
Start by cutting a piece of 1/2-inch hardware cloth or galvanized wire mesh into a rectangle about 24 inches long and 12 inches wide. The exact size can be adjusted to fit your cage. Bend the mesh into a tube shape, overlapping the edges by about an inch, and secure the seam with zip ties or small wire twists.
Make sure there are no sharp edges—cover any exposed wire ends with duct tape or a dab of hot glue.
Tunnel Construction
- Use 1/2-inch wire mesh to prevent little feet from getting stuck.
- Form a tube with a diameter of at least 8 inches so guinea pigs can easily turn around.
- Secure the seam tightly with zip ties spaced every 3-4 inches.
Next, create a removable fleece cover. Cut a piece of fleece large enough to wrap around the tunnel with a little extra length at each end. Sew or use fabric glue to create a tube of fleece that slides over the wire frame.
Leave the ends open so your guinea pigs can enter from either side. You can also add a small fleece pad inside for extra comfort.
Hanging Method
- Attach small eye hooks or S-hooks to the top of the wire tunnel at both ends.
- Use chain or sturdy string to hang the tunnel from the cage top or wall brackets.
- Make sure the tunnel is secure and doesn’t swing excessively.
The hanging tunnel provides excellent enrichment. Guinea pigs are natural burrowers and feel safe in enclosed spaces. Suspending the tunnel adds a new dimension to their environment, encouraging climbing and exploration.
Plus, it frees up valuable floor space in your small pet corner.
Enrichment Tips
- Place a small handful of hay inside the tunnel to encourage foraging.
- Rotate the tunnel’s position occasionally to keep it interesting.
- Add a small jingle bell or crinkle toy to the outside for sensory stimulation.
7. Multi-Level Corner Shelf Unit
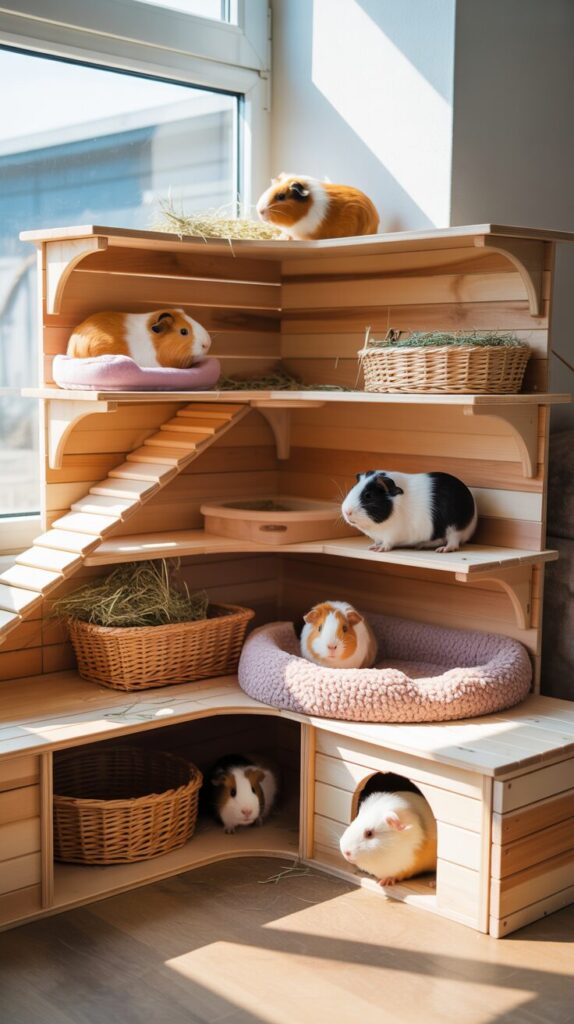
When floor space is tight, look up. A multi-level corner shelf unit turns an unused corner into a vertical guinea pig condo. This project is perfect for small pet corners because it uses the often-wasted corner area and gives your piggies multiple levels to explore without taking up much floor space.
Start by measuring your corner. Cut wooden shelves to fit snugly into the corner, each at a different height. Use sturdy plywood or pine boards—avoid particle board as it can swell if wet.
Sand all edges smooth and apply a non-toxic, water-based sealant to protect the wood from urine and moisture. Let the sealant cure completely (usually 24–48 hours) before introducing your guinea pigs.
Attach each shelf to the wall using L-brackets screwed into wall studs for stability. Do not rely on stacking alone—unstable stacking can collapse and injure your pets. For each level, build a small ramp with shallow steps or a gentle slope.
Cover ramps with a non-slip material like shelf liner or carpet to prevent falls.
Key Tips for Success
- Cut shelves as wide as your corner allows—at least 24 inches across the front for each level.
- Space shelves 12–18 inches apart vertically so guinea pigs can stand up and move freely.
- Add a low lip (about 1 inch) along the front of each shelf to prevent bedding from spilling.
- Place a hidey house or cozy bed on at least one level for security.
- Ensure the entire unit is anchored to the wall—this is critical for safety.
This corner shelf unit maximizes vertical space in small corners, giving your guinea pigs more room to roam and climb. It also creates distinct zones—one level for eating, one for sleeping, and one for playing. With proper construction, it becomes a permanent, space-saving addition to your small pet corner.
8. Portable Outdoor Playpen from PVC
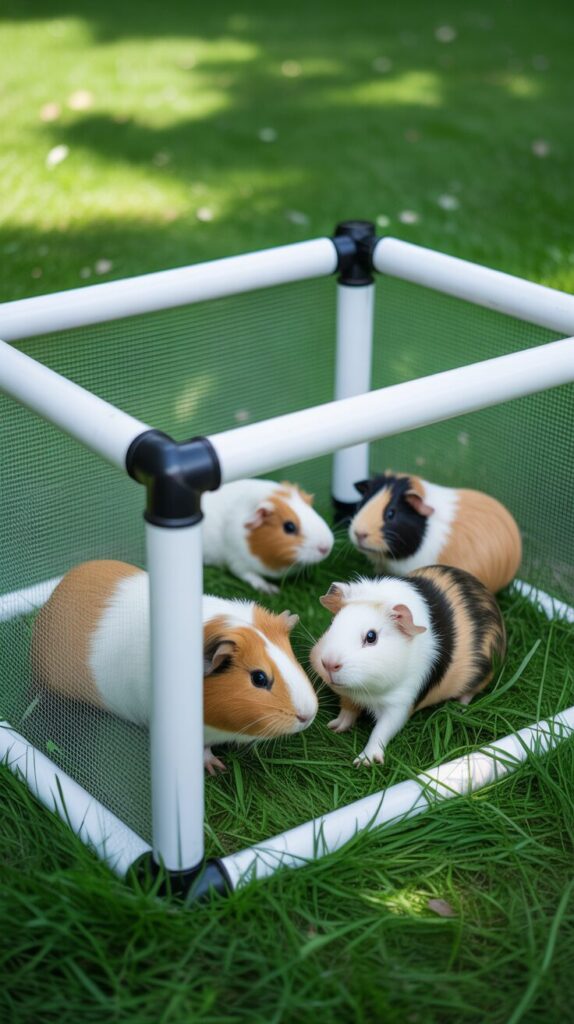
A portable outdoor playpen gives your guinea pigs a safe space to enjoy fresh grass and sunshine. Using PVC pipes and connectors, you can build a lightweight, foldable pen that sets up in minutes and stores flat when not in use.
This DIY project is perfect for small pet corners because the playpen can be easily moved to any spot—whether it’s a sunny corner of the living room or a patch of grass in the backyard. The PVC frame is sturdy yet light, and covering it with mesh or fleece provides shade and prevents escapes.
Key Features
- PVC pipes and corner connectors form a collapsible frame that can be folded flat.
- Mesh or fleece coverings offer ventilation, shade, and security from predators.
- No sharp edges or small gaps that could injure your pets.
- Easy to clean: just wipe down the PVC and wash the fabric cover.
Building Tips
Cut PVC pipes to your desired dimensions—a 4×4 ft square works well for a small herd. Use slip-T connectors for easy disassembly. Sew or clip a mesh or fleece cover with openings for doors.
Ensure the bottom edge sits flush on the ground to prevent digging escapes.
9. DIY Wooden Corner Hide House
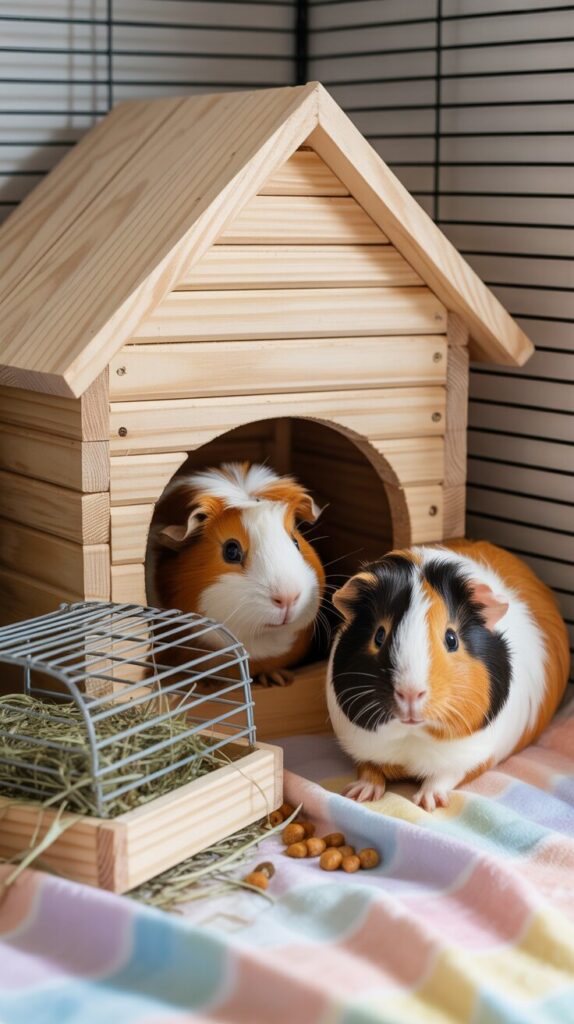
A wooden corner hide house is one of the simplest ways to create a secure retreat for your guinea pigs while making the most of unused cage corners. Unlike bulky hideouts that take up valuable floor space, this design fits neatly against two cage walls and still gives your pets a comfortable place to rest.
You can build the hide house using untreated plywood or pine boards. Cut two side panels and a triangular roof, then assemble them using pet-safe screws or wood glue. Sand all edges thoroughly to prevent splinters and avoid any treated wood that could be harmful if chewed.
What You’ll Need
- Untreated plywood or pine boards
- Pet-safe wood glue
- Small screws
- Sandpaper
- Measuring tape
Building Tips
Keep the entrance at least 6–7 inches wide so guinea pigs can enter comfortably.
Add a removable roof to make cleaning easier.
Place a fleece pad inside for extra comfort.
Position the hide house in a quiet cage corner away from high-traffic areas.
This project works especially well in small pet corners because it utilizes space that would otherwise remain empty. The solid walls help nervous guinea pigs feel protected while still leaving plenty of open room for exercise.
10. Under-Table Guinea Pig Corner Habitat
Turn an unused corner beneath a small table or desk into a dedicated guinea pig habitat. This clever project makes use of existing furniture while creating a protected and cozy environment for your pets.
The table acts as a natural roof, making guinea pigs feel secure while reducing the need for large cage structures. Simply place a C&C cage or exercise pen underneath and customize the space with fleece liners, tunnels, hay stations, and hideouts.
What You’ll Need
- Small table or sturdy desk
- C&C grids or exercise pen panels
- Coroplast base or waterproof liner
- Fleece bedding
- Hideouts and enrichment toys
Creating the Habitat
Measure the area under the table before building.
Leave enough height for proper airflow and easy access.
Use the table legs as attachment points for water bottles and hay racks.
Add fleece tunnels and hideouts to create multiple activity zones.
Keep one side open for cleaning and interaction.
The biggest advantage is that this setup transforms otherwise unused space into a functional guinea pig home. It works especially well in apartments, bedrooms, or offices where every square foot matters.
FAQ
What materials are safe for DIY guinea pig houses?
Use non-toxic materials like untreated wood, coroplast, fleece, and PVC. Avoid pressure-treated wood, toxic paints, and small parts that could be chewed and swallowed.
How much space does a guinea pig need?
A minimum of 7.5 square feet for one guinea pig, but more is better. For two, aim for at least 10.5 square feet. These DIY projects help maximize space in small corners.
Can I use these projects for other small pets?
Yes, many of these projects can be adapted for rabbits, hamsters, or rats, but ensure the size and materials are appropriate for the specific pet.
How often should I clean a DIY guinea pig house?
Spot clean daily and do a full clean weekly. Wash fleece items and disinfect hard surfaces with pet-safe cleaners.
Conclusion
With these 10 guinea pig house DIY projects, you can transform a small corner into a cozy and functional home for your furry friends. Each project is designed to be space-efficient, safe, and easy to maintain.
Whether you choose a corner C&C cage or a hanging tunnel, your guinea pigs will love their new digs. Happy building!

I’m Pallab Kishore, the owner of Little Pets Realm — an animal lover and pet care enthusiast sharing easy tips, healthy recipes, and honest advice to help every small pet live a happy, healthy, tail-wagging life.