
Last updated on August 19th, 2026 at 04:15 pm
Your dog deserves a safe, comfortable space to call their own in the backyard. Building a kennel yourself saves money and lets you customize it to fit your yard and your pup's needs. Whether you're a weekend warrior or a first-time builder, these plans are designed to be straightforward and rewarding.
From simple A-frame shelters to spacious runs with attached houses, there's a plan here for every dog size and skill level. Most projects use common materials like plywood, 2x4s, and roofing panels.
You don't need fancy tools—just a saw, drill, and some patience. We've gathered 10 proven kennel plans that balance durability, comfort, and ease of construction.
1. Portable Folding Kennel
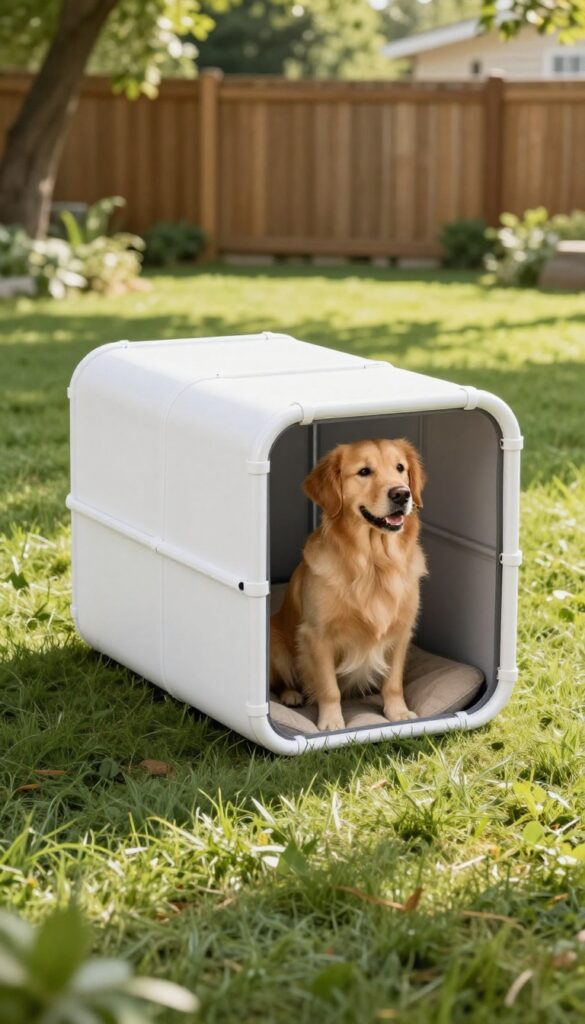
If you love taking your dog on outdoor adventures, a portable folding kennel is a game-changer. It gives your pup a familiar spot to relax whether you're camping, at the beach, or visiting friends. Best of all, you can build one yourself in under an hour with basic materials and tools.
This lightweight kennel folds flat for storage and transport. The frame uses PVC pipe and connectors, which are cheap and easy to cut. For the walls, you'll use mesh fabric or hardware cloth—breathable, secure, and lightweight.
The whole thing collapses into a compact bundle that fits in your trunk or closet.
Materials You'll Need
Start with 1-inch PVC pipes and elbow connectors. You'll need enough to create a cube or rectangle shape—about 12 feet of pipe for a 2x2x2-foot kennel. Grab a roll of mesh fabric or plastic-coated hardware cloth, plus zip ties or small screws to attach the mesh to the frame.
A PVC cutter or hacksaw makes clean cuts.
Step-by-step Build
Cut the PVC into four vertical posts and eight horizontal pieces. Assemble the frame using elbow connectors—dry-fit first to check alignment. Once the frame is square, attach the mesh to the outside using zip ties.
Leave one side open as a door, or add a zippered mesh panel for easy access. To make it foldable, use removable connectors on two opposite corners so the frame collapses flat.
Pro Tips For Durability
For outdoor use, choose UV-resistant PVC to prevent cracking. Reinforce the bottom with a piece of plywood or a thick plastic tray so your dog's weight doesn't push the mesh down. If you plan to use it in windy areas, add stakes or sandbag loops to the bottom corners.
2. Classic A-Frame Dog House with Run
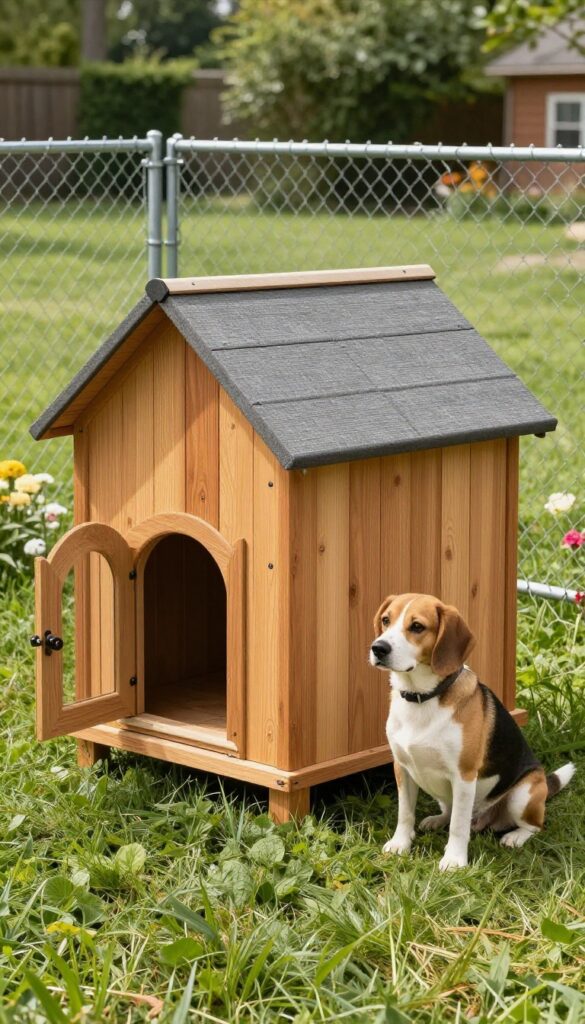
The A-frame dog house is a backyard staple for good reason. Its sloped roof sheds rain and snow easily, keeping the interior dry. Adding an attached run gives your dog a secure outdoor space to stretch their legs while staying close to their shelter.
This design works especially well for medium breeds like beagles, border collies, or spaniels.
This plan combines a cozy A-frame house with a fenced run, giving your dog both a den and a safe outdoor area. The house features a hinged roof for easy cleaning, and the run can be built with chain-link or welded wire. Total build time is about two weekends, and materials cost around $200–$350 depending on lumber prices.
Why The A-frame Works
The steep roof angle prevents water pooling and extends the life of the structure. Inside, the triangular shape creates a snug space that dogs naturally love. You can insulate the walls with foam board for colder climates.
Run Dimensions And Layout
A 4×8 foot run is ideal for a medium dog. Attach it to the front of the house with a dog door so your pup can come and go freely. Use pressure-treated lumber for the frame and galvanized hardware to prevent rust.
Customization Tips
Add a removable floor panel for easier cleaning. Paint the exterior with weatherproof stain in a color that matches your yard. You can also install a small porch roof over the dog door to keep rain out.
3. Insulated Winter Kennel
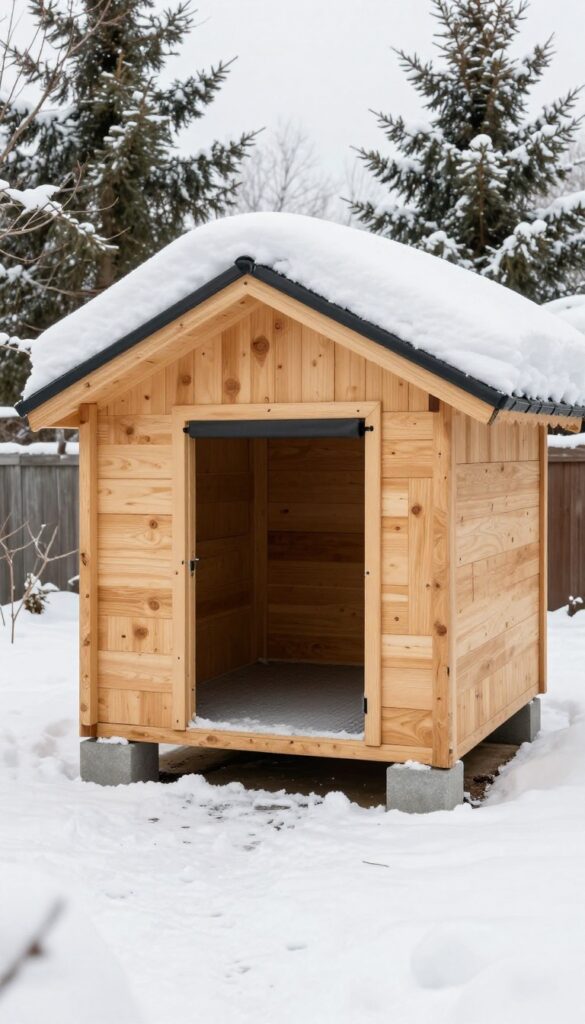
When temperatures drop, your dog still needs time outside. An insulated winter kennel keeps them warm and dry without relying on space heaters or electricity. This plan combines plywood walls with rigid foam insulation and a windproof door flap to create a cozy retreat that holds in body heat.
Materials And Insulation Choices
Start with 3/4-inch exterior-grade plywood for the shell. For insulation, use 1-inch rigid foam board (R‑5 or higher) cut to fit between studs. Seal all seams with expanding foam or foil tape to prevent drafts.
A vapor barrier on the warm side keeps moisture out.
Door Flap And Ventilation
Cut a door opening just big enough for your dog to enter without scraping. Hang a heavy rubber or vinyl flap over the opening—overlap it by at least an inch on each side. Add a small adjustable vent near the roof peak to let moisture escape without letting in cold air.
Floor And Off‑ground Setup
Elevate the kennel on pressure‑treated skids or concrete blocks to keep the floor dry and reduce heat loss. Insulate the floor with foam board under a plywood subfloor, then cover with a removable rubber mat for easy cleaning. A sloped roof sheds rain and snow.
4. Elevated Platform Kennel
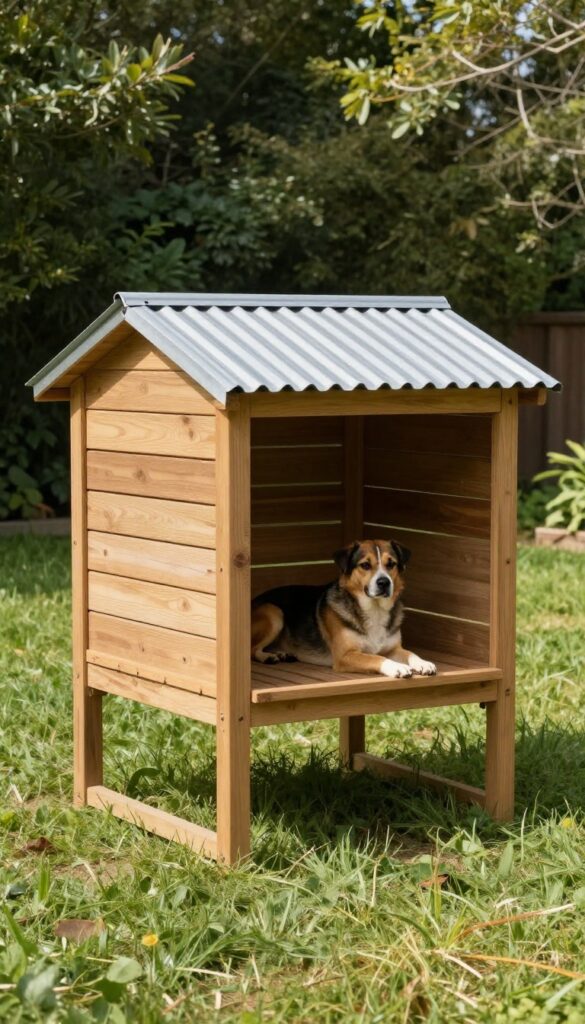
An elevated platform kennel keeps your dog off damp ground, making it a smart choice for humid climates or dogs that prefer a cooler spot. The raised design also discourages pests and extends the kennel's lifespan. This plan uses a simple deck-style frame with a slatted floor and a pitched roof for shade and rain protection.
Building an elevated kennel is straightforward if you're comfortable with basic framing. The key is a sturdy platform supported by pressure-treated legs, with a slatted floor that allows air circulation and drainage. A roof overhead provides shade and keeps rain out, while the open sides offer good ventilation.
You can customize the height and add a ramp for older dogs.
Why Go Elevated?
Moisture is a common enemy of dog houses. By lifting the kennel off the ground, you eliminate contact with wet soil and reduce the risk of rot. Air flows freely underneath, helping to keep your dog cool in summer and dry during rainy seasons.
It's also harder for fleas and ticks to reach your pup.
Materials And Build Tips
Use pressure-treated 4x4s for the corner posts and 2x4s for the frame. The floor can be made from 2×2 slats spaced about half an inch apart for drainage. For the roof, corrugated metal panels or plywood with shingles work well.
Make sure the platform is at least 12 inches off the ground, and consider adding a solid panel on one side for wind protection.
Customization Ideas
You can add a hinged door on one side for easy cleaning, or attach a ramp with grip strips for senior dogs. Painting or staining the wood with pet-safe finish adds durability. If your dog likes to lounge, a removable cushion or cot on top of the slats adds comfort without trapping moisture.
5. Two-Dog Kennel with Divider
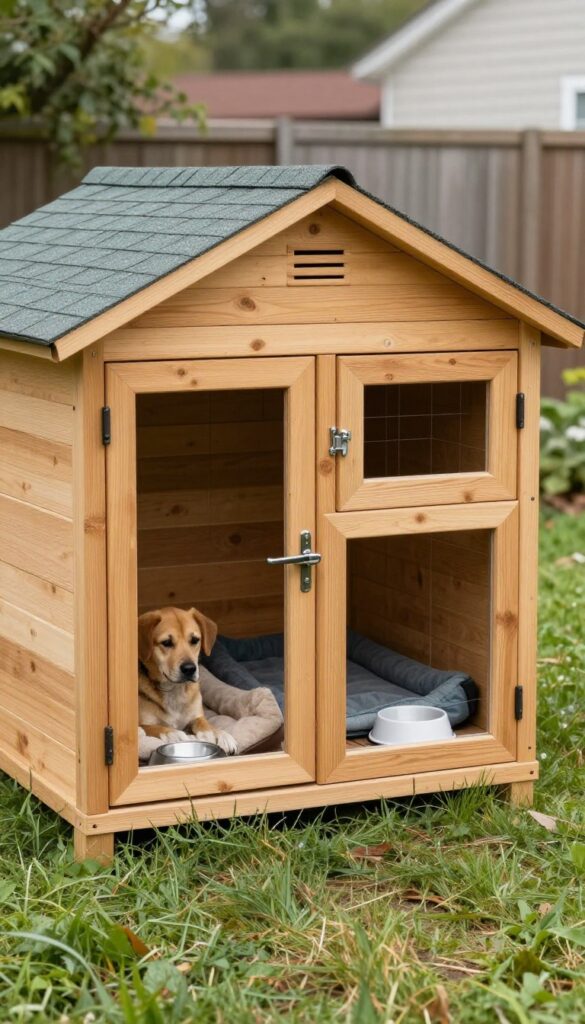
If you have two dogs that get along but still appreciate their own space, a divided kennel is a smart solution. This design gives each pup their own side with a separate door and bedding area, while sharing a common wall to save on materials and yard space. It's perfect for multi-dog households where you want to avoid resource guarding or just give each dog a quiet retreat.
Building a two-dog kennel with a divider is straightforward if you follow a few key steps. Start with a solid base—pressure-treated lumber for the floor frame works best. Build the outer walls and the center divider simultaneously to ensure they align perfectly.
Each side should be at least 4×6 feet for medium breeds, or larger for bigger dogs. Use plywood for the walls and a sloped roof with asphalt shingles for weather protection. Add a door on each side, preferably with a latch that's easy for you but secure against escape.
For the divider, use the same material as the outer walls, but consider adding a small window or gap at the top for ventilation and visibility between the two sides.
Why A Shared Wall Works
A shared wall isn't just about saving lumber—it also helps with insulation and noise reduction. Dogs can hear and smell each other through the divider, which can be comforting for pack animals. The wall also provides structural stability, making the kennel stronger than two separate units.
Just make sure the divider is solid and extends from floor to roof to prevent any sneaky interactions.
Customizing Each Side
Each side can be tailored to your dogs' individual needs. One side might have a raised bed for an older dog with joint issues, while the other has a cool tile floor for a pup that runs hot. You can also add separate feeding stations and water bowls that attach to the wall.
If one dog is a chewer, use metal edging on that side's door frame.
Materials And Cost Breakdown
For a basic 8×6 foot kennel (two 4×6 sides), you'll need about 12 sheets of plywood, 20 pressure-treated 2x4s, roofing materials, hinges, latches, and screws. Total cost typically runs between $300 and $500, depending on your local prices and whether you use new or reclaimed wood. The divider itself adds maybe $50 in extra materials.
This is still way cheaper than buying two separate pre-built kennels.
6. Pallet Wood Kennel
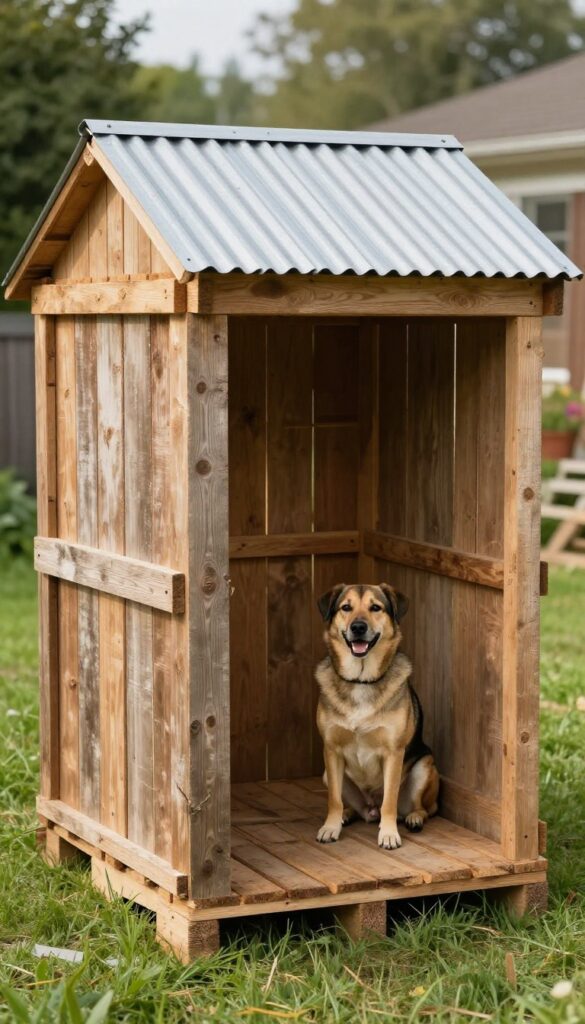
Reclaimed wood gives any project instant character, and a pallet kennel is no exception. You can often get pallets for free from hardware stores, warehouses, or recycling centers. With a little disassembly and some basic tools, you can build a sturdy, rustic kennel that costs next to nothing.
The key to a successful pallet kennel is proper preparation. Start by selecting heat-treated pallets (stamped with HT) rather than chemically treated ones. Disassemble carefully using a pry bar and hammer to avoid splitting the wood.
Sand down rough edges and remove any nails or staples. Then, arrange the boards to create solid walls, a floor, and a roof. You can leave the wood natural or apply a pet-safe sealant to extend its life.
This design works best for medium to large dogs and fits nicely into a rustic backyard aesthetic.
Sourcing And Safety
Look for pallets marked with HT (heat-treated) — they're safe for pets. Avoid MB (methyl bromide) treated pallets, which are toxic. Check local businesses like lumber yards or feed stores for free pallets.
Always inspect for rot, mold, or chemical spills before using.
Building The Frame
Use the sturdiest pallet boards for the frame. Build a simple rectangular base with 2x4s or doubled-up pallet boards. Attach walls using screws for stability.
Leave gaps between boards for ventilation, or fill them for a more enclosed feel. A slanted roof made from pallet boards and covered with corrugated plastic or metal will shed rain.
Finishing Touches
Sand all surfaces to prevent splinters. Apply a non-toxic, pet-safe wood stain or sealant to protect against weather. Add a hinged roof for easy cleaning, and install a removable floor for drainage.
A coat of paint can match your existing outdoor decor.
7. Large Breed Kennel with Covered Run
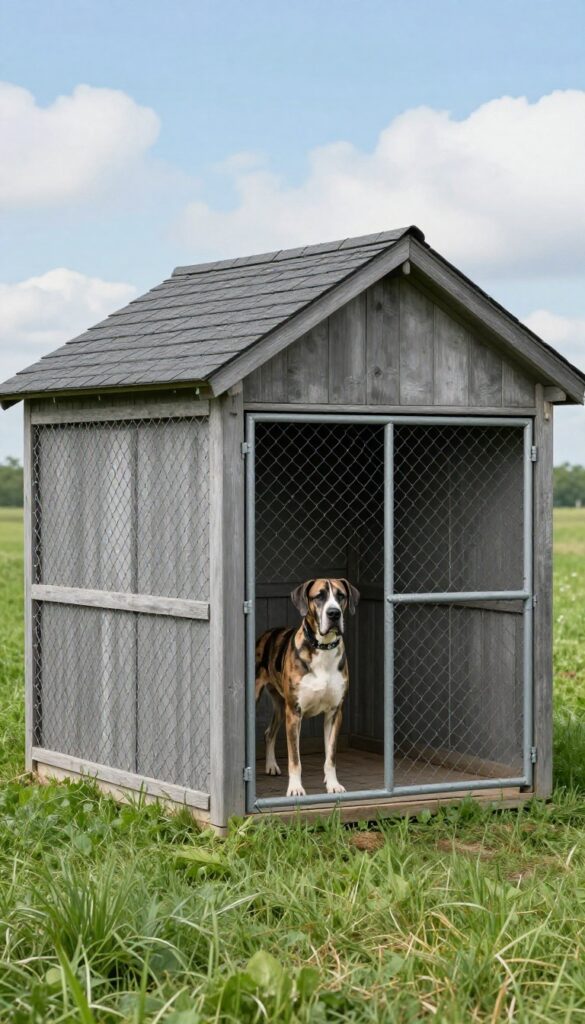
Big dogs need big spaces. This kennel plan is built for gentle giants like Great Danes, Mastiffs, or Saint Bernards. It combines a spacious insulated house with a covered run made from chain-link panels, giving your dog room to stretch and stay dry in any weather.
The design is sturdy enough to handle a 200-pound dog leaning against it, and the covered run means they can enjoy the outdoors even when it's raining or snowing. You'll need moderate carpentry skills for this one, but the payoff is a professional-grade kennel that costs a fraction of store-bought versions.
This plan focuses on durability and comfort. The house is built with 2×4 framing and plywood walls, insulated with rigid foam, and finished with exterior-grade paint or stain. The roof is sloped for rain runoff and covered with asphalt shingles or metal panels.
The run is framed with pressure-treated lumber and enclosed with 6-foot-tall chain-link fencing. A solid roof over the run keeps out rain and provides shade. The house has a removable partition for easy cleaning, and the run has a locking gate for access.
Total size is about 6 feet wide by 12 feet long, with the house taking up roughly 4×6 feet.
Materials And Tools
You'll need pressure-treated 4×4 posts for the run corners, 2x4s for framing, 3/4-inch plywood for the house walls and roof, rigid foam insulation, chain-link fencing (6 ft tall), gate hardware, roofing material (asphalt shingles or metal panels), screws, nails, and exterior paint or stain. Tools include a circular saw, drill, level, tape measure, post hole digger, and a staple gun for the chain-link.
Building The House
Start with a base frame of 2x4s on a gravel or concrete pad. Build the walls flat on the ground, then raise them. Add insulation between studs, then sheath with plywood.
Cut a dog door opening (large enough for your breed) on one side facing the run. Build a sloped roof with a 4/12 pitch, overhanging by a few inches. Install the roof covering, then paint or stain everything.
Constructing The Covered Run
Set 4×4 posts at the corners and midway along the long sides, set in concrete. Attach 2×4 rails horizontally at top and bottom. Staple chain-link fencing to the rails, starting from one end and pulling taut.
For the roof, attach rafters from the house to the far end, spaced 24 inches apart. Cover with corrugated metal or polycarbonate panels. Install a gate on one of the short sides.
Tips For Large Breeds
Make the dog door at least 24 inches wide and 30 inches tall. Use heavy-duty hinges and a latch that can't be bumped open. Consider adding a vinyl flap over the dog door for insulation.
Place the kennel on a slight slope for drainage. Add a thick rubber mat inside the house for joint comfort.
8. Modern Minimalist Kennel
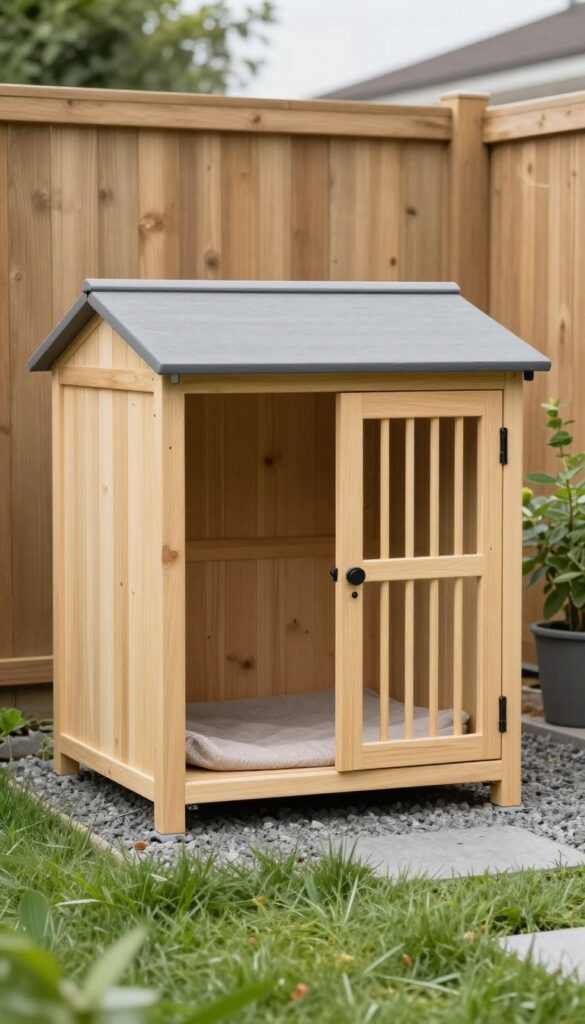
Clean lines and a sleek design define this kennel, making it a standout addition to contemporary backyards. Built with cedar or pressure-treated lumber and topped with a flat roof, it's simple yet stylish. This plan prioritizes aesthetics without sacrificing function, giving your dog a chic retreat that complements your outdoor space.
Materials & Tools
You'll need cedar or pressure-treated 2x4s and 2x6s for the frame, exterior-grade plywood for walls, and a flat roof membrane or metal roofing. Use stainless steel screws for longevity. Basic tools include a circular saw, drill, level, and tape measure.
A miter saw helps achieve clean cuts for the modern look.
Construction Steps
Start with a level base of gravel or concrete pavers. Build the floor frame as a rectangle, then attach wall frames with studs 16 inches on center. Leave an opening for the door.
Install the flat roof with a slight pitch for drainage—just 1/8 inch per foot. Add a weatherproof membrane or metal panels. Finish with exterior paint or stain in a neutral tone.
Customization Tips
Add a removable interior platform for easy cleaning. Use a Dutch door so you can open the top half for ventilation while keeping your dog inside. For extra style, mount a modern house number or a small planter on the side.
Keep the design clutter-free to maintain that minimalist vibe.
9. Portable PVC Kennel
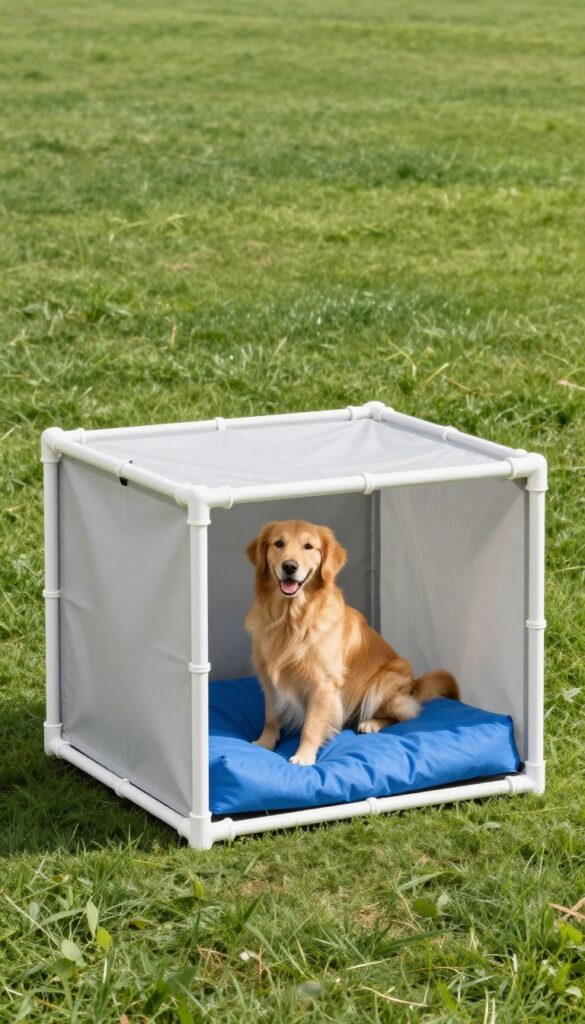
When you need a kennel that can move with you—whether across the yard or across the country—PVC pipe construction is a game-changer. This design is ultra-light, assembles in minutes, and requires zero tools or fasteners. It's perfect for temporary setups, travel, or as a backup crate for guests.
The PVC kennel is built from standard schedule 40 PVC pipes and slip-fit connectors, so you can cut the pieces to size and snap them together by hand. The frame is surprisingly sturdy for its weight, and you can cover it with shade cloth, hardware cloth, or even a tarp for weather protection. When not in use, it breaks down flat for easy storage.
Materials And Cutting List
You'll need 1-inch PVC pipe, 3-way and 4-way corner connectors, and a pipe cutter or hacksaw. A typical 4x4x4-foot kennel uses about 60 feet of pipe. Cut list includes 8 vertical posts, 8 top rails, 8 bottom rails, and optional door frame pieces.
Pre-cut everything at the hardware store to save time.
Assembly Tips
Dry-fit all connections first before gluing—though many builders skip glue for portability. Use a rubber mallet to seat stubborn joints. For the door, create a separate frame hinged with zip ties or PVC hinges.
Add a latch made from a short pipe section that slides over two aligned connectors.
Covering And Anchoring
Attach shade cloth or mesh using zip ties every 6 inches along the frame. For windy areas, stake the bottom rails into the ground with tent stakes or sandbags. If using as a travel crate, build a plywood floor panel that fits inside the base for stability.
10. Multi-Function Kennel with Storage
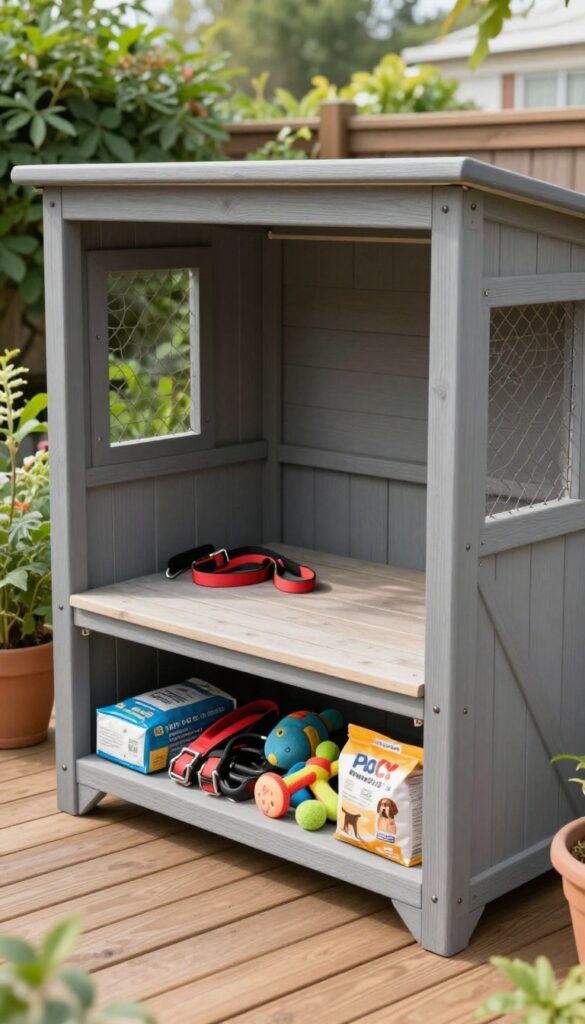
Small yards demand smart solutions, and this kennel design delivers double duty. It combines a cozy dog house with a spacious storage bench on top, giving you a place to stash leashes, toys, food bags, and grooming supplies. The bench lid lifts up for easy access, and the kennel below stays dry and comfortable for your pup.
It's a practical way to keep your backyard organized without sacrificing your dog's comfort.
This plan is ideal for DIYers who want to maximize every square foot. The storage bench sits on a sturdy frame that also forms the roof of the kennel. You can customize the bench depth to hold bins or baskets, and the kennel interior remains well-ventilated with a small window or vent near the top.
The design uses standard lumber and plywood, and the total build time is about two weekends. Paint or stain the exterior to match your deck or fence, and add a weatherproof sealant to protect the storage compartment from moisture.
How The Storage Bench Works
The bench is essentially a large, hinged lid box built on top of the kennel frame. It's deep enough to store collapsible crates, bags of food, and bulkier items. Use a gas strut or a simple prop stick to keep the lid open while you grab supplies.
The bench surface can double as extra seating or a plant stand, making it a true multi-purpose feature.
Building Tips For Durability
Use pressure-treated lumber for the base and any parts that touch the ground. The bench lid should have a slight overhang and a drip edge to keep rain from seeping into the storage area. Add a small drain hole or two in the bench floor (drill them at a slight angle) so any moisture that gets in can escape.
For the kennel interior, line the walls with smooth, easy-to-clean material like PVC paneling or sealed plywood.
Customization Ideas
Paint the bench a bright color to make it a focal point, or match it to your house trim. Add a cushion on top for a cozy reading nook—just make sure it's removable for cleaning. You can also install a small hook rail under the bench lip for hanging leashes and collars.
If you have a larger dog, extend the kennel depth and adjust the bench height accordingly.
FAQ
What is the easiest dog kennel plan for beginners?
The portable PVC kennel is the easiest—no cutting wood or using power tools. Just connect PVC pipes and attach mesh fabric. It takes about 30 minutes.
How much does it cost to build a DIY dog kennel?
Costs vary widely. A simple pallet kennel can be under $50, while a large insulated kennel with a run might run $200–$400. Most plans fall between $100 and $250.
What type of wood is best for an outdoor dog kennel?
Pressure-treated pine or cedar are best for outdoor use. They resist rot and insects. Avoid treated wood with chemicals that could be harmful if chewed—use exterior-grade plywood instead.
Do I need a building permit for a backyard dog kennel?
It depends on your local regulations. Small portable kennels usually don't require permits, but permanent structures over a certain size might. Check with your city or county before building.
How do I make a dog kennel waterproof?
Use roofing felt or metal panels for the roof. Seal all seams with exterior caulk. Elevate the floor slightly and add a sloped roof to shed water.
For extra protection, apply a waterproof stain or paint.
Conclusion
Building your own dog kennel is a rewarding project that gives your pup a cozy retreat and saves you money. With these 10 plans, you can find one that matches your skill level and your dog's needs. Start with a simple design if you're new to DIY, then work your way up.
Your dog will love having a dedicated space outdoors, and you'll enjoy the satisfaction of creating it yourself. Grab your tools, pick a plan, and make this weekend the start of something great for both of you.

I’m Pallab Kishore, the owner of Little Pets Realm — an animal lover and pet care enthusiast sharing easy tips, healthy recipes, and honest advice to help every small pet live a happy, healthy, tail-wagging life.