
Drawing a dog doesn't require fancy supplies or years of practice. A pencil, some paper, and a few simple shapes are enough to get a recognizable pup on the page, even if you've never drawn an animal before.
Kids tend to dive right in, while adults often freeze up worrying about getting the proportions perfect. These thirteen ideas skip the pressure and start with shapes anyone can handle, like circles, ovals, and zigzags.
Some take five minutes, others give you room to add color and detail. Pick one that matches your energy level, grab whatever's in the drawer, and let the dog take shape.
1. The Classic Circle-and-Oval Pup
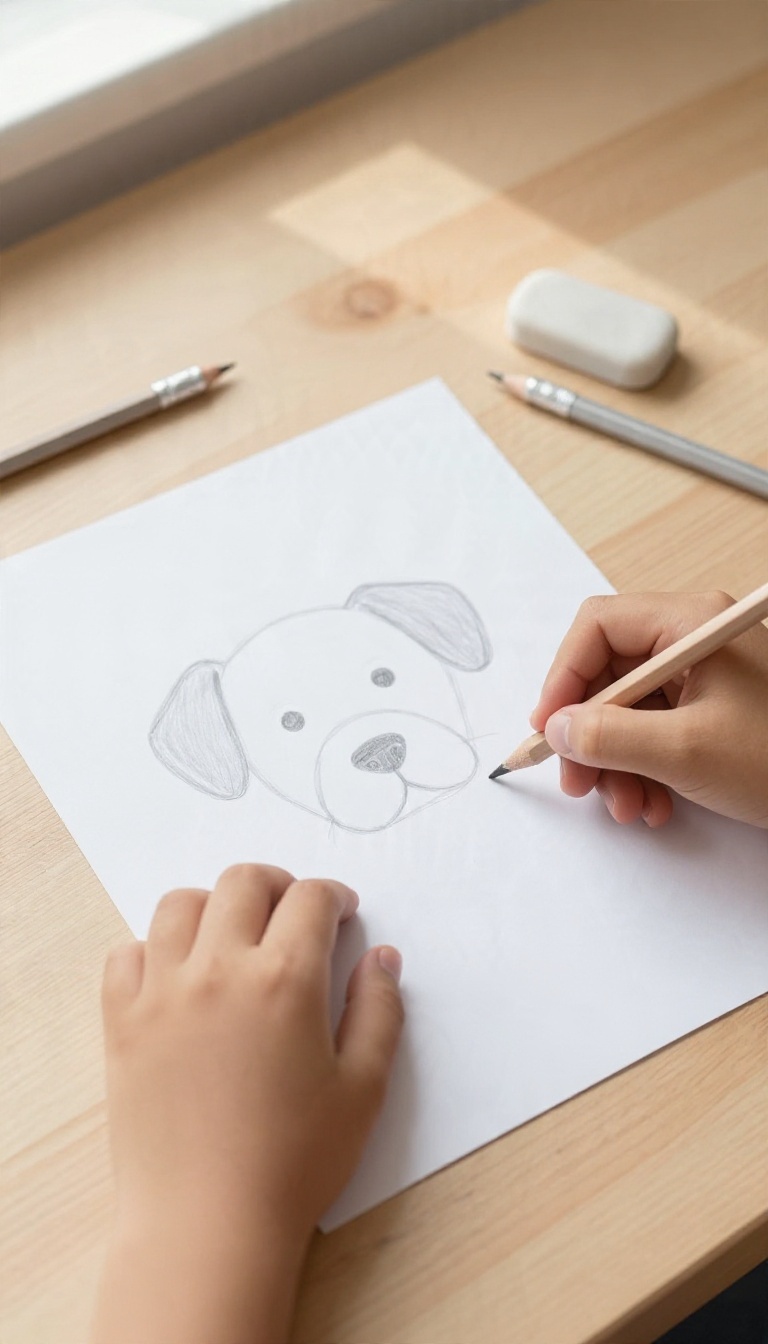
Every good dog drawing starts somewhere, and a circle plus an oval is about as friendly a starting point as you can get. The circle becomes the head, the oval becomes the snout, and suddenly you have something that already looks like a dog. It's the kind of drawing that forgives a wobbly line or a lopsided shape, which makes it perfect for beginners and kids alike.
You don't need to measure anything or worry about getting it exactly right. The whole point is to see how two simple shapes can turn into a face with personality. Once you've done it a couple of times, you'll start noticing how small changes make a big difference.
Grab a pencil and draw a circle near the middle of your paper. Don't stress about making it perfectly round, because a slightly uneven circle actually looks more natural. Next, draw an oval that overlaps the bottom of the circle, sticking out to one side for the snout.
The two shapes should touch and share a bit of space, not sit far apart. That overlap is what makes the head and snout feel connected instead of floating. Once those are down, you've got the whole foundation of your pup.
Add The Ears And Eyes
Floppy ears are the easiest win here. Draw a curved shape hanging down from each side of the circle, kind of like a soft triangle with a rounded tip. They don't have to match, and honestly, mismatched ears give the dog more character.
For the eyes, two small dots placed just above the snout work great. Leave a little space between them so the face doesn't look squished. If you want a friendlier look, put the dots slightly closer to the snout than the top of the head.
Finish The Snout And Nose
A small oval or rounded triangle at the tip of the snout makes a simple nose. Add a short curved line underneath for the mouth, and you're basically done. A tiny dot or two on the snout for whisker spots is optional but fun for kids.
If your oval came out too long, just shorten the nose placement and it'll balance out. Nothing here is permanent until you decide it is, so keep adjusting until it feels right.
Why This One Works For Beginners
This drawing teaches proportion without making a big deal out of it. You learn how the head relates to the snout, where the eyes sit, and how ears frame the face, all without a single complicated step. Kids can finish it in a few minutes and feel proud of the result.
Adults get a low-pressure warm-up that builds confidence before trying something with more detail. Either way, it's a solid first dog.
2. Stick-Figure Dog With Personality
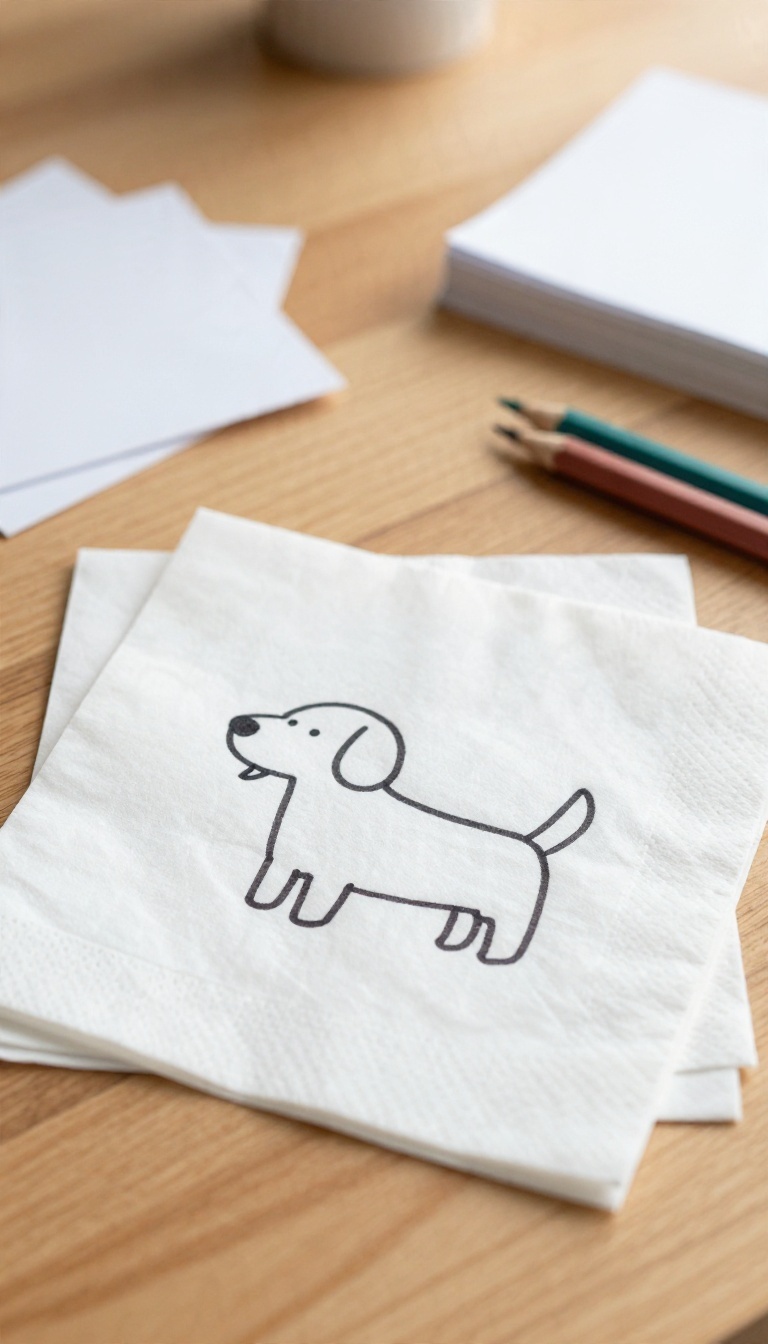
Stick figures get a bad rap, but they're secretly a great way to draw a dog that actually looks like a dog. The trick is to give the stick body a round head and a tail with some attitude. Kids love this one because it takes about two minutes, and adults love it because you can't really mess it up.
Start with a circle for the head, then add a simple stick body—one line for the back, one for the front legs, and a little zigzag for the tail. The personality comes from the details: a floppy ear, a tongue sticking out, or eyebrows that make the dog look surprised. You can draw this on a napkin, a whiteboard, or the corner of a homework sheet.
The Basic Stick Dog
Draw a circle for the head and a smaller oval for the snout. Add two dots for eyes and a triangle nose. For the body, draw a straight line down from the head, then two short lines for front legs and two for back legs.
Finish with a tail—straight, curly, or zigzag. That's it. You've got a dog.
Adding Personality
Now make it yours. Give the dog a collar with a tiny tag, or a tongue hanging out of the mouth. Goofy eyebrows—one up, one down—turn a blank stare into a curious look.
You can also change the tail angle to show mood: up for happy, down for sleepy, mid-wag for excited.
Quick Variations For Kids
Try a stick dog with a superhero cape, or one wearing a party hat. Kids can add spots, stripes, or a speech bubble. The stick figure is forgiving, so mistakes turn into new ideas.
Keep a few blank index cards handy and let them draw a whole pack of stick dogs in different poses.
3. Sleeping Curled-Up Dog

A sleeping dog is basically a soft blob with ears, which makes it one of the most forgiving things you can draw. You don't need to worry about legs or a straight back—just a rounded shape that looks cozy. It's also a great excuse to practice light, relaxed pencil strokes.
Start with a bean shape, slightly tilted, and build from there. The goal is a drawing that feels calm and simple, not perfectly anatomical.
Start With A Bean
Draw a kidney bean or a fat crescent—whatever feels natural. This is the dog's curled body, so keep the line loose and light. If it looks a little lumpy, that's fine; sleeping dogs aren't perfectly smooth.
Tuck The Nose And Tail
Add a small circle at one end for the nose, and curve the tail around toward it. The nose doesn't have to touch the tail—just suggest that the dog is curled inward. A couple of floppy ears on top complete the silhouette.
Close The Eyes And Shade Softly
Draw two small downward curves for closed eyes, and maybe a tiny nose dot. Then use the side of your pencil to add light shading along the bottom edge of the body. Keep it gentle—this is about softness, not detail.
4. Cartoon Puppy With Big Eyes
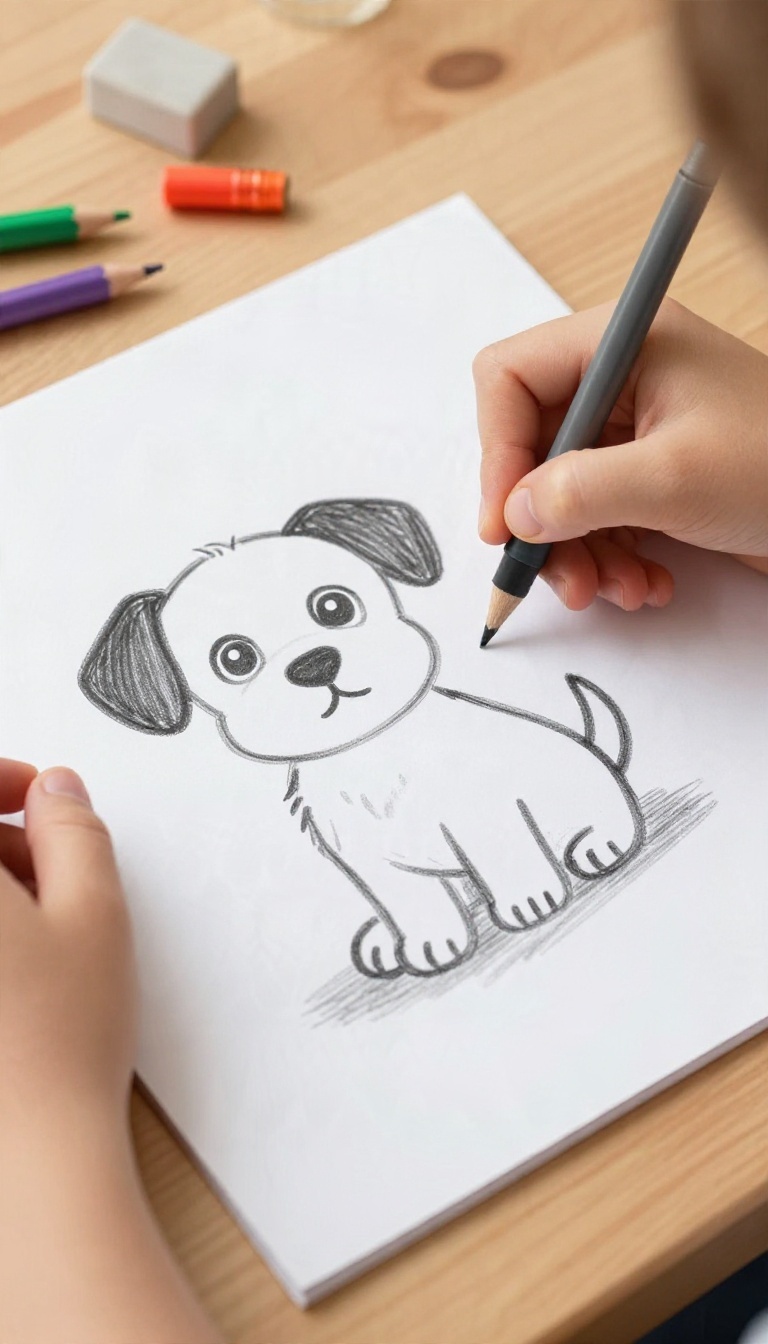
Big eyes do a lot of heavy lifting in cartoon drawing. Give a puppy a pair of oversized, shiny eyes and suddenly every wonky line around them looks intentional. The body stays small and simple, so most of the drawing lives in that face.
Kids pick up on this fast, and it takes the fear out of getting things perfect. When the eyes are the star, a lopsided ear or a stubby leg just reads as charm.
Start with two big circles for the eyes, spaced close together and sitting low on the face. That low placement is the secret to the cute look, since it mimics how puppies actually appear. Add a small oval nose underneath, then wrap a soft rounded shape around the whole face.
Keep the head noticeably bigger than the body you'll draw next. The body can be tiny, maybe a third the size of the head. A small potato shape with four short legs and a curled tail is plenty.
Because the proportions are already goofy on purpose, there's no wrong way to finish it. Lean into that freedom and let the drawing get a little weird.
Making The Eyes Pop
Leave a small white dot in each pupil for a highlight, and the eyes instantly look alive. A thick outline around the eyes draws attention right where you want it. If you're using color, pick one bright shade for the irises and keep everything else soft.
Kids especially love adding tiny eyelashes or a little sparkle.
Turning Mistakes Into Style
A crooked ear? Floppy ears are supposed to be crooked. A leg that's too short?
That's just a puppy mid-bounce. When the whole drawing is already exaggerated, small slips blend right in. Point this out to kids early so they stop erasing and start finishing.
Adding Personality
A tilted head, a tongue sticking out, or one raised eyebrow changes the whole mood. Try a few versions with different expressions and see which one feels right. You can also give the pup a collar, a bandana, or a favorite toy.
These little extras take two minutes and make the drawing feel like a specific dog rather than a generic one.
5. Simple Side-Profile Dog Head
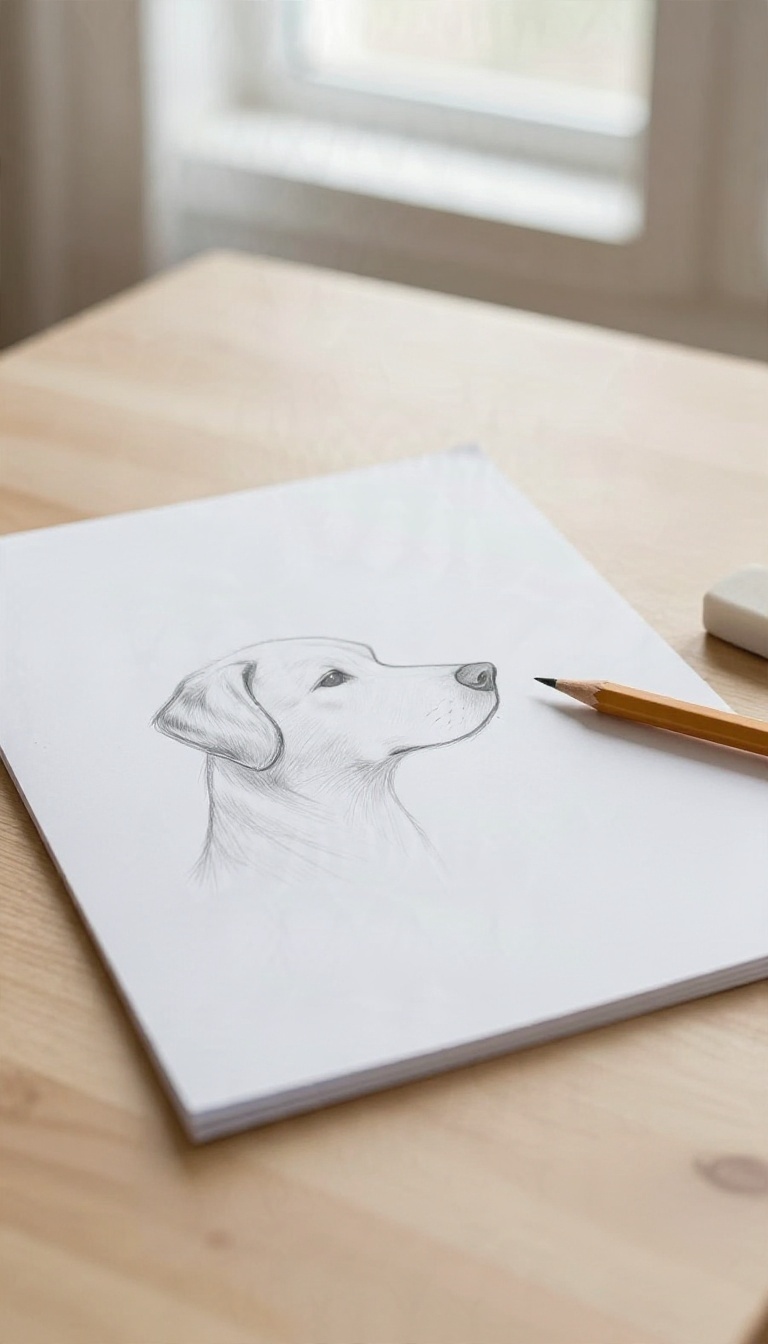
A side view strips a dog down to its most basic outline, and that's exactly why it works so well for beginners. You get one smooth curve for the snout, a little triangle for the nose, and a single floppy ear to finish it off. It looks intentional and clean, but it's really just a handful of lines working together.
This one nudges you past random shapes and into something a bit more structured. The proportions are forgiving, so small wobbles won't ruin it. If you've done a few of the earlier ideas, this is a natural place to level up.
Start by thinking of the head as a soft wedge rather than a perfect circle. The forehead rounds over the top, then the line dips down into the muzzle and out to the nose. Keep your pencil loose at first so you can adjust the curve before committing.
The profile works because the eye only needs a simple dot or small oval set back from the snout. You're not drawing a full face, just the side of one. That single viewpoint keeps things manageable and fast.
Build The Snout Curve First
Draw a gentle line that starts near the top of the head and slopes down toward where the nose will sit. Let it curve slightly outward at the muzzle so the dog looks like it has a real snout instead of a flat edge. Once that line feels right, everything else hangs off it.
If the curve comes out too steep or too shallow, just erase and try again. This is the backbone of the whole drawing, so it's worth a second pass.
Add The Nose And Ear
A small triangle at the tip of the snout gives you an instant dog nose, angled slightly down. Then drop a floppy ear behind the top of the head, hanging down past the jawline. The ear can be one relaxed curve or a slightly wavy shape, depending on the breed you have in mind.
Keep the ear simple. A single outline reads better than a fussy one, especially when you're still getting comfortable with the profile.
Finish The Neck And Eye
Close off the head with a short neck line running down from the back of the jaw. Add a small oval for the eye, set back from the nose so the spacing looks natural. A tiny highlight dot inside the eye brings a little life to the face.
From there you can shade the ear or leave it plain. Either way, the profile holds up as a clean, recognizable dog head.
6. Dog in a Sweater

Clothing can feel like a shortcut to personality, and a sweater is the easiest piece to pull off. The trick is to draw the whole dog first, then dress it. That way the body underneath still makes sense, and the sweater just sits on top like a cozy layer.
Start with the same basic shapes you'd use for any standing dog: an oval for the body, a circle for the head, and four simple legs. Keep the lines light so you can erase later. Once the pup looks solid, sketch the sweater outline slightly outside the body shape, leaving the head, paws, and tail poking out.
Build The Dog Before The Clothes
Draw the full body first, even the parts the sweater will cover. This keeps the proportions believable, so the legs don't look glued on and the head sits in the right spot. Light pencil strokes make it easy to tuck the body under the sweater later.
Shape The Sweater Around The Body
Trace a loose outline just outside the torso, then add a ribbed hem at the bottom and a small collar at the neck. Let the sleeves end partway down the front legs. Keep the edges slightly wobbly, since knitwear rarely sits perfectly flat.
Add Stripes, Dots, Or Both
Simple patterns do the heavy lifting here. Horizontal stripes are the quickest option and help show the curve of the body. Dots work well for a playful look, and a mix of both can be fun if you keep the spacing even.
Color it in last so the pattern stays crisp.
7. Paw Print and Nose Study
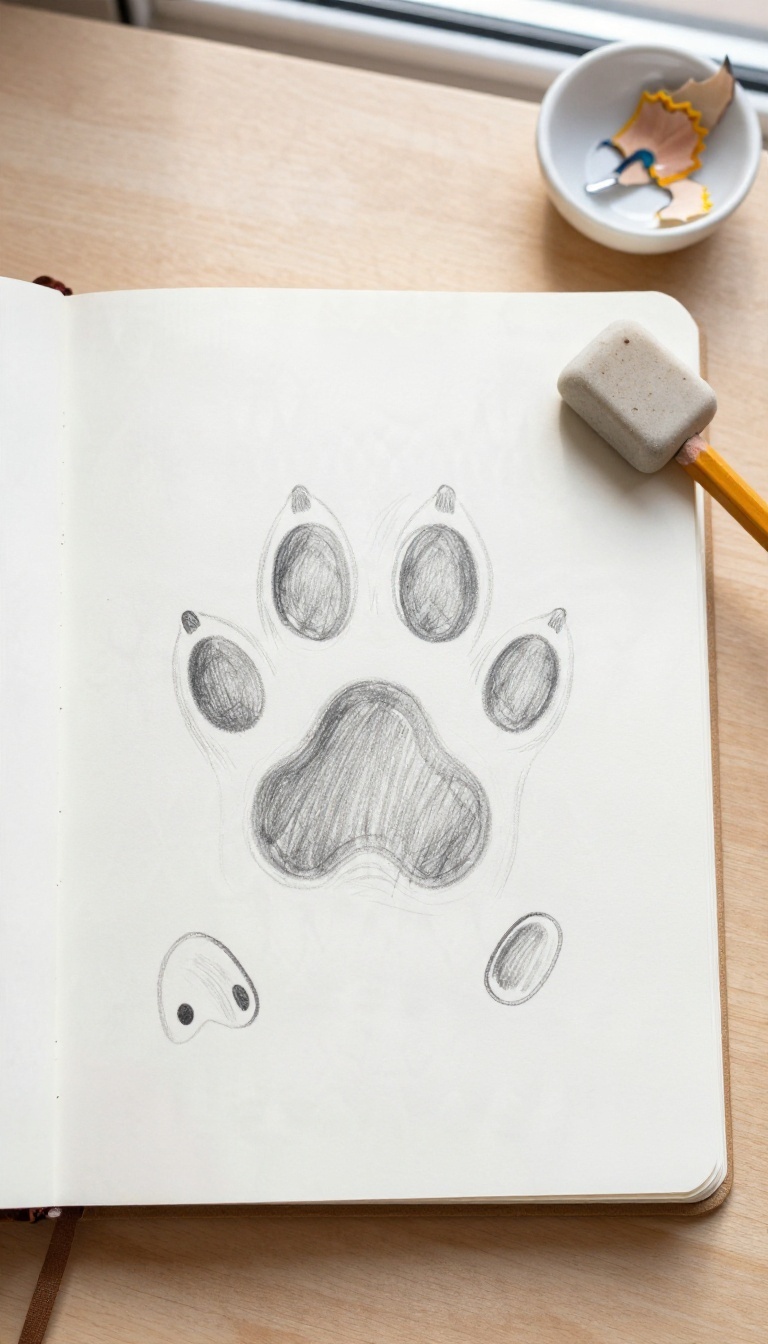
Paws and noses are the small details that make a dog drawing feel finished, and they're also some of the easiest shapes to practice. A single page of paw pads and snouts works like a warm-up before you commit to a whole dog. It gives kids a fast win and builds the hand control that bigger drawings need.
Think of this as a sketchbook warm-up page. You're not drawing a dog here, just the parts that trip people up later. Fill half a sheet with these little shapes and you'll notice your pencil feels steadier by the end.
Paw pads and noses share a lot of the same rounded, soft-edged shapes. Practicing them together trains your eye to see curves and spacing. It's low-stakes drawing, which is exactly why it works so well for beginners.
Start With The Paw Pad Shapes
A dog's main paw pad looks like a rounded triangle or a fat heart, depending on the angle. Draw a big one in the center, then add four smaller ovals above it for the toe pads. Keep the shapes loose.
Real paw pads aren't perfect circles, so slightly uneven ovals actually look more natural. Have kids press a little harder on the pencil for the pad edges and lighter for the middle.
Draw A Nose In Three Steps
Most dog noses start as a rounded triangle with the point facing down. Add two small curved lines on top for the nostrils, then a short vertical line down the middle. Try a few noses at different angles: one straight on, one tilted, one from the side.
Each angle changes the shape a little, and that variety is what makes a finished dog face feel real.
Add Shading For A Quick Win
Once the outlines are down, shade the pads and nose with the side of your pencil. Press harder near the edges and lighter toward the center to give them a rounded look. A small white dot left unshaded near the top of the nose reads as a shine.
It's a tiny trick that makes the whole study look polished, and kids love how fast it works.
8. Running Dog With Motion Lines

Stillness is easy to draw. Motion is where things get fun. A running dog gives you permission to stretch, tilt, and exaggerate, and the result looks more alive than a perfectly proportioned sitting pose.
The trick is to capture the leap, not the anatomy. You're drawing energy, not a photograph. A few angled legs and a couple of speed lines behind the tail do most of the work, and you don't need any special skills to pull it off.
Start with a long oval for the body, tilted slightly upward at the front. This becomes the stretch of the leap. Add a smaller circle for the head at the top end, then sketch a triangle for the snout.
The legs are where the motion lives: draw them as simple angled lines, front legs reaching forward and back legs pushing off. Keep them straight or slightly bent, like sticks mid-stride. Add a curved tail streaming behind, and you've got the basic shape of a dog in full run.
Angling The Legs For A Sense Of Speed
Legs on a running dog shouldn't look like they're standing. Front legs stretch out ahead, back legs kick behind, and none of them touch the ground at the same time. Draw each leg as a single line or a narrow triangle, angled away from the body.
The more extreme the angle, the faster the dog looks. Keep the joints loose and don't worry about paws yet. You can add small ovals at the ends later if you want, but simple points work fine for a quick sketch.
Adding Motion Lines That Actually Help
Speed lines are short, straight strokes behind the dog, usually near the tail and back legs. They shouldn't touch the body. Think of them as a trail of wind.
Draw three or four lines, spaced apart, all pointing in the same direction the dog is moving. Vary the length slightly so it doesn't look like a fence. Curved lines can suggest a bounce, while straight lines feel more like a sprint.
A few well-placed lines make the whole drawing feel like it's moving, even if the dog itself is simple.
Keeping It Loose And Full Of Energy
This drawing works best when you don't overthink it. Use quick strokes, especially for the legs and tail. If a line comes out wobbly, leave it.
Wobbles read as motion. Resist the urge to erase and perfect every shape. The goal is a lively sketch, not a clean diagram.
Once you've got the basic pose, you can go over the main lines with a darker pencil or marker, but keep the speed lines light. They're background noise, not the star.
9. Dog Holding a Ball

A dog with a ball between its paws gives you one of those drawings that looks harder than it actually is. The trick is that the whole thing is built on a center line, so you're basically drawing half a dog and mirroring it. That symmetry does most of the work for you, and the ball hides a lot of small mistakes where the paws meet.
Start with a light vertical line down the middle of your page. That's your mirror, and every shape you draw will have a partner on the other side. Work lightly so you can erase the guide line at the end without leaving a groove in the paper.
Build The Face First
Draw a circle for the head, then add two floppy ears on either side of the center line. Place the eyes and nose symmetrically so the pup looks straight at you. A wide, happy mouth curve underneath sells the whole expression, and it takes about ten seconds.
Add The Paws And Ball
Sketch two rounded shapes below the head for the front legs, angled slightly inward. Drop a circle right between them so it overlaps both paws a little. That overlap is what makes the ball look held rather than floating, so don't be shy about letting the lines cross.
Clean Up And Finish
Erase the center guide and any stray pencil marks, then darken the outline. Add a curved line or two on the ball to give it some roundness, and shade the underside of the paws for a little depth. Colored pencils work great here if you want a bright tennis ball against a brown or black pup.
10. Fluffy Dog Using Zigzag Fur
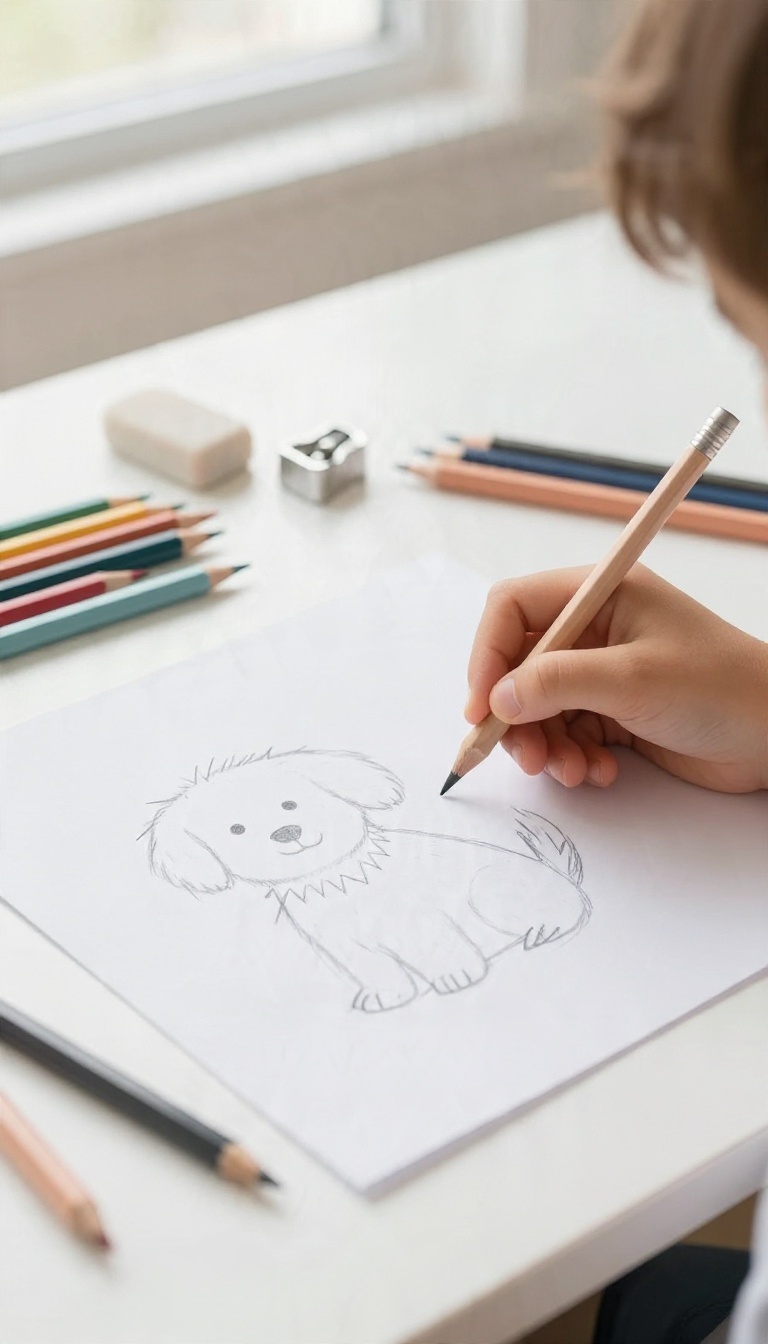
Fluff looks intimidating until you realize you don't have to draw a single hair. Instead of trying to render every strand, you draw a simple body and then trace around it with loose zigzags. Those jagged edges read as fur from across the room, and they're way more forgiving than smooth, perfect outlines.
This one works well for kids because it's fast and a little silly. Adults like it too, since there's no pressure to get anything exact. The messier the zigzags, the fluffier the dog tends to look.
Start with the same basic body you'd use for any dog: a circle for the head, an oval for the torso, and a few lines for legs and a tail. Keep it light so the zigzags can sit on top without fighting your sketch. Once the shape feels right, go around the whole outline with short zigzag strokes.
Vary the size of the points so it doesn't look like a saw blade. Bigger spikes on the chest and tail, smaller ones on the face and legs, gives you a natural, scruffy look.
Build The Body First
Sketch the head circle and body oval with a light pencil. Add simple leg lines and a tail, then check that everything connects. This plain version is your guide, so don't worry about making it pretty yet.
Add The Zigzags
Trace around your outline with quick, loose zigzags instead of a smooth line. Keep your hand moving and let the points be uneven on purpose. If a spike looks too wild, leave it.
Fluff isn't tidy.
Finish The Face And Details
Draw the eyes, nose, and mouth inside the head, clear of the zigzag edge. Add a couple of small zigzag tufts on top of the head or around the ears. Erase any leftover smooth guide lines so the fur outline stands out.
11. Dog Face Made From One Continuous Line
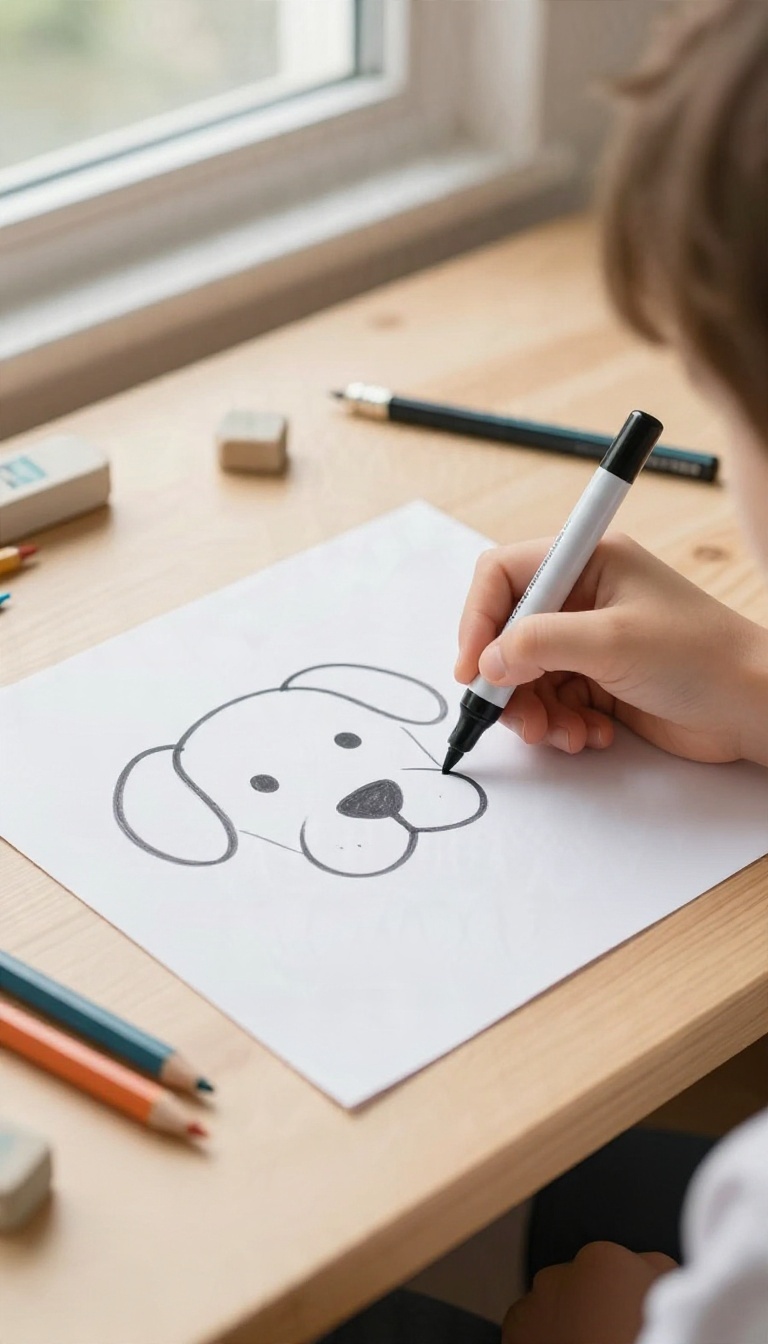
Here's a drawing trick that feels more like a game than a lesson. You put your pencil down and don't lift it until the dog is done. One unbroken line loops around the ears, dips into the snout, and comes back around to close the face.
It's silly, it's fast, and it's a great way to shake off stiffness before you try something more careful.
The whole point is to keep moving. Don't worry about perfect proportions or symmetry. The line wanders a little, and that's fine.
A wobbly dog face has more personality than a stiff one anyway.
How To Keep The Line Going
Start at the top of one ear. Curve down and around to form the side of the head, then swoop into the snout. Loop back up for the other ear, and finish by closing the chin.
If you mess up, just keep going. The charm is in the imperfection.
Why It Helps You Loosen Up
Drawing without lifting your pencil forces you to stop overthinking. You can't erase easily, so you commit to each curve. That's a good warm-up for kids who get frustrated and adults who get stuck in their heads.
Do three or four of these and your hand will feel lighter.
Make It Your Own
Once you've got the basic loop, try adding a floppy ear or a longer snout by changing the path of the line. You can also use a colored pencil or marker to make the line stand out. A thick marker is more forgiving than a sharp pencil, especially for kids.
12. Two-Tone Dog With Crayon or Marker
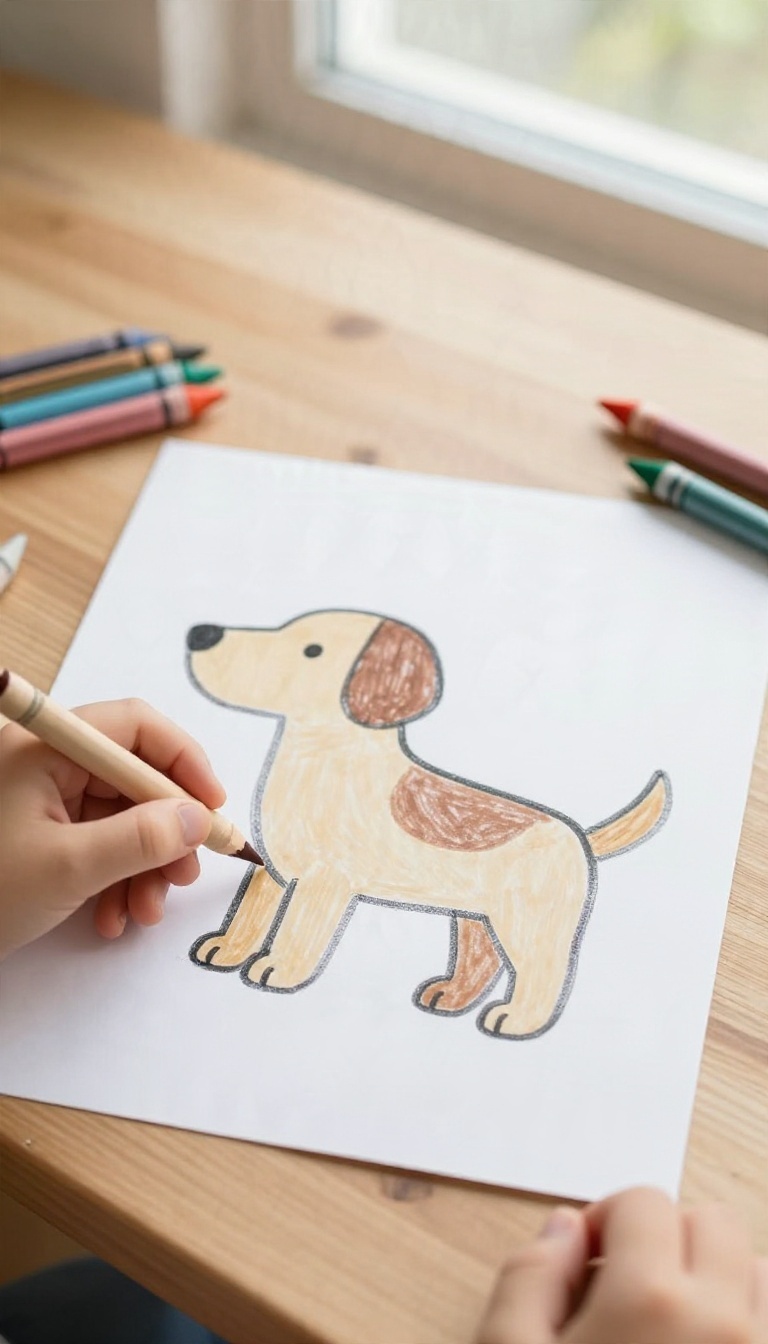
Color can do a lot of heavy lifting in a dog drawing, and this idea leans on that. You sketch one simple outline, then fill it in with just two colors to suggest patches, a mask, or a saddle marking. Nothing about the drawing gets more complicated.
The outline stays the same, and the color does the storytelling. It's a relaxed way to make a plain sketch look finished without adding a single extra line. It also sneaks in a real skill.
Blocking in color and thinking about contrast is something every artist does, and kids pick it up here without even noticing they're learning.
Start with a basic dog shape you're comfortable with. A rounded head, a simple body, and four stubby legs will do. Keep the outline light if you're using pencil underneath, since crayon and marker both like to grab onto the paper.
Once the outline feels right, pick two colors that look good together. One light, one darker works best. Think tan and brown, white and gray, or cream and black.
Then decide where the second color goes. That's the whole method. Outline first, color second, and let the patches do the work.
Pick A Marking That's Easy To Block In
Some markings are basically ready-made shapes. An eye patch is just a circle or an oval. A saddle is a wide blob across the back.
A muzzle is a rounded patch over the snout. Choose one or two of these and commit. A dog with a single eye patch reads clearly and takes about thirty seconds to color.
Two patches, like an eye patch plus a chest spot, add a little more interest without much extra effort. Stay away from thin spots or speckles for now. Those work better with a fine pen, and crayon will just smudge them into mush.
Keep The Colors Bold And Separate
Contrast is what makes this idea pop. If your two colors are too close, like light gray and slightly darker gray, the patches disappear from across the room. Go for a clear jump.
Cream and chocolate. White and rust. Pale yellow and deep brown.
The eye reads the difference instantly, and the drawing looks intentional. Also let the colors stay separate. Don't blend them at the edges.
Sharp patch lines are part of the charm here, and they're much easier to control with a crayon or marker anyway.
Color In One Direction
Crayon looks best when you fill an area with steady, same-direction strokes. Back and forth is fine, but keep the strokes going the same way rather than scribbling in circles. Markers are more forgiving, but watch for streaks.
Work in small sections and overlap each pass slightly so the color stays even. Leave a little white space if you want a highlight, like a shine on the nose or a spot on the chest. It's a small touch that makes the flat color feel alive.
13. Draw Your Own Dog From a Photo
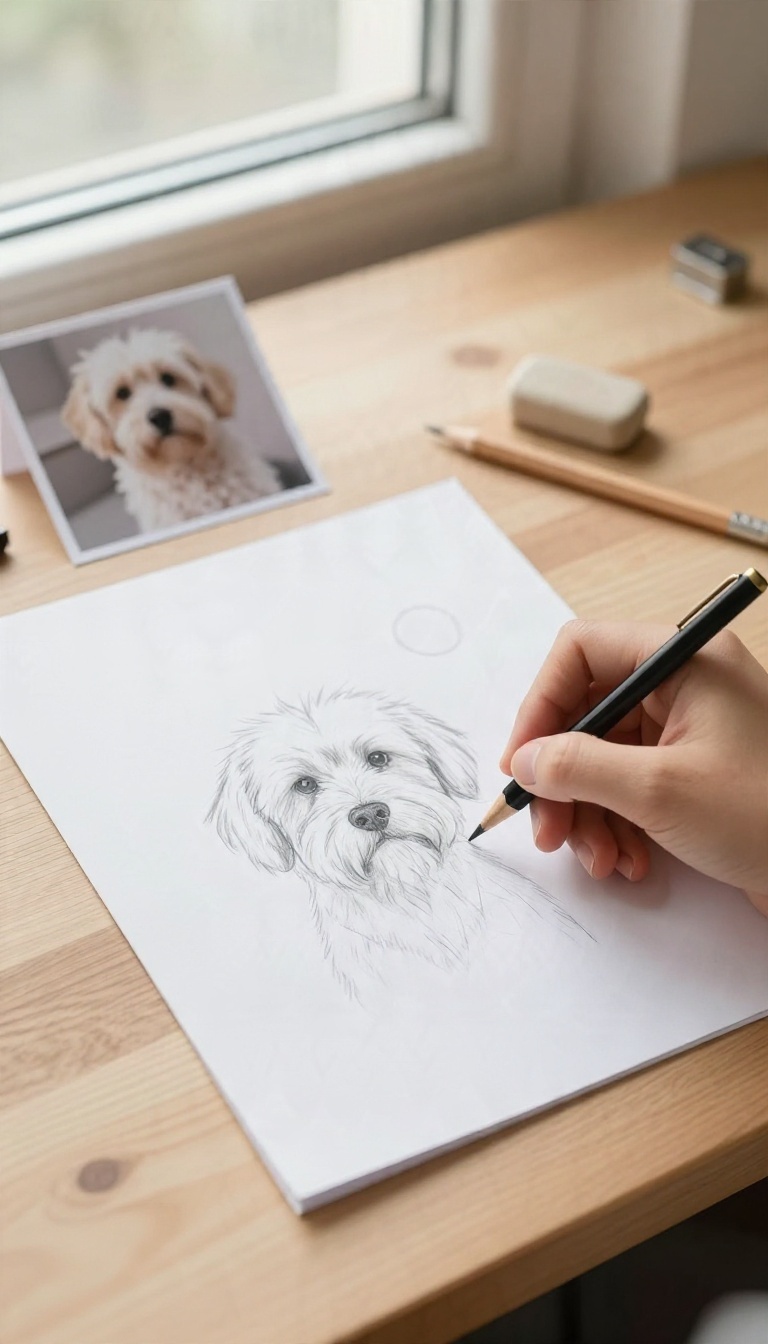
You've practiced shapes, fur, and expressions. Now it's time to bring it all together with a drawing of a dog you actually know. Grab a photo of your pet, a friend's pup, or even a shelter dog you follow online.
This final project turns a familiar face into a drawing you'll want to frame.
Working from a photo takes the guesswork out of proportions. You don't have to invent anything—just translate what you see into simple shapes. The result feels personal and satisfying, and it's a great way to see how far you've come.
Pick A Clear, Simple Photo
Choose a photo where your dog's head and shoulders are clearly visible. Avoid blurry shots or busy backgrounds. A straight-on angle with good lighting makes it easier to spot the basic shapes.
Break The Photo Into Shapes
Lightly sketch a circle for the head, an oval for the snout, and triangles for the ears. Don't worry about details yet—just block in the big forms. Compare your sketch to the photo and adjust the shapes until they match.
Add Details And Refine
Once the shapes look right, start adding eyes, nose, and fur texture. Use the photo as a guide for where shadows fall. Keep your lines loose and build up slowly.
Before you know it, you'll have a recognizable portrait of your furry friend.
FAQ
What supplies do I need to start drawing dogs?
A pencil, eraser, and plain paper cover almost every idea here. Crayons or markers are optional for the coloring projects, so you don't need to buy anything special.
Is this suitable for very young kids?
Yes. The stick-figure dog, paw print study, and continuous-line face work well for ages five and up with a little guidance. Older kids and adults can jump to the profile and photo-based ideas.
How long does each drawing take?
Most of these take five to fifteen minutes. The photo-based dog and the sweater pup may run closer to twenty minutes if you take your time.
What if my drawing doesn't look like a dog?
That's normal at first. Focus on getting the basic shapes in the right spots, and remember that cartoon styles are forgiving by design. Practice the same idea a few times and it clicks.
Can I use these ideas for a classroom or party activity?
Absolutely. The circle-and-oval pup and cartoon puppy are easy to teach in groups. Print a few reference steps and hand out pencils and paper.
Conclusion
Pick one drawing from this list that matches what you have on hand, whether that's a pencil stub, a marker, or a cheap sketchbook. Try it once, see where your lines get wobbly, and adjust from there. A simple shape you actually finish beats a fancy one you abandon halfway.
Once you've got one dog down, the rest come easier.
Swap in floppy ears, a different snout, or a new pose for the next attempt. Keep the drawings loose and have fun with it. That's the whole point.
I’m Pallab Kishore, the owner of Little Pets Realm — an animal lover and pet care enthusiast sharing easy tips, healthy recipes, and honest advice to help every small pet live a happy, healthy, tail-wagging life.