
Your dog shivers on every walk once the temperature drops, and you've got a hook, a few skeins, and a free afternoon. A crocheted sweater solves the problem faster than you'd think, and most of these patterns work up in a weekend.
The trick is picking one that matches your dog's shape and your actual skill level. Below are nine free patterns worth your time, from simple rectangles sewn into a tube to turtlenecks and leg openings that fit real dogs.
Each one comes with notes on sizing, yarn, and the spots where beginners usually get stuck.
1. The Basic Rectangle Sweater That Fits Almost Any Dog
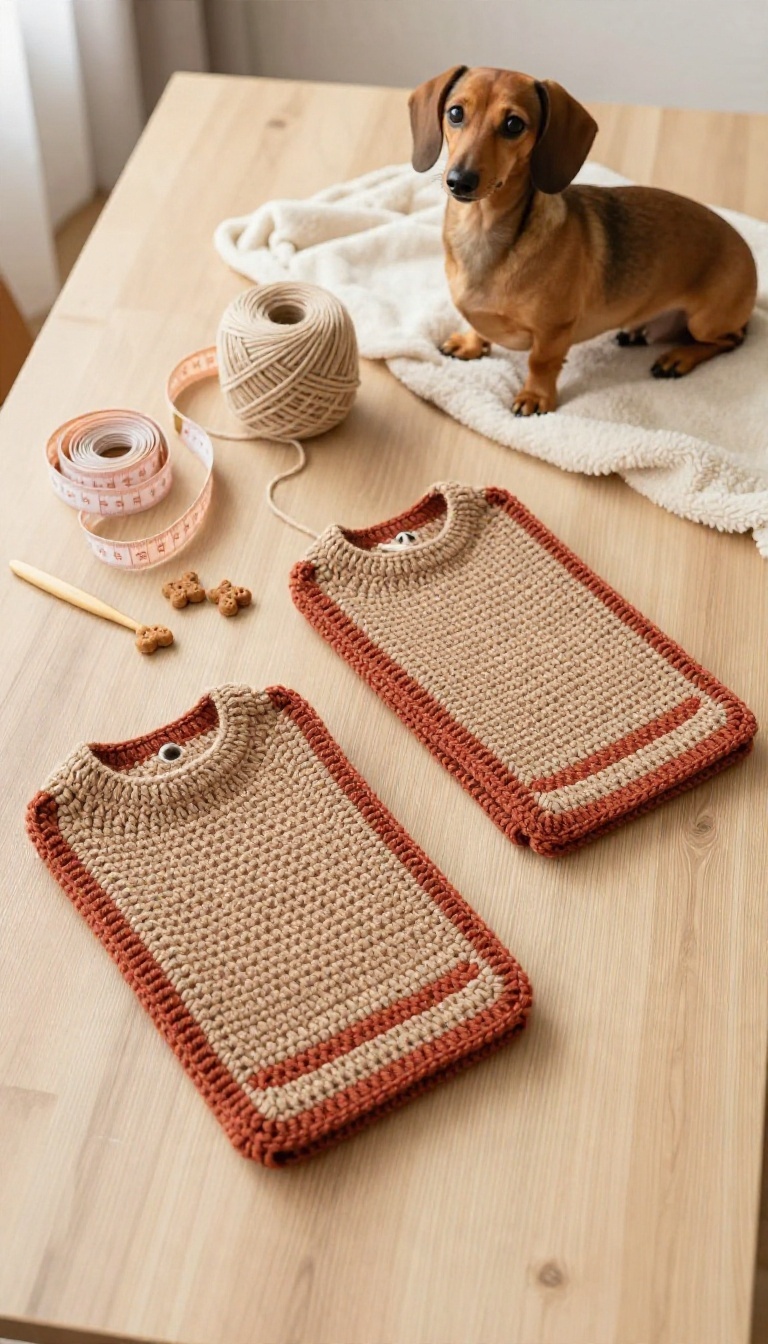
Two rectangles, a few seams, and you've got a sweater that actually stays on. This pattern works because it follows your dog's shape instead of fighting it. No shaping, no complicated stitch counts, just straight rows and a little measuring.
Start by grabbing a soft tape measure and your dog's favorite treats. You'll need two numbers: the length from the base of the neck to the tail, and the widest part of the chest right behind the front legs. Write them down, because guessing never works out.
The back panel is a rectangle as long as your dog's back and as wide as you want the sweater to cover. The chest panel is shorter and wraps under the belly. Join them at the sides, leaving openings for the front legs, and you're basically done.
It's the kind of project you can finish during a movie marathon.
How To Measure Without A Wrestling Match
Measure your dog while they're standing, not sitting or lying down. If they won't hold still, have a helper feed treats while you wrap the tape around the chest and along the spine. Round up to the nearest half inch so the sweater isn't tight.
For the chest, measure the widest point just behind the front legs. For the back, go from the collar line to where the tail starts. Jot both numbers down and keep them handy—you'll use them for every sweater you make.
Picking Yarn That Holds Up To Walks
Washable worsted weight yarn is your best bet here. It works up quickly, holds its shape, and survives the washing machine. Avoid anything too fuzzy or slippery, because it'll stretch out or pill after a few wears.
A single skein usually covers a small to medium dog. For bigger breeds, grab two and check your gauge before you start. You want the fabric to be dense enough to block wind but still flexible.
The Two-rectangle Assembly, Step By Step
Crochet the back rectangle first, then the chest rectangle. The chest piece should be about two-thirds the length of the back and wide enough to wrap under the belly. Lay them together with right sides facing and seam the sides from the bottom edge up to where the leg openings start.
Leave a gap on each side for the front legs—usually three to four inches for small dogs, more for larger ones. Try it on before you weave in ends. If it's snug, add a row or two; if it's loose, take one out.
Easy Tweaks For A Better Fit
Add a ribbed collar by working a few rows of single crochet in the back loop only. It gives a little stretch and keeps the neck from gaping. For boy dogs, make the belly panel slightly shorter so there's no accidental pee soaking.
If your dog has a deep chest, widen the chest rectangle by an inch. For slender breeds, narrow it. The pattern bends to your dog's shape, not the other way around.
2. A Chunky Turtleneck for Cold-Morning Walks
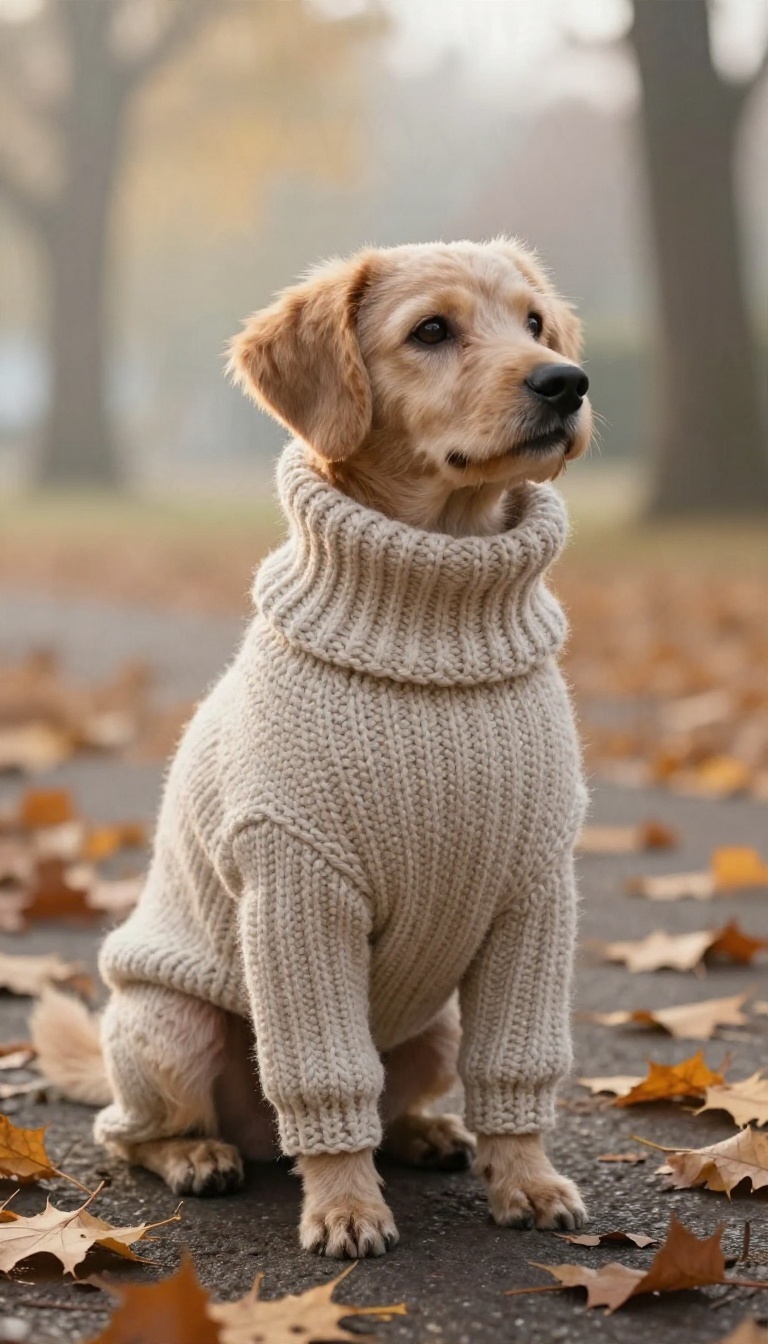
Short-haired dogs feel the cold fast, and a bulky turtleneck covers the two spots that matter most: the back and the neck. Bulky-weight yarn works up quickly, so you can finish this one in a couple of evenings. The tall ribbed collar is the star here, trapping warmth right where thin-coated breeds lose it.
This pattern suits confident beginners who can chain, single crochet, and work in the round. It's also forgiving, since chunky stitches hide small mistakes. Below are the details that make it fit well and stay comfortable.
The build is simple: a tube for the body with a collar worked straight up from the neckline. Because bulky yarn covers ground fast, you'll spend less time counting stitches and more time checking fit. Measure your dog's chest and neck before you start, then pick the size closest to those numbers.
Why Bulky Yarn Works Here
Bulky-weight yarn gives you warmth without bulk in the wrong places. It also means fewer stitches per inch, so the whole sweater moves along quickly. Choose a washable wool blend or acrylic that won't sag when wet.
Avoid anything scratchy, since the collar sits right against sensitive skin. A soft, machine-washable yarn keeps the sweater practical for muddy morning walks.
Building The Ribbed Collar
Work the collar in back-loop single crochet or a front-post/back-post rib to get that stretchy, folded-over look. Aim for a collar about three to four inches tall for small breeds and a bit more for larger dogs. Try the sweater on before you finish the collar.
You want it snug enough to block wind but loose enough to slip two fingers underneath. That gap is your comfort check.
Keeping The Neck Snug, Not Tight
A collar that's too loose lets cold air in; one that's too tight is a hazard. Always test fit around the neck, not just the chest. If the collar gapes, add a round of single crochet or a drawstring-style tie at the base.
If it digs in, frog a round or switch to a larger hook for the collar only. Never leave a sweater on an unsupervised dog, and check the neckline after every walk.
3. The Tiny Dog Sweater Sized for Chihuahuas and Yorkies
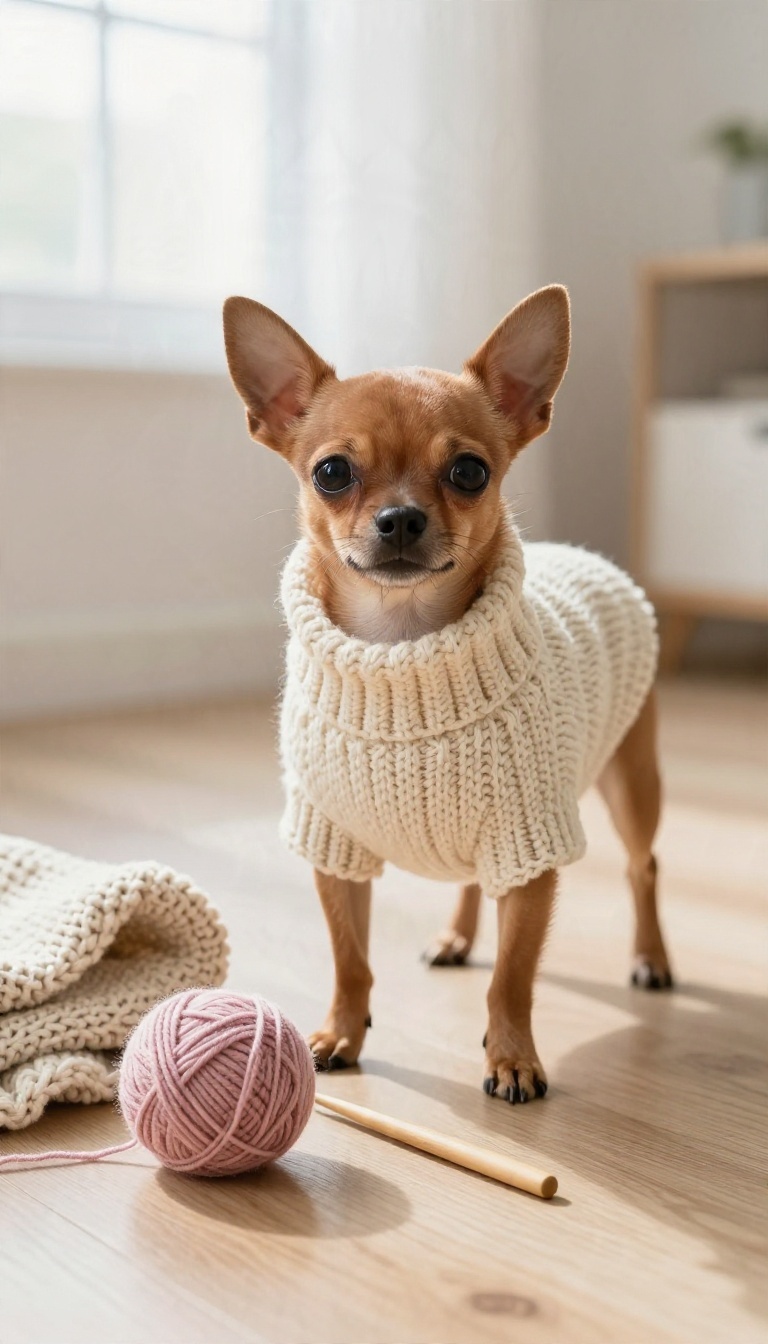
Tiny breeds get cold just as fast as big ones, but they come with a fitting problem all their own. A sweater built for a lab will hang off a Chihuahua like a curtain, and even patterns labeled "small" often run big. This pattern scales everything down: fewer stitches around the chest, a shorter body, and a snug fit that lets those little legs move freely.
The core idea is a simple back-and-chest piece joined into a tube, but every number shrinks. You'll cast on for a chest circumference of roughly 10 to 12 inches, then work a body that stops just past the ribcage. Short rows shape the neck so it sits close without choking, and the leg openings stay small enough that a Yorkie can't slip a paw out mid-walk.
The real work happens before you start, though. Tiny dogs have almost no room for error, so gauge matters more here than on any other sweater in this list.
Getting The Gauge Right
On a 10-inch chest, being off by half an inch per inch throws the whole fit. Swatch in the round if the pattern calls for it, because your flat gauge often runs looser. Aim for a fabric that holds its shape but still stretches over the head.
If your swatch comes out bigger than the pattern expects, drop a hook size before you touch the stitch counts.
Adjusting Stitch Counts
Most tiny-dog patterns give you a chest measurement and a stitch multiple, not a fixed count. Measure your dog right behind the front legs, add an inch for ease, and multiply by your stitch gauge. Round to the nearest multiple the pattern needs.
If the body feels long, stop a row or two early rather than ripping back the whole thing.
Keeping It Comfortable
Chihuahuas and Yorkies are wiggly, so a sweater that binds at the armpit gets ditched fast. Check the leg openings against your dog's actual legs, not the pattern photo. A soft, washable yarn in a light worsted weight keeps the fabric thin enough to move in.
Skip bulky trims and heavy buttons, and let the fit do the work.
4. A Seamless Top-Down Sweater With Leg Openings
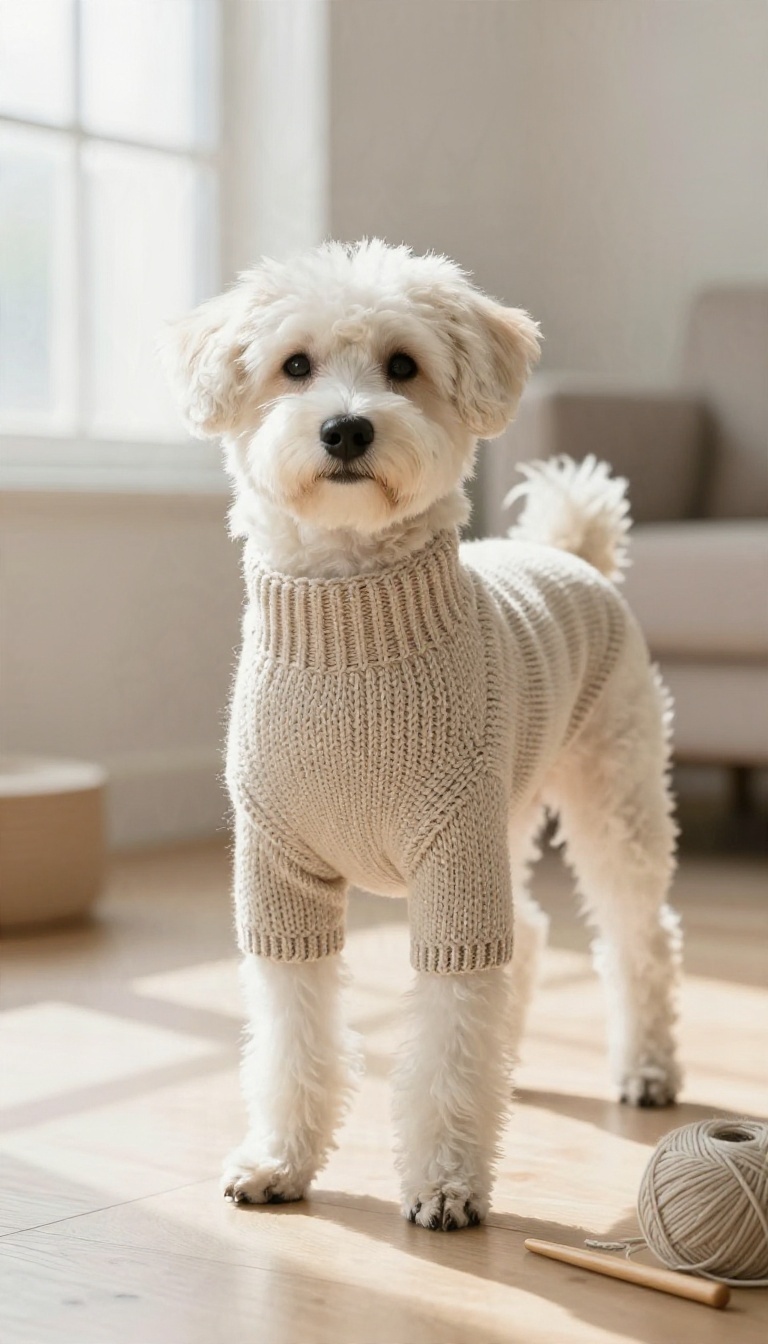
Seaming is the part of crochet most people quietly dread, and this pattern basically removes it from the equation. You start at the collar and work downward in one continuous piece, so the sweater grows into shape as you go. The front leg openings get built in along the way, which means your dog can walk, sniff, and squat without the sweater riding up or bunching under the chest.
Top-down construction is a favorite for a reason. You can try the sweater on your dog as you work, add or skip rows, and stop when the fit looks right instead of guessing at a flat measurement. That flexibility matters when every dog seems to have a slightly different chest-to-back ratio.
The leg openings are the real win here. Instead of a straight tube that traps the front legs, you chain a small gap on each side at the right row, then keep working around. The result is a sweater that moves with your dog rather than fighting them.
Starting At The Collar And Working Down
Begin with a foundation chain that fits loosely around your dog's neck, then join it into a ring. Work a few rounds of single or half double crochet for a soft collar band that won't dig in. From there, increase evenly over the first several rounds to open up toward the shoulders, checking the width against your dog's chest as you go.
Placing The Front Leg Openings
When the piece reaches the top of the front legs, you'll create the openings by chaining a few stitches and skipping the same number of stitches underneath on each side. This gives each leg a clean gap to pass through. Measure the distance between your dog's front legs before you commit, since a gap that's too wide lets cold air in and one that's too narrow rubs.
Finishing The Body And Edging
Keep working in rounds below the leg openings until the sweater reaches the length you want, usually stopping a few inches before the tail. Add a simple border of single crochet around the leg holes and the back edge to keep everything neat and stop the fabric from curling. Weave in your ends, and you're done with barely any seaming at all.
5. The Quick Bulky-Yarn Sweater You Can Finish in a Weekend
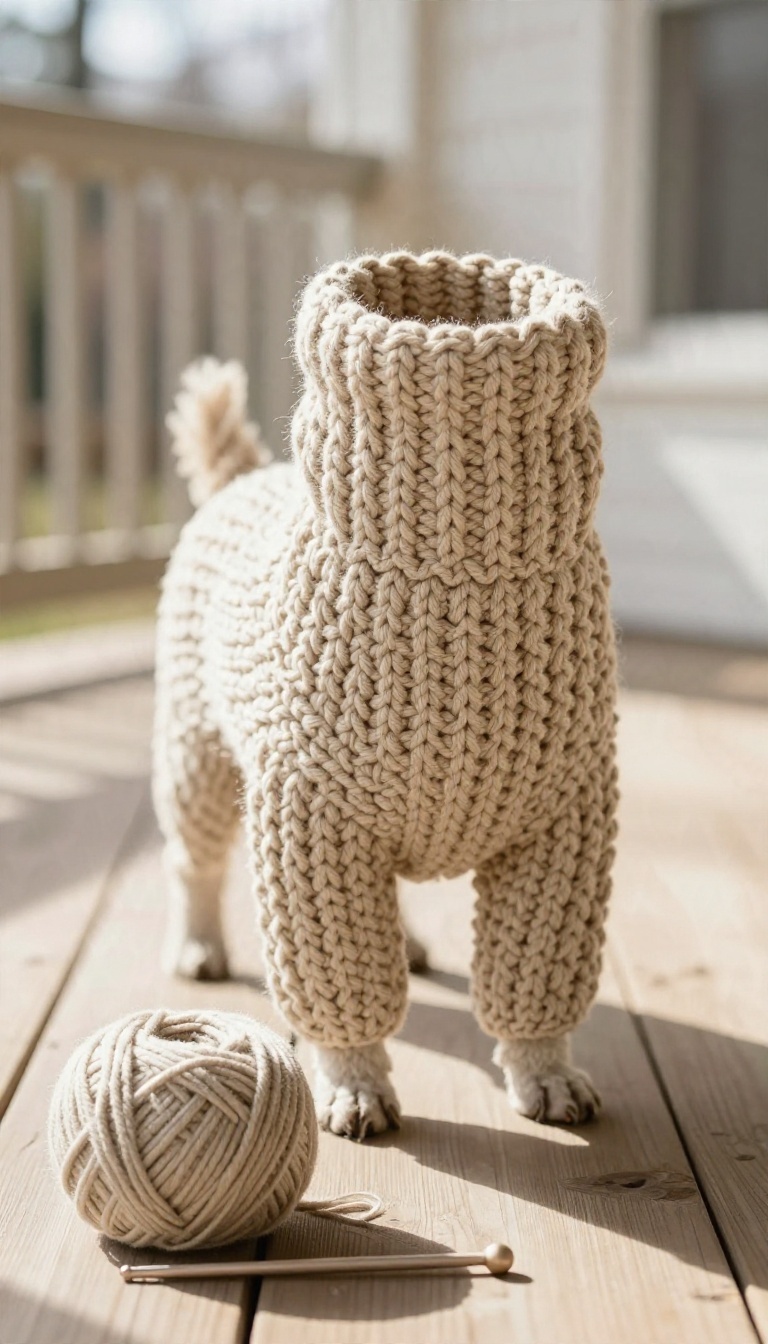
Cold snaps don't send warnings. One day it's mild, the next your dog is doing that full-body shiver on the front porch. This pattern exists for exactly that moment: thick yarn, basic stitches, and a shape simple enough to finish before Monday.
You're working with bulky or super bulky yarn and a big hook, so the fabric grows fast. Most of the sweater is double crochet or half double crochet in a rectangle, which means very little counting and almost no shaping to worry about. It won't win a fine-crochet contest, but it will keep your dog warm, and you'll have it done in a couple of evenings.
Bulky yarn is the whole reason this works as a weekend project. The stitches are big, the rows add up quickly, and you can measure progress with a glance instead of a row counter. If you've got a dog and a cold front coming, this is the pattern to reach for.
Hook Size And Yarn Notes
Grab a 9 mm to 10 mm hook (M/N or N/P) and check the yarn label for a suggested range. Bulky weights usually call for 8 mm and up, so you're right in the zone. A size up from the label recommendation gives you a looser, more forgiving fabric.
Yardage runs roughly 120 to 200 yards for a small dog and 250 to 350 for a medium one. One or two skeins of bulky usually covers it, so buy a little extra if you're between sizes. Super bulky eats yardage faster, so plan accordingly.
Why Thick Yarn Forgives Beginners
Small gauge hides a lot. When your stitches are chunky, a slightly tight or loose tension barely shows in the finished fabric. The gaps that would look sloppy in worsted weight just read as texture here.
It also means fewer stitches to keep track of, so a dropped stitch or a miscount is easy to spot and easy to fix. You're not fighting a hundred tiny stitches across a row, which takes a lot of the stress out of a first sweater.
The Basic Construction
Work a rectangle wide enough to wrap around your dog's chest with a little ease, then crochet it to the length you want from neck to tail. Seam the short ends to make a tube, leaving an opening for the front legs if your dog needs one. Add a simple ribbed collar in single crochet or half double crochet worked into the back loop, and you're basically done.
Try it on before you weave in ends so you can adjust the leg openings while the yarn is still easy to undo.
6. A Striped Scrap-Yarn Sweater for Using Up Leftovers
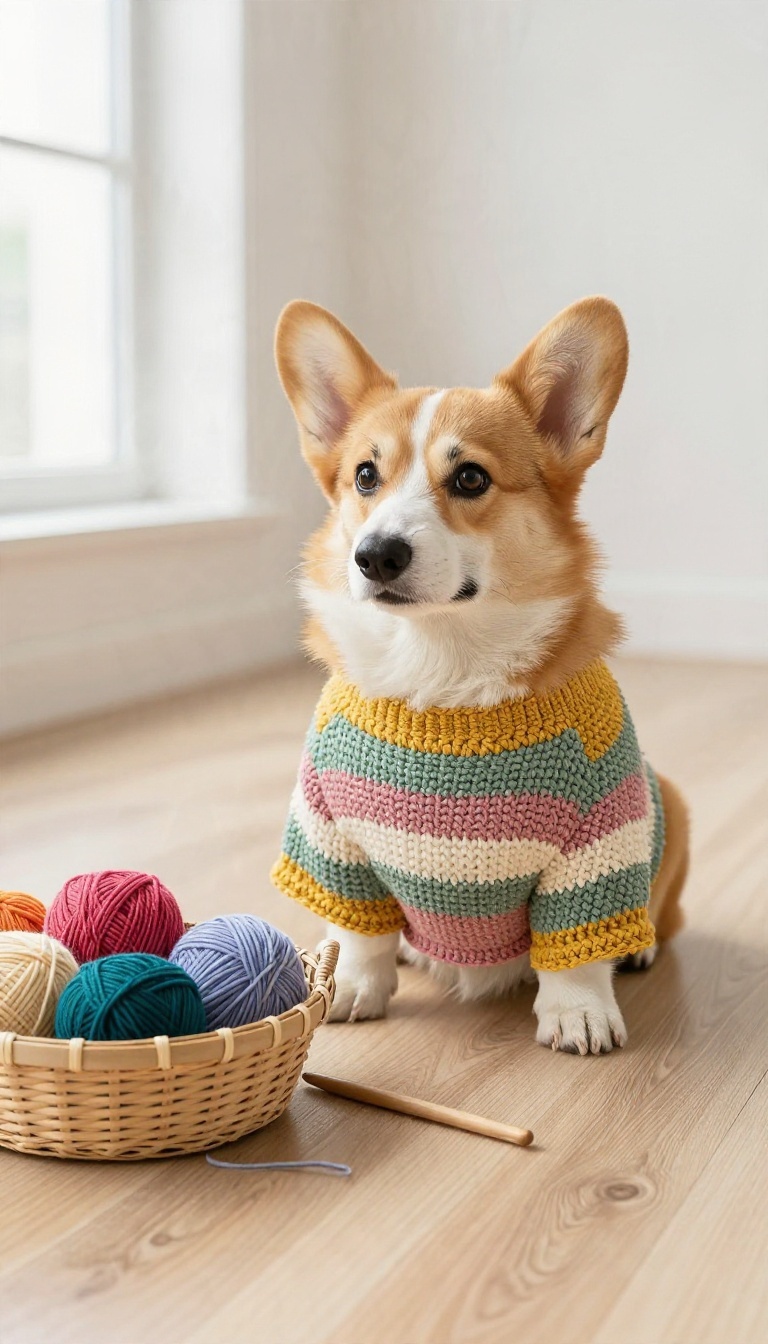
Every crocheter has a basket of leftover yarn—those half skeins and odd balls too small for a big project but too precious to toss. This striped scrap-yarn sweater turns that stash into a cozy dog sweater while keeping your budget happy. The pattern uses simple stripes, so you can mix colors without worrying about complicated colorwork.
Plus, it's a great way to experiment with different yarns while making something useful.
The sweater is worked in one piece from the neck down, with stripes added as you go. You'll need a variety of yarns in similar weights—DK or worsted works well—and a hook size that matches. The pattern includes instructions for sizes XS to L, so you can fit everything from a Chihuahua to a Corgi.
Because you're using scraps, the exact yardage will vary, but plan for about 200-400 yards total, depending on size.
Keeping Your Stripes Even
Uneven stripes can make a sweater look messy, but a few tricks keep things tidy. First, decide on a stripe height—two rounds or four rounds is common—and stick to it. Use a stitch marker to track the beginning of each round, and count your rounds carefully.
If you're changing colors frequently, carry the unused yarn up the inside of the work to avoid extra ends. And always check your gauge; if your stitches are taller or shorter than the pattern, your stripes will be too.
Matching Yarn Weights
Scrap yarns often come in different weights, which can throw off your gauge. Sort your scraps by weight and use similar ones together. If you have a mix, hold two strands of a lighter yarn together to match a heavier one.
Swatch a few rows to see how the yarns behave, and adjust your hook size if needed. The goal is a fabric that's consistent, so the sweater fits well and looks polished.
Managing All Those Ends
With many color changes, you'll have a lot of ends to weave in. To minimize them, use the Russian join or a felting needle to connect yarns as you go. Alternatively, crochet over the tails for a few stitches to secure them.
If you're using acrylic, you can knot and melt the ends with a lighter (carefully! ). A little extra time spent on finishing makes the sweater durable and neat.
Customizing The Fit
Since scrap yarn amounts vary, you might need to adjust the length or width. The pattern is easy to modify: add or remove rounds before the leg openings, or extend the body for a longer fit. Try the sweater on your dog as you go (or measure a favorite coat) to ensure the leg holes line up.
The stretchy fabric means it's forgiving, but a quick fit check saves frogging later.
7. The Cable-Detail Sweater for Crocheters Ready to Level Up
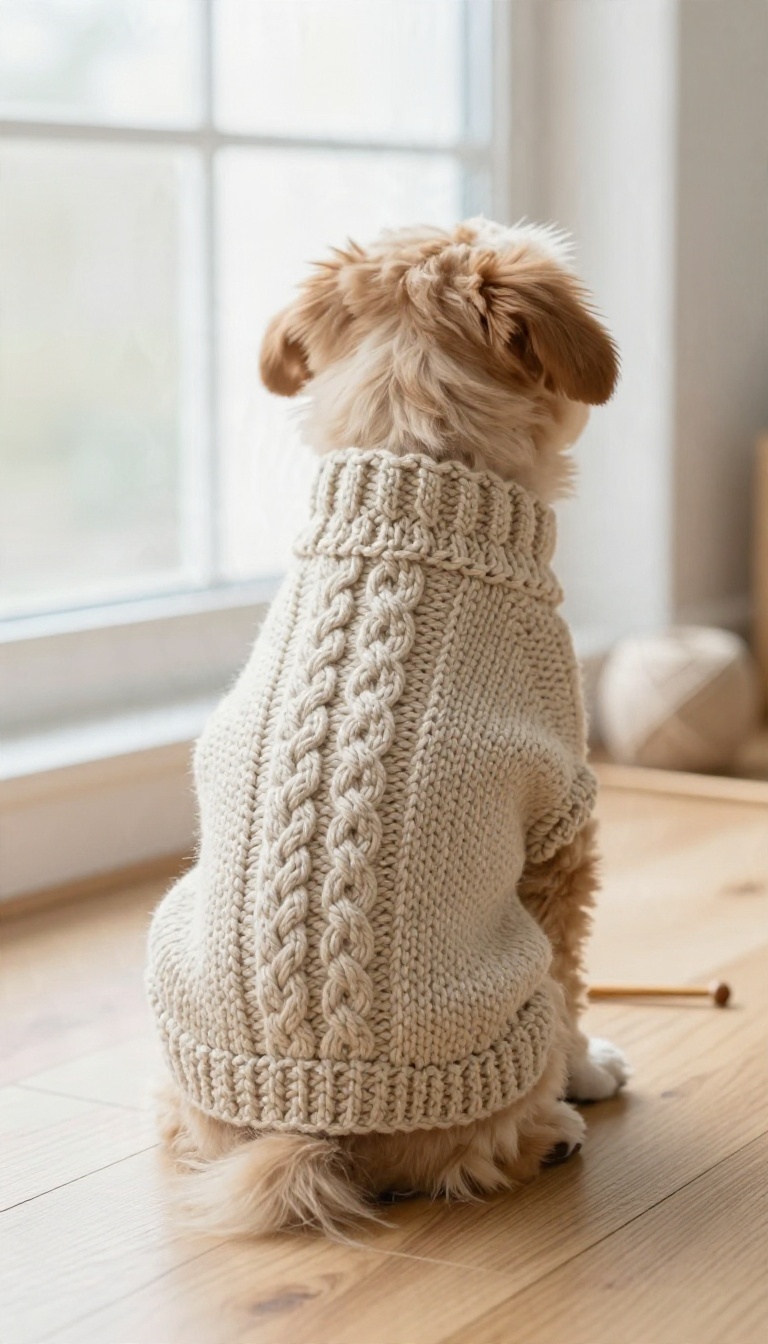
Plain stockinette gets the job done, but eventually you want a sweater that looks like you actually planned it. A faux-cable or post-stitch panel gives you that raised, braided texture without asking you to learn a whole new craft. This pattern keeps the body simple and saves the fancy stuff for one strip down the back, which is exactly where a dog sweater needs a little drama.
It's the right pick once you've made a basic tube sweater or two and you're bored of single crochet. The detail is forgiving, the repeats are short, and the finished piece reads as handmade in the best way. Your dog won't care about the cables, but everyone at the park will notice.
The trick with textured dog sweaters is restraint. A full body of post stitches gets heavy, stiff, and slow to work, and your dog will feel every bump of it. This pattern runs a single cable panel down the spine and leaves the sides and belly in plain half double crochet, so the sweater stays flexible where it needs to bend.
The panel itself is usually a set of front post double crochet stitches crossing over back post stitches, worked in a short repeat of four to six rows. You don't need a cable needle, and you don't need to hold live stitches aside. You just work around the posts of the row below, and the twist builds on itself.
Because the panel sits on the back, it also hides the spot where a dog sweater tends to look lumpy, right along the spine. That's a happy accident worth leaning into.
Reading The Post-stitch Repeat
Most faux-cable patterns read like this: front post double crochet into the next two stitches, then back post double crochet into the two after that, and repeat. The crossing happens when you swap the order on alternating rows. Work a practice swatch about six inches wide before you commit to the sweater.
You want to see the twist actually form and confirm your stitch count stays steady. Post stitches pull the fabric in, so a panel that starts at twelve stitches may finish narrower than you expect. Count your stitches at the end of every row.
If you're off by one, the cable will drift sideways and the whole panel looks crooked.
Placing The Panel On The Back
Mark the center of your back section before you start the panel. From there, count outward to find where the panel begins and ends, and place stitch markers on both edges. Keep the panel centered between the front leg openings, not running over them.
The chest and shoulders need to move freely, and a stiff cable right at the leg hole will rub. If your dog has a long back, extend the panel with extra repeats rather than making it wider. A narrow, long panel looks intentional; a wide one starts to look like armor.
Keeping The Fit Right
Post stitches make a denser fabric, so go up one hook size from what the pattern lists if your gauge swatch comes out tight. A stiff sweater is a sweater your dog refuses to wear. Try it on before you add the ribbed hem and neckline.
Those edgings are your chance to tighten up any looseness, and they're much easier to adjust than the body. Block the finished sweater lightly to open up the cable. A quick spritz and a flat dry does more for the texture than any amount of tugging while you work.
8. A Hooded Sweater for Dogs That Hate the Rain
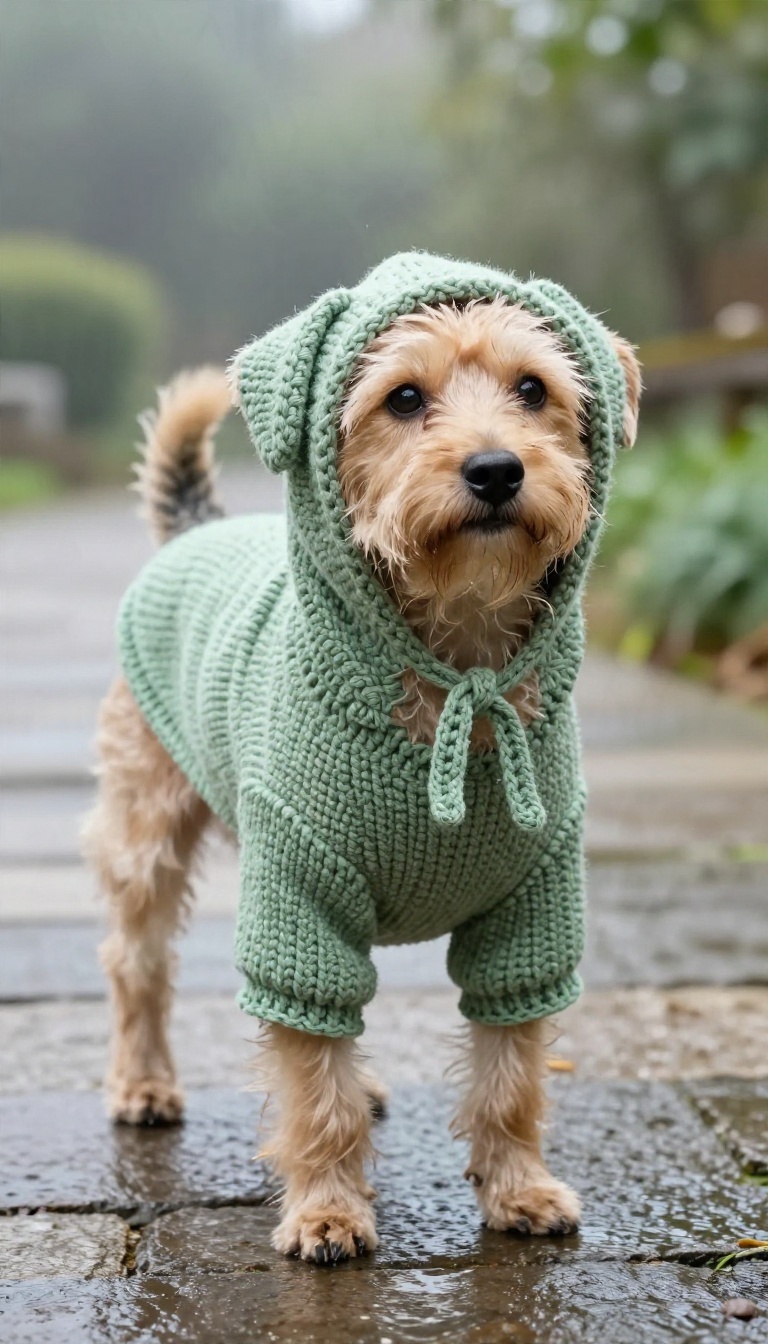
Some dogs will happily trot through a drizzle and others act like the sky is personally attacking them. A hooded sweater bridges the gap—it keeps the back and neck warm while giving your dog a little shield against wind and light rain. The catch is that most hoods flop over the eyes or slide off the second your dog shakes.
This pattern fixes that with a shaped hood and a simple tie, so it actually stays where you put it.
The design starts as a basic back panel worked in rows, then narrows at the neck before the hood grows upward from the collar edge. That continuous construction means fewer seams and a hood that sits at the right angle instead of drooping forward. You'll also want a yarn you can toss in the machine without a second thought.
Wet-weather walks mean mud, splashes, and the occasional roll in something questionable, so choose a smooth, washable worsted or a soft acrylic blend that holds its shape after a few cycles. A leash hole at the collar is the detail that makes this sweater genuinely usable. Without it, you're clipping the leash to a harness underneath and bunching everything up.
With it, the sweater stays put and your walk stays simple.
Getting The Hood To Stay Put
Work the hood in a slightly denser stitch than the body—single crochet or a tight half double—so it holds its shape rather than sagging. Shaping the opening with a few decreases around the face keeps it from swallowing your dog's head. A short crocheted tie or a length of matching cord threaded through the front edge gives you an adjustable fit.
Keep it loose enough to slip two fingers underneath, and skip it entirely for dogs who panic at anything around the neck.
Choosing A Washable Yarn
Look for labels that say machine washable and dryable, and avoid anything that felts or pills badly. Acrylic, cotton-acrylic blends, and superwash wool all handle regular washing without turning into a matted mess. Make a small swatch and run it through a full wash cycle before you commit to the whole sweater.
It takes twenty minutes and saves you from discovering shrinkage after the fact.
Adding The Leash Hole
Place the hole at the center back of the collar, right where a harness D-ring sits. Work a chain of three or four stitches, skip the same number below, and continue—that leaves a clean opening without weakening the edge. Reinforce the hole with a round of single crochet if your yarn is stretchy, since a loose opening will stretch out over time.
Test the fit with your actual leash clip before you weave in the ends.
9. The Adjustable Sweater With a Belly Band for Hard-to-Fit Dogs
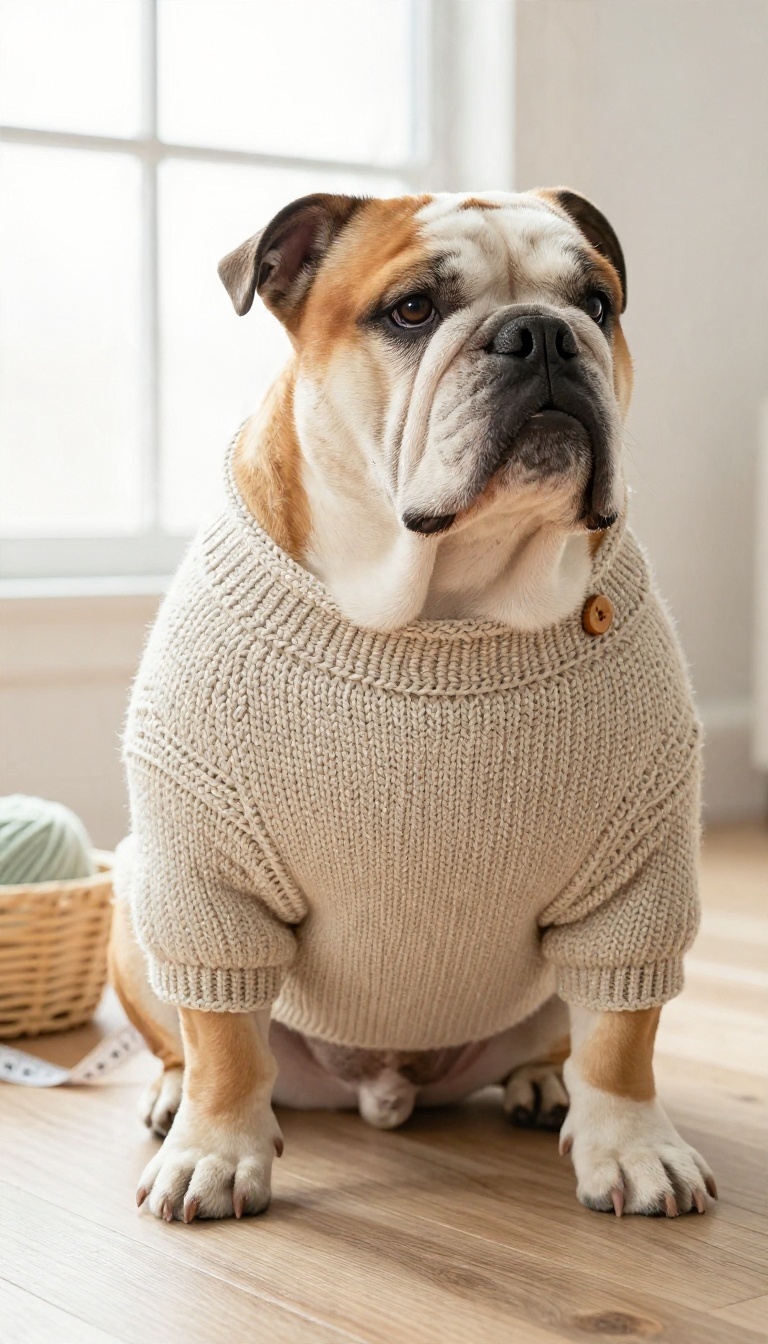
Some dogs just don't fit the standard size chart. A barrel-chested bulldog, a long-backed dachshund, a senior dog who's lost muscle in the hind end—these are the bodies that make you measure three times and still end up with a sweater that pulls at the shoulders or hangs loose underneath. This pattern solves that by building in room where it counts.
The chest is drafted wider than a typical tube, and a separate belly band wraps underneath and fastens with buttons or a tie, so you can snug it up or let it out depending on the dog. It's a free pattern, and the adjustable closure is the whole point. You get a custom fit without rewriting the whole thing from scratch.
The core of this design is a wider chest panel worked in one piece, then a belly strap that crosses under the ribcage and attaches at both sides. That strap is where all the forgiveness lives. You can tighten it for a slim dog or leave slack for a deep-chested one.
If your dog is between sizes, you don't have to guess—you just adjust the band. The pattern works in a simple stitch, so the shaping stays readable and you're not fighting a complex chart while you fuss with fit. Most crafters finish it in a few evenings.
Measuring For A Body That Won't Cooperate
Skip the size chart and grab a soft tape measure. You want three numbers: the widest part of the chest right behind the front legs, the length from the base of the neck to the tail, and the girth around the belly where the band will sit. Write those down and compare them to the pattern's finished measurements, not the dog breed labels.
If your dog falls between two sizes, size up on the chest and rely on the belly band to take in the slack. For barrel-chested dogs, add an inch or two to the chest width. It's easier to adjust a roomy sweater than to stretch a tight one.
Choosing Yarn That Moves With The Dog
A worsted-weight yarn with a little stretch works best here. Pure acrylic can feel stiff against the chest, and cotton has almost no give, which fights the adjustable design. Look for a wool blend or a soft acrylic-wool mix.
It holds shape, stretches enough for movement, and survives the wash. Stay away from anything scratchy or bulky. This sweater sits close to the skin, and a dog in an itchy sweater will spend the whole walk trying to wiggle out of it.
Making The Belly Band Actually Stay Put
The band is only as good as its closure. Buttons look nice but can pop off; a simple tie or a pair of sturdy hook-and-loop strips holds better on an active dog. Place the closure slightly off-center so it doesn't rub against the sternum.
Test the fit with the dog standing, sitting, and lying down before you sew anything permanent. If your dog is a chewer, keep the tie short so there's nothing dangling to grab. A snug, flat band sits best under a coat or harness.
FAQ
Do I need to know how to read a crochet pattern to use these?
Most of these patterns use basic stitches and standard abbreviations, so a quick refresher on terms like sc, hdc, and ch helps. Beginner-friendly ones include stitch counts and photos.
What yarn works best for a dog sweater?
Machine-washable acrylic or a cotton-acrylic blend holds up best. Avoid anything scratchy or loosely spun, since dogs will rub against furniture and roll around in it.
How do I measure my dog for a sweater?
Measure the back length from the base of the neck to the tail, and the chest girth right behind the front legs. Those two numbers matter more than breed or weight.
Can I make a dog sweater without a pattern?
Yes, if you can crochet a rectangle and seam it. Measure the back and chest, work a panel to fit, and join the sides, leaving openings for the front legs.
How long does a crochet dog sweater usually take?
A small dog sweater in worsted weight often takes four to eight hours. Bulky yarn and simple stitches cut that down, while cables and tiny hooks add time.
Conclusion
Nine patterns give you plenty of room to match the sweater to your dog's size, coat, and patience level. Start with the simplest shape that fits your pup, then work your way toward the ones with cables or colorwork once you've got the basics down. A quick gauge swatch and a soft, washable yarn go a long way toward a sweater your dog will actually wear.
Measure twice, crochet once, and don't sweat the small stuff. Your dog won't judge the stitches, and a warm, comfy fit is the whole win.