
A handmade portrait of your dog beats almost any store-bought gift, because it turns a favorite photo into something people actually hang on the wall. The good news is that most of these projects need basic supplies and a free afternoon, not an art degree.
Some ideas suit a steady hand and a paintbrush, while others lean on a printer, a camera, or a ball of clay. You can go bold with pop art color or quiet with a single line.
Either way, the finished piece feels personal in a way a generic frame never does. Below are eleven dog art ideas worth making for your own home or gifting to a fellow dog person.
1. Painted Pop Art Portrait From a Photo

Pop art takes your dog's best features and turns them up a notch. Think bright blocks of color, thick outlines, and a look that feels like it belongs in a gallery. This project starts with a clear photo and a simple grid, so you don't need to be a painter to pull it off.
The result is a bold canvas that makes people smile the second they see it.
The trick to a good pop art portrait is picking the right photo and keeping your paint layers clean. You'll use a grid to transfer the outline, then fill in with a limited palette. It's part tracing, part coloring, and totally doable in an afternoon.
Pick A Photo That Translates Well
Not every cute photo makes a good pop art subject. Look for a shot with clear lighting and strong contrast between your dog's features and the background. A close-up of the face works best because the eyes and nose become the focal points.
Avoid blurry action shots or photos with busy backgrounds that compete for attention.
Set Up Your Grid And Outline
Print your photo and draw a grid over it—half-inch squares work well for a small canvas. Then draw the same grid, scaled up, on your canvas. Copy the outline square by square, focusing on the major shapes: head, ears, eyes, nose, and mouth.
Keep your lines light so they don't show through the paint.
Choose A Limited Color Palette
Pop art thrives on bold, unnatural colors. Pick three or four shades that contrast with each other—like hot pink, turquoise, and yellow—plus black for outlines. Use one color for the background, another for the main fur areas, and accents for details.
Limiting your palette keeps the piece cohesive and makes it pop.
Paint In Layers For Clean Results
Start with the background and let it dry completely before moving on. Then fill in the largest areas of color, working from light to dark. Use a small brush for the outlines and details, and keep a steady hand.
If you make a mistake, wait for the paint to dry before touching it up—wet paint smears easily.
2. Paw-Print Canvas With a Hidden Message

A paw print on canvas is one of those projects that looks store-bought but costs almost nothing. The trick is getting a clean print the first time, then layering a small secret into the design that only the recipient knows about. It works for a wall hanging, a card, or a framed keepsake.
The basic build is simple: press a clean paw onto canvas or heavy cardstock, let it dry, then design around it. You can paint a soft background wash, add your dog's name in script, or leave lots of white space so the print stands on its own. The hidden message is where it gets fun.
Tuck a date, a short phrase, or a tiny heart into the paint so it blends in until someone looks closely.
Pick A Pet-safe Paint
Skip anything labeled for outdoor use or with strong fumes. Water-based acrylics and washable tempera are the safe bets, and both clean off fur with a warm damp cloth. Test a dot on a less obvious spot first, like the back of a paw, and watch for any irritation before you commit.
Keep the paint thin so it dries fast and doesn't clump in the fur.
Get A Clean Print First Try
Work on a hard floor or a table with a towel down, and have a damp cloth and a dry one within reach. Load the paw lightly, press it straight down onto the canvas, and hold for a second or two without sliding. Lift straight up.
If it smears, don't panic, because a second canvas is cheap and the first attempt usually teaches you the right pressure.
Hide The Message In The Design
Paint a light wash over the print and write your secret in a slightly darker shade of the same color, so it reads as texture until you're close. A date under a paw pad or initials tucked into a corner both work. Keep the lettering small and the contrast low.
The reveal is better when it takes a second glance.
Frame It Like A Gift
Let the canvas dry a full day before it goes near a frame. A simple thin frame in black or natural wood keeps the focus on the print. Add a small card explaining the hidden message so the recipient knows to look for it, then wrap it in plain paper with a ribbon.
3. Custom Dog Silhouette Cutout
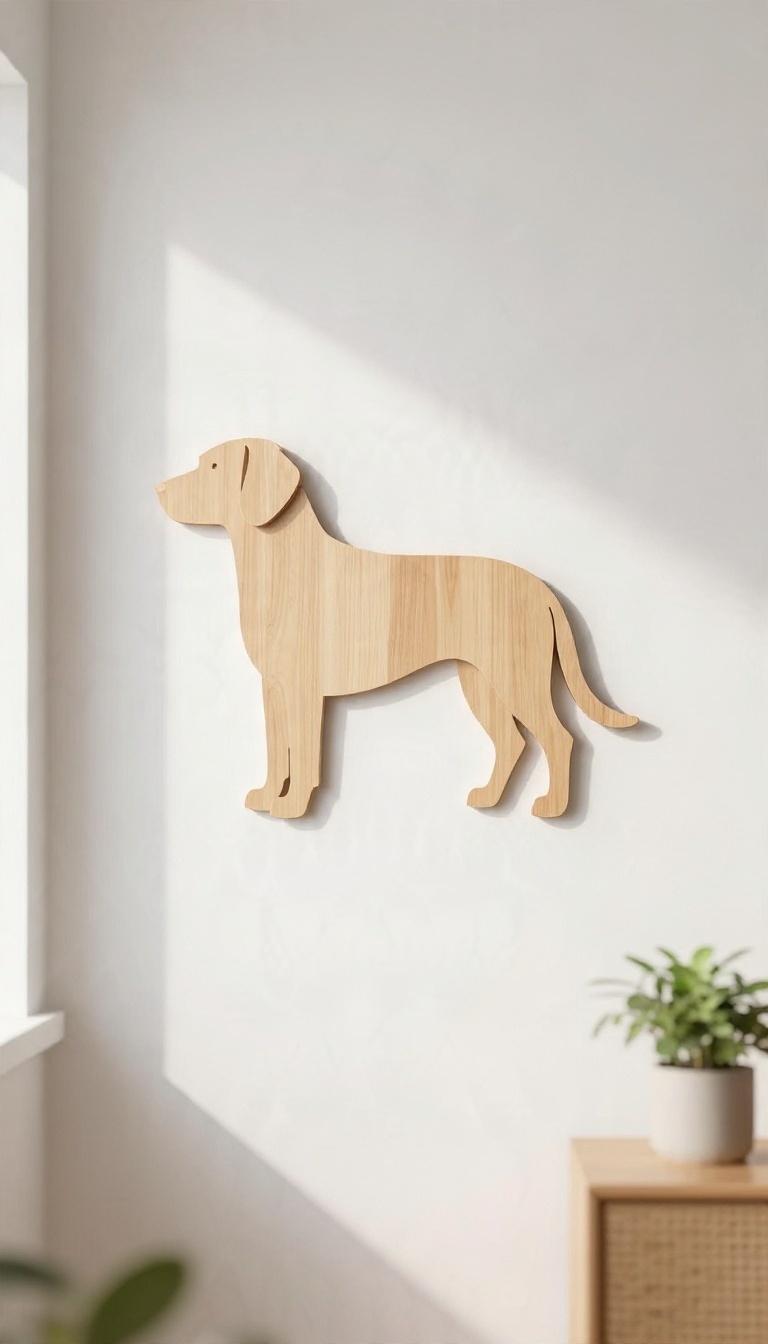
A silhouette strips your dog down to the outline that makes them recognizable from across the room. The floppy ear, the proud chest, the tail that curls just so. You trace that profile from a side-view photo, cut it out, and end up with a clean, modern piece that fits almost any wall.
The best part is how little it takes. Wood, acrylic, or even heavy cardstock all work, and the whole project fits into an afternoon. No painting skills required, just a steady hand and a photo where your dog is actually standing still.
Silhouettes work because they lean on shape instead of detail. You don't need to capture fur texture or eye color, just the outline that makes your dog instantly recognizable. That's why this one holds up in a living room, a hallway, or a gift box without feeling like a craft project.
It's also forgiving. A slightly wobbly cut barely registers once the piece is up on the wall, and the finished look reads as intentional and modern either way.
Start With The Right Photo
You want a true side view, ideally with your dog standing or sitting against a plain background. A photo taken at eye level gives you the most accurate profile. Avoid angles where the head turns toward the camera, since that flattens the snout and muddies the shape.
If your dog won't hold still, take a burst of shots and pick the cleanest one later. A slightly blurry photo still traces fine as long as the outline is clear.
Trace And Cut
Print the photo at the size you want the finished piece, then trace the outline onto your material. A light table or a bright window makes this easier. For wood or acrylic, a scroll saw or jigsaw handles the curves, while heavy cardstock works with sharp scissors or a craft knife.
Go slow around the ears and tail, where the shape gets delicate. Sand the edges of wood or acrylic afterward so the profile looks smooth and finished.
Finish And Hang It
Leave wood natural for a warm, Scandinavian feel, or paint it matte black for a bold contrast against a light wall. Acrylic gives you a glossy, contemporary look and needs no sealing at all. Mount the cutout on a plain backing board or float it slightly off the wall with small spacers.
Either way, keep the surrounding space simple so the silhouette does the talking.
4. Photo Tile Coasters and Trivets
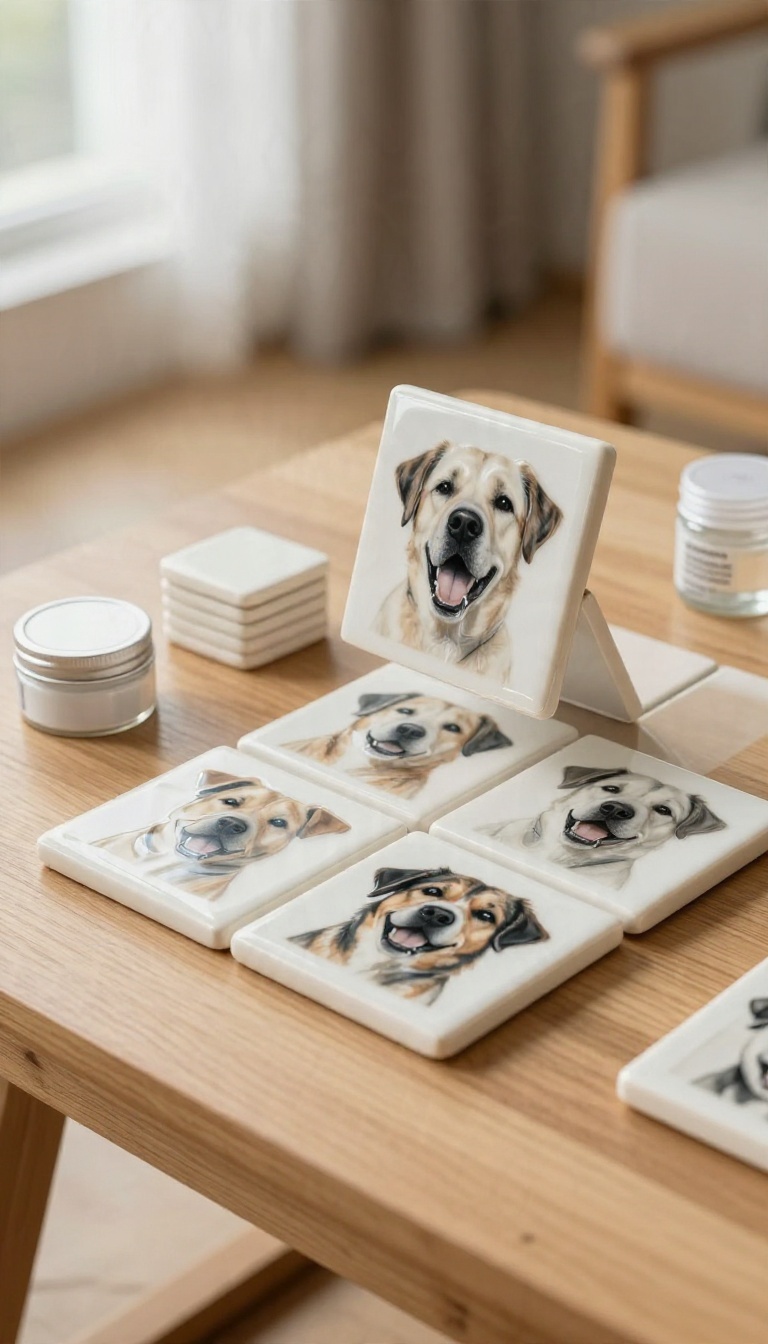
A set of tile coasters with your dog's face on them solves two problems at once: it protects the coffee table and gives you a small daily dose of that goofy grin. The same method scales up to a trivet for the kitchen counter, so one afternoon of work can cover a whole gift set. The trick is picking photos that survive heat and moisture, then sealing them so they don't peel or fade after a month of use.
You don't need fancy equipment here. A plain ceramic or stone tile, a printed photo, and a good sealer do most of the work. The difference between a coaster that lasts years and one that curls at the edges comes down to prep and sealing, so slow down on those steps.
Gather your tiles from a hardware store, print your photos on the right paper, and seal everything in thin coats. That's the whole recipe. The details below cover the parts people usually get wrong.
Choosing Photos That Hold Up
High-contrast photos with a clear subject work best. A dark dog against a light background stays readable under a sealer, while a busy photo of your pup in tall grass turns into mush at coaster size. Skip anything with heavy shadows or motion blur.
Heat and moisture also punish low-quality prints, so use the sharpest original file you have rather than a screenshot or a compressed social media download. A close-up of the face beats a full-body shot every time.
Sizing And Printing
Standard tiles run about 4 by 4 inches, so size your photo to roughly 3. 5 inches square to leave a clean border. A 6-inch tile makes a good trivet and gives you room for a wider crop.
Print on laser or inkjet photo paper, then let the ink dry completely before touching it. If you want a matte finish, choose matte paper; glossy prints can look plasticky once sealed. Trim with a sharp blade and a ruler so the edges stay straight.
Sealing For Heat And Moisture
Seal the tile first with a thin coat of Mod Podge or a similar decoupage medium, then press the photo down and smooth out bubbles with a credit card. Let it dry fully, then add three or four thin coats over the top, drying between each one. Finish with a waterproof spray or a brush-on polyurethane, and add felt pads or cork to the bottom so the tile doesn't scratch furniture.
For trivets, use a heat-resistant sealer and avoid setting anything straight from the oven on it. Hand wash only, and never soak them.
5. Line-Art Portrait in One Continuous Stroke
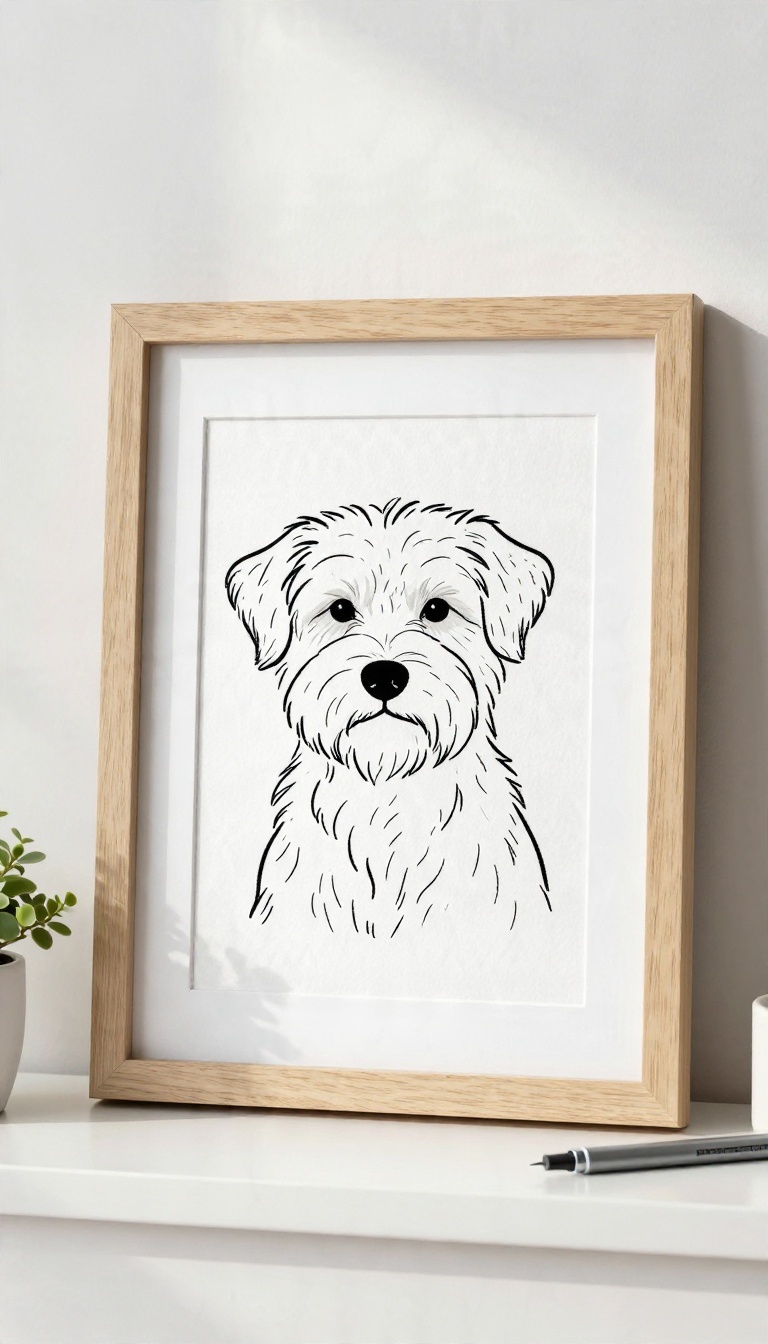
One unbroken line can capture more of your dog's character than a fully shaded portrait, and it looks like it belongs in a gallery. The trick is that single-stroke drawings read as intentional even when your hand wobbles a little. That looseness is part of the charm, so you don't need to be a confident illustrator to pull this off.
Start with a clear photo of your dog in profile or a three-quarter view, then simplify what you see into one flowing path. The goal isn't anatomical accuracy. It's the gesture: the slope of the snout, the curve of an ear, the lift of a tail.
Trace The Shape, Then Loosen It
Print your photo at the size you want the final piece, then tape it to a bright window with your drawing paper over it. Lightly trace the main outline with a pencil, following the edge of the head, ears, and muzzle in one go. Lift your pencil as little as possible, but don't panic if you have to restart a line.
Once the pencil guide feels right, go over it with a fine-tip pen in one steady, unhurried stroke. A slight overlap or a wobbly curve reads as style, not error.
Pick A Pen That Holds Up
Fine-liner pens in the 0. 3 to 0. 5 mm range give you a clean, consistent line without bleeding.
Test yours on scrap paper first so you know how fast the ink flows before you commit to the real thing. If you want a warmer look, try a black brush pen for a line that thickens and thins as you press. Either way, let the ink dry fully before you erase any pencil marks underneath.
Frame It With Room To Breathe
A single line needs empty space around it to feel deliberate. Choose a frame with a wide mat, at least two inches of border on each side, so the drawing floats instead of feeling cramped. A thin black or natural wood frame keeps the focus on the line.
Skip heavy ornate styles here. The quieter the frame, the more the drawing looks like a considered piece of art rather than a quick sketch.
6. Embroidered Hoop Portrait

Embroidery turns a simple photo into a textured, tactile keepsake that feels like a hug every time you see it. You don't need to be a master stitcher—just a few basic stitches and a little patience can produce a charming dog face or paw motif. The hoop itself becomes the frame, giving it a rustic, handmade vibe that fits almost any decor.
The key is to start with a clear, high-contrast photo of your dog. Print it at the same size as your hoop, then use a light source (like a window or a tablet) to trace the main outlines onto your fabric with a water-soluble pen or a heat-erasable pencil. Keep it simple: focus on the eyes, nose, and ears—those are the features that make your dog recognizable.
Beginner-friendly Stitches To Try
Backstitch is your best friend for outlines—it's sturdy and easy to control. Use satin stitch to fill in the nose or eyes for a smooth, solid look, and French knots for small details like freckles or paw pads. If you're feeling adventurous, a few lazy daisy stitches can add a playful touch around the border.
Transferring A Photo Onto Fabric
Tape your printed photo to a bright window, then tape your fabric over it. Trace the main lines with a water-soluble pen—no special equipment needed. For darker fabrics, use a white dressmaker's pencil or a heat-erasable pen that disappears with an iron.
Always test on a scrap first to avoid surprises.
Finishing And Framing The Hoop
Once your stitching is done, trim the excess fabric to about an inch beyond the hoop. Run a gathering stitch around the edge and pull it tight to the back, then secure with a few stitches. You can glue a felt circle over the back for a clean finish.
Hang it as-is or add a ribbon for a gift-ready touch.
7. Dog-Themed Gallery Wall Set

A gallery wall lets you turn a handful of small dog art pieces into one big statement. Instead of committing to a single large portrait, you collect photos, prints, and maybe a painted piece, then arrange them so they read as a set. It’s a flexible project that works with budget prints, favorite snapshots, and a little DIY painting.
The trick is to plan the layout before you hammer any nails. Start by gathering all the pieces you want to include—photos, prints, and your painted element—and cut paper templates to match each frame’s size. Tape the templates to the wall and move them around until the arrangement feels balanced.
This step saves you from a wall full of extra holes and lets you test different configurations without commitment. Once you’re happy with the layout, pick frames that tie everything together. Matching frames in one color create a clean, cohesive look, while mixed frames work if they share a similar style or finish.
Keep the spacing consistent—about two to three inches between frames—so the group feels intentional. And don’t forget to mix in a painted piece for a personal touch that stands out from the photos.
Plan The Layout First
Cut paper templates for each frame and tape them to the wall. Move them around until the arrangement feels right—this is your chance to experiment without making holes. Aim for a balanced mix of sizes and shapes, and keep the spacing even.
Mix Your Mediums
Combine photos, prints, and a painted piece to add texture and interest. A painted dog portrait or a simple silhouette can break up the uniformity of photos. Just make sure the colors and styles don’t clash—stick to a loose theme or palette.
Pick Frames That Tie It Together
Choose frames that share a common element, like the same color or material. Matching frames in black or white keep the focus on the art, while mixed frames can work if they’re all wood or all metal. Consistency in framing makes the whole set look curated.
8. Clay Paw-Imprint Ornament or Dish

A paw print pressed into clay turns a fleeting moment into a permanent keepsake. It's a simple project that works for ornaments, trinket dishes, or paperweights, and it doesn't require any special skills. The result is a textured, handmade piece that feels personal and looks great on a shelf or tree.
Start with air-dry clay, which is easy to work with and doesn't need a kiln. Roll it out to an even thickness, then press your dog's paw firmly but gently. Clean the edges, let it dry, and finish with paint or sealant for a gift-ready look.
Choosing The Right Clay
Air-dry clay is the most beginner-friendly option. It's forgiving, doesn't require baking, and holds detail well. Look for a fine-grained clay that won't crack as it dries.
If you want a smoother finish, consider polymer clay, but note that it needs to be baked. For a more rustic look, natural air-dry clay works beautifully.
Getting A Clean Paw Impression
Press your dog's paw into the clay with steady, even pressure. Aim for a depth of about 1/4 inch to capture the pads and claws clearly. If your dog is squirmy, try when they're relaxed or after a walk.
Clean the paw with a damp cloth afterward, and use a toothpick to remove any clay stuck in the fur.
Drying And Finishing Touches
Air-dry clay typically takes 24 to 48 hours to dry completely, depending on thickness. Flip it halfway through to ensure even drying. Once dry, sand any rough edges with fine sandpaper.
Paint the imprint with acrylics to make it pop, or leave it natural for a minimalist look. Seal with a matte or glossy varnish to protect it.
9. Custom Pet Portrait Mug Wrap
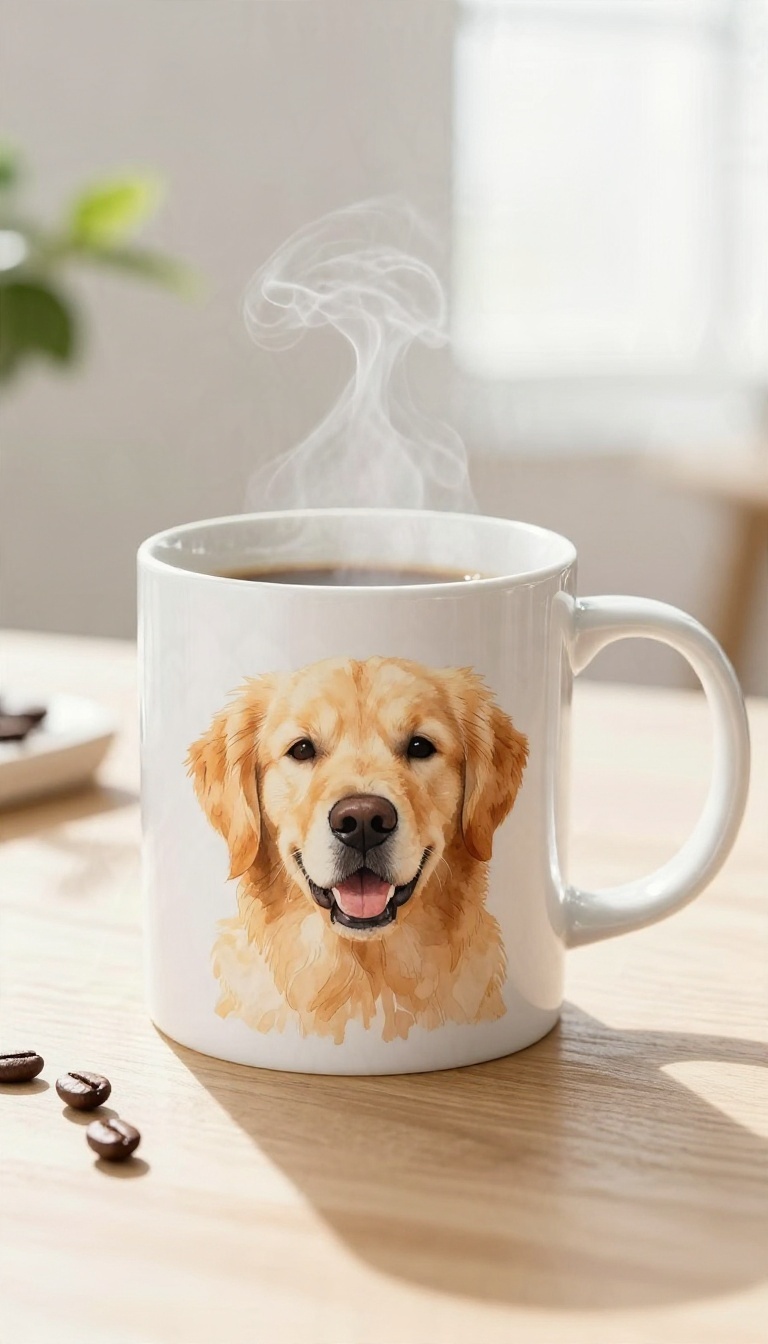
A mug that shows off your dog's face every morning is a small joy that adds up. You can design a wrap-around illustration or photo collage and apply it with printable transfer paper. It's a practical gift that gets used daily, and it's easier than it sounds once you know a few tricks.
The process is straightforward: pick a photo or draw a simple line portrait, size it to wrap around the mug, print it onto transfer paper, and apply it with heat. The result is a personalized mug that feels custom-made. Below are the key details to get right so your mug looks good and holds up.
Sizing The Image For A Seamless Wrap
Measure your mug's circumference and height before you design anything. A standard 11 oz mug is about 8. 5 inches around and 3.
5 inches tall, so your image should be slightly smaller to leave a small gap at the handle. For a photo collage, crop the images to fit that rectangle, and for an illustration, make sure the edges blend or repeat so the wrap looks intentional. Test print on plain paper first to check the scale before using transfer paper.
Choosing A Mug That Takes Transfer Well
Not all mugs are equal when it comes to transfers. Look for a smooth, glossy ceramic mug with a straight-sided shape; textured or matte finishes can make the transfer bubble or peel. Avoid mugs with a colored interior or rim if you want the design to be the focus.
Also, check that the mug is oven-safe or heat-resistant if your transfer paper requires baking.
Making It Dishwasher Durable
Transfer paper prints can fade or scratch if you just stick them on. To make your mug dishwasher-safe, use a transfer paper specifically designed for ceramics and follow the heat-setting instructions carefully. Many require baking the mug in the oven for a set time to cure the ink.
Hand washing will always extend the life of the design, but a properly cured transfer can survive the dishwasher for many cycles.
10. Pressed-Flower and Dog Photo Shadow Box
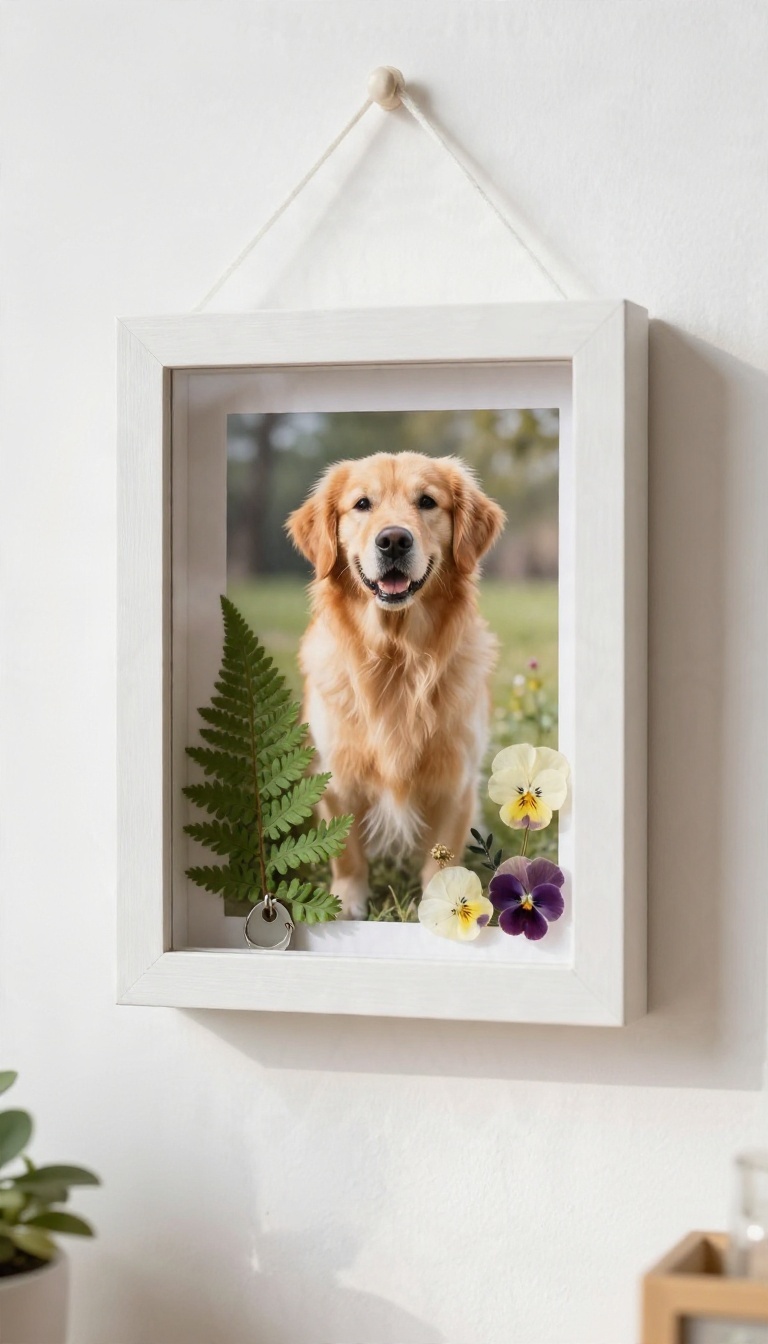
A shadow box gives you room to build a little scene instead of a flat frame. You print a favorite dog photo, tuck pressed flowers or a collar tag beside it, and the whole thing gains depth and shadow. It reads like a memory box you can hang on the wall, and it works just as well as a gift for someone who just said goodbye to a dog.
The trick is planning the layers before anything gets glued down. Once you know how deep your box is, you can decide what sits in front, what floats in the middle, and what rests against the back. A little measuring up front saves you from a cramped, squished arrangement later.
Pressed flowers bring softness and color that a photo alone can't match. Pair them with a clean print of your dog and a small tag or charm, and you get a piece that feels collected rather than decorated.
Match The Layers To The Box Depth
Measure the inside depth of your shadow box first. A shallow box around an inch deep suits a photo, a thin mat, and a flat pressed flower or two. Deeper boxes of two to three inches let you float the photo forward and leave real air behind it.
Lay every piece on the table in the order you want them to sit. Stack them loosely and check the total thickness against your measurement. If the glass won't close, trim a layer rather than forcing it.
Press And Prep The Flowers
Pick flowers that press flat and hold their color, like pansies, cosmos, or small fern fronds. Tuck them inside a heavy book between sheets of parchment paper for a week or two. Thin petals dry faster, so check after a few days.
Handle pressed flowers with tweezers once they're dry, since they tear easily. Seal them lightly with a coat of clear craft glue on the back if you want extra protection from fading.
Mount Everything So Nothing Shifts
Print your dog photo on matte paper and glue it to a stiff backing board so it stays flat. Use acid-free adhesive and smooth it down from the center out to avoid bubbles. For floating pieces, attach them to thin foam core or clear mounting strips, then glue that to the back panel.
Add a small dab of glue behind each flower and press it gently with a clean cloth. A collar tag can hang from a hidden pin or sit on a tiny foam riser. Let the whole box dry flat overnight before you close the glass.
That gives the adhesive time to set so nothing slides when the box is upright.
11. Hand-Lettered Name Sign With Dog Motif
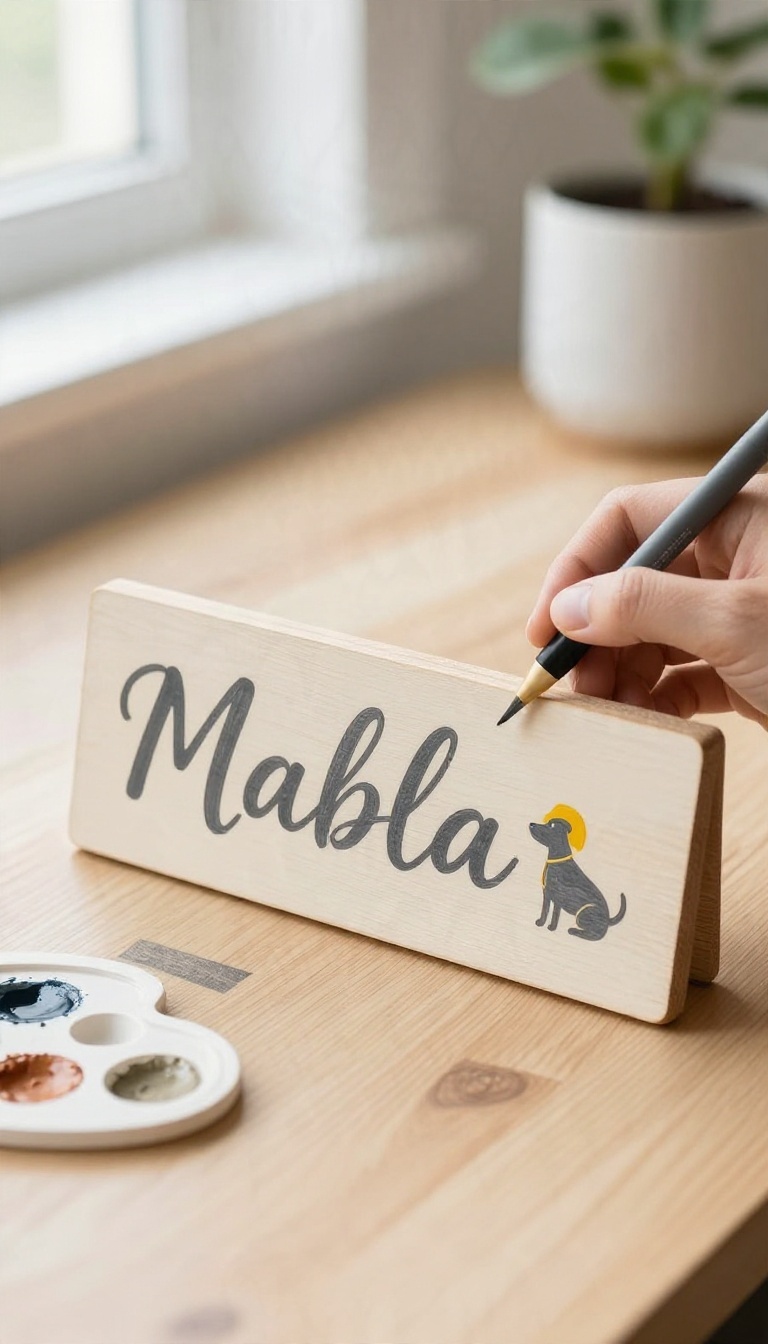
A name sign does double duty: it labels a dog's spot in the house and doubles as decor you actually want on the wall. The hand-lettered part adds warmth, and a small painted or cutout motif of your pup makes it unmistakably theirs. You don't need perfect penmanship to pull this off.
A few layout tricks and a shortcut or two will get you a sign that looks intentional, not like a craft experiment gone sideways. It's also one of the easiest ideas here to batch-make if you're gifting to several dog people.
Start with the surface before you touch a pen. A plain wood plaque, a painted canvas board, or even a thrifted frame backing all work. Give it a light sand and a base coat so your lettering has something smooth to sit on.
Pick a palette that matches the room it's headed for. Two or three colors max keeps it clean, and letting the motif be the brightest element draws the eye right where you want it.
Plan The Layout Before You Letter
Sketch the whole sign on paper first, at the same proportions as your board. Block out where the name goes, where the motif sits, and how much breathing room each element gets. Center the name and let the motif sit slightly off to one side or tucked below it.
Symmetry is safe, but a small offset feels more handmade. Tape a light grid onto the board or draw faint pencil guide lines you can erase later.
Lettering Shortcuts For Beginners
You don't have to freehand the letters. Print your dog's name in a font you like, size it to fit, and rub graphite on the back to transfer it onto the board. Trace over the outline with a fine paint pen or a small brush.
If you want a script look without the practice, use a lightbox or a window to trace a template in pencil, then paint over it. Go slow, keep your wrist anchored, and build thickness on the downstrokes last. A little wobble reads as charm, not error.
Add The Dog Motif
Keep the motif simple: a silhouette of your dog's head, a paw print, or a tiny bone. Paint it directly for a flat look, or cut it from cardstock or thin wood and glue it on for a little dimension. Match the motif's style to the lettering.
A clean silhouette pairs well with block letters, while a loose painted shape suits a casual script. Use the dog's actual coloring if you want it to feel like them.
Seal It For Indoor Use
Once everything is dry, erase any pencil lines and seal the sign. A matte or satin polycrylic keeps paint pens and acrylics from smudging and protects the wood from dust and the occasional damp nose. Brush on two thin coats rather than one thick one, and let each dry fully.
If the sign will hang near a door or in a kitchen, a satin finish wipes clean more easily than matte.
FAQ
Do I need art experience to make these dog art gifts?
No. Most of the projects rely on tracing, printing, or pressing rather than freehand skill. Pick one that matches your comfort level and start there.
What kind of photo works best for a dog portrait project?
A sharp, well-lit shot with your dog facing the camera or in clear profile. Avoid blurry phone photos and busy backgrounds, since those make tracing and painting harder.
Are these projects safe to make with my dog nearby?
Keep pets away from paint, clay dust, and small craft pieces. Use pet-safe paint for paw prints and wipe paws clean right after.
How far ahead should I start a dog art gift?
Give yourself at least a week for drying, sealing, and framing. Clay and painted pieces need the most time, while printed photo projects can be done in an afternoon.
Can I make these gifts if I don't own a dog?
Yes. Ask the recipient for a favorite photo, or use a friend's dog with permission. The projects work the same way with any clear reference image.
Conclusion
Start with the project that fits your skill level and the wall space you actually have. A simple ink portrait or a clay paw print delivers plenty of charm without demanding a weekend of work. Make one, live with it for a bit, and see how it feels in the room.
From there, branch out. Try a colorful pop art piece for a hallway or a painted portrait for a gift. The best dog art is the kind you finish and hang, not the kind that sits half-done in a closet.

I’m Pallab Kishore, the owner of Little Pets Realm — an animal lover and pet care enthusiast sharing easy tips, healthy recipes, and honest advice to help every small pet live a happy, healthy, tail-wagging life.