
Winter photo shoots go sideways fast when your dog is shivering, the light is already fading, and every shot comes out as a blur of fur. The fix isn't a better camera. It's picking a setup that works with the cold instead of against it.
These ideas lean on what winter already gives you: soft overcast light, clean snow, and a reason to bundle up. Most take under an hour and need nothing fancier than a blanket, a leash, and a pocket full of treats.
Pick two or three that fit your dog's tolerance for cold and chaos. The rest can wait for the next snowfall.
1. Fresh Snow Portrait With a Pop of Color
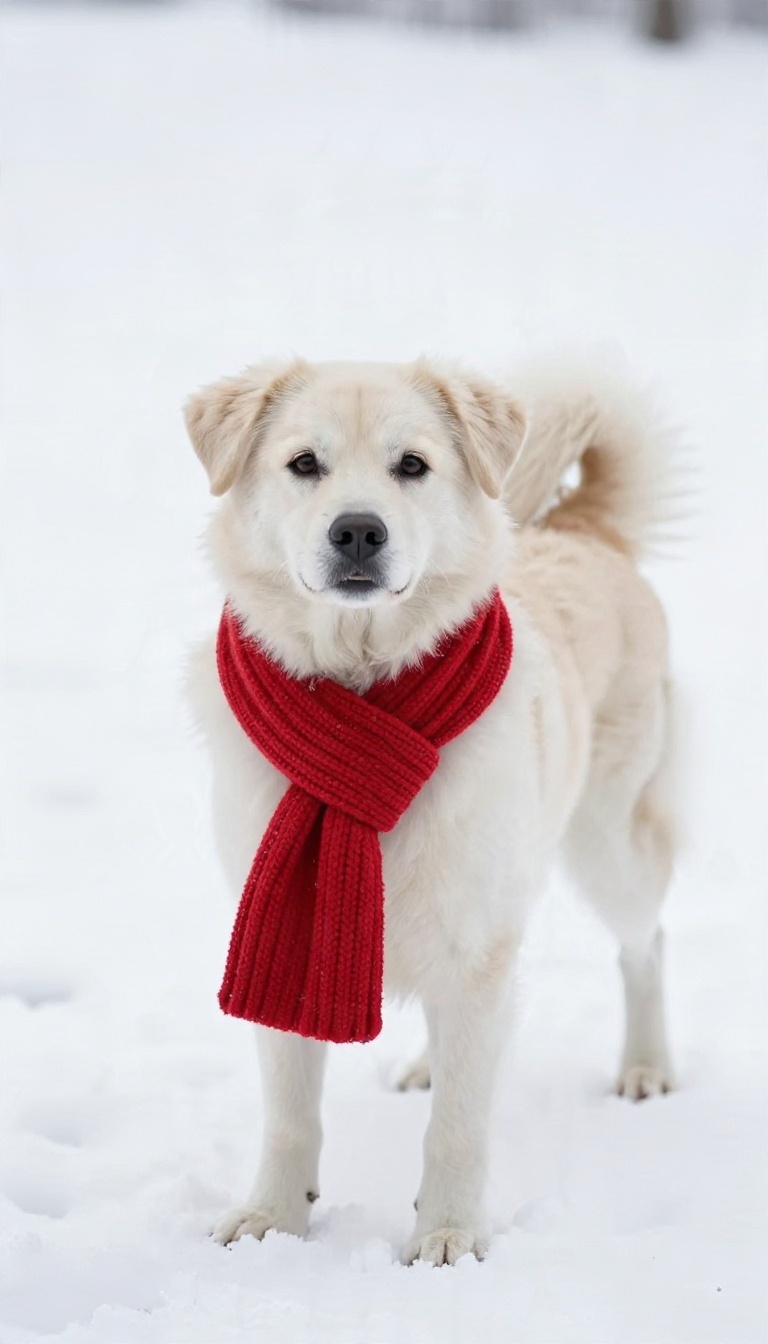
Snow makes a gorgeous backdrop, but it can also swallow your dog whole. A white dog on white snow turns into a floating nose and two eyes. The easiest fix costs almost nothing: add one bright item and let the snow do the rest.
A single pop of color gives the camera something to lock onto and gives your photo an instant focal point. You don't need a full costume. One bold piece is plenty.
The trick is contrast. Plain snow reflects light evenly, so anything saturated jumps forward. Pick one loud item and keep everything else neutral so the color stays the star.
Pick One Bold Item
A cherry-red scarf, a mustard sweater, or a neon leash all work. Choose the color that suits your dog's coat. Deep reds and teals pop hardest against white fur, while orange and cobalt stand out on black or brown dogs.
Skip busy patterns. A solid block of color reads cleaner in photos and keeps the eye on your dog's face. If your dog hates wearing things, a bright leash or a colored bandana tied loosely does the job without a fight.
Nail The Exposure
Cameras and phones both get fooled by big white scenes. They read all that brightness and darken everything, which turns your dog into a silhouette. Bump your exposure up a stop or two until the snow looks white instead of gray.
On a phone, tap your dog's face to lock focus, then drag the brightness slider up. On a camera, meter for your dog's face and let the snow blow out slightly. Slightly bright snow looks better than a muddy gray frame.
Shoot on an overcast day or in open shade. Harsh midday sun on snow creates blown highlights and squinting dogs. Soft light keeps the color rich and your dog's expression relaxed.
Keep It Short And Warm
Cold paws end a session fast. Ten to fifteen minutes is usually plenty for a portrait, especially in real cold. Set up your shot before your dog is in position so you're not fumbling while they freeze.
Watch for lifted paws, shivering, or a tucked tail. Those are your cues to stop. Bring a towel to dry paws and a blanket to wrap them in between shots.
Treats help, but keep them small and quick so your dog isn't chewing through every frame. Toss one just before you shoot, then catch the happy face that follows.
2. Cozy Blanket Burrito Indoors
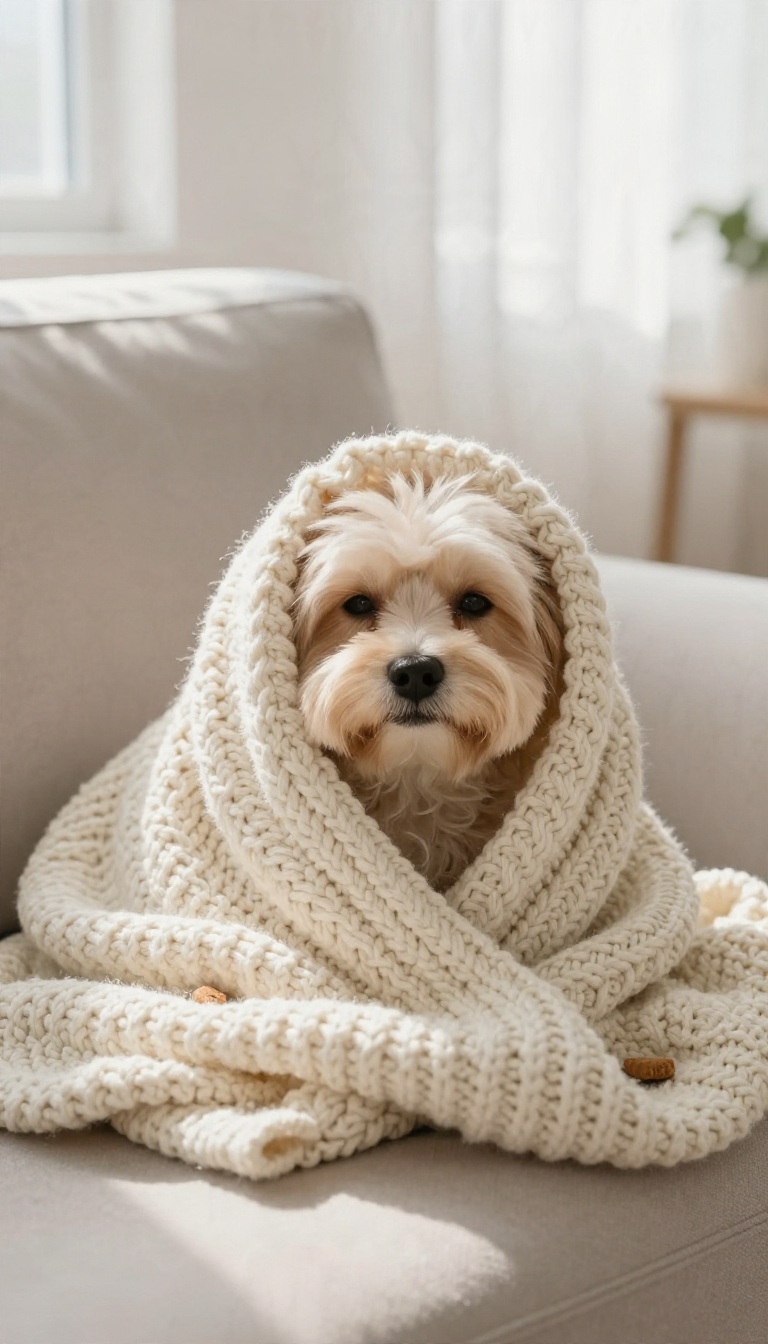
When the weather outside is frightful, your dog can still be delightful—wrapped in a chunky knit blanket by a window. This setup uses soft, natural light and a snuggle factor that makes for heart-melting photos. It's perfect for dogs who hate the cold or for days when you just want to stay in.
Plus, you don't need a studio; your living room will do.
The key to the blanket burrito look is keeping it loose and comfortable. You want your dog to feel secure, not trapped. A chunky knit blanket works best because it adds texture and warmth without being too heavy.
Start by letting your dog sniff and settle on the blanket before you wrap them. A few treats tucked into the folds can encourage them to stay put.
Timing The Window Light
Soft, diffused light is your best friend here. Aim for a window that gets indirect sunlight—east-facing in the morning or west-facing in the late afternoon. Avoid direct sun, which can create harsh shadows.
If the light is too strong, sheer curtains can help. The goal is a gentle glow that highlights your dog's face and the blanket's texture.
The Art Of The Loose Wrap
Wrap the blanket around your dog's body, leaving their head and paws free. Make sure it's snug but not tight—you should be able to slide a hand underneath. Let the blanket drape naturally; don't force perfect folds.
A little messiness adds charm. If your dog seems uncomfortable, loosen the wrap or take a break.
Capturing The Sleepy Look
A relaxed, sleepy expression makes the shot. To get it, tire your dog out with a short play session before the shoot. Then, let them settle on the blanket with a favorite toy or a chew.
Speak softly and move slowly. Patience pays off—wait for those heavy eyelids and a soft sigh. Treats can help, but don't overdo it or they'll be too alert.
3. Golden Hour in the Cold
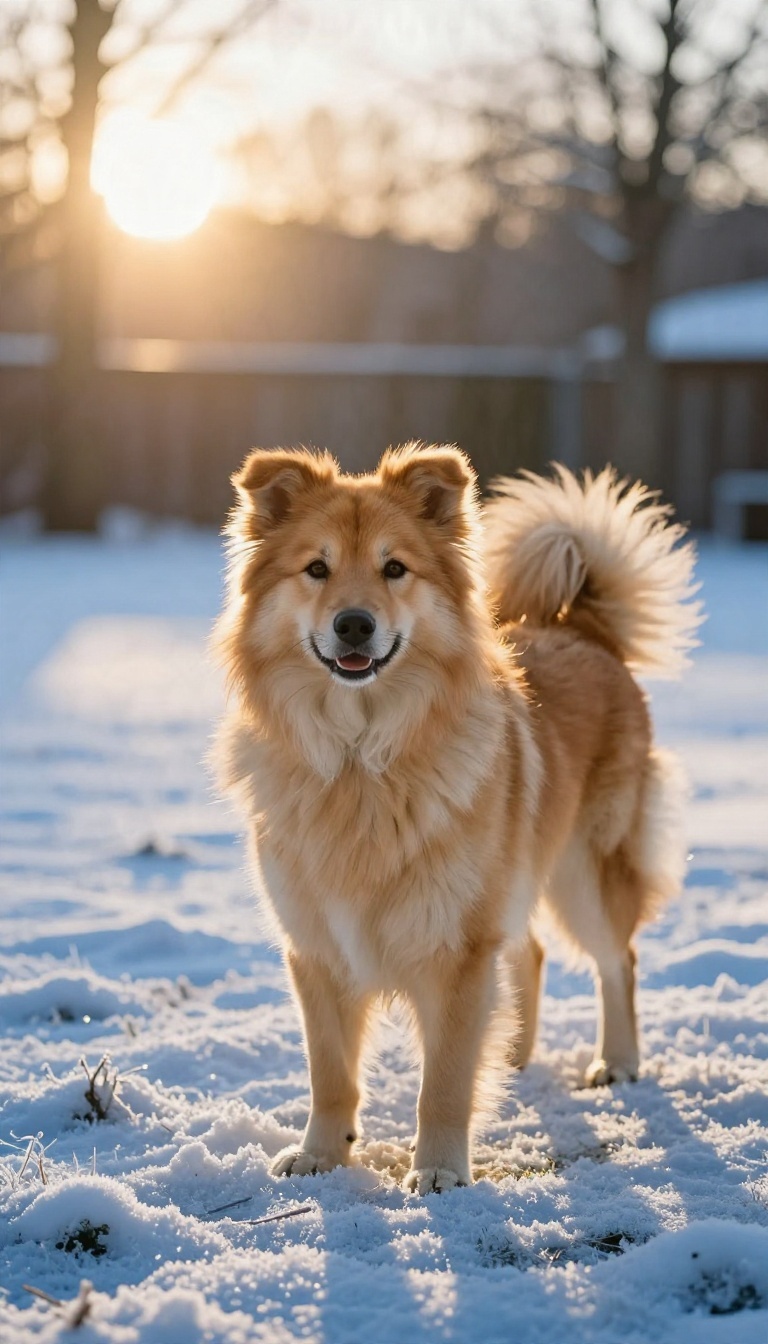
Winter gives you a golden hour you can actually work with. The sun hangs low for what feels like ages, so you're not racing a fast sunset like you would in summer. That low angle throws warm light across your dog's coat and drags long blue shadows over the frost.
It's the kind of light that makes an ordinary backyard look expensive. You just need to time it right and keep a few small problems from ruining the shot. Here's how to pull it off without squinting dogs or lens flare eating half your frames.
Golden hour in winter is shorter and colder than the summer version, but it's also softer and more forgiving. The sun sits close to the horizon, which means light wraps around your dog instead of blasting straight down. You get glow in the fur and shadows that stretch for days.
The catch is that everything happens fast and your hands will be cold. Plan the shot before you head out so you're not fumbling with settings while the light disappears.
Nail The Timing
Check your weather app for sunset and aim to start shooting about 45 minutes before it. The best window usually lands in the last 20 to 30 minutes, when the light turns gold and the shadows get long. On clear days the light is punchier and the shadows are sharper.
On slightly hazy days you get a softer wash that flatters almost every coat color. Either works, so don't skip a session just because there's a thin cloud layer. If you're shooting sunrise instead, the same rules apply, just in reverse.
Fewer people are out, which is a bonus if your dog gets distracted.
Position Your Dog Facing The Light
Backlight looks gorgeous, but you still want some light hitting your dog's face. Angle yourself so the sun is behind or just off to the side of your dog, then turn their head toward the glow. A treat held up near your camera does most of the work.
Hold it slightly above lens height so your dog lifts their chin and catches that rim of light along the snout and ears. Squinting is the real enemy here. If your dog is closing their eyes, move so the sun is more behind them than in their face.
A little shade from a fence or tree can soften things without killing the mood.
Keep Flare Out Of Your Lens
Shooting into the sun invites flare, and flare can wash out the whole frame. Use a lens hood if you have one, and cup a hand just above the front of your lens to block stray light. A slight change in your shooting angle often fixes it faster than any gear.
Step a foot to the left or right and watch the haze disappear from your viewfinder. Sometimes a touch of flare actually helps, adding a warm glow across the corner. Take a few frames with it and a few without, then pick your favorite later.
Expose For The Fur, Not The Sky
Bright sky behind your dog will trick your camera into underexposing the face. Meter for your dog's coat and let the sky blow out a little, or dial in a bit of positive exposure compensation. Shoot in RAW if your camera allows it.
You'll have way more room to pull detail out of the shadows and tame the highlights afterward. Check a few shots on the back of your camera as you go. Cold fingers make it tempting to rush, but a quick glance saves you from coming home with a card full of silhouettes.
4. Matching Winter Gear With Your Pup
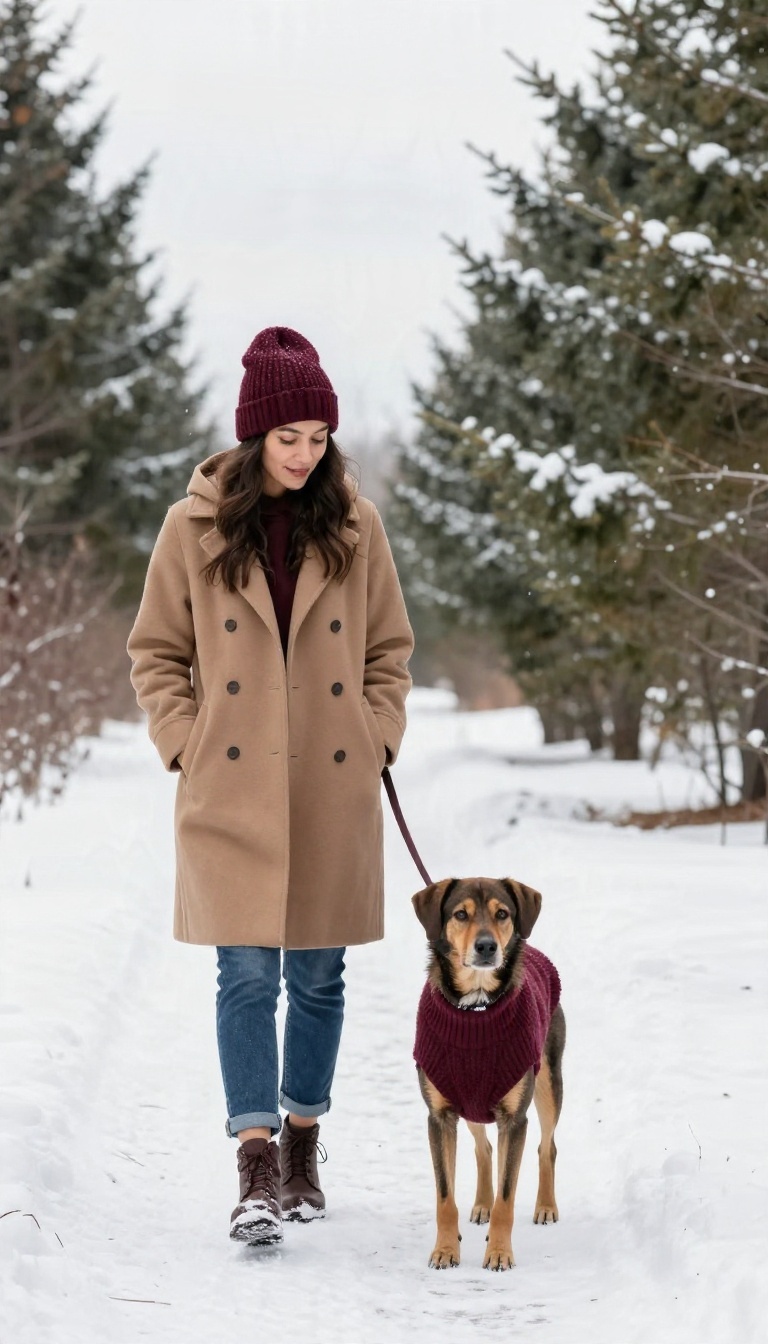
Coordinating outfits with your dog doesn't have to mean matching pajamas. A shared color palette or one repeated detail is enough to make the photo look intentional. The trick is keeping it simple so neither of you looks like you're trying too hard.
Start with what you already own. Pick one piece for you and one for your dog, then build around them. The goal is a pulled-together look that still feels like a winter walk, not a catalog shoot.
Matching gear works best when it looks accidental. Choose a color that flatters both of you and let the rest stay neutral. A deep burgundy beanie and a burgundy dog sweater, paired with jeans and a tan coat, reads as coordinated without screaming "couples costume.
" Avoid busy patterns on both of you. If your dog's sweater has a Fair Isle print, keep your own layers solid. If you're wearing plaid, put your dog in a solid knit.
One pattern per photo is plenty. Framing is where most people struggle. You want both faces visible and the outfits readable.
Shoot from chest height or slightly above, and don't be afraid to crop tight. A close shot of your matching scarves says more than a full-body frame where the details get lost.
Pick A Shared Color, Not A Shared Outfit
Choose one color that appears in both of your outfits. It can be as small as a scarf or as big as a coat. Earth tones like rust, olive, and cream work well in winter light and photograph softly.
Avoid neon unless you want that to be the whole story.
Keep Patterns To One Person
If your dog's sweater has a pattern, wear solids. If you're in a patterned coat, put your dog in a solid color. This keeps the photo from looking cluttered and makes both of you easier to see against snow.
Frame For Faces And Details
Get low enough to be near your dog's eye level, or hold them up if they're small. Crop in so the matching details—hat, scarf, sweater—are clearly visible. A tight shot of the two of you laughing is better than a wide shot where the coordination gets lost.
5. Snow Nose Close-Ups
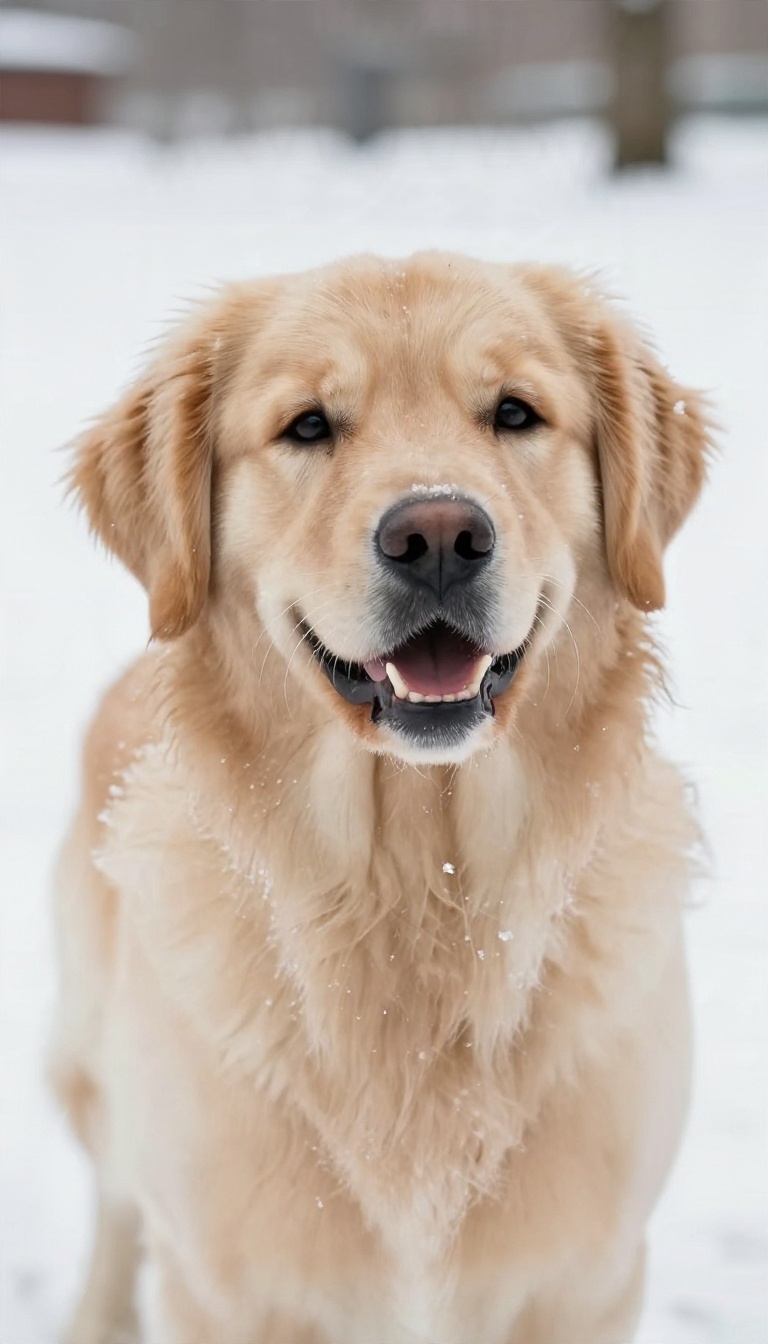
A close-up of your dog's face with snow dusting their whiskers tells a whole winter story in one frame. You don't need a studio or a fancy lens—just a cooperative pup, a handful of treats, and a little patience. The trick is getting low, locking focus on the eyes, and letting the cold do its thing.
Snowflakes on fur and breath in the air add texture that makes these shots feel alive. The goal is to fill the frame with your dog's expression while keeping the background soft and snowy. It's a simple setup, but small adjustments make a big difference.
Get Down To Their Level
Kneel or lie on the snow so your camera is at your dog's eye level. This angle makes the shot feel intimate and avoids that looking-down-at-a-pet vibe. If the ground is too cold, bring a small mat or use a low crouch and shoot slightly upward.
Use A Treat To Hold Focus
Hold a treat just above your lens to draw your dog's gaze right where you want it. Keep your hand steady and be ready to snap the moment their ears perk up. After a few tries, give the treat so they stay engaged.
Clean Up The Details
Snowflakes on the nose are cute, but a messy background or a stray hair can distract. In editing, brighten the eyes slightly and soften any harsh shadows. A little clarity boost on the whiskers makes the snow stand out without overdoing it.
6. Holiday Lights and Bokeh Backgrounds
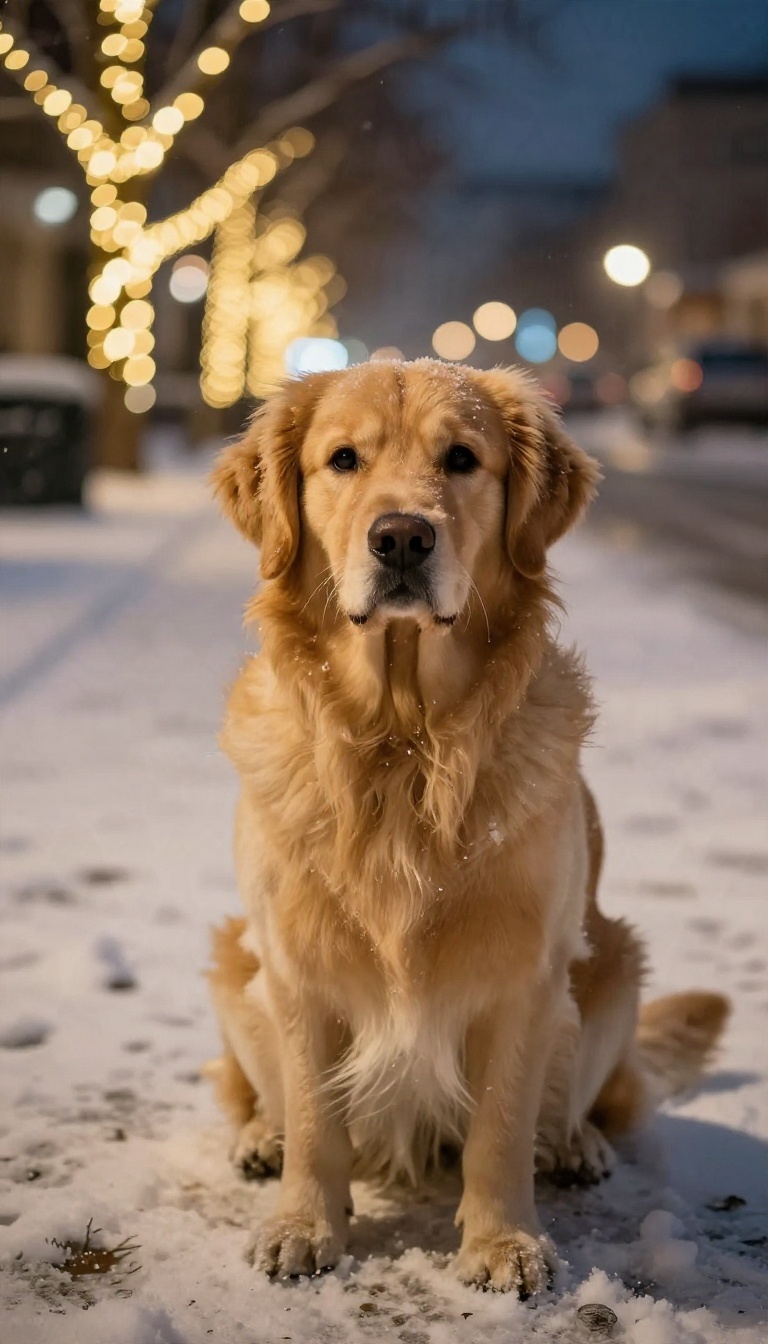
Holiday lights turn an ordinary winter night into a soft, glowing backdrop that makes your dog look like the star of a cozy movie. The trick is using distance and a steady hand to turn those lights into dreamy bokeh instead of a harsh, distracting mess. This setup works best after dark, when the world quiets down and your dog's attention is easier to hold.
String lights or a lit-up street can create a magical atmosphere, but you need to position your dog far enough from the lights to get that soft blur. A wide aperture helps, but even a phone camera can do it if you tap to focus on your dog and keep the background at least 10 feet away. Avoid using flash—it flattens the scene and kills the glow.
Instead, rely on the ambient light and maybe a small continuous light behind you if your dog's face gets too dark.
Set The Distance For Soft Bokeh
Place your dog at least 10–15 feet in front of the lights. The farther the lights are, the blurrier they'll become. If you're using a phone, tap on your dog's face to lock focus, then adjust exposure slightly downward so the lights don't blow out.
For a DSLR or mirrorless, use a wide aperture (like f/2. 8 or lower) and focus on the eyes.
Keep Your Dog Still Without Flash
Without flash, you'll need a slower shutter speed, so keeping your dog still is key. Use treats and a sit-stay command, or have a helper hold a favorite toy just above the camera. A quick burst of shots increases your odds of a sharp frame.
If your dog is wiggly, try a faster shutter speed and bump up the ISO instead of using flash.
Avoid Harsh Flash And Embrace The Glow
Flash will overpower the string lights and create harsh shadows. Turn it off and let the ambient light do the work. If your dog's face is too dark, position a small continuous light (like a phone flashlight covered with a diffuser) behind you, aimed at your dog.
Keep it subtle to preserve the mood.
7. Frosty Morning Paw Prints
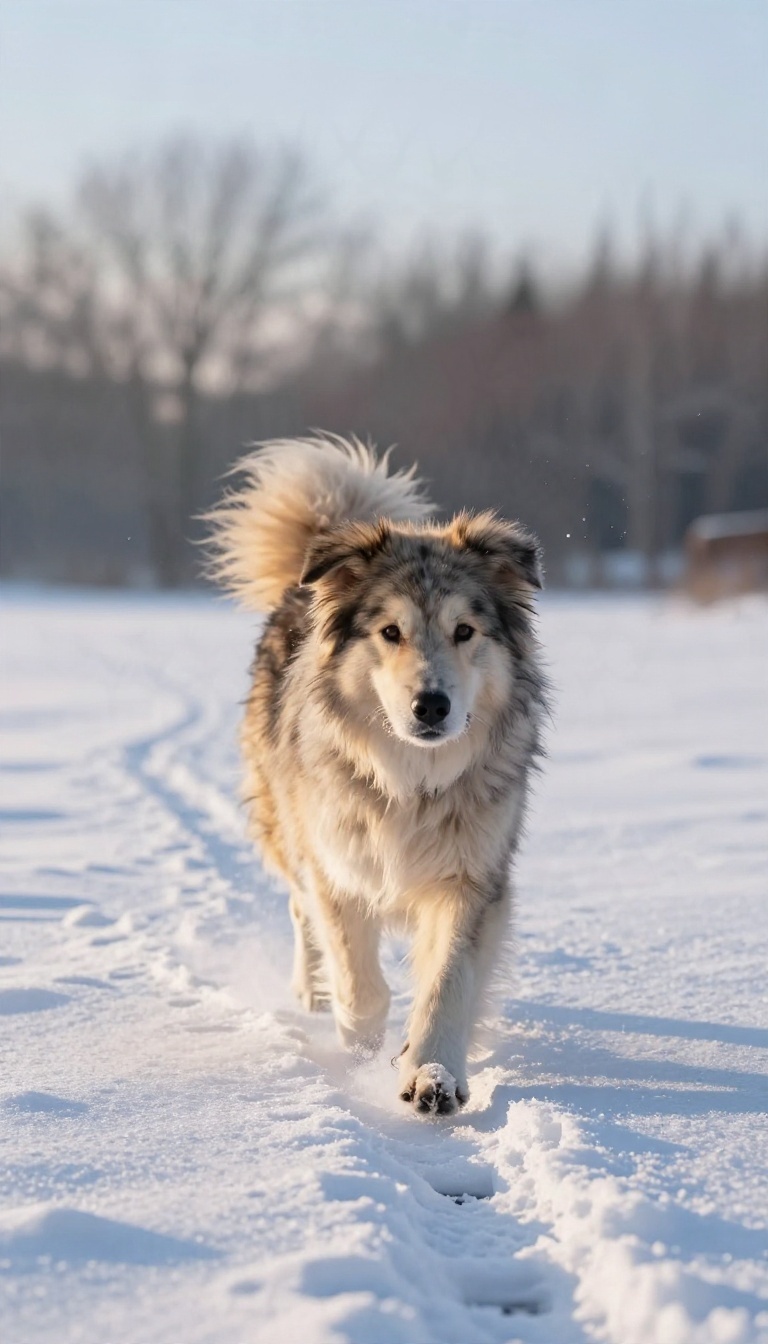
There's a short window after a fresh snowfall when the world looks untouched, and your dog gets to be the first one to ruin it. That's the shot: your pup trotting away from the camera with a clean line of paw prints trailing behind them. It's simple, it's story-driven, and it works with almost any dog, big or small.
The magic here is the trail. The prints tell the viewer where your dog came from, and your dog's back tells them where they're headed. You don't need a fancy location.
A quiet park, a backyard, or a field before anyone else shows up will do the job. Timing matters more than gear. Get out early, ideally right after the snow stops, before footprints, sled tracks, and dog pee spots turn the ground into a mess.
If you can be the first set of boots in the snow, you've already won half the battle.
Get Low And Shoot Down The Trail
Crouch or kneel so your camera sits close to the snow. A low angle makes the paw prints feel bigger and pulls the eye straight from the foreground prints to your dog in the distance. Shoot slightly behind your dog so the trail leads into the frame rather than out of it.
Keep the horizon roughly a third of the way up and leave some empty snow ahead of your dog. That negative space gives them somewhere to walk into, and it makes the shot feel calm instead of cramped.
Beat The Crowd To The Snow
Fresh snow is a limited resource, so treat it like one. Check the forecast the night before, set an alarm, and head out within an hour of the snowfall ending. Early morning light is soft and blue, which flatters white snow and dark fur alike.
If you miss the window, don't panic. Find an untracked patch off the main path, or wait for the next snow. A clean trail is worth a little patience.
Set Up Off-leash Or On A Long Line
Your dog needs to walk away from you for this shot, so plan the setup before you start shooting. A fenced yard or a quiet, low-traffic area is ideal for off-leash. If your dog isn't reliable off-leash, use a long line and let it drag behind them.
A dragging line stays mostly out of frame, and you can edit out the odd glimpse later. Keep treats in your pocket and call your dog back after a few steps so they don't wander too far. Short bursts work better than one long walk, and you'll get more usable frames.
8. Cabin or Doorway Framing

A doorway does half the work for you. Your dog sits inside where it's warm, the snow piles up outside, and the frame builds itself around them. It reads as cozy without you staging a single thing.
The trick is the light. You've got two very different sources meeting at that threshold, and the shot lives or dies on how you handle them. Get that part right and the pose usually follows.
Start by picking your opening. A back door looking onto a snowy yard works, and so does a big window if your dog likes to perch. The wider the frame, the more winter you get to show around them.
Set your dog just inside the line where indoor and outdoor light meet, not right at the glass. That spot keeps their face lit by the room while the snow stays bright behind them. It's the sweet spot, and it's usually a foot or two back from the door.
If your dog won't hold still, don't force it. A dog lying down in the doorway with their chin on their paws looks just as good as a perfect sit, and it's a lot easier to get.
Balancing The Two Light Sources
Your camera wants to expose for the bright snow, which turns your dog into a dark blob. Expose for your dog's face instead and let the snow go bright. A little blown-out white outside actually looks clean and wintry.
Turn off the overhead light if you can. It fights the daylight and casts weird shadows on your dog's face. Natural room light plus the snow outside is all you need.
If your dog's face still looks too dark, move them a step deeper into the room or angle them slightly toward the nearest window. Small shifts change everything here.
Keeping The Pose Relaxed
Doorways make dogs curious, so give them a reason to stay. Toss a treat just behind your camera and shoot the second they look up. That alert, ears-forward moment is the one you want.
Don't loom over them with the camera. Crouch down to their eye level so the doorway frames them evenly and they don't feel crowded. A favorite blanket or bed placed in the opening gives them somewhere to settle.
Let them get comfortable first, then back up and shoot. Patience beats posing every time.
Working The Frame
Shoot straight on for a clean, symmetrical look, or step to the side for a angled view that shows more of the room. Both work, so try a few and see what fits your dog. Keep the edges of the doorway in the shot.
That border is what makes the whole thing feel intentional rather than just a snapshot near a door. If the snow outside is dull, wait for a flurry or catch it right after a fresh fall. A little falling snow behind your dog sells the whole scene.
9. Winter Accessories That Stay Put
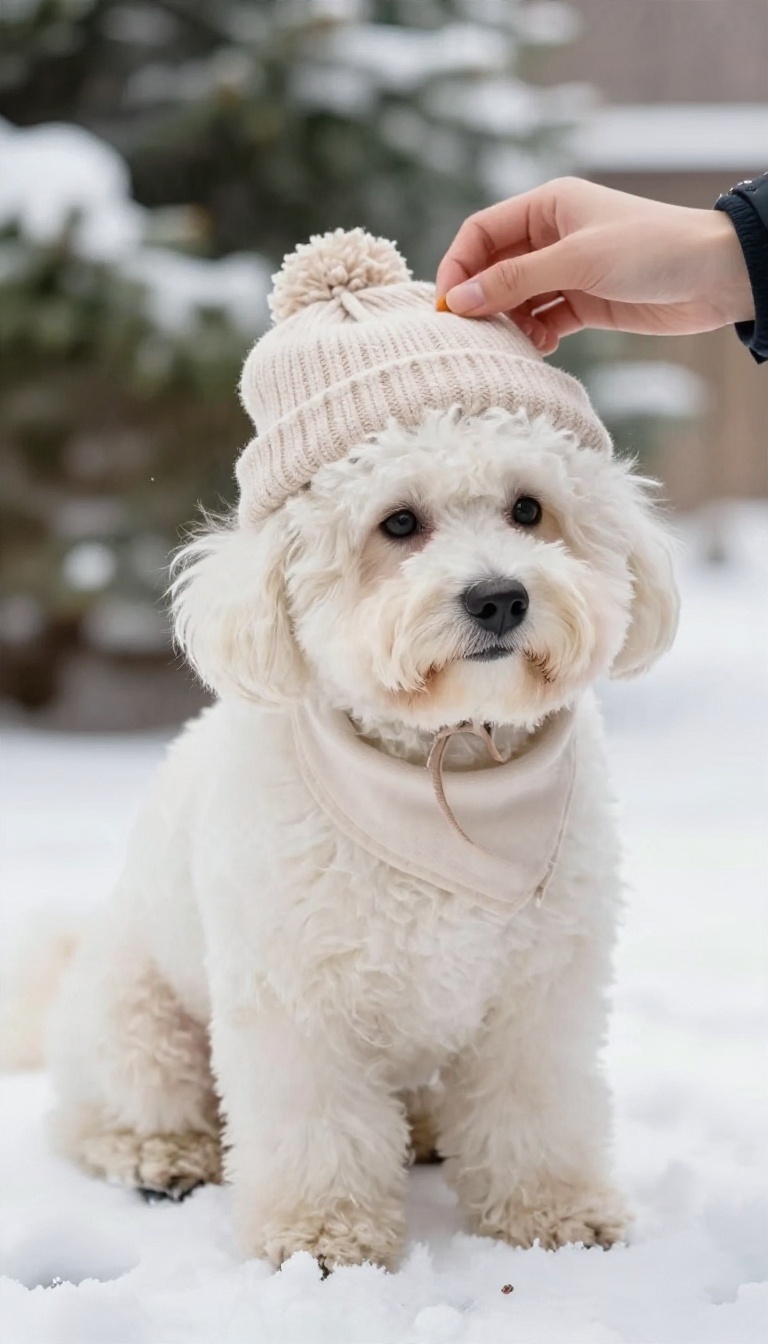
Nothing kills a winter shoot faster than a hat that slides off the second your dog shakes. The trick isn't finding sturdier gear. It's fitting the accessory so it moves with your dog instead of fighting them.
Hats, earmuffs, and bandanas all work for photos, but each one needs a slightly different approach. Get the fit right and you'll buy yourself enough time to grab a few good frames before your dog decides they're done. Shoot the accessory first, then the dog.
That sounds backwards, but it saves you from redoing everything after a mid-shoot escape.
The order you shoot in matters more than the accessory itself. Test the fit, reward, shoot fast, and repeat if your dog is still willing.
Fitting Tips By Accessory Type
A knit hat needs a chin strap or a snug ear band, otherwise it's gone the moment your dog looks down. Earmuffs work best on floppy-eared dogs when you slide them just behind the ear base, not over the top of the head. Bandanas are the easiest win, but tie them snug against the neck with the knot off to one side so it doesn't bunch under the chin.
Skip anything with dangling pom-poms or long ties. They look cute in the package and turn into a chew toy in about four seconds.
Reward Before You Pose
Put the accessory on, feed a treat, take it off. Do that three or four times before you even pick up the camera. Your dog learns the hat predicts snacks, not a wrestling match.
Once you're shooting, keep treats in your non-camera hand and reward every few frames. A dog who's getting paid stays still longer than a dog who's just being told to sit.
Shoot The Accessory First
Get the accessory shot while your dog is fresh and patient. Frame tight on the hat or bandana, grab two or three clean frames, then move to wider shots. If your dog starts pawing at it, you already have the close-up in the bag.
Everything after that is a bonus.
10. Snowball Action Shots
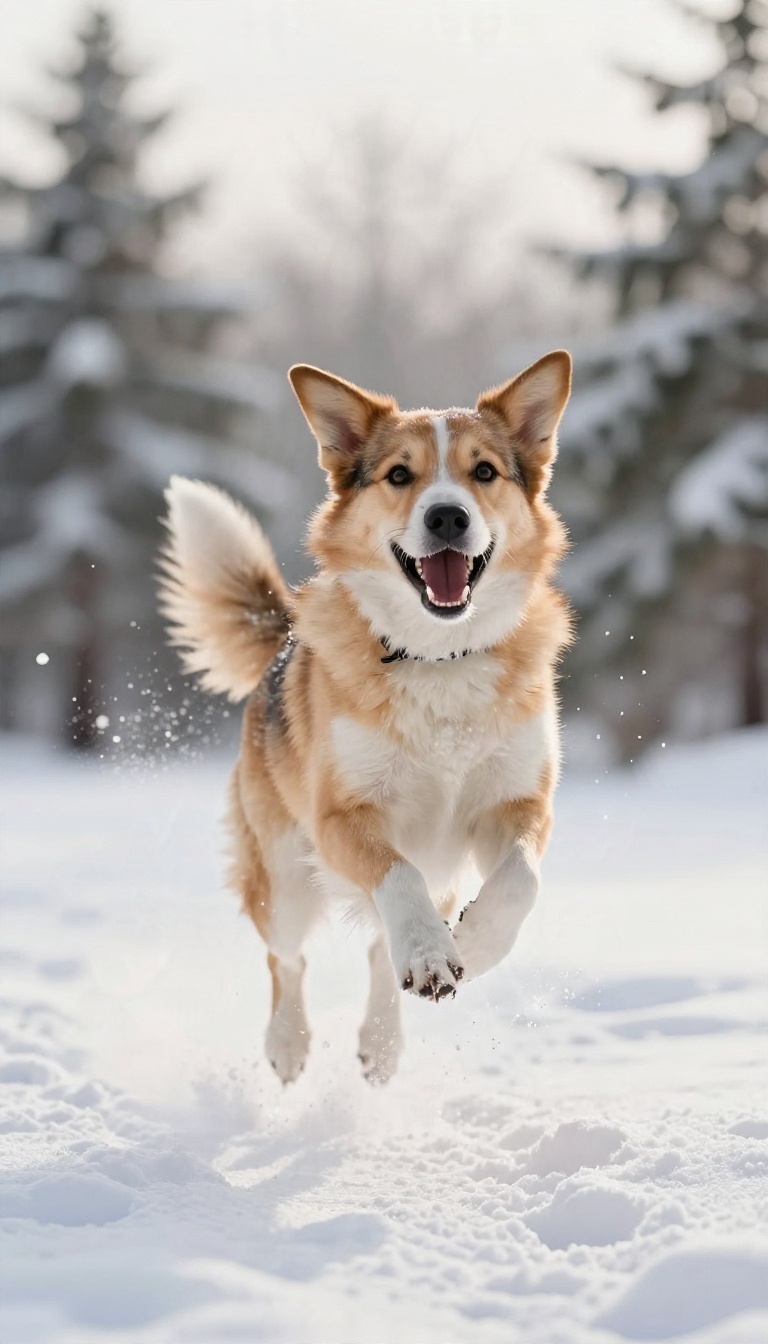
A dog mid-leap with their mouth open and snow spraying everywhere beats a posed portrait almost every time. Action shots capture the goofy, unbothered joy that makes winter feel fun instead of freezing. The catch is that motion and snow are both tricky to photograph.
Get the settings and your position right, though, and you'll walk away with frames that look like they came from a dog food commercial.
The whole game here is speed. A dog running through powder moves fast, and your camera has to keep up or you'll get a soft, smeared mess. You don't need a pro kit, but you do need to know which buttons to press before the snowball leaves your hand.
Set yourself up first, then let your dog loose. Once they're sprinting, fiddling with menus is a lost cause.
Lock In Your Shutter Speed
Push your shutter speed to at least 1/1000 of a second, and go higher if your dog is a greyhound type. That's the number that freezes paws and flying snow instead of blurring them. Bump your ISO up to 400 or 800 to make it work on an overcast day, and don't stress about a little grain.
A sharp action shot with slight noise always beats a clean blurry one.
Turn On Burst Mode
Single shots will betray you. Switch to continuous or burst mode and hold the shutter down through the whole leap, then pick the best frame later. You'll shoot a lot of throwaways, but somewhere in that burst is the one where all four paws are off the ground and the snowball is right at their nose.
Stand Where The Light Helps
Keep the soft overcast sky behind you or off to the side so it lights your dog's face instead of silhouetting it. Get down low, at or below their eye level, and you'll make the jump look bigger and more dramatic. Crouch a few feet back with room in the frame for them to run into, and let them come toward you.
Throw Snow, Not Ice
Pack a loose, soft snowball so nobody gets hurt and the spray looks fluffy in the shot. Toss it just ahead of your dog rather than straight at them, and keep the throws gentle. A pocket of treats between rounds keeps them interested, and a quick break every few minutes keeps everyone warm.
11. Cozy Couch Session With Warm Tones
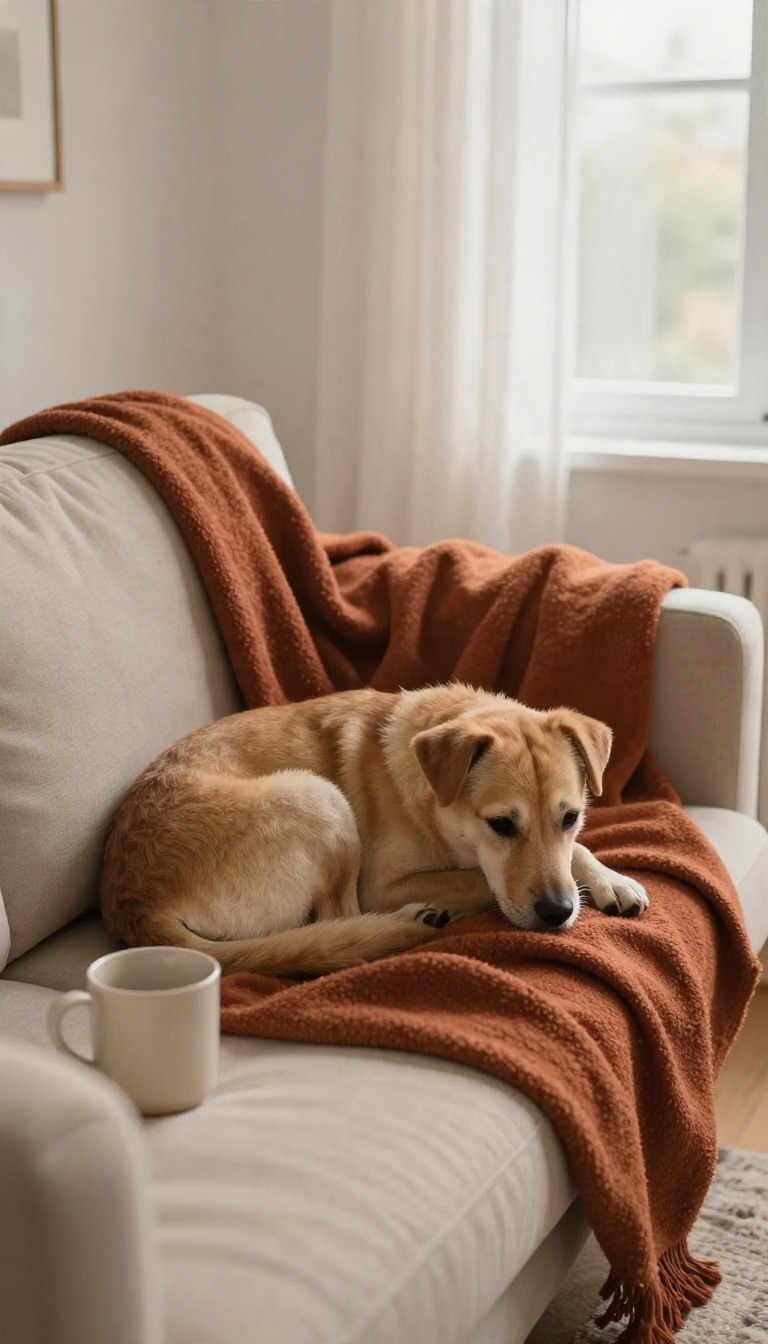
Cold weather gives you a perfect excuse to stay inside, and your couch is already the best backdrop in the house. This setup trades snow and shivering for soft blankets, a warm drink, and light that makes everything look like a slow Sunday morning. The goal is a hygge mood: low light, warm colors, and a dog who looks genuinely relaxed instead of posed.
You don't need a studio. A corner of the living room, one window, and a few soft textures will do most of the work. It's also the easiest idea on this list for older dogs, short-haired breeds, or any pup who hates the cold.
No boots, no shivering, no rushing before the sun drops.
Build The Scene Before Your Dog Arrives
Start with the background, because a cluttered room will pull attention away from your dog every time. Clear off the side table, tuck away charging cables, and push stray shoes out of frame. You want the eye to land on fur and fabric, nothing else.
Layer two or three blankets in warm tones like cream, rust, oatmeal, or soft brown. Drape one over the back of the couch and let another pool loosely on the seat. A single mug on the armrest sells the cozy story without looking staged.
Keep the palette tight. Warm neutrals and one richer accent color photograph better than a rainbow of throws, and they keep the mood calm instead of busy.
Work With One Window And Low Light
You don't need bright light for this look, but you do need the right light. Turn off overhead bulbs and rely on a window off to the side, ideally in the morning or late afternoon when the sun sits low. If the room feels too dark, add one small lamp with a warm bulb behind your dog rather than in front.
That soft glow separates them from the background and adds that golden, lived-in feel. Skip the flash. It flattens the cozy mood and usually startles dogs into a stiff expression.
Bump up your camera's ISO instead and accept a little grain, which honestly suits this aesthetic.
Style Your Dog Without A Costume
A chunky knit sweater or a simple bandana reads cozy without turning the shoot into a dress-up session. Choose something soft that your dog already tolerates, and put it on a few minutes early so they forget it's there. Position them on the blanket with a favorite toy or a chew within reach.
Props work best when your dog actually wants them, so let them mouth the toy or rest a paw on the mug-adjacent blanket rather than forcing a pose. If they'll wear it, a loose scarf or a tiny knit hat can add charm, but only for a few frames. The second it becomes a nuisance, take it off and shoot the rest in their natural coat.
Get Natural Expressions, Not Stiff Poses
Treats are your timing tool, not your bribe. Hold one just above the lens, let your dog lean in, and shoot the moment right before they lunge. That's where the soft, curious look lives.
Talk to them, make small noises, and let a helper dangle a toy behind you if you're shooting solo on a timer. Movement keeps the session fun and keeps their ears and eyes engaged. Take breaks.
A dog who's been staring at a camera for ten minutes will look tired, so reset with a quick play session and come back for a second round. The best frames usually happen in the first few minutes and again after a rest.
12. Frost and Ice Detail Shots

Frost turns ordinary branches and fences into something worth photographing, and your dog adds the warmth that keeps the shot from feeling cold and empty. These detail shots zoom in on ice crystals, snowy twigs, and frozen textures while your pup anchors the frame. The trick is balancing tiny details with a subject who won't sit still for long.
You don't need a macro lens to make frost look interesting. A standard zoom or even a kit lens can capture ice patterns if you get close and watch your background. The real challenge is keeping your dog in the shot without losing the texture that made you stop in the first place.
Find The Right Frost
Frost shows up best on surfaces with some texture: rough bark, metal fences, dried seed heads, and evergreen needles. Look for it early in the morning before the sun softens the edges. Snowy branches work too, especially when they dip low enough for your dog to sniff.
Scout a few spots before you bring your dog out so you're not wandering while they get cold.
Use Depth Of Field On Purpose
A shallow depth of field blurs the background and makes frosty details turn into soft sparkles. Focus on your dog's eye or nose and let the icy branches behind them go creamy. If you want the frost sharp too, stop down to f/5.
6 or f/8 and place your dog parallel to the camera. That way both the texture and your subject stay in focus. Try both looks and see which tells the story better.
Compose Around Small Details
Place a frosted branch in the foreground and let your dog peek through or stand behind it. The branch frames the shot and adds depth without hiding your subject. Get low to shoot through grass or snow crust for a bug's-eye view.
Keep your dog's face clear of clutter and give them a little space to breathe in the frame. A treat held just above the lens can pull their gaze exactly where you want it.
Shoot Fast And Keep Them Warm
Detail shots take time, and your dog won't wait forever. Set your focus and exposure before they step in, then shoot in short bursts. Bring a towel to dry paws and a blanket to wrap them between setups.
If the cold bites, call it. A few good frames beat a miserable dog every time.
13. Snow Day Group Shot With the Whole Crew
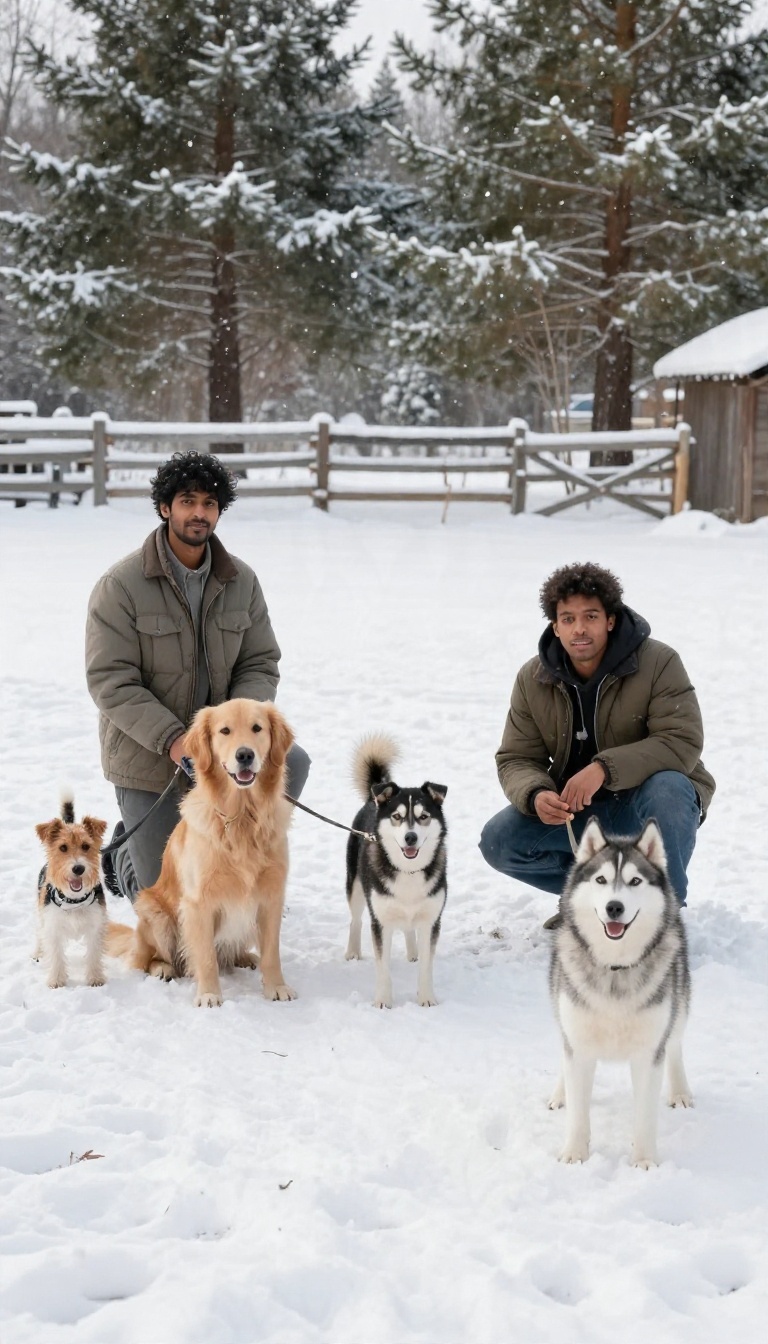
Getting multiple dogs—or the whole family—into one snowy frame without a meltdown is possible. You just need a plan, a helper, and a trigger finger. The trick is to set up fast, shoot faster, and accept that perfect stillness is overrated.
Here’s how to pull off a group shot that looks joyful, not chaotic.
Start by choosing a spot with a clean background and even light. A flat area of snow with trees or a fence behind works well. Position the tallest person or the most energetic dog in the back, and arrange everyone else in a slight V-shape so no one is hidden.
Use treats or a favorite toy to guide them into place, but don’t expect them to hold it long.
Positioning Without The Pileup
Place the calmest dog or person in the center as an anchor. Put the wiggliest ones on the ends where they have space to shift without bumping neighbors. If you’re mixing dogs and people, have people kneel or squat to get closer to dog level.
Keep leashes loose but attached—you can always edit them out later.
The Helper’s Job
One person should stand just behind the camera, armed with squeaky toys or treats. Their job is to get everyone’s attention at the same moment. Have them make a sudden noise or toss a small handful of snow in the air.
The split second of surprise is your shot.
Shoot First, Sort Later
Set your camera to burst mode and fire off a rapid series. Don’t wait for everyone to look perfect—you’ll miss the good ones. After 10 or 15 frames, let everyone break.
Then review and pick the frame where eyes are open and tails are up. Repeat if needed, but keep sessions short and fun.
FAQ
How cold is too cold for a winter dog photo shoot?
Watch your dog, not the thermometer. Small, short-haired, and senior dogs get cold fast, so keep sessions under 10 to 15 minutes and head inside if they shiver, lift paws, or tuck their tail.
What's the best time of day for winter dog photos?
Overcast midday light is soft and forgiving, and golden hour hits earlier in winter, so plan around 3 to 4 pm for warm backlight. Avoid harsh direct sun on snow, which blows out highlights.
How do I keep my dog still long enough to get the shot?
Use high-value treats, a favorite toy, and a helper to hold attention just off-camera. Shoot in burst mode and keep sessions short so your dog stays engaged.
Do I need a fancy camera for cute winter dog photos?
No. A modern phone handles most of these setups well, especially in good light. Focus on a clean background, a cooperative dog, and simple styling before upgrading gear.
How do I protect my dog's paws in the snow?
Use dog booties or a paw balm, and avoid salted sidewalks. Wipe paws after the shoot and keep an eye out for ice balls forming between their toes.
Conclusion
Winter shoots go sideways fast when your dog gets cold, distracted, or tired of posing. Pick two or three ideas that match your dog's tolerance and the light you actually have, then shoot in short bursts with treats close by. A simple setup you finish beats an elaborate one you abandon halfway through.
Once you have a few shots you love, the rest is just editing and sharing. Swap in a new backdrop or prop for next year and you have a fresh set without starting from scratch.

I’m Pallab Kishore, the owner of Little Pets Realm — an animal lover and pet care enthusiast sharing easy tips, healthy recipes, and honest advice to help every small pet live a happy, healthy, tail-wagging life.