
A framed painting of someone's dog makes a gift they keep on the wall long after the wrapping paper is gone. You don't need a studio or an art degree to pull one off, just a decent photo, a few supplies, and an afternoon.
Some of these ideas lean on a brush and steady hand, while others work around a printer, a canvas tote, or a pile of torn paper. Go bold with pop-art color or keep it quiet with a single clean line.
Either way, the finished piece lands as personal in a way a store-bought frame never does. Here are twelve dog painting ideas worth making for the dog lovers on your list.
1. Classic Pet Portrait from a Favorite Photo
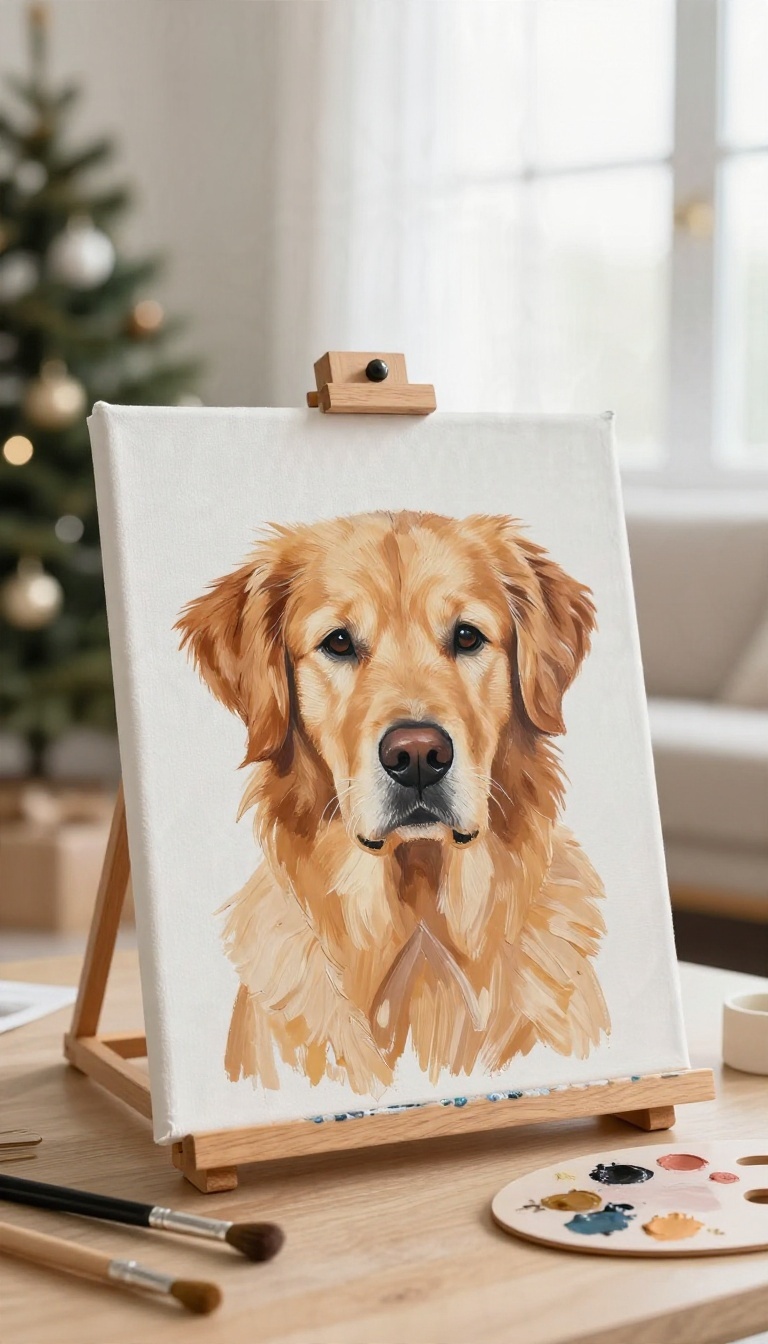
Start with the idea that never misses: a straight-up portrait of the dog, painted from a photo the recipient already loves. It works because everyone has that one picture of their pup that captures them perfectly. You just turn it into something they can hang on the wall.
You don't have to be a portrait artist to pull this off. A clear reference photo does most of the heavy lifting, and a little patience handles the rest.
The magic of a pet portrait lives in the face, and the face lives in the photo you choose. Pick the right image and the painting almost paints itself. Pick a blurry one and you'll fight it the whole way through. ## Choosing the Right Reference Photo Look for a photo where the dog's face is sharp and evenly lit.
Natural daylight near a window beats a flash every time, since flash flattens the fur and blows out the highlights in the eyes. Aim for a shot where the dog is looking toward the camera, or close to it. You want to see both eyes clearly.
A profile can work, but a straight-on or three-quarter view gives you the most personality to work with. If the recipient has a favorite photo, ask for it. A picture they already love means the finished painting lands exactly where their heart is.
If you're surprising them, quietly borrow one from their social media or ask a family member. ## Getting the Proportions Right Before you touch paint, sketch the basic shapes lightly in pencil. Block in the head as a simple oval, then place the eyes, nose, and ears as rough marks. Getting the spacing right now saves you from a portrait that looks slightly off later.
A cheap trick is to print the photo at the same size as your canvas and trace the main outlines with graphite paper. It's not cheating. It's just saving yourself an hour of erasing. ## Capturing the Eyes and Expression The eyes make or break a pet portrait.
Paint them last, and paint them with care. Add a tiny white highlight in each one, because that little glint is what makes a painting feel alive. Study the expression in your photo before you start.
Is the dog goofy, serious, sleepy, or alert? Whatever it is, exaggerate it just a touch. A slightly tilted head or a raised brow reads better on canvas than a perfectly neutral stare.
Work the fur in layers, starting with the darker tones and building up to the lighter highlights. Short, quick strokes along the direction of the fur look more natural than long, careful ones. ## Picking a Background That Lets the Dog Shine Keep the background simple. A soft wash of muted color or a plain neutral tone pushes the dog forward and keeps the focus on the face.
A busy background competes with all that lovely detail in the fur. If you want a little warmth, pull one color from the dog's coat and use a lighter version of it behind them. It ties the whole painting together without stealing attention.
Finish with a frame that suits the recipient's home. A simple wood or black frame lets the portrait do the talking, and it turns a painted canvas into a gift that's ready to hang.
Choosing The Right Reference Photo
Look for a photo where the dog's face is sharp and evenly lit. Natural daylight near a window beats a flash every time, since flash flattens the fur and blows out the highlights in the eyes. Aim for a shot where the dog is looking toward the camera, or close to it.
You want to see both eyes clearly. A profile can work, but a straight-on or three-quarter view gives you the most personality to work with. If the recipient has a favorite photo, ask for it.
A picture they already love means the finished painting lands exactly where their heart is. If you're surprising them, quietly borrow one from their social media or ask a family member.
Getting The Proportions Right
Before you touch paint, sketch the basic shapes lightly in pencil. Block in the head as a simple oval, then place the eyes, nose, and ears as rough marks. Getting the spacing right now saves you from a portrait that looks slightly off later.
A cheap trick is to print the photo at the same size as your canvas and trace the main outlines with graphite paper. It's not cheating. It's just saving yourself an hour of erasing.
Capturing The Eyes And Expression
The eyes make or break a pet portrait. Paint them last, and paint them with care. Add a tiny white highlight in each one, because that little glint is what makes a painting feel alive.
Study the expression in your photo before you start. Is the dog goofy, serious, sleepy, or alert? Whatever it is, exaggerate it just a touch.
A slightly tilted head or a raised brow reads better on canvas than a perfectly neutral stare. Work the fur in layers, starting with the darker tones and building up to the lighter highlights. Short, quick strokes along the direction of the fur look more natural than long, careful ones.
Picking A Background That Lets The Dog Shine
Keep the background simple. A soft wash of muted color or a plain neutral tone pushes the dog forward and keeps the focus on the face. A busy background competes with all that lovely detail in the fur.
If you want a little warmth, pull one color from the dog's coat and use a lighter version of it behind them. It ties the whole painting together without stealing attention. Finish with a frame that suits the recipient's home.
A simple wood or black frame lets the portrait do the talking, and it turns a painted canvas into a gift that's ready to hang.
2. Bold Silhouette on a Solid Background
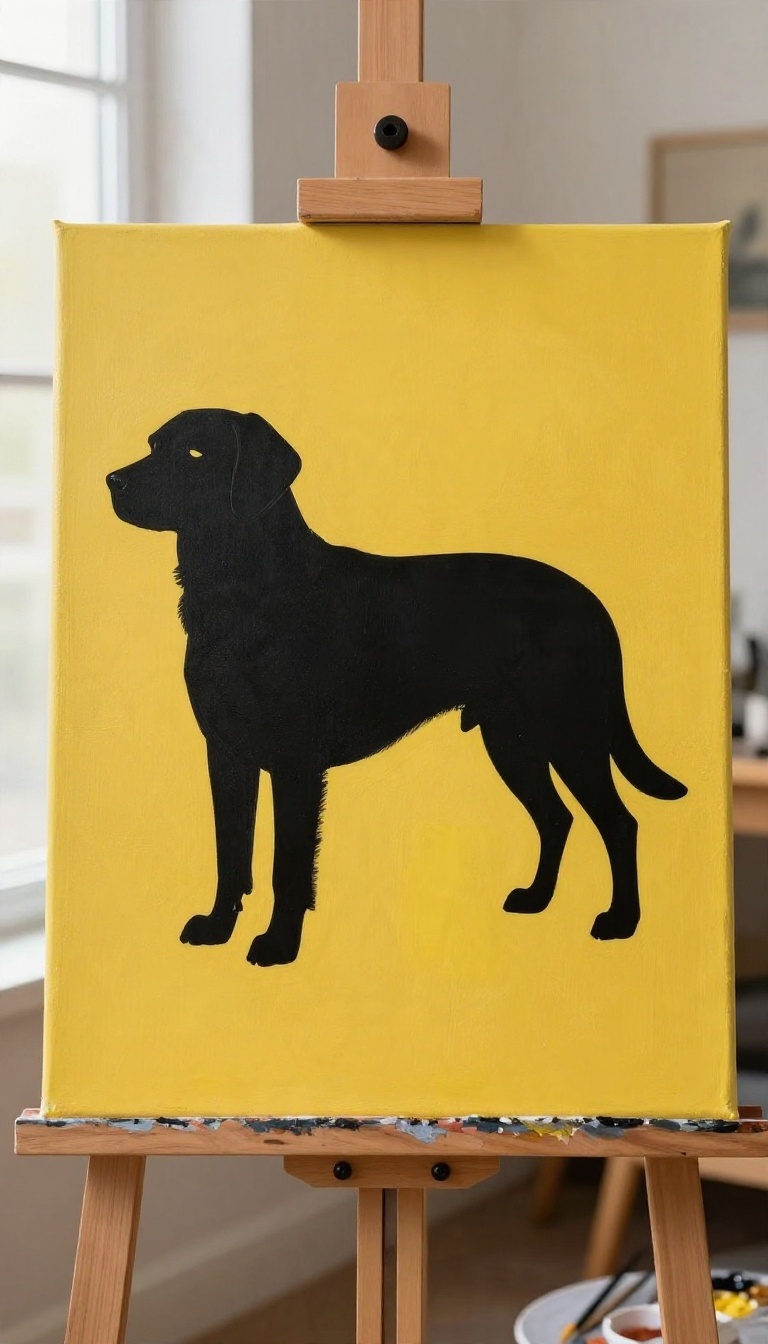
A silhouette strips a dog down to its outline, and somehow that makes it more recognizable, not less. The shape of the ears, the set of the snout, the way the chest drops into the front legs, all of it reads instantly to anyone who knows the dog. It also happens to be one of the friendliest projects on this list for someone holding a brush for the first time.
There's no fur to render, no eyes to get right, no shading to fuss over. You paint one solid shape against a background that does the heavy lifting, and the contrast carries the whole piece. Pick a bright color or a metallic finish and it looks modern on just about any wall.
Getting A Clean Profile Photo
The silhouette is only as good as the photo behind it, so this step earns its time. You want a side view of the dog, ideally standing or sitting with the head turned so the profile is clear. A photo taken at the dog's eye level flattens the shape nicely, while a shot from above distorts it.
Backlighting helps more than you'd think. A dog standing in front of a bright window or against a light wall gives you a crisp edge to trace. If the ears flop or the fur is long and wispy, don't worry about every strand.
Aim for the overall gesture and let the small details go.
Tracing And Transferring The Shape
Print the photo at the size you want the painting, then tape it to a window on a sunny day. Lay your canvas or board over it and trace the outline in pencil. The light shines through and turns a fiddly job into a ten-minute one.
No window handy? A tablet screen at full brightness works just as well. Keep the traced line simple and confident, since a shaky outline shows up more in a solid shape than it would in a detailed portrait.
Once it's transferred, step back and check that the proportions still look like your dog.
Filling In And Choosing A Background
Fill the silhouette with a flat black or deep charcoal, working from the edges inward so you don't lose your line. Two thin coats beat one thick one, and they dry faster too. Let it cure fully before you touch the background.
For the backdrop, a saturated color like teal, mustard, or coral makes the shape pop, while gold or copper metallic paint gives it a dressier feel for a gift. Paint the background right up to the silhouette edge with a small flat brush, and clean up any wobbles with a touch of the silhouette color once it's dry. Seal the whole thing with a matte or satin varnish so it holds up over time.
3. Pop Art Pup with Bright Colors
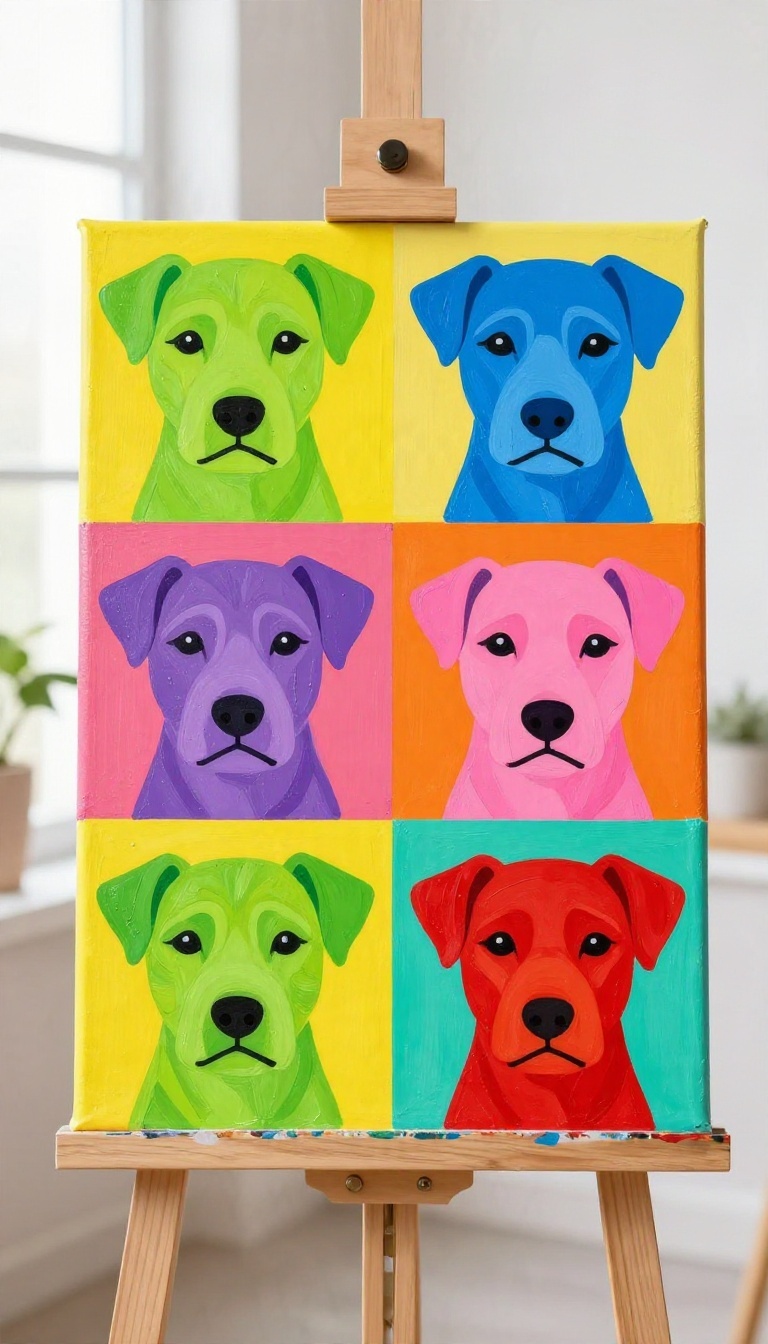
Pop art takes a familiar face and turns the volume all the way up. For this one, you paint the same dog portrait across a grid of panels, then swap in wild colors for each version. Think lime green fur, hot pink shadows, and a turquoise background behind a very serious dog expression.
The joke is built right into the contrast. A dignified pup rendered in neon purple is funny without trying too hard, and it reads as art rather than a novelty. It suits a friend with a bold living room or anyone who laughs at their own dog's goofiness.
You don't need to be a Warhol scholar to pull this off. The whole look comes down to repetition, flat color, and a willingness to ignore what a dog actually looks like. Keep the drawing loose and the palette loud.
Start with one strong reference photo, ideally a straight-on headshot with clear shapes. You'll trace or sketch that same face four times, so pick a pose you don't mind staring at for an hour.
Set Up Your Grid
Divide a square canvas into four equal panels with light pencil lines, or tape off the sections if you want crisp edges. Two-by-two is the classic layout, but a single row of four works too if your canvas is wide. Keep the dog's head in the same spot in every panel.
Consistency is what sells the repetition, so sketch the outline once on tracing paper and transfer it to each square.
Pick A Loud Palette
Choose four color schemes that clash on purpose. A good starting set: hot pink and orange, lime green and yellow, electric blue and purple, and a bright red with teal. Assign one background color and one main fur color per panel, then let a third shade handle the shadows.
Skip realistic browns and blacks entirely, because the moment you add them the whole thing goes muddy. Acrylics work best here since they dry fast and stay flat. A cheap set of craft acrylics covers this fine.
Paint Flat And Fast
Block in each background first, then fill the fur shapes with solid color. Resist the urge to blend, because flat areas of color are the entire point. Add simple shadow shapes in your third color, keeping the edges clean.
If you want a screen-print feel, outline the dog's features in black once the paint dries. Let each panel dry before moving to the next so you don't smudge wet edges.
Finish And Frame
Peel the tape while the paint is still slightly tacky for the cleanest lines. Touch up any bleed with a small brush and the background color. A thin black frame keeps the busy colors contained and makes the piece look intentional.
Sign the bottom corner and you're done.
4. Watercolor Splash Portrait
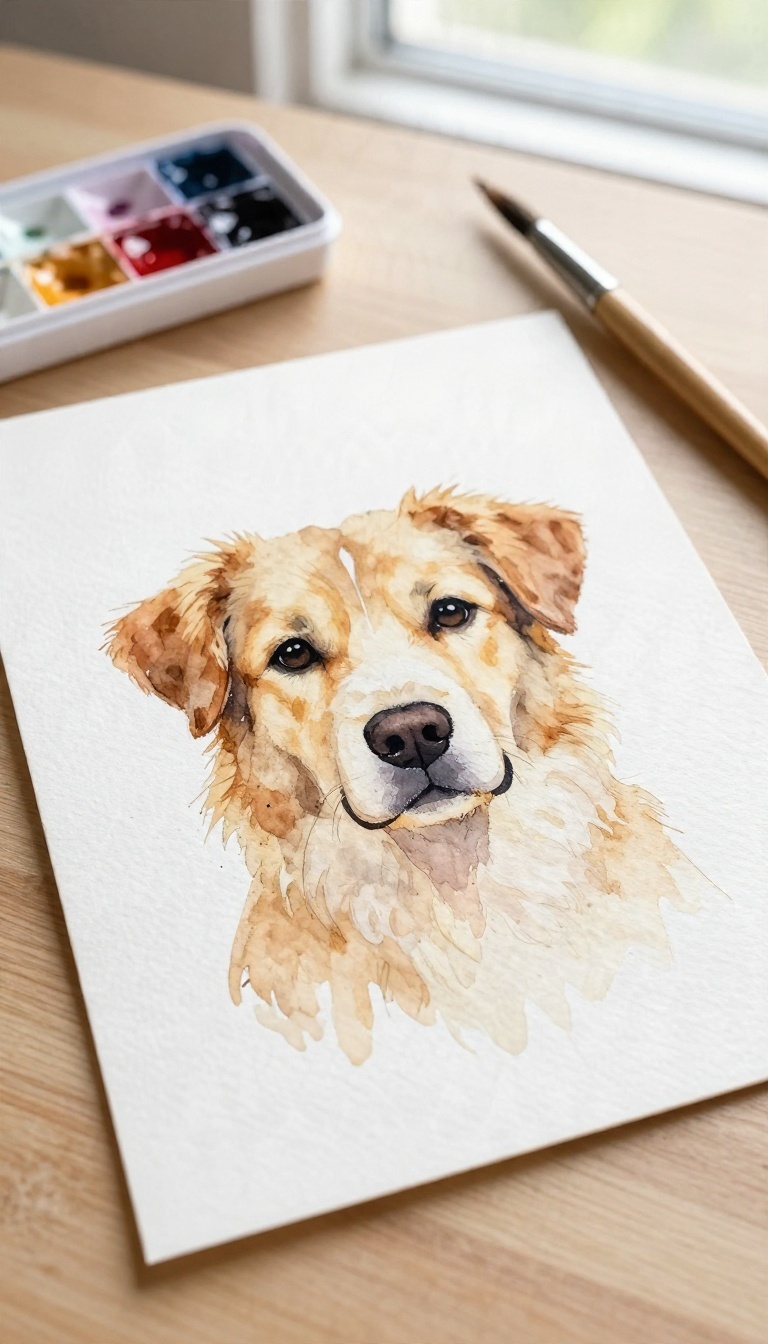
Watercolor forgives in a way acrylic and oil never do. A loose portrait with soft edges and a few deliberate splatters looks intentional and dreamy, even when your brush wanders off course. It also happens to hide the small mistakes that would stand out in a tight, realistic painting.
This one suits the sentimental gift on your list, the friend who still tears up over their old dog or the family member who treats their pup like a kid. The finished piece feels airy and personal without demanding precision.
The trick with watercolor is to work with the medium instead of fighting it. You want the paint to bloom and bleed a little, so plan for softness rather than sharp detail. A few well-placed splatters do more for the mood than any amount of fussing.
You also don't need a full set of artist pans. A basic watercolor palette, a couple of brushes, and cold-press paper will get you there.
Set Up Your Reference Photo
Pick a photo with clear lighting and a simple background. A shot where the dog's face is well lit and turned slightly toward the camera gives you the best shapes to work from. Simplify what you see before you paint.
Sketch just the head, ears, and the main lines of the muzzle on your paper with a light pencil. Keep the sketch loose, because the paint will do most of the work.
Paint Loose, Then Splatter
Start with a wet wash of your lightest colors and let the paper stay damp. Drop in darker tones for the eyes, nose, and shadows and let them bleed naturally at the edges. Once the base is dry, load a brush with paint and tap it over the paper to scatter fine splatters around the portrait.
A few bigger drops near the edges add energy. Keep the face readable and let the splashes live around it.
Frame It Like A Keepsake
Let the painting dry completely, then press it flat under a heavy book for a day or two. Watercolor paper likes to curl, and a flat piece frames much easier. Mount it in a simple frame with a wide mat so the soft edges have room to breathe.
Add the dog's name and the year on the back, and you have a gift that feels considered rather than rushed.
5. Minimalist Line Art on Canvas
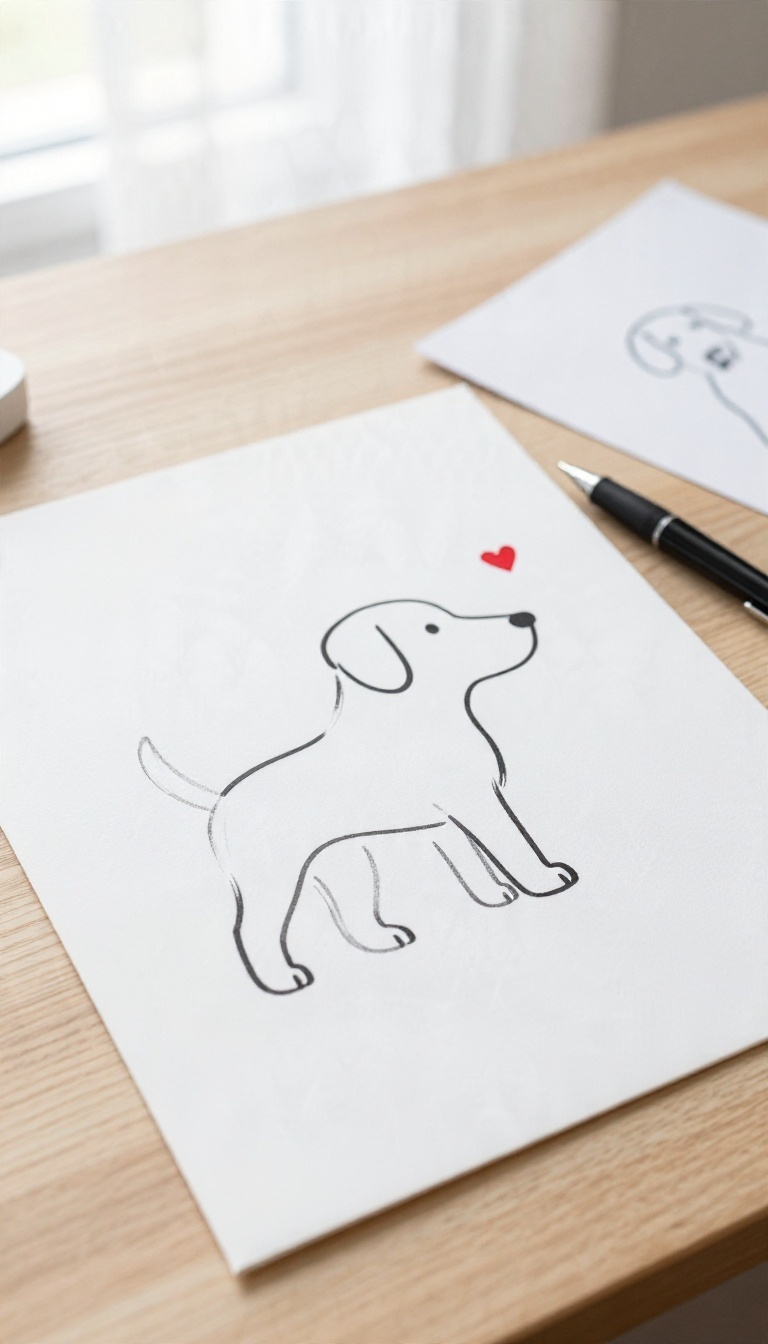
Minimalist line art turns a dog into a single, flowing stroke. It's the kind of painting that looks like it took hours of careful planning, but the process is surprisingly forgiving. With a steady hand and a reference photo, you can capture the essence of a dog in just a few minutes.
The trick is to keep your pen moving without lifting it from the canvas. Start with a light pencil sketch to map out the key features, then go over it with a fine-tip brush or paint pen in one continuous line. Add a tiny heart or paw print near the nose or chest for a sweet finishing touch.
The result is modern, elegant, and perfect for a minimalist home.
Choosing The Right Reference Photo
Pick a photo where the dog's profile or head tilt is clear and uncluttered. A side view or a simple sitting pose works best because it gives you a clean outline to follow. Avoid busy backgrounds or awkward angles that make the line confusing.
Tools That Make It Easier
You don't need fancy supplies. A stretched canvas, a fine-tip paint pen or a small round brush with acrylic paint, and a pencil for sketching are enough. If you're nervous, practice the line on a piece of paper first.
The paint pen gives you more control than a brush, especially for beginners.
The One-line Technique
Start at the nose, move up over the head, trace the back, and loop around the tail. Then come back along the belly and up the front legs. Don't worry about perfection—small wobbles add character.
Once the line is dry, add a small heart or paw print in a contrasting color, like red or gold, to make it pop.
6. Paw Print Ornament Painting
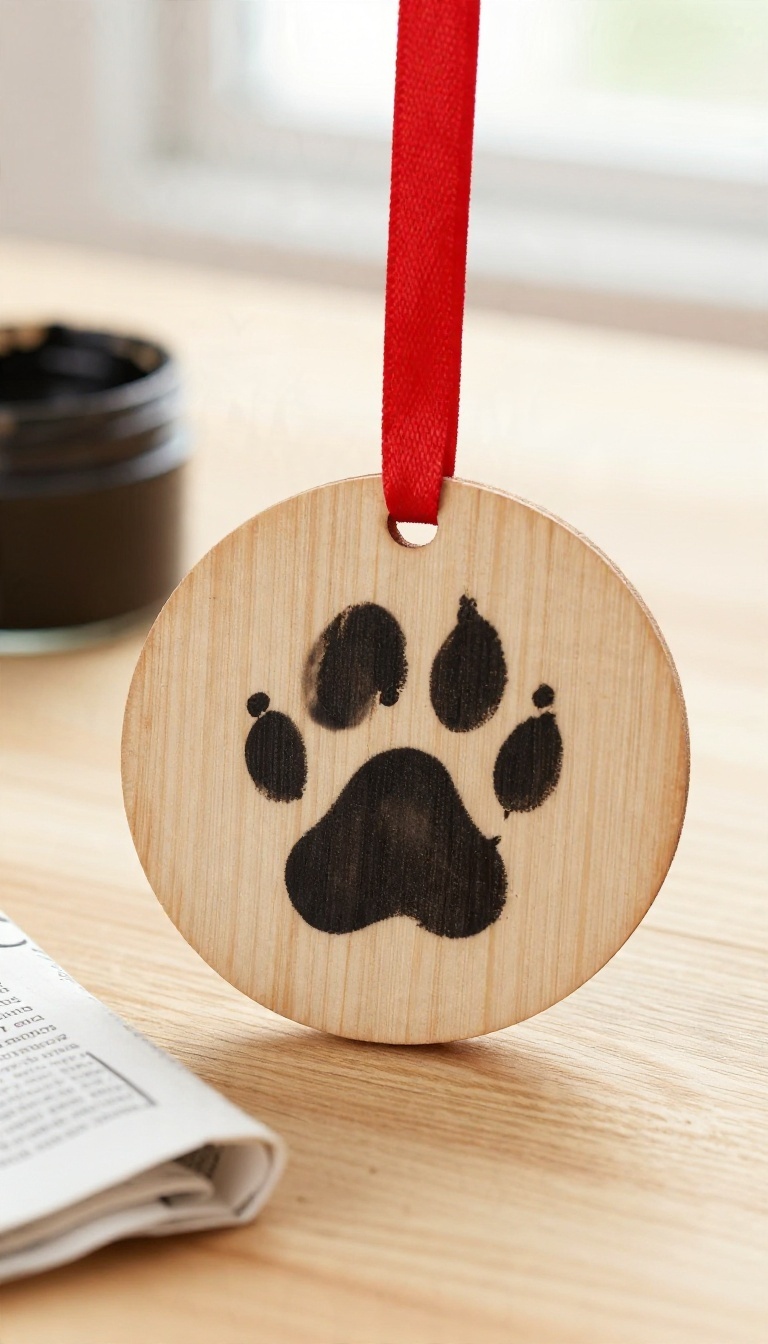
A paw print on the tree beats a photo in a drawer. This one works because it captures something you can't fake: the actual shape of the dog's foot, pressed into paint and hung where everyone sees it every December. You don't need much to pull it off.
A small wooden or ceramic ornament blank, pet-safe paint, and a cooperative dog (or a workaround if your dog isn't the sitting-still type). Add a name and a year, and you've got a gift that takes up almost no space but carries a lot of weight.
The trick with this one is prep. Get your materials laid out before the dog comes anywhere near the paint, because once a paw is coated, you've got about ten seconds to get a clean stamp. Lay down newspaper, have a damp cloth ready, and keep treats within reach.
Wooden blanks from a craft store work great and take paint well. Ceramic rounds feel a little more like a real ornament and hold up for years. Either way, drill or check for a hole at the top before you start, or you'll be improvising a hanger later.
Getting A Clean Paw Print
Press the paw into a shallow dish of paint rather than dunking it. You want an even coat, not a puddle. Then press the paw flat onto the ornament and hold it steady for a second or two before lifting straight up.
If the first attempt smears, don't panic. Wipe the blank clean with a damp cloth, dry it, and try again. Most dogs tolerate two or three tries before they lose interest, so work fast and reward generously.
When The Dog Won't Cooperate
Some dogs hate having their feet handled, and that's fine. You've got options. Press their paw onto an ink pad and stamp it onto paper first, then paint over the print on the ornament by hand.
Or skip the real print entirely and paint a paw shape freehand. It won't be exact, but nobody's comparing it to a footprint. The gesture matters more than the accuracy.
Finishing Touches That Last
Let the paint dry completely before adding anything else, at least a few hours and longer for thicker coats. Then paint the dog's name in a contrasting color, plus the year in small numbers along the bottom edge. Seal it with a clear acrylic spray or a brush-on varnish so it survives the tree, the storage box, and the occasional drop.
Tie on a ribbon loop and you're done.
7. Dog and Owner Matching Portrait
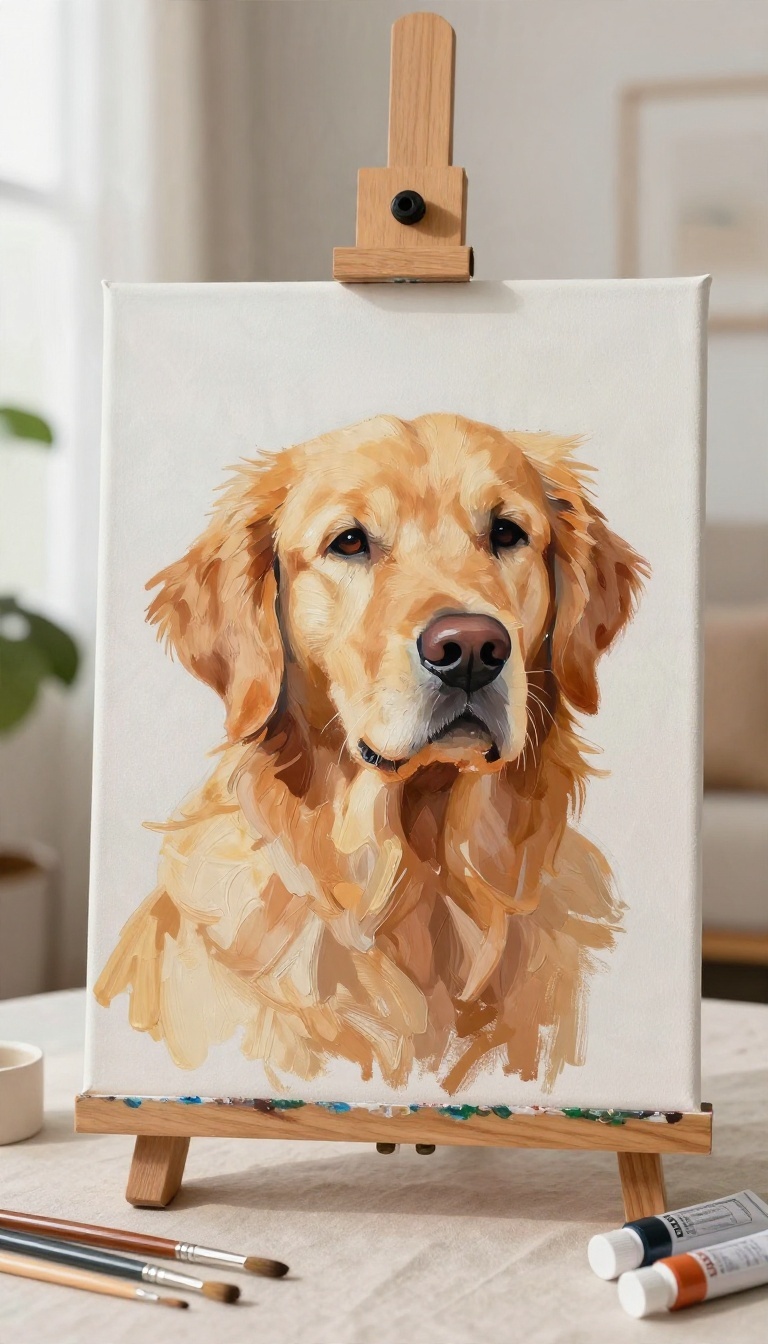
A portrait of the dog alone is sweet. A portrait of the dog next to its person is the one that makes someone tear up a little. This idea pairs both faces on one canvas, either side by side or softly overlapping, so the gift captures the bond and not just the pet.
It works especially well for a partner, a parent, or anyone whose dog follows them room to room. The trick is keeping both faces simple and consistent, so the painting reads as one piece instead of two pictures taped together.
You have a few ways to lay this out, and the right one depends on the photos you can actually get your hands on. Side-by-side is the safest bet. Overlapping is more intimate but harder to pull off.
Pick based on your comfort level, not just what looks good on Pinterest. ## Pick the Layout That Fits Your Photos Side-by-side means two clear portraits on one canvas, split roughly down the middle or spaced with breathing room. It's forgiving because each half stands on its own, and you can fix one face without touching the other. Overlapping puts the dog slightly in front of or beside the person, heads close together.
This reads warmer and more connected, but you need photos where both faces are at similar angles and lighting. If one photo is a sunny outdoor shot and the other is dim and indoors, the overlap will look off. A third option: paint the person from the shoulders up and let the dog sit in the foreground, turned toward them.
It hides a lot of detail in the human face and puts the focus on the relationship instead. ## Match the Photos Before You Paint Grab one photo of the dog and one of the person, then look at them together. Do the lighting directions agree? Are the heads turned the same way?
If not, hunt for better shots. Aim for both faces looking roughly toward the camera or both in a three-quarter turn. Same light source, ideally soft and even, keeps skin tones and fur from fighting each other.
If you can't find a matching pair, take a new photo. Set the person on a chair with the dog beside them and shoot a few frames on a phone. That five-minute session solves most of the layout problems before you ever pick up a brush. ## Keep Both Faces Simple Resist the urge to render every eyelash and whisker.
Flat blocks of color with a few defining strokes keep the two portraits looking like they belong to the same painting. Use the same palette across both faces. If the person's skin leans warm, pull a warm tone into the dog's fur highlights.
Shared color is what makes the pairing feel intentional. Paint the backgrounds last and keep them plain, maybe a single soft wash. A busy background on one side and an empty one on the other splits the canvas in half. ## Add a Small Personal Detail One tiny touch makes the portrait unmistakably theirs.
A collar tag with a real name, a favorite sweater, or the person's glasses sitting slightly crooked. Keep it to one detail per figure. Too many and the painting gets cluttered, and the sentimental punch gets buried.
Frame it in a simple wood or black frame so the faces stay the focus. This one tends to end up on a dresser or a hallway wall, so make sure it looks good up close.
Pick The Layout That Fits Your Photos
Side-by-side means two clear portraits on one canvas, split roughly down the middle or spaced with breathing room. It's forgiving because each half stands on its own, and you can fix one face without touching the other. Overlapping puts the dog slightly in front of or beside the person, heads close together.
This reads warmer and more connected, but you need photos where both faces are at similar angles and lighting. If one photo is a sunny outdoor shot and the other is dim and indoors, the overlap will look off. A third option: paint the person from the shoulders up and let the dog sit in the foreground, turned toward them.
It hides a lot of detail in the human face and puts the focus on the relationship instead.
Match The Photos Before You Paint
Grab one photo of the dog and one of the person, then look at them together. Do the lighting directions agree? Are the heads turned the same way?
If not, hunt for better shots. Aim for both faces looking roughly toward the camera or both in a three-quarter turn. Same light source, ideally soft and even, keeps skin tones and fur from fighting each other.
If you can't find a matching pair, take a new photo. Set the person on a chair with the dog beside them and shoot a few frames on a phone. That five-minute session solves most of the layout problems before you ever pick up a brush.
Keep Both Faces Simple
Resist the urge to render every eyelash and whisker. Flat blocks of color with a few defining strokes keep the two portraits looking like they belong to the same painting. Use the same palette across both faces.
If the person's skin leans warm, pull a warm tone into the dog's fur highlights. Shared color is what makes the pairing feel intentional. Paint the backgrounds last and keep them plain, maybe a single soft wash.
A busy background on one side and an empty one on the other splits the canvas in half.
Add A Small Personal Detail
One tiny touch makes the portrait unmistakably theirs. A collar tag with a real name, a favorite sweater, or the person's glasses sitting slightly crooked. Keep it to one detail per figure.
Too many and the painting gets cluttered, and the sentimental punch gets buried. Frame it in a simple wood or black frame so the faces stay the focus. This one tends to end up on a dresser or a hallway wall, so make sure it looks good up close.
8. Seasonal Scene with Dog in Snow
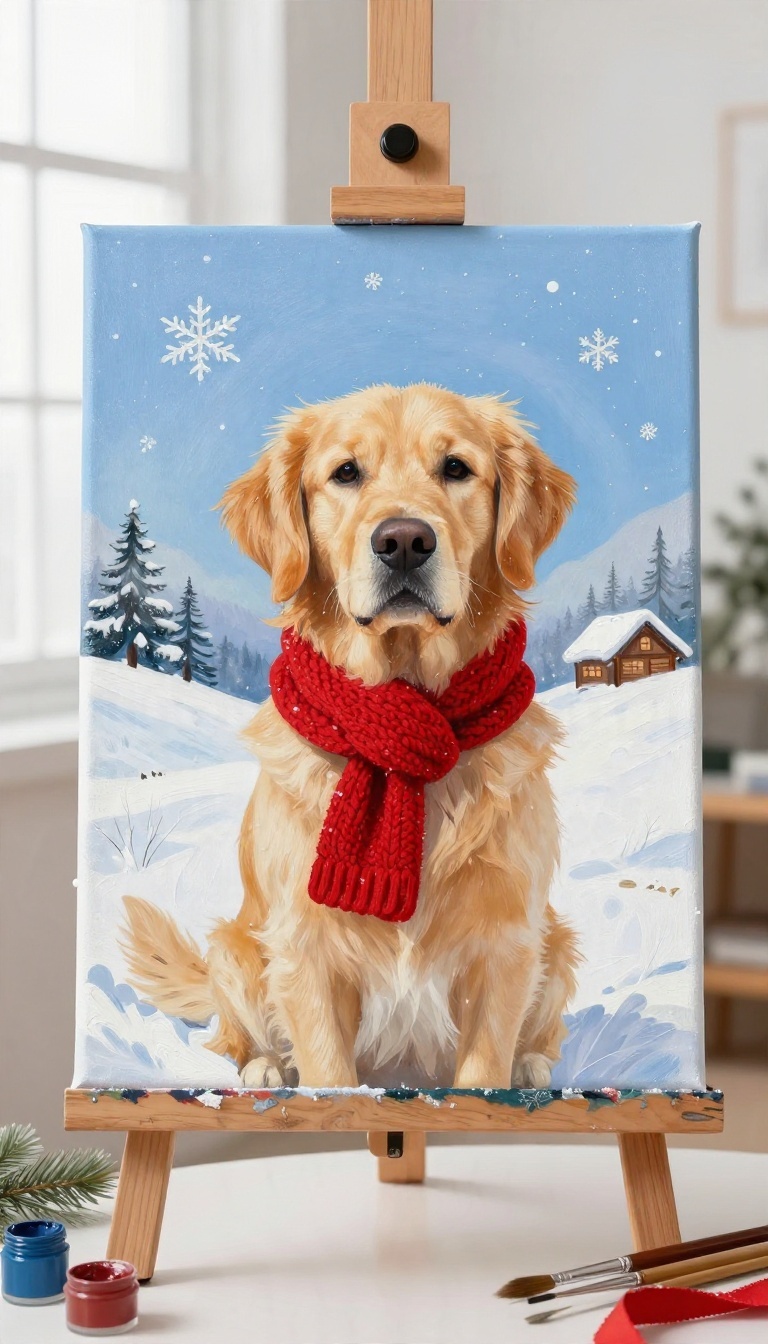
A snowy backdrop turns a simple dog portrait into a little holiday moment. Picture your pup with a red scarf, flakes drifting around their ears, and a cozy cabin or pine tree in the distance. It's festive without being fussy, and the finished painting works as decor long after the tree comes down.
The trick is to keep the dog as the star while the snow sets the mood. You don't need a blizzard—just enough white and a few well-placed details to sell the scene. Start with a photo of your dog, then imagine them in a winter setting.
The result feels personal and seasonal, and it gives you a built-in color palette of cool blues, crisp whites, and a pop of warm red.
Set The Scene Without Overwhelming The Dog
Begin with a simple background: a soft gradient of blue and white for the sky, a few snow-covered hills, and maybe a bare tree or a cabin silhouette. Keep the dog large in the frame so their face stays the focus. A light dusting of snow on the ground and a few falling flakes add movement without clutter.
If you're new to painting, sketch the dog first, then block in the background around them.
Add Festive Details That Feel Natural
A red scarf is the easiest win—it adds color and warmth and instantly reads as holiday. You can also try a Santa hat, a wreath collar, or a small gift box nearby. Keep accessories simple so they don't distract from the dog's expression.
For the snow, use a dry brush to dab white paint for flakes, or splatter a little white paint mixed with water for a softer effect.
Make It Gift-ready And Display-friendly
Once the painting is dry, consider framing it in a simple wood or black frame to match holiday decor. A square or rectangular canvas works well for this scene. If you're giving it as a gift, add a ribbon and a handwritten tag.
The recipient can hang it during the holidays or leave it up all winter—it's versatile enough for both.
9. Abstract Color Block Dog
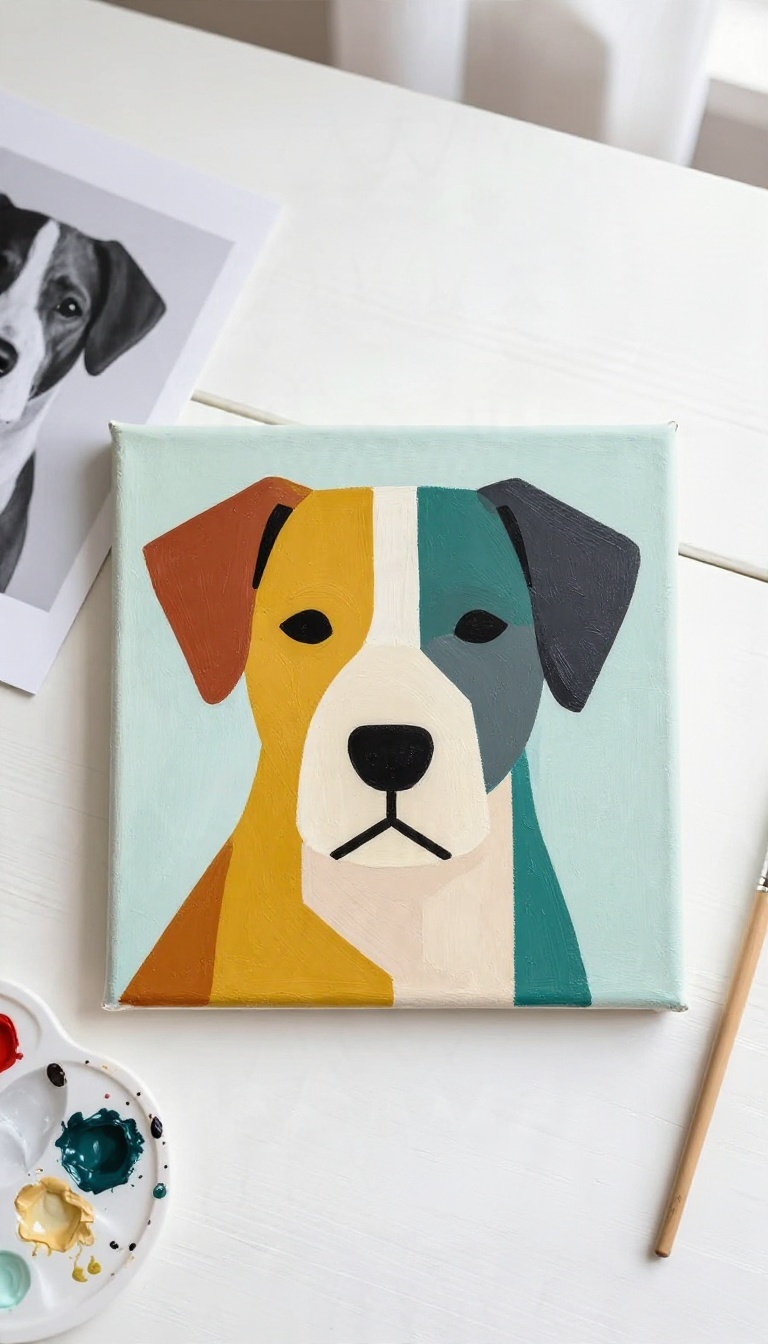
Abstract color block dog paintings turn a familiar face into a modern statement piece. Instead of blending fur and shading eyes, you break the dog's image into flat geometric shapes of color. The result looks gallery-worthy, but the process is surprisingly forgiving for beginners.
There's no pressure to render every whisker—just bold blocks that capture the dog's essence.
The magic of this style is that it hides imperfections. A slightly wobbly edge or an unexpected color choice reads as intentional when it's part of a geometric pattern. You'll work from a photo, simplify it into a few key shapes, and fill each with a solid color.
The dog's personality comes through in the silhouette and the color palette you choose.
Pick A Photo That Simplifies Well
Choose a photo where the dog's head and shoulders are clear and the background is uncluttered. A side profile or a straight-on face shot works best because the shapes are easier to trace. Avoid busy patterns or extreme angles that make the outline confusing.
Once you have the photo, print it in black and white to see the contrast more clearly.
Break The Image Into Shapes
Use a pencil to sketch the dog's outline on your canvas, then draw a few straight lines across the body to divide it into geometric sections. Think triangles, rectangles, and trapezoids. Don't overdo it—five to ten blocks are plenty for a small canvas.
Keep the dog's most recognizable features, like the ears and snout, as distinct shapes.
Choose A Bold Color Palette
Pick three to five colors that work together. You can go with the dog's natural colors but push them brighter, or choose a completely unexpected palette like teal, mustard, and coral. Paint each block with a flat, even coat, and let it dry before adding the next color if they touch.
A little painter's tape can help keep the edges crisp.
Add A Clean Background
A solid background in a neutral tone makes the color blocks pop. White, light gray, or even black works well. Paint the background last so you can clean up any edges.
If you want a bit more interest, add a thin outline around the dog's silhouette in a contrasting color. That small detail makes the whole piece look more finished.
10. Custom Dog Portrait on a Tote Bag

A tote bag gets used. It hauls groceries, library books, and the leash on morning walks, which means a painted dog face on the front shows up in someone's day over and over. That's a lot of mileage out of a few dollars of canvas and a small tube of fabric paint.
The trick is treating the bag as fabric, not paper. Fabric paint behaves differently than acrylic, and a tote takes more abuse than a canvas on a wall. Get those two things right and you've got a gift that survives the washing machine and the bottom of a car trunk.
Start with a plain canvas tote in a light color so your paint reads clearly. Natural, off-white, or pale gray all work well. Wash and dry it first to remove any sizing that could keep the paint from bonding.
Pick a simple reference photo, ideally one where the dog's face is clear and the lighting is even. You're going to simplify it anyway, so a busy background doesn't help. Crop in tight on the head and shoulders.
Sketch the outline lightly with a water-soluble fabric pencil or a piece of chalk. Keep the shape loose, because a stiff, overworked sketch looks worse than a confident quick one.
Pick The Right Paint And Prep The Fabric
Fabric paint is the safe bet here, and most craft stores carry it in small bottles. Acrylic mixed with a fabric medium also works if you already have a paint stash, though straight acrylic will crack and peel once the bag gets washed. Slip a piece of cardboard inside the bag before you start.
It stops paint from bleeding through to the back panel and gives you a flat surface to work on. Tape the bag down if it keeps shifting.
Keep The Portrait Simple
A full detailed portrait is hard to pull off on textured canvas. Instead, paint the dog's silhouette in one solid color, or just the face with a few key features like the eyes, nose, and ear shape. A single-color outline in black or dark brown is forgiving and looks sharp.
If you want a little more, add one accent color for a collar or a bandana. Resist the urge to fill in every detail, because less usually reads better at arm's length.
Set The Paint So It Survives The Wash
Let the bag dry completely flat for at least 24 hours. Then heat-set it by pressing a cloth over the painted area with a warm iron, no steam, for about 30 seconds. Flip it and do the back too.
Tell the recipient to wash it cold and inside out, and to skip the dryer. That small heads-up keeps the portrait looking fresh for years instead of months.
11. Paw-some Quote with Dog Illustration

Words and a little paint go a long way. Pair a short quote about dogs with a small hand-painted illustration, and you get a gift that makes people smile before they even hang it up. It's the kind of piece that adds personality to a hallway, a desk nook, or a kitchen wall without taking itself too seriously.
The beauty here is flexibility. You can go funny, tender, or a little bit of both, and the painting stays small and manageable. A quote in tidy lettering plus one simple dog drawing is enough to carry the whole piece.
Pick A Quote That Fits The Recipient
Start with the person, not the paint. A friend who jokes about their dog's drama might love something like "My dog is fine, it's the humans I worry about, " while a quieter gift calls for a line about loyalty or home. Keep it short, six to twelve words works best, so the lettering stays readable and the illustration has room to breathe.
If you're stuck, borrow a line from a favorite book or song and credit it small at the bottom.
Paint The Dog Small And Simple
The illustration doesn't need detail to land. A single-color silhouette, a floppy-eared head, or a tiny sitting pup in profile reads clearly at a small size. Sketch it lightly in pencil first, then fill with one or two flat colors.
Leaving white space around the dog keeps it clean and makes the quote the star. If lettering isn't your thing, print the quote on cardstock and paint the dog beside it, then frame the pair together.
Frame It To Match The Room
A simple thrifted frame in black, white, or natural wood lets the art do the talking. Cut a mat from plain paper if the frame opening feels too big, and sign and date the back so it feels like a real keepsake. For a lighter option, paint straight onto a small canvas board or a wooden plaque that can lean on a shelf.
Either way, seal it with a matte spray so the paint holds up over time.
12. Mixed Media Collage with Photo and Paint
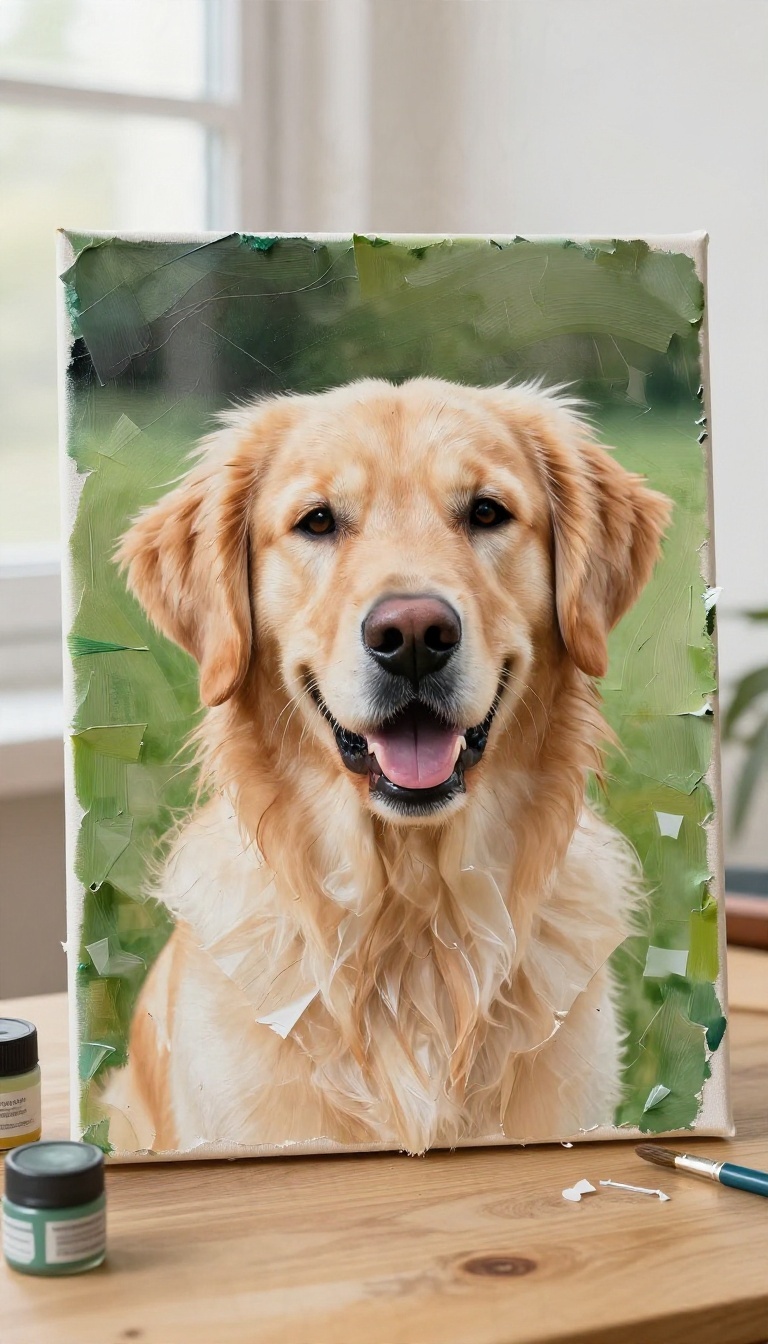
Sometimes the best painting starts with a photo you already love. Mixed media collage lets you build a painted scene around a real snapshot of the dog, so the face stays perfectly recognizable while everything else gets a handmade touch. It's forgiving, too.
If your brushwork feels shaky, the photo carries the likeness and the paint just sets the mood. Torn paper, fabric scraps, and a little texture paste do the rest of the heavy lifting. This one suits anyone who'd rather assemble than paint from scratch, and it uses up scraps you probably already have in a drawer.
Start with a clear, well-lit photo of the dog, printed on decent paper or cardstock. Trim around the head and shoulders, leaving a little breathing room so the cutout doesn't feel cramped. Then paint a loose background on canvas or heavy board, something simple like a wash of color or a soft outdoor scene.
Glue the photo down once the paint dries, and layer texture around it to blend the edges. The result reads as a real portrait but carries the charm of something handmade, which is exactly what a gift should feel like.
Pick And Prep The Photo
Choose a shot where the dog's face is sharp and the lighting is even. Blurry or dark photos get muddy once they're printed and glued down. Print on matte cardstock rather than thin paper so it holds up under glue and paint.
Cut a soft outline around the head, or leave the full rectangle if you want a cleaner, more graphic look. A thin coat of matte medium over the print seals it and keeps ink from smearing when you paint nearby.
Build The Painted Background
Keep the background simple so it doesn't fight the photo. A single color wash, a few brushy strokes of sky, or a loose suggestion of grass all work. Let it dry completely before you go near it with glue.
Wet paint plus paper equals a wrinkled mess you'll have to start over on. If you want depth, add a second layer of color around where the photo will sit, slightly darker at the edges. This frames the cutout and helps it feel intentional.
Add Texture With Paper And Fabric
Torn paper gives you soft, organic edges that blend nicely into paint. Old book pages, sheet music, or patterned scrapbook paper all add character. Fabric scraps work well for collars, blankets, or a bit of ground beneath the dog.
Fray the edges slightly for a cozier, more handmade feel. Layer pieces with mod podge or a similar medium, pressing them flat as you go. A little texture paste stippled around the edges ties the whole thing together.
Seal It And Frame It
Once everything is glued and dry, brush a thin sealant over the whole piece to lock it in. Matte finish keeps it from looking shiny and plastic. A simple frame or a canvas with painted edges means it's ready to hang straight out of the wrapping paper.
Add a small handwritten note on the back with the dog's name and the year. That little detail turns a craft project into a keepsake someone will pull off the wall to read.
FAQ
What kind of paint works best for dog paintings?
Acrylic paint is the most versatile and beginner-friendly. It dries quickly, works on canvas, wood, and fabric, and cleans up with water.
I'm not good at drawing. Can I still make a dog painting?
Absolutely. Use a projector, trace from a printed photo, or try a silhouette or abstract style. Many of these ideas are designed for beginners.
How do I choose the best photo for a dog portrait?
Pick a clear, well-lit photo where the dog's face is visible and in focus. A straight-on shot with good contrast makes painting easier.
What's the easiest dog painting idea for a last-minute gift?
The minimalist line art or paw print ornament are both quick and simple. You can finish either in under an hour.
Can I paint on something other than canvas?
Yes—try wood slices, tote bags, ornaments, or even rocks. Just make sure to use the appropriate paint and sealant for the surface.
Conclusion
You don't need to be a professional artist to give a dog painting that someone will cherish. Pick an idea that matches your time and skill, and don't stress about perfection—the personal touch is what counts.
Whether you go for a quick silhouette or a detailed portrait, your handmade gift will stand out under the tree. So grab a brush and a photo, and make this Christmas a little more personal.

I’m Pallab Kishore, the owner of Little Pets Realm — an animal lover and pet care enthusiast sharing easy tips, healthy recipes, and honest advice to help every small pet live a happy, healthy, tail-wagging life.