
A hat that slides off the second your dog shakes is the fastest way to waste an afternoon of crochet. Most store-bought pet hats ignore ear placement and head shape, so they sit crooked or pinch. These nine patterns fix that by working with your dog's anatomy instead of against it.
Each idea below targets a specific problem, whether it's floppy ears, a wide skull, or a pup who hates anything tight. You'll find beginner-friendly beanies and a few showstoppers for photos.
Pick one that matches your dog's build and your patience level. A tape measure and a quick head circumference check will save you a lot of frogging.
1. The Basic Ear-Hole Beanie
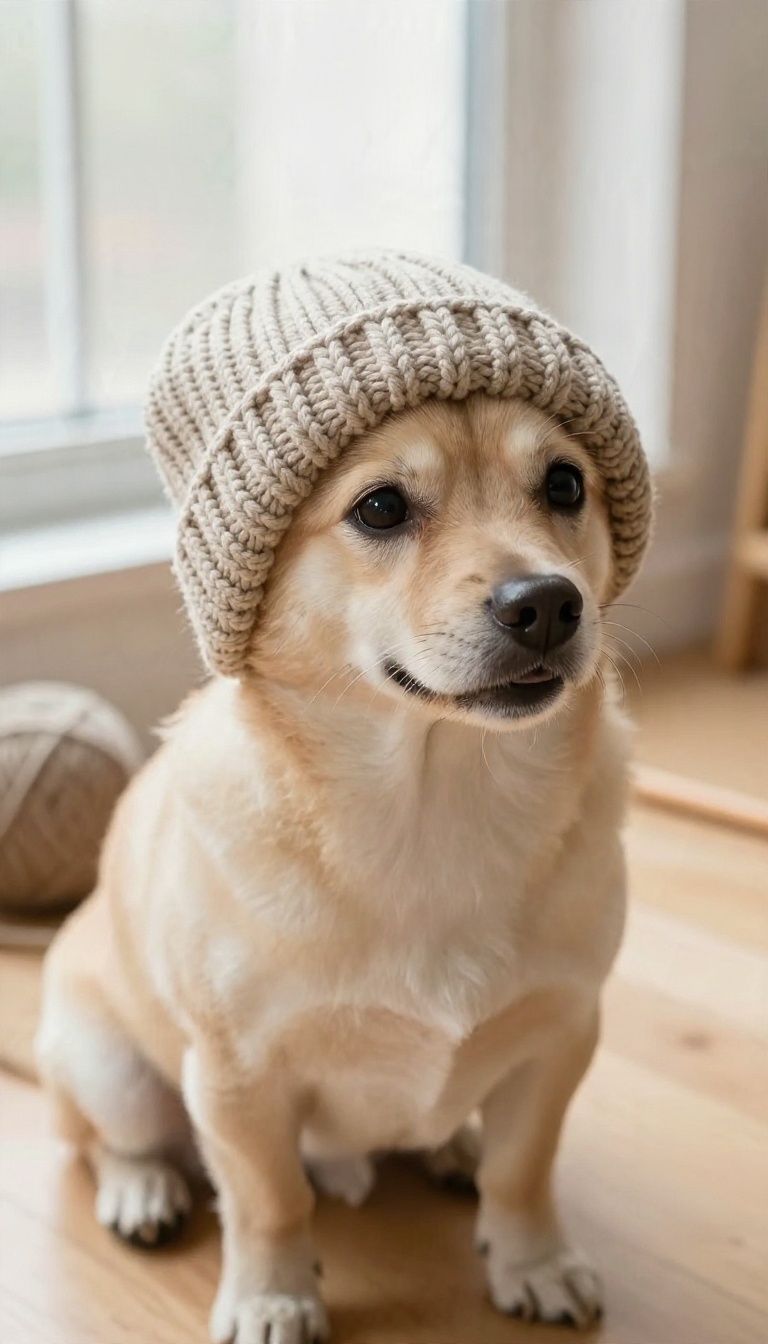
Every crocheter's first dog hat should be the one that actually stays on. The basic ear-hole beanie is exactly that: a snug ribbed tube with two clean openings where the ears come through, so nothing rides up or digs in. It solves the two biggest complaints about simple pet hats.
Without ear holes, a hat either slides backward off the skull or bunches awkwardly behind the ears. Two well-placed openings fix both problems at once. This is also the most forgiving pattern to start with.
You work a rectangle in ribbing, join it into a tube, and add the holes as you go. No shaping, no complicated decreases.
The whole hat is built from half double crochet worked in the back loop only, which gives you that stretchy, store-bought ribbed look. You start with a chain that matches your dog's head length from forehead to nape, then work rows until the width wraps comfortably around the head. Measure twice before you commit.
Wrap a soft tape around the widest part of the skull, just behind the ears, and jot that number down. Then measure from the brow line to the base of the skull for the length. A little negative ease matters here.
Subtract about half an inch from the circumference so the hat hugs the head instead of hanging loose. Ribbing stretches, so a slightly small hat will fit better than a roomy one.
Placing The Ear Holes
Mark where the ears sit before you crochet a single hole. Slip the joined tube onto your dog's head and pinch the fabric where each ear naturally pokes through, then pin or mark those spots with a stitch marker. Work the holes by chaining two to four stitches and skipping the same number of stitches underneath, depending on ear size.
Small terriers need a tighter gap, while floppy-eared dogs like a beagle need a wider opening so the ear can fold through without pinching. Try the hat on again before you fasten off. If an ear looks squished or the hole sits too high, it's much easier to frog a few rows now than to rework the whole hat later.
Getting The Ribbing To Fit
Half double crochet in the back loop gives good stretch, but the starting chain decides how snug the finished hat feels. Work a small swatch, stretch it gently, and compare it to your dog's measurement. If the hat feels tight around the brow, go up a hook size rather than adding stitches.
A bigger hook loosens the whole fabric evenly, which looks cleaner than patching in extra width at one spot. Dogs with thick double coats, like huskies or goldens, need a looser fit so the fur doesn't bunch. Short-coated breeds can wear a closer-fitting version without any trouble.
Finishing Touches That Keep It On
A simple single crochet border around each ear hole stops the edges from curling and gives them a clean, finished look. Work it in the same yarn so it blends in. Add a short chin strap with a button or a small piece of hook-and-loop tape if your dog is a head-shaker.
Even a snug beanie can work its way off during a good shake, and a strap takes five minutes to add. Weave in your ends securely, since dogs will chew and tug at anything dangling. A yarn needle and a few extra passes through the last stitch will keep everything locked down through repeated wear.
2. The Floppy-Ear Snood Hat

Dogs with long, floppy ears have a hard time with most hats. A standard beanie squashes their ears flat or pushes them into their face, which is uncomfortable and looks a little sad. The floppy-ear snood hat solves that by sitting wide and shallow on the crown, then draping softly behind the ears instead of over them.
Your pup gets warmth and style without any ear drama.
This design works like a little cape for the head. You crochet a shallow bowl that covers the top of the skull, then add a loose fabric tube or mesh that hangs behind the ears. The ears stay free to flop naturally, and the hat stays put because it's anchored around the crown, not clamped over the ears.
Getting The Fit Right
Measure around the widest part of your dog's head, just behind the ears, and add about an inch for ease. The hat should sit snug but not tight, like a loose headband. Use a soft tape measure and check twice—dogs wiggle.
If your dog is between sizes, go up rather than down, since the snood part can be adjusted with a drawstring or a few stitches.
Choosing Yarn And Stitch
Pick a worsted-weight cotton or a soft acrylic blend that won't irritate sensitive ears. Avoid scratchy wool, especially if your dog has short fur around the head. A simple half-double crochet in the round gives the crown a nice shape without gaps.
For the drape behind the ears, switch to a lighter stitch like single crochet in a loose tension, or even a mesh pattern so air can flow.
Making The Ear Drape
Instead of closing the hat under the chin, work a rectangular panel that extends from one side of the crown to the other, passing behind the ears. This panel should be wide enough to cover the back of the neck but not so long that your dog steps on it. Attach it with a few stitches at each side, leaving the middle open so ears can move freely.
Add a small button or tie if you want extra security.
Keeping It On
Floppy-eared dogs often shake their heads, so the snood needs to stay put without being tight. A thin crochet cord or a soft elastic band around the back of the head can help, but make sure it doesn't pull on the ears. Test the hat indoors first and watch how your dog moves.
If they seem bothered, adjust the drape length or loosen the crown slightly.
3. The Pom-Pom Winter Topper
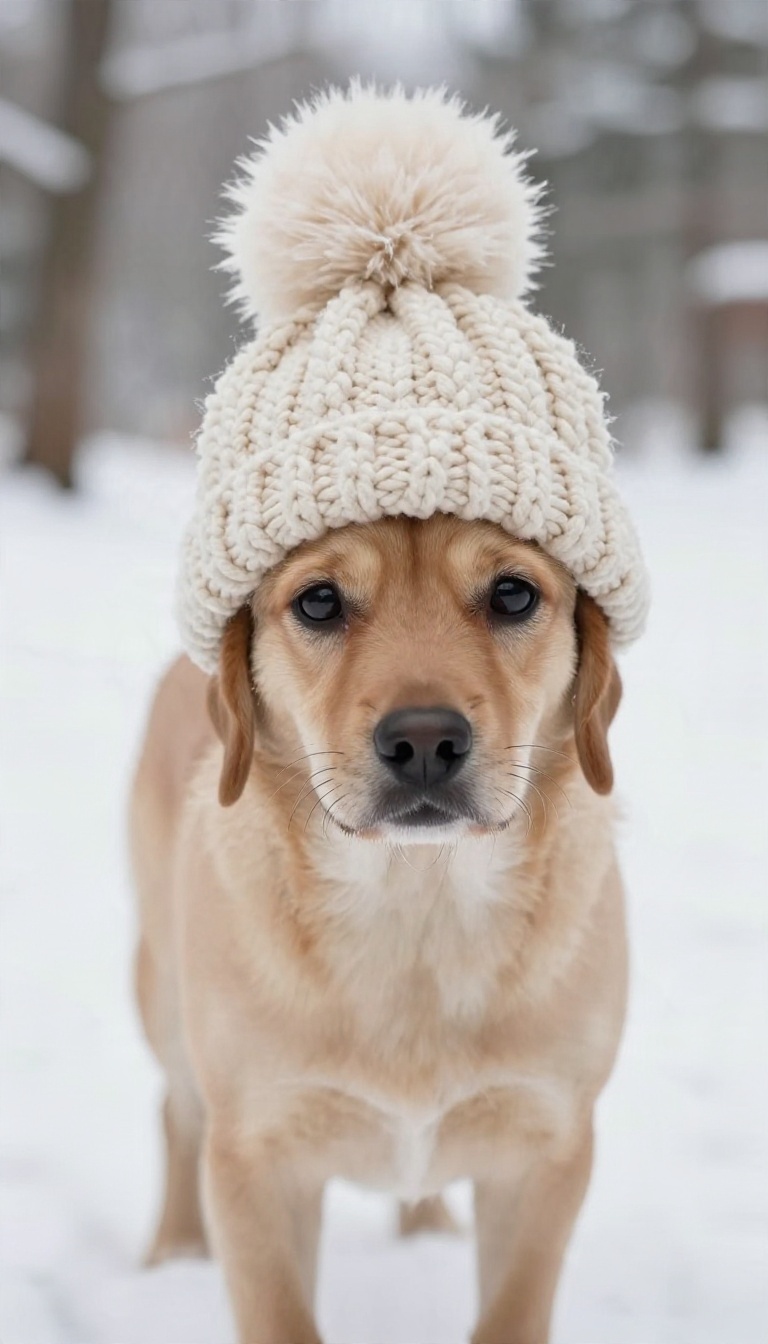
Cold-weather walks call for something with a little more substance than a thin cotton beanie. This design leans on chunky yarn and double crochet stitches, so the fabric comes out thick and warm without turning into a week-long project. A fluffy pom-pom on top finishes it off and gives your pup that cozy, slightly ridiculous winter look people stop to photograph.
The whole hat works up in an evening or two, which makes it a good pick when the temperature drops and you realize your dog has nothing warm to wear. It suits short-haired breeds and any dog that shivers the moment the wind picks up.
Double crochet is the workhorse here. It builds height fast, keeps the fabric flexible enough to pull over ears, and traps a layer of warm air when you use a bulky or super-bulky weight yarn. You'll want a hook sized to match your yarn, usually somewhere in the 6.
5mm to 8mm range for chunky skeins. Check the label and swatch a small square first, because gauge matters more than usual when the hat has to fit a specific head. ### Choosing a Yarn That Holds Up Wool blends handle cold and moisture best, but a soft acrylic is easier to wash and kinder on sensitive skin. Avoid anything scratchy near the ears, since that's the spot dogs notice first.
Superwash merino is a solid middle ground. It's warm, it doesn't felt in the wash, and it drapes nicely over the skull without sagging. ### Getting the Fit Right Measure head circumference just behind the ears and again around the widest part of the skull. Work a flat circle until it matches the first number, then stop increasing and let the sides grow straight down.
The hat should sit snug but not tight. You want to be able to slide two fingers under the edge without stretching the stitches. ### Adding Ear Openings Without Ruining the Shape For dogs with upright ears, skip a round or two of stitches where the ears sit, then chain across the gap and keep going. This creates a clean opening that doesn't distort the rest of the hat.
Floppy-eared dogs usually do fine with a plain tube, since the hat rests above the ear line. Try it on before you weave in ends so you can adjust while the yarn is still workable. ### Making and Attaching the Pom-Pom A large pom-pom, roughly three to four inches across, balances the chunky fabric. Use a pom-pom maker or two cardboard rings and wrap plenty of yarn so it comes out dense rather than sparse.
Trim it evenly, then tie it on with a doubled strand of the same yarn and a secure knot. A small button or a crocheted chain loop underneath lets you remove the pom-pom for washing, which is a nice touch for a hat that'll see snow and slush.
Choosing A Yarn That Holds Up
Wool blends handle cold and moisture best, but a soft acrylic is easier to wash and kinder on sensitive skin. Avoid anything scratchy near the ears, since that's the spot dogs notice first. Superwash merino is a solid middle ground.
It's warm, it doesn't felt in the wash, and it drapes nicely over the skull without sagging.
Getting The Fit Right
Measure head circumference just behind the ears and again around the widest part of the skull. Work a flat circle until it matches the first number, then stop increasing and let the sides grow straight down. The hat should sit snug but not tight.
You want to be able to slide two fingers under the edge without stretching the stitches.
Adding Ear Openings Without Ruining The Shape
For dogs with upright ears, skip a round or two of stitches where the ears sit, then chain across the gap and keep going. This creates a clean opening that doesn't distort the rest of the hat. Floppy-eared dogs usually do fine with a plain tube, since the hat rests above the ear line.
Try it on before you weave in ends so you can adjust while the yarn is still workable.
Making And Attaching The Pom-pom
A large pom-pom, roughly three to four inches across, balances the chunky fabric. Use a pom-pom maker or two cardboard rings and wrap plenty of yarn so it comes out dense rather than sparse. Trim it evenly, then tie it on with a doubled strand of the same yarn and a secure knot.
A small button or a crocheted chain loop underneath lets you remove the pom-pom for washing, which is a nice touch for a hat that'll see snow and slush.
4. The Bear-Ear Hood

A hood solves the problem most hats create: the escape route. Slip a beanie over your dog's head and the first good shake sends it flying, but a hood wraps around the back of the skull and anchors under the chin, so it has somewhere to grip. Add two round bear ears on top and you get a hat that reads as a costume without feeling like one to your dog.
The ears sit high and slightly forward, which keeps them out of the way during a sprint around the yard. This one earns its spot for photo sessions and Halloween events, but it holds up on ordinary walks too. The snug fit is the whole point.
The structure is simple: a tube that becomes a hood, with a shaped opening for the face and a strap or button closure under the jaw. The bear ears attach last, so you can adjust their angle before you sew them down. Work it in a worsted-weight yarn with some spring to it.
Cotton blends and acrylics both hold their shape, while a soft wool can sag once it warms up against the head.
Getting The Face Opening Right
The face opening decides whether your dog tolerates the hood at all. Measure from the top of the head down to just behind the eyes, then work the opening to that depth so the edge sits clear of the brow. Too wide and the hood slides forward over the eyes.
Too narrow and it pulls at the cheeks. Try it on before you finish the last round, and keep a few stitches easy to undo.
Ears That Stand Up
Round bear ears need a little structure or they flop flat. Work them in tight single crochet, stuff them lightly with fiberfill, and leave a long tail for attaching. Pin each ear in place first and check from the front.
A slight outward tilt reads more like a bear than straight-up ears, and it keeps them from crowding the top of the hood.
Keeping It On During Zoomies
A chin strap with a button closure beats a tie every time. Ties come loose mid-run, but a button sits flat and stays put. If your dog hates anything under the jaw, run a short elastic loop from the hood edge to a button on the side instead.
It gives enough give to stay comfortable without letting the hood ride up.
Yarn And Color Choices
Brown and tan make the classic bear look, but a cream hood with dark ears reads just as clearly and photographs well against most backgrounds. Skip anything fuzzy or heavily textured for the main hood. It catches on fur and pills fast, and the ears lose their clean shape.
5. The Wide-Skull Bucket Hat
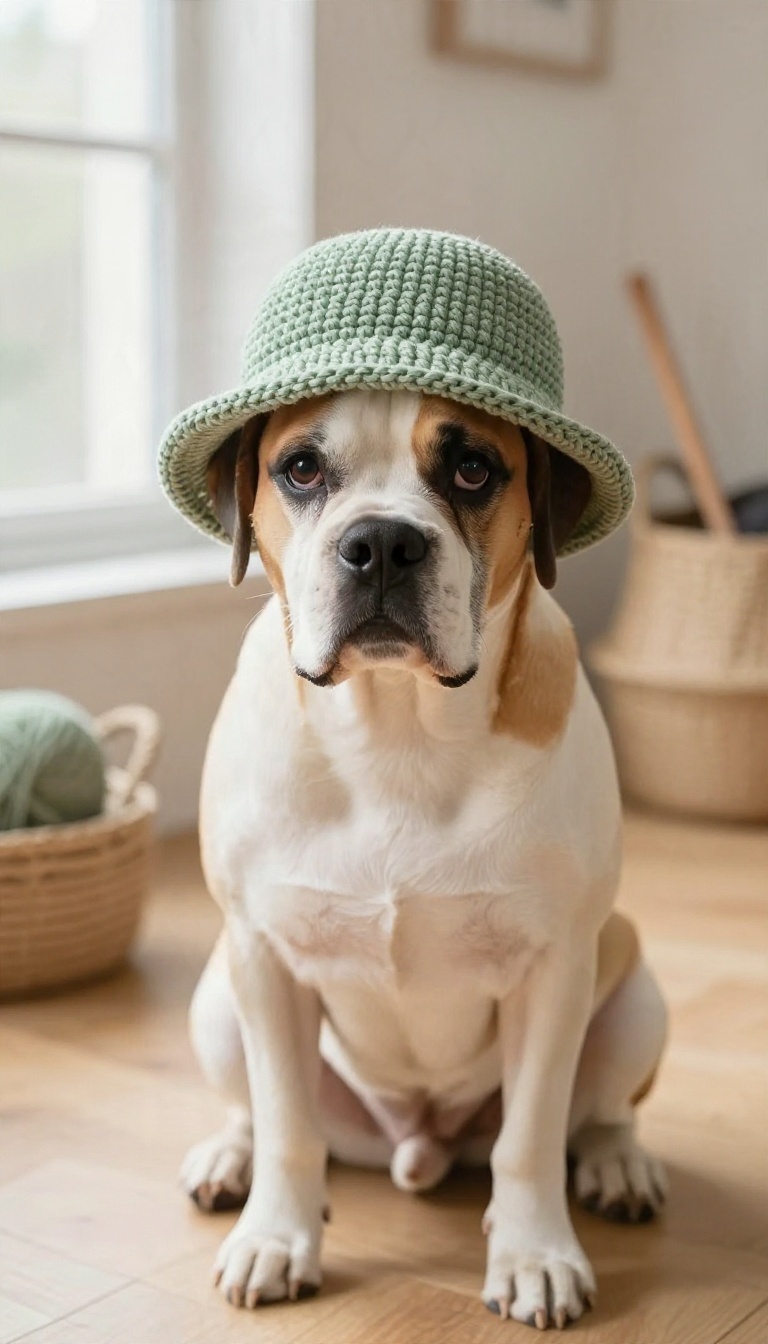
Some dogs have a head that seems built for a helmet, not a hat. Broad breeds like pit bulls, boxers, and Frenchies often blow right past the stitch counts in standard patterns, leaving you with a crown that won't stretch over the skull. A bucket hat with a brim handles this nicely, because the shape gives you room to build width first and add structure after.
The trick is getting the crown increases right before you commit to the sides. Do that, and the brim sits level instead of riding up like a tiny visor. Get it wrong, and you'll have a hat that fits the ears but strangles the forehead.
The bucket hat earns its place on wide-headed dogs because the crown is worked flat and round before the sides drop down. That flat top is where all your extra width lives. Once the circle matches the widest part of the skull, the sides work up straight with no shaping, and the brim flares out at the end.
Most pattern failures on broad breeds come from stopping the increases too early. A standard small-dog pattern might call for six rounds of increases, but a wide skull may need eight or nine. The difference between a hat that perches and one that covers comes down to those two extra rounds.
Measure the head circumference first, then measure ear to ear across the top of the skull. The second number tells you how wide that crown circle needs to be. Write both down before you pick up the hook.
Getting The Crown Circle Right
Work your increases in the round until the flat circle measures the ear-to-ear distance across the top of the head. Lay it flat and measure straight across the middle. If it's short by half an inch, add another increase round, even if the pattern says to stop.
Keep your increase rounds evenly spaced so the circle stays flat. If the edges start to ruffle, you've added too many stitches in one round. If it cups upward like a bowl, you need more.
A flat circle is the whole game here.
Building The Sides Without Pinching
Once the crown is wide enough, stop increasing and work even rounds for the sides. This is where the hat gains height and wraps the skull. Two to three rounds usually covers a broad head, but check as you go by slipping it on your dog.
The sides should sit snug but not tight. If you can slide a finger under the edge without much effort, you're in good shape. If it leaves a mark on the forehead, add a round or two of a larger hook size to loosen it up.
Adding A Brim That Holds Its Shape
A bucket brim needs a little stiffness or it flops into your dog's eyes. Work the brim in single crochet with a few increase rounds so it flares outward, then finish with a round of slip stitch or crab stitch to firm up the edge. For extra hold, crochet the final brim round over a length of craft wire or a strand of stiff cord.
Bury the ends inside the stitches so nothing pokes out. A brim that keeps its shape frames the face and makes the whole hat look intentional.
6. The Beginner's Ear-Warmer Band
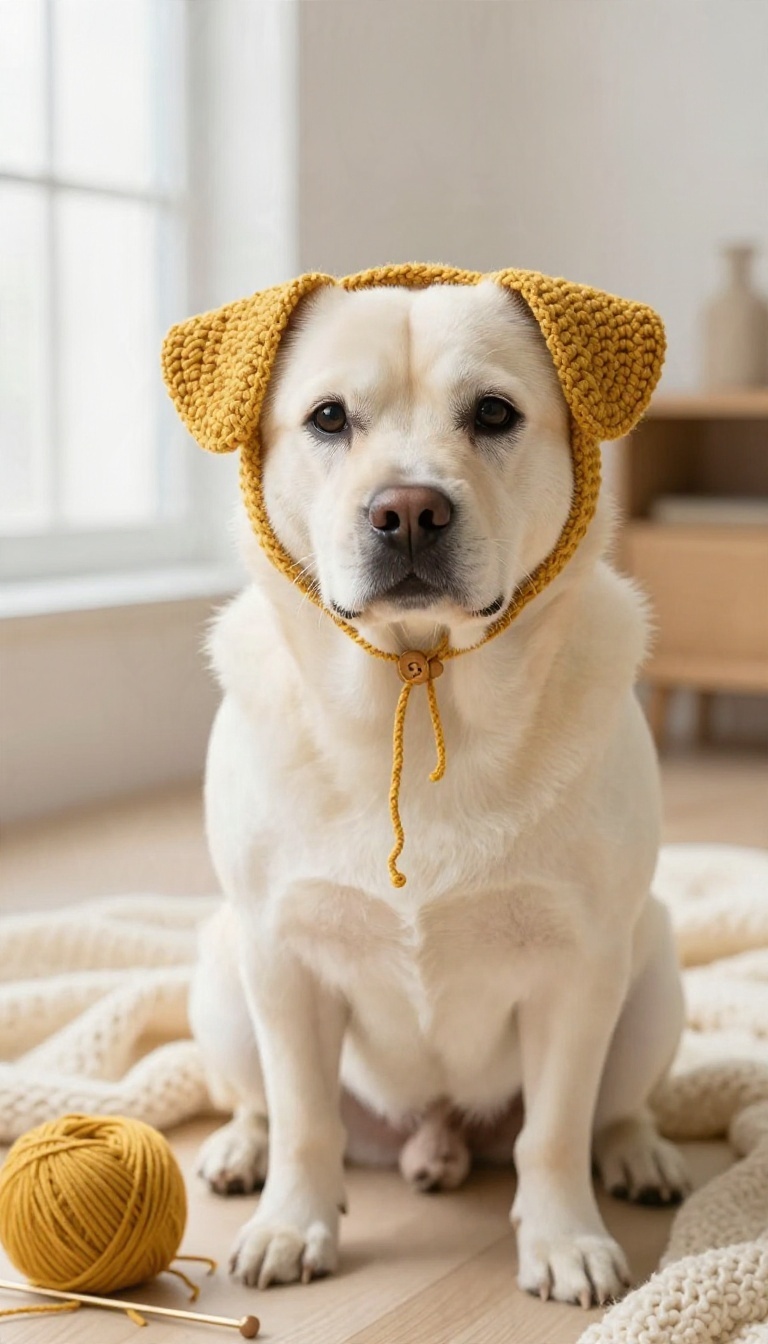
Not every dog needs a full hat, and not every crocheter wants to wrestle with shaping on their first try. The ear-warmer band is a simple strip of crochet that wraps behind the ears and fastens under the chin, keeping the head warm without covering the eyes or squishing the skull. It's the easiest project in this list and a smart way to learn pet measurements before you commit to a more complex pattern.
You'll work a flat rectangle in half double crochet, then add a button or a tie to close it. The band sits snug but not tight, and because it doesn't cover the ears, most dogs tolerate it right away. It's also a great stash-buster—one skein of worsted-weight yarn is plenty for a medium pup.
Measure Twice, Crochet Once
Wrap a soft tape measure from just behind one ear, under the chin, and back up to the starting point. That's your band length. For width, measure from the base of the ear to the top of the head—usually 2 to 3 inches for small breeds, 3 to 4 for larger ones.
Write those numbers down; you'll use them for every hat you make.
The Basic Stitch Recipe
Chain until you hit your width measurement, then half double crochet in each row until the band reaches your length. Half double crochet gives you a soft, stretchy fabric that won't curl too much. Leave a 6-inch tail for sewing on a button or creating a tie closure.
That's it—no increasing, no decreasing, no shaping.
Fastening Without Fuss
A simple button and a crochet chain loop make the band easy to take on and off. If your dog is a chewer, skip the button and use two long ties instead—just knot them loosely under the chin. Test the fit with two fingers: you should be able to slide them under the band without it feeling tight.
Make It Yours
Once you've got the basic band down, add a stripe of color, a little scalloped edge, or a small flower near the ear. Keep embellishments flat and secure so they don't bother your dog. This is also the perfect place to practice a new stitch before you use it on a full hat.
7. The Fruit Slice Photo Hat
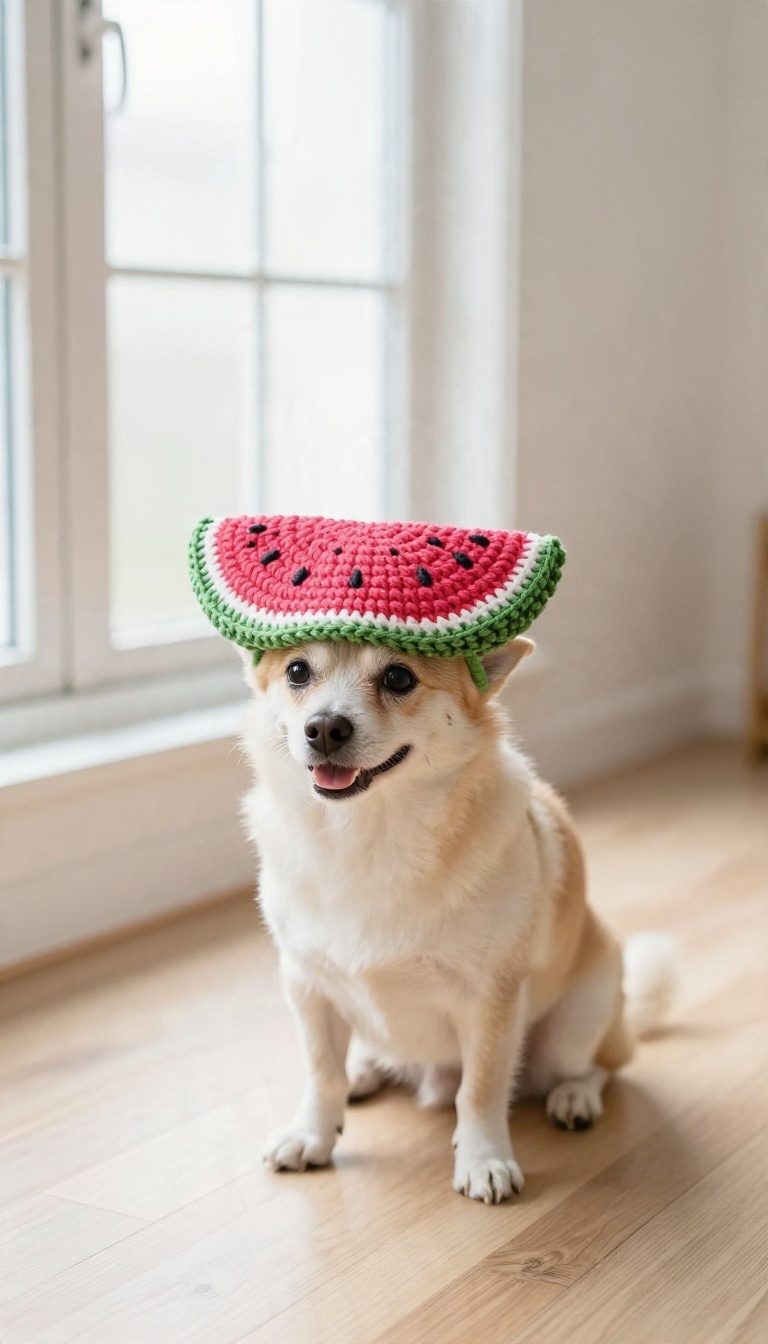
Some hats exist purely for the camera, and that's completely fine. A watermelon or citrus slice hat turns a five-minute photo session into something you'll actually want to frame. The best part is how little shaping it demands.
You work it flat like a potholder, seam it up, and you're done before your dog loses interest.
This one skips the complicated crown shaping that scares off newer crocheters. You build a flat semicircle or wedge, add a rind border, and join it into a cap. The result reads instantly as a fruit slice, which is exactly the point.
Because it's mostly flat work, you can knock one out in an evening. It also gives you a low-stakes way to practice color changes before committing to a bigger project.
Working It Flat And Seaming
Start with a half-circle worked in rows, increasing at the edges to keep it rounded. Use a bright flesh color for the center and a contrasting rind color for the last two rows. Once the piece is the right width for your dog's head, fold it and seam the two short ends together.
That seam becomes the back of the hat, so keep your stitches tidy there. A simple single crochet seam holds up well and stays flat against the head. If you want a cleaner finish, whipstitch instead and hide the tail inside the rind.
Adding The Seeds And Details
Watermelon slices need seeds, and citrus needs segments. You can embroider these with a tapestry needle after seaming, which is faster and more forgiving than crocheting them in. Small black stitches spaced evenly across the flesh read as seeds from a few feet away, which is all a photo needs.
For citrus, work a few straight stitches radiating from the center in a slightly darker shade. Keep them loose so the hat doesn't pucker.
Getting A Good Photo
These hats sit best when the flat edge rests just above the brows and the curve follows the skull. Secure it with a thin elastic strap under the chin if your dog tends to back out of hats. Natural light and a plain background make the colors pop without much fuss.
Treat it as a quick prop, not everyday wear. Snap your shots, praise your pup, and take it off before they get annoyed. A handful of treats between poses goes a long way.
8. The Adjustable Strap Cap
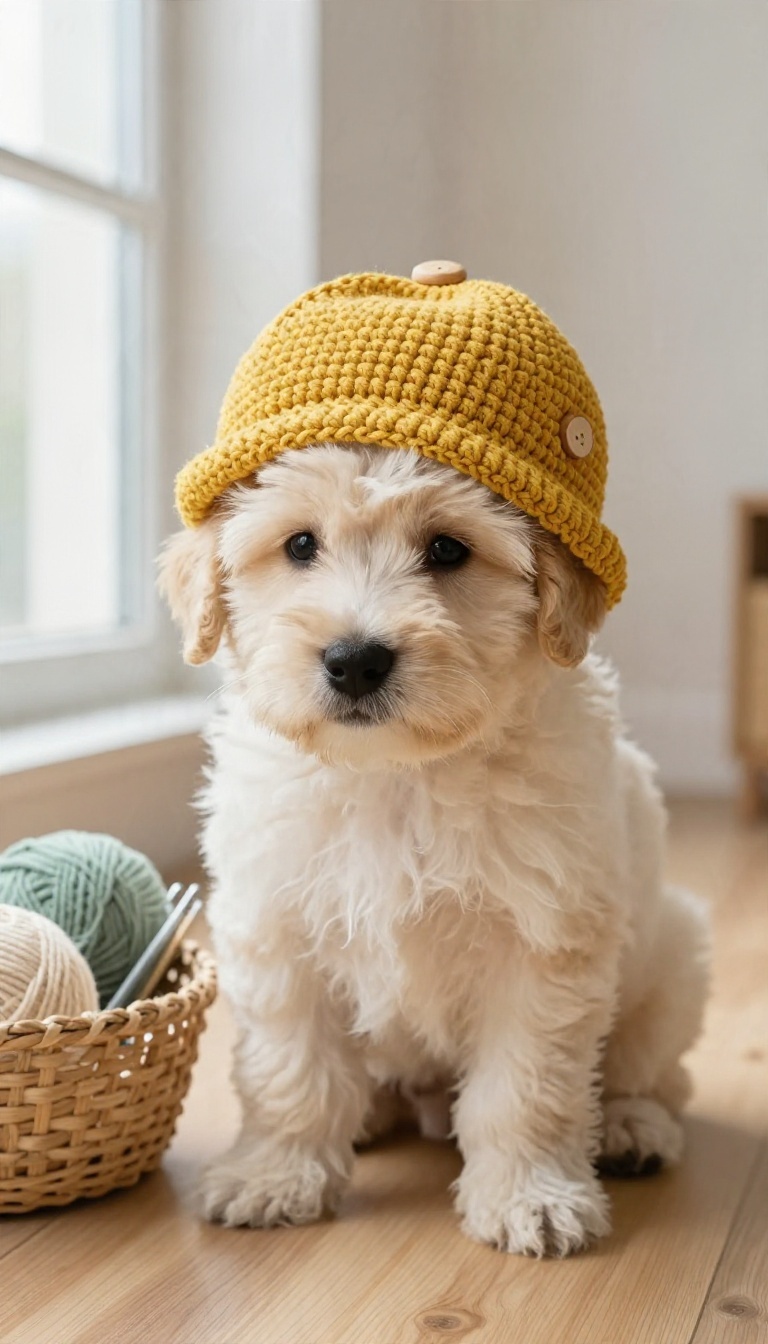
Puppies grow fast, and a hat that fit in March can be snug by June. The adjustable strap cap solves that with a simple crocheted band and a button closure at the back, just like a real baseball cap. You work the crown, add a short strap, and fasten it wherever it sits comfortably on your dog's head.
It's a practical pick for anyone who wants a hat that sticks around through a growth spurt. The strap also helps on dogs with a narrower skull, since you can cinch it down without squeezing the ears.
The crown is the main event here, so start with a basic half-double crochet circle worked flat until it covers the top of the head. Then work even rounds down the sides until the cap reaches just above the ears. Keep your tension a little firm so the cap holds its shape instead of drooping.
Leave a gap at the back for the strap. You'll pick up stitches along each side of that opening and work a short band, then finish one end with a button and the other with a small loop or buttonhole. That's the whole mechanism, and it takes maybe fifteen minutes.
Getting The Crown To Sit Right
Measure from the top of the head to just above the ear, then work rounds until you hit that number. A cap that stops too high looks like a beanie, and one that goes too low covers the eyes. Try it on your dog before you commit to the final round.
Half-double crochet gives you a firm fabric that holds a curve nicely. Single crochet works too, but it takes longer and pulls tighter, so size up your hook if you go that route.
Strap Length And Button Placement
Crochet the strap long enough to overlap by about an inch, then place your button where the fit feels right on your dog. Sew it on with doubled thread so it survives a good head shake. A wooden or large plastic button is easier to fasten than a tiny one.
If you'd rather skip buttons, a short length of single crochet worked as a loop slips over a button just as well. Either way, check the strap for slack before you let your dog wear it unsupervised.
Making It Work For Growing Pups
This is where the strap earns its keep. Add a second button further along the band so you have two sizes ready as your puppy fills out. You can also work the strap a couple of inches longer than needed and trim it later.
For dogs with a wider head, skip the cinch and wear the strap loose. The cap still stays put because the crown does most of the gripping.
9. The Holiday Elf Hat
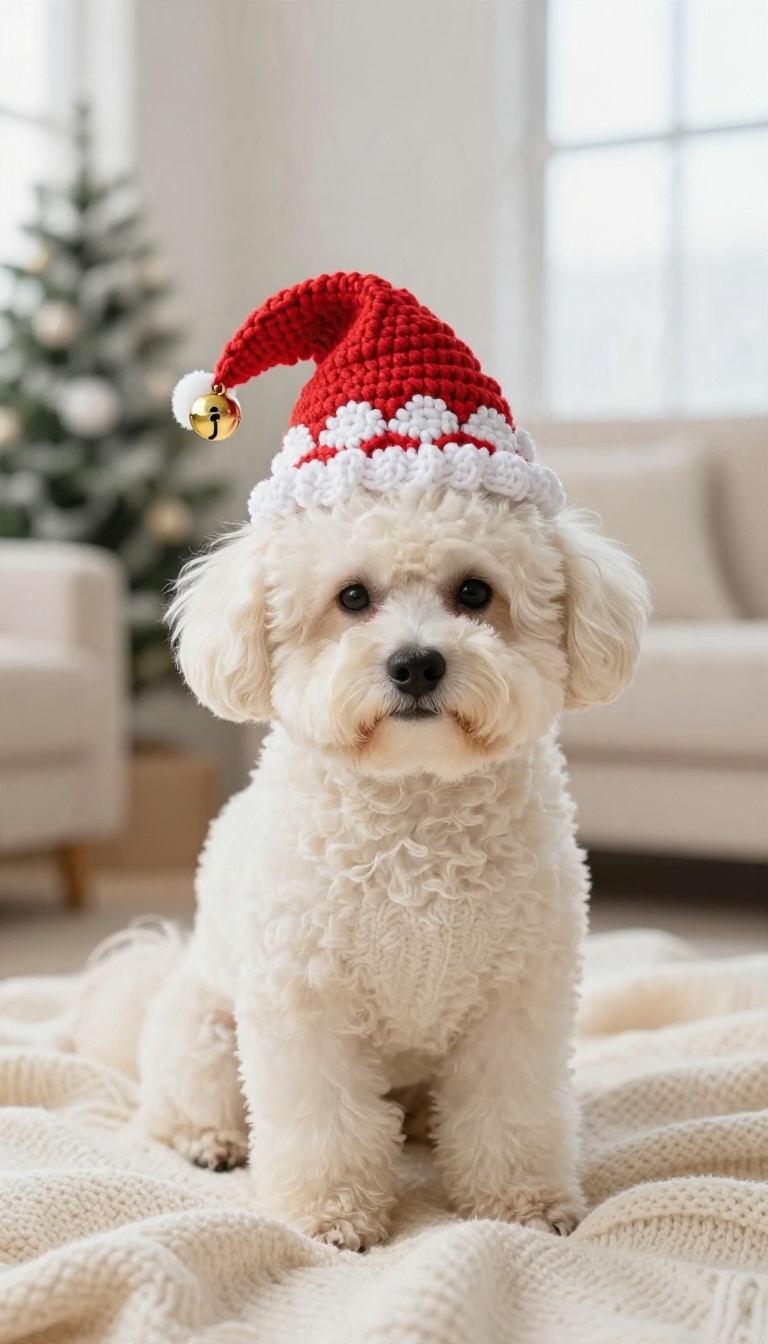
December photos hit different when your dog has a tiny pointed hat perched on their head. The elf hat leans into the season without going full costume, and it works up fast enough to finish before the family dinner. The key is keeping it light and slightly loose so it reads as festive, not forced.
A folded tip gives the hat its shape, and a jingle bell adds just enough sparkle for a photo. Size it to rest gently rather than grip, because seasonal hats come off quickly and nobody wants a wrestling match on the rug.
The elf hat is essentially a tapered cone with a brim, which means the shaping is simple and forgiving. You work in the round from the brim up, decreasing steadily toward the point. The fold at the tip is what sells the look, so plan for a little extra length before you close it off.
Because it sits lightly, this hat suits dogs who tolerate a hat for a few minutes at a time. It's a photo prop first and a warmth layer second, and that's the right expectation going in.
Shaping The Cone
Start with a brim worked in single crochet, then switch to a taller stitch for the body so the cone grows quickly. Decrease every few rounds rather than every round to keep the taper smooth instead of stepped. A cone that narrows too fast looks stubby, so check the length against your dog's head as you go.
Leave the last few rounds open at the tip. That opening becomes the fold, which you stitch down after the hat is finished.
The Folded Tip And Bell
Fold the pointed end over and tack it in place with a few hidden stitches. This gives the hat that classic droopy elf silhouette and hides any messy closing rounds. A small jingle bell attaches to the folded tip with a short length of yarn or a split ring.
Use a lightweight bell so the hat doesn't pull sideways, and check that it's secure before your dog wears it.
Getting The Fit Right
Measure the head circumference and add a little ease, since this hat should rest on the head rather than hug it. A chin strap made of a thin crochet chain keeps it in place during photos without squeezing the neck. Skip the strap entirely for dogs who dislike anything under the chin.
A slightly snugger brim usually holds well enough for a quick photo session.
FAQ
How do I measure my dog's head for a crochet hat?
Wrap a soft tape measure around the widest part of the head, just above the ears and around the back of the skull. Add about half an inch of ease so the hat isn't tight.
What yarn works best for dog hats?
Worsted or bulky acrylic and cotton blends hold their shape and wash well. Avoid scratchy wool near the ears and anything too stiff for a hat that sits on the head.
Will my dog actually keep a crochet hat on?
Most dogs tolerate a light, well-fitted hat better than a tight one. Start with short sessions, use treats, and choose a style with ear holes or a chin strap for security.
Can I make these hats without a pattern?
Yes, several styles like the ear-warmer band and basic beanie are simple enough to freehand once you know your dog's measurements. Start with the band to practice gauge.
Are crochet hats safe for dogs to wear?
They're safe for short wear during photos and walks in cool weather. Skip them in hot weather, remove any small bells or pom-poms your dog might chew, and never leave a hat on unsupervised.
Conclusion
Start with the hat that solves your biggest problem, whether that's a pup who hates ear holes or a yarn stash that needs using up. Make one, check the fit, and adjust before you commit to a second. A quick test run saves you from reworking a whole set later.
Once you've got a size that stays put, the rest is just color and detail. Try a new stitch or swap in a seasonal palette for the next one. Your dog gets a comfortable hat, and you get a project that actually gets worn.

I’m Pallab Kishore, the owner of Little Pets Realm — an animal lover and pet care enthusiast sharing easy tips, healthy recipes, and honest advice to help every small pet live a happy, healthy, tail-wagging life.