
Last updated on August 19th, 2026 at 04:15 pm
You're halfway through a groom and can't find the right blade. The clipper oil is buried under three towels, and the dryer hose is tangled around your feet. Sound familiar?
In a mobile grooming van, every inch counts, and clutter can slow you down fast. Smart storage isn't just about fitting more stuff—it's about creating a workflow that keeps everything within arm's reach. When your tools have a dedicated home, you spend less time searching and more time grooming.
These 11 ideas come from seasoned mobile groomers who've learned the hard way. Whether you're building a new van or retrofitting an existing one, these solutions will help you work smarter, not harder.
1. Magnetic Strips for Metal Tools
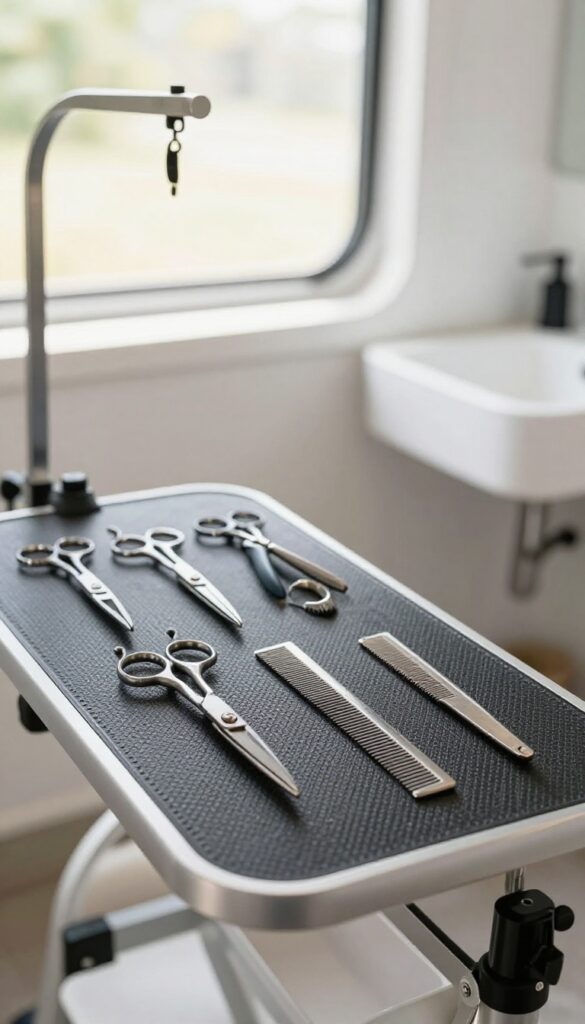
Scissors, clipper blades, and combs always seem to migrate to the bottom of a drawer. A magnetic strip changes that. Mount one on a wall or inside a cabinet door, and your metal tools stay put, visible, and dry between grooms.
No more digging through piles to find the right shear.
Magnetic strips are cheap, easy to install, and incredibly effective in a van. They keep tools off countertops, which frees up workspace and reduces the chance of knocking something onto the floor. Plus, air circulates around the tools, helping them dry faster and preventing rust.
Choose a strip with strong magnets—neodymium is best—and make sure it's rated for the weight of your heaviest shears. You can mount multiple strips at different heights to separate tools by size or frequency of use.
Where To Mount Them
The inside of a cabinet door is a prime spot—tools are hidden but instantly accessible. Another option is a narrow wall space near your grooming table, so you can grab a comb or blade without turning around. Avoid areas where water might splash directly onto the strip, like directly above a wash tub.
What To Store On Them
Scissors, clipper blades, nail clippers, metal combs, and even small files all stick well. Just be careful with tools that have plastic handles or delicate edges—test the grip first. You can also use small magnetic hooks for items like thinning shears with finger rests.
Pro Tip: Label The Strip
Use a fine-tip marker or small vinyl labels to mark where each tool lives. That way, you and any assistants always know where to return things. It also helps you notice if something is missing at the end of the day.
2. Sliding Drawers Under the Grooming Table
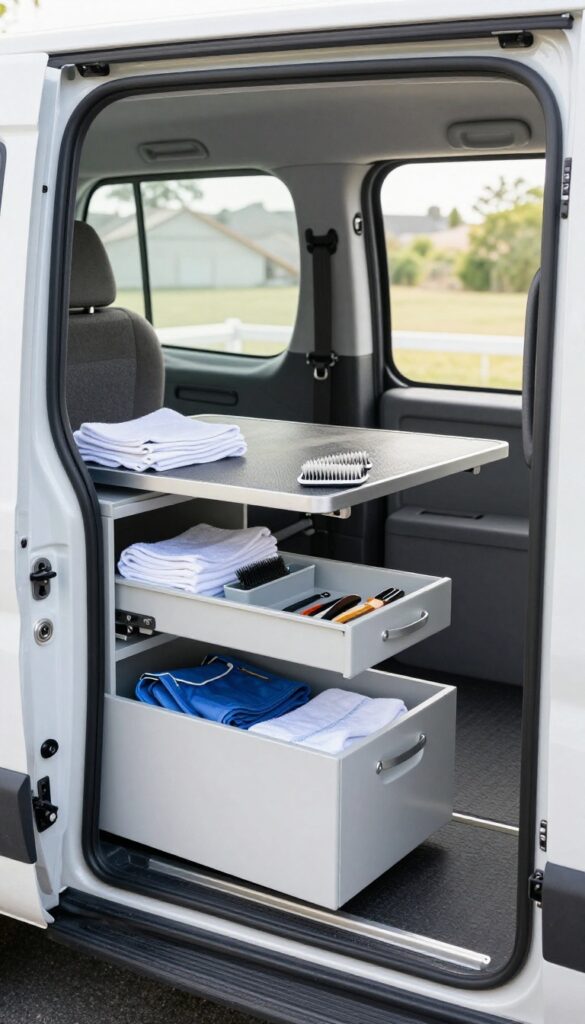
That awkward gap between the grooming table and the van floor is prime real estate. Instead of letting it collect dust bunnies and stray clippings, install shallow sliding drawers. They're perfect for stashing towels, aprons, and the supplies you grab multiple times per groom.
Out of sight but never out of reach.
These drawers turn dead space into a functional storage zone. Keep them shallow—just deep enough for folded towels or a stack of aprons—so you don't lose items in the back. Use dividers or small bins to separate blades, brushes, and clipper oil.
The sliding mechanism means you can access everything without bending or moving your table.
Measure First, Build Second
Before ordering or building, measure the clearance under your table. Account for the track system and drawer thickness. You want the drawer to slide smoothly without scraping the floor or bumping the table legs.
A 3- to 4-inch deep drawer works for most vans.
Choose The Right Slides
Full-extension ball-bearing slides are a must. They let you see the entire drawer contents and handle the weight of towels and tools. Soft-close slides add a nice touch, preventing drawers from slamming shut when you're in a hurry.
Add Quick-access Organizers
Inside the drawer, use adjustable dividers or small plastic bins to group items. Keep clipper blades in one section, combs in another, and a towel stack on the side. This way, you can grab what you need without rummaging.
3. Pegboard Wall Panels
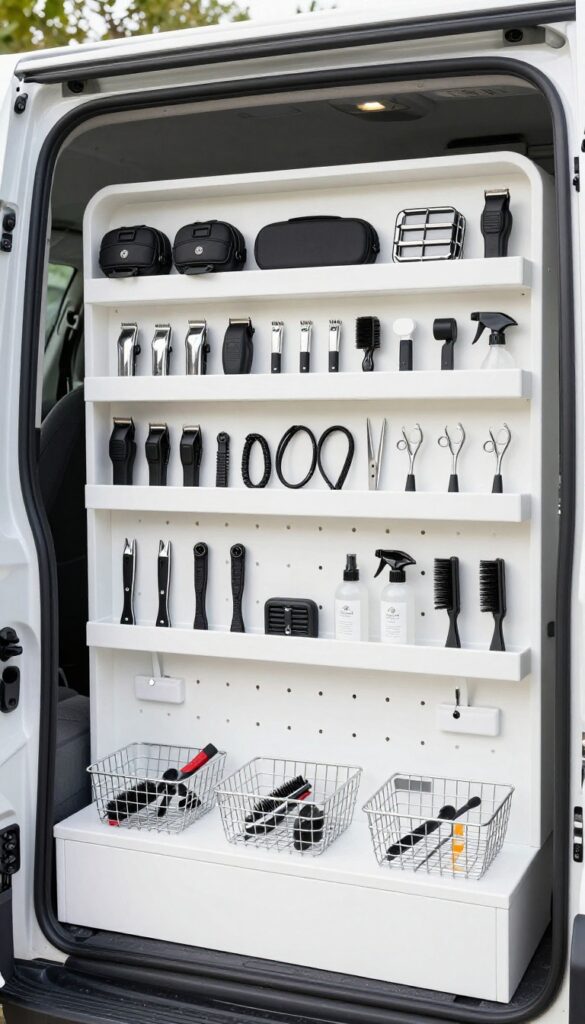
A blank wall in your van is wasted space. Pegboard turns that vertical real estate into a flexible storage system that adapts as your tool collection grows. Unlike fixed shelves, pegboard lets you move hooks, baskets, and shelves around in seconds.
That means you can reconfigure your setup between appointments without drilling new holes.
Pegboard is lightweight, inexpensive, and surprisingly durable. For a grooming van, you want the hardboard or PVC version—avoid the thin fiberboard that can sag. Cut a panel to fit a wall section behind the driver seat or above the tub, then secure it with furring strips for airflow.
Once it's up, you can hang clipper cases, spray bottles, looped leashes, and even small bins for brushes. The key is to group items by use: drying tools on one section, scissor sheaths on another. You'll never dig through a drawer again.
Hook And Basket Combo
Mix standard pegboard hooks with small wire baskets to hold items that don't hang well—like nail files, dematting rakes, or ear powder. Baskets keep small stuff from falling off hooks. Place them at eye level for quick access.
Magnetic Add-ons
Pegboard is non‑magnetic, but you can attach magnetic strips or small tins with rare earth magnets glued to the back. Use these to hold metal tools like thinning shears or clipper blades. Just make sure the magnets are strong enough to stay put while driving.
Label Zones
Use a label maker or colored tape to mark sections: “Clippers, ” “Brushes, ” “Sprays. ” This helps any relief groomer find things fast. When you reorganize, just peel and re‑label. It takes two minutes and saves hours of confusion.
4. Overhead Cabinets with Latches
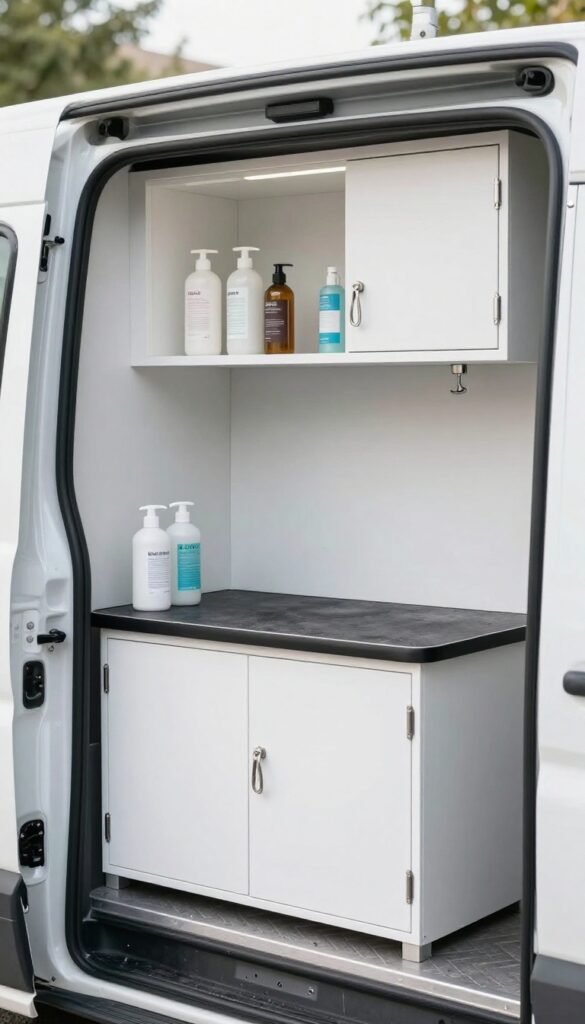
Overhead cabinets are a go-to for many van builders, but they're extra valuable in a grooming rig. You can stash bulk supplies up high, freeing up lower cabinets for heavier gear. The key is choosing cabinets with secure latches—bumpy roads can send bottles flying if they're not locked in.
Overhead cabinets keep bulk items like shampoo, conditioner, and paper towels out of the way but still accessible. They work best above the grooming table or near the wash station, where you use these supplies most. Latches are non-negotiable; magnetic or push-to-close catches won't hold up on rough roads.
Go for metal or heavy-duty plastic latches that click shut. Also, consider shallow cabinets (12–15 inches deep) so you can see everything without digging. Add a small lip or rail on each shelf to prevent items from sliding out when you open the door.
Choosing The Right Latches
Not all latches are van-worthy. Look for positive-lock latches—the kind that physically hook or clamp the door shut. RV-style latches with a rubber bumper work well too.
Avoid magnetic or friction latches; they'll pop open on a bump. Test a few before installing to make sure they're easy to open with one hand while holding a bottle.
What To Store Up High
Overhead cabinets are perfect for lightweight, bulky items. Think gallon jugs of shampoo, boxes of gloves, rolls of paper towels, and extra towels. Don't store heavy bottles like full conditioner gallons—they're safer in lower cabinets.
Keep frequently used items at eye level, and rotate seasonal supplies to the top shelves.
Installation Tips
Mount cabinets to the van's metal ribs or use heavy-duty toggle bolts into the wall. Don't rely on sheet metal screws alone. Add a small LED strip under the cabinet to light up your work surface.
If you're handy, build custom cabinets to fit the exact curve of your van's roof. Prefab RV cabinets work too, but measure twice.
5. Fold-Down Work Tables
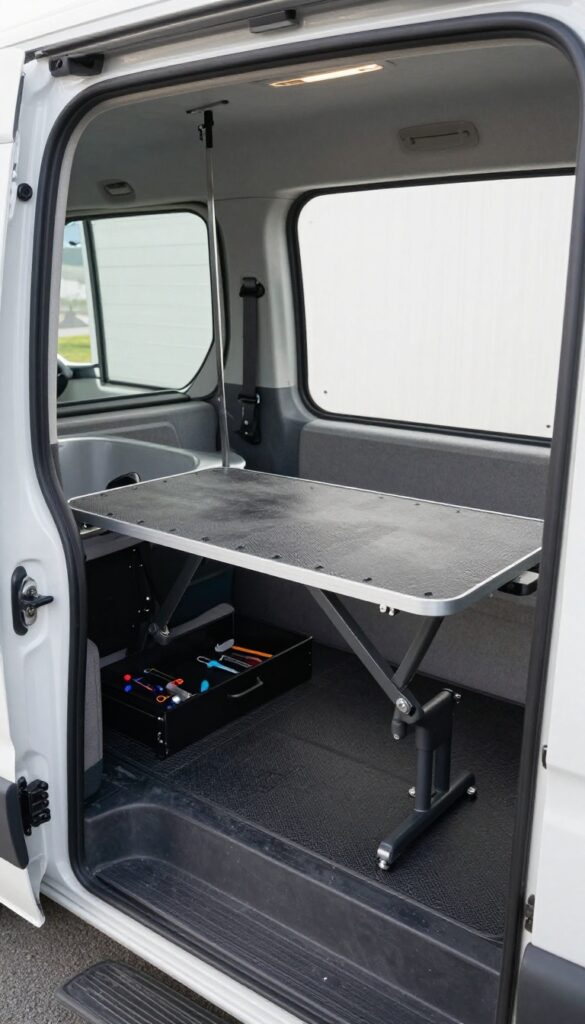
Every grooming van has that one wall that's just sitting there, empty. Maybe it's next to the tub or behind the driver's seat. That wall can become your most flexible workspace with a fold-down table.
A fold-down table gives you extra counter space when you need it—prepping a difficult mat, laying out tools for a complex groom, or holding a second drying cage. When you're done, it folds flat against the wall, taking up zero floor space.
Choose The Right Size And Height
Measure your wall space carefully before buying or building. A table that's too wide blocks access to cabinets; one that's too narrow isn't useful. Standard heights range from 28 to 36 inches, but consider your own height and the tasks you'll do there.
A table at hip height works well for prepping tools, while a lower one might serve as a grooming arm mount.
Add A Lip Or Raised Edge
A fold-down table without a lip is a recipe for rolling bottles and falling scissors. Install a small raised edge—about half an inch—on the back and sides. This keeps items from sliding off when you hit a bump or when the van is parked on a slope.
Some groomers also add a non-slip mat on top for extra grip.
Incorporate Built-in Storage
Take your fold-down table to the next level by adding storage underneath. Attach a shallow drawer or a mesh pocket to the underside. When the table is folded up, the storage is hidden.
When you lower it, you have quick access to frequently used items like clipper oil, combs, or blade guards.
Secure It Properly
A fold-down table that rattles or comes loose while driving is a hazard. Use heavy-duty hinges and a locking mechanism, like a latch or a spring-loaded pin. Test it by giving it a firm shake after installation.
If it moves, reinforce it. Your tools—and your sanity—will thank you.
6. Tension Rods for Spray Bottles
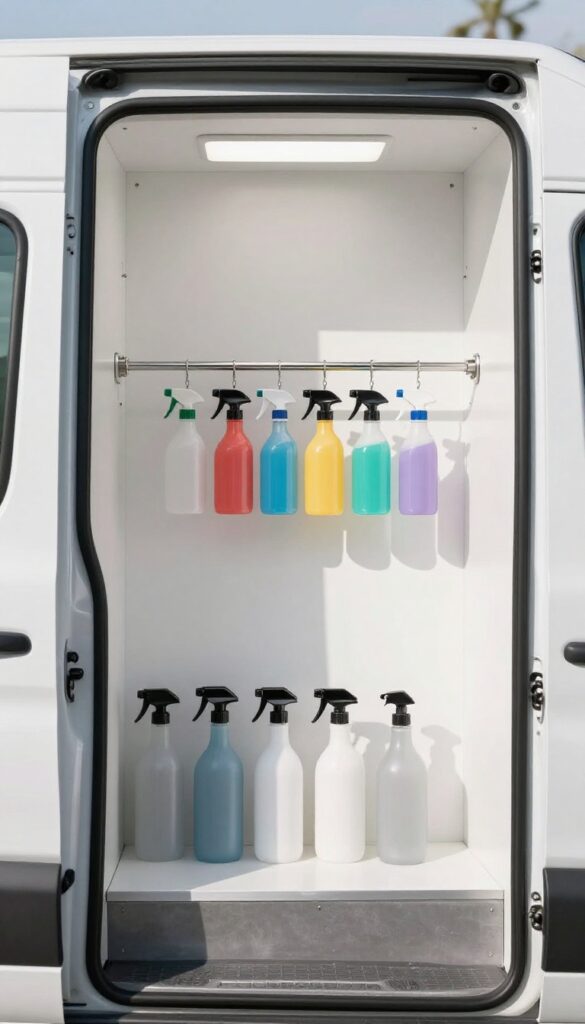
Spray bottles are essential in a grooming van, but they're a pain to store. They roll around, leak, and take up valuable shelf space. A tension rod changes that completely.
Install one horizontally inside a cabinet, and you can hang bottles upside down by their triggers. This keeps nozzles clear of clogs, prevents leaks from pooling, and frees up the shelf below for other supplies. It's a simple, low-cost fix that makes a big difference in daily workflow.
Tension rods are cheap, easy to install, and don't require any drilling or permanent modification to your van. You just twist them into place between two cabinet walls. They work best in cabinets that are at least 12 inches wide, but you can also use shorter rods in narrower spaces.
The key is to position the rod high enough so bottles hang freely without touching the shelf below. For best results, choose rods with rubber ends to grip the cabinet walls securely. Test the tension before loading bottles—you don't want them crashing down mid-turn.
You can also double up rods in deeper cabinets for extra capacity.
Choosing The Right Rod
Not all tension rods are created equal. For grooming van use, pick one with a weight rating of at least 10 pounds. Stainless steel or coated metal resists rust better than basic plastic.
Measure your cabinet width accurately and buy a rod that can extend slightly beyond that range for a tight fit. Some groomers prefer adjustable shower rods because they're sturdier. Others use lightweight curtain rods for smaller bottles.
The choice depends on how many bottles you plan to hang and how heavy they are.
Arranging Bottles For Quick Access
Group bottles by frequency of use. Keep shampoos, conditioners, and sprays you reach for multiple times a day on the rod. Less-used products like flea treatments or deshedding sprays can go on a lower shelf or in a different cabinet.
Hang bottles with the nozzle facing the same direction so you can grab them without looking. If you have multiple rods in one cabinet, stagger the bottles to avoid collisions. This setup turns a messy cabinet into a streamlined workstation.
7. Custom Foam Inserts for Drawers
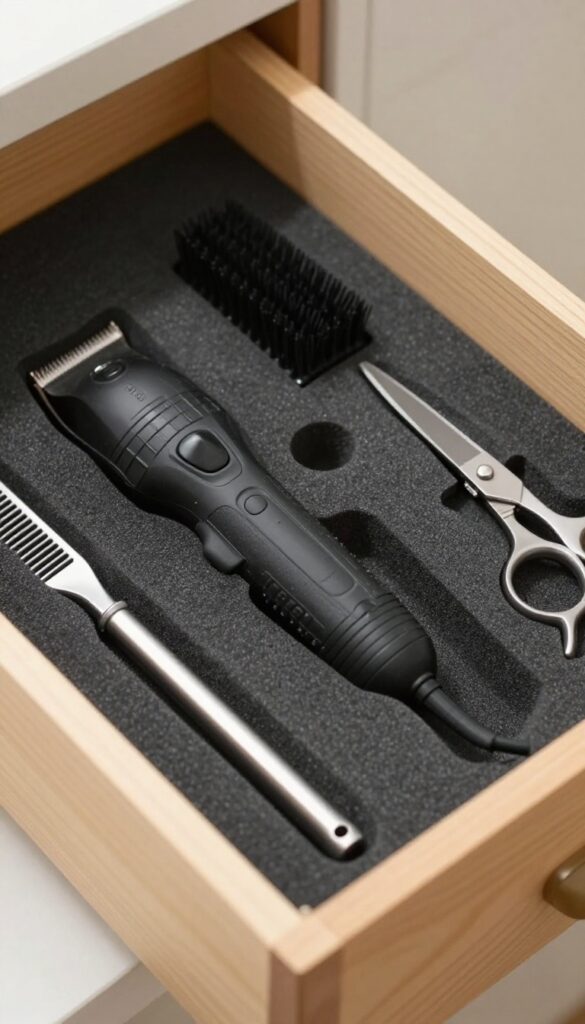
Drawers are great for storage, but without organization, they become black holes where small tools disappear. Custom foam inserts solve that by giving every item a designated spot. You cut the foam to fit your drawer and trace the outlines of your clippers, brushes, combs, and shears.
The result is a tidy, quiet workspace where you can grab what you need without rummaging.
When you're driving between appointments, tools can slide around and get damaged. Foam inserts cushion everything, reducing noise and preventing dings. They also make inventory checks a breeze—if a slot is empty, you know something is missing.
This is especially helpful for keeping track of expensive items like cordless clippers or specialty blades.
Choosing The Right Foam
Pick a closed-cell foam that's firm enough to hold tools upright but soft enough to absorb shock. EVA foam (often sold as "pick and pluck" or in sheets) is a popular choice. It's durable, easy to cut, and resists water and chemicals.
Measure your drawer depth and leave a little extra foam thickness so tools sit snugly.
Cutting The Inserts
Lay your tools on the foam and trace around them with a marker. Use a sharp utility knife or a hot wire cutter for clean edges. Cut about 1/8 inch inside the line so tools fit tightly.
For multiple layers, cut a base layer and a top layer with cutouts, then glue them together. This creates a shadow board effect that's both functional and professional.
Maintenance And Updates
Foam inserts can be cleaned with a mild soap and water. Over time, they may compress or wear out, but replacement is cheap and easy. When you add new tools, simply cut new slots.
Some groomers keep a spare sheet of foam on hand for quick modifications.
8. Hanging Shoe Organizers for Small Items
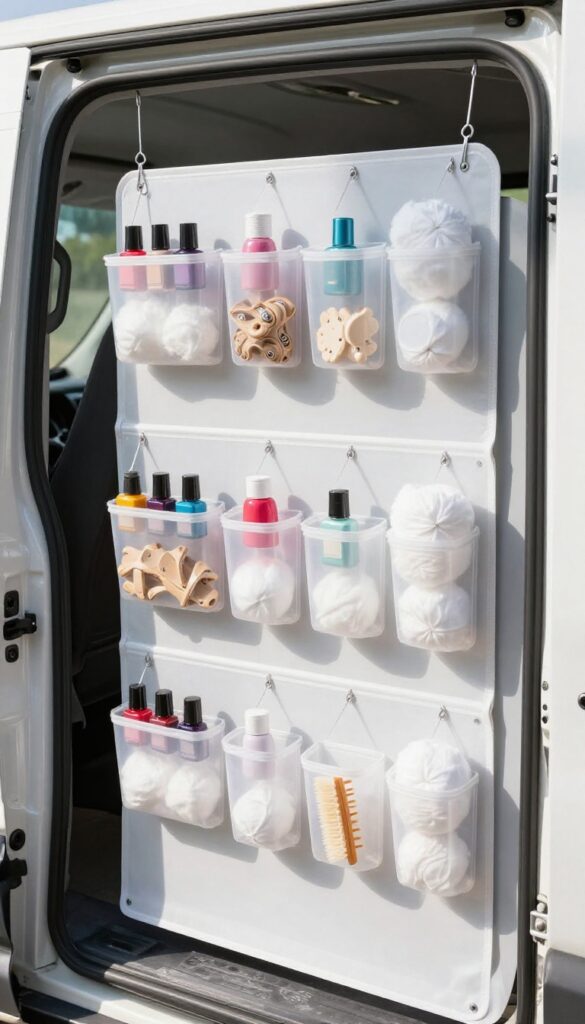
Small supplies have a way of taking over every surface in a grooming van. Nail polish, ear powder, cotton balls, and tiny brushes end up scattered across counters or lost in drawers. A clear hanging shoe organizer solves that problem in seconds.
Hang one on the back of a door or inside a cabinet, and suddenly every small item has a visible, accessible home. The clear pockets let you see exactly what you need without digging. Plus, they're cheap and easy to replace when they get grimy.
Pocket Size Matters
Look for organizers with a mix of pocket sizes. Standard shoe pockets work well for bottles and jars, while smaller compartments are perfect for cotton balls, ear powder, and nail files. Avoid organizers with tiny pockets that won't hold a typical nail polish bottle.
Mounting Tips
Use heavy-duty adhesive hooks or Command strips to hang the organizer on a metal door or cabinet face. If your van has wood panels, small screws or nails work better. Make sure the organizer doesn't swing when you drive—secure the bottom with a second hook or velcro strip.
What To Store
Fill the pockets with items you reach for multiple times per groom: nail polish, quick-dry spray, ear cleaning solution, cotton rounds, and small scissors. Keep the top pockets for less-used items like styptic powder or wound spray. Rotate seasonally if needed.
9. Under-Sink Pull-Out Bins
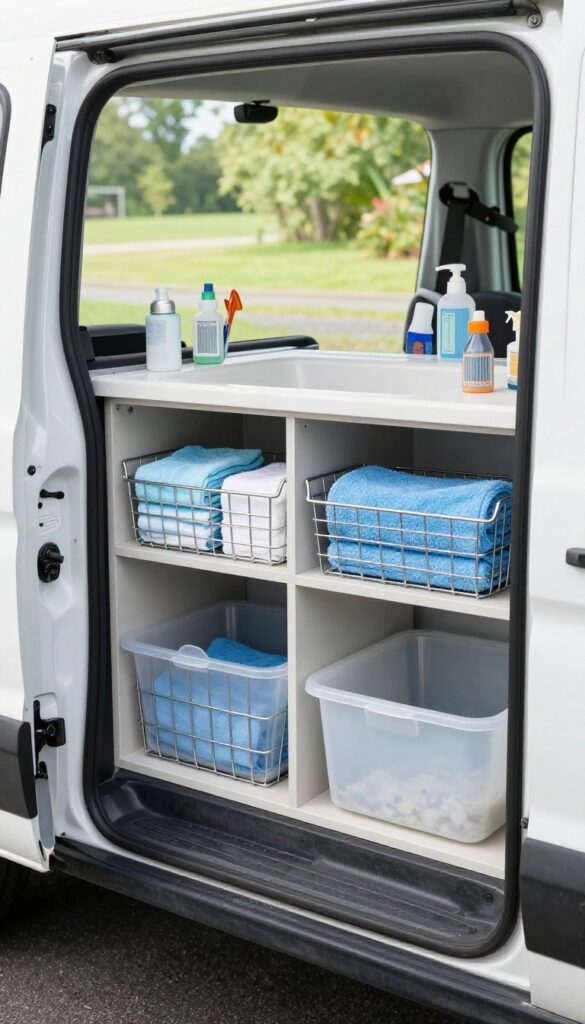
The space under your grooming van's sink is often a dark, awkward void where things go to die. You know the drill—bend down, rummage around, and still can't find that spare filter. Replacing fixed shelves with pull-out bins or baskets turns that dead zone into a functional storage hub.
Pull-out bins let you see everything at a glance. No more crawling on hands and knees or playing a guessing game with your supplies. They're especially handy for storing plumbing tools, extra towels, or cleaning products that you need regularly but not every minute.
Choose The Right Bin Style
Wire baskets let water and debris drain through, so damp towels or spill-prone bottles won't cause mold. Solid plastic bins are better for small items like clipper blades or ear-cleaning supplies. Look for bins with built-in handles or rails that slide smoothly on drawer slides.
Measure Before You Buy
Sink bases have weird shapes—pipes, traps, and shut-off valves take up space. Use a tape measure and note the clearance around the plumbing. You might need shallow bins for the front and deeper ones for the back.
Some groomers install a U-shaped shelf that wraps around the trap.
Mounting Tips For A Smooth Glide
Full-extension drawer slides are worth the extra cost. They let you pull the bin all the way out so nothing hides in the back. Attach the slides to the cabinet floor or side walls, not to the sink base itself.
Use a level to keep them parallel, or the bins will wobble.
10. Ceiling-Mounted Drying Rack
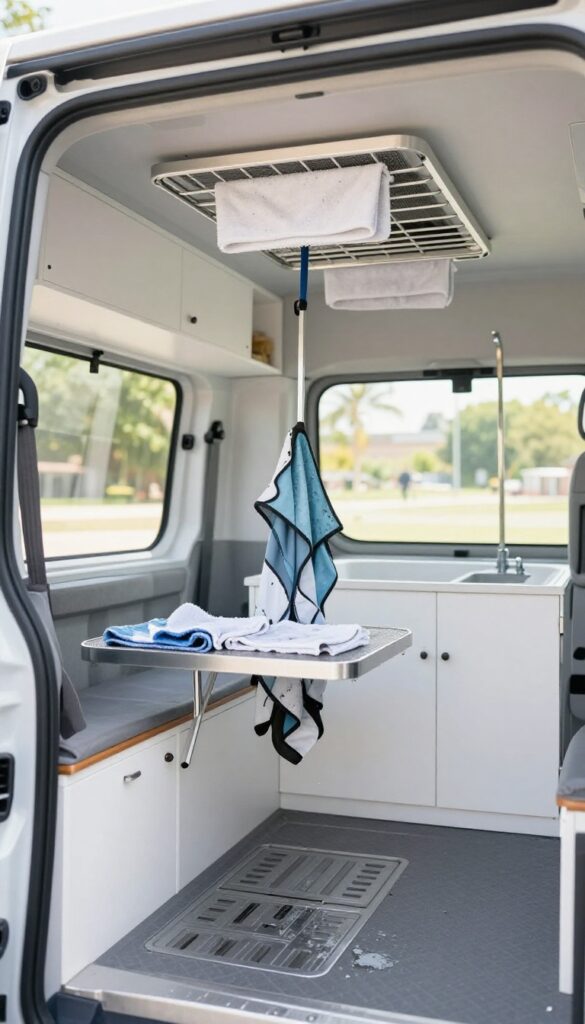
Wet towels and drying coats take up valuable counter space and never seem to dry properly when piled up. A ceiling-mounted drying rack or retractable clothesline solves both problems at once. By using overhead space that's otherwise wasted, you keep damp items out of the way while allowing air to circulate around them.
This reduces mildew smells and speeds up drying time—a win for hygiene and workflow.
Installing a retractable clothesline or a fold-down ceiling rack gives you a dedicated spot for wet gear without sacrificing floor or counter space. When not in use, it tucks away neatly, leaving your van open and uncluttered.
Types Of Ceiling Racks
You have a few options: a retractable clothesline that pulls out from a wall-mounted reel, a fixed ceiling rack that folds up when not needed, or a motorized drying rack that lowers and raises with a button. Retractable lines are cheap and easy to install, but fixed racks hold more weight.
Installation Tips
Mount the rack over the tub or a low-traffic area so dripping water doesn't become a hazard. Use heavy-duty anchors rated for the ceiling material—especially important in a moving van. Consider adding a small drip tray underneath if you'll hang soaking wet towels.
What To Hang
Use the rack for wet towels, microfiber drying coats, grooming aprons, or even freshly washed grooming loops. Avoid overloading it, as excess weight can stress the mounting points. Rotate items to ensure even drying.
11. Modular Storage Cubes with Labels
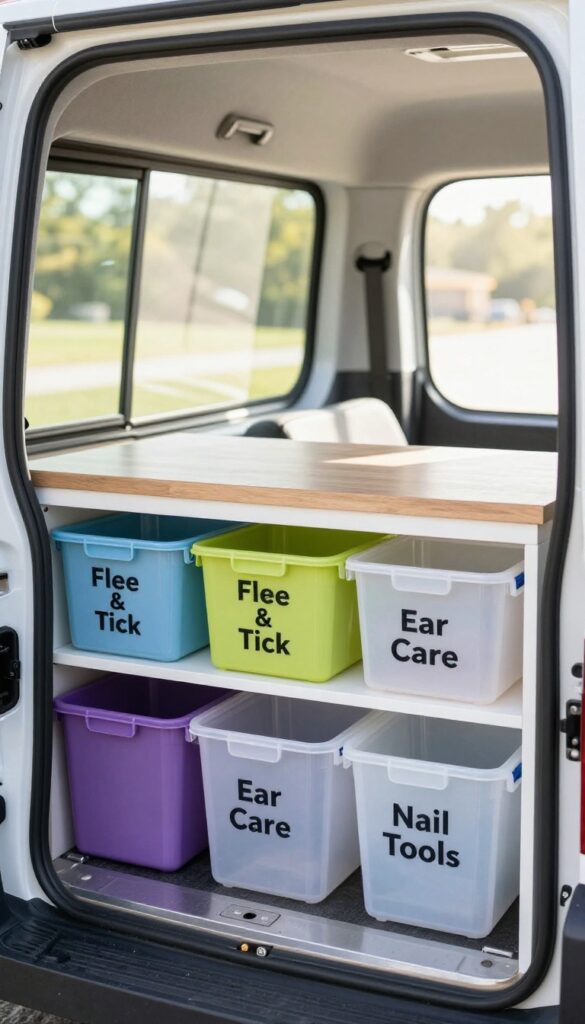
Labeling might sound like overkill, but in a cramped van, it saves you from digging through four bins to find a single bottle of ear wash. Modular cube units are lightweight, stackable, and easy to rearrange as your inventory changes. Each cube becomes a dedicated home for a category of supplies, so you can grab what you need without pulling everything out.
These cubes fit neatly under counters, on shelves, or even in overhead cabinets. They're especially useful for small items that tend to get lost in deep drawers. The best part?
When your stock changes, you just swap the label—no need to buy new storage.
Modular storage cubes are a game-changer for mobile groomers who need to stay organized on the road. Unlike fixed shelving, these cubes can be reconfigured as your needs evolve. Use clear or colored bins so you can see contents at a glance.
Labels should be bold and legible—think 'Flea & Tick', 'Ear Care', 'First Aid', 'Nail Tools', 'Coat Sprays'—so even a quick glance tells you exactly where things are.
Why Cubes Beat Drawers
Drawers are great until they become junk drawers. Cubes force you to keep categories separate. You can pull out the entire cube for a specific task and set it on your counter, then put it back.
No more rummaging through a dark drawer while holding a squirming dog.
Labeling That Actually Works
Use a label maker with large, bold font or write on chalkboard labels that you can erase and rewrite. Stick the label on the front of the cube, not the top, so you see it when the cube is on a shelf. Color-code by category (e. g. , red for medical, blue for grooming products) for even faster retrieval.
Where To Place Them
Stack cubes in unused vertical spaces—above the wheel wells, on top of cabinets, or under the sink. Keep frequently used cubes at waist height and less-used ones higher or lower. If you have a dedicated supply cabinet, install adjustable shelves so cube heights can vary.
FAQ
What is the best way to organize grooming van tools?
Use a combination of magnetic strips, pegboards, and custom drawer inserts to keep tools visible and secure. Prioritize items you use most often at waist level.
How can I maximize space in a small grooming van?
Utilize vertical space with overhead cabinets and pegboards. Install fold-down tables and sliding drawers to make use of every nook. Keep only essential items on board.
What storage solutions prevent tools from rattling during travel?
Custom foam inserts in drawers, magnetic strips for metal tools, and tension rods for bottles keep items snug. Secure all cabinets with latches.
How do I keep my grooming van clean and organized daily?
Adopt a 'clean as you go' routine. Use labeled bins for different categories and return tools to their designated spots after each use. Wipe down surfaces after each groom.
Can I install these storage ideas myself?
Many ideas like magnetic strips, pegboards, and tension rods are DIY-friendly. For custom cabinetry or electrical work, consider hiring a professional to ensure safety and durability.
Conclusion
Smart storage isn't just about fitting more stuff into your van—it's about making your workday smoother and your gear last longer. Whether you're a mobile groomer just starting out or looking to upgrade your setup, these ideas can help you create a space that's both functional and comfortable. Take what works for your specific needs and leave the rest.
The best van layout is one that evolves with you, so don't be afraid to tweak things as you go. Happy grooming!

I’m Pallab Kishore, the owner of Little Pets Realm — an animal lover and pet care enthusiast sharing easy tips, healthy recipes, and honest advice to help every small pet live a happy, healthy, tail-wagging life.