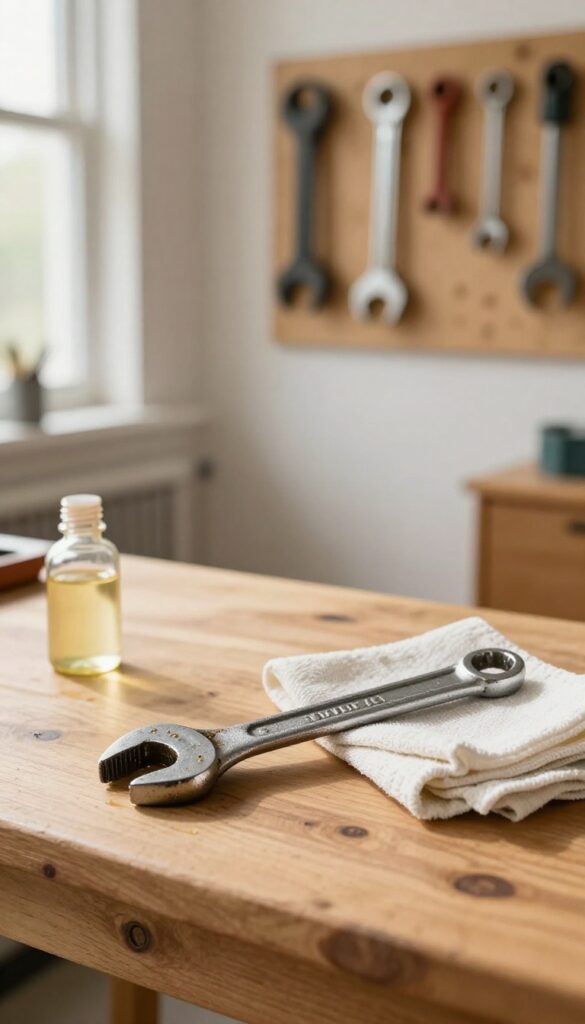
Ever pulled a favorite wrench from the drawer only to find it speckled with rust? You're not alone—garage tools take a beating from moisture and neglect. The good news: you don't need harsh chemicals or expensive replacements to bring them back.
These 17 tricks use everyday items like vinegar, baking soda, and even a potato to tackle rust at any stage. From light surface spots to heavy pitting, each method is practical and proven.
Ready to rescue your tools and score some easy garage wins? Let's dive in.
1. White Vinegar Soak for Light Rust
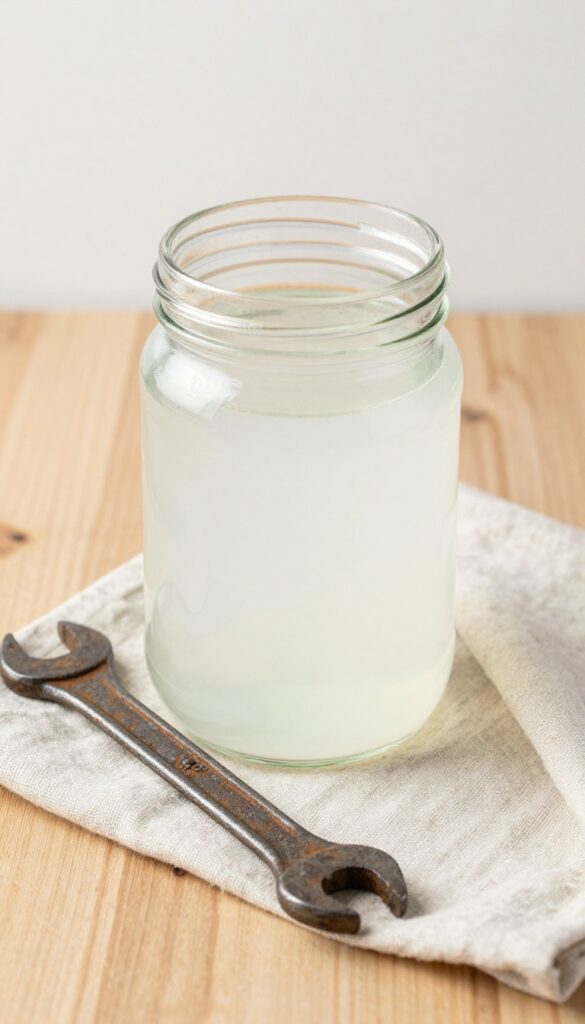
White vinegar is a pantry staple that doubles as a rust remover. Its mild acetic acid breaks down rust without harming the metal underneath. For tools with light surface rust, a simple soak does the trick.
White vinegar is a pantry staple that doubles as a rust remover. Its mild acetic acid breaks down rust without harming the metal underneath. For tools with light surface rust, a simple soak does the trick.
Submerge the rusty tool completely in white vinegar. Let it sit for 24 hours—no longer, or the acid may start etching the metal. After the soak, pull it out and scrub with a stiff brush or steel wool.
The rust should flake off easily. Rinse the tool with water and dry it immediately to prevent new rust from forming. A quick wipe with a clean cloth or paper towel works.
For extra protection, apply a light coat of oil after drying.
How Long To Soak
Stick to 24 hours for light rust. If the rust is a bit heavier, you can extend to 48 hours, but check periodically. Over-soaking can dull the finish or cause pitting on softer metals.
Scrubbing Tips
Use a brass brush or steel wool for most tools. For intricate areas like hinges or gears, an old toothbrush works wonders. If stubborn spots remain, sprinkle baking soda on the brush for extra abrasion.
Neutralizing The Vinegar
After scrubbing, rinse the tool with water and a dab of baking soda to neutralize any remaining acid. This step is optional but recommended for long-term tool health. Dry thoroughly before storing.
2. Baking Soda Paste for Stubborn Spots
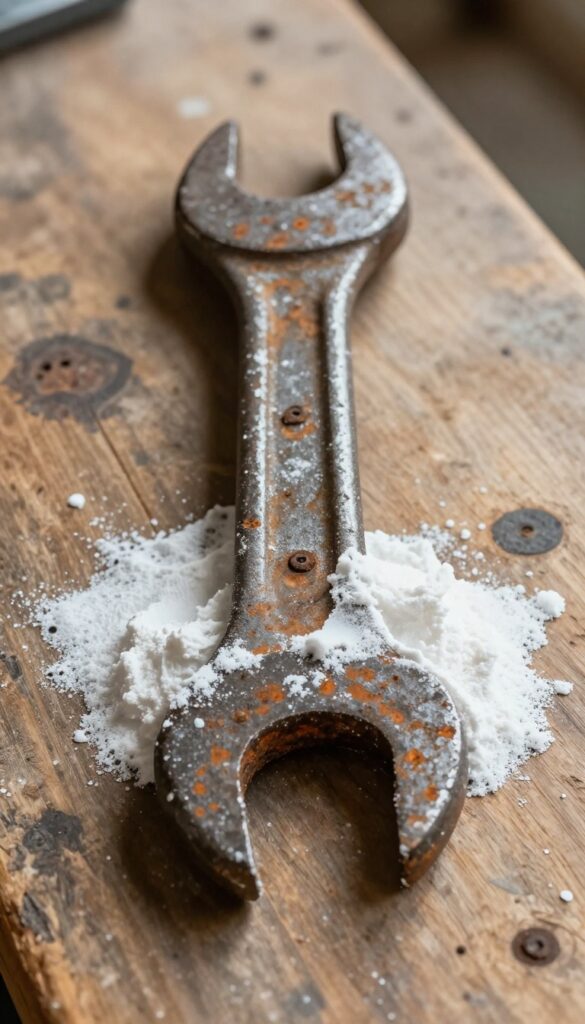
For rust that's dug into tight corners or intricate tool surfaces, a simple baking soda paste can work wonders. It's gentle enough not to damage the metal but abrasive enough to lift corrosion. Plus, you probably already have the ingredients in your kitchen.
How To Make The Paste
Mix three parts baking soda with one part water in a small bowl. Stir until it forms a thick, spreadable paste. Adjust the ratio if needed—too runny won't cling to vertical surfaces, too dry won't spread easily.
Application And Waiting Time
Apply the paste generously over the rusted areas, especially in crevices and around hinges. Let it sit for at least 20 minutes, or up to an hour for heavy rust. The baking soda reacts with the rust, loosening its grip on the metal.
Scrubbing And Finishing
Use an old toothbrush or a stiff nylon brush to scrub the paste into the rust spots. Rinse with water and dry thoroughly. For stubborn residue, repeat the process.
Finish with a light coat of oil to prevent future rust.
3. Lemon and Salt Scrub for Surface Rust
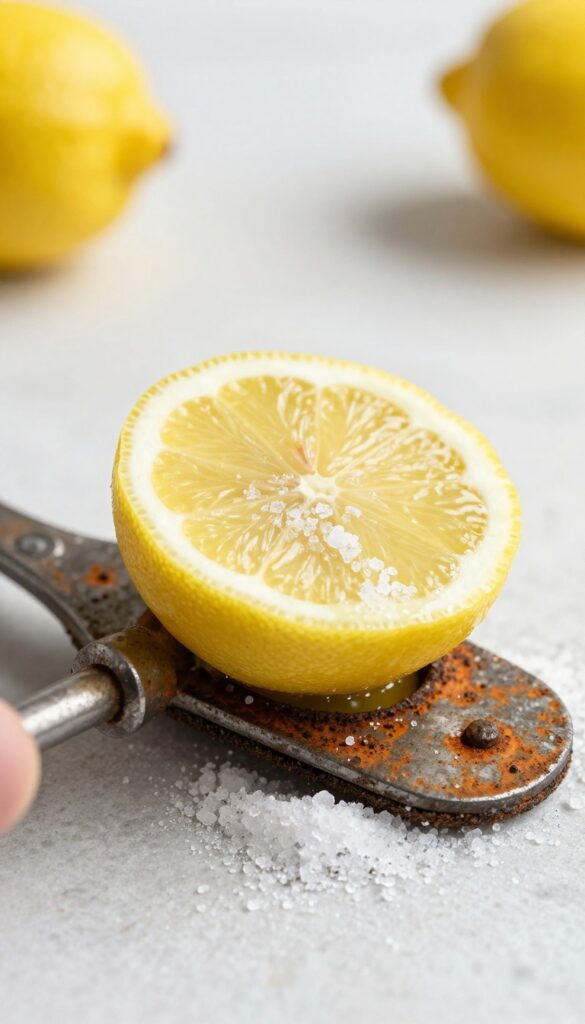
When rust is still light and hasn't dug deep, you don't need heavy artillery. A lemon and salt scrub uses natural acidity and grit to lift rust without damaging the metal underneath. It's cheap, smells great, and works fast on spots that aren't too stubborn.
How It Works
Lemon juice contains citric acid, which breaks down iron oxide (rust). Salt acts as an abrasive—it scrubs away the loosened rust particles without scratching the tool's surface. Together, they create a mild chemical reaction that helps lift rust on contact.
Step-by-step Application
Start by sprinkling a generous layer of table salt directly onto the rusty area. Cut a lemon in half and squeeze the juice over the salt so it forms a gritty paste. Use the lemon half itself as a scrubber—rub it firmly over the rust in circular motions for a minute or two.
For tough spots, let the paste sit for 10–15 minutes before scrubbing again.
Rinse And Dry Thoroughly
Once the rust is gone, rinse the tool with water to remove any salt and lemon residue. Dry it completely with a clean cloth—moisture is rust's best friend. For extra protection, apply a light coat of oil to the metal afterward.
4. Potato and Dish Soap Method
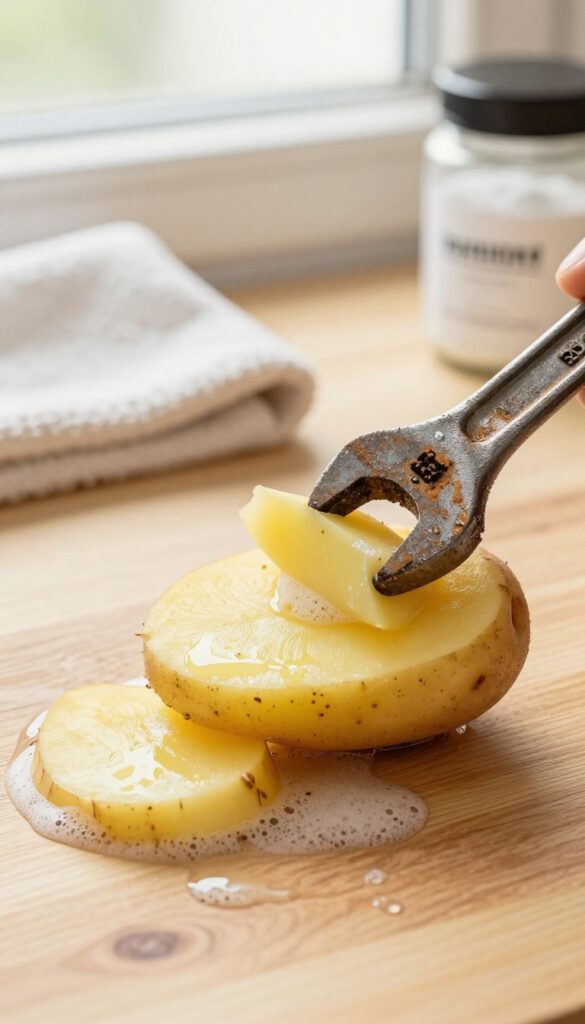
If your toolbox smells more like a damp basement than a workspace, it's time for a kitchen intervention. Potatoes aren't just for fries—they contain oxalic acid, a natural rust fighter that's gentle on metal but tough on corrosion. Pair that with dish soap's grease-cutting power, and you've got a surprisingly effective rust removal paste.
This method works best for light to moderate rust on flat or slightly curved tool surfaces. The potato's natural acidity softens the rust while the soap helps lift grime. It's non-toxic, cheap, and leaves your tools smelling fresh instead of chemical-laden.
How It Works
Oxalic acid in potatoes reacts with iron oxide (rust) to form soluble compounds that rinse away. The dish soap acts as a surfactant, helping the mixture penetrate and loosen rust particles. Together, they create a gentle abrasive paste that won't damage the underlying metal.
Step-by-step Instructions
- Cut a raw potato in half. 2.
Dip the cut side into a small dish of liquid dish soap. 3. Rub the soapy potato directly onto the rusty areas, applying moderate pressure.
- Let the tool sit for 2–4 hours—overnight for heavier rust. 5.
Rinse with water and wipe dry. Repeat if needed.
Pro Tips For Best Results
Use a fresh cut potato for each application—the oxalic acid is most active right after cutting. For stubborn spots, sprinkle a little baking soda on the potato before rubbing. Always dry tools thoroughly after rinsing to prevent flash rust.
This method is safe for most steel and iron tools, but avoid on highly polished or plated surfaces.
5. Coca-Cola Soak for Heavy Rust
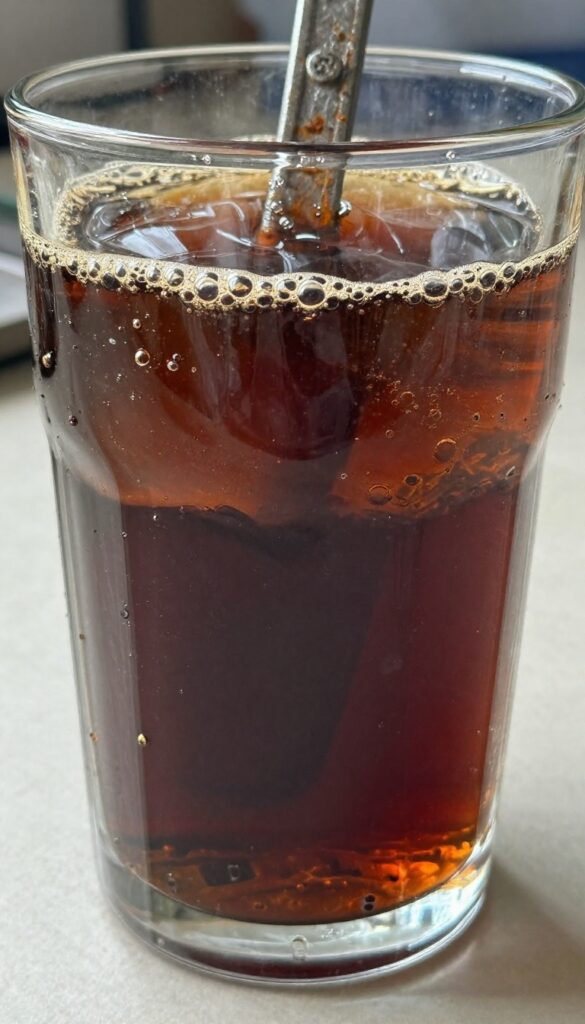
You've probably heard that soda can clean a penny, but it works on stubborn tool rust too. The phosphoric acid in cola breaks down iron oxide without scrubbing. It's a slow process, but it's also cheap and hands-off.
For tools with thick, crusty rust that won't budge, a cola soak is your lazy-day solution. The acid gently eats away at the rust while you do something else. Just don't rush it—give it a full 24 hours.
Prep The Bath
Find a container big enough to submerge the rusty tool completely. Pour in enough cola to cover it. If the tool has a wooden handle, keep the handle out of the liquid to avoid damage.
Set the container in a spot where it won't be knocked over.
Soak And Check
Let the tool sit for 24 hours. After that, pull it out and scrub with a stiff brush or steel wool. Most of the rust should flake off easily.
For extra-stubborn spots, soak another 12 hours.
Rinse And Dry Immediately
Rinse the tool thoroughly with water to remove all sugary residue. Dry it completely with a towel, then apply a light coat of oil to prevent flash rust. The sugar in cola can attract moisture, so drying is critical.
6. Electrolysis with a Car Battery Charger
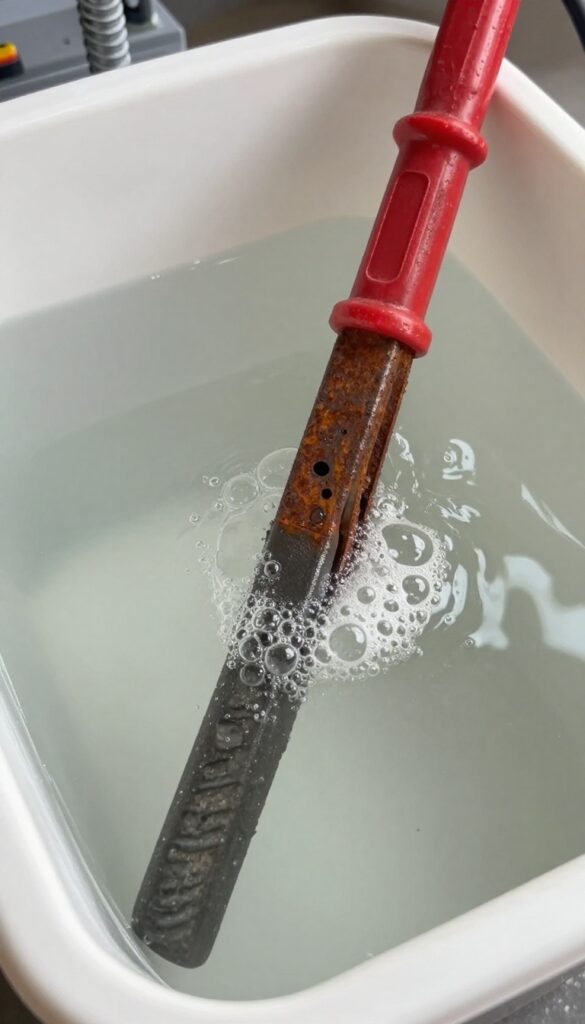
If you've got a car battery charger and some washing soda, you can set up a DIY electrolysis bath that pulls rust off like magic. No scrubbing, no harsh fumes—just clean metal. This method works best for heavily rusted tools or parts with lots of crevices.
What You'll Need
Grab a plastic container (big enough to submerge the tool), a car battery charger (12V works well), a piece of steel or iron for the anode (rebar or a flat bar), and washing soda (sodium carbonate). You'll also need water and a wire to connect everything.
Setting Up The Bath
Fill the container with water and dissolve about one tablespoon of washing soda per gallon. Attach the positive lead (red) to the sacrificial anode and the negative lead (black) to your rusty tool. Submerge both, making sure they don't touch.
Plug in the charger—you'll see bubbles forming almost immediately.
Let It Work
Leave it running for a few hours or overnight, depending on rust thickness. The rust will loosen and fall off, leaving a dark residue that rinses away easily. Afterward, dry the tool thoroughly and apply a light oil to prevent flash rusting.
Safety Tips
Work in a well-ventilated area—the process produces hydrogen gas, which is flammable. Never use stainless steel as the anode (it releases toxic fumes). Keep the charger away from water splashes, and unplug it before touching the solution.
7. Fine Steel Wool for Delicate Tools
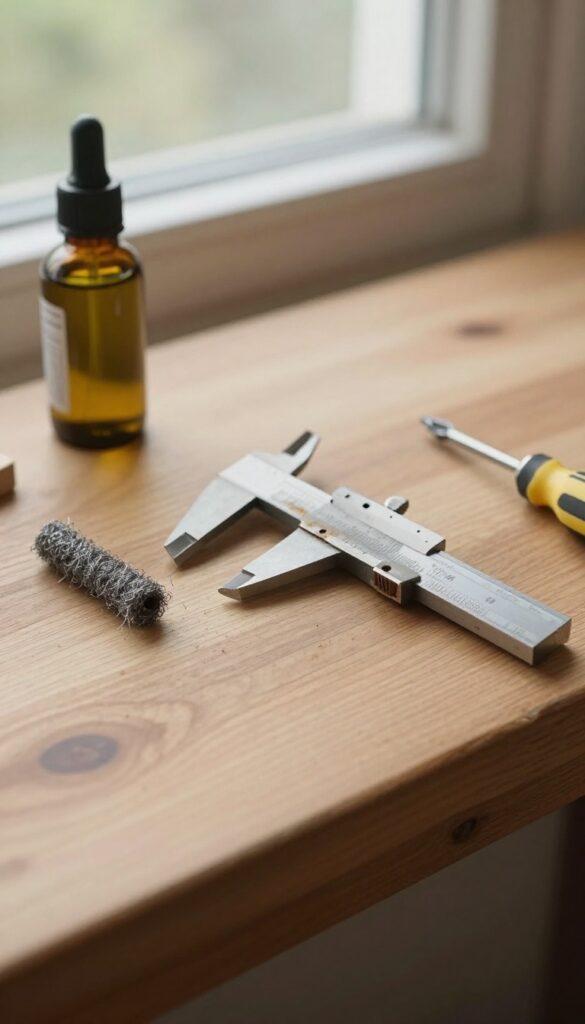
Not all rust removal calls for heavy abrasives. For precision tools like calipers, small screwdrivers, or fine-toothed saws, you need a gentler touch. That's where fine steel wool shines—specifically, the 0000 grade, which is ultra-fine and won't scratch the metal underneath.
Using a coarser grade can leave visible swirl marks or remove the tool's original finish. The trick is to pair 0000 steel wool with a light oil—mineral oil or WD-40 works great—to lubricate the surface and lift rust particles without grinding them in. This method is ideal for light surface rust that hasn't pitted the metal.
Why 0000 Grade Matters
Steel wool grades range from coarse (3–4) to super fine (0000). The 0000 grade is about as fine as you can get, making it safe for polished or plated surfaces. Coarser grades act like sandpaper and will strip away the tool's protective coating or leave scratches that invite future rust.
Step-by-step Buffing
Start by applying a few drops of oil to the rusty area. Tear off a small pad of 0000 steel wool and gently rub in the direction of the grain (if visible) or in circular motions for even coverage. Wipe away the residue with a clean cloth.
Repeat if needed, but avoid excessive pressure.
Aftercare To Prevent Return Rust
Once the rust is gone, wipe the tool clean with a dry rag. Apply a thin coat of oil or a rust inhibitor like Boeshield T-9 to seal the surface. Store the tool in a dry place—consider adding silica gel packs to your toolbox for extra moisture control.
8. Sandpaper for Heavy Pitting
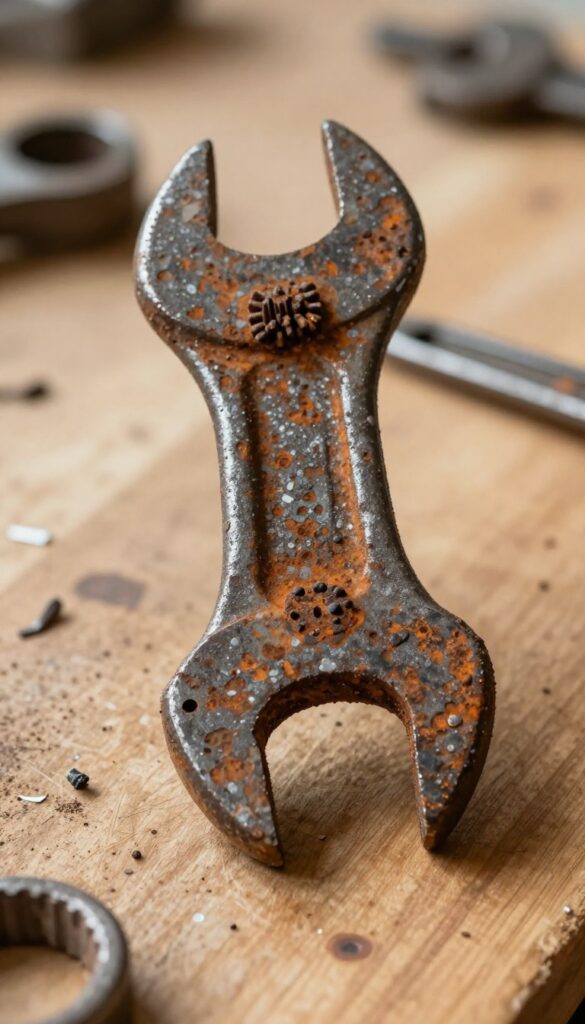
When rust has dug deep and left your tools pitted, you need to grind it out. Sandpaper is your go-to for smoothing those craters and restoring a usable surface. It's simple, cheap, and gives you total control over how much material you remove.
Start with a coarse grit like 80 or 120 to knock down the worst of the pitting. Work in a consistent direction to avoid gouging the metal. As the surface evens out, switch to finer grits—240, then 400, finally 600—to polish away the scratches.
Finish by wiping off all dust and applying a thin coat of oil to prevent flash rust.
Choosing The Right Grit Sequence
For heavy pitting, begin with 80-grit to cut through the deepest rust. If the pitting is moderate, start at 120-grit. Always progress through intermediate grits—don't jump from 80 to 400, or you'll leave deep scratches that are hard to remove.
Technique For Curved Surfaces
Wrap the sandpaper around a sponge or a piece of foam to conform to curved tool handles, wrench jaws, or gear teeth. This prevents flat spots and uneven wear. For tight corners, fold the paper into a sharp crease and use the edge.
Final Protection After Sanding
Once you've smoothed the surface, clean off all metal dust with a dry cloth or compressed air. Apply a rust-preventive oil like 3-in-1 or WD-40, rubbing it in thoroughly. This seals the bare metal and keeps rust from coming back.
9. Rust Eraser Blocks for Quick Touch-Ups
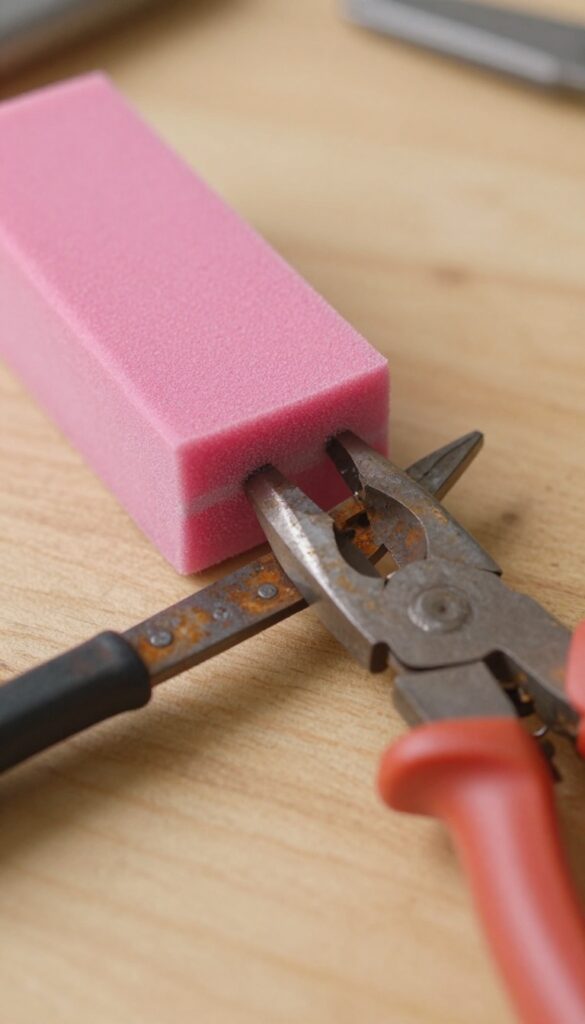
For those small rust spots that appear overnight on your favorite pliers or screwdriver tips, a rust eraser block is the perfect quick fix. These blocks, like the popular Sandflex brand, are made of rubbery abrasive material that lifts rust without scratching the underlying metal. They're reusable, mess-free, and ideal for spot treatments when you don't want to break out the vinegar or sandpaper.
Rust eraser blocks are a game changer for maintaining tools that see regular use. Unlike liquids or pastes, they require no drying time or cleanup—just rub, wipe, and you're done. They work best on light to moderate rust and can be used dry or with a little water for lubrication.
Keep one in your toolbox or on your workbench for instant touch-ups whenever you spot a rust fleck.
How To Use A Rust Eraser Block
Simply rub the block back and forth over the rusted area with moderate pressure. For curved surfaces, flex the block slightly to conform. The abrasive action removes the rust while leaving the base metal intact.
After a few strokes, wipe away the residue with a dry cloth. If the rust is stubborn, wet the block slightly for extra cutting power.
When To Choose A Rust Eraser Over Other Methods
Rust erasers shine for quick, targeted jobs. They're perfect for cleaning the jaws of pliers, the tips of screwdrivers, or the edges of chisels. Avoid them for large surface areas or heavy pitting—that's when you'd want electrolysis or sanding.
They also work great for maintaining knives and other bladed tools without dulling the edge.
Extending The Life Of Your Eraser Block
These blocks are reusable, but they wear down over time. To get the most out of yours, clean it occasionally with a stiff brush to remove embedded rust particles. Store it in a dry place to prevent it from absorbing moisture.
When the block becomes too smooth to cut rust effectively, it's time for a replacement.
10. WD-40 and Scrub Pad for Routine Maintenance
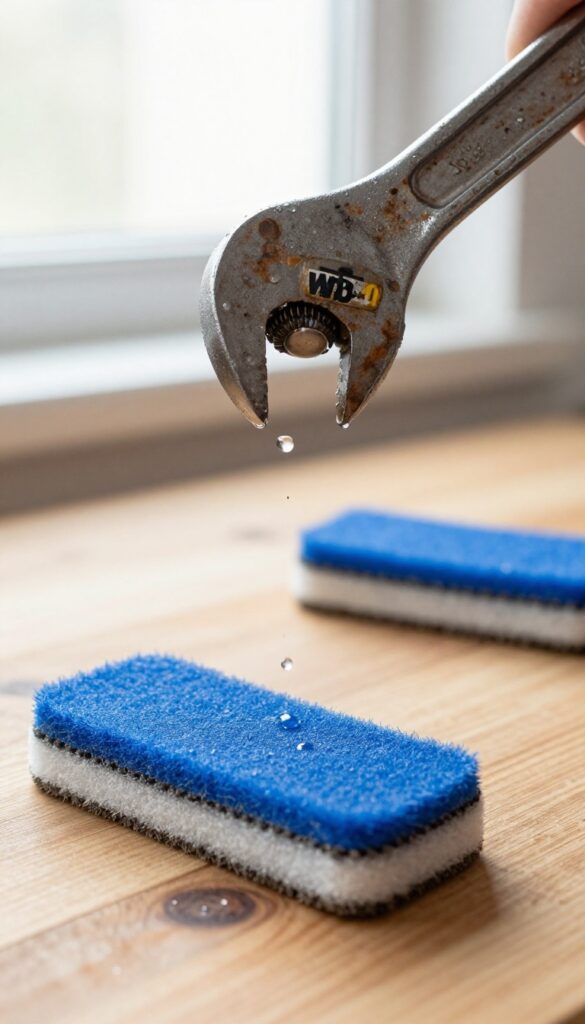
WD-40 isn't just for squeaky hinges—it's a surprisingly effective rust loosener. When you catch rust early, a quick spray and scrub can save you from heavier work later. This method works best for light to moderate rust and doubles as a protective treatment.
For tools with surface rust that hasn't yet pitted the metal, WD-40 and a nylon scrub pad are your go-to combo. The solvent penetrates rust flakes, breaking their bond with the metal, while the pad gently abrades without scratching. Afterward, the leftover film helps prevent new rust from forming.
How To Apply
Spray WD-40 generously over the rusty areas. Let it sit for about 10 minutes—longer if the rust is thicker. Then scrub with a nylon pad in a circular motion.
Wipe away the residue with a clean rag. For stubborn spots, repeat or let it soak overnight.
Best Tools For This Method
This technique works great on wrenches, pliers, screwdrivers, and other hand tools with smooth surfaces. Avoid using it on tools with wooden handles or intricate mechanisms where the solvent might seep into joints and attract grime.
Why It's A Maintenance Staple
WD-40 is cheap, easy to find, and doesn't require rinsing or drying. The thin protective layer it leaves behind acts as a moisture barrier, making it ideal for tools you use regularly. Keep a can in your garage for quick touch-ups after each use.
11. Oxalic Acid Solution for Stubborn Rust
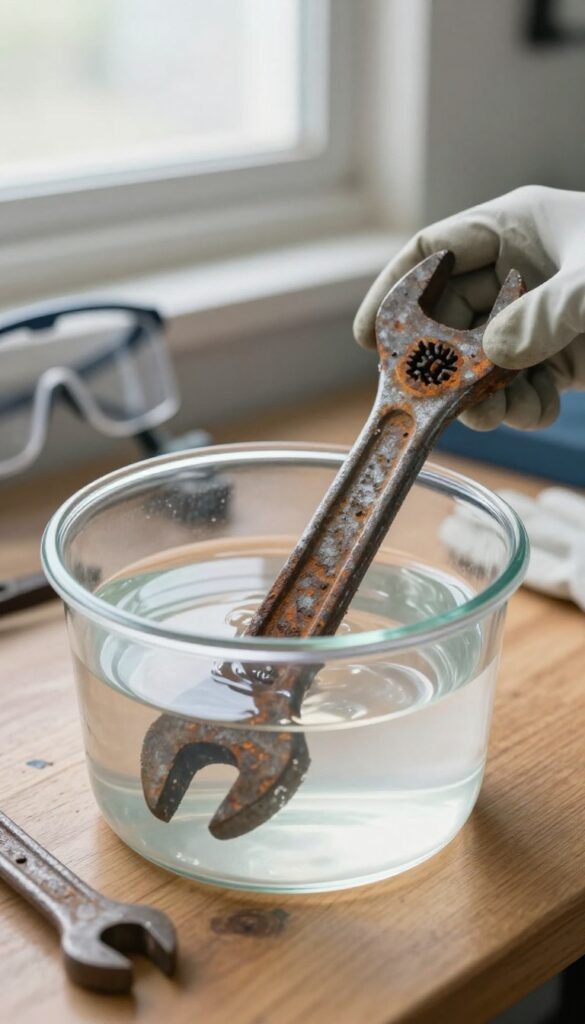
When vinegar and baking soda just aren't cutting it, it's time to bring out the big guns. Oxalic acid is a chemical compound that dissolves rust on contact, making it perfect for tools that have been sitting in a damp corner for years. It's the same stuff found in commercial rust removers, but you can buy it as a powder and mix it yourself.
Just be careful—this is strong stuff and demands respect.
Oxalic acid works by chemically converting iron oxide into a soluble compound that rinses away. It's especially effective on tools with intricate shapes or hard-to-reach crevices where scrubbing isn't practical. The process is simple: dissolve the powder in warm water, soak your tools for 20-30 minutes, then rinse thoroughly.
You'll see rust literally disappear. However, because it's a potent acid, you must wear gloves and work in a well-ventilated area. Also, avoid using it on chrome or plated tools, as it can damage the finish.
For best results, scrub lightly with a nylon brush after soaking to remove any loosened residue.
Safety First: Handling Oxalic Acid
Before you start, suit up. Wear rubber gloves to protect your skin and safety glasses to shield your eyes from splashes. Work outdoors or in a garage with the door open—the fumes are mild but can irritate your lungs.
Keep a bucket of clean water nearby in case of spills. And never mix oxalic acid with bleach or other household cleaners; it can produce toxic gases. Treat it like the powerful chemical it is, and you'll be fine.
Step-by-step: Soaking Your Tools
Fill a plastic or glass container with warm water—enough to fully submerge your tools. Slowly add oxalic acid powder while stirring, following the package ratio (usually about 1 tablespoon per quart of water). Place your rusty tools in the solution, ensuring they're completely covered.
Let them soak for 20-30 minutes; you'll see bubbles and the rust starting to dissolve. After soaking, remove the tools with tongs or a gloved hand, and rinse them thoroughly under running water. Dry immediately with a clean cloth to prevent flash rusting.
Aftercare: Neutralizing And Protecting
Oxalic acid is acidic, so after rinsing, neutralize any residue by wiping the tools with a solution of baking soda and water (1 tablespoon per cup). This stops the acid from continuing to work and damaging the metal. Then, apply a thin coat of oil or wax to protect the bare metal from future rust.
Your tools will look like new—just remember to store them in a dry place.
12. Naval Jelly for Instant Rust Removal
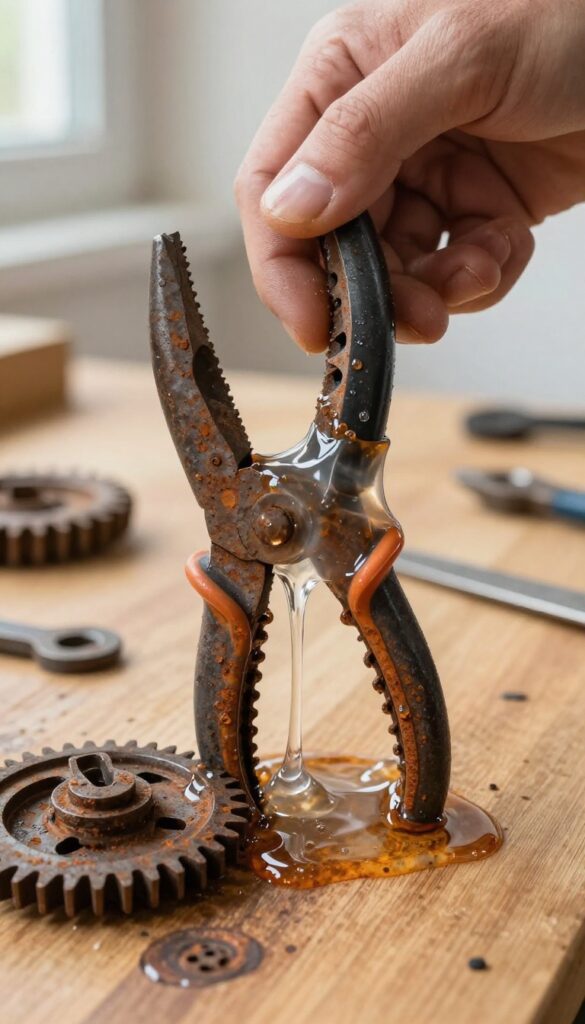
When you need rust gone fast and you're dealing with intricate tool surfaces, naval jelly is your secret weapon. This phosphoric acid gel works chemically, not abrasively, so it reaches into every nook and cranny without damaging the metal underneath. It's especially handy for tools with complex shapes like gears, hinges, or multi-part pliers.
Applying naval jelly is straightforward: brush it on generously, let it sit for about 15 minutes, then rinse thoroughly with water. The gel converts rust into a water-soluble compound that washes away, leaving a clean surface. For heavy rust, you can repeat the process.
Always wear gloves and work in a well-ventilated area, and dry the tool immediately after rinsing to prevent flash rust.
Why Naval Jelly Works So Well
Naval jelly contains phosphoric acid, which reacts with iron oxide (rust) to form iron phosphate—a stable, inert coating that can be easily rinsed off. Unlike sanding or wire brushing, it doesn't remove healthy metal, so your tool's dimensions and fit remain unchanged. That's crucial for precision tools like wrenches or sockets.
Step-by-step Application Tips
Start by cleaning the tool of grease or dirt. Apply a thick, even layer of naval jelly with a disposable brush or an old toothbrush to work it into crevices. Let it sit for 15 minutes—longer for heavy rust, but don't exceed 30 minutes.
Rinse with water or wipe off with a damp cloth. Neutralize any residue with baking soda and water, then dry and oil the tool.
When To Use Naval Jelly Vs. Other Methods
Naval jelly shines on tools with lots of small parts, like a rusty pair of scissors or a compound-action plier. For flat surfaces or light rust, vinegar or a rust eraser might be quicker. But if you have a tool that's hard to disassemble or has delicate threads, naval jelly is the gentlest effective option.
13. Ketchup for Small Rust Spots
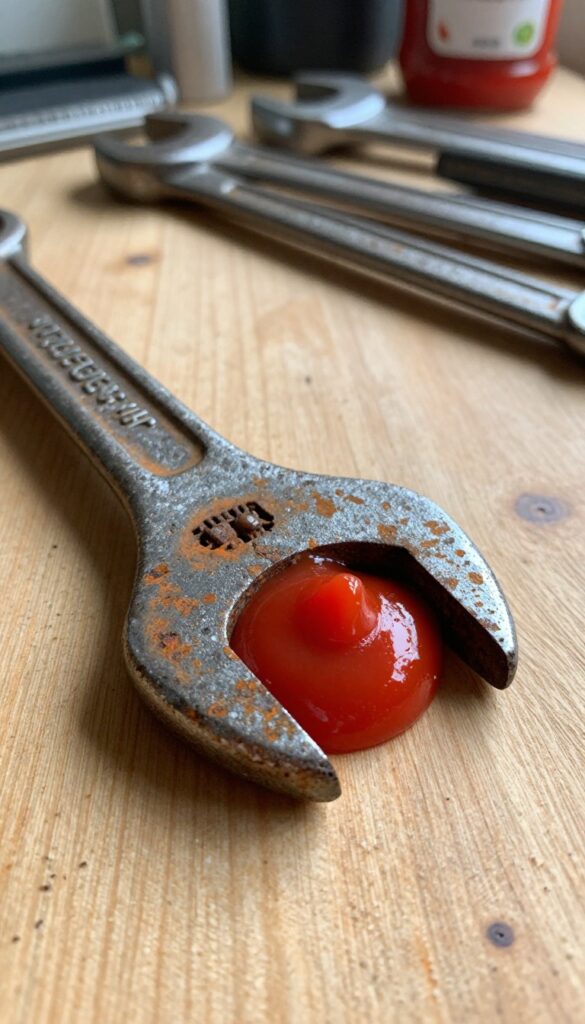
You might think ketchup belongs only on burgers, but it's actually a mild rust remover in disguise. The vinegar and tomato acids in ketchup work together to break down light rust without scrubbing. It's a weird trick that really works for small spots on hand tools.
Ketchup is a surprisingly effective rust remover for light surface rust. The acetic acid in vinegar and the citric acid in tomatoes create a gentle chemical reaction that loosens rust. This method is best for small spots on tools like screwdrivers, pliers, or wrenches.
It's non-toxic and safe for most metal surfaces, though avoid leaving it on for too long to prevent etching.
How To Apply Ketchup For Rust Removal
Squeeze a dollop of ketchup directly onto the rusted area. Spread it evenly with a finger or a soft brush to cover the spot completely. Let it sit for about an hour—longer if the rust is stubborn.
The ketchup will start to bubble slightly as the acids work. After the wait, wipe it off with a damp cloth. Rinse the tool with water and dry it thoroughly to prevent new rust.
When Ketchup Works Best
This method shines on light, fresh rust that hasn't had time to dig deep. It's perfect for tools that get occasional moisture exposure but aren't heavily pitted. Ketchup is also great for delicate items like knife blades or small parts where you don't want to use abrasives.
For heavier rust, you'll need a stronger method, but for quick touch-ups, ketchup is a handy kitchen hack.
Tips For Best Results
Use regular ketchup, not organic or low-sugar varieties, as the sugar helps the acids cling. If the rust is in a crevice, use a toothpick to apply the ketchup precisely. For extra stubborn spots, cover the ketchup with plastic wrap to keep it from drying out.
After cleaning, apply a light coat of oil to protect the metal.
14. Boiling Water for Loosening Rusted Joints
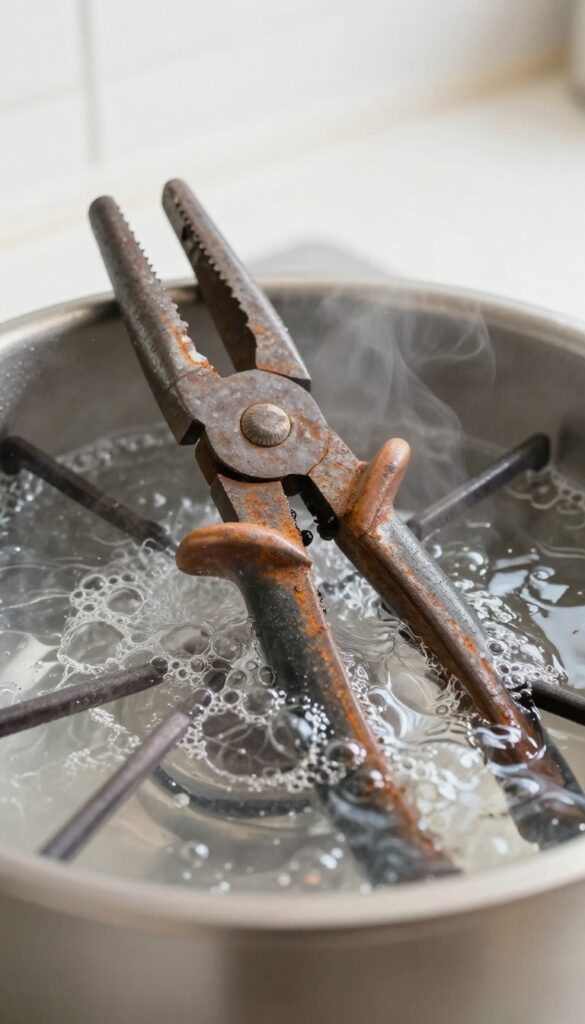
When rust locks up pliers or wrenches so tight they won't budge, heat is your friend. Boiling water is a surprisingly effective way to break that bond without any chemicals. The rapid expansion of metal loosens the grip of rust, making it easy to work the joint free.
Just be ready to dry and oil immediately after.
This method works best for tools with moving parts like pliers, scissors, or adjustable wrenches. The heat causes the metal to expand slightly, which breaks the rust's hold. After boiling, the joint should move freely—but you must act fast before rust re-forms.
How To Do It
Bring a pot of water to a rolling boil. Submerge the rusted tool fully for 10 minutes. Use tongs to remove it—careful, it's hot.
Immediately work the joint back and forth to break the rust seal. Dry it thoroughly with a towel, then apply a light coat of oil to prevent flash rusting.
Why It Works
Metal expands when heated. Rust is brittle and doesn't expand as much, so the difference in expansion breaks the bond. This is a simple physics trick that costs nothing and uses no harsh chemicals.
Safety Tips
Use long tongs or gloves to avoid burns. Don't boil tools with plastic or wooden handles—they'll warp or melt. Work in a well-ventilated area and keep a dry towel nearby.
15. Citric Acid Bath for Bulk Cleaning
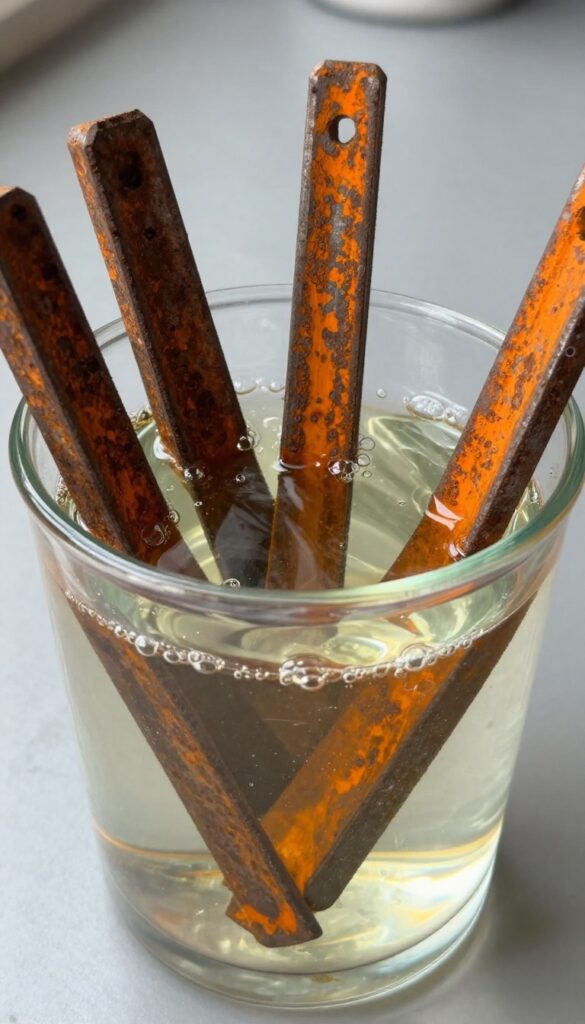
If you've got a pile of rusty tools and want to clean them all at once, a citric acid bath is your best bet. This food-grade acid is gentler than harsh chemicals but tough on rust, leaving a bright, clean finish. It's especially handy when you have multiple items to tackle in one go.
Citric acid is a natural rust remover that's safer to handle than many commercial products. You can buy it as a powder online or at grocery stores. The process is simple: dissolve the powder in hot water, submerge your tools, and let them soak.
Unlike vinegar, citric acid doesn't have a strong smell and works faster.
How To Mix And Soak
Use about 1 tablespoon of citric acid powder per liter of hot water. Stir until fully dissolved. Place your rusty tools in a plastic or glass container, pour the solution over them, and ensure they're fully submerged.
Let them soak for 12 to 24 hours. Check periodically—heavier rust may need more time.
Rinsing And Drying
After soaking, remove the tools and rinse them thoroughly with water. Use a brush to scrub off any loosened rust. Dry immediately with a cloth to prevent new rust from forming.
For extra protection, apply a light coat of oil after drying.
16. Drill with Wire Brush Attachment for Large Surfaces
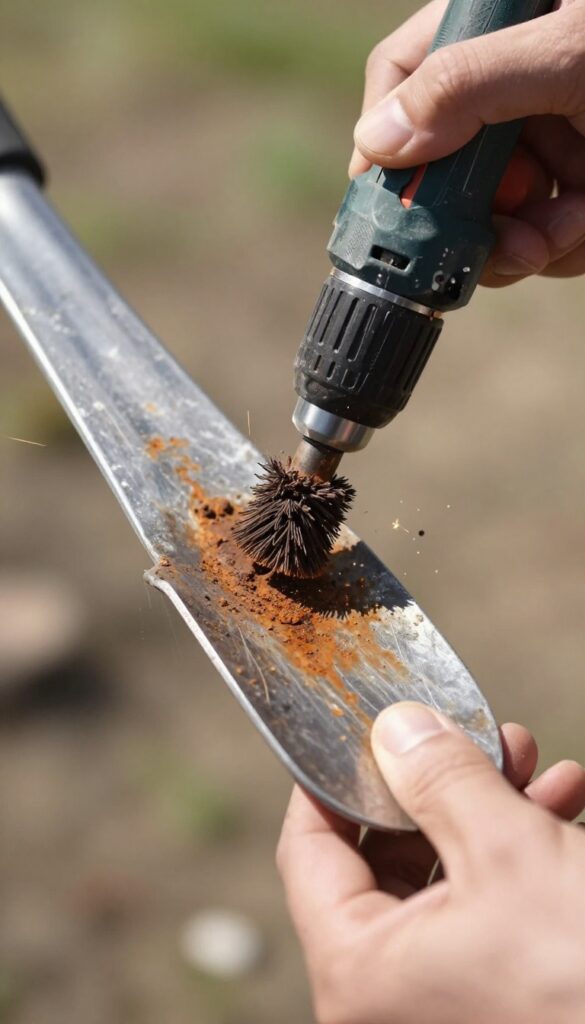
When you're staring down a shovel or hoe that's more rust than metal, scrubbing by hand is a losing battle. A drill with a wire cup brush turns that chore into a quick, satisfying job. It's the fastest way to strip heavy rust off large, flat surfaces without breaking a sweat.
Fit a wire cup brush onto your drill and run it over the rusted areas. The spinning bristles chew through oxidation in seconds, leaving bare metal behind. This method works best on shovels, hoes, trowels, and other large garden or garage tools.
Just keep the drill moving to avoid gouging the metal, and always wear eye protection—those wire bristles can fly off.
Choose The Right Brush
Wire cup brushes come in different materials: steel for heavy rust, brass for softer surfaces, and stainless steel for non-corrosive needs. For most rusty tools, a steel cup brush is your best bet. Make sure it's rated for the RPM of your drill to avoid breakage.
Safety First
Wire bristles can snap and shoot out at high speed. Safety glasses are non-negotiable. Also wear gloves to protect your hands from the spinning brush and any loose rust flakes.
Work in a well-ventilated area or outdoors to avoid inhaling rust dust.
Finish With A Seal
After brushing off the rust, wipe the tool clean with a rag. Apply a thin coat of oil or a rust-inhibiting spray to prevent new rust from forming. Your tools will look and work like new.
17. Protective Oiling After Cleaning
You've scrubbed, soaked, and polished your tools back to life. Now comes the step that keeps them that way. A thin layer of oil or wax after cleaning seals out moisture and oxygen, the two things rust needs to form.
It's a five-minute habit that saves hours of future work.
Once your tools are dry and free of rust, apply a light coat of mineral oil, 3-in-1 oil, or paste wax. Mineral oil is food-safe and won't gum up, 3-in-1 is great for moving parts, and paste wax leaves a dry, protective film. Use a clean rag to wipe a thin layer over all metal surfaces.
Store tools in a dry spot—add silica gel packs or a dehumidifier if your garage is damp. Reapply after heavy use or if tools get wet.
Choose The Right Protector
Mineral oil is odorless and safe for tools that touch food, like pruners or kitchen shears. 3-in-1 oil penetrates joints and protects without being sticky. Paste wax dries hard and won't attract dust, making it ideal for chisels and saws.
Avoid WD-40 as a long-term protectant—it evaporates quickly.
Application Tips
Wipe the tool clean first, then apply a few drops of oil to a lint-free cloth. Rub it evenly over the metal, including hard-to-reach spots like hinge pins. For paste wax, let it haze before buffing with a dry cloth.
Don't over-oil—a thin, even coat is all you need.
Storage Matters
Even with a protective coat, moisture is the enemy. Hang tools on pegboard or store them in a dry toolbox. Add a small container of silica gel or a dehumidifier rod inside closed drawers.
Check tools seasonally and re-oil if the film looks worn.
FAQ
Can I use bleach to remove rust from tools?
No, bleach can accelerate rusting and damage metal. Stick to acidic solutions like vinegar or citric acid.
How long should I soak tools in vinegar?
For light rust, 24 hours is enough. Heavier rust may need up to 48 hours. Check periodically and scrub gently.
Is it safe to use electrolysis at home?
Yes, with proper precautions. Use a plastic container, keep the area ventilated, and never submerge the charger. Follow a detailed guide.
What oil is best for preventing rust on tools?
Mineral oil, 3-in-1 oil, or camellia oil work well. Avoid cooking oils that can become sticky.
Can I restore heavily pitted tools?
Yes, but pitting may remain visible. Use sandpaper or electrolysis to remove rust, then oil to protect. Functionality is usually restored.
Conclusion
With these 17 tricks, your rusty tools will look and work like new in no time. Pick a few that fit your gear and give them a try.
You'll save money and feel proud every time you open your toolbox.


