Hitting the trail with your dog is one of the best ways to spend time together. But all that sniffing, exploring, and running burns energy fast. Packing the right snacks keeps your pup happy and fueled without breaking the bank.
Store-bought trail treats can get pricey, especially if you hike often. Luckily, making your own dog treats at home is simple and wallet-friendly. You probably already have most of the ingredients in your kitchen.
These 9 homemade dog trail treat recipes are designed for active dogs. They're portable, shelf-stable enough for a day out, and made with real, dog-safe ingredients. Your pup will love the taste, and you'll love the savings.
1. Peanut Butter & Banana Bites
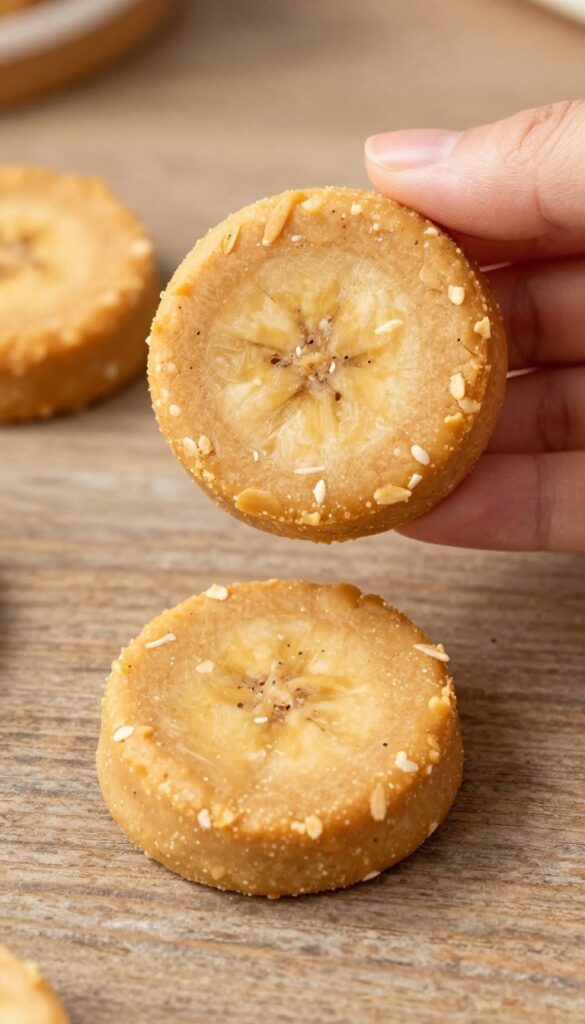
These no-bake bites are a trail-ready treat that won't break the bank. With just three simple ingredients—peanut butter, banana, and oats—you can whip up a batch in minutes. They're soft, chewy, and packed with energy, making them perfect for refueling your pup during a long walk or hike.
Best of all, they're made from pantry staples you probably already have.
Ingredients
- 1 ripe banana, mashed
- 1/2 cup xylitol-free peanut butter
- 1 cup rolled oats
Instructions
- In a bowl, mix the mashed banana and peanut butter until smooth.
- Stir in the oats until a thick dough forms. Roll into small bite-sized balls.
- Refrigerate for 30 minutes to firm up before packing for your hike.
Serving Tip
Store these bites in an airtight container in the fridge for up to a week, or freeze them for longer trips. They soften quickly in warm weather, so pack them in a cool pouch or offer them as quick rewards during rest stops.
2. Sweet Potato Chews

Sweet potatoes are a budget-friendly powerhouse for homemade dog treats. They're packed with fiber, vitamins, and natural sweetness that dogs love. Baking thin slices low and slow transforms them into a chewy, jerky-like snack that's perfect for hikes or training sessions.
Plus, you can make a big batch for just a few dollars.
Ingredients
- 1 large sweet potato, scrubbed clean
- 1 tablespoon coconut oil (optional, for extra shine)
- Pinch of cinnamon (optional, dog-safe)
Instructions
- Preheat your oven to 200°F (95°C). Line a baking sheet with parchment paper.
- Slice the sweet potato into thin rounds, about 1/4-inch thick. For even drying, try to keep slices uniform.
- Arrange slices in a single layer on the baking sheet. Brush lightly with melted coconut oil and sprinkle with cinnamon if desired.
- Bake for 2.5 to 3 hours, flipping halfway, until chewy and slightly shriveled. Let cool completely before serving.
Serving Tip
Store these chews in an airtight container in the fridge for up to two weeks. For longer storage, freeze them in a zip-top bag. Break larger pieces into smaller bits for training treats or use whole as a low-calorie chew on walks.
3. Oatmeal & Apple Cookies
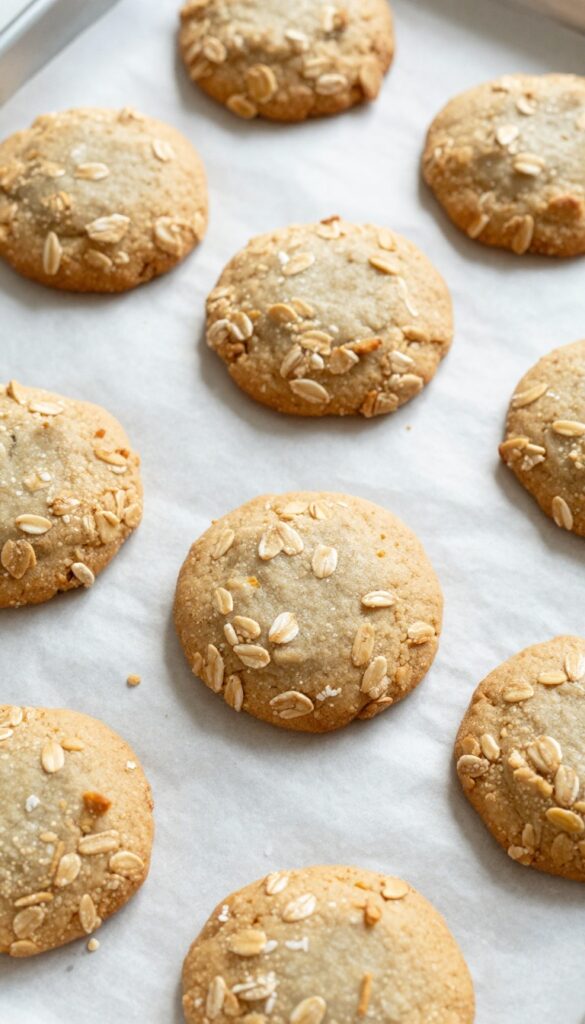
These soft, baked cookies are a wallet-friendly way to pack a wholesome snack for your pup on the trail. Oatmeal and unsweetened applesauce come together with a hint of cinnamon for a gentle flavor that's easy on sensitive stomachs. They hold together nicely without crumbling in your pocket, making them a practical choice for a day out with your dog.
Ingredients
- 1 cup rolled oats (not instant)
- 1/2 cup unsweetened applesauce
- 1/4 teaspoon ground cinnamon
- 1 tablespoon coconut oil, melted (optional for binding)
Instructions
- Preheat your oven to 350°F (175°C) and line a baking sheet with parchment paper.
- In a bowl, mix the rolled oats, applesauce, cinnamon, and melted coconut oil until a thick dough forms.
- Scoop tablespoon-sized portions onto the baking sheet and flatten slightly with a fork.
- Bake for 12–15 minutes until firm and lightly golden. Let cool completely before packing.
Serving Tip
Store these cookies in an airtight container in the fridge for up to a week, or freeze them for longer trips. Give one cookie per 10 pounds of body weight as a trail snack—they're soft enough to break into smaller pieces for training rewards.
4. Pumpkin & Coconut Balls

These no-bake energy balls come together in minutes and cost pennies per serving. Canned pumpkin is usually under a dollar, and oat flour can be made by blitzing regular oats in a blender. The shredded coconut adds healthy fats that support your dog's coat and brain.
Dogs love the soft, chewy texture, and the balls hold their shape well in a pouch or treat bag.
Ingredients
- 1 cup canned pumpkin (not pie filling)
- 1/2 cup unsweetened shredded coconut
- 1 1/2 cups oat flour (or ground oats)
Instructions
- In a large bowl, mix the pumpkin and shredded coconut until combined.
- Gradually add oat flour, stirring until a firm dough forms. If too sticky, add more oat flour a tablespoon at a time.
- Roll the dough into small balls about 1 inch in diameter. Place on a parchment-lined tray and refrigerate for 30 minutes to set.
Serving Tip
Store these balls in an airtight container in the fridge for up to a week, or freeze for up to three months. They're perfect for hikes because they won't crumble in your pocket. Give one or two per day depending on your dog's size, and break them into smaller pieces for training rewards.
5. Chicken & Rice Bites
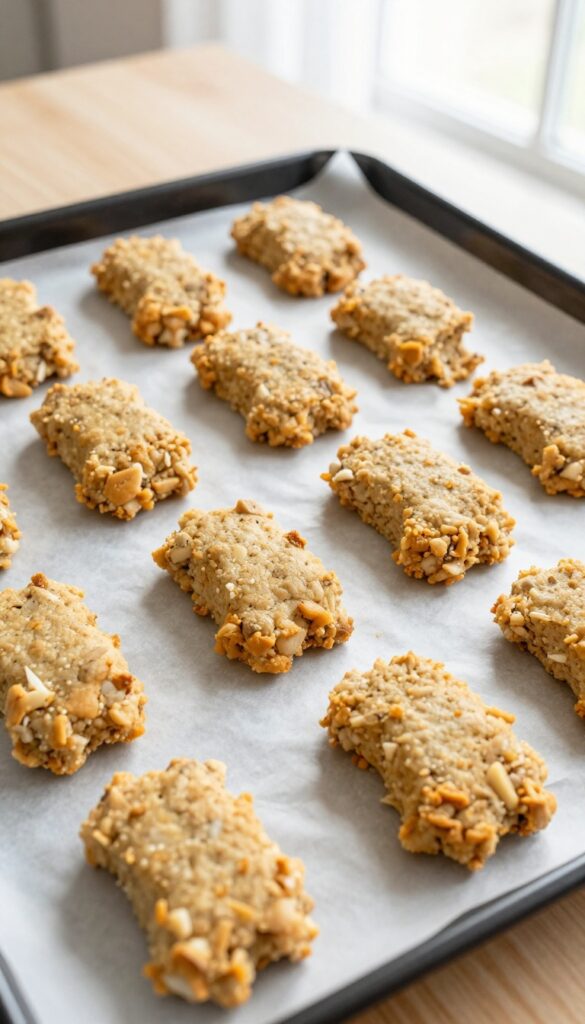
These mini baked patties turn leftover chicken and rice into a budget-friendly trail treat. Made with just three simple ingredients, they pack protein and carbs for energy on long walks. Dogs love the savory flavor, and you’ll love how easy they are to break into training-sized pieces.
Ingredients
- 1 cup cooked chicken, finely chopped or shredded
- 1 cup cooked white or brown rice
- 1 large egg, beaten
Instructions
- Preheat your oven to 350°F (175°C) and line a baking sheet with parchment paper.
- In a bowl, mix the chicken, rice, and beaten egg until well combined.
- Scoop tablespoon-sized portions onto the baking sheet and flatten each into a small patty.
- Bake for 12–15 minutes, until firm and lightly golden. Let cool completely before serving.
Serving Tip
Store these patties in an airtight container in the fridge for up to a week, or freeze them for up to three months. Break into smaller pieces for training rewards or pack whole for a satisfying hike snack.
6. Carrot & Oat Crunchies

These crunchy little bites are proof that budget-friendly treats don't have to be boring. Grated carrot adds natural sweetness and a boost of fiber, while oats provide gentle energy for your pup's next adventure. A touch of parsley helps freshen breath, making these a win for both your dog and your nose.
They bake up crisp and stay that way, so they're perfect for stuffing in a pouch and pulling out mid-hike.
Ingredients
- 1 cup rolled oats
- 1 cup grated carrot
- 1/4 cup chopped fresh parsley
- 1 egg, beaten
- 2 tablespoons coconut oil, melted
Instructions
- Preheat oven to 350°F (175°C) and line a baking sheet with parchment paper.
- In a bowl, mix oats, grated carrot, and parsley. Add beaten egg and melted coconut oil, stirring until a dough forms.
- Roll dough into small balls (about 1 inch) and place on the baking sheet. Flatten each ball with a fork.
- Bake for 20–25 minutes until golden and firm. Let cool completely before serving or storing.
Serving Tip
Store these crunchies in an airtight container at room temperature for up to a week, or freeze for longer trips. For small dogs, break into smaller pieces to use as training rewards. The crunchiness helps scrape away plaque, so they double as a dental snack.
7. Blueberry & Yogurt Drops

These frozen yogurt drops are a simple, budget-friendly treat your dog will love on warm hikes. Made with just two ingredients—plain yogurt and fresh blueberries—they're easy to whip up without breaking the bank. The blueberries add a pop of antioxidants, while the yogurt provides probiotics for healthy digestion.
Just keep them chilled in a thermos until snack time.
Ingredients
- 1 cup plain, unsweetened yogurt (no xylitol)
- 1/2 cup fresh blueberries
- Optional: 1 teaspoon honey (for extra sweetness)
Instructions
- Rinse the blueberries and pat them dry. If your dog is small, you can chop the blueberries into smaller pieces.
- In a small bowl, gently fold the blueberries into the yogurt until evenly distributed.
- Using a teaspoon or a small cookie scoop, drop dollops of the mixture onto a parchment-lined baking sheet.
- Place the baking sheet in the freezer for at least 2 hours, or until the drops are completely frozen solid.
- Transfer the frozen drops to an airtight container or a thermos for your hike.
Serving Tip
These drops soften quickly in warm weather, so pack them in a small thermos or insulated container. Offer 2-3 drops per 10 pounds of body weight as a refreshing trail snack. They're best enjoyed within a week if stored in the freezer.
8. Beef Liver Jerky Strips
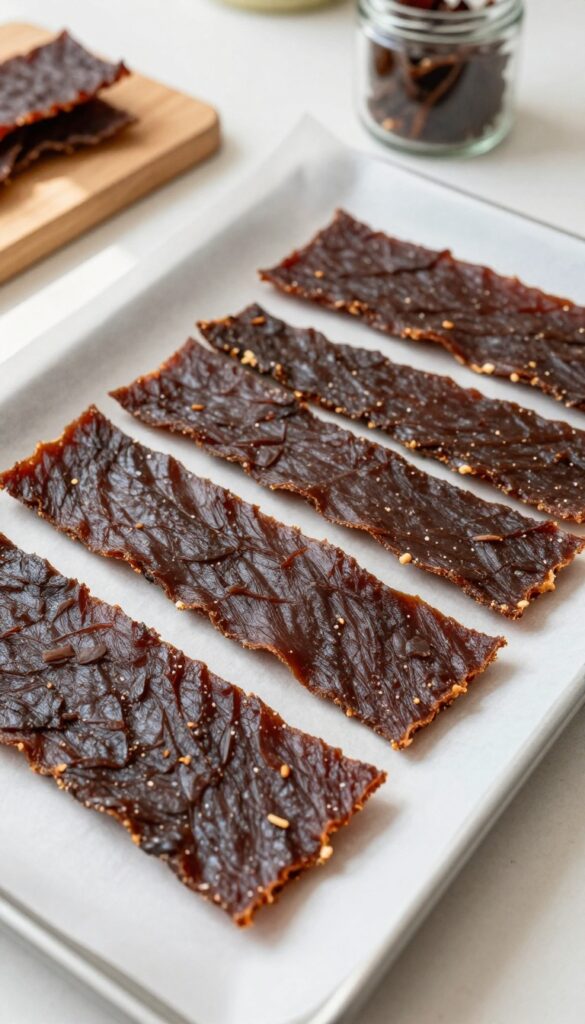
Beef liver is a powerhouse ingredient for dogs, packed with iron, protein, and essential vitamins. These jerky strips are incredibly simple to make—just one ingredient and your oven. They're a budget-friendly alternative to store-bought liver treats, and the chewy texture makes them perfect for rewarding your pup on the trail.
Plus, you control the thickness and dryness, so you can customize them to your dog's preference.
Ingredients
- 1 lb beef liver, sliced into thin strips (about 1/4 inch thick)
- Optional: a light sprinkle of salt (if desired, but not necessary)
- 1 cup prepared plain cooked lean beef in small dog-safe pieces
- 1 cup oat flour or finely ground oats
- 1 egg or 2 tablespoons unsweetened applesauce for binding
Instructions
- Preheat your oven to 200°F (95°C) and line a baking sheet with parchment paper.
- Arrange the liver strips in a single layer on the baking sheet, making sure they don't touch.
- Bake for 2-3 hours, flipping halfway through, until the strips are dry and chewy but not brittle. Let cool completely before serving.
- Mix the prepared plain cooked lean beef with the oat flour and binder until a soft dough or spoonable mixture forms.
- Shape into small treat portions, bake on a lined tray at 325°F until firm, then cool completely before serving.
Serving Tip
Store these jerky strips in an airtight container in the refrigerator for up to two weeks. For longer storage, freeze them in a zip-top bag. Break into smaller pieces for training treats or keep whole for a satisfying chew on a long hike.
9. Coconut & Kale Chips
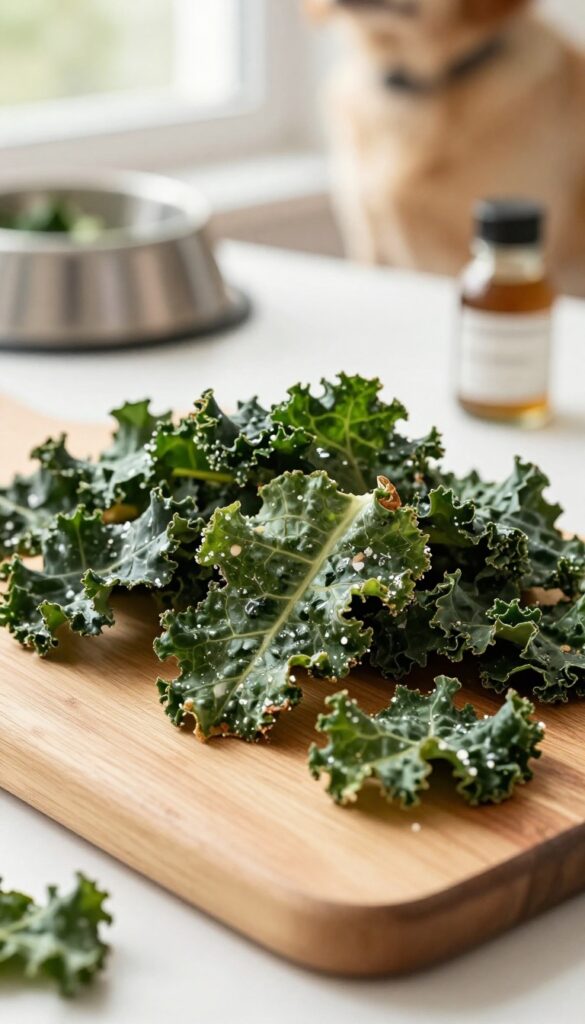
Kale is a powerhouse green packed with vitamins A, C, and K, plus fiber and antioxidants. When you coat the leaves lightly in coconut oil and bake or dehydrate them, you get a crispy, crunchy chip that dogs absolutely love. This recipe is incredibly budget-friendly because kale is inexpensive, and you only need a small amount of coconut oil.
Plus, it’s a great way to use up kale that might otherwise go to waste. These chips are perfect for hikes because they’re lightweight, non-greasy, and won’t crumble in your pocket.
Ingredients
- 1 bunch of kale, washed and dried
- 1 tablespoon coconut oil, melted
- Optional: pinch of turmeric (for color and anti-inflammatory benefits)
Instructions
- Preheat your oven to 250°F (120°C) or set your dehydrator to 125°F (52°C).
- Remove kale leaves from the tough stems and tear into bite-sized pieces.
- In a large bowl, drizzle the kale with melted coconut oil and toss gently to coat evenly. Add turmeric if using.
- Spread the kale pieces in a single layer on a baking sheet lined with parchment paper or on dehydrator trays.
- Bake for 20–25 minutes, checking frequently to prevent burning, until the leaves are dry and crisp. If using a dehydrator, dry for 2–3 hours until completely crisp.
- Let cool completely before serving or storing.
Serving Tip
- Store these chips in an airtight container at room temperature for up to a week. They’re fragile, so pack them in a sturdy container for hikes. Start with a few small pieces to see how your dog handles the crunch, especially if they’re a gulper.
- These chips are great for training or as a low-calorie snack.
FAQ
How long do homemade dog trail treats last?
Most baked or dehydrated treats last 1-2 weeks in an airtight container at room temperature. For longer storage, freeze them for up to 3 months. Always check for spoilage before a hike.
Can I use these treats for training on walks?
Yes! Many of these recipes, like Carrot & Oat Crunchies or Chicken & Rice Bites, can be made small for training. Just break them into pea-sized pieces before heading out.
Are these treats safe for puppies?
Most are safe for puppies over 8 weeks, but avoid hard chews like Sweet Potato Chews for very young pups. Always supervise and adjust treat size to prevent choking.
What's the best way to pack treats for a hike?
Use a reusable pouch or a small container. For frozen treats like Blueberry & Yogurt Drops, pack them in a thermos or insulated bag. Keep treats away from direct sun.
Can I substitute ingredients in these recipes?
Absolutely. Swap peanut butter for sunflower seed butter, or use pumpkin instead of banana. Just avoid xylitol, grapes, raisins, onions, garlic, and chocolate.
Conclusion
Making your own dog trail treats is a simple way to save money and know exactly what your pup is eating. These 9 recipes use everyday ingredients and are easy to prep ahead of your next adventure. Your dog will appreciate the homemade taste, and you'll appreciate the peace of mind.
Start with one or two recipes that match your dog's preferences and your schedule. Before you know it, you'll have a stash of healthy, budget-friendly treats ready for every walk or hike.

I’m Pallab Kishore, the owner of Little Pets Realm — an animal lover and pet care enthusiast sharing easy tips, healthy recipes, and honest advice to help every small pet live a happy, healthy, tail-wagging life.