
Last updated on August 19th, 2026 at 04:15 pm
Your dog doesn't need a fancy store-bought bed to sleep like royalty—sometimes the best spots come from stuff you already have lying around. Repurposing spare materials saves money, cuts waste, and gives your pup a one-of-a-kind sleeping spot with plenty of personality.
From old t-shirts to wine crates, these ten DIY ideas turn forgotten items into cozy retreats your dog will actually want to use. Each project is simple enough for a weekend afternoon, and most don't require special skills or tools.
Grab what you've got, pick a project, and get ready to see your dog test-drive their new favorite nap zone.
1. Upcycled T-Shirt Braided Bed
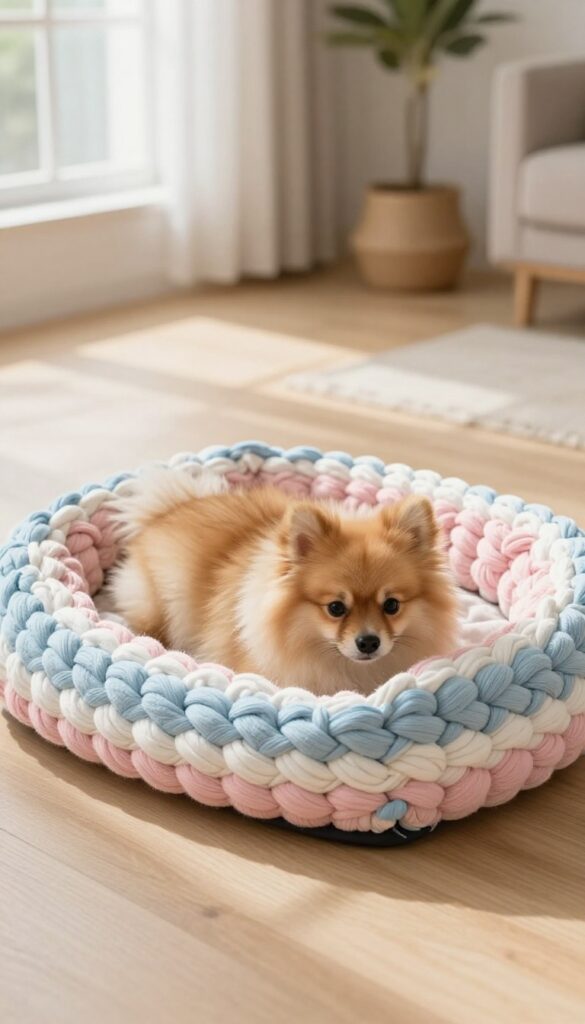
Old t-shirts that are too stained or stretched to donate can become a cozy, washable bed in about an hour. This project works best for small to medium dogs who like to curl up in a nest. The braided design holds its shape well and feels soft against your pup's fur.
Start by gathering 5–8 cotton t-shirts in colors you like. Cut off the sleeves and side seams so you have one large rectangle of fabric per shirt. Then cut each rectangle into 2–3 inch wide strips, working from the bottom hem up to the shoulders.
You'll want strips that are long enough to tie together into three long ropes. Once you have three equal-length ropes, braid them tightly, then coil the braid into a flat spiral, securing it with needle and thread as you go. The result is a plush, textured bed that's surprisingly sturdy and easy to toss in the washing machine on a gentle cycle.
Choosing The Right Shirts
Cotton t-shirts work best because they're soft, breathable, and easy to cut. Avoid shirts with heavy prints or thick seams, as they can make the braid lumpy. You can mix colors to create a fun pattern, or stick to one color for a more uniform look.
If you want a thicker bed, use more shirts or cut wider strips.
Braiding And Coiling Tips
Keep the braid tight as you work, so the bed holds its shape and doesn't sag. When you coil the braid, use a hot glue gun or strong thread to secure each loop to the previous one. Start from the center and work outward, flattening the coil slightly as you go.
For a softer edge, tuck the end of the braid under the last loop.
Washing And Care
This bed is machine-washable, but to keep it from unraveling, place it in a mesh laundry bag or pillowcase. Use cold water and a gentle cycle, then air dry. Avoid the dryer, as high heat can shrink the cotton and distort the braid.
With proper care, this bed can last for years.
2. Repurposed Suitcase Pet Bed
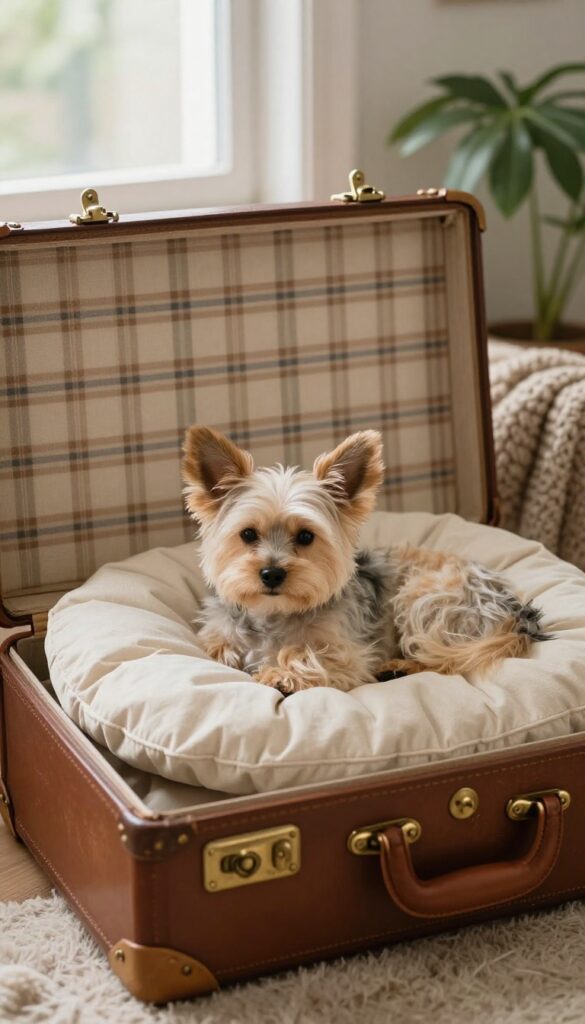
That old suitcase gathering dust in the attic or closet can become a charming, portable dog bed with minimal effort. Not only does it give your pup a cozy spot, but it also adds a touch of vintage style to your home. You'll need a suitcase with a sturdy base and a lid that opens flat.
Add a cushion or pillow that fits snugly inside, and you're ready to go. The best part? You can close it up when not in use, keeping fur and mess contained.
A repurposed suitcase bed is perfect for small to medium dogs, but even larger breeds can enjoy it if you find a big enough suitcase. The hard shell provides a sense of security, and the raised edges help your dog feel nestled in. Plus, it's easy to move from room to room or take on trips.
Choosing The Right Suitcase
Look for a suitcase that's wide enough for your dog to stretch out, but not so deep that they have trouble getting in. Vintage suitcases often have lovely linings, but if the interior is worn, you can line it with a soft fabric or a removable cushion cover. Ensure the hinges and latches are in good working order so the lid stays open safely.
Making It Comfy And Washable
Use a pet bed cushion that fits snugly, or make your own with foam and fabric. For easy cleanup, add a removable, washable cover. A soft blanket on top adds extra warmth and can be swapped out easily.
If you want to keep the suitcase lid open, you can prop it with a small chain or a sturdy ribbon.
Adding A Personal Touch
Decorate the outside with stickers, paint, or decoupage to match your home decor. You can also attach a handle for easy carrying. If your dog likes to burrow, leave the lid slightly ajar with a soft blanket inside—they'll love the cave-like feel.
3. Pallet Wood Lounger
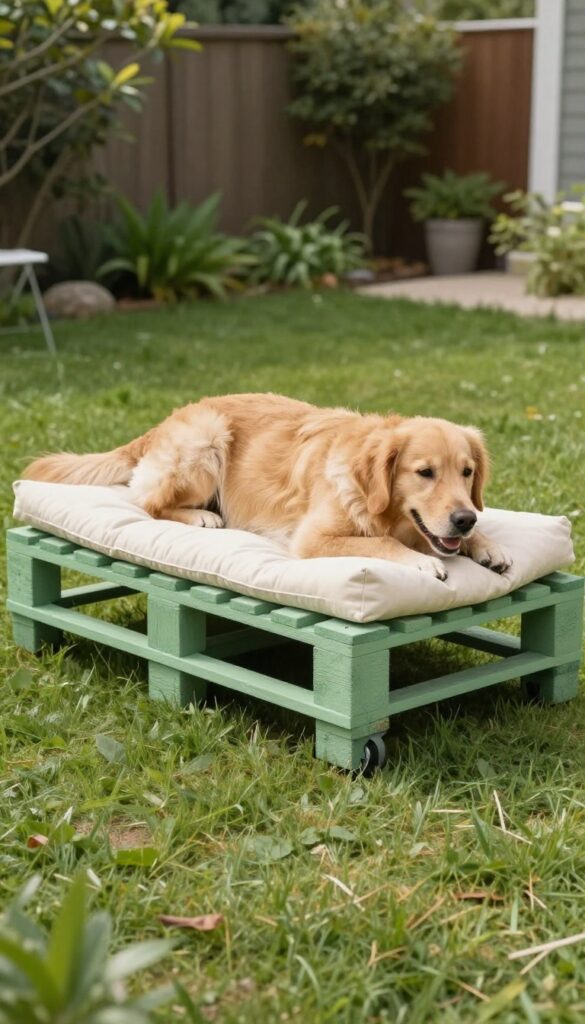
Wooden pallets are often free for the taking behind hardware stores or warehouses, and they make surprisingly sturdy pet furniture. With a bit of sanding and a splash of paint, you can turn one into a raised lounger that keeps your dog off hot concrete in summer and damp grass after rain. The open slats also let air circulate underneath, which is a bonus for thick-coated breeds.
Choosing And Prepping The Pallet
Look for a heat-treated pallet (stamped with “HT”) rather than one treated with chemicals, and avoid any that smell strongly of fuel or have obvious stains. Give the whole thing a good scrub with soapy water and let it dry completely. Then sand every surface—especially the top slats—so there are no splinters to catch on your dog’s paws or nose.
Finishing Touches For Indoor Or Outdoor Use
A coat of non-toxic, pet-safe paint or wood stain adds color and protects the wood from moisture. If the lounger will live outside, use a weather-resistant sealant on top. For extra comfort, add a simple outdoor cushion or a folded blanket that you can wash easily.
You could also attach small casters to the bottom to make it easy to move around.
Why Your Dog Will Love It
The raised design is great for dogs who like to keep an eye on their surroundings—they can see over low grass or deck rails. It also keeps them cooler in warm weather because air flows underneath. Plus, the sturdy frame can handle even the most enthusiastic digger or sprawler.
4. Old Sweater Cozy Cave
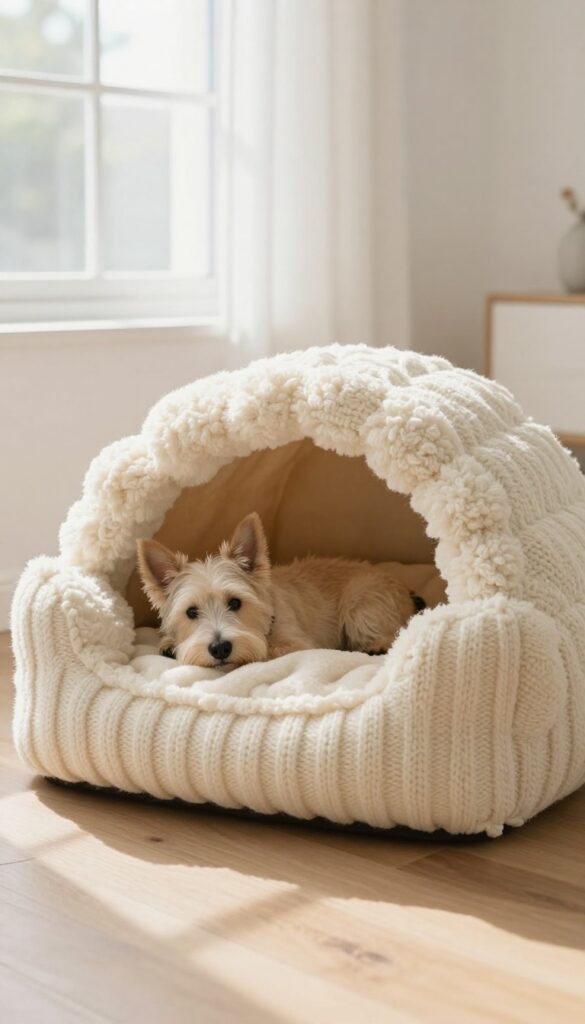
When your favorite sweater pills beyond repair, don't toss it—turn it into a warm, snuggly cave for your dog. This project uses the sweater's natural softness and shape to create a hideaway that burrowing breeds absolutely love. It's a quick sew that takes less than an hour and costs nothing if you already have an old sweater and some stuffing.
Start by laying the sweater flat and cutting off the sleeves, then sew the armholes shut. Turn the sweater inside out and sew the bottom hem closed, leaving the neck opening as the entrance. Stuff the body with polyester filling or old fabric scraps, then sew the neck shut and fold it under to create a plush rim.
Your dog will have a cozy, portable cave that's perfect for curling up and hiding from the world.
Picking The Right Sweater
Look for a sweater that's soft, stretchy, and machine-washable—avoid anything with rough seams or scratchy wool. A larger sweater gives you more room to stuff, and a crew neck or V-neck works best for the entrance. If the sweater has a hood, you can leave it attached and use it as an extra flap for your dog to burrow under.
Stuffing Options
Polyester fiberfill is the easiest to work with and keeps its shape well. You can also repurpose old pillows, ripped cushions, or even clean fabric scraps from other projects. Just make sure the filling is evenly distributed and not too lumpy, so your dog can comfortably nestle in.
If you want a washable bed, use a removable inner liner or choose a sweater that can survive gentle machine washing.
Sizing And Customization
For a small dog, a child's sweater works perfectly; for a larger breed, use an adult XL or even a chunky knit cardigan. You can adjust the loft by adding more or less stuffing, and you can sew in a soft fleece lining for extra warmth. Add a simple ribbon tie or a patch of contrasting fabric to give it a personal touch without complicating the design.
5. Crib Mattress Dog Bed
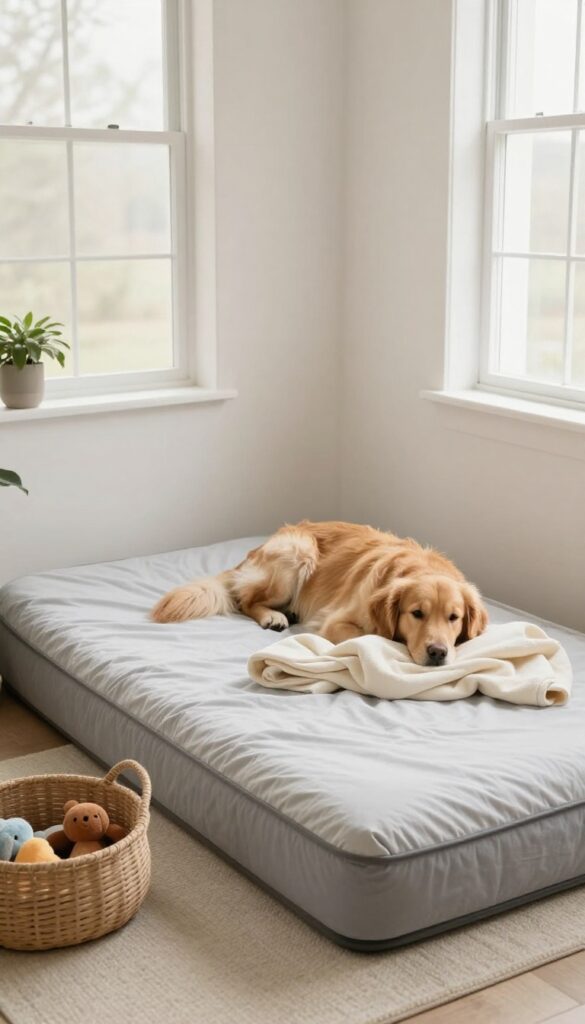
Baby gear often outlives its original purpose, and a crib mattress is a prime example. Once your little one moves to a big-kid bed, that sturdy mattress can get a second life as a spacious, supportive dog bed. It’s a practical swap that gives your pup plenty of room to stretch out, and it’s a lot cheaper than buying a large orthopedic bed from a pet store.
Crib mattresses are designed to be firm and durable, which is exactly what your dog’s joints need, especially for older or larger breeds. They’re also easy to clean—just toss a fitted sheet or a duvet cover over the mattress, and you can wash it as often as needed. Plus, the mattress is already the perfect size for a medium to large dog, so you won’t have to worry about your pup hanging off the edges.
Why A Crib Mattress Works So Well
The firm support of a crib mattress is great for dogs with arthritis or hip issues. It’s also waterproof on the inside (most have a vinyl or plastic core), so accidents won’t ruin the bed. And because it’s a standard size, you can find cheap fitted sheets at thrift stores or on sale—no need for custom bedding.
How To Make It Cozy And Dog-proof
Start by wiping down the mattress with a pet-safe cleaner and let it air out. Then, add a soft, washable cover—a crib fitted sheet works perfectly, or you can use a duvet cover for a plush feel. To keep it from sliding around, place a non-slip rug pad underneath.
If your dog likes to burrow, add a folded blanket on top for extra comfort.
Where To Put It
Because the mattress is larger, it’s best for a corner of the living room, a bedroom, or even a home office. You can lean it against the wall for a cozy nook feel, or place it flat on the floor. If you have a crate, check if the mattress fits—many crib mattresses are about the same size as large dog crate pads.
6. Tire Ottoman Bed
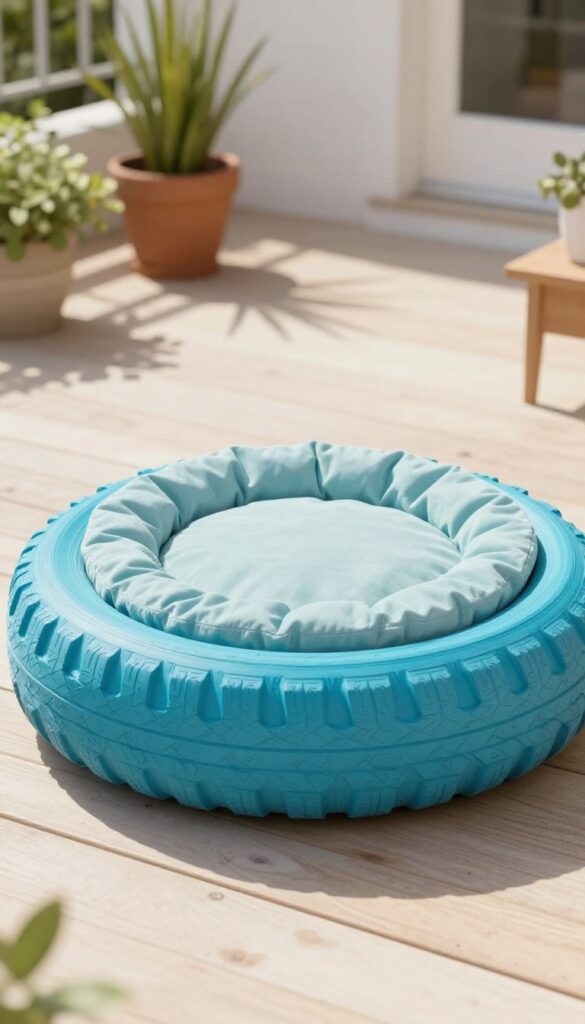
An old tire might seem like junk, but with a little elbow grease it can become one of the toughest, most stylish beds your dog will ever own. This project is perfect for outdoor lovers, garage dwellers, or anyone who wants a bed that can handle muddy paws and rough play. Plus, the flat top means it doubles as a side table or footrest when your pup isn't using it.
Start by cleaning the tire thoroughly with soap and water to remove dirt and grease. Once dry, sand the surface lightly to help paint adhere, then apply a coat of primer. Choose a weather-resistant outdoor paint in a color that matches your patio or living room—spray paint works best for even coverage.
After the paint dries, flip the tire over and attach a round piece of plywood to the bottom for stability, then add furniture pads to protect your floors. For the cushion, cut a circle of outdoor fabric and sew or glue it around a thick piece of foam or an old pillow. Place the cushion on top of the tire, and you're done.
The tire's natural sturdiness means it won't tip over, and the raised sides give your dog a sense of security while they nap.
Choosing The Right Tire
Any standard car tire works, but a larger truck or SUV tire gives bigger dogs more room to stretch out. Avoid tires with visible cracks or exposed steel belts, as these can be sharp. If you're grabbing a tire from a repair shop, ask if they have any with minimal wear—they're usually happy to give them away for free.
Painting And Sealing Tips
Use a spray primer made for rubber or plastic, then apply two coats of outdoor spray paint. Let each coat dry completely before adding the next. To keep the paint from chipping, finish with a clear outdoor sealant.
This also makes the tire easier to wipe clean when your dog tracks in mud.
Making The Cushion
For the cushion, you can repurpose an old round ottoman cushion, a baby play mat, or even a folded duvet. Cut a circle slightly larger than the tire's inner diameter so it sits snugly on top. Cover it with durable fabric like canvas or outdoor upholstery, and add a zipper or Velcro for easy removal and washing.
7. Fleece Tie Blanket Bed
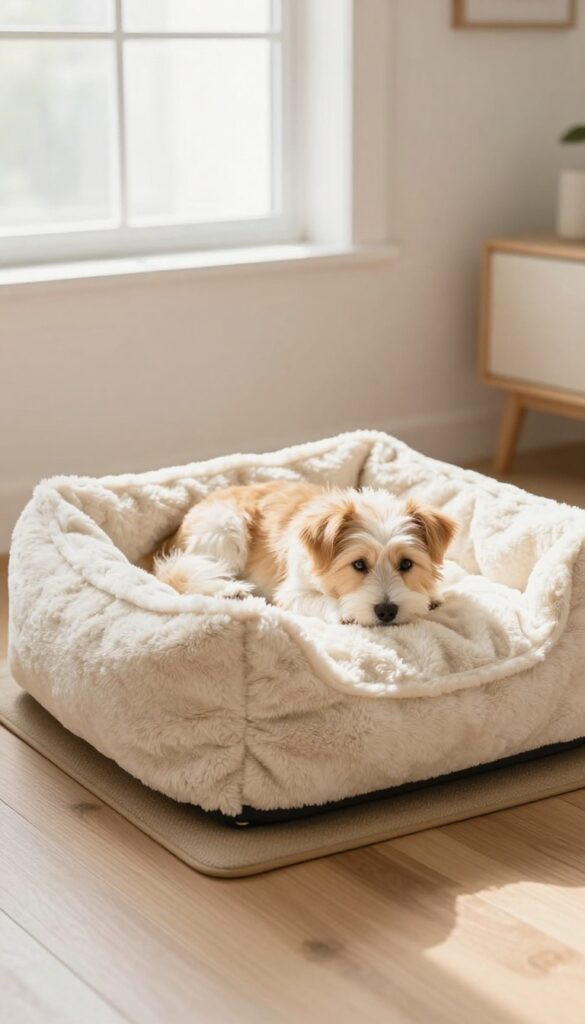
Fleece is one of those fabrics that seems to multiply in craft bins, and it’s perfect for a no-sew project. You can turn two coordinating pieces into a soft, plush bed that’s basically a giant pillow your dog can burrow into. The best part?
No sewing machine required—just a pair of scissors and a little patience.
Start by cutting both fleece pieces to the same size—about 2 feet by 3 feet works well for most dogs. Lay them on top of each other, then cut strips along all four edges, about 1 inch wide and 2 inches deep. Tie the top and bottom strips together in a double knot, working your way around the entire perimeter.
Once all the ties are done, you’ll have a cozy, fluffy blanket that’s naturally thick and cushiony.
Why Fleece Works So Well
Fleece is warm, lightweight, and doesn’t fray, so you can skip hemming entirely. It also holds up well to washing, which is a must for any dog bed. The double-layer construction gives it enough thickness to feel like a real mattress, and the tied edges create a nice, finished look without any sewing.
Step-by-step Assembly
First, wash and dry your fleece to pre-shrink it. Then trim any loose threads and lay the pieces perfectly aligned. Use a ruler and fabric marker to draw cutting lines if you want straight strips, or just freehand it—imperfect ties add character.
After tying all the edges, fold the blanket in half or into thirds to create a plush sleeping surface, then place it on a non-slip mat to keep it from sliding on hardwood or tile floors.
Customizing For Your Dog
You can adjust the size based on your dog’s breed—use larger pieces for a Great Dane or smaller ones for a Chihuahua. Add a layer of quilt batting between the fleece layers for extra cushioning, or insert a removable pillow form to make it easier to wash. For a personal touch, choose fleece with a fun pattern that matches your home decor or your dog’s personality.
8. PVC Frame Elevated Bed
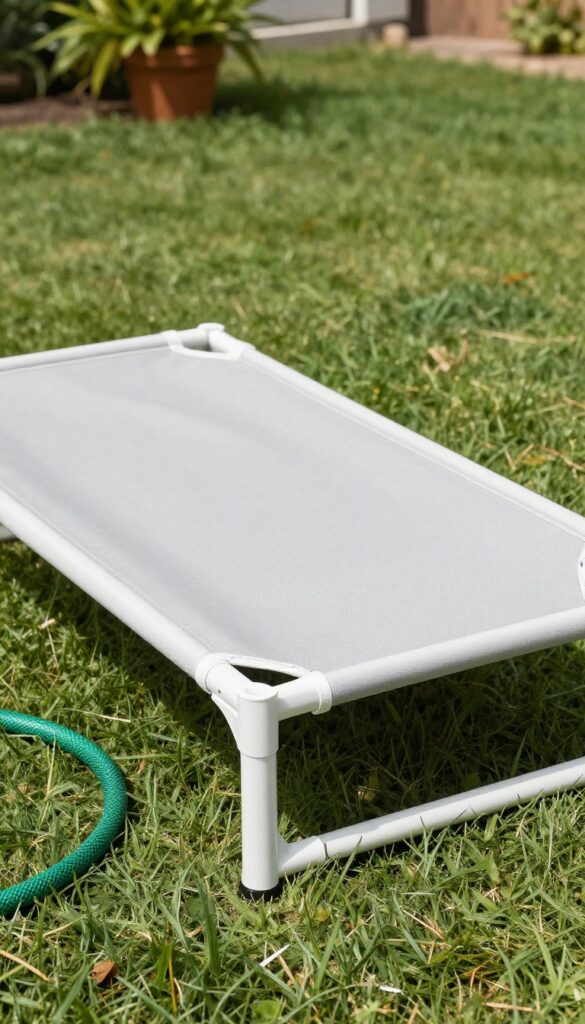
If your dog loves lounging outside but you're tired of muddy paws and damp grass, an elevated bed is a game-changer. Using PVC pipes and a sturdy fabric, you can build a lightweight frame that keeps your pup cool and clean. It's a smart project for hot summer days or rainy seasons, and it's easier than you might think.
Why Elevated Beds Work
Elevated beds lift your dog off the ground, which means better airflow underneath. That helps them stay cool in warm weather and dry when the ground is wet. Plus, it keeps them away from bugs, dirt, and chilly concrete.
Many dogs love the gentle bounce of a suspended surface, and it's a great option for older pups with joint issues.
Gathering Your Materials
You'll need PVC pipes (about 1 inch in diameter), four corner elbows, and four tee connectors. For the bed surface, choose a durable fabric like canvas or outdoor upholstery. You'll also need a drill, zip ties, and a measuring tape.
Most hardware stores sell PVC pipe cut to size, so you can skip the saw if you want.
Building The Frame
Start by cutting the PVC into two long pieces for the sides and two shorter pieces for the ends. Connect the corners with elbows, then add the tee connectors in the middle of each side for extra support. Slide the legs into the tees, and you've got a basic frame.
Make sure everything fits snugly—you can use PVC cement for a permanent bond.
Attaching The Fabric
Lay the fabric over the frame and pull it tight. Use zip ties to secure it to the PVC at each corner and along the sides. Trim any excess fabric, leaving a few inches to fold over for a clean edge.
If you want extra stability, you can sew a pocket or hem to slide the pipes through, but zip ties work just fine for a quick project.
9. Memory Foam Scrap Bed
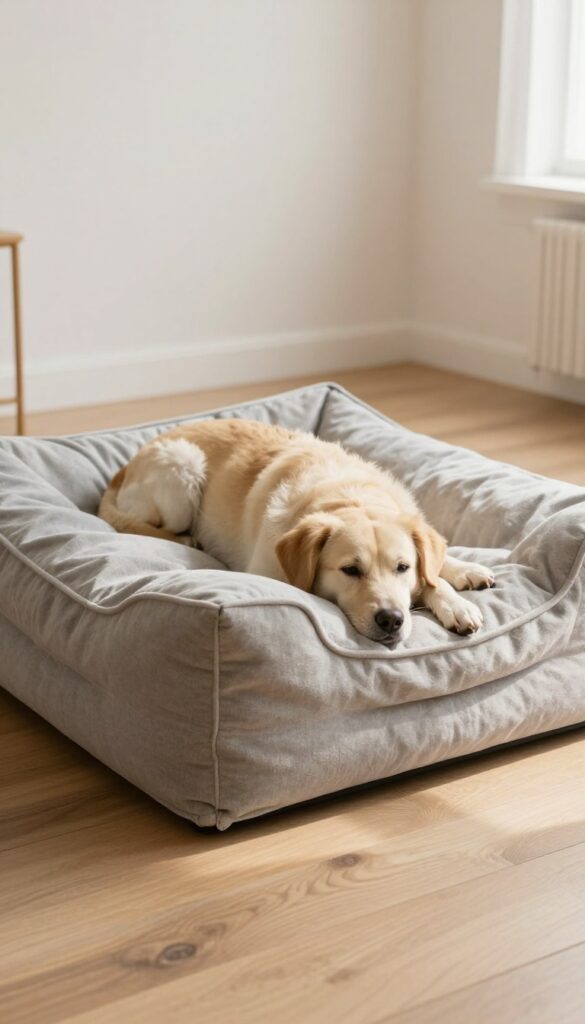
If you've upgraded your own mattress or have leftover foam from a DIY project, those scraps can become a plush, supportive bed for your dog. Memory foam contours to your pup's body, easing pressure on joints—a real bonus for older dogs or breeds prone to hip issues. Instead of letting those pieces gather dust, sew them into a custom bed that fits your dog's favorite sleeping position perfectly.
Gather your memory foam scraps and arrange them to match your dog's size and shape. You can stack thinner pieces to reach the desired thickness, or use one large piece if you have it. The key is to create a flat, even surface that your dog can sink into comfortably.
Once you've got your foam arranged, you'll need to sew a cover that holds everything together securely.
Choosing And Prepping Your Foam
Start by collecting memory foam scraps from old pillows, mattress toppers, or packaging. Make sure they're clean and dry. If you have multiple pieces, trim them to similar thicknesses so the bed is level.
You can also mix different densities, but keep the top layer soft for comfort. For a firmer base, use a denser foam underneath.
Sewing A Simple Cover
Measure your foam stack and cut a piece of durable fabric (like canvas or denim) to wrap around it, leaving a seam allowance. Sew three sides together, insert the foam, then close the fourth side with a zipper or by hand-stitching. For easy washing, make the cover removable with a zipper or Velcro closure.
If you're not confident with zippers, a simple envelope closure works too.
Customizing For Your Dog
Consider your dog's sleeping style. If they like to curl up, make the bed round or oval. If they stretch out, go rectangular.
You can also add a raised rim by sewing a rolled-up towel or extra foam around the edges—this gives a sense of security and a place to rest their head. Add a non-slip bottom using a piece of rug gripper or silicone fabric paint.
10. Wine Crate Nesting Bed
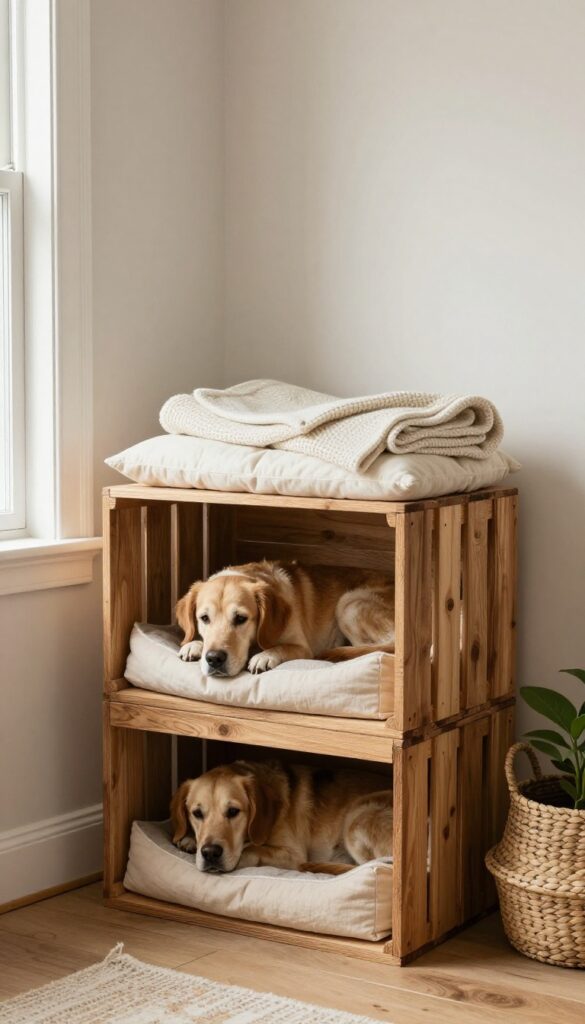
Wine crates have a rustic charm that can instantly elevate a corner of your living room, and they happen to make surprisingly sturdy dog beds. Instead of letting them gather dust in the garage or recycling bin, stack a couple to create a cozy, multi-level nook your dog will love. This project is as much about style as it is about comfort, so you can feel good about giving your pup a bed that looks great in your home.
Start by sanding down any rough edges on your wine crates to protect your dog's paws and nose. Then, arrange them in a layout that suits your space—stack them vertically for a tall perch or side by side for a sprawling lounge. Secure the crates together with wood screws or heavy-duty brackets to make sure they don't shift when your dog jumps in and out.
Once the structure is solid, add a plush cushion or folded blanket to each level, and your dog will have a stylish, elevated sleeping spot that's perfect for napping or keeping an eye on the household.
Why Wine Crates Work So Well
Wine crates are naturally durable, often made from solid wood that can handle daily use. Their slatted sides provide ventilation, which helps keep your dog cool in warmer months. Plus, the open design gives your dog a sense of security while still allowing them to see what's going on around them.
If you can get your hands on a few crates from a local liquor store or winery, you're well on your way to a bed that's both functional and full of character.
Customizing The Comfort
The key to making this bed irresistible is layering softness. Start with a non-slip rug pad or piece of grippy shelf liner on the crate bottom to keep cushions in place. Then add a thick dog mattress or a couple of folded quilts for support.
Top it off with a soft fleece throw or an old hoodie that smells like you—your dog will appreciate the familiar scent. You can also add a removable cover for easy washing, so the bed stays fresh without much fuss.
Safety And Stability Tips
Before letting your dog use the bed, give the whole structure a gentle shake to make sure everything is secure. If you're stacking crates, use corner brackets or L-braces for extra reinforcement. Place the bed against a wall to prevent wobbling, and check for any protruding nails or splinters that could cause injury.
If your dog is a heavy jumper, consider adding a non-slip pad underneath the crate to keep it from sliding on hardwood or tile floors.
FAQ
What materials do I need for a homemade dog bed?
Most DIY dog beds require basic materials like old fabric, foam, scissors, and a sewing kit. For wood-based projects, you’ll need sandpaper, paint, and screws. Always choose non-toxic materials and avoid small parts that could be chewed off.
How do I clean a homemade dog bed?
It depends on the material. Fabric beds can often be machine-washed, while wooden or PVC frames can be wiped down. Use removable covers for easy cleaning, and vacuum regularly to remove hair and dirt.
Are homemade dog beds safe for puppies?
Yes, as long as you avoid loose buttons, zippers, or stuffing that could be ingested. Use durable, non-toxic materials and supervise your puppy until they learn not to chew the bed.
How long does it take to make a DIY dog bed?
Simple no-sew projects like t-shirt braids can take under an hour, while woodworking projects may take a weekend. Plan for 1-3 hours for most fabric-based beds.
Can I make a dog bed from recycled materials?
Absolutely! Old clothes, towels, blankets, and even furniture can be repurposed. Just ensure the materials are clean, non-toxic, and free of sharp edges.
Conclusion
With a little creativity and some spare materials, you can craft a dog bed that’s both functional and full of character. These projects not only save money but also give your furry friend a cozy spot that’s uniquely theirs.
Pick one that matches your skill level and your dog’s size, and enjoy the satisfaction of making something with your own hands. Your pup will thank you with extra cuddles and sweet dreams.

I’m Pallab Kishore, the owner of Little Pets Realm — an animal lover and pet care enthusiast sharing easy tips, healthy recipes, and honest advice to help every small pet live a happy, healthy, tail-wagging life.