Camping with your dog is one of the best ways to enjoy the outdoors together. But keeping your pup fueled and happy on the trail means having the right snacks on hand. These camping dog treat ideas are designed to be simple, portable, and comforting for your furry friend.
Each recipe uses dog-safe ingredients that you can prep ahead or even make at the campsite. No complicated steps, no fancy equipment—just practical treats that travel well and keep tails wagging.
Whether you're hiking, sitting by the fire, or settling into the tent, these treats will make your camping trip cozier for both of you. Let's get started with eight easy ideas your dog will love.
1. Peanut Butter & Oat Trail Bites
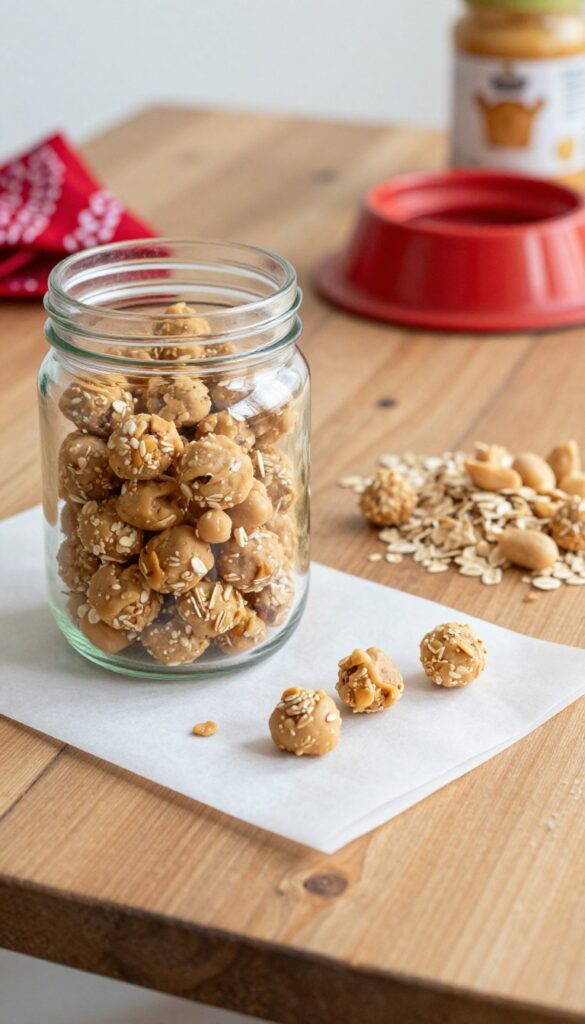
When you're out on the trail and your pup starts giving you that look, these no-bake energy bites are a lifesaver. Made with just three simple ingredients, they come together in minutes and pack easily in a baggie. Dogs love the rich peanut butter flavor, and you'll love how they provide a quick energy boost without any fuss.
Ingredients
- 1 cup rolled oats
- 1/2 cup xylitol-free peanut butter
- 2 tablespoons honey
Instructions
- In a medium bowl, mix the rolled oats, peanut butter, and honey until a stiff dough forms.
- Roll the dough into small bite-sized balls (about 1 inch in diameter) and place them on a parchment-lined tray.
- Refrigerate for at least 30 minutes to firm up before packing for your trip.
Serving Tip
Store these bites in a cool place or an insulated bag during your hike. For smaller dogs, break a bite in half to avoid overfeeding. They'll stay fresh for up to a week in the fridge.
2. Dehydrated Sweet Potato Chews

Sweet potatoes are a vitamin-rich, budget-friendly ingredient that dogs absolutely love. When dehydrated into chewy strips, they become a long-lasting snack that's easy to pack for camping trips. The natural sweetness and soft-yet-chewy texture make these treats a cozy, comforting option for your pup after a day of hiking.
Plus, they're simple to prepare and store well without refrigeration.
Ingredients
- 2 large sweet potatoes, washed and unpeeled
- Optional: a light sprinkle of cinnamon (dog-safe, no sugar)
- 1 cup prepared cooked sweet potato in small dog-safe pieces
- 1 cup oat flour or finely ground oats
- 1 egg or 2 tablespoons unsweetened applesauce for binding
Instructions
- Slice sweet potatoes into even 1/4-inch thick rounds or long strips using a mandoline or sharp knife.
- Arrange slices in a single layer on dehydrator trays, leaving space between each piece.
- Dehydrate at 135°F (57°C) for 6–8 hours, or until chewy but not brittle. Alternatively, bake at 200°F (93°C) for 3–4 hours, flipping halfway, until desired texture.
- Mix the prepared cooked sweet potato with the oat flour and binder until a soft dough or spoonable mixture forms.
- Shape into small treat portions, bake on a lined tray at 325°F until firm, then cool completely before serving.
Serving Tip
Store in an airtight container at room temperature for up to 2 weeks, or freeze for longer storage. Break into smaller pieces for training treats or give a whole strip as a satisfying chew. Always supervise your dog with any chew treat.
3. Campfire Bacon & Cheese Biscuits

There's nothing quite like the smell of bacon and cheese wafting from a campfire skillet. These simple biscuits bring that cozy comfort straight to your pup's bowl. Made with just a handful of dog-safe ingredients, they bake up golden and crisp in a cast iron pan over the fire.
Your dog will be wagging for a taste of this warm, homemade treat.
Ingredients
- 1 cup whole wheat flour
- 1/2 cup cooked, crumbled bacon (no added salt or seasoning)
- 1/2 cup shredded cheddar cheese
- 1/4 cup plain yogurt or water
Instructions
- In a bowl, mix the flour, bacon bits, and cheese. Add the yogurt or water and stir until a dough forms.
- Turn the dough onto a floured surface and roll to about 1/4-inch thickness. Cut into small bone shapes or squares.
- Place biscuits in a greased cast iron skillet and cook over campfire coals or low flame for about 10 minutes per side, until golden and firm.
Serving Tip
Let the biscuits cool completely before serving. Store leftovers in an airtight container for up to a week, or freeze for longer trips. Break into smaller pieces for training rewards.
4. Frozen Berry & Yogurt Drops
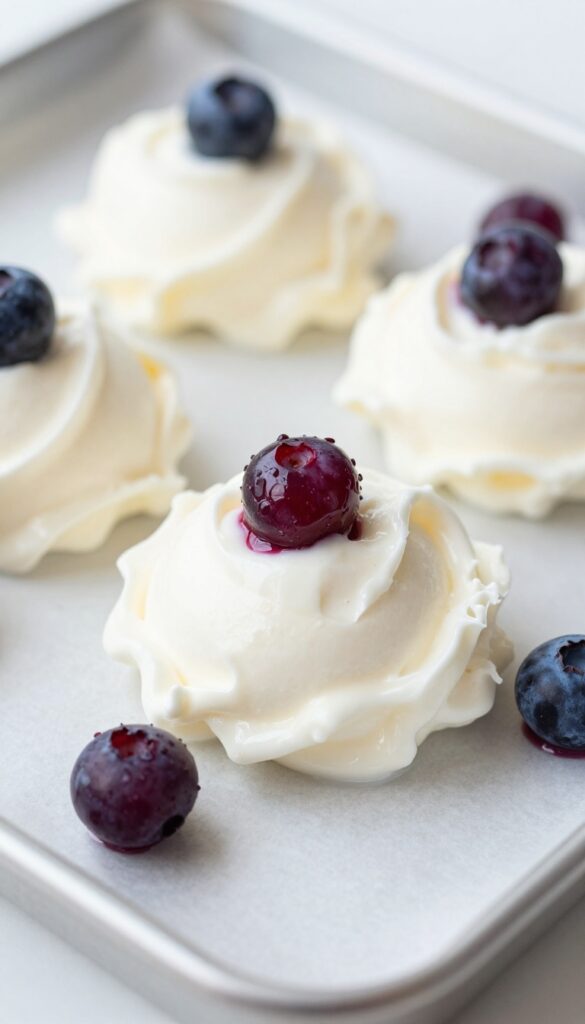
Warm days call for a cool, comforting treat that your dog can enjoy right at the campsite. These frozen drops blend creamy yogurt with antioxidant-rich berries, creating a refreshing snack that feels like a little indulgence. They're simple to whip up ahead of time and easy to pack in a thermos or insulated bag, so you can offer a chilly reward after a long hike or a sunny afternoon by the tent.
Ingredients
- 1 cup plain unsweetened yogurt (no xylitol)
- 1/2 cup mixed blueberries and strawberries, fresh or frozen
- 1 tablespoon honey (optional, for sweetness)
Instructions
- Blend the yogurt, berries, and honey in a blender until smooth.
- Spoon the mixture into a silicone mold or drop small dollops onto a parchment-lined baking sheet.
- Freeze for 2-3 hours until solid, then pop out and store in a freezer bag or airtight container.
Serving Tip
Portion these drops into a thermos or insulated container to keep them frozen during your trip. Serve 2-3 drops per dog, depending on size, and let them soften for a minute before offering—especially for smaller pups.
5. Pumpkin & Coconut Oil Bites
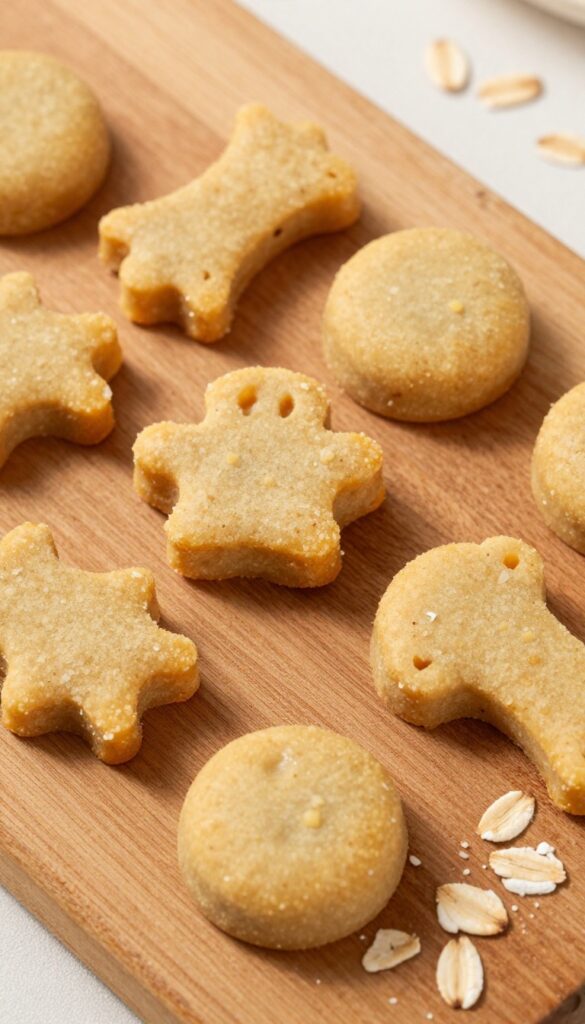
These soft, no-bake bites are like a little hug for your dog’s tummy. Pumpkin puree is gentle on digestion, while coconut oil adds healthy fats and a subtle flavor dogs love. They come together in minutes and pack flat in a baggie, making them a cozy, low-fuss snack for camping trips.
Ingredients
- 1/2 cup canned pumpkin puree (100% pumpkin, no additives)
- 2 tablespoons melted coconut oil
- 1 1/2 cups oat flour (or ground rolled oats)
Instructions
- In a bowl, mix pumpkin puree and melted coconut oil until smooth.
- Stir in oat flour gradually until a soft dough forms. Roll into small bite-sized balls.
- Refrigerate for 20 minutes to firm up before packing.
Serving Tip
Store these bites in a sealed container in the fridge for up to a week, or freeze them for longer trips. Give one or two per day depending on your dog's size—great as a quick reward after a hike or a calming treat at the campsite.
6. Beef Liver Jerky Strips
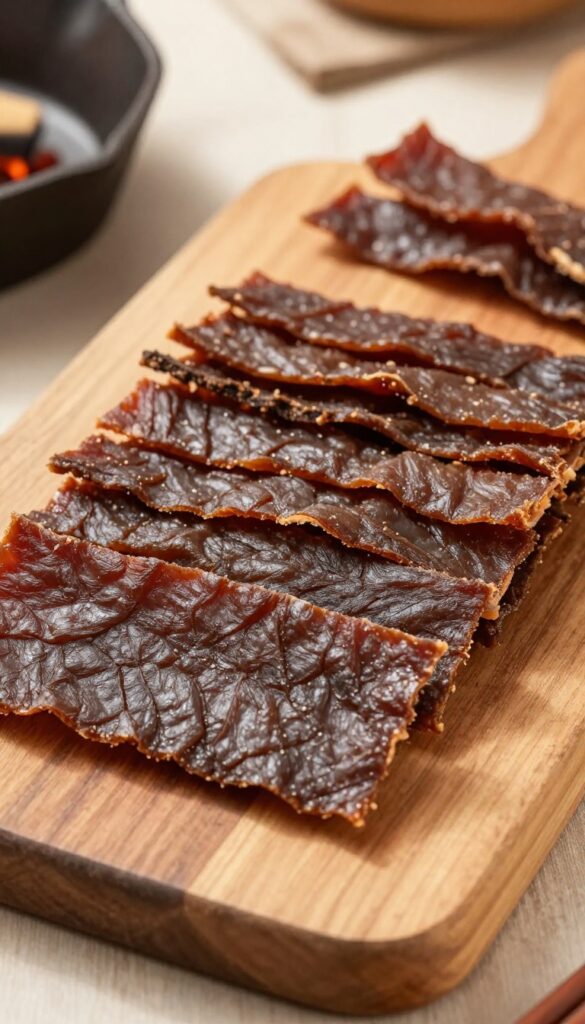
Nothing says camping comfort like a chewy, savory treat your dog can enjoy by the fire. Beef liver jerky strips are a high-protein reward that's simple to make and easy to pack. Dehydrating or baking the liver concentrates its rich flavor, making it irresistible for even picky pups.
Plus, the jerky texture keeps well in your backpack without refrigeration, so you can pull out a strip whenever your dog earns it on the trail.
Ingredients
- 1 pound beef liver, sliced into thin strips (about 1/4 inch thick)
- 1 tablespoon coconut oil, melted (optional, for brushing)
- Pinch of salt (optional, for human taste; dogs don't need it)
Instructions
- Preheat your oven to 200°F (or set your dehydrator to 160°F). Line a baking sheet with parchment paper if using the oven.
- Arrange the liver strips in a single layer on the sheet or dehydrator trays, making sure they don't overlap. Brush lightly with coconut oil if desired.
- Bake for 3–4 hours, flipping halfway, until the strips are dry and firm but still slightly pliable. In a dehydrator, this takes about 4–6 hours.
- Let the jerky cool completely before storing in an airtight container or zip-top bag. It will keep for up to 2 weeks at room temperature.
Serving Tip
Break or cut the jerky into smaller pieces for training rewards—each strip can yield several bite-sized treats. For soft-mouthed dogs or puppies, bake just until dry but not brittle to avoid choking hazards. Store in a cool, dry place and discard any strips that develop mold or an off smell.
7. Apple & Carrot Crunch Sticks

These dehydrated apple and carrot sticks are a crunchy, sweet treat that holds up perfectly in a backpack. The natural sugars in the apples and carrots concentrate during dehydration, creating a candy-like chew that dogs love. Since they're shelf-stable, you can make a big batch before your trip and grab a handful whenever your pup needs a quick reward on the trail.
Ingredients
- 2 large apples, cored and cut into thin sticks
- 3 large carrots, peeled and cut into thin sticks
- 1 tablespoon lemon juice (optional, to prevent browning)
Instructions
- Toss the apple and carrot sticks with lemon juice if using, then arrange them in a single layer on dehydrator trays.
- Dehydrate at 135°F for 6–8 hours, or until completely dry and crisp. Store in an airtight container for up to 2 weeks.
Serving Tip
Break the sticks into smaller pieces for small dogs or use them as a training reward. Because they're crunchy, supervise your dog while eating to prevent choking, especially for enthusiastic chewers.
8. Chicken & Rice Campfire Patties

After a long day of hiking, your dog deserves a hearty meal-like treat that feels as comforting as a campfire dinner. These mini patties combine ground chicken and cooked rice, pan-fried right over the flames for a warm, satisfying snack. They're easy to pack raw and cook on-site, so you can serve a freshly made meal that your pup will love.
Ingredients
- 1 lb ground chicken
- 1 cup cooked white rice, cooled
- 1/4 cup finely chopped carrots
- 1 tablespoon olive oil
Instructions
- In a bowl, mix ground chicken, cooked rice, and chopped carrots until well combined.
- Form the mixture into small patties, about 2 inches wide.
- Heat olive oil in a campfire-safe skillet over medium heat. Cook patties for 4-5 minutes per side until golden and cooked through.
- Let cool completely before serving to your dog.
Serving Tip
These patties are filling, so offer one per 20 pounds of body weight as a treat or meal supplement. Store leftovers in a cooler and reheat gently over the fire. For smaller dogs, break patties into bite-sized pieces.
FAQ
Can I make these treats ahead of time?
Yes, most of these treats can be prepared a few days in advance and stored in an airtight container. Dehydrated treats last even longer.
How should I store camping dog treats on the trail?
Use resealable bags or small containers. For frozen treats, pack them in a thermos or cooler. Keep everything in a bear-safe container if required.
Are these treats safe for all dogs?
Always check with your vet before introducing new ingredients. Avoid any foods your dog is allergic to, and adjust portion sizes based on your dog's size.
Can I substitute ingredients in these recipes?
Absolutely. Swap peanut butter for sunflower seed butter, or use different fruits and veggies. Just make sure all substitutions are dog-safe.
How many treats should I give my dog while camping?
Treats should make up no more than 10% of your dog's daily calories. Adjust based on activity level and your dog's size.
Conclusion
These eight camping dog treat ideas are designed to make your outdoor adventures more enjoyable for both you and your pup. With simple ingredients and easy prep, you can focus on the fun parts of camping—exploring, relaxing, and making memories together. Remember to pack plenty of water and take breaks when your dog needs them.
A well-fed, happy dog makes for the best camping buddy. Try a few of these recipes on your next trip and see which ones become your dog's new favorites.

I’m Pallab Kishore, the owner of Little Pets Realm — an animal lover and pet care enthusiast sharing easy tips, healthy recipes, and honest advice to help every small pet live a happy, healthy, tail-wagging life.