
A bare corner of the yard can become your dog's favorite spot with a little planning. The right dog house does more than shelter them from rain; it gives them shade in summer, warmth in winter, and a place that feels like theirs.
You don't need a contractor or a huge budget to pull this off. Most of these ideas work with basic tools, a weekend of time, and materials you can grab at any hardware store.
Below you'll find 11 options that range from quick fixes to full builds. Pick the one that fits your climate, your space, and how much your dog actually likes being outside.
1. The Insulated Wooden Classic

A pitched-roof wooden dog house is the picture most people have in mind when they think of a backyard shelter. It looks right, it lasts, and with a little insulation it handles both summer heat and winter cold better than most plastic options. The key is getting the size and ventilation right, not just the look.
This design starts with a simple frame, usually 2x4s, wrapped in exterior-grade plywood or cedar planks. Between the outer walls and an inner lining, you sandwich a layer of foam board or mineral wool insulation. The floor gets the same treatment, because that's where most of the cold creeps in.
A pitched roof sheds rain and snow, and an overhang keeps the doorway dry. Build it on a slight platform or skids so the base stays off the wet ground. The whole thing is straightforward for a weekend DIYer with a saw, a drill, and a staple gun.
Why Sizing Beats Style
A house that's too big won't hold your dog's body heat, and one that's too small feels cramped and stressful. Your dog should be able to stand up, turn around, and lie down stretched out without hitting the walls. Measure your dog from nose to tail and add a few inches, then check the height at the shoulder plus a couple of inches of clearance.
A snug fit is warmer in winter and easier to cool in summer. Fancy trim and paint don't matter if the dimensions are off.
Materials That Hold Up
Cedar and pine are common choices, but cedar resists rot and insects naturally. Avoid pressure-treated wood if your dog likes to chew, since the chemicals aren't ideal for pets. For insulation, rigid foam boards are easy to cut and fit between studs.
Line the inside with a smooth, dog-safe material like sanded plywood or composite panel so it's easy to wipe down. Use stainless or coated screws so they don't rust, and seal the exterior with a pet-safe stain or paint.
Ventilation And Airflow
Insulation traps warmth, but without airflow it also traps moisture and odor. Add a few small vents near the top of the walls or under the roof overhang, covered with mesh to keep bugs out. The doorway should be offset or have a small flap to block wind without sealing the house completely.
In hot climates, a vent low on one side and high on the other creates a chimney effect that pulls air through. Check vents regularly to make sure they aren't blocked by bedding or debris.
2. Raised Platform House on Legs

Elevating your dog's house on legs solves a lot of problems at once. It keeps the floor dry, stops pests from moving in, and adds years to the structure. Plus, it looks pretty sharp sitting in the yard.
This approach works for almost any climate, but it's especially handy in wet or humid areas. The key is getting the height and access right so your dog stays comfortable and safe.
A raised platform house is exactly what it sounds like: the dog house sits on a sturdy platform supported by legs, lifting it off the ground. The gap underneath lets air circulate, which keeps moisture from building up and rotting the floor. It also makes it harder for insects, snakes, and rodents to take up residence.
How high you go depends on your needs. A few inches is enough for airflow, but 6 to 12 inches gives you better protection and makes it easier to clean underneath. Just remember that higher legs mean a bigger step for your dog, so plan the access accordingly.
Choosing The Right Leg Height
Leg height affects both the house's function and your dog's ability to get in. For small dogs or seniors, keep the platform low—around 4 to 6 inches—so they can step up without strain. Medium to large dogs can handle 8 to 12 inches, which offers better pest control and airflow.
Also consider your yard's drainage. If water pools in that spot, go higher to keep the floor dry. And check that the legs are pressure-treated or made of rot-resistant wood like cedar.
Access Options: Ramps Vs. Steps
A ramp is often the best choice for older dogs or breeds with short legs, like Dachshunds or Corgis. It's easier on joints and reduces the chance of falls. Make sure the ramp has traction—add grip tape or cleats—and a gentle slope.
Steps work well for younger, agile dogs. Keep the rise shallow (no more than 6 inches per step) and consider a small landing at the top. Whichever you choose, secure it firmly to the platform so it doesn't shift.
Anchoring Against Wind And Weather
A raised house catches more wind than one sitting on the ground, so anchoring is important. You can stake the legs into the ground using metal anchors or augers, or tie the platform to ground screws. If your area gets high winds, add diagonal bracing to the legs.
Also, make sure the roof is securely fastened and consider adding a windbreak panel on the side facing prevailing winds. That keeps the interior cozy and prevents the house from tipping in storms.
3. Shaded Summer Bungalow With Cross Ventilation
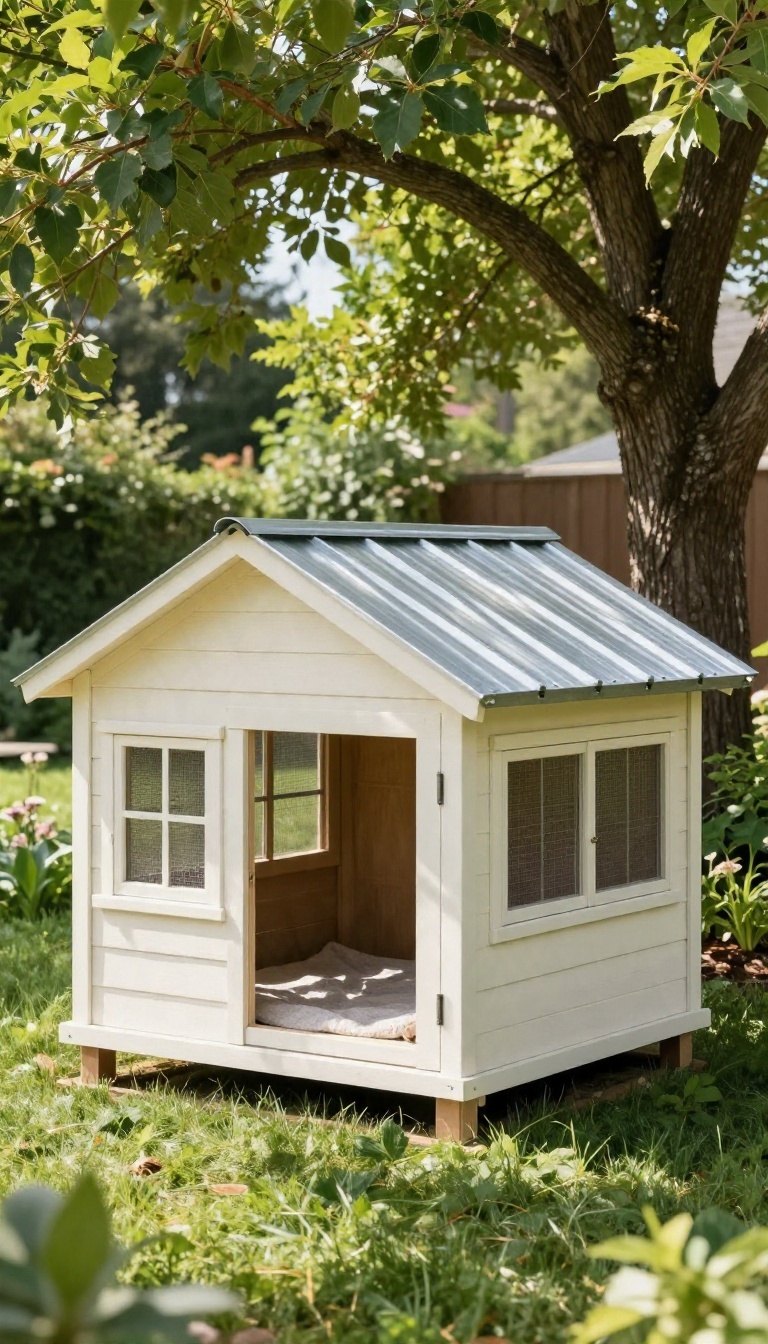
When the sun beats down, your dog needs more than a roof—they need moving air. A bungalow-style house with cross ventilation keeps the interior cooler by letting breezes flow through and hot air escape. This design works best in warm climates where summer heat is the main challenge.
You don't need electricity or fans. Smart placement, reflective materials, and screened openings do the heavy lifting. Your dog gets a comfortable retreat that stays noticeably cooler than the outside air.
The key is to think like a breeze. Position the house so that prevailing summer winds hit one side and exit the other. That means openings on opposite walls, aligned to catch the airflow.
Screened windows or mesh panels keep bugs out while letting air in. A roof overhang protects the openings from rain and adds extra shade. Keep the interior simple—no thick bedding that traps heat.
A raised floor helps, too, by allowing air to circulate underneath.
Pick The Right Spot
Place the bungalow under a deciduous tree that leafs out in summer and drops leaves in winter. That gives you natural shade exactly when you need it. If you don't have a tree, use a shade sail or an awning to block the worst of the afternoon sun.
Orientation matters. Face the main opening away from the harsh western sun. In most regions, that means the entrance should point north or east.
You want the breeze to come from the cooler side of the yard.
Build For Airflow
Use a light-colored or reflective roof to bounce heat away. Metal roofing with a reflective coating works well, or you can paint a wooden roof with a light, heat-reflective paint. Insulate the roof if you can—it makes a big difference.
For the walls, create openings high and low. Hot air rises and escapes through high vents, while cooler air enters low. Cover openings with hardware cloth or insect screen.
Make sure the openings are small enough to keep out snakes and other critters.
Keep It Cool Without Power
Add a raised floor with gaps between boards to let air move. Avoid dark, heavy materials inside. A simple cot or a breathable bed is better than a thick cushion.
You can also add a small water bowl that stays in the shade—evaporation helps a little. And consider a light-colored exterior to reflect sunlight. These small choices add up to a noticeably cooler space.
4. Heated Winter Den for Cold Climates
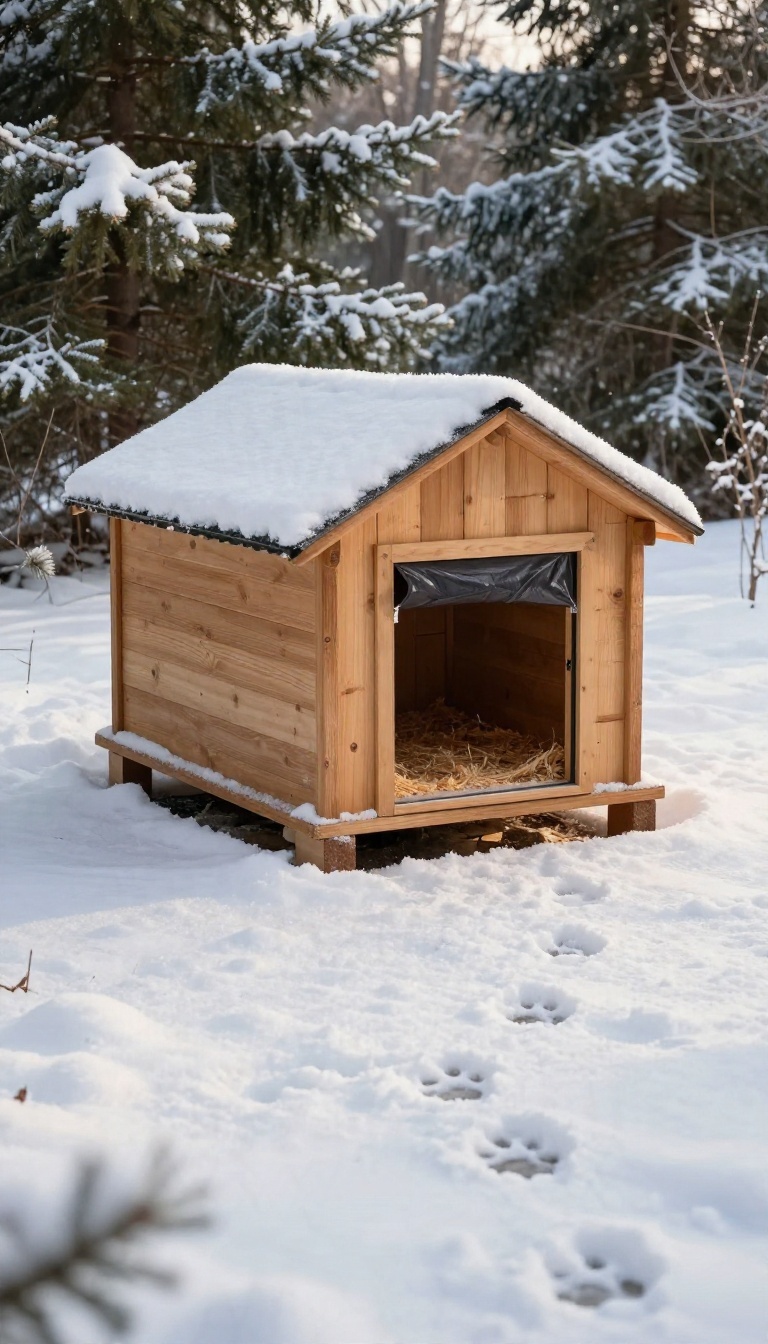
Cold snaps don't have to send your dog pacing at the back door. A winter den built for real freezing weather gives them a warm, dry retreat they can actually use, not just a box that looks nice from the kitchen window. The goal is simple: trap body heat, block drafts, and keep the inside dry so your dog stays comfortable even when the temperature drops hard.
This setup works best for dogs that spend real time outdoors in winter, whether they're working breeds, hardy northern types, or just pups who love a snowy yard. You're basically building a small insulated room, so treat it like one. A few smart choices up front make the difference between a cozy den and a frozen crate.
Insulation And Bedding That Hold Heat
Start with insulation in the walls, floor, and roof. Rigid foam board between the studs is cheap and effective, and a raised floor keeps the cold ground from pulling warmth straight out of the bedding. For bedding, straw and cedar shavings both trap heat well.
Straw is the classic choice because dogs can burrow into it, while cedar adds a pleasant smell and some natural pest resistance. Avoid blankets and towels in freezing weather, since they soak up moisture and then freeze.
Door Flaps And Draft Control
A door flap is one of the highest-value upgrades you can make. Heavy vinyl or canvas flaps block wind and keep warm air inside while still letting your dog push through. Hang the flap so it overlaps the opening with a slight gap at the bottom, and check that it isn't so stiff your dog refuses to use it.
Seal any gaps around the frame with weatherstripping, and face the door away from prevailing winter winds if you can.
Heat Pads Without The Risk
A radiant heat pad can make a real difference, but only if it's built for outdoor animal use and rated for damp conditions. Look for chew-resistant cords and a thermostat, and run the cord safely out of reach. Don't oversize the heat.
A pad that's too warm makes dogs avoid the house or overheat in a well-insulated den. A low setting is usually plenty, and you can skip the pad entirely if your dog runs hot or the climate is only mildly cold.
Freeze-night Checks
During hard freezes, do a quick check each evening. Make sure bedding is dry, the flap is hanging right, and no snow or ice has built up around the entrance. Feel inside the house to confirm it's noticeably warmer than the outside air.
If it isn't, add insulation or reposition the house. And if your dog seems reluctant to go in, that's your cue to fix something before the next cold front hits.
5. The Under-Deck or Porch Nook Conversion

Most yards have a dead zone nobody uses: the shadowy space under a deck or beside a porch. It's too low to stand in, too dark to plant, and too awkward to store much. Your dog, though, sees a den.
Converting that leftover gap into a sheltered sleeping spot takes a weekend and costs less than a decent dog house, because the roof already exists.
The trick is turning a drafty, damp crawlspace into something your dog actually wants to walk into. You're not sealing a box shut—you're shaping an open nook so it blocks weather on three sides while still letting air move through. Think of it as a windbreak with a floor, not a bunker.
Start by watching how the space behaves on a wet, windy day. Water pools in certain corners, wind funnels through one side, and the ground stays cold and clammy. That five-minute observation tells you where to put walls and where to leave openings.
Block The Wind, Not The Air
Solid walls on the windward side and the back do most of the work. Leave the downwind side open so stale air and moisture can escape instead of getting trapped. Wood panels, corrugated plastic, or even a pair of hinged shutters work fine here.
Leave a gap along the top of each wall so air keeps moving even when the sides are closed off.
Give It A Dry Floor
Bare soil under a deck wicks moisture straight into your dog's bedding. Lay down a simple raised platform made of pressure-treated lumber or composite decking to lift them off the ground. A pallet with a sheet of plywood on top is the cheap version and works surprisingly well.
Just make sure whatever you use sits level and won't shift when your dog jumps in and out.
Make It Feel Like A Den
Dogs relax in spaces that feel enclosed and secure, so a low ceiling is actually a plus here. Add a partial front wall or a fabric flap to soften the opening without closing it off completely. Tuck the bed toward the back corner and keep the entry wide enough that your dog can see out.
A small rug or mat at the entrance catches mud and makes the threshold feel intentional.
Keep Damp Air Moving
Enclosed nooks under decks can turn musty fast if air sits still. Skip the sealed walls and keep at least one side open to the breeze. Check the space after heavy rain and clear out any leaves or debris that block drainage.
If the ground stays wet, add a layer of gravel under the platform to help water drain away.
6. DIY Pallet House on a Budget

Pallets are everywhere, and most of them are free or close to it. That makes them a solid starting point for a dog house that costs a fraction of a store-bought one. The trick is knowing which pallets to grab and how to prep them so the finished build is safe, dry, and worth putting in your yard.
The plan is simple: use whole pallets for the walls and floor, add a basic frame for structure, and cap it with a plywood roof. You're not building furniture here, so don't overthink the joinery. A few straight cuts and some screws will get you most of the way there.
Set a hard budget before you start, say $75 to $150 depending on what you already have. Pallets are the free part. Your money goes toward plywood, screws, sealer, and maybe a couple of 2x4s for framing.
Write the number down and stick to it.
Pick The Right Pallets
Look for pallets stamped HT, which means heat-treated rather than chemically fumigated. Avoid any that are cracked, stained, or smell like oil. Grab a few extras so you can swap out bad boards.
Sanding And Sealing
Pallet wood is rough, and splinters are a real risk for paws and noses. Go over every surface your dog can touch with a sander or a good hand sanding block. Then seal the whole thing with a pet-safe wood sealer or an exterior stain.
This step keeps the wood from rotting and makes cleanup easier.
Framing And Roof
Screw together a simple frame from 2x4s to hold the pallet walls square. Cut a sheet of plywood for the roof with a slight overhang so rain runs off the sides. Add a small lip at the doorway to keep water from pooling inside.
7. The Converted Kids' Playhouse or Shed
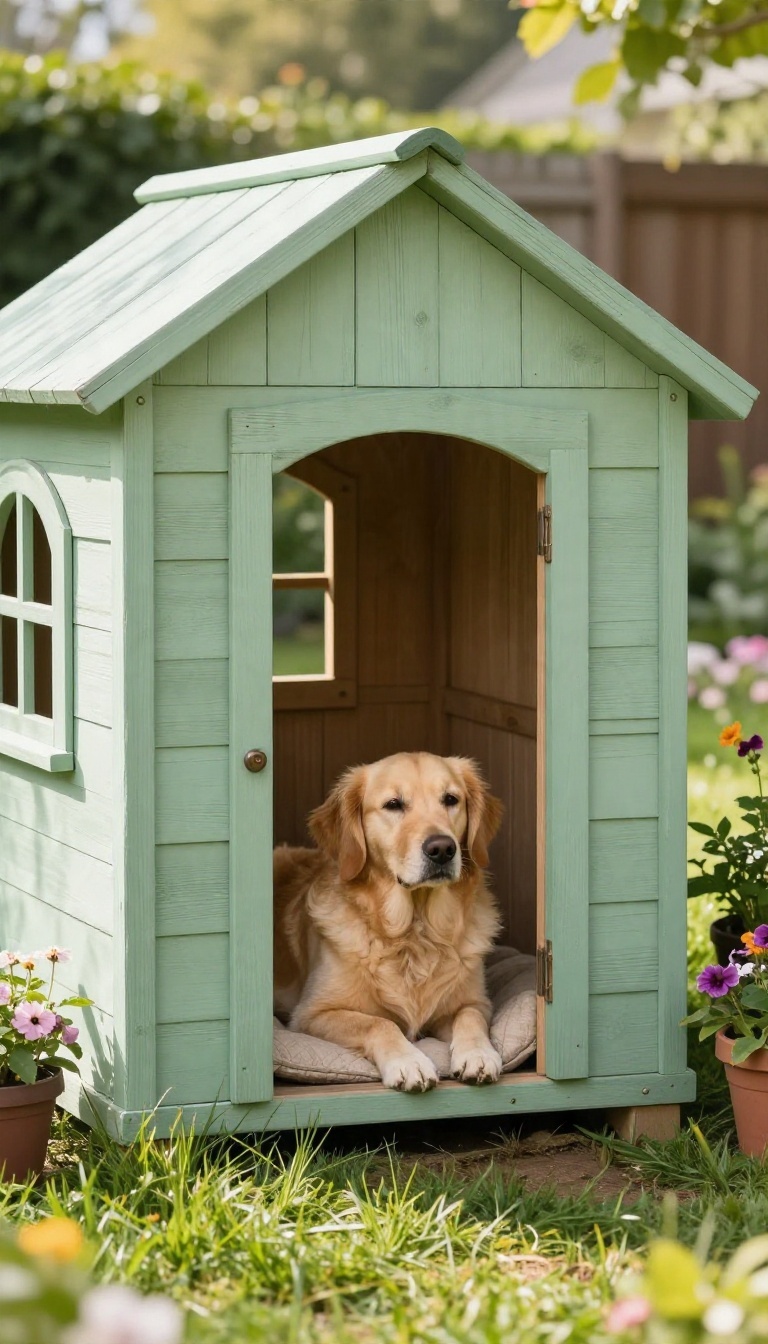
That little playhouse in the corner of the yard has probably seen better days. Instead of letting it rot or hauling it to the curb, you can turn it into a solid dog house with a weekend of work. The bones are already there—walls, a roof, and a floor—so you're mostly fixing it up rather than building from scratch.
A few smart upgrades make it safe, comfortable, and ready for your dog to claim as their own.
The biggest advantage here is that you're reusing a structure that already has a roof and walls. That saves time and money, but it also means you need to check a few things before your dog moves in. Old paint, treated wood, and a lack of insulation are the main issues to address.
Start by giving the playhouse or shed a good once-over. Look for loose boards, rusty nails, and any signs of rot. Fix those first so the structure is sound.
Then focus on making it dog-friendly with the steps below.
Check For Safe Materials
Older playhouses and sheds often have lead-based paint or pressure-treated wood that contains chemicals you don't want your dog chewing on. If the paint is peeling or chalking, test it for lead with a cheap kit from the hardware store. If it's positive, sand it down and repaint with a pet-safe, water-based paint.
For treated wood, seal it with a non-toxic sealant or cover any exposed areas your dog can reach. Better safe than sorry.
Insulate For Comfort
Most playhouses have thin walls and no insulation, which means they get hot in summer and cold in winter. Add foam board insulation between the studs, then cover it with plywood or beadboard. Don't forget the floor and ceiling—those are big heat-loss spots.
A layer of rigid foam under the floor and in the roof will make a noticeable difference. Leave a gap for ventilation so moisture doesn't get trapped.
Cut A Proper Door
The existing door might be too tall or too wide for your dog. You want an opening that's just big enough for them to pass through comfortably—usually about 1. 5 times their shoulder width and height.
Use a jigsaw to cut a new opening, or modify the existing door. Add a flap or a small curtain to keep drafts out. Sand the edges smooth so there's no splintering.
Add A Cozy Interior
Once the structure is safe and insulated, make the inside inviting. A raised bed or a thick layer of cedar shavings keeps your dog off the cold floor. Add a small rug or blanket that's easy to wash.
If the playhouse is large, you can even partition off a smaller sleeping area to help retain warmth. A hook for a water bowl and a shelf for toys are nice touches.
8. Built-In House Under a Garden Bench
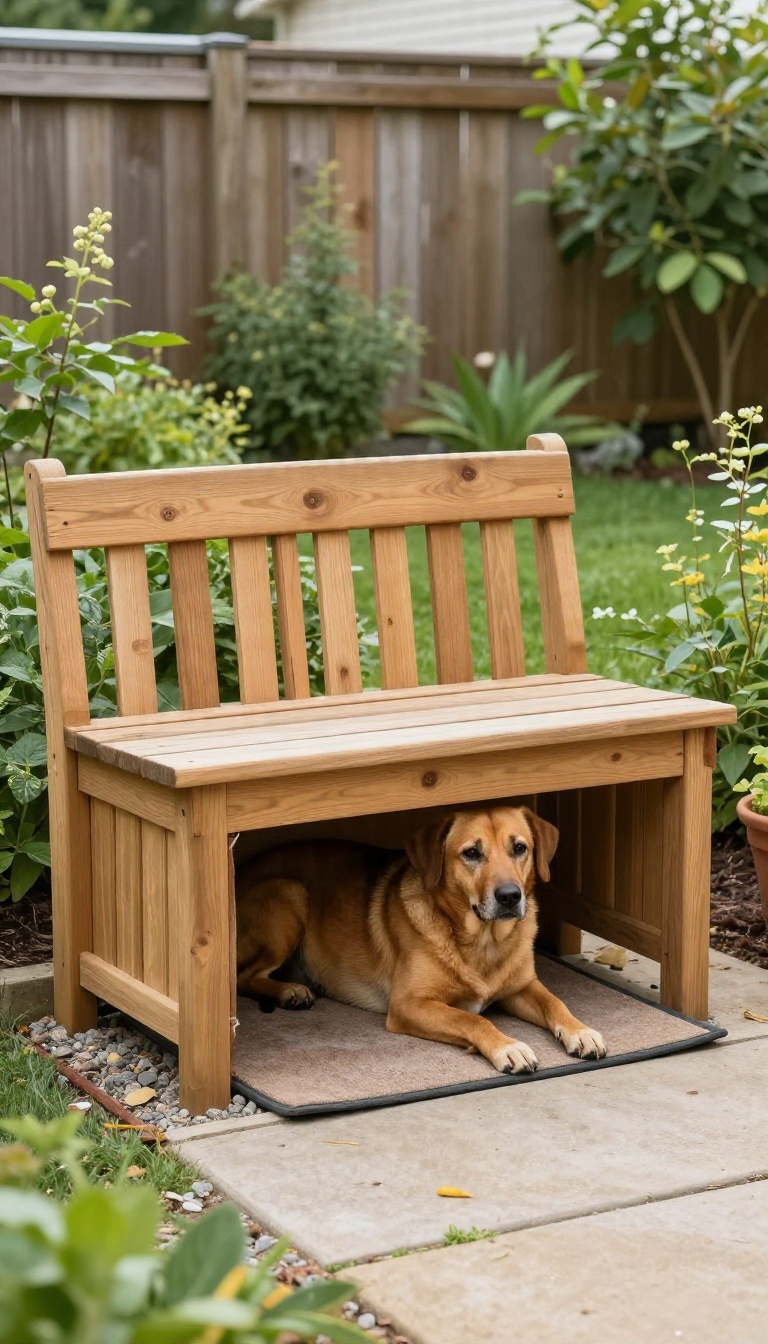
A bench and a dog house usually take up two separate spots in the yard. But you can stack them into one footprint by tucking a dog-sized retreat right under the seat. It keeps the yard looking tidy and gives your dog a den that feels hidden and secure.
The trick is building it so the bench stays comfortable to sit on and the inside stays dry.
This design works best along a fence line or in a corner where the bench already makes sense. You build a simple box for the dog, then frame a bench seat over the top. The dog gets a covered nook, and you get a place to sit and watch the yard.
Just plan the height so your dog can stand up and turn around inside without ducking.
Framing The Bench And Den
Start with a sturdy base: pressure-treated 2x4s or 4×4 posts set on concrete pavers so the wood stays off the dirt. Frame the dog house walls first, then build the bench seat across the top with a slight overhang. Leave the front open for the dog, but add a short lip at the bottom to keep bedding inside.
Use exterior-grade screws and galvanized brackets so it holds up through wet seasons.
Drainage And A Dry Floor
Water is the enemy of any built-in dog house. Slope the floor slightly toward the front, and set the whole structure on a gravel pad so moisture drains away. Line the inside floor with a removable, washable mat or a piece of composite decking that won't rot.
Check that the roof of the den (which is the bench seat) sheds water away from the opening, not into it.
Keeping The Seat Usable
The bench top needs to stay flat and solid, so use thick boards or a single piece of exterior plywood with a cushion on top. Leave a small gap at the back for air to move through, and make sure the seat doesn't trap heat inside the den. If you want extra comfort, add a hinged section that lifts up for cleaning.
That way you don't have to crawl inside to scoop out bedding.
9. Cooling Tile Floor and Water Station Combo
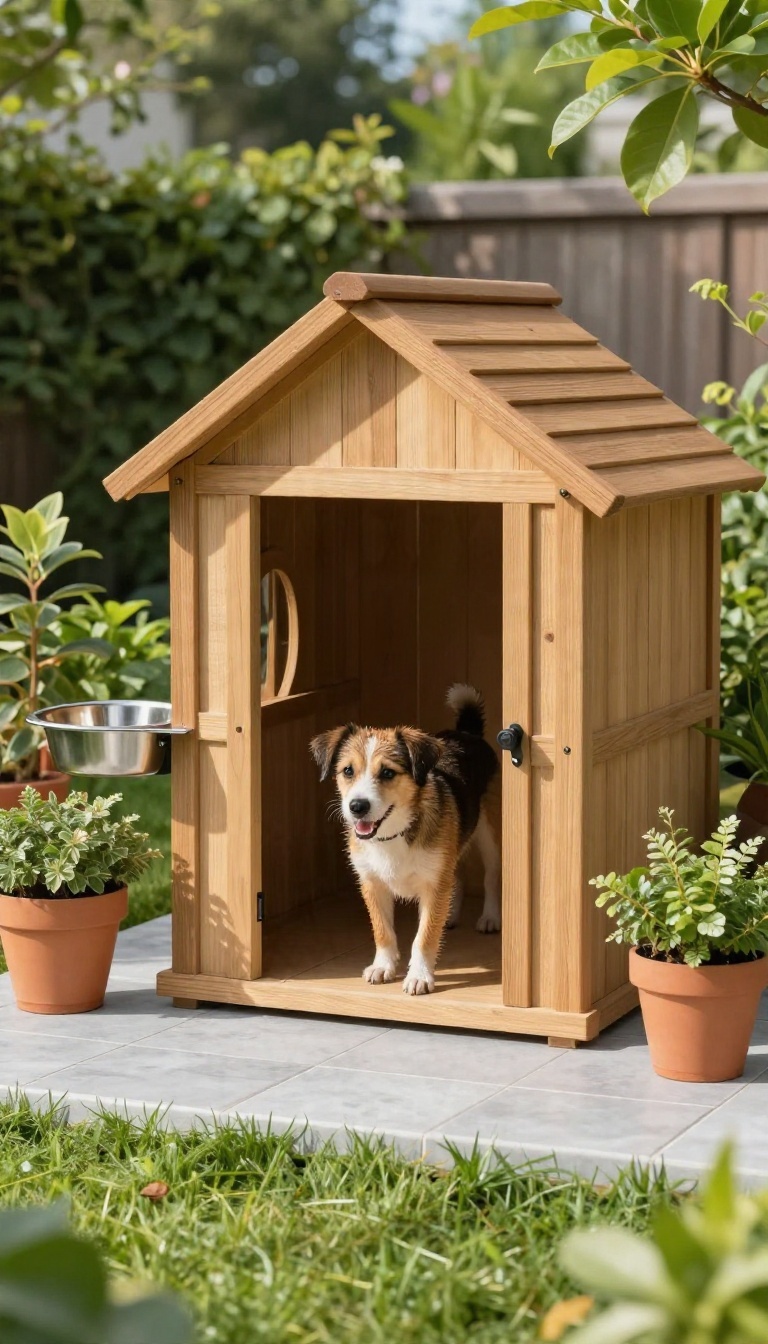
Heat hangs in a dog house like it does in a parked car, and a wooden floor only makes it worse. Swap in tile or sealed concrete and you give your dog a surface that pulls warmth away from their belly instead of holding onto it. Add a water station right by the entrance and you've handled the two biggest summer problems at once: a hot floor and an empty bowl.
It sounds simple, and it is, but the details are where this build either works or turns into a muddy mess. Here's how to set it up so it stays cool, drains well, and doesn't turn into a science project by August.
Pick A Tile That Stays Cool
Porcelain and ceramic tile both stay noticeably cooler than wood or plastic, and they wipe clean in seconds. Look for a matte or lightly textured finish so your dog isn't sliding around when they hop in with wet paws. Avoid dark colors.
A charcoal tile in direct sun gets uncomfortably hot, while a light gray, tan, or cream stays touchable even on a warm afternoon. Unglazed quarry tile is another solid pick because it grips well and handles moisture without complaint. If tile feels like too much work, a poured concrete slab works almost as well.
Seal it so it doesn't soak up urine and hose it down when it needs a refresh.
Get The Slope And Drainage Right
Water plus a flat floor equals a puddle, so give the floor a slight slope toward the door or a small drain. A quarter inch per foot is plenty and won't bother your dog at all. If the house sits on a concrete pad, you can build the slope into the slab before it cures.
For a retrofit, a thin mortar bed under the tile lets you shape the fall without tearing anything apart. Add a shallow lip at the threshold to keep splash and runoff from creeping back inside. A one-inch rise does the job and doubles as a small dam when the bowl tips over.
Set Up The Water Station
Mount the bowl just outside the door in the shade, not inside where spilled water sits on the floor. A weighted stainless bowl resists tipping, and a raised stand keeps it off the dirt so it stays cleaner. In hot weather, change the water at least once a day, more often if your dog is outside a lot.
Scrub the bowl every couple of days, because warm water grows a slimy film fast. A simple tip: freeze a big block of water in a plastic container and drop it in the bowl on scorching days. It keeps the water cold for hours and gives your dog something to nose at.
Shade And Airflow Make It Work
Tile alone won't save a house that bakes in the sun. Put the structure where it gets morning sun and afternoon shade, or add a shade cloth over the roof. Leave the door open to the breeze and skip insulation on the sunny wall if you can.
Cross ventilation does more for comfort than any single material. Check the floor with your own hand on a hot day. If it's too warm to hold there for five seconds, your dog won't want to lie on it either.
10. The Covered Run and House Combo
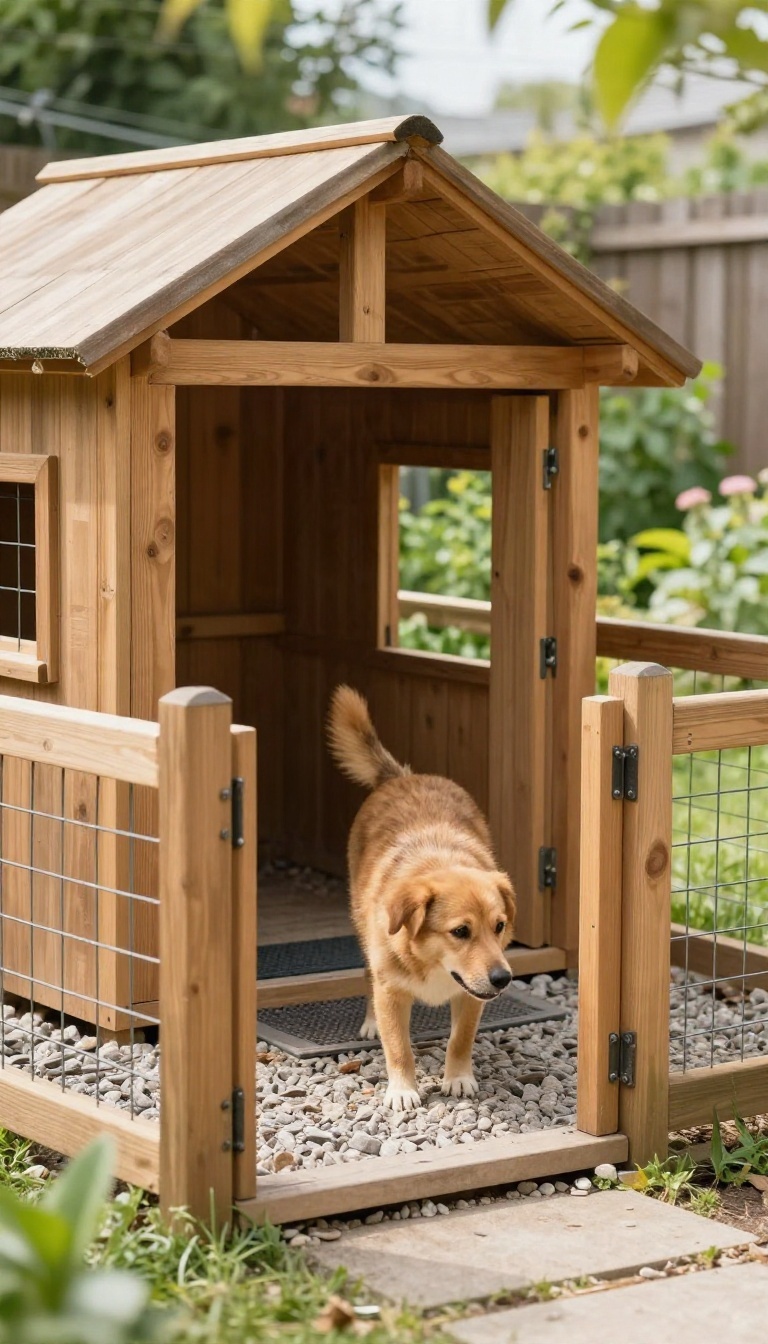
A dog house keeps your pup dry, but it doesn't give them much room to stretch their legs. Attaching a fenced run solves that problem without handing over the whole yard. The house becomes the sleeping and shelter zone, and the run becomes the place to sniff, pace, and soak up some sun.
This setup works especially well for dogs who spend part of the day outside while you're at work or busy in the garden. They get fresh air and movement, and you get peace of mind knowing they can't wander off or dig under the fence. It's also a solid option for renters or anyone with a small lot who can't fence the entire property.
Get The Footing Right First
Whatever you build above it, the ground under the run does most of the work. Grass turns to mud fast in a high-traffic run, so plan for something that drains. A layer of pea gravel over a base of compacted crushed stone holds up well and rinses clean.
Some owners prefer a concrete pad for easy hosing, though it's harder on joints during long days. Rubber mats over gravel give you the best of both: drainage plus a soft landing. Slope the surface slightly away from the house so rainwater runs off instead of pooling at the door.
Place The Gate Where You'll Actually Use It
Put the gate on the side closest to your house, your shed, or wherever you store the food and hose. A gate you have to walk around the yard to reach is a gate you'll resent. A four-foot gate is fine for most dogs, but jumpers need five or six feet of height.
Add a self-latching hinge so it stays shut even when your hands are full. If the run connects to a door on the house, a small transition panel keeps muddy paws from tracking inside.
Pick A Shade Cloth That Fits Your Climate
Shade cloth comes in different densities, and the number matters. A 70 percent block cuts harsh summer sun while still letting breezes through. In milder climates, 50 percent is plenty and keeps the run brighter.
Stretch it over the top of the run on a slight angle so rain and leaves slide off. Leave one side open for airflow, or your pup ends up in a hot box on still afternoons. In winter, swap the cloth for clear corrugated panels to keep the run dry without blocking light.
Tie The House And Run Together
The house should open directly into the run so your dog can move between shelter and exercise without you lifting a latch. Line up the house door with a matching opening in the run fence. Raise the house a few inches on a platform to keep the floor dry and stop rot.
Add a small ramp or step if your dog is older or has short legs. A covered walkway between the two keeps the transition dry on rainy days and gives your dog a reason to use both spaces.
11. Decorated House That Blends With the Yard
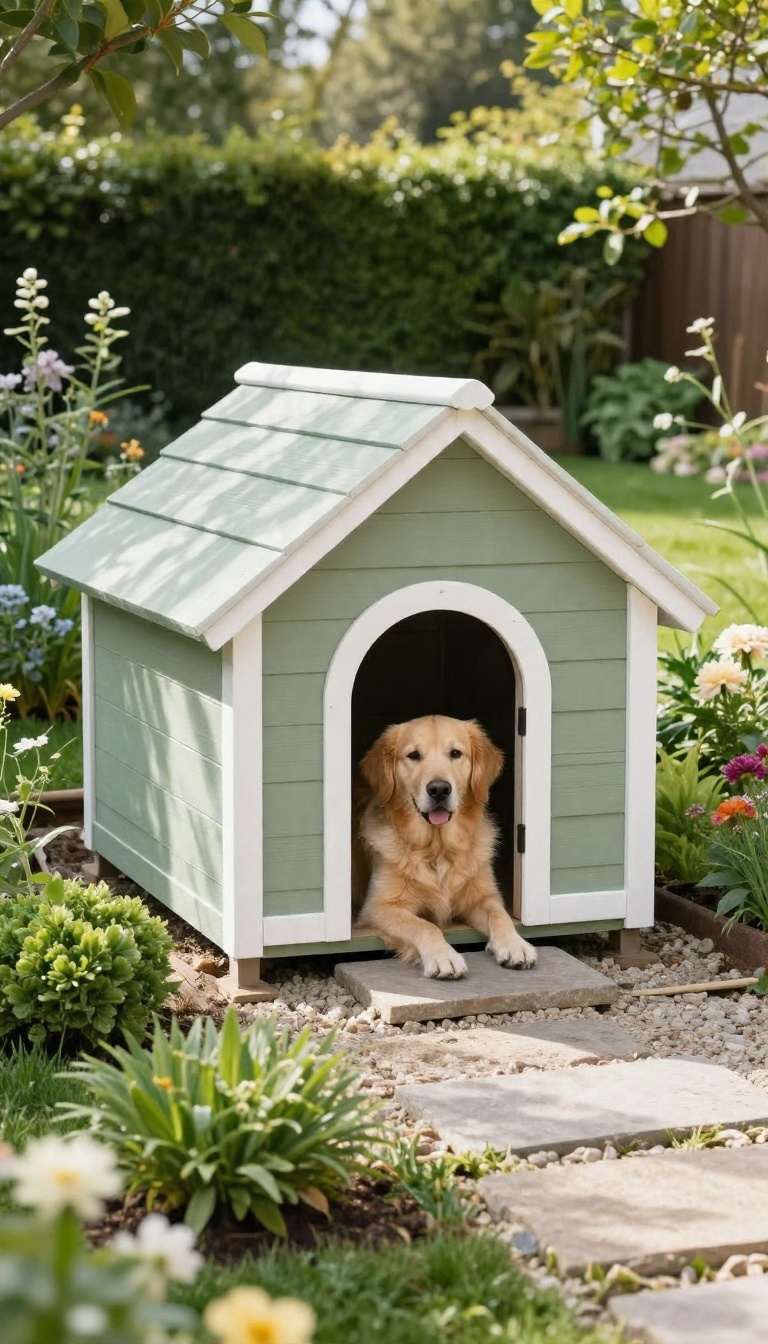
A dog house can look like an eyesore if it's just raw plywood sitting on the lawn. But with a few finishing touches, it can look like it belongs there—like a little garden feature rather than an afterthought. The goal is to make it intentional, not invisible.
Paint, trim, and a bit of landscaping go a long way, and they don't cost much. Plus, a decorated house often lasts longer because you're sealing and protecting it. So grab a brush and let's make your dog's pad the best-looking spot in the yard.
Start with a clean, dry surface. If the wood is new, give it a light sanding. If it's older, scrub off dirt and let it dry completely.
Then apply a pet-safe paint or stain. Look for low-VOC or water-based products labeled safe for animals. Avoid lead-based paints and anything with strong solvents.
Two coats usually do it, and a top coat of clear sealant adds weather protection. While you're at it, check for sharp edges or splinters and sand them smooth.
Paint And Stain Choices
Not all paints are safe for pets. Choose water-based, low-VOC options and let them cure fully before letting your dog inside. Stain is another good option—it soaks in and doesn't chip.
Pick a color that matches your house or fence for a cohesive look. Earth tones blend nicely with gardens, while a pop of color can make the house a fun focal point. Just avoid anything with a strong chemical smell; your dog's nose is way more sensitive than yours.
Trim And Details
Add simple trim around the door and roof edges to give the house a finished look. You can use leftover lumber or buy inexpensive trim pieces. A little window with a frame?
Even if it's just decorative, it adds charm. Make sure any added pieces are secure and won't trap paws or catch on collars. A name sign above the door is a classic touch—paint your dog's name on a piece of wood or use a custom sign.
Just attach it firmly so it doesn't become a chew toy.
Landscaping Around The House
A small garden border around the base helps the house settle into the yard. Use pet-safe plants like marigolds, lavender, or ornamental grasses. Avoid toxic plants like azaleas or lilies.
A border of stones or mulch also keeps mud from splashing onto the house and makes trimming the grass easier. Just leave enough clearance so your dog can get in and out without stepping on plants. And skip anything with thorns or sharp leaves.
FAQ
What size should a dog house be?
Your dog should be able to stand up, turn around, and lie down comfortably inside. A house that's too big loses heat in winter, so keep it snug rather than roomy.
Do dog houses need insulation?
In most climates, yes. Insulation in the walls, floor, and roof keeps the interior steadier in both heat and cold, and it's one of the cheapest upgrades you can make.
Where should I put a dog house in the backyard?
Pick a spot with partial shade and good drainage, away from low spots that collect water. Face the door away from prevailing wind and rain.
Can I build a dog house myself?
Absolutely. Simple designs like a pallet build or a raised platform house work with basic tools. Just sand rough edges, use pet-safe finishes, and make sure the roof sheds water.
How do I keep a dog house cool in summer?
Shade the house, add cross ventilation, and consider a lighter roof color. A raised floor and a cooling mat or tile surface also help on hot days.
Conclusion
A good dog house doesn't have to be fancy. It needs to fit your dog, handle your weather, and sit somewhere in the yard that makes sense. Start with the simplest option that solves your dog's biggest problem, whether that's heat, cold, or just having a spot to call their own.
Once the basics are in place, you can add shade, a water station, or a coat of paint later. Your dog will appreciate the shelter long before the finishing touches go on.