
Homemade dog treats make great Christmas gifts, and they cost a lot less than you'd think. A bag of flour, some peanut butter, and an afternoon in the kitchen can cover every dog on your list.
You don't need fancy equipment or a culinary degree either. Most of these recipes use ingredients you probably already have, and a few don't require any baking at all.
Whether you're wrapping gifts for one spoiled pup or a whole pack of neighborhood dogs, there's a treat here that fits your time and budget.
1. Peanut Butter and Oat Biscuits

Peanut butter and oat biscuits earn their spot at the top of this list for one simple reason: they work every single time. Three ingredients, one bowl, and a dough that rolls out without fighting you. They bake up firm and crunchy, which means they hold their shape in a cookie cutter and survive a trip in a gift jar without crumbling to dust.
That sturdiness is exactly what you want when you're making treats for other people's dogs. A soft, squishy biscuit looks sad by the time it reaches a doorstep. These stay crisp, stack neatly, and look like you tried a lot harder than you did.
The ingredient list is short and forgiving: whole wheat flour, rolled oats, and peanut butter, plus a little water to bring it together. You can swap in oat flour if that's what's in the pantry, and the recipe still behaves. Nothing here is fussy, and nothing needs a special trip to the store.
One thing to check before you start: your peanut butter. Many brands sneak in xylitol, a sweetener that's dangerous for dogs. Read the label and stick to plain, unsalted peanut butter with peanuts as the only ingredient.
It's the single most important step in this whole recipe.
Mixing And Rolling The Dough
Stir the flour and oats together first, then work in the peanut butter and add water a spoonful at a time until the dough holds together when you squeeze it. It should feel like firm playdough, not sticky cookie batter. If it's too dry, add water; too crumbly, a touch more peanut butter.
Roll it out to about a quarter inch thick on a lightly floured counter. Thinner biscuits bake faster and snap easily, while thicker ones take longer and come out chewier. Either works, but keep the thickness even so the whole batch finishes at the same time.
Baking For A Firm Crunch
Bake at 350°F for roughly 18 to 22 minutes, flipping the tray halfway through. You're looking for dry and lightly golden, not browned. A biscuit that still feels soft in the middle when it comes out will firm up as it cools, so don't panic and overbake it.
For extra shelf life, drop the oven to 200°F and leave the baked biscuits in for another 30 minutes. This dries them out completely, which is what keeps them crunchy for weeks in a sealed jar.
Shaping And Packaging As Gifts
Holiday cookie cutters make these look festive with zero extra effort. Stars, trees, and bones all work well, and small shapes are ideal for tiny dogs. Reroll the scraps once or twice, then let the dough rest if it starts to fight back.
Once cooled, stack the biscuits in a glass jar with a ribbon, or tuck them into a cellophane bag with a handwritten tag. Add a note listing the three ingredients so the recipient knows exactly what their dog is getting. That small touch makes the gift feel thoughtful rather than generic.
2. Pumpkin and Cinnamon Crunch Bites
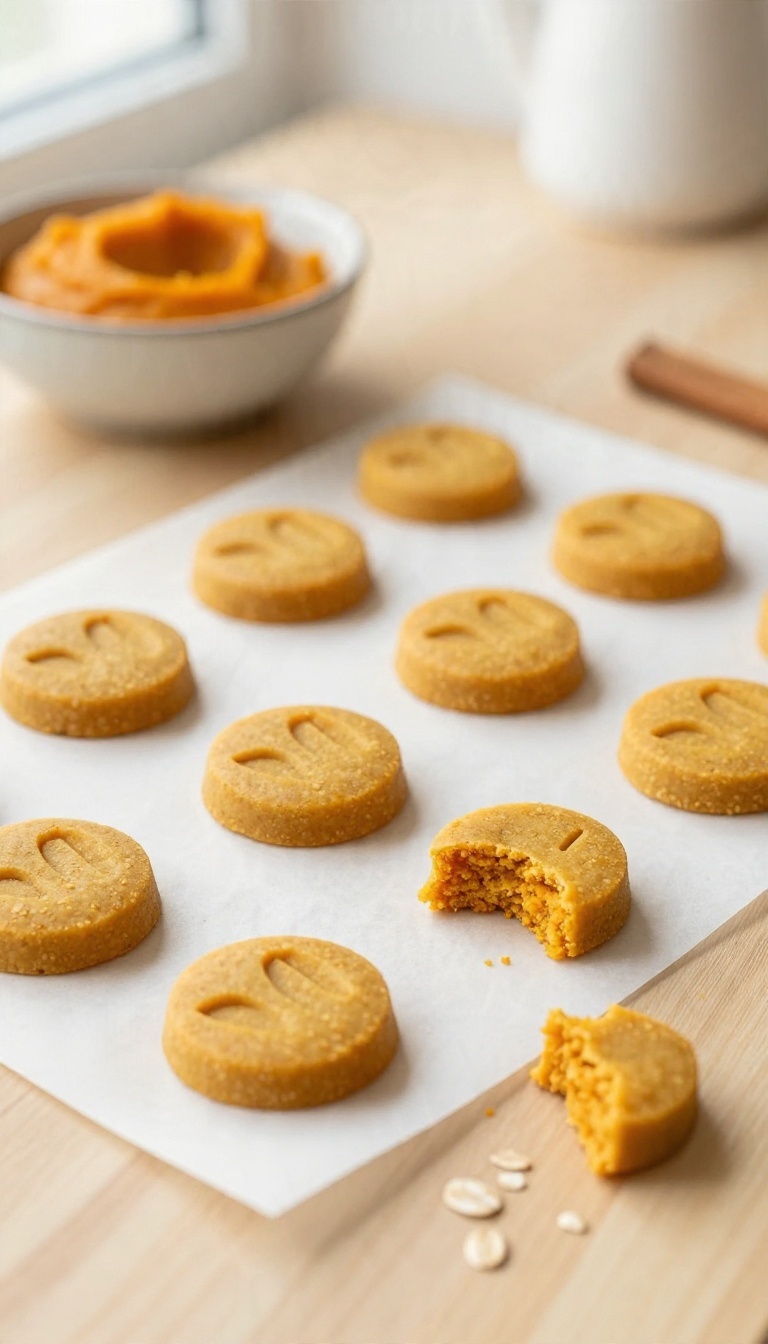
Not every dog can handle a hard, crunchy biscuit. Senior pups with sensitive teeth, flat-faced breeds, and small dogs often do better with something softer. These pumpkin and cinnamon bites deliver a gentle chew with real pumpkin flavor and a warm spice note that smells like the holidays.
They also happen to be one of the easiest recipes on this list.
Canned pumpkin does most of the heavy lifting here. It keeps the bites moist and gives them a natural sweetness dogs love. A small amount of cinnamon adds warmth without overpowering the pumpkin.
The dough comes together in one bowl, and you don't need a stand mixer or any special tools.
What You'll Need
Grab one cup of canned pumpkin puree (not pumpkin pie filling), two cups of oat flour, one egg, and a quarter teaspoon of ground cinnamon. That's it. You can make oat flour by blending rolled oats until they're powdery, which takes about thirty seconds in a blender.
If your dog has a sensitive stomach, skip the cinnamon entirely and add a tablespoon of honey instead for a touch of sweetness.
Mixing And Shaping
Stir the pumpkin, egg, and cinnamon together first, then fold in the oat flour. The dough should be tacky but not sticky. If it feels too wet, add oat flour one tablespoon at a time.
Roll the dough into small balls, about the size of a marble, and place them on a parchment-lined baking sheet. Press each ball gently with a fork to flatten it slightly. This helps them bake evenly and gives them a nice texture.
Baking And Storage
Bake at 350°F for about twenty minutes, or until the bites feel firm to the touch. They'll still be soft in the middle, which is exactly what you want. Let them cool completely before storing.
These bites keep in an airtight container in the fridge for up to a week, or you can freeze them for up to three months. They make a great gift stacked in a small jar with a ribbon and a handwritten label.
3. Frozen Yogurt and Banana Bites
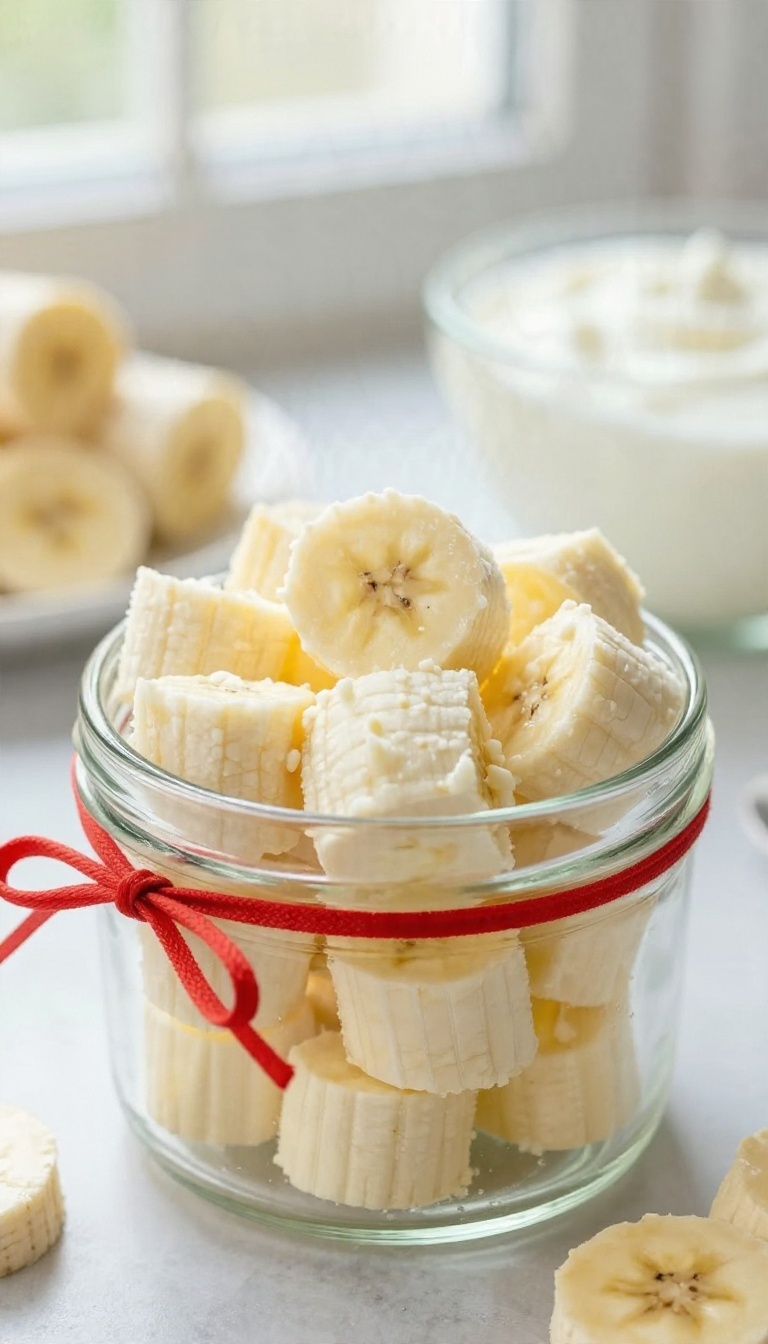
Some dogs turn their noses up at anything crunchy, and that's where these little frozen drops come in. Plain yogurt and ripe banana blend into a creamy mixture that sets up firm in the freezer, no oven required. They're the easiest treat on this list, and they look surprisingly fancy in a small jar with a ribbon on top.
The whole recipe comes down to two ingredients and a blender. Use plain, unsweetened yogurt and skip anything with artificial sweeteners, since xylitol is dangerous for dogs. A ripe banana brings enough natural sweetness that most pups won't miss the sugar.
Blend the two until smooth, then spoon the mixture into silicone molds or small candy cups. A piping bag or a zip-top bag with the corner snipped off keeps things tidy. Freeze for a couple of hours until they're solid, then pop them out and store in a freezer bag.
Picking The Right Yogurt
Plain Greek or regular yogurt both work, as long as it's unsweetened and free of xylitol. If your dog handles dairy well, full-fat yogurt gives a richer texture. For sensitive stomachs, a lactose-free plain yogurt is a safe swap.
Gift Them Frozen
These bites melt fast, so package them in small freezer-safe containers with a note to keep them frozen until serving. A little label with the date helps the recipient use them within a month or two. Toss in a few extra banana slices for good measure.
4. Sweet Potato Chews
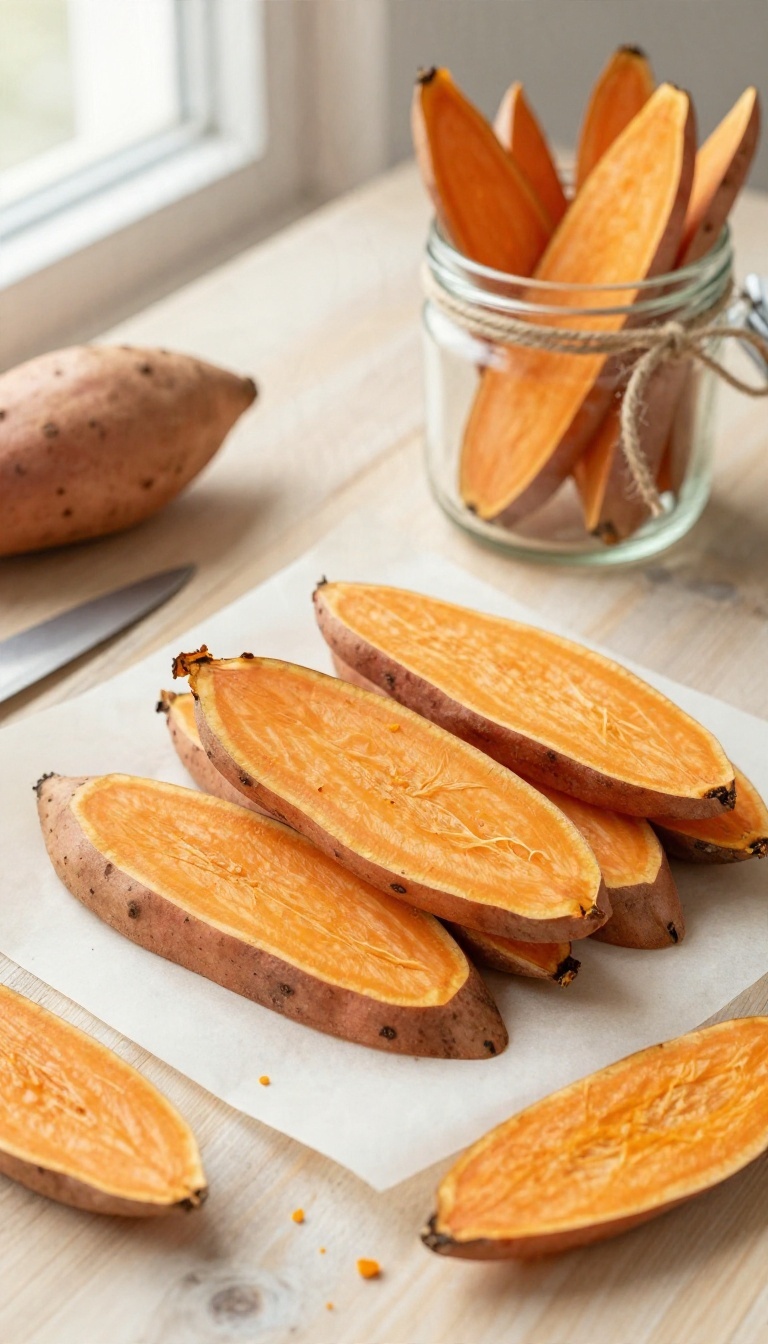
Sweet potato chews might be the simplest thing you make all season, and somehow they still look like they came from a boutique. You slice a sweet potato thin, bake it low and slow, and let the oven do the rest. One ingredient, zero fuss, and a treat that holds up beautifully in a gift bag.
The magic here is patience. A hot oven turns these into brittle chips, but a low one coaxes out the natural sugars and leaves you with something chewy and satisfying. Dogs tend to go wild for that texture, and you get to feel smug about how little effort it took.
They also keep well, which makes them a smart pick if you're prepping gifts a week or two ahead of Christmas. Stack them in a jar or tuck them into a cellophane bag with a ribbon, and nobody would guess there's exactly one item on the ingredient list.
How To Make Them
Scrub two large sweet potatoes and slice them about an eighth of an inch thick. A mandoline helps, but a sharp knife works fine if you go slow. Spread the slices on a parchment-lined sheet with a little breathing room and bake at 250°F for two to three hours, flipping once halfway through.
They're done when they feel leathery and bend without snapping.
Getting The Texture Right
Ovens vary, so start checking around the two-hour mark. If the edges are browning too fast, drop the heat to 225°F. Thicker slices stay chewier and last longer, while paper-thin ones crisp up like chips.
Either way, let them cool completely before bagging so they don't steam and turn soft.
Storing And Gifting
Keep the chews in an airtight container at room temperature for up to two weeks, or freeze them for longer storage. For gifting, layer them in a clear jar or a small kraft bag with a handwritten tag. A few slices of sweet potato look surprisingly elegant when they're stacked neatly, and the single-ingredient angle is an easy talking point.
5. Chicken and Rice Training Treats
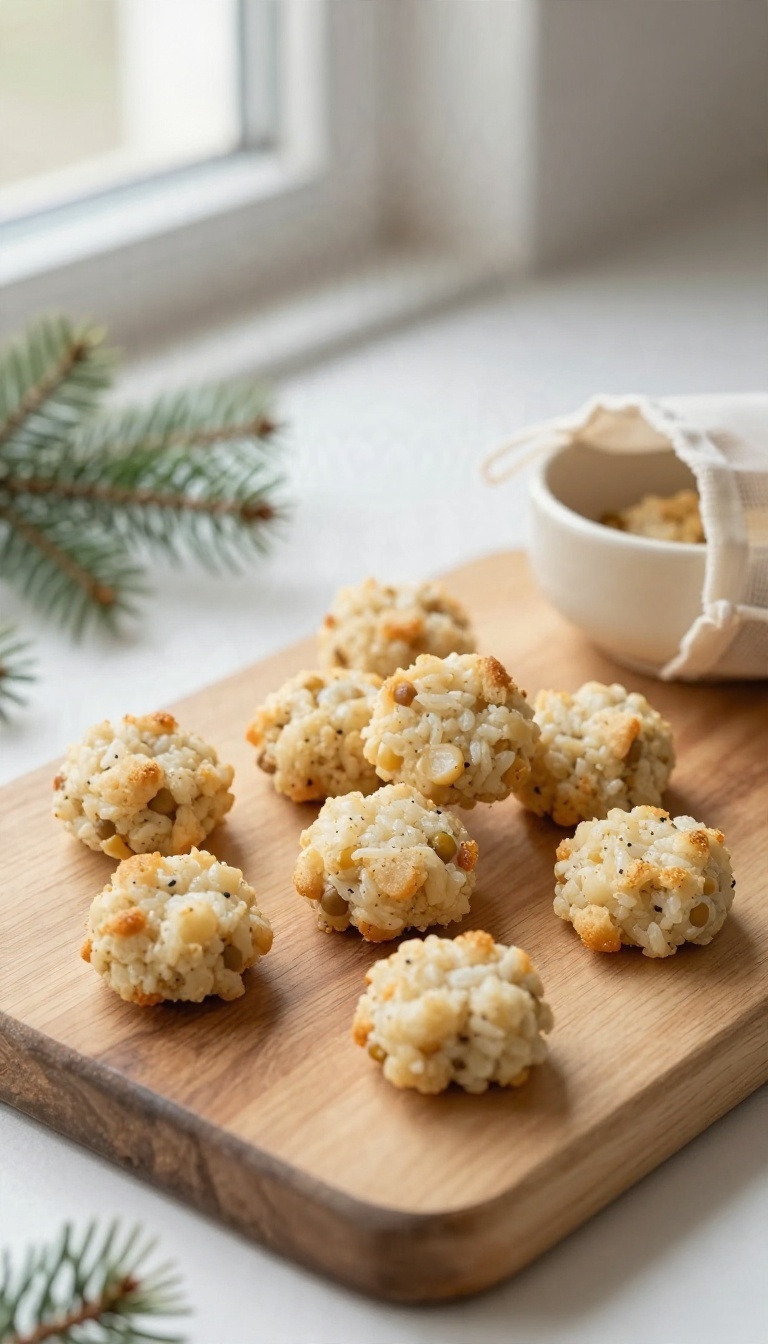
Training treats have one job: to be small, soft, and gone in a single gulp. These little chicken and rice bites nail all three. They're also gentle on sensitive stomachs, which makes them a smart pick for puppies and older dogs alike.
The dough comes together with cooked chicken, rice flour, and an egg, then bakes into soft, chewy morsels you can break into pea-sized pieces. Portion them into tiny pouches and you've got a gift that trainers actually appreciate.
Start by poaching or boiling a boneless chicken breast until it's cooked through, then let it cool. Toss it in a food processor with an egg and pulse until it's finely shredded. Add rice flour a little at a time until the mixture pulls into a soft, slightly sticky dough.
Roll the dough into a log, cut it into small pieces, and bake at 350°F for about 15 to 18 minutes. You want them set but still soft, not crunchy. Let them cool completely before bagging.
These treats keep for about a week in the fridge or up to two months in the freezer. That makes them a good make-ahead option if you're assembling several gifts at once.
Why Soft Beats Crunchy For Training
When you're running a training session, you're handing out a lot of rewards fast. Hard biscuits slow things down and leave crumbs everywhere. Soft bites let your dog swallow and get back to work in seconds.
Small pieces also mean you can reward often without overloading a dog's stomach. Keep each treat roughly the size of a pea and you're in good shape.
Packing Them As Gifts
Grab small muslin bags or little kraft pouches and fill each one with a handful of treats. A treat pouch with a clip is a nice upgrade if you want to go the extra mile for a friend who trains their dog. Add a simple label with the ingredients and a use-by date.
Anyone with a food-sensitive dog will thank you for that small bit of clarity.
Simple Swaps That Still Work
No rice flour on hand? Finely ground oats make a solid substitute and most dogs handle them fine. Just avoid anything with added sugar or flavoring.
If your dog has a chicken sensitivity, cooked turkey works the same way. The method stays identical, so you can swap the protein without rethinking the whole recipe.
6. Apple and Cheddar Dog Cookies
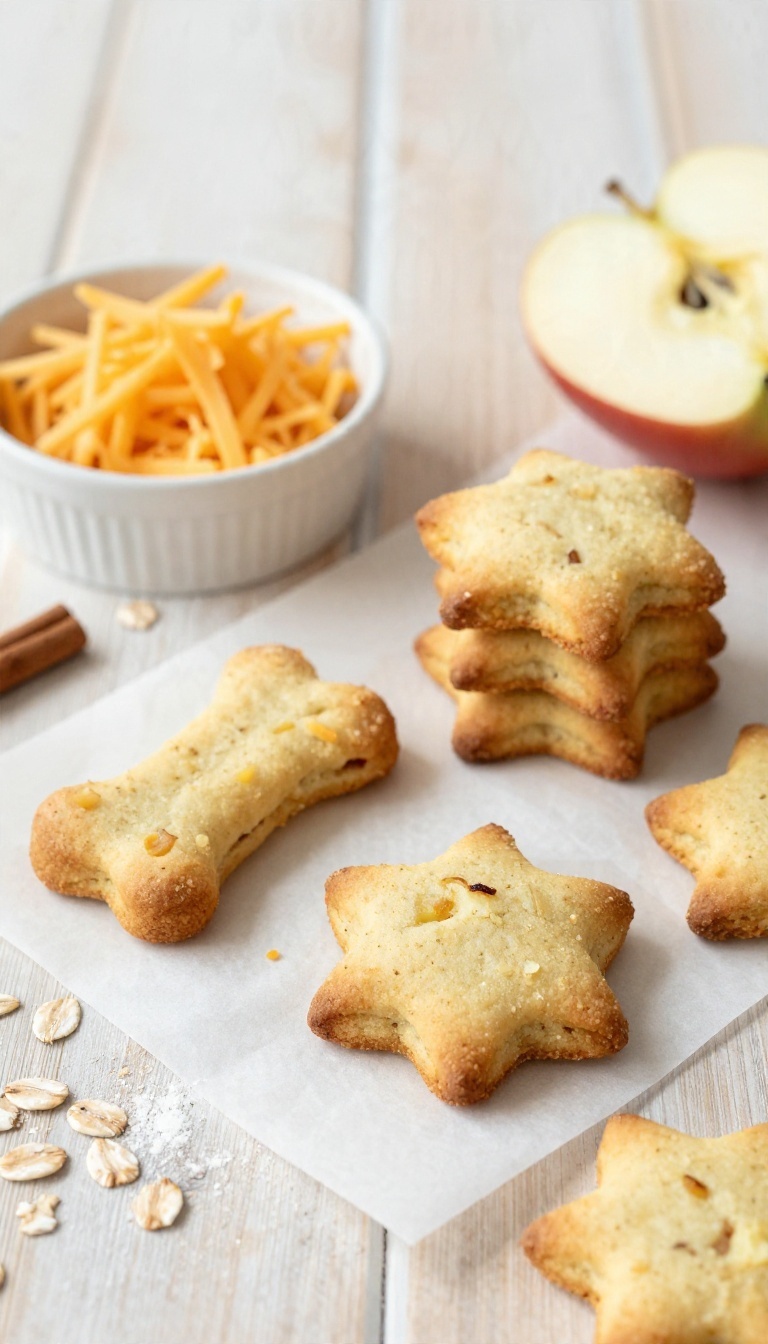
Apple and cheddar might sound like a strange combo for a dog cookie, but trust us on this one. The sweetness of fresh apple pairs with sharp cheddar for a flavor that dogs find irresistible. These cookies also happen to smell amazing while baking, so your kitchen will be filled with a warm, cheesy aroma.
These cookies are a nice change from the usual peanut butter treats. They're savory with a hint of sweet, and the texture is a satisfying crunch. Plus, they use simple ingredients you likely have on hand.
Here's how to make a batch that will have tails wagging.
What You'll Need
Gather 1 cup of whole wheat flour, 1/2 cup of old-fashioned oats, 1/2 cup of grated apple (peeled and cored), 1/2 cup of shredded sharp cheddar, 1 egg, and 1/4 cup of water or unsweetened applesauce. That's it—no weird additives or preservatives.
Mix And Bake
Preheat your oven to 350°F (175°C) and line a baking sheet with parchment paper. In a large bowl, combine the flour and oats. Add the grated apple and cheddar and mix well.
Beat the egg with the water or applesauce, then pour it into the dry mixture. Stir until a dough forms. It should be slightly sticky but manageable.
Roll the dough out on a floured surface to about 1/4 inch thick and cut into shapes with a cookie cutter. Place on the baking sheet and bake for 20-25 minutes, or until golden and firm. Let cool completely before serving or packaging.
Storage And Gifting
These cookies keep well in an airtight container for up to two weeks. For gifting, stack them in a clear cellophane bag tied with a festive ribbon, or arrange them in a cute tin. Add a label with the ingredients so the recipient knows what's inside.
They're a thoughtful present for any dog on your list.
7. Carrot Cake Bites with Cream Cheese Drizzle
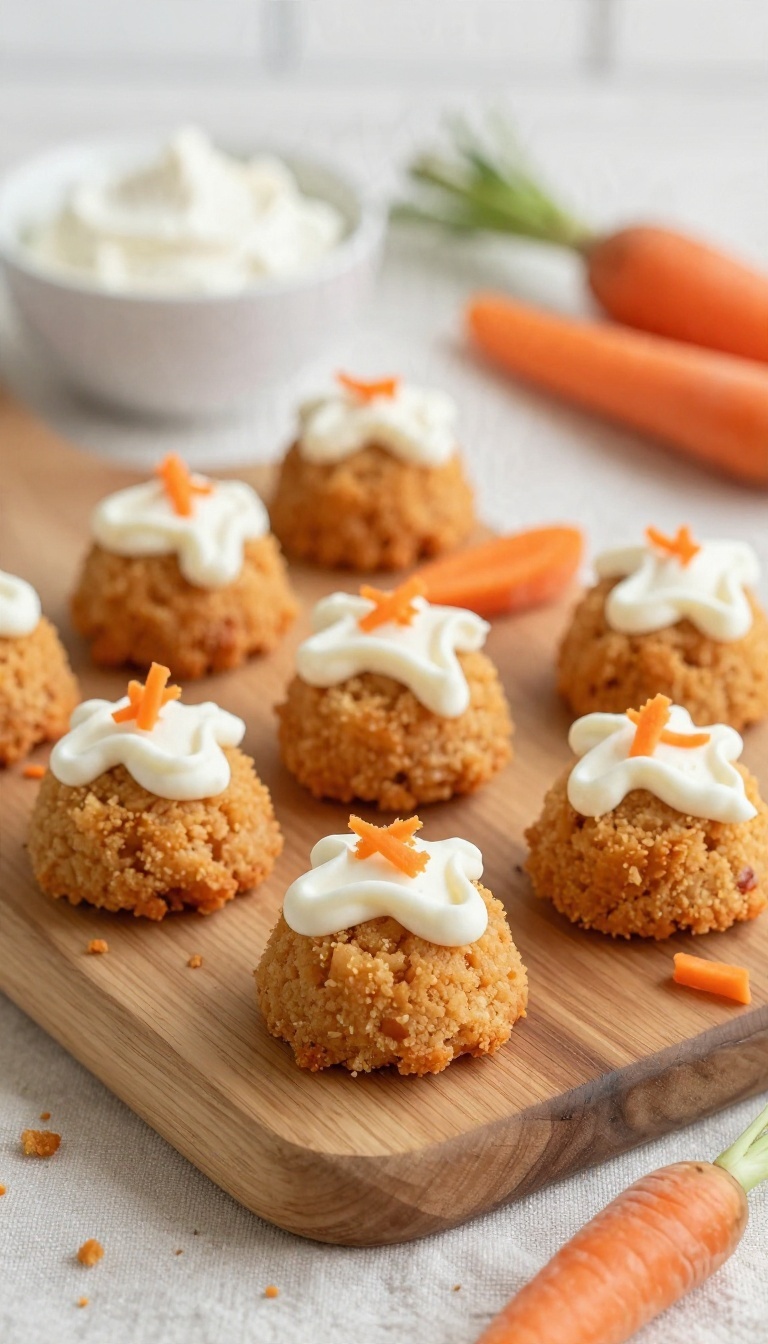
Carrot cake bites bring a little bakery energy to the treat bag. They're small, golden, and finished with a cream cheese drizzle that makes them look like they came from a fancy dog boutique. The cake part leans on grated carrot, a little honey, and an egg to hold it together.
The drizzle uses dog-safe cream cheese with no xylitol, thinned out so it pipes easily. These are the ones to box up for the pup with a birthday party invite list. They photograph well, travel fine, and disappear fast.
Start by grating a couple of carrots on the fine side of your box grater. You want about a cup, loosely packed, so the bites stay moist without turning gummy. Whisk an egg with a spoonful of honey and a splash of plain yogurt, then stir in the carrot.
Add whole wheat flour a little at a time until the batter looks like thick muffin batter, not cookie dough. Spoon the mixture into a greased mini muffin tin or drop rounded teaspoons onto a lined baking sheet. Bake at 350°F for about 15 minutes, until the tops spring back when you touch them.
Let them cool completely before the drizzle goes anywhere near them. Warm cake plus cream cheese equals a puddle, and nobody wants that.
Getting The Drizzle Right
Use plain cream cheese with no added sweeteners, and check the label for xylitol, which is toxic to dogs. Soften a few tablespoons and stir in a spoon of plain yogurt to loosen it up. Spoon the mixture into a zip-top bag, snip a tiny corner, and zigzag it over the cooled bites.
Work quickly and don't stress about neat lines. Rustic looks intentional here. Pop the tray in the fridge for ten minutes so the drizzle sets before you pack them.
Storage And Gifting
These bites keep in the fridge for about five days in a sealed container, or freeze for up to two months. Layer them with parchment so the drizzle doesn't smear. For gifting, tuck a few into a small paper box lined with wax paper.
A ribbon and a handwritten ingredient tag finishes the whole thing off nicely. Include a note that they're best kept chilled, especially if the gift will sit under a tree for a while.
8. Beef Broth and Parsley Biscuits
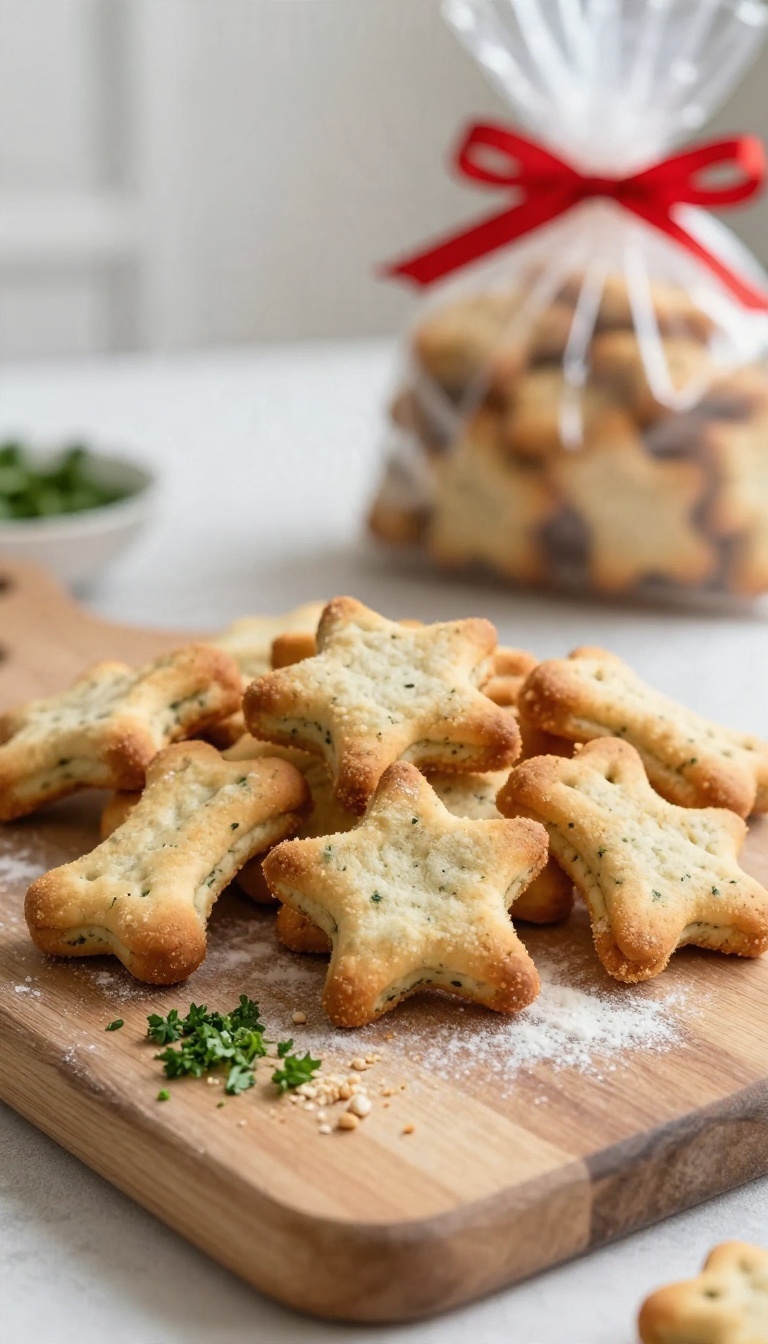
Savory biscuits made with low-sodium beef broth and fresh parsley give dogs a break from the usual peanut butter and pumpkin flavors. They're a nice breath-friendly option for gifting to friends' dogs, and they look kind of fancy in a cellophane bag with a ribbon. The dough comes together fast, and the house smells like a roast while they bake.
These biscuits are a solid choice when you want something that feels a little more grown-up than a standard cookie. The beef broth brings the savory depth, and the parsley adds a fresh, green note that also happens to help with doggy breath. They're sturdy enough to survive a gift bag and tasty enough that picky pups will actually finish them.
What You'll Need
You'll need low-sodium beef broth, whole wheat flour, an egg, a splash of olive oil, and a good handful of fresh parsley. That's it. If your dog has a sensitive stomach, you can swap in oat flour or a gluten-free blend.
Just check that your broth doesn't contain onions or garlic, which are no-gos for dogs.
Mixing And Baking
Whisk the egg with about a cup of broth and the oil, then stir in the flour and chopped parsley until a dough forms. Roll it out to about a quarter-inch thick and cut into shapes. Bake at 350°F for 25 to 30 minutes, flipping halfway, until they're dry and crisp.
Let them cool completely before bagging.
Gifting And Storage
These biscuits keep well in an airtight container for a couple of weeks, or you can freeze them for longer storage. For gifts, stack them in a mason jar or a paper bag with a window, and add a tag with the ingredients. Friends with dogs will appreciate a treat that's both practical and a little different from the usual.
9. No-Bake Peanut Butter and Coconut Balls
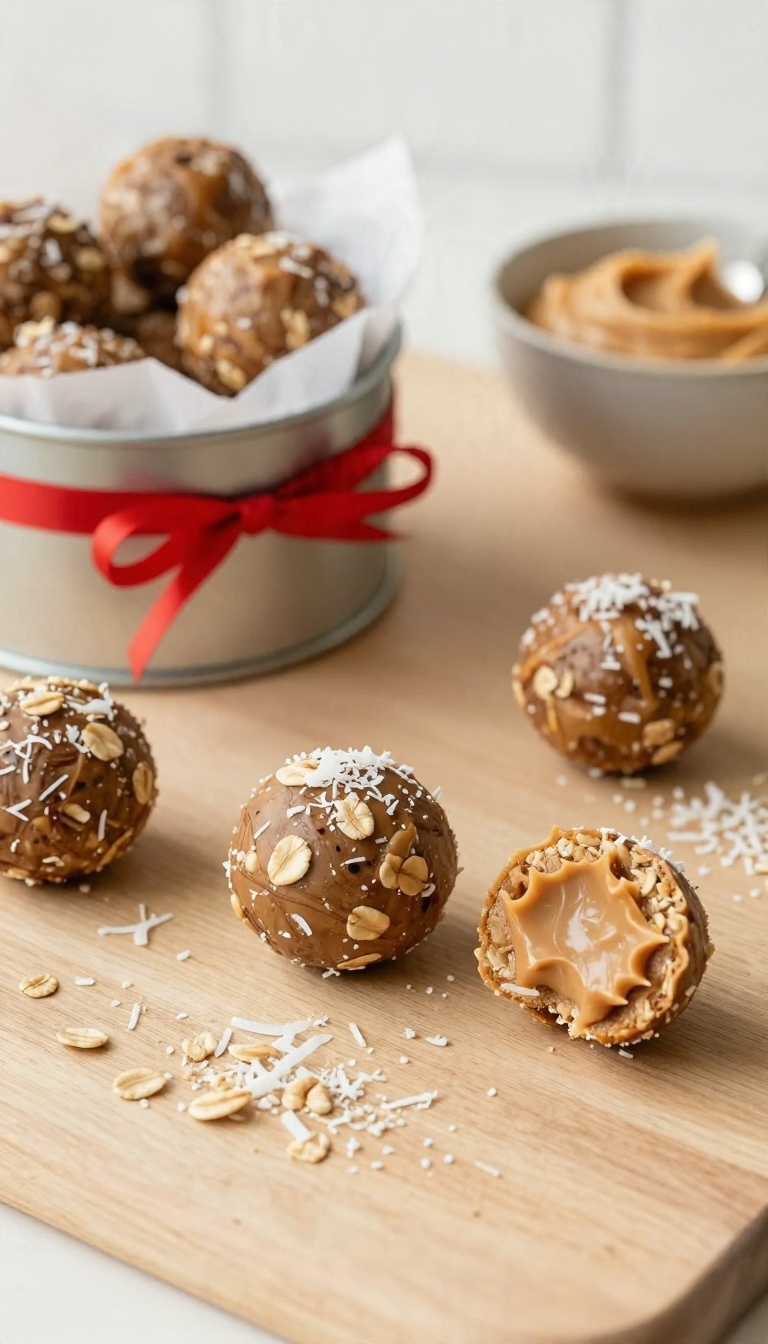
Some nights the oven feels like too much to ask. That's where these little peanut butter and coconut balls come in. Five minutes, one bowl, and zero baking — they're the recipe you make when the calendar is packed but the gift list isn't getting any shorter.
The method is about as simple as it gets. Stir together rolled oats, creamy peanut butter, and shredded coconut until the mixture holds together, then roll it into bite-sized balls and chill. That's the whole thing.
They look like something from a fancy pet bakery, but they come together on a weeknight with ingredients you likely already have. Tuck a few in a small tin with a ribbon, and you've got a gift that feels far more thoughtful than the effort suggests.
What You'll Need
You want plain rolled oats, natural peanut butter with no xylitol, and unsweetened shredded coconut. Xylitol is toxic to dogs, so check that label carefully before you start. A spoonful of honey is optional if you want a little extra binding, and a splash of water can loosen a dry mix.
Skip the honey for diabetic dogs or pups on a strict diet.
How To Roll Them
Mix everything in one bowl until it looks like coarse, sticky dough. If it crumbles instead of clumping, add peanut butter a teaspoon at a time. Scoop out small portions and roll them between your palms.
Aim for marble-sized balls — big enough to feel like a treat, small enough to be safe for most dogs. Chill them on a lined tray for about 20 minutes so they firm up.
Storing And Gifting
Keep the balls in an airtight container in the fridge for up to a week, or freeze them for a month or two. They hold their shape well, which makes them easy to stack in a gift box. Layer them with parchment paper so they don't stick together.
A small jar with a handwritten label listing the ingredients is a nice touch, especially if the recipient has a dog with allergies.
10. Dehydrated Liver Training Bits
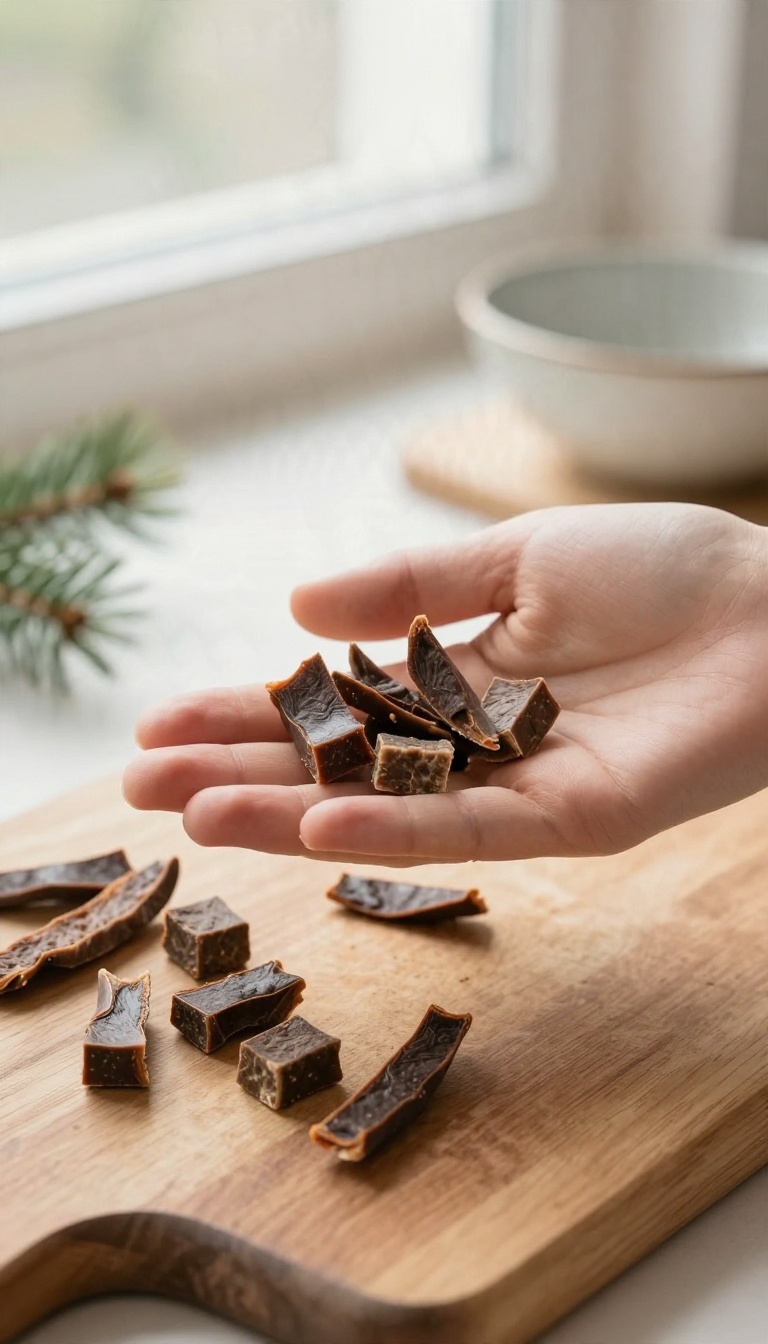
Liver treats have a reputation among trainers for a reason: dogs go crazy for them. And when you dehydrate liver into tiny, chewy bits, you get a high-value reward that's perfect for training sessions or stuffing stockings. The best part?
You can make a whole batch for less than the price of one fancy pet store bag.
These little bits are the secret weapon of professional trainers. They're smelly, savory, and small enough to reward without filling up your dog. Plus, dehydrating locks in nutrients and creates a shelf-stable treat that lasts for weeks.
Making them at home is straightforward. You'll need a dehydrator or an oven set to its lowest temperature. Beef or chicken liver works great, and you can often find it cheap at the butcher counter.
The process takes a few hours, but most of that is hands-off time.
Why Trainers Love Liver
Liver is packed with protein, iron, and vitamin A, making it a nutritional powerhouse. But the real reason trainers swear by it is the smell. That strong, meaty aroma cuts through distractions and keeps your dog focused.
And because you cut the bits small, you can reward frequently without overfeeding.
How To Make Them
Start with fresh liver and rinse it well. Pat it dry, then slice it into thin strips or small cubes. If using a dehydrator, set it to 155°F and let it run for 6-8 hours until the pieces are dry and leathery.
For the oven, set it to the lowest setting (usually 170°F) and prop the door open slightly with a wooden spoon. Bake for 4-6 hours, flipping once. Store in an airtight container in the fridge for up to two weeks, or freeze for longer storage.
Gift-wrapping Tips
These bits are perfect for a training-themed gift. Package them in a small mason jar or a resealable pouch, and add a tag that says "For Good Dogs Only. " Pair with a new clicker or a training pouch for a thoughtful present any dog owner will appreciate.
11. Mint and Parsley Dental Chews

Dog breath has a way of announcing itself right when guests arrive. These firm baked chews lean on fresh mint and parsley to freshen things up, and they give a pup something satisfying to gnaw on. Pack them in a little tin and you've got a gift that solves a real problem.
The texture matters as much as the flavor here. A firm, slightly crunchy chew scrapes against teeth as your dog works through it, which is part of why these earn the "dental" label. They won't replace brushing, but they're a nice everyday habit that happens to taste good.
Fresh herbs do the heavy lifting on scent. Mint cools the breath, and parsley brings its own clean, green note. Together they mask the usual doggy aroma without any artificial flavoring, and most pups don't mind the taste one bit.
What You'll Need
Grab whole wheat flour, an egg, a splash of water or low-sodium broth, and a small handful each of fresh mint and parsley, finely chopped. A tablespoon of coconut oil helps the dough come together and adds a little richness. No fresh herbs on hand?
Dried works in a pinch, though you'll want to use less since the flavor concentrates. Skip anything from the onion family and keep the mint mild, since too much can upset a sensitive stomach.
Baking For The Right Crunch
Mix the dry ingredients, then work in the egg, oil, and enough liquid to form a stiff dough. Roll it out to about a quarter inch and cut small shapes, since these are meant to be chews rather than meals. Bake at 350°F until they're dry and firm, usually 25 to 30 minutes, then flip and give them another 10.
For extra crunch, leave them in the warm oven with the heat off for an hour. They should snap, not bend, when they're done.
Gifting And Storage
Let the chews cool completely before they go anywhere near a bag, or condensation will soften them. A mason jar with a ribbon or a small tin makes a tidy presentation, and a handwritten label with the ingredients is a thoughtful touch for anyone with a picky or sensitive dog. Store them in an airtight container for up to two weeks, or freeze a batch for later.
Mention the mint and parsley on the tag so the recipient knows exactly what their pup is getting.
12. Pumpkin and Peanut Butter Frozen Pops

Not every dog wants to curl up by the fire. Some run hot, some live where December feels like June, and some just think ice is the best thing since squeaky toys. These layered frozen pops handle all three.
You pour a pumpkin layer, freeze it, add a peanut butter layer, and end up with something that looks like a fancy doggy popsicle and costs almost nothing to make.
The trick is the layering. Freeze each layer for about 20 minutes before adding the next, and you get clean stripes instead of a muddy swirl. Use plain canned pumpkin, not pie filling, and make sure your peanut butter has no xylitol, which is toxic to dogs.
Silicone molds come in bone, paw, and star shapes, so the pops look festive right out of the freezer. Once they're solid, pop them out and store them in a freezer bag. They keep for about two months, which means you can make a big batch in early December and hand them out all season.
What You'll Need
One cup of plain canned pumpkin, half a cup of unsweetened peanut butter, and a couple tablespoons of plain yogurt or water to loosen things up. A silicone mold helps, but ice cube trays work fine too. Skip the honey and sugar, because dogs don't need them and pumpkin is sweet enough on its own.
Making The Layers
Blend the pumpkin with a splash of water until it's pourable, then fill each mold about halfway and freeze for 20 minutes. Mix the peanut butter with yogurt until smooth, spoon it over the frozen pumpkin, and freeze again until solid. If you want a third stripe, a thin layer of plain yogurt on top looks great and adds a little calcium.
Gifting And Storage
Stack the frozen pops in a freezer bag with a layer of parchment between them so they don't stick. Add a small tag with the ingredients and a note to keep them frozen, since nobody wants a melted gift. For warm-climate pups, these make an especially thoughtful present because they double as a way to cool down on a hot afternoon.
A Quick Safety Note
Always check the peanut butter label for xylitol before you start, since it shows up in some natural brands now. Keep portions small for little dogs, and let the pops soften for a minute before handing one over. Frozen treats are a great reward, but a whole pop is a lot for a Chihuahua.
13. DIY Treat Jar Gift Sets
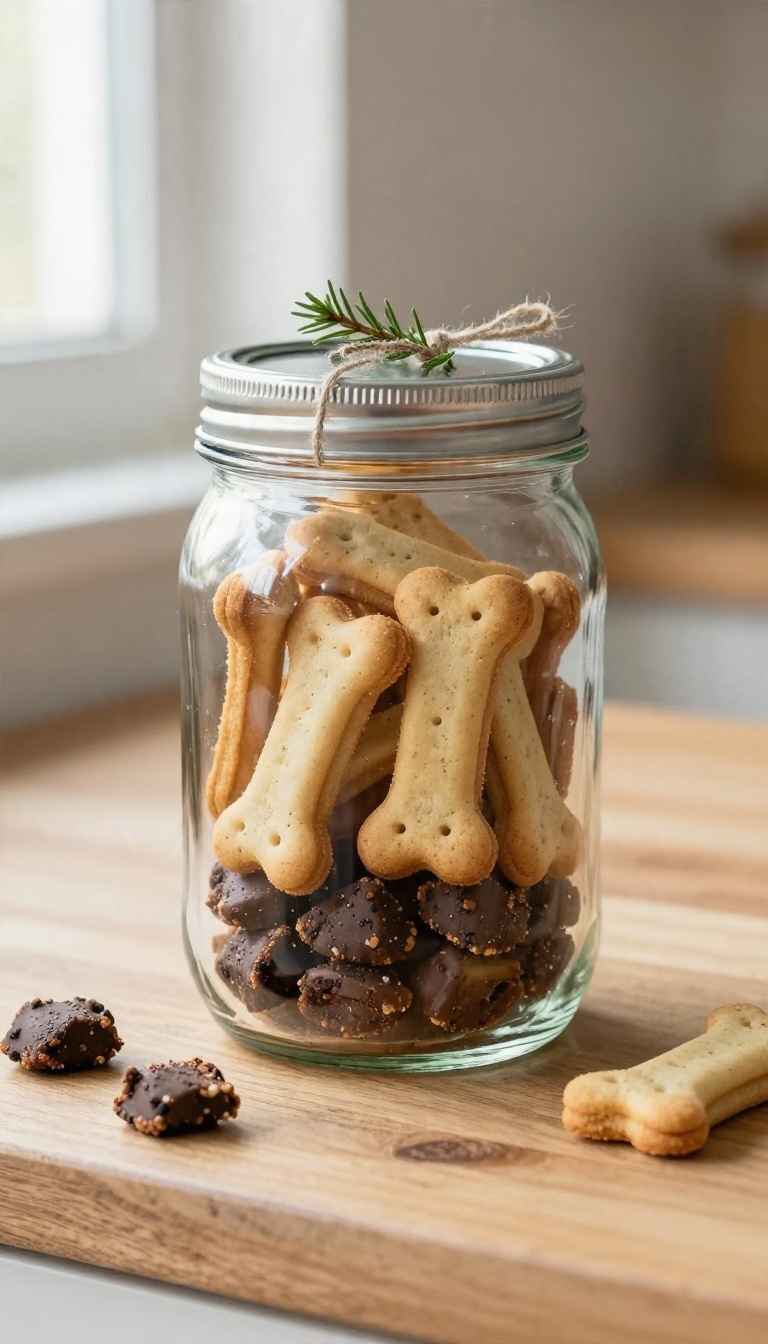
A decorated jar packed with a couple of your best homemade treats turns a kitchen project into a gift someone actually wants to unwrap. It's the lowest-effort way to make your baking look intentional, and it solves the problem of treats going stale in a plastic bag on the counter. The jar does most of the work for you.
Layer two or three different treats so the colors and shapes show through the glass, tie a ribbon around the lid, and you've got something that looks like it came from a boutique rather than your Tuesday night.
Start with a clean, dry jar with a tight-fitting lid. Mason jars work great, and so do the flip-top glass jars you can find at most craft or discount stores for a few dollars. Wide-mouth openings make layering easier and let the recipient get treats out without a fight.
Pick treats that hold up well together. Firm biscuits and baked bites stack nicely, while softer treats can go in a smaller bag tucked on top so they don't get crushed. Two or three varieties is the sweet spot, enough to look generous without turning into a jigsaw puzzle.
Layer by color and texture for the best look. Alternate light and dark treats, or put the smallest pieces at the bottom and the biggest biscuits standing upright near the top. Fill the jar close to the rim so nothing shifts around in transit.
What To Put On The Label
A handwritten label makes the whole thing feel personal. Write the treat names, the date you made them, and a rough "best by" date, which is usually about two to three weeks for most baked treats stored in an airtight jar. Add a short ingredient list on the back or a tag tied to the ribbon.
This matters more than people think, since some dogs have allergies to wheat, chicken, or dairy, and the person receiving the gift may not be the one who knows the dog's full history. List every ingredient, including the small stuff like eggs and oil. If you want to go the extra step, note which treats are grain-free or contain no common allergens.
It takes thirty seconds and makes the gift genuinely useful.
Decorating Without Going Overboard
A strip of ribbon around the neck of the jar and a simple tag does plenty. Washi tape comes in holiday patterns and wraps around the lid in seconds. A small piece of fabric cut with pinking shears and tied with twine gives that homemade farmhouse look without any craft skills.
Skip anything glued to the glass if the jar will be reused, and avoid painting the inside of the lid, since it touches the treats. Keep decorations on the outside and food-safe. A tiny cookie cutter tied to the ribbon as a gift tag is a nice touch, and it doubles as a hint about what's inside.
Pairing Treats That Travel Well
Not every recipe belongs in a jar. Soft, moist treats like pumpkin bites can get sticky and smush against the glass, so bag those separately in a small zip pouch before adding them. Firm biscuits, dehydrated liver bits, and baked peanut butter cookies hold their shape and stay fresh for weeks.
Those are your jar-friendly picks. If you're gifting to multiple dogs, make a few jars at once and vary the combinations so each one feels a little different. It's the same effort, just a better result.
FAQ
How long do homemade dog treats last?
Most baked biscuits keep for about two weeks in an airtight container at room temperature, or up to two months frozen. Soft or no-bake treats should stay refrigerated and get eaten within about a week.
Are these treats safe for all dogs?
Most are, but always check with your vet if your dog has allergies or health issues. Skip peanut butter containing xylitol, and go easy on dairy and rich ingredients for sensitive stomachs.
Can I make these treats ahead of Christmas?
Yes. Bake them a week or two early and freeze them, then thaw and package right before gifting. Frozen treats like the yogurt bites should stay frozen until you hand them over.
What's the cheapest treat on this list?
The sweet potato chews and the no-bake peanut butter balls cost the least since they use just a couple of basic ingredients. Both still look thoughtful when packaged well.
How should I package homemade treats as gifts?
Use airtight jars or tins, add a label with the ingredients and a use-by date, and tie on a small ribbon. A handwritten note makes it feel personal without much extra effort.
Conclusion
You don't need fancy equipment or a big budget to pull off homemade dog treats. A few simple ingredients, a cookie cutter, and an afternoon are enough to make something your pup will actually get excited about.
Start with one recipe that fits your dog's taste and any dietary needs, then branch out once you know what works. Wrap a batch up with a little ribbon, and you've got a gift that beats anything off the shelf.