
Your dog gives you that look every time you open the fridge. You want to reward it with something homemade, but the oven feels like a big ask after a long day. No-bake treats solve that problem in minutes.
These recipes skip the baking step entirely. Most use five ingredients or fewer, and many come together in a single bowl. You can mix a batch while dinner simmers and have treats ready before the kettle boils.
Whether your dog has allergies, needs a training reward, or just deserves a little extra love, there's a no-bake option here for you. Grab a mixing bowl and let's get started.
1. Peanut Butter & Oat Bites

Peanut butter and oats might be the most reliable flavor combo in the dog world. Three ingredients, five minutes, and you've got a soft, chewy bite your dog will happily trade a sit for. It's also a smart way to clear out the pantry without a trip to the store.
You need creamy peanut butter, rolled oats, and a little something to bind it all together. That's it. No oven, no chilling overnight, no fancy equipment beyond a bowl and your hands.
These bites stay soft, which makes them a good fit for older dogs or pups with sensitive teeth. They also break apart easily, so you can tear off smaller pieces for training sessions.
What You'll Need
Grab one cup of rolled oats, half a cup of creamy peanut butter, and two to three tablespoons of honey or mashed banana. Skip chunky peanut butter if your dog is a gulper, and always check the label for xylitol, which is toxic to dogs. If the mix feels crumbly, add a splash of water or a little more peanut butter until it holds together.
You want a dough that sticks to itself but doesn't coat your fingers.
How To Make Them
Stir the oats and peanut butter together in one bowl until evenly combined. Add the honey or banana and mix until the dough pulls into a rough ball. Roll spoonfuls into small balls, about the size of a marble for small dogs or a golf ball for bigger ones.
Press each one flat with a fork if you want them to dry faster. Store them in the fridge in a sealed container for up to a week.
Tips For Picky Eaters
Some dogs turn their nose up at plain oats, so toast them dry in a pan for a couple of minutes first. That brings out a nutty flavor without any extra oil. You can also swap in a tablespoon of plain yogurt for creaminess, or roll the finished bites in crushed freeze-dried liver for extra appeal.
Adjust the texture to whatever your dog prefers.
2. Pumpkin & Coconut Flour Drops
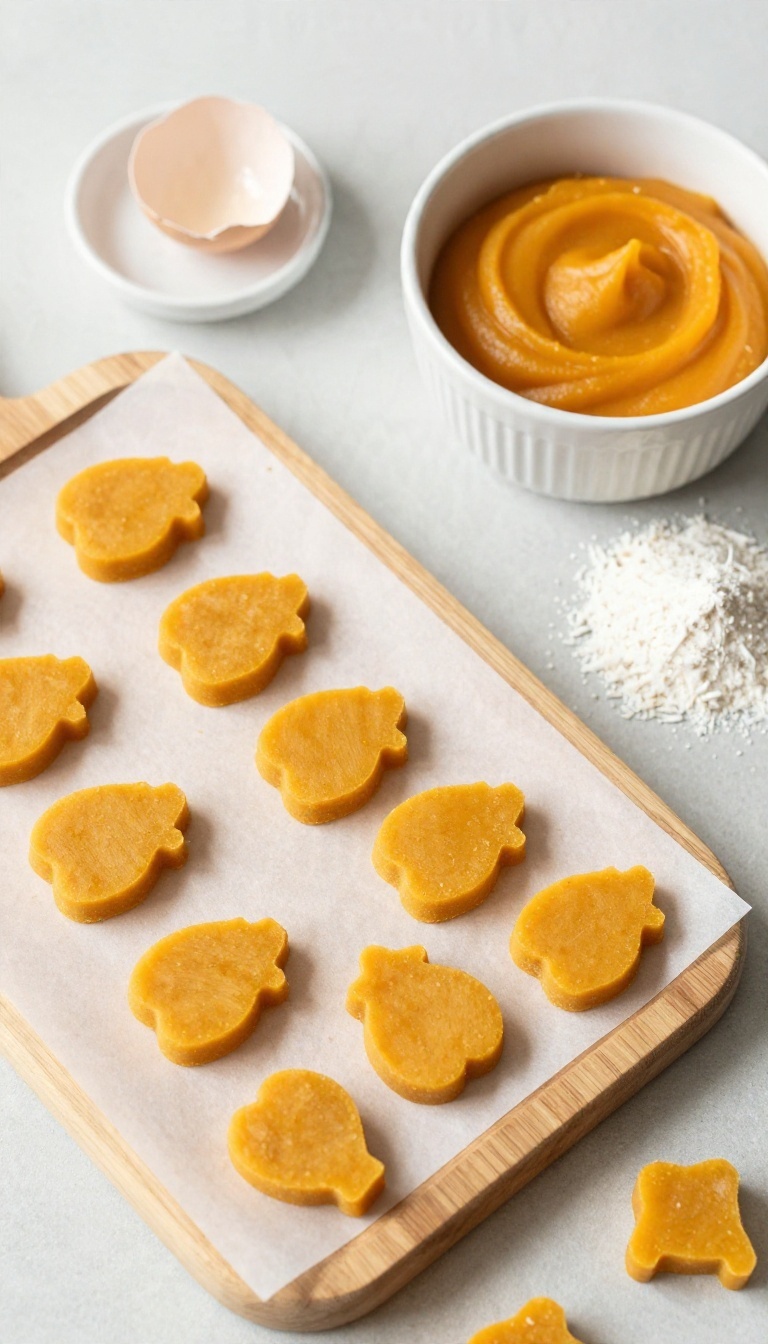
Canned pumpkin and coconut flour team up for a grain-free drop that's easy on sensitive stomachs. Pumpkin is gentle on digestion and adds natural sweetness, while coconut flour gives structure without any grains. These no-bake drops come together in one bowl and set up in the fridge, so you can whip up a batch in no time.
Pumpkin is a go-to for dogs with tummy troubles because it's high in fiber and low in fat. Coconut flour soaks up moisture and creates a soft, drop-style treat that holds its shape. Together, they make a simple, soothing snack that even picky eaters tend to love.
What You'll Need
You only need three ingredients: 1 cup canned pumpkin (not pie filling), 1/2 cup coconut flour, and 1 egg. The egg helps bind everything together, but you can leave it out if your dog has an egg allergy—just add a tablespoon of water or unsweetened applesauce instead. That's it.
No baking powder, no sugar, no grains.
How To Make Them
Mix the pumpkin and egg in a bowl until smooth. Add the coconut flour and stir until a soft dough forms. If it's too sticky, add a little more coconut flour, one tablespoon at a time.
Scoop small spoonfuls onto a parchment-lined tray and refrigerate for at least an hour to firm up. Store in an airtight container in the fridge for up to a week.
Why Dogs With Sensitive Stomachs Love Them
Pumpkin is famously easy to digest and can help regulate both loose stools and constipation. Coconut flour is grain-free and low in carbohydrates, making it a good option for dogs with grain allergies. These drops are also naturally sweet from the pumpkin, so they work well as a training reward or a between-meal snack.
Just remember to introduce any new treat slowly and keep portions small.
3. Frozen Yogurt & Banana Bites
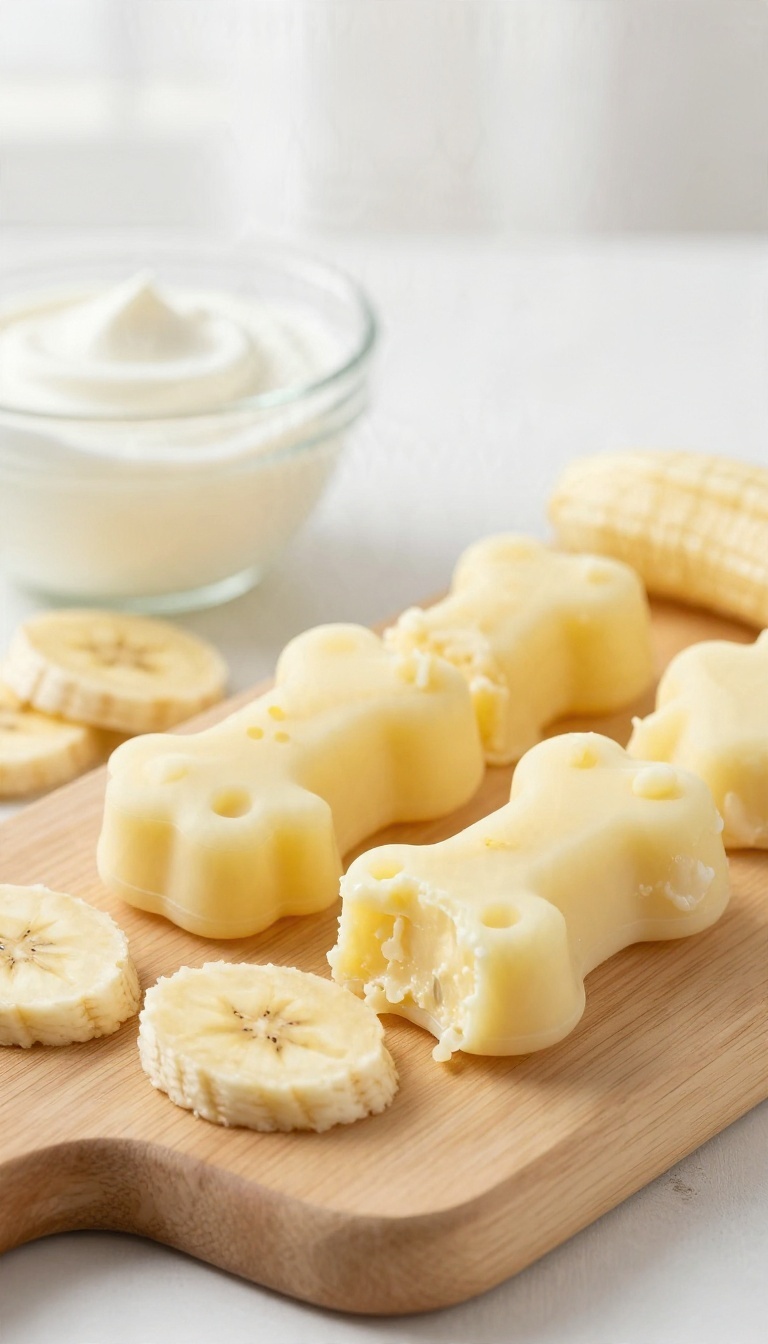
When the temperature climbs, your dog needs a treat that cools from the inside out. These frozen yogurt and banana bites do exactly that. Ripe banana brings natural sweetness, plain yogurt adds creaminess, and the freezer does the rest.
No oven, no fuss, just a refreshing reward that's ready in a couple of hours.
Start with one ripe banana and half a cup of plain yogurt. Mash the banana with a fork until smooth, then stir in the yogurt until fully combined. Spoon the mixture into silicone molds or ice cube trays.
Freeze for at least two hours, or until solid. Pop them out and store in a freezer bag for up to two weeks. For an extra layer of flavor, add a teaspoon of honey (if your dog is over one year old) or a tablespoon of peanut butter (make sure it's xylitol-free).
These bites are perfect for hot afternoons or as a post-walk cool-down.
Choosing The Right Yogurt
Not all yogurt is safe for dogs. Stick to plain, unsweetened yogurt with live active cultures. Avoid anything with added sugar, artificial sweeteners (especially xylitol), or flavorings.
Greek yogurt works well because it's thicker, but regular plain yogurt is fine too. If your dog is lactose intolerant, you can use a lactose-free yogurt or a small amount of coconut yogurt as a substitute.
Molds And Shapes
You don't need special equipment. Silicone ice cube trays, small silicone molds (like bone or paw shapes), or even paper cups work great. If you use paper cups, peel them away after freezing.
For smaller dogs, use mini muffin tins or candy molds. The size doesn't matter as long as the bites are easy for your dog to handle.
Serving And Storage
Serve these bites straight from the freezer as a cooling treat. They're also great for teething puppies or dogs that need to slow down their eating. Store in an airtight container in the freezer for up to two weeks.
If they start to melt, toss them—don't refreeze. And always supervise your dog when giving frozen treats to prevent choking.
4. No-Bake Carrot & Apple Crunch Squares
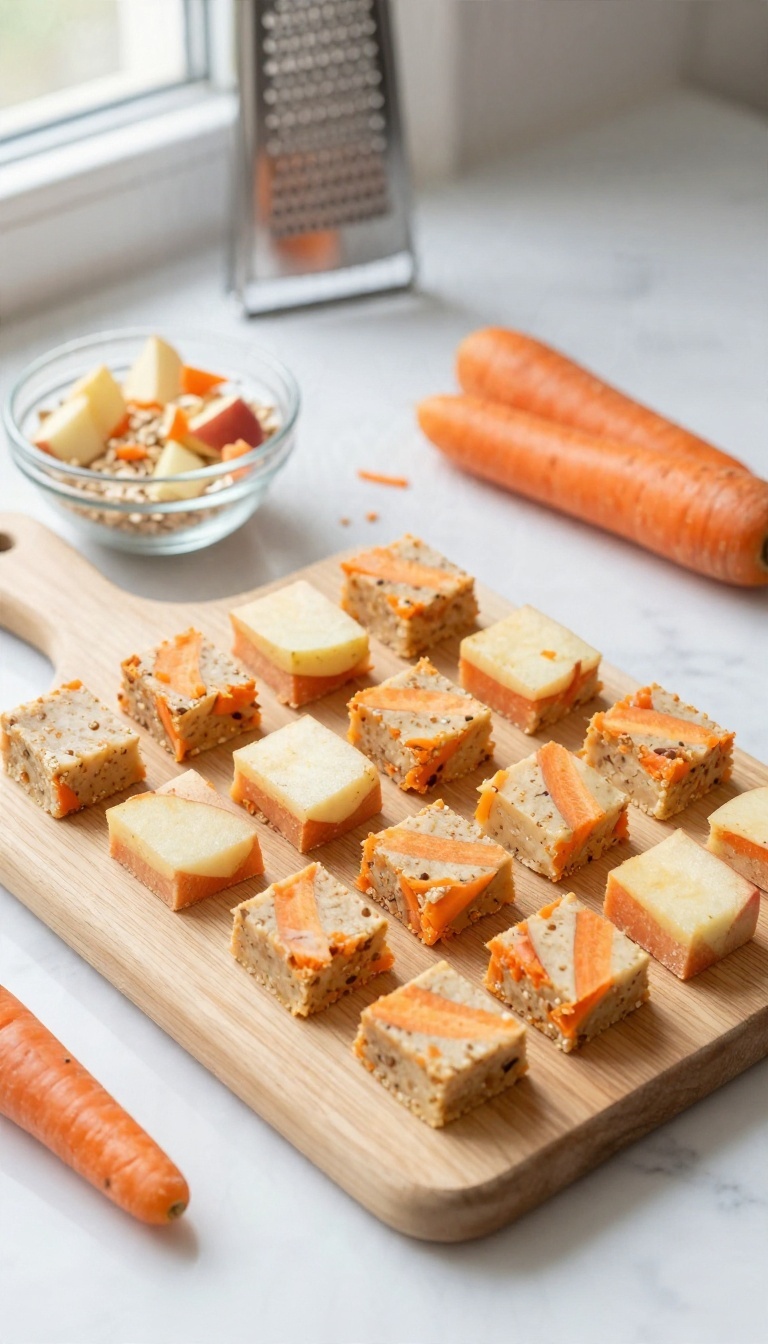
Carrots and apples bring a little sweetness and a lot of crunch to the treat jar. Grate them fine, mix with oats and a binder, and you get a firm square that slices cleanly into training-size bites. The fiber does your dog's digestion a favor, and the whole batch takes about ten minutes of hands-on work.
Start with one medium carrot and half a firm apple, both grated on the fine side of a box grater. Skip the apple core and seeds, and pat the shreds dry with a paper towel so the mixture doesn't turn soupy. Toss them into a bowl with a cup of rolled oats.
For the binder, plain unsweetened applesauce works well, and so does a spoonful of plain yogurt or a little mashed banana. Add it a tablespoon at a time until the mix holds together when you squeeze it. Press the mixture firmly into a lined square pan, chill for about an hour, then cut into small squares.
Getting The Texture Right
Too wet and the squares crumble into mush; too dry and they won't hold their shape. Aim for a mixture that clumps in your fist without dripping. If it's sticky, add another spoon of oats.
If it's crumbly, add a splash more binder and press again.
Cutting For Training
Once chilled, turn the block out onto a cutting board and slice it into a grid of small cubes, roughly the size of your thumbnail for a medium dog. Smaller pieces mean more rewards per batch and fewer extra calories during a session. Store them in a sealed container in the fridge for up to five days.
Swaps And Watch-outs
Use quick oats if that's what's in the pantry, though rolled oats hold up better. Keep portions modest since carrots and apples both carry natural sugar. Skip this one for dogs with grain sensitivities, and check with your vet if your dog has a history of digestive issues.
5. Cheese & Parsley Soft Training Treats
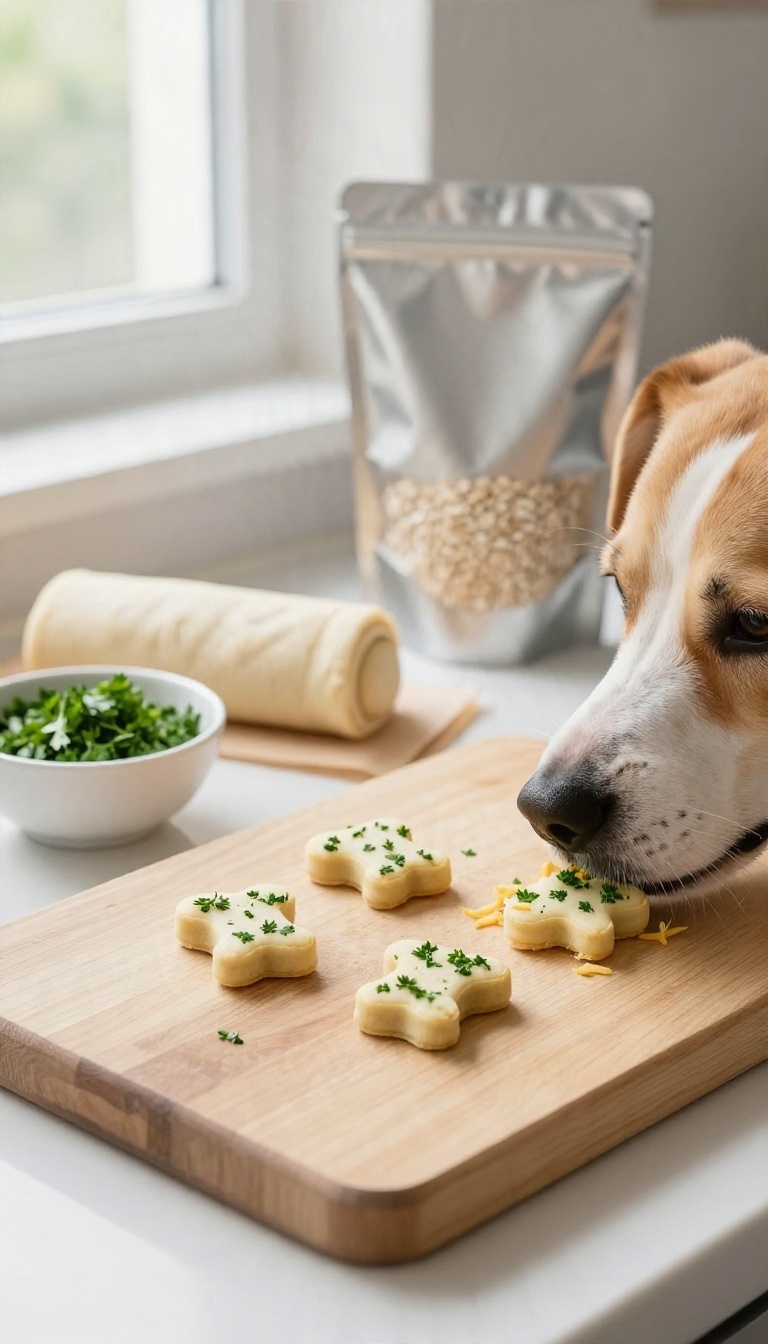
Training sessions go better when the reward is worth working for. These soft, savory bites pack real cheese flavor and a hit of fresh parsley, and they hold together with nothing more than a little oat flour and moisture. No oven, no fuss, and no crumbly mess in your treat pouch.
They're especially handy for dogs who ignore sweet treats or get bored of the same old biscuit. The texture stays pliable, so you can tear off tiny pieces mid-session without slowing down. Mix a batch in about ten minutes and keep it in the fridge for the week.
The base is simple: shredded cheese, oat flour, an egg, and a spoonful of plain yogurt to bring it together. Fresh parsley adds a clean, grassy note and a little breath-freshening bonus. Roll the mixture into a log, chill it, and slice off soft coins whenever you need them.
Because these stay soft, they're ideal for quick repetitions during obedience work. Small pieces mean fewer calories per reward, which matters when you're running through a whole session of sits and stays.
What You'll Need
Grab one cup of shredded cheddar or mozzarella, one and a half cups of oat flour, one egg, two tablespoons of plain yogurt, and a small handful of chopped fresh parsley. That's it. If your dog is dairy-sensitive, swap in a hard cheese alternative and skip the yogurt for a splash of water instead.
You can also add a pinch of garlic-free seasoning if you want variety, but plain works great. Keep the parsley chopped fine so it distributes evenly through the dough.
Mixing And Shaping
Stir the cheese, flour, and parsley together first, then add the egg and yogurt. Knead with your hands until it forms a soft, slightly sticky dough. If it's too wet, add oat flour a tablespoon at a time; if it's too dry, add a little water.
Roll the dough into a log about an inch thick, wrap it in parchment or plastic, and chill for at least thirty minutes. Once firm, slice into thin coins or cut into small cubes. Store them in an airtight container in the fridge for up to a week.
Training Tips
Cut these smaller than you think you need. A pea-sized piece is plenty for most dogs, and you'll get more rewards out of each batch. Keep a portion in your pocket or pouch and the rest chilled until you need a refill.
These also freeze well, so double the recipe and stash a log in the freezer for busy weeks. Just thaw a portion overnight before your next session.
6. Sweet Potato & Almond Butter Rolls

Sweet potato does a lot of quiet work in dog treats. It holds moisture, adds fiber, and brings a natural sweetness most dogs go wild for. Pair it with almond butter and you get a dough that rolls out clean and slices into neat little coins.
There's no oven involved here. You mash, mix, roll, and chill. The fridge does the rest, firming everything up so the slices hold their shape in the treat jar.
Start with one medium sweet potato. Roast or steam it until a fork slides through with no resistance, then let it cool completely. Warm potato makes sticky dough, so patience here pays off.
Scoop the flesh into a bowl and mash it smooth. You want about a cup. Add a half cup of almond butter and stir until the two come together into a soft, even mixture.
Getting The Dough Right
Almond butter thickness varies a lot between brands. If yours is runny, the dough may need a spoonful of coconut flour or oat flour to firm up. Add it a little at a time until the dough pulls away from the bowl.
If the mixture feels crumbly instead of tacky, splash in a bit of water or a drizzle of honey. You're aiming for a texture like cookie dough that holds a fingerprint when you press it.
Roll, Chill, And Slice
Lay a sheet of parchment on the counter and plop the dough in the middle. Shape it into a log about an inch and a half thick, then wrap it tight and twist the ends. Chill for at least an hour, or pop it in the freezer for twenty minutes if you're short on time.
Once firm, unwrap and slice into coins about a quarter inch thick. A sharp knife keeps the edges clean.
Storage And Serving Notes
Keep the slices in a sealed container in the fridge for up to a week. For longer storage, freeze them on a tray first, then move them to a bag so they don't clump. These treats are rich, so keep portions small.
One or two coins make a solid reward, and they're soft enough to break in half for training. Skip them entirely if your dog has a nut allergy.
7. Tuna & Oat Fudge Squares

Some dogs will do anything for a whiff of fish, and that's exactly what makes these squares so handy. Canned tuna packed in water gets mashed with oats and an egg, then pressed into a pan and chilled until firm. The result is a soft, stinky fudge that ranks as a high-value reward in most dogs' minds.
It's a smart pick for picky eaters who turn their nose up at plain biscuits. The strong smell alone pulls them in, and the soft texture works well for older dogs or puppies. You don't need any special equipment, just a bowl, a fork, and a little fridge space.
## Why the Stink Works in Your Favor Dogs lean on their noses far more than their taste buds. A treat that smells strongly gets their attention fast, which is why tuna outperforms bland ingredients in training moments. That fishy aroma also helps when you're competing with squirrels, other dogs, or a busy park.
A square of tuna fudge cuts through the noise. ## What You'll Need – One can of tuna packed in water, drained well – About one cup of rolled oats – One egg – Optional: a spoonful of plain yogurt or a little grated cheese Keep the tuna water-drained, not oil-packed. Oil makes the mixture greasy and harder to press into a firm square. ## Mixing and Setting the Squares Mash the tuna with a fork until it breaks apart, then stir in the egg and oats. You want a thick, sticky dough that holds together when you squeeze it.
Press the mixture into a small lined pan or shape it into a flat block on parchment. Chill it for at least an hour, then cut it into small squares. ## Storage and Serving Notes These keep in the fridge for about three to four days in a sealed container. For longer storage, freeze the squares on a tray and move them to a bag.
Because they contain fish and egg, treat them like fresh food. Toss any squares that smell off, and keep portions small since tuna is rich.
Why The Stink Works In Your Favor
Dogs lean on their noses far more than their taste buds. A treat that smells strongly gets their attention fast, which is why tuna outperforms bland ingredients in training moments. That fishy aroma also helps when you're competing with squirrels, other dogs, or a busy park.
A square of tuna fudge cuts through the noise.
What You'll Need
One can of tuna packed in water, drained well. About one cup of rolled oats. One egg.
Optional: a spoonful of plain yogurt or a little grated cheese. Keep the tuna water-drained, not oil-packed. Oil makes the mixture greasy and harder to press into a firm square.
Mixing And Setting The Squares
Mash the tuna with a fork until it breaks apart, then stir in the egg and oats. You want a thick, sticky dough that holds together when you squeeze it. Press the mixture into a small lined pan or shape it into a flat block on parchment.
Chill it for at least an hour, then cut it into small squares.
Storage And Serving Notes
These keep in the fridge for about three to four days in a sealed container. For longer storage, freeze the squares on a tray and move them to a bag. Because they contain fish and egg, treat them like fresh food.
Toss any squares that smell off, and keep portions small since tuna is rich.
8. Coconut Oil & Mint Fresh Breath Drops
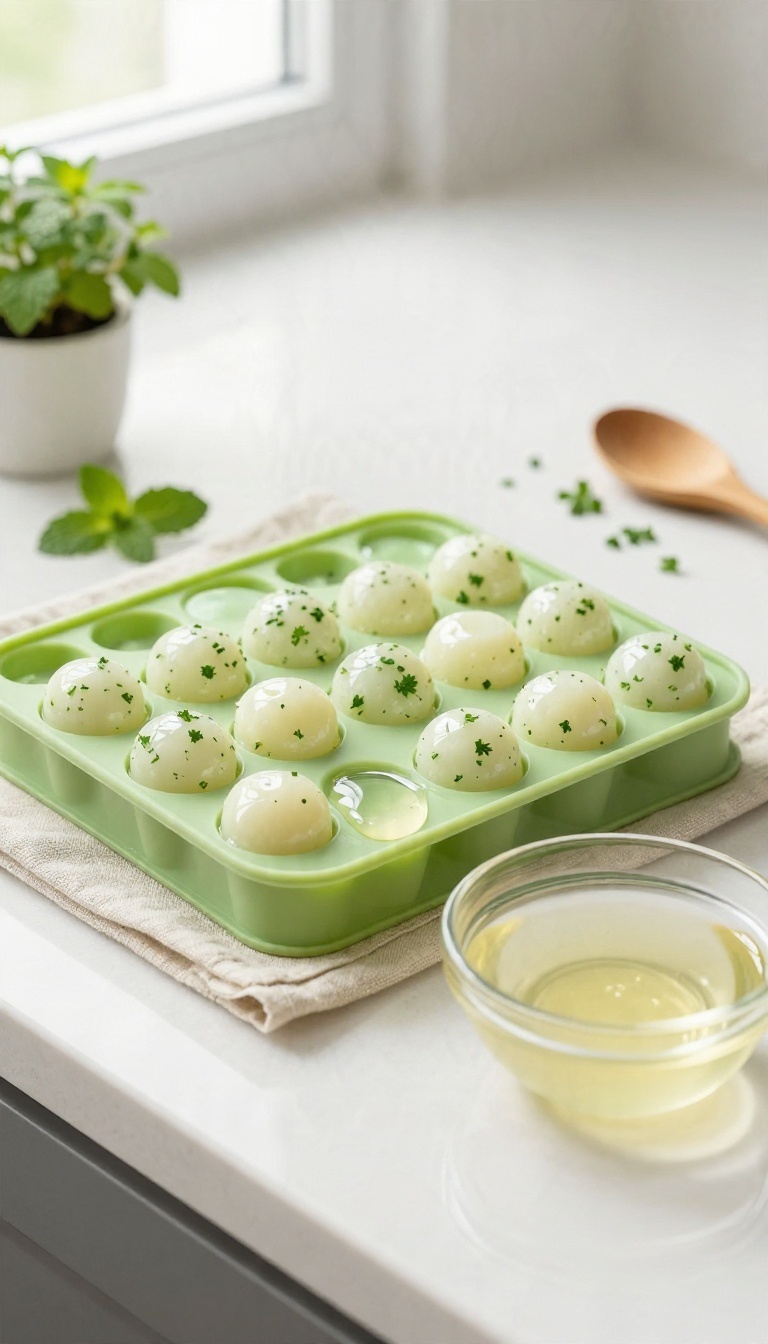
Dog breath has a way of announcing itself right when you're leaning in for a cuddle. These little frozen drops tackle that problem with three ingredients you probably already have. Coconut oil, fresh parsley, and a touch of mint get blended together, spooned into a mold, and chilled until firm.
The result is a cool, crunchy treat your dog will happily crunch through, and you get a little fresher breath in return.
The whole batch takes about ten minutes of hands-on work, plus an hour or so in the freezer. No stove, no oven, no fuss. Just melt, mix, and freeze.
Coconut oil is the base here. It holds everything together once it sets and gives each drop a satisfying snap when your dog bites down. Parsley and mint do the breath-freshening work, and both are safe for dogs in small amounts.
What You'll Need
Grab a half cup of coconut oil, a quarter cup of finely chopped fresh parsley, and about a tablespoon of fresh mint leaves, also chopped fine. You'll also want a silicone mold or an ice cube tray with small compartments. Keep the herbs chopped as small as you can manage.
Big leafy pieces make the drops harder to set and easier for your dog to pick out and leave on the floor.
Making The Drops
Melt the coconut oil gently until it's liquid, then stir in the parsley and mint. Give it a good mix so the herbs spread evenly instead of clumping at the bottom. Spoon the mixture into your mold, filling each compartment about three-quarters of the way.
Pop it in the freezer for an hour, or until the drops are solid. Store them in a sealed container in the fridge for up to two weeks, or freeze for longer storage.
Serving And Storage Tips
Start with one small drop for a dog under twenty pounds, and two for larger dogs. Coconut oil is rich, so too much at once can upset a sensitive stomach. These melt fast at room temperature, so hand them over straight from the fridge or freezer.
If your dog is a gulper, break the drops into smaller pieces to avoid any choking risk.
9. Blueberry & Oatmeal Energy Balls
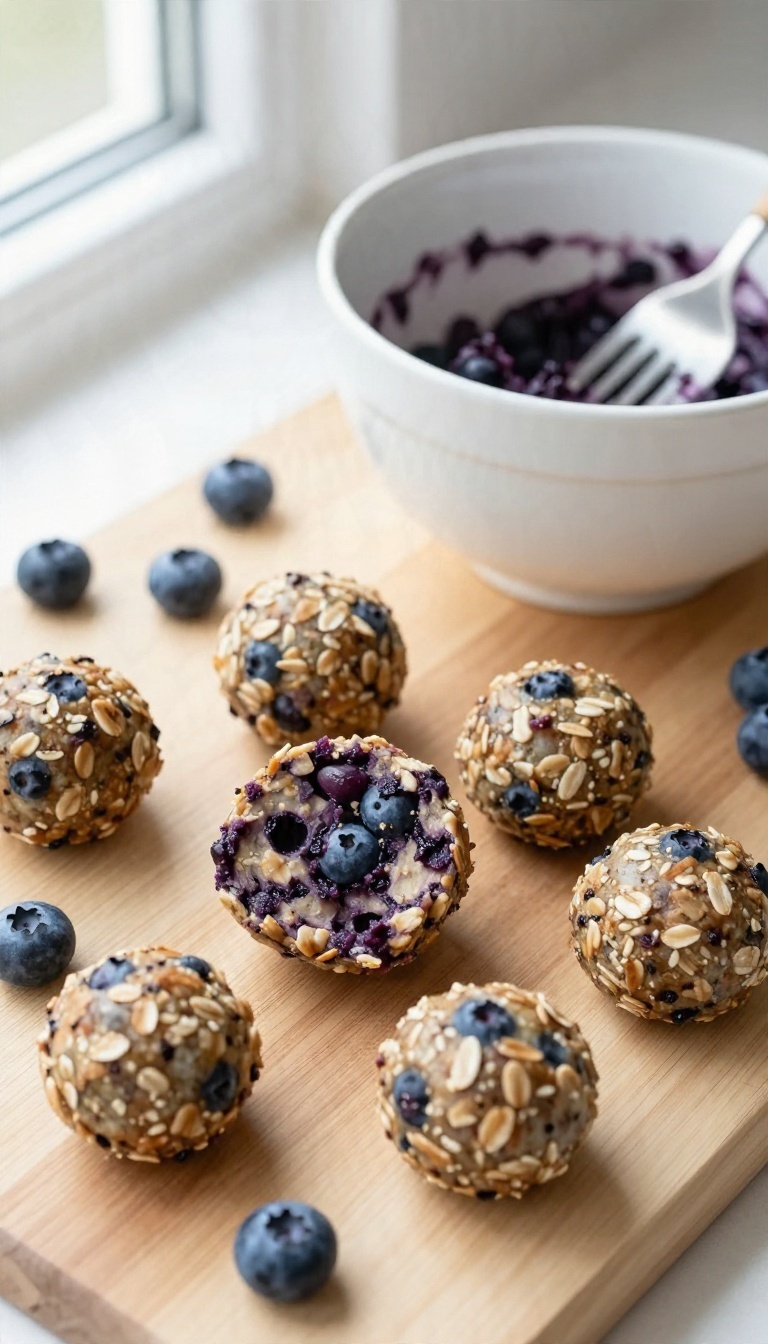
Blueberries and dogs are a better match than most people realize. The berries bring antioxidants and a soft, jammy sweetness, while rolled oats hold everything together without any baking. Mash them into a dough, roll it into balls, and you have a fruity treat that doubles as a puzzle toy filler.
This one takes about ten minutes and dirties a single bowl. It also freezes well, so you can keep a stash ready for busy weeks.
Start with about a cup of rolled oats and a third of a cup of fresh or frozen blueberries. Frozen berries work fine here, but thaw them first so they mash easily. Add a tablespoon of honey to bind the mix, or skip it entirely and use a spoonful of plain yogurt instead.
Mash everything together with a fork until it forms a sticky, cohesive dough. If the mixture feels too wet, add oats a tablespoon at a time. Too dry, and a splash of water or an extra berry will loosen it up.
Roll into small balls, about the size of a marble for small dogs or a golf ball for bigger ones. Chill them for twenty minutes to firm up before serving.
Why The Honey Matters (and When To Skip It)
Honey helps the balls hold their shape and adds a touch of sweetness dogs love. But it's still sugar, so keep the amount small and treat these as an occasional reward rather than a daily snack. Skip the honey completely for puppies under a year old, since honey can carry botulism spores that young immune systems can't handle.
A mashed banana makes a safe, sticky substitute that works just as well.
Stuffing Them Into Puzzle Toys
These balls are soft enough to press into the crevices of a Kong or a snuffle mat. Crumble one slightly and pack it in, then freeze the toy for a longer challenge. A frozen blueberry ball keeps a busy dog occupied for a good stretch, which makes it a solid option for crate time or when you need a few quiet minutes.
Just size the pieces to your dog so nothing becomes a choking risk.
Storage And Shelf Life
Keep the finished balls in an airtight container in the fridge for up to five days. For longer storage, freeze them on a tray first, then transfer to a bag. They'll keep for about two months that way.
Pull out a few the night before you need them and let them thaw in the fridge. They hold their texture well after freezing, so you won't lose much in the process.
10. Bacon & Egg Breakfast Bites
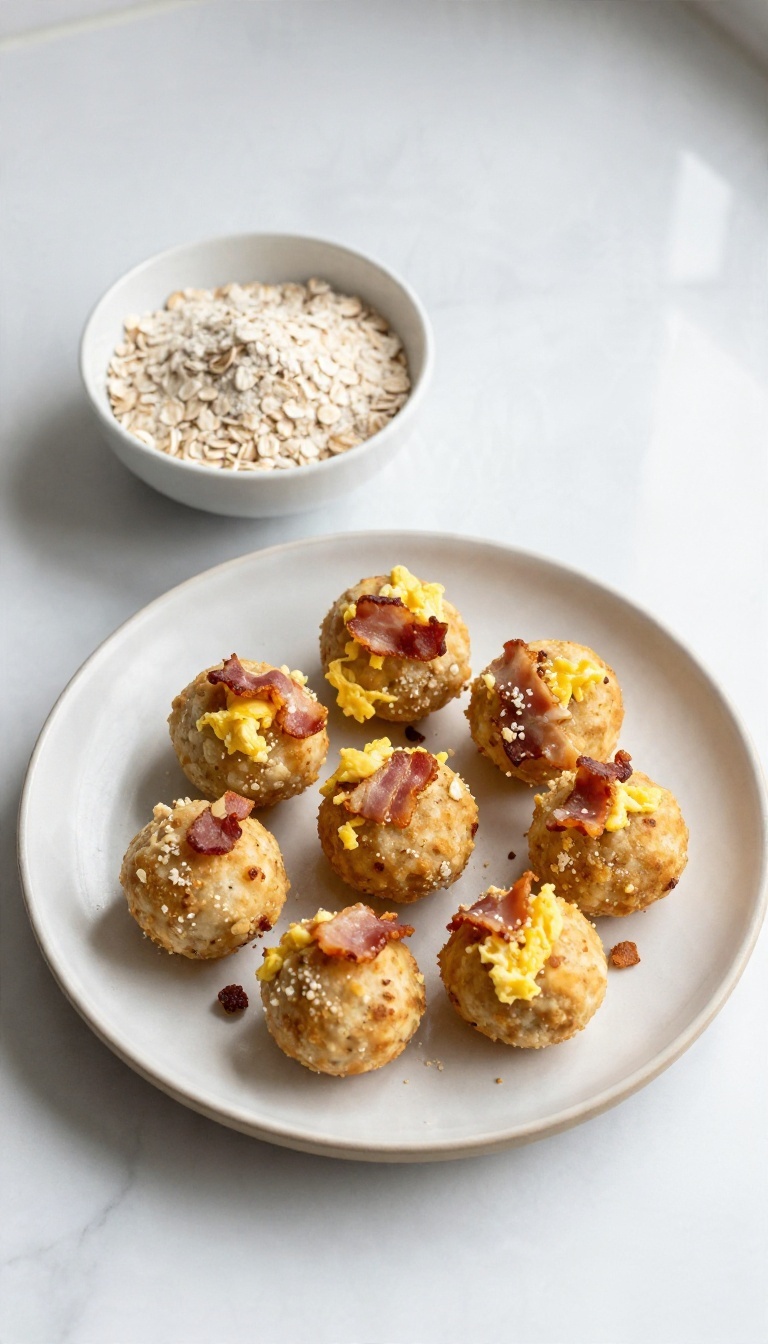
Sunday morning bacon and eggs aren't just for you. These savory bites turn that breakfast combo into a dog treat that disappears fast. The best part?
You can make a batch while you're already cooking breakfast and stash it in the fridge for the week ahead.
Start with two slices of bacon, cooked until crispy and crumbled into small pieces. In a bowl, scramble two eggs and cook them low and slow until just set, then let them cool completely. Mix the bacon and eggs with about a cup of oat flour until the mixture holds together when you squeeze it.
Roll into small balls and refrigerate for at least an hour to firm up. That's it—no oven, no fuss.
Why Dogs Go Crazy For These
Bacon brings that salty, smoky flavor dogs seem to detect from across the house. Eggs add protein and a soft texture that's easy to chew. Together, they make a high-value reward that works well for training or just saying good job.
Make-ahead And Storage Tips
These bites keep in an airtight container in the fridge for up to five days. You can also freeze them for longer storage—just thaw a few at a time. If the mixture feels too sticky, add a little more oat flour until it's easy to roll.
Keep It Safe
Cook the bacon without extra salt or seasoning, and make sure the eggs are fully cooked. Skip the bacon if your dog has pancreatitis or is on a low-fat diet. Always introduce new treats slowly and in small amounts.
11. No-Bake Liver & Herb Training Cubes

Some rewards need to hit harder than a plain biscuit. That's where liver comes in. It's stinky in the best way, packed with protein, and dogs treat it like currency.
Blend it with a few herbs, press the mix into a pan, and chill until firm. You end up with tiny cubes that carry serious value in distracting places.
These cubes work best as a high-value training reward. Think busy parks, noisy streets, or that moment your dog spots a squirrel and forgets you exist. A strong-smelling treat like liver can pull focus back to you fast.
The herbs add a little freshness and give the mix some structure. Best of all, there's no oven involved. Just a blender, a pan, and a bit of fridge time.
What You'll Need
Grab about half a pound of cooked liver. Chicken or beef both work, and leftovers are perfect here. Add a quarter cup of oat flour or ground oats to bind things together.
Toss in one egg for stickiness and a spoonful of plain yogurt for texture. For herbs, use a pinch of dried parsley and a smaller pinch of dried rosemary. Skip onion, garlic, and anything salty, since those aren't safe for dogs.
How To Make Them
Blend the liver, egg, yogurt, and herbs until smooth. Add the oat flour a little at a time until the mix holds together without being crumbly. Press it firmly into a small lined pan, aiming for about half an inch thick.
Smooth the top, cover it, and chill for at least two hours. Once set, cut it into tiny pea-sized cubes. Keep them small, since liver is rich and a little goes a long way.
Using Them In Training
These cubes shine when your dog is distracted. Pull one out during recall practice and let the smell do the work. Because they're soft, they break apart easily and won't slow you down mid-session.
Store them in the fridge for up to four days, or freeze the batch and pull out a few at a time. Just keep portions modest and count them toward your dog's daily food. Liver is a treat, not a meal.
FAQ
How long do no-bake dog treats last?
Most no-bake treats keep in the fridge for about 5 to 7 days. For longer storage, freeze them for up to 2 months and thaw as needed.
Can I use regular flour instead of coconut or oat flour?
Yes, but keep in mind that wheat flour isn't suitable for dogs with grain allergies. Oat and coconut flours are common grain-free swaps.
Are these treats safe for puppies?
Most are, but skip honey and any recipe with added salt or bacon for puppies under 6 months. Always check with your vet for age-specific advice.
What can I use instead of peanut butter?
Almond butter, sunflower seed butter, or mashed banana work well. Make sure any nut butter is xylitol-free, as xylitol is toxic to dogs.
Do I need special molds for the frozen treats?
No. Ice cube trays, silicone candy molds, or even small paper cups work fine. Just make sure the treats are small enough for your dog's size.
Conclusion
No-bake treats take the pressure off. You can throw a batch together after work, skip the oven entirely, and still hand your dog something you feel good about. Pick whichever idea matches what's already in your pantry and start there.
Keep portions small, store leftovers in the fridge, and adjust ingredients to fit your dog's needs. Once you land on a favorite, it becomes a quick habit rather than a project. Simple treats, happy dog, less fuss all around.