Grooming your dog at home doesn't have to be a messy or expensive chore. With a few smart tweaks, you can turn any corner into a functional grooming space that works for both you and your pup.
Start by assessing your current setup—maybe it's a bathroom, laundry room, or even a spot in the garage. A little organization goes a long way in making grooming sessions smoother and more enjoyable.
These ideas focus on safety, comfort, and practicality, so you can tackle everything from brushing to nail trims with confidence. Let's dive into ways to upgrade your routine without breaking the bank.
1. Create a Non-Slip Grooming Mat for Stability
Ever notice your dog sliding around during bath time? A non-slip mat can make grooming feel less like a chore and more like a calm routine. It's a simple fix that adds safety and comfort, turning any slippery surface into a secure spot for brushing or washing.
Dogs often get anxious when they lose their footing, so this mat helps them stay put and relaxed. You'll find it's a game-changer for keeping sessions smooth and stress-free, whether you're in a bathroom or garage.
Why It Works
A non-slip mat provides traction that prevents slips, reducing the risk of injuries for both you and your dog. It also minimizes movement, making grooming tasks like nail trimming or fur drying easier and safer.
Best For
This idea is perfect for owners with active or nervous dogs, especially in homes with tile or hardwood floors. It works well in apartments or houses where space is limited but safety is a priority.
Practical Tip
Place the mat in a corner of your grooming area to define the space and keep it tidy. Choose a waterproof material for easy cleanup after baths, and ensure it's large enough for your dog to stand comfortably without edges curling up.
Budget-Friendly Option
If you don't want to buy a new mat, use an old rubber-backed bathmat or cut textured tiles from a hardware store. These options offer similar grip at a lower cost and can be customized to fit your space.
2. Set Up a Portable Grooming Station in Small Spaces
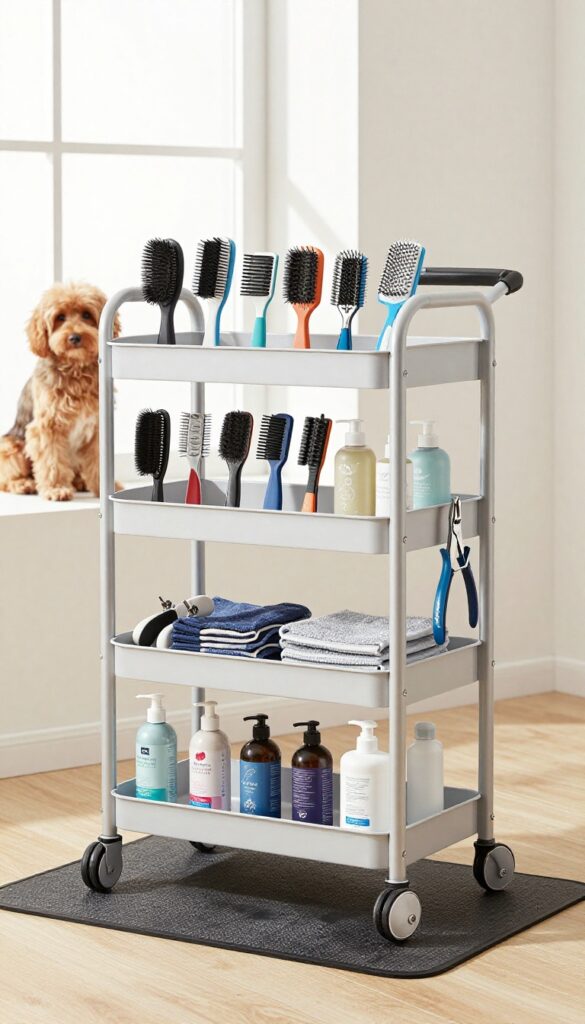
Living in a cozy apartment or a home where every inch counts? A portable grooming station lets you create a dedicated spot for brushing, trimming, and cleaning without needing a permanent setup. It's all about flexibility—you can roll it out when it's grooming time and tuck it away neatly afterward.
Dog owners love how it keeps supplies organized and reduces clutter, making those sessions less stressful for both you and your furry friend.
Why It Works
This idea works because it maximizes limited space efficiently. By using a rolling cart or foldable table, you centralize all your grooming tools in one accessible spot, which speeds up the process and minimizes mess. It's easy to move around, so you can groom in the best-lit area or near a sink for quick cleanups.
Best For
This setup is perfect for apartment dwellers, renters, or anyone with multi-use rooms like living areas or small bathrooms. It suits dogs of all sizes, especially those who might get anxious in fixed grooming spots, as you can adapt the location to keep them calm.
Practical Tip
Choose a cart with sturdy wheels and multiple shelves to hold brushes, shampoos, towels, and nail clippers. Add non-slip mats on top to prevent your dog from sliding during grooming. Keep it stocked with essentials so everything is within reach, and wipe it down after each use to maintain hygiene.
Budget-Friendly Option
If a new cart isn't in the budget, repurpose an old utility cart or use a sturdy folding TV tray table. You can organize supplies in baskets or bins you already have at home to keep costs low while still creating a functional mobile hub.
3. DIY a Gentle Dog Shower Attachment for Bath Time
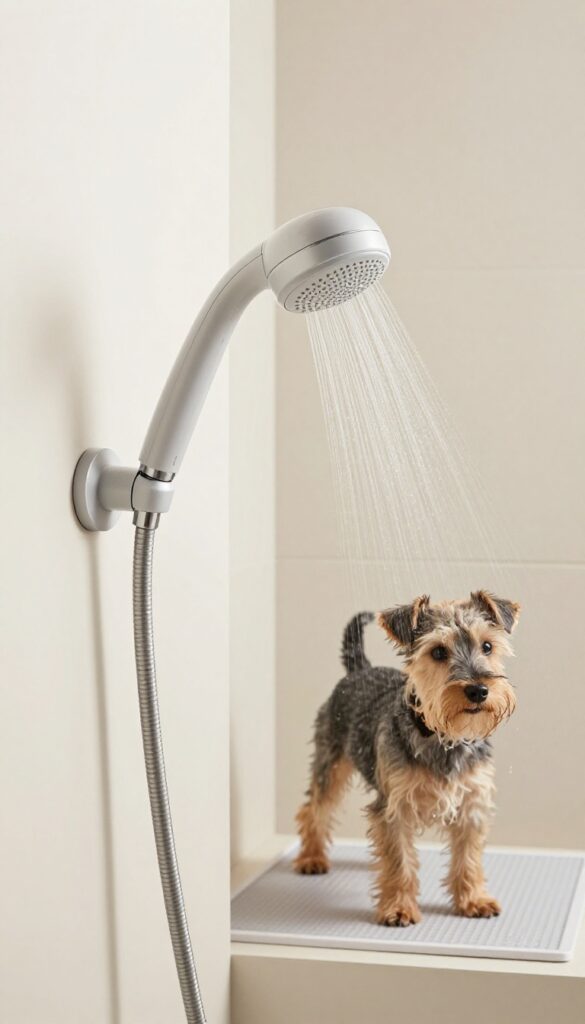
Bath time can turn into a splashy struggle if your dog hates the water pressure from a regular showerhead. A simple handheld attachment with a soft spray setting lets you rinse them gently, reducing stress for both of you. Many dog owners find this tweak makes grooming sessions quicker and more pleasant, especially in tight spaces like bathrooms or laundry rooms.
Why It Works
This idea works because it mimics the gentle flow of a hose or sink, which dogs often tolerate better than harsh streams. The adjustable spray helps you control the water direction and intensity, making it easier to rinse shampoo thoroughly without startling your pup. It's a small change that can transform bath time from a chore into a smoother routine.
Best For
This setup is ideal for water-shy breeds like Terriers or small dogs that get nervous during baths. It also fits well in apartments or homes with limited bathing areas, where every drop counts and you need efficient cleanup. If your dog tends to squirm or hide when wet, this attachment can help keep things calm and contained.
Practical Tip
Mount the showerhead at a comfortable height on your wall or use a hook to keep it accessible. Choose one with rubberized grips to prevent slips, and test the spray settings before bringing your dog in. After each use, wipe it down to prevent mineral buildup and store it out of reach to avoid accidental messes.
4. Organize Grooming Tools in a Hanging Wall Caddy
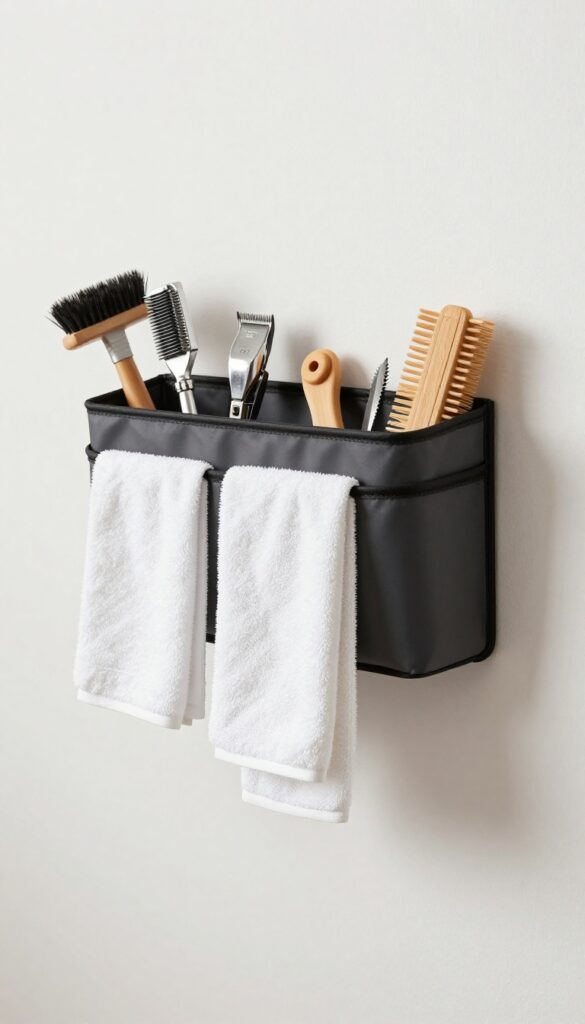
A hanging wall caddy transforms cluttered grooming supplies into an accessible, space-saving station. Mount it near your grooming area to keep brushes, clippers, and towels within arm's reach. Dog owners love how it speeds up cleanup and keeps counters clear for more important tasks.
Why It Works
This setup reduces the time spent searching for tools during grooming sessions. Everything stays organized and visible, so you can focus on your dog instead of rummaging through drawers. It also minimizes mess by containing stray fur and accessories in one spot.
Best For
This idea suits small homes or apartments where counter space is limited. It's great for multi-dog households or breeds that require frequent grooming, like Poodles or Golden Retrievers. Anyone with a dedicated grooming corner will find it boosts efficiency.
Practical Tip
Choose a fabric caddy for lightweight items or a plastic one for durability with wet towels. Mount it at eye level in a dry area to prevent mold. Label pockets if you have multiple dogs or tools to keep things sorted quickly.
Budget-Friendly Option
Repurpose an old shoe organizer or use command hooks with fabric bins as a low-cost alternative. Look for second-hand caddies at thrift stores to save money while keeping your space tidy.
5. Build a Simple Elevated Drying Rack for Wet Dogs
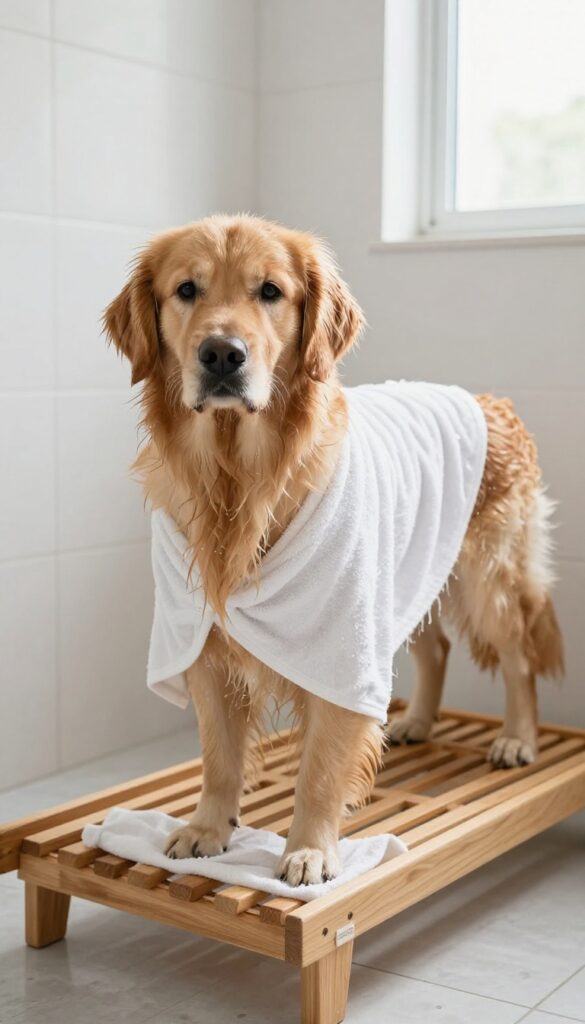
After a bath, wet dogs can leave puddles and damp spots all over your floors. An elevated drying rack lifts your pup off the ground, letting air circulate underneath to speed up drying. It's a straightforward solution that keeps messes contained and makes post-bath time less of a hassle.
Why It Works
Elevating your dog allows moisture to evaporate more quickly from their fur and the surface below. This reduces the risk of mold or mildew on your floors and helps prevent slipping accidents. Plus, it keeps your dog in one spot, so you can easily towel them off without chasing them around.
Best For
This idea is great for dog owners with tile or hardwood floors that get slippery when wet. It works well for medium to large breeds that take longer to dry, but smaller dogs benefit too. If you have limited space, like in an apartment bathroom, it helps keep the area tidy.
Practical Tip
Use a low bench or DIY platform with non-slip feet for stability. Add absorbent mats or old towels on top to soak up water and provide comfort. Place it near a vent or fan for better airflow, and ensure it's easy to clean by choosing waterproof materials.
Budget-Friendly Option
Instead of buying a specialized rack, repurpose an old coffee table or sturdy crate covered with a towel. You can also use plastic storage bins flipped upside down with mats on top. Look for second-hand items at thrift stores to save money while keeping it functional.
6. Craft a Calming Grooming Corner with Soft Lighting
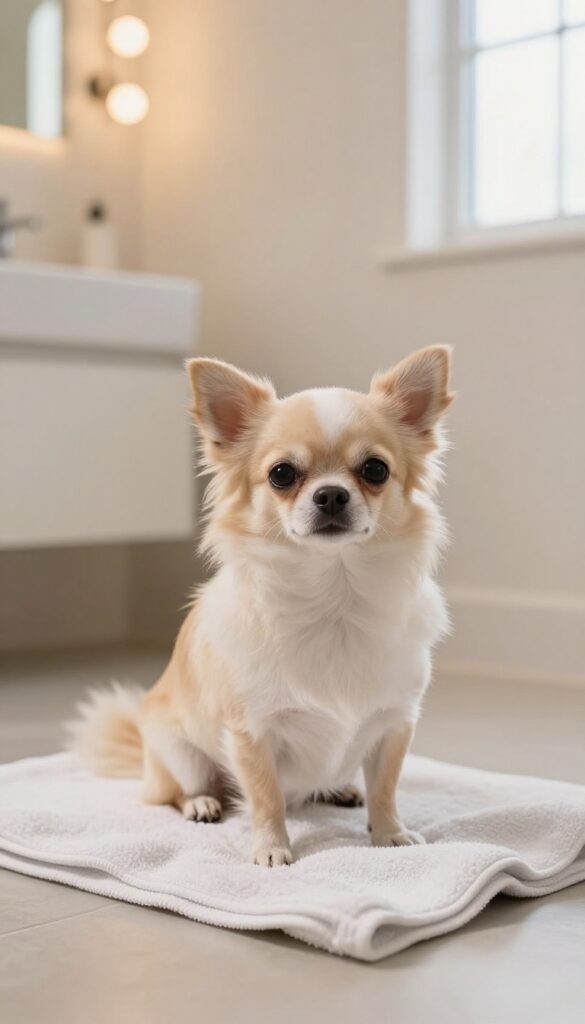
Soft lighting can transform a grooming session from stressful to serene for your dog. By adding dimmable lamps or gentle string lights, you create a cozy atmosphere that helps nervous pups relax. Many owners find this simple tweak makes brushing and trimming much smoother, as dogs feel more at ease in the warm glow.
Why It Works
Dogs often get anxious in bright, harsh light during grooming, which can lead to fidgeting or resistance. Soft lighting reduces glare and shadows, mimicking a calm environment that encourages stillness. This makes it easier to handle tools safely and keeps your dog comfortable throughout the process.
Best For
This idea is perfect for dogs who get jittery during grooming, especially breeds like Chihuahuas or rescue dogs with anxiety. It works well in small spaces like bathrooms or laundry rooms where you can control the lighting easily, making it great for apartments or homes with limited natural light.
Practical Tip
Place lamps on a stable surface away from water sources to prevent accidents. Use warm-toned bulbs to avoid harshness, and position lights so they illuminate your work area without shining directly in your dog's eyes. Keep cords tucked away to minimize tripping hazards and ensure easy cleanup after sessions.
7. Make Your Own Natural Paw Wipes for Quick Cleanups
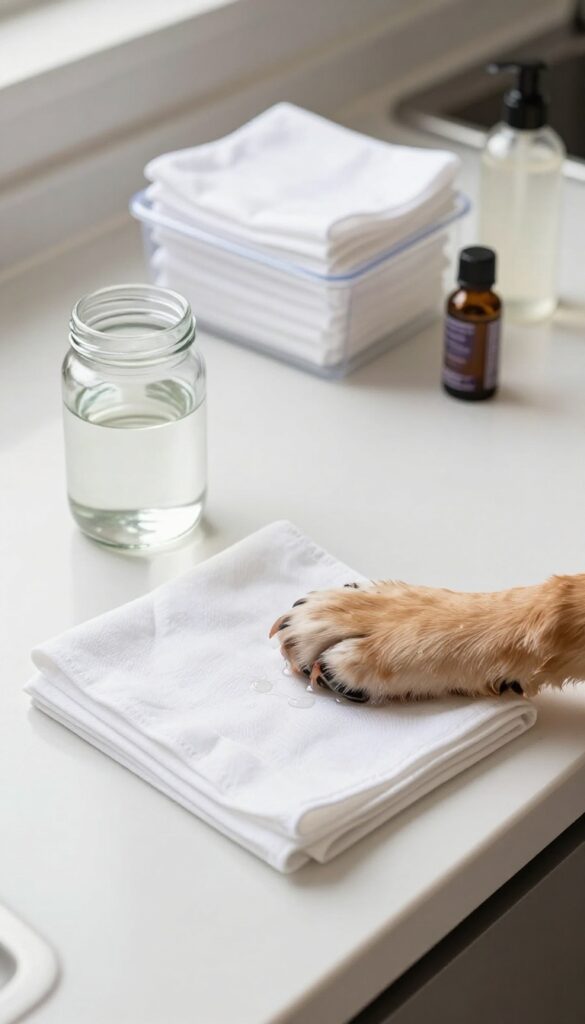
Keeping your home clean after muddy walks doesn't have to mean buying expensive disposable wipes. With a simple homemade solution, you can create reusable paw wipes that are gentle on your dog's skin and easy on your wallet. Dog owners love this idea because it cuts down on waste and lets you control exactly what touches their paws, making post-walk cleanup a breeze.
Why It Works
These wipes work by combining water with mild soap and a drop of essential oil like lavender or chamomile, which helps soothe paws while removing dirt. The reusable cloths hold up well through multiple uses, and the natural ingredients reduce the risk of irritation compared to some store-bought options with harsh chemicals.
Best For
This idea fits best for busy pet parents in apartments or homes with limited outdoor space, where tracking in mud is common. It's especially handy for dogs with sensitive skin or allergies, as you can skip fragrances and adjust the recipe to suit their needs.
Practical Tip
Store your paw wipes in a sealed container near the door you use for walks, so they're always within reach. Use soft cotton cloths or old t-shirts cut into squares—just toss them in the wash after use to keep things hygienic and ready for next time.
Budget-Friendly Option
If you don't have essential oils on hand, skip them entirely; the water and mild soap alone will still clean effectively. For cloths, repurpose old towels or flannel scraps instead of buying new ones to save even more.
8. Design a DIY Nail Trimming Guide for Precision

Nail trimming often feels like a high-stakes game of guesswork, but a simple guide can take the stress out of the process. By creating a visual aid, you'll know exactly where to cut without risking the quick. Dog owners love this approach because it builds confidence and makes grooming sessions quicker and safer for everyone involved.
Why It Works
A DIY guide eliminates the fear of cutting too short by providing a clear reference point. Whether you use marked clippers or a cardboard template, it helps you avoid the sensitive quick, reducing pain and anxiety for your dog. This method turns a daunting task into a straightforward routine that anyone can master with practice.
Best For
This idea is perfect for nervous first-time groomers or anyone with a dog who squirms during nail trims. It works well for all breeds, especially those with dark nails where the quick is hard to see. Apartment dwellers and busy households will appreciate how it streamlines care without needing extra space.
Practical Tip
Set up in a well-lit area with non-slip mats to keep your dog steady. Practice with treats and praise to create positive associations, and store your guide with clippers for easy access. Clean tools after each use to maintain hygiene and extend their lifespan.
Budget-Friendly Option
Instead of buying specialty clippers, use a permanent marker to add lines on your existing ones. For a template, repurpose cardboard from packaging—it's free and just as effective as fancier materials.
9. Set Up a Dedicated Brushing Area with Easy Cleanup
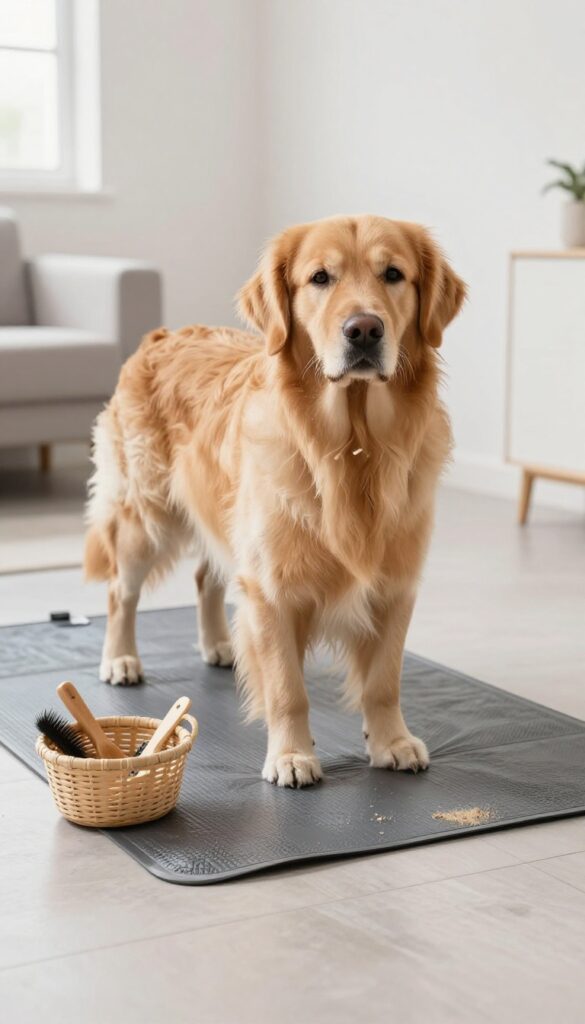
Brushing your dog can quickly turn into a furry mess that spreads all over your home. By creating a simple, designated spot for grooming, you keep the chaos contained and make cleanup a breeze. It's one of those small changes that saves you time and keeps your space looking neat without any fuss.
Why It Works
A mat or tray catches loose fur as you brush, preventing it from floating onto floors or furniture. This setup means you're not chasing down stray hairs later—just roll up the mat and shake it out outside or into a trash bin. It's efficient and reduces the overall cleaning effort after each session.
Best For
This idea is perfect for dog owners in apartments or small homes where space is limited. It works well for breeds that shed heavily, like Golden Retrievers or Huskies, but any dog can benefit from a tidy brushing corner.
Practical Tip
Choose a waterproof or washable mat for easy maintenance, and place it in a spot with good lighting so you can see what you're doing. Keep grooming tools nearby in a small basket to avoid clutter and make the area inviting for your pup.
Budget-Friendly Option
If you don't want to buy a special mat, an old towel or a piece of vinyl flooring can work just as well. Lay it flat under your dog during brushing, then shake it off or toss it in the wash for a cost-effective solution.
10. Create a Homemade Ear Cleaning Solution for Routine Care
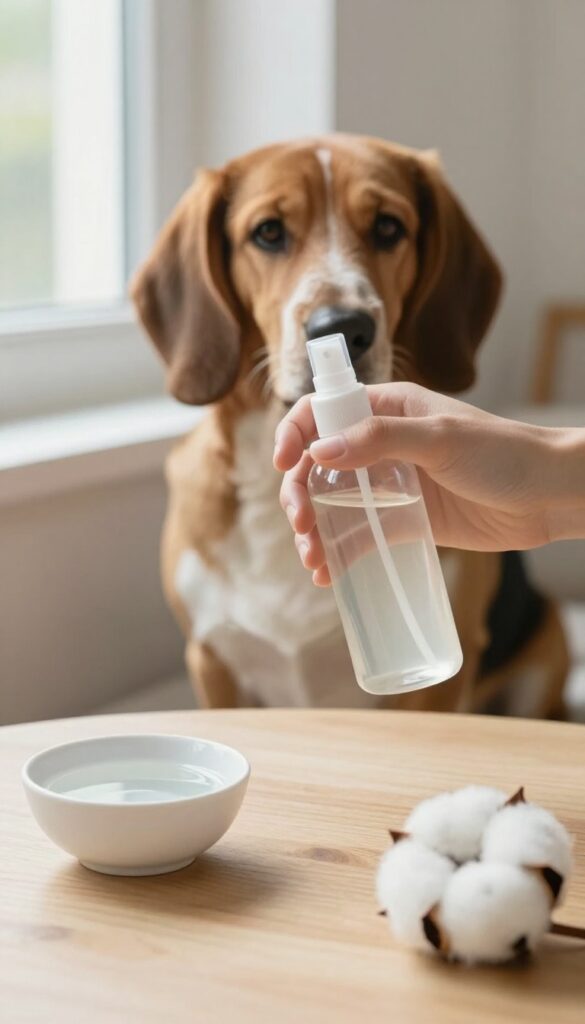
Keeping your dog's ears clean doesn't require fancy products or a trip to the store. A simple spray bottle with vinegar and water can do the trick, offering a gentle way to maintain ear health between grooming sessions.
Many dog owners appreciate this approach because it's easy to mix up, uses ingredients you likely have on hand, and avoids harsh chemicals that might irritate sensitive ears. It's a small step that fits smoothly into your regular care routine.
Why It Works
Vinegar has mild antibacterial properties that help prevent buildup and infections, while diluting it with water makes it safe for regular use. This homemade solution cleans without stripping natural oils, keeping ears comfortable and reducing odor.
Best For
This idea is great for dogs prone to ear issues like floppy-eared breeds such as Basset Hounds or Cocker Spaniels, but it works well for any dog as part of preventive care. It's also ideal for budget-conscious owners or those living in apartments where storage space is limited.
Practical Tip
Store the spray bottle in a cool, dry place like a bathroom cabinet or grooming kit to keep it handy. Always test a small amount on your dog's skin first to check for reactions, and use cotton balls or soft cloths to wipe away excess—never insert anything deep into the ear canal.
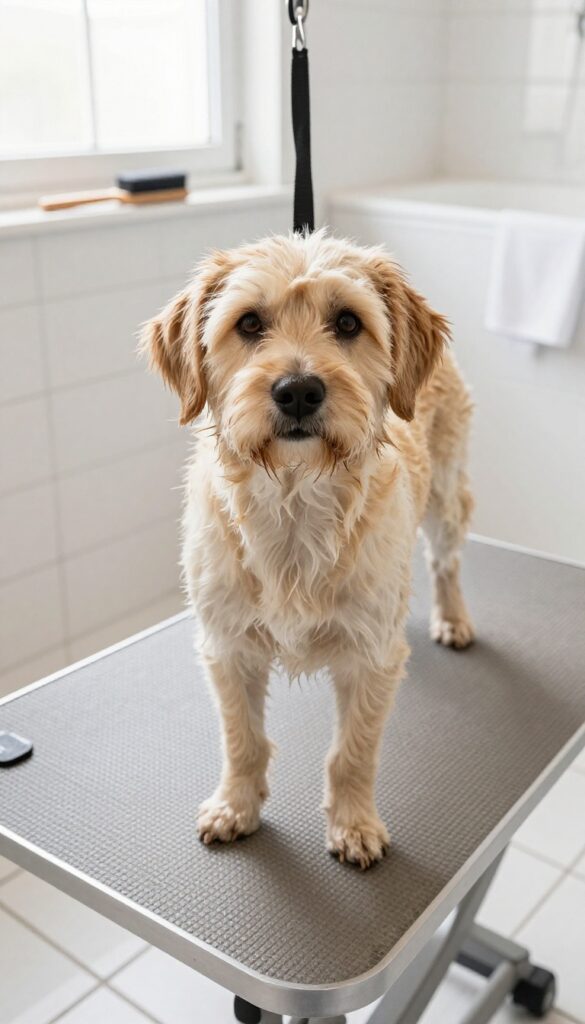
11. Install a Low-Cost Grooming Arm for Restraint
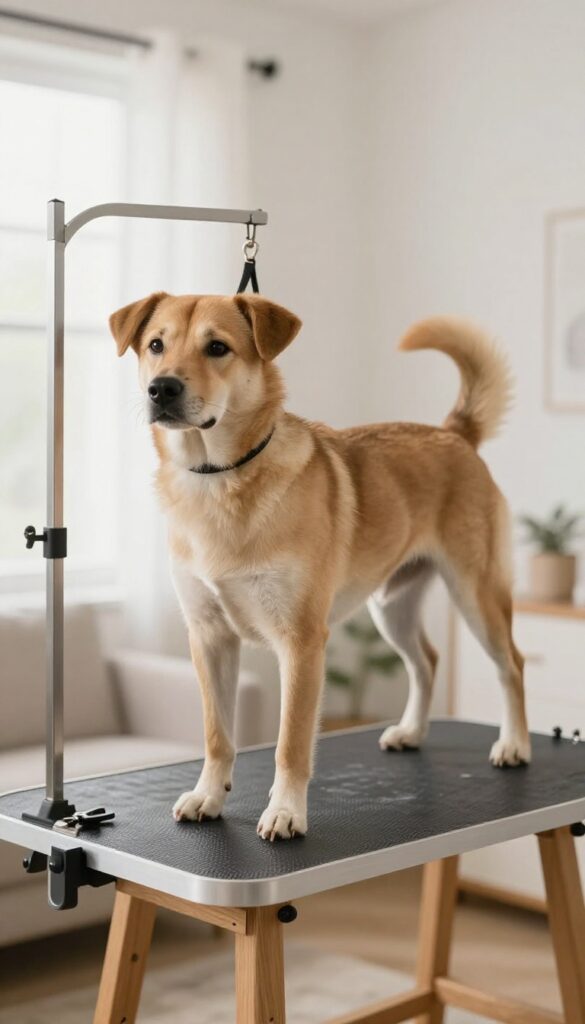
Ever tried grooming a wiggly dog on a slippery table? It can turn into a balancing act that stresses both of you out. A simple grooming arm attached to your table offers gentle restraint, keeping your pup secure and making the whole process safer and more manageable.
This setup is all about control without force. By clipping a leash or arm to the table, you prevent sudden movements that could lead to slips or nicks, allowing you to focus on brushing or trimming with confidence.
Dog owners love it because it's affordable and easy to install. You don't need fancy equipment—just a sturdy clip and a bit of DIY spirit to create a grooming station that feels professional yet cozy.
Why It Works
A grooming arm works by providing a stable anchor point. This reduces your dog's ability to jump or shift unexpectedly, which minimizes accidents and helps them feel more settled. With less struggling, grooming becomes quicker and less stressful for everyone involved.
Best For
This idea is perfect for medium to large dogs who tend to be restless during grooming sessions. It's also great for apartment dwellers or anyone with limited space, as it turns any sturdy table into a multi-use spot without needing a dedicated grooming table.
Practical Tip
Choose a non-slip mat for the table surface to add extra stability. Position the arm at a height that allows your dog to stand comfortably without straining their neck, and always use a quick-release clip for safety in case they panic.
Budget-Friendly Option
If you're on a tight budget, repurpose an old leash with a carabiner clip instead of buying a specialized arm. Just loop it around a table leg or secure it to a heavy piece of furniture—it provides similar restraint at nearly no cost.
12. DIY a Cooling Mat for Summer Grooming Sessions
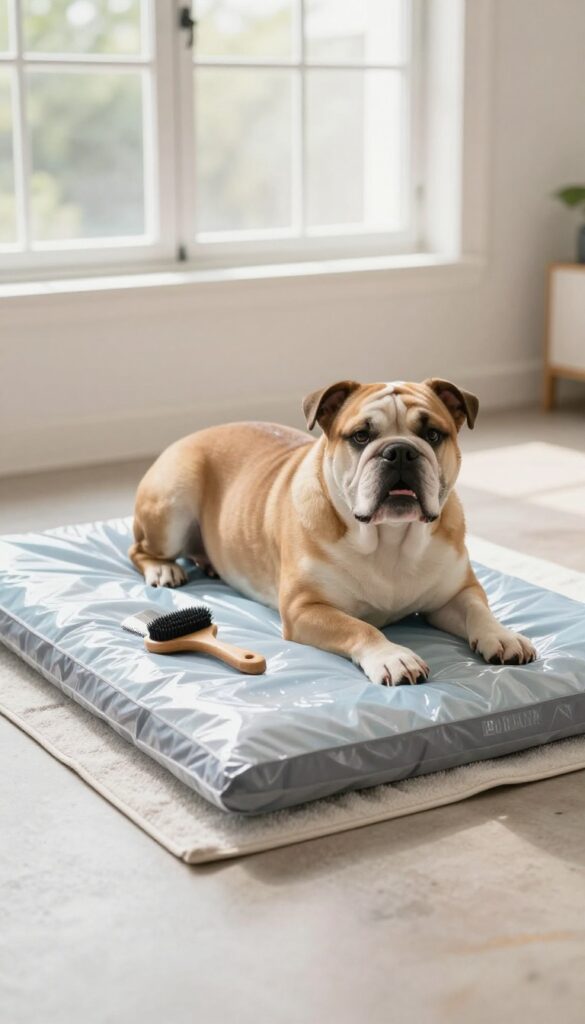
Summer grooming can turn into a sweaty ordeal for both you and your dog, especially in warm spaces like garages or sunny corners. A DIY cooling mat offers a simple fix to keep your pup comfortable and calm during those sessions. It's a budget-friendly project that adds a touch of relief without needing fancy equipment.
Why It Works
Filling a sealed mat with gel or water creates a cool surface that helps regulate your dog's body temperature, preventing overheating. This makes grooming less stressful and more enjoyable, encouraging your dog to stay still and cooperative.
Best For
This idea is perfect for dog owners in hot climates or homes without air conditioning during grooming. It works well for breeds prone to overheating, like Bulldogs or thick-coated dogs, and fits easily in small apartments or dedicated grooming areas.
Practical Tip
Place the mat on a non-slip surface to prevent sliding during use. For easy cleanup, choose a waterproof cover and store it flat when not in use to maintain its shape and cooling effectiveness.
Budget-Friendly Option
Instead of buying a pre-made gel mat, use a sealed plastic bag filled with water or repurpose an old pillowcase stuffed with frozen peas wrapped in a towel for a quick, reusable option.
13. Organize a First-Aid Kit Specifically for Grooming Mishaps
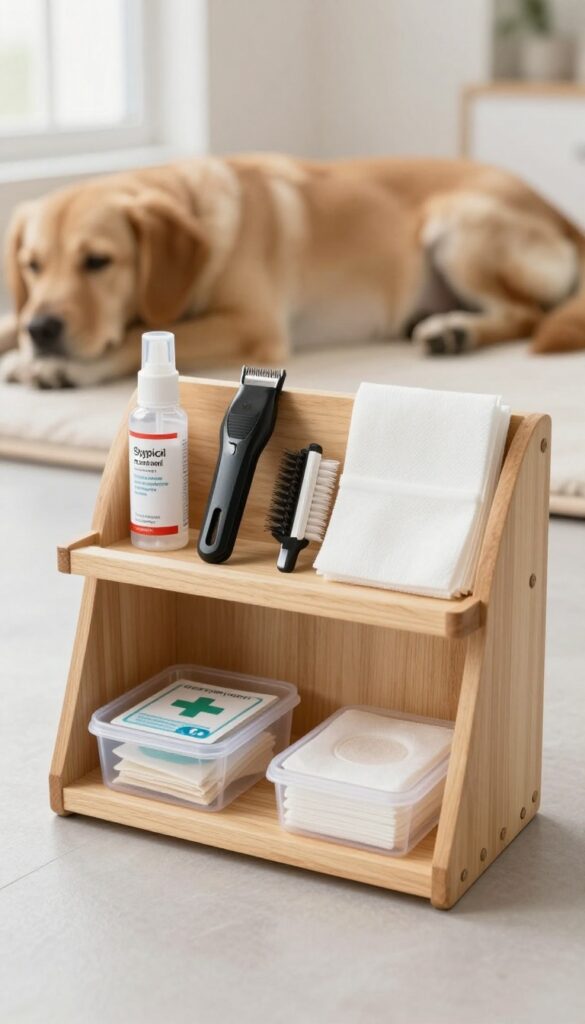
Even the most careful grooming session can lead to a small nick or cut, and having supplies ready helps you stay calm and handle it quickly. A dedicated first-aid kit means you're not scrambling through bathroom cabinets while your dog gets anxious. It's a simple step that makes home grooming feel more professional and less stressful for both of you.
Why It Works
This kit works because it puts essential items like styptic powder, bandages, and antiseptic wipes in one accessible spot. You can address minor injuries immediately, preventing them from worsening and keeping your dog comfortable. It turns a potential panic moment into a manageable part of your routine.
Best For
This idea fits any dog owner who grooms at home, especially those with active or sensitive dogs prone to wiggling during nail trims or brushing. It's great for apartments or houses where storage is limited, as the kit stays compact and out of the way until needed.
Practical Tip
Store the kit in your grooming area, like a shelf or drawer near your tools, so it's always within reach. Use a small container with clear labels to keep items organized and easy to find during a quick glance. Check supplies every few months to replace anything used or expired.
FAQ
How often should I groom my dog at home?
It depends on your dog's breed and coat type, but aim for brushing a few times a week and baths every 4-6 weeks, with nail trims as needed.
What essential tools do I need for DIY dog grooming?
Start with a good brush, nail clippers, dog-safe shampoo, a non-slip mat, and towels. Add tools like clippers or a drying rack as you get more comfortable.
How can I make grooming less stressful for my dog?
Keep sessions short, use positive reinforcement with treats, and create a calm environment with soft lighting and familiar sounds to help your dog relax.
Are DIY grooming products safe for all dogs?
Most are safe if you use mild, dog-specific ingredients, but always patch-test new solutions and avoid harsh chemicals, especially for sensitive breeds.
Can I groom my dog if I live in a small apartment?
Absolutely! Use portable stations, foldable mats, and multi-purpose tools to maximize space, and groom in areas like bathrooms for easy cleanup.
Conclusion
With these DIY ideas, grooming your dog at home becomes a manageable and even enjoyable part of your routine. Focus on safety and comfort to build trust and keep your pup looking their best.
Start with one or two projects that fit your space and budget, then gradually expand your setup. Remember, consistency and patience make all the difference in creating a stress-free grooming experience for both you and your furry friend.

I’m Pallab Kishore, the owner of Little Pets Realm — an animal lover and pet care enthusiast sharing easy tips, healthy recipes, and honest advice to help every small pet live a happy, healthy, tail-wagging life.