
You walk into your living room on Saturday morning, and somehow the clutter has multiplied overnight. The dust bunnies under the couch have formed their own ecosystem. It's not that you don't clean—it's that the usual approach of tackling everything at once leaves you exhausted and your home only half-fresh.
A weekly cleaning checklist changes the game. Instead of marathon cleaning sessions, you spread tasks across the week in short, focused bursts. This keeps your home consistently tidy without burning you out.
These 23 ideas cover every room and surface, from quick daily resets to deeper weekly tasks. Pick the ones that fit your lifestyle and watch your home stay fresh with less effort.
1. Monday: Kitchen Reset – Wipe Down All Surfaces
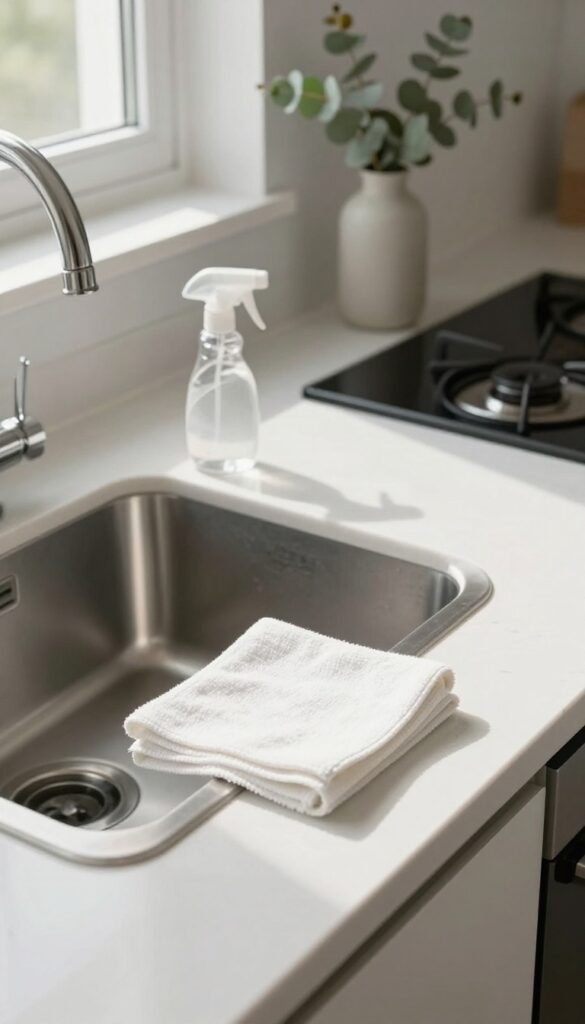
Monday mornings can feel chaotic, but a quick kitchen reset sets a calm tone for the week. By wiping down countertops, the stovetop, and the sink, you erase any weekend residue and start with a clean slate. This simple habit prevents grime from building up and makes your kitchen feel more inviting every time you walk in.
A full kitchen deep-clean can wait. For this daily reset, focus on the high-touch areas that get the most use. A spray of all-purpose cleaner and a microfiber cloth are all you need.
Hit the counters, the stovetop (after it cools), and the sink. Don't forget the handles and knobs—they collect grease and fingerprints quickly. This five-minute wipe-down keeps your kitchen looking fresh and prevents stuck-on messes from becoming a weekend project.
Why Monday?
Monday sets the tone for the week. A clean kitchen means you're more likely to cook at home and less likely to order takeout. It also reduces morning stress when you're rushing to make coffee or pack lunch.
What You'll Need
Keep a spray bottle of all-purpose cleaner or a gentle degreaser under the sink, plus a stack of microfiber cloths. Microfiber picks up grime without scratching surfaces and can be washed and reused.
Pro Tip: Work Top To Bottom
Start with higher surfaces like the stovetop and backsplash, then move to counters, and finish with the sink. This way, any splatters or drips fall onto areas you haven't cleaned yet, saving you from re-wiping.
2. Tuesday: Bathroom Deep Clean – Scrub the Toilet and Sink
Tuesday is the perfect day to give your bathroom some focused attention. By now, the weekend is behind you, and the bathroom has seen a few days of use. A quick deep clean midweek prevents grime from building up and keeps the space feeling fresh without a major weekend scrub session.
Start by gathering your supplies: a toilet bowl cleaner, a scrub brush, an all-purpose cleaner, a microfiber cloth, and a glass cleaner. Squirt the toilet bowl cleaner around the rim and let it sit while you work on the sink. Spray the sink with all-purpose cleaner and scrub the basin, faucet, and handles.
Wipe down the mirror with glass cleaner for a streak-free shine. Return to the toilet, scrub the bowl thoroughly, and flush. Finally, wipe down the toilet seat, lid, and exterior with a disinfecting wipe or spray.
What You’ll Need
Gather a toilet bowl cleaner with a curved nozzle, a dedicated toilet brush, an all-purpose cleaner or disinfectant spray, microfiber cloths (color-coded for bathroom use), and a glass cleaner. Having everything ready makes the job quick and efficient.
Step-by-step Process
Apply toilet bowl cleaner and let it sit. Meanwhile, spray the sink and faucet with all-purpose cleaner, scrub, and rinse. Clean the mirror with glass cleaner.
Then scrub the toilet bowl, flush, and wipe down the exterior surfaces. Finish by wiping the counter and any bathroom fixtures.
Pro Tips For A Faster Clean
Keep a small caddy with your bathroom cleaning supplies under the sink so you can grab it in seconds. Use a squeegee on the mirror after cleaning to prevent streaks. For tough toilet stains, use a pumice stone gently on porcelain.
Wipe down the shower walls with a daily spray to reduce weekly buildup.
3. Wednesday: Vacuum and Mop High-Traffic Areas
By Wednesday, the entryway, kitchen, and hallways have taken a beating. These are the zones where shoes drop dirt, crumbs fall, and daily life leaves its mark. A quick targeted clean here stops grime from migrating into your whole house.
Start With A Quick Declutter
Before you vacuum, pick up anything on the floor—shoes, bags, mail, pet toys. This takes two minutes and makes the vacuuming way more effective. It also gives you a chance to spot any spills or stains that need pre-treatment.
Vacuum Like A Pro
Use your vacuum's hard floor setting or switch to a dedicated hard floor tool. Go over entry mats both sides, then hit the kitchen floor, paying extra attention under the dining table and near the trash can. Don't forget baseboards and corners where dust bunnies hide.
Mop Without The Mess
Use a microfiber mop with a bucket of warm water and a few drops of dish soap or a floor cleaner safe for your surface. Work from the farthest corner toward the exit so you don't walk on wet floors. Let it air dry completely before moving rugs back.
Finish With A Quick Touch-up
Wipe down the bottom of your front door, the door frame, and any light switches near the entry. Spray a little disinfectant on the doormat if it's washable. This extra step keeps the first impression of your home fresh all week.
4. Thursday: Dust Living Room Surfaces
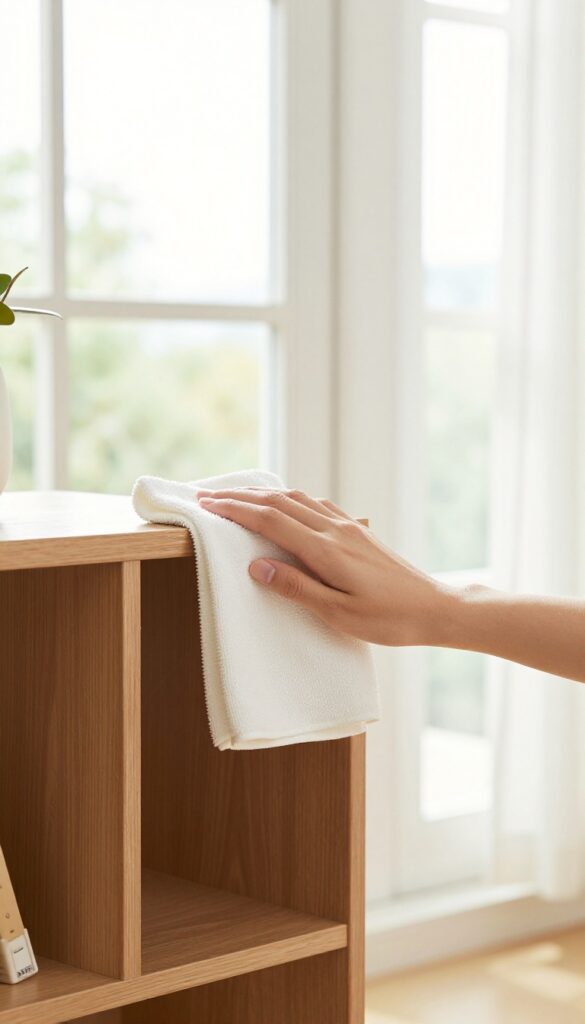
Thursday is the perfect day to give your living room some love before the weekend rush. Dust settles on every surface, from the TV screen to the bookshelf, and if left alone, it just keeps building. A targeted dusting session keeps the room looking crisp and feeling fresh without much effort.
Start by grabbing a microfiber cloth—it traps dust instead of pushing it around like a feather duster. Work from top to bottom: ceiling fans, high shelves, then lower surfaces. Don't forget electronics like the TV and soundbar, which attract static dust.
Finish with furniture and baseboards. This one-room focus takes about 15 minutes and makes the whole space feel cleaner instantly.
Work Top To Bottom
Always start at the highest point in the room—ceiling fan blades, tall shelves, or wall art. Dust falls downward, so cleaning from the top prevents you from having to redo lower surfaces. Use a microfiber cloth or an extendable duster for high spots.
Don't Skip Electronics
TVs, monitors, and gaming consoles are dust magnets. Use a dry microfiber cloth to gently wipe screens and vents. Avoid spray cleaners—they can damage electronics.
For keyboards and remote controls, a soft brush or compressed air works wonders.
Finish With Furniture And Floors
Once the upper surfaces are clean, dust tables, shelves, and lamps. Then vacuum or sweep the floor to catch any fallout. If you have upholstered furniture, a quick pass with a lint roller or vacuum attachment picks up pet hair and crumbs.
5. Friday: Bedroom Refresh – Change Bed Linens
Friday deserves a reward, and fresh sheets are one of the best. After a long week, crawling into a bed that smells clean and feels crisp is pure therapy. Changing your linens on Friday also means you start the weekend with a bedroom that feels like a mini hotel suite.
Start by stripping the bed completely—remove pillowcases, fitted sheet, flat sheet, and any duvet covers or blankets. Toss everything in the laundry with a warm or hot cycle, using a detergent that smells great. While the linens wash, take two minutes to vacuum the mattress surface and flip or rotate it if needed.
Once the wash is done, make the bed with fresh linens, smoothing out wrinkles and fluffing pillows. The whole process takes about 15 minutes of active time, and the payoff is a sleep sanctuary that helps you unwind faster.
Strip And Wash
Remove all bedding and wash on a warm cycle with a quality detergent. Add a half cup of baking soda to the wash to boost freshness and remove odors. If you have time, throw in a few drops of lavender essential oil on a wool dryer ball for a calming scent.
Mattress Care
While the linens are washing, vacuum the mattress to remove dust, dead skin, and allergens. Use the upholstery attachment and go over the entire surface, paying extra attention to seams and edges. If your mattress is due for a rotation, now is the perfect moment.
Make The Bed
Once the linens are dry, make the bed immediately to avoid wrinkles. Start with the fitted sheet, then the flat sheet, and add a lightweight blanket or duvet. Fluff pillows and arrange them neatly.
A well-made bed instantly makes the whole room feel more put together.
Quick Room Reset
While you're at it, do a five-minute tidy: put away any clothes on the floor, clear nightstands of clutter, and open the curtains for a few minutes to air out the room. This small effort keeps your bedroom a peaceful retreat all weekend.
6. Saturday: Declutter One Zone
Saturdays are for slowing down, not for scrubbing every surface. Instead of a full deep clean, choose one small zone—a countertop, a single drawer, or a closet shelf—and clear out what doesn't belong. This targeted declutter prevents the slow creep of mess and keeps your home feeling organized without the overwhelm.
By Saturday, you've already tackled the major cleaning tasks for the week. Now it's time to address the clutter that builds up in hidden pockets. Picking just one zone makes the task manageable and surprisingly satisfying.
You'll see immediate results and feel motivated to maintain the order throughout the next week.
Pick Your Zone Wisely
Walk through your home and spot the area that bothers you most—maybe the junk drawer in the kitchen, the corner of the bedroom dresser, or the bathroom counter. Choose something that can be done in 15 to 20 minutes. The goal is a quick win, not a full reorganization.
The Three-box Method
Grab three boxes or bags labeled Keep, Donate, and Trash. Pull everything out of your chosen zone and sort each item into one of the boxes. Be honest: if you haven't used it in six months and it doesn't hold sentimental value, it probably goes to donate or trash.
Return And Reset
Once you've sorted, wipe down the empty zone with a damp cloth. Then return only the Keep items, arranging them neatly. Put the Donate box in your car or by the door so it's ready to go, and toss the Trash bag immediately.
Enjoy the fresh, open space you've created.
7. Sunday: Plan the Week Ahead
Sunday sets the tone for a smooth week. Instead of diving into chores, take ten minutes to map out your cleaning schedule. This small habit prevents last-minute scrambles and keeps your home consistently fresh.
A little planning on Sunday saves you from decision fatigue later. You'll know exactly what to tackle each day, so nothing gets forgotten or pushed off.
Review Your Weekly List
Pull up your cleaning checklist and look at the upcoming week. Note any appointments, work deadlines, or social plans that might eat into your usual cleaning time. Adjust tasks accordingly—maybe swap a deep-clean day for a lighter one.
Prep For Guests Or Events
If you have visitors coming, move related tasks to earlier in the week. For example, if friends are coming Friday, shift bathroom and living room deep cleans to Wednesday or Thursday. That way you're not rushing the day before.
Set Realistic Goals
Be honest about how much time you have each day. If Tuesday is packed, assign only a 10-minute task like wiping counters. The goal is consistency, not perfection.
A few small wins every day keep your home fresh without burnout.
8. Daily: Make the Bed Every Morning
There's a reason this tiny task tops so many productivity and home routines. Making your bed takes less than two minutes, but the payoff is immediate and lasting. A neatly made bed transforms the entire bedroom from chaotic to calm, and it signals to your brain that the day has started with a small win.
This simple habit is the anchor of a tidy home. When your bed is made, the room instantly looks 80% cleaner, even if clothes are draped over a chair. It also prevents dust and pet hair from settling on your sheets, keeping them fresher longer.
And that feeling of climbing into a made bed at night? Pure satisfaction.
The Two-minute Trick
Set a timer if you need to. Pull up the flat sheet, then the duvet or comforter, and fluff the pillows. Smooth out wrinkles with your hands.
That's it. No hospital corners required. The goal is neat, not perfect.
Why It Works For Your Whole Day
Making your bed is a keystone habit. It creates a sense of order and accomplishment first thing, which often leads to making other good choices—like tidying the kitchen or starting work on time. It's a small domino that tips over bigger ones.
Tips For Staying Consistent
If you're not a natural bed-maker, start by just pulling the duvet up. Over time, add the extra step of straightening pillows. Keep your bedding simple—fewer layers mean less effort.
And if you share a bed, take turns or make it together. It becomes a quick team effort.
9. Daily: Do a 10-Minute Evening Tidy-Up

The end of the day is often when energy dips and clutter peaks. Instead of leaving everything for tomorrow, a quick 10-minute tidy-up before bed can reset your space and your mind. It’s a small habit that pays off in a calmer morning and a consistently fresh home.
What To Focus On
Target the main living areas: living room, kitchen, and entryway. Put away items that don't belong—remotes, mail, shoes, jackets. Fluff pillows and fold blankets.
Clear kitchen counters of dishes and wipe them down. This isn't deep cleaning; it's about restoring order.
Make It A Family Routine
Get everyone involved. Assign each person a zone or a task, like collecting clutter from their room or loading the dishwasher. Set a timer and make it a race.
When it becomes a shared habit, the burden lightens and the home stays tidy with minimal effort.
Prep For Tomorrow
Use the last two minutes to set up for the next day. Lay out clothes, pack bags, fill the coffee maker. These small actions reduce morning decisions and stress.
You'll wake up to a clean, organized home and a smoother start.
10. Weekly: Clean Out the Refrigerator
The fridge is where good intentions go to die—literally. That leftover casserole from two weeks ago? It's now a science experiment.
A weekly fridge cleanout keeps your food fresh, your meal prep on track, and your grocery bills lower.
Set aside 15 minutes once a week to tackle this task. Start by removing everything and placing it on the counter. Check expiration dates and toss anything past its prime.
Wipe down shelves and drawers with a mild cleaner, then organize items by category—dairy together, condiments grouped, leftovers front and center. This habit not only prevents smells and spills but also makes it easy to see what you have, so you buy less and waste less.
Spot The Expired And The Forgotten
Go through every shelf, drawer, and door bin. Look for expired dairy, moldy produce, and half-empty jars that have been sitting too long. A quick sniff test helps, but trust the dates.
Toss anything questionable. This step alone cuts down on fridge odors and frees up space.
Wipe Down Shelves And Drawers
Remove any removable parts and wash them in warm soapy water. For fixed shelves, use a microfiber cloth and an all-purpose cleaner or a vinegar-water mix. Pay attention to sticky spots and corners where crumbs hide.
Dry everything before putting items back.
Organize For Easy Access
Group similar items together: dairy on one shelf, leftovers on another, condiments in the door. Use clear bins for small items like yogurt cups or cheese packs. Place newer items behind older ones so you use things before they expire.
Keep leftovers in clear containers at eye level so you remember to eat them.
11. Weekly: Wipe Down Kitchen Appliances
Kitchen appliances work hard all week, but they also collect fingerprints, splatters, and dust. A quick weekly wipe-down keeps them looking new and prevents grime from building up. Focus on the high-touch areas: microwave, coffee maker, and refrigerator door.
Start with the microwave. Remove the turntable and wash it in warm soapy water. Wipe the interior with a damp cloth or a vinegar solution to loosen baked-on food.
Don't forget the exterior, especially the handle and keypad. For the coffee maker, descale monthly, but weekly wipe the carafe, warming plate, and exterior. Finally, polish the refrigerator door with a stainless steel cleaner or a microfiber cloth and mild detergent.
Pay attention to handles and the water dispenser area.
Microwave Deep Clean
The microwave interior can get splattered quickly. Place a bowl of water with lemon slices inside and run it for 2 minutes. The steam loosens grime, making it easy to wipe clean.
Then remove the glass plate and wash it separately.
Coffee Maker Care
Empty leftover coffee and rinse the carafe. Wipe the warming plate with a damp cloth to remove stains. Use a soft brush to clean the filter basket.
For a deeper clean, run a vinegar cycle once a month.
Refrigerator Door Shine
Fingerprints show up fast on stainless steel. Use a microfiber cloth and a dedicated stainless steel cleaner or a mix of vinegar and olive oil. Wipe in the direction of the grain to avoid streaks.
Don't forget the top of the fridge where dust settles.
12. Weekly: Sanitize High-Touch Surfaces
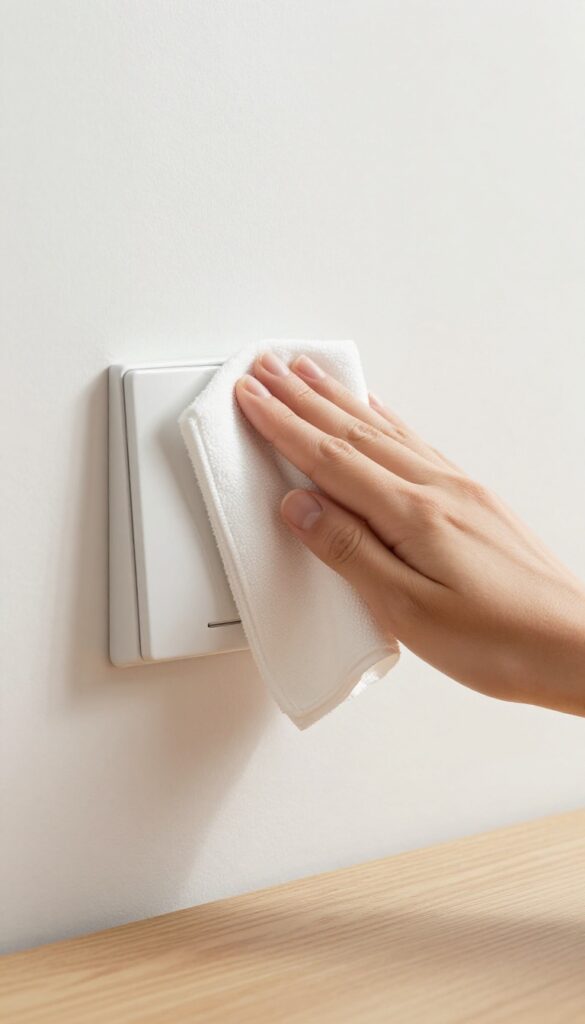
Think about everything your hands touch in a day—light switches, doorknobs, remote controls, phone chargers. These spots are germ magnets, yet they rarely get the attention they deserve. A quick weekly sanitizing session can cut down on illness and make your home feel noticeably cleaner.
High-touch surfaces are the hidden hotspots for bacteria and viruses. They're touched constantly but cleaned only occasionally. By adding a weekly sanitizing routine, you reduce the spread of germs without much extra effort.
Focus on the areas that get the most traffic: entry points, living room controls, and bedside items. Use disinfectant wipes or a spray with a microfiber cloth. Let the surface air dry for the recommended contact time to ensure effectiveness.
Don't forget less obvious spots like cabinet handles, drawer pulls, and the buttons on your coffee maker.
Where Germs Hide Most
Light switches and doorknobs are obvious, but remote controls, phone chargers, and gaming controllers are even dirtier because they're shared and rarely cleaned. Keyboards, mouse devices, and touchscreens also harbor germs. Make a list of every surface in your home that gets frequent hand contact, and rotate through them weekly.
Choose Your Weapon Wisely
Disinfectant wipes are convenient for quick jobs, but sprays with microfiber cloths are more economical and eco-friendly. Check the label for contact time—most disinfectants need to stay wet for several minutes to kill germs effectively. For electronics, use wipes that are safe for screens or a 70% isopropyl alcohol solution on a soft cloth.
Make It A Habit
Tie this task to something you already do weekly, like taking out the trash or doing laundry. Keep a pack of wipes under the sink or in a caddy so you can grab and go. Set a timer for 10 minutes and work through your list.
Done consistently, this simple habit keeps your home's germ load low and your family healthier.
13. Weekly: Clean Bathroom Mirrors and Fixtures
Bathroom mirrors and fixtures take a beating from toothpaste splatter, hard water, and daily use. A quick weekly wipe-down keeps them looking like new and prevents buildup that's harder to remove later. This small task takes less than ten minutes but makes the whole bathroom feel fresher.
Mirrors: Streak-free In Seconds
Spray a glass cleaner directly onto a microfiber cloth—not the mirror—to avoid drips. Wipe in an S-pattern from top to bottom, then buff with a dry section of the cloth. This method eliminates streaks and catches any drips before they dry.
For stubborn spots, a dab of rubbing alcohol on the cloth works wonders.
Faucets And Showerheads: Shine Without Scratching
Use a damp microfiber cloth to wipe down faucets and showerheads, then dry immediately to prevent water spots. For chrome or stainless steel, a tiny drop of dish soap in water cuts through grime without dulling the finish. Avoid abrasive sponges or harsh cleaners—they can scratch the surface over time.
Hard Water Spots: A Gentle Remedy
If you have hard water, those white spots can be stubborn. Mix equal parts white vinegar and water in a spray bottle, spritz on fixtures, let sit for a minute, then wipe clean. Rinse with water and dry thoroughly.
For mirrors, use a vinegar solution sparingly—too much can damage the backing.
14. Weekly: Vacuum Under Furniture and Cushions
Move couches and chairs slightly to vacuum hidden dust and crumbs. Don't forget to lift couch cushions and vacuum underneath. This weekly habit prevents dust bunnies from taking over and keeps your upholstery lasting longer.
Vacuuming under furniture and cushions is a game-changer for a truly clean home. It targets the spots where dirt and allergens accumulate unnoticed. Here's how to do it efficiently.
Why It Matters
Dust, pet hair, and crumbs collect under furniture and between cushions. Over time, they can cause odors, attract pests, and trigger allergies. Regular vacuuming keeps your living space healthier and extends the life of your furniture.
How To Do It
Start by moving lightweight furniture like chairs and small sofas. For heavier pieces, use a furniture slider or just tilt them. Use a crevice tool to reach edges.
Lift cushions and vacuum the base, then flip cushions and vacuum the other side. Don't forget the sides and back.
Pro Tips
Vacuum under furniture at least once a week. If you have pets, do it twice. Use a vacuum with a HEPA filter to trap allergens.
For hard-to-move furniture, use a long-reach attachment. And always check for lost items before vacuuming.
15. Weekly: Mop Hard Floors in Kitchen and Bathroom
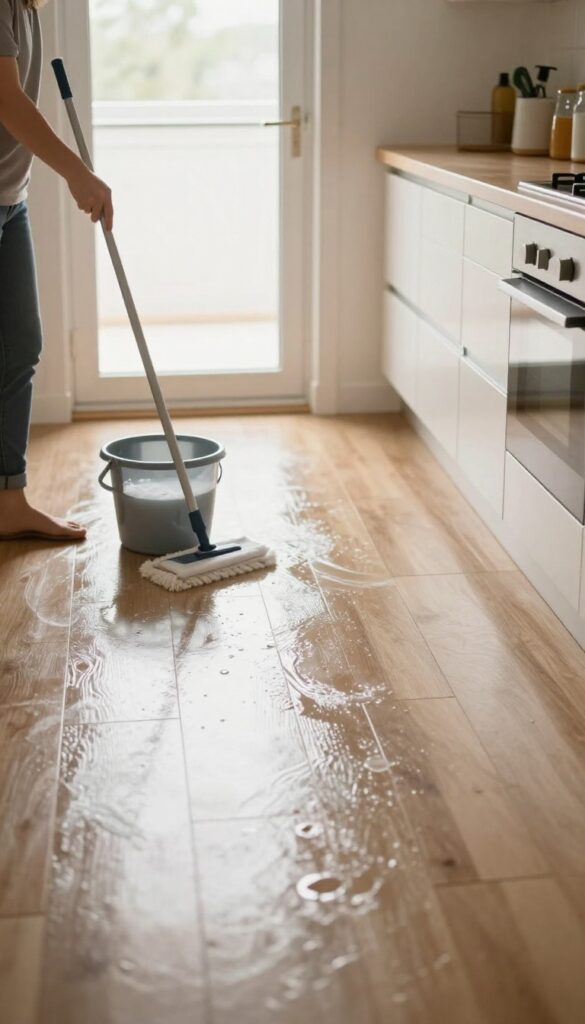
Hard floors in the kitchen and bathroom see the most action—spills, splashes, and everyday grime. A quick sweep or vacuum picks up the dry debris, but it's the damp mopping that really resets those surfaces. Doing this weekly prevents sticky residues from building up and keeps the floors looking fresh.
Prep With A Sweep Or Vacuum
Before you bring out the mop, clear the floor of loose dirt, crumbs, and hair. A quick pass with a broom or a stick vacuum saves you from pushing debris around in a wet mess. Pay extra attention to corners and under the cabinets where dust bunnies like to hide.
Choose The Right Cleaner
Not all floor cleaners are created equal. For tile and vinyl, a gentle pH-neutral cleaner works best—harsh chemicals can dull the finish over time. If you have natural stone, use a cleaner specifically made for it.
A few drops of dish soap in warm water can also do the trick for most messes.
Mop In Sections, Not All At Once
Start from the farthest corner and work your way toward the door so you don't step on wet spots. Use a figure-eight motion and rinse the mop head frequently. For stubborn spots, let the cleaner sit for a minute before scrubbing gently.
Finish by letting the floor air dry completely before walking on it.
16. Weekly: Dust Blinds and Window Sills
Blinds and window sills are dust magnets. Every time you open a window, a breeze stirs up whatever has settled there, sending particles straight into your living space. A quick weekly wipe keeps the air cleaner and your windows looking crisp.
This task takes less than five minutes but makes a visible difference. You'll notice less dust on nearby surfaces and a brighter feel to the room.
Grab a microfiber cloth or a lambswool duster. Start at the top of the blinds and work downward, closing the slats one way, then the other, to catch both sides. For window sills, wipe the entire surface, paying attention to corners where grime collects.
If you have horizontal blinds, you can also vacuum them with a brush attachment for a deeper clean. Make it a habit: pair this task with another weekly chore, like watering plants or taking out recycling. That way you won't forget.
Why Blinds And Sills Matter
Dust on blinds doesn't just sit there—it gets redistributed every time air moves. If you have allergies, this is especially important. Keeping these surfaces clean reduces airborne particles and helps your HVAC system run more efficiently.
Quick Cleaning Method
Use a microfiber cloth slightly dampened with water or a gentle cleaner. For fabric blinds, a vacuum with a soft brush is safer. Wipe sills last, and don't forget the tracks if they're exposed.
A dry paintbrush can help dislodge stubborn dust from corners.
How To Stay Consistent
Add this to your Saturday morning routine or tie it to another weekly task. Set a timer for five minutes and work through each room. Over time, it becomes automatic and you'll notice the difference in how fresh your home feels.
17. Weekly: Clean Pet Areas
Pets bring joy, but they also bring fur, dander, and the occasional muddy paw print. Their favorite spots—beds, couches, and feeding stations—can quickly become sources of odors and allergens. A weekly reset of these areas keeps your home smelling fresh and reduces the sneeze factor for everyone in the house.
Wash pet beds on a hot cycle with pet-safe detergent to remove embedded hair and odors. Vacuum upholstery and carpets where your pet lounges, using a rubber brush or lint roller to lift stubborn fur. Wipe down food and water bowls daily, but give them a deep clean with soap and hot water weekly to prevent bacterial buildup.
Bedding Refresh
Pet beds collect dander, dirt, and smells fast. Strip the cover and wash it in hot water weekly. If the bed is machine-washable, toss the whole thing in.
For non-washable beds, vacuum thoroughly and spot-clean with an enzyme cleaner. Let it dry completely before your pet reclaims it.
Furniture Fur Patrol
Couches and chairs can become fur magnets. Use a vacuum with a pet hair attachment or a rubber squeegee to pull hair from fabric. For leather or vinyl, a damp microfiber cloth works wonders.
Don't forget under cushions—crumbs and fur hide there too.
Bowl Sanitization
Food and water bowls can harbor bacteria if left unwashed. Wash them with hot soapy water weekly, or run them through the dishwasher on a sanitize cycle. Use separate bowls for wet and dry food to reduce residue.
Let bowls air dry before refilling to prevent slime.
18. Weekly: Wipe Down Baseboards
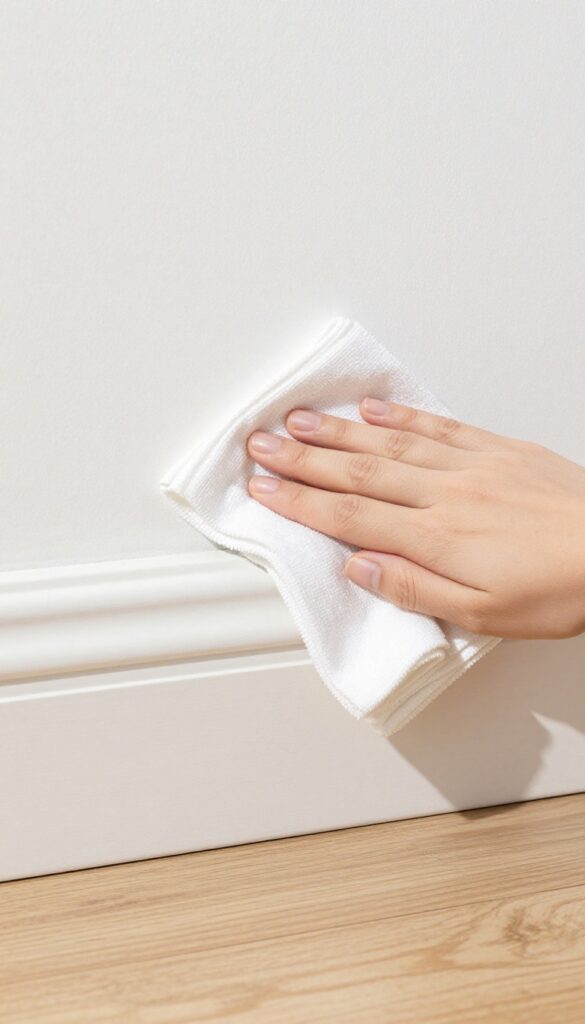
Baseboards are one of those surfaces you don't notice until they're grimy. Dust settles on the top edge, and scuffs from shoes or the vacuum cleaner accumulate over time. A quick weekly wipe keeps them looking crisp without turning it into a deep-cleaning project.
Grab a damp microfiber cloth or a Swiffer duster and run it along the top and face of each baseboard. For sticky spots or scuffs, a little all-purpose cleaner on the cloth does the trick. This takes just a few minutes per room and prevents buildup that would require scrubbing later.
What You'll Need
A microfiber cloth, a Swiffer duster, or a damp sponge. If you have stubborn marks, a magic eraser works wonders without damaging the paint.
How To Make It A Habit
Tie this task to something you already do weekly, like vacuuming. After you finish the floors, grab your cloth and do a quick pass around the room. It becomes automatic after a few weeks.
Pro Tip For High-traffic Areas
In hallways and entryways, baseboards get dirtier faster. Keep a small duster or cloth nearby so you can spot-clean when you notice a scuff, rather than waiting for the weekly wipe.
19. Weekly: Organize Entryway and Coat Closet
The entryway sets the tone for your entire home. When it's cluttered, you start every day feeling a little frazzled. A quick weekly reset keeps this high-traffic zone welcoming and functional.
Start by collecting anything that doesn't belong—stray mail, random bags, kids' toys that wandered in. Then give surfaces a fast wipe-down. Finally, reorganize shoes and coats so everything has a place.
Clear The Surfaces
Remove everything from the console table, bench, or any flat surface. Sort mail into bills, to-do, and recycle. Wipe down the surface with a microfiber cloth.
Put back only the essentials—a key dish, a small plant, maybe a catchall tray.
Tackle The Coat Closet
Open the closet and assess. Hang up any coats that ended up on hooks or chairs. Check pockets for trash or forgotten items.
Group like items together—work coats, casual jackets, scarves. If the floor is messy, sweep or vacuum quickly.
Shoe Station Reset
Gather all shoes near the door. Pair them up and return them to their designated spot—a rack, a basket, or cubbies. If you have a boot tray, shake it out or wipe it down.
Remove any shoes that are worn out or out of season to donate or store.
20. Weekly: Clean Garbage and Recycling Bins
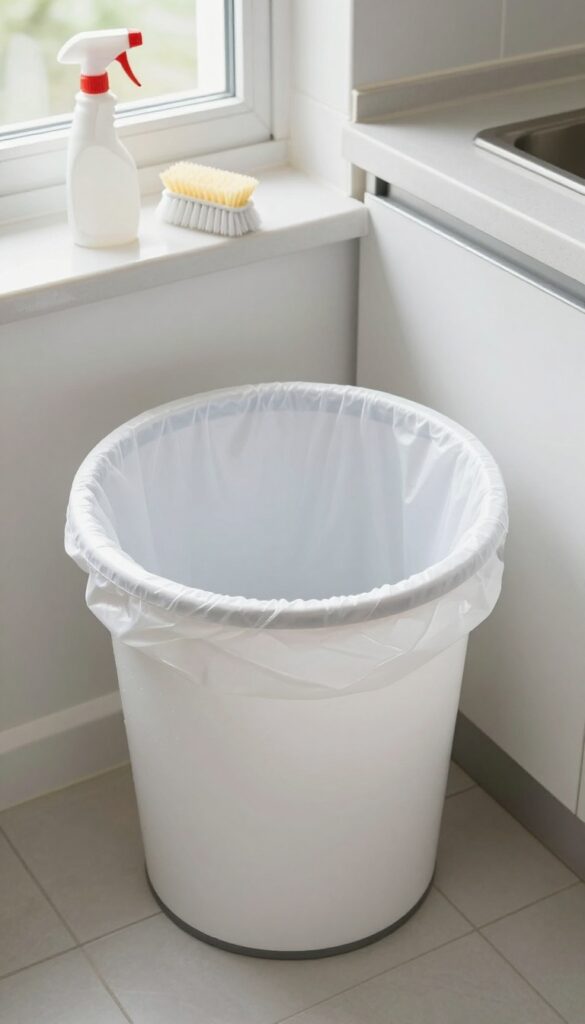
Trash and recycling bins work hard all week, but they rarely get any love. Over time, residue builds up, smells develop, and fruit flies or ants start to take notice. A quick weekly wipe-down keeps them fresh and your kitchen or garage odor-free.
Start by taking out the trash and recycling on collection day. Once the bins are empty, spray the inside with a disinfectant or all-purpose cleaner. Let it sit for a minute, then scrub with a brush or sponge.
Rinse thoroughly and let them air dry before adding new liners. This simple habit prevents sticky messes from hardening and keeps pests from moving in.
Why Weekly Matters
Waiting until bins are visibly dirty means odors have already set in. A weekly schedule catches buildup early, so you're never dealing with a foul-smelling surprise. It also reduces the chance of attracting ants, roaches, or flies to your kitchen or garage.
What You'll Need
Keep a spray bottle of diluted bleach or a commercial disinfectant, a long-handled scrub brush, and rubber gloves near your cleaning caddy. For recycling bins, a quick rinse with a hose and a few drops of dish soap works well. Microfiber cloths help dry the inside without leaving lint.
Quick Tips For Better Results
If your bin has a removable liner, take it out and wash it separately. Sprinkle baking soda at the bottom of the bin after drying to absorb future odors. For outdoor bins, tilt them upside down to drain after rinsing so no standing water collects.
21. Weekly: Freshen Up Upholstery and Rugs
Your couch and rugs absorb daily life—spills, pet dander, cooking smells, and just general living. After a week, they can start to feel a little tired and smell a bit stale. A quick refresh with baking soda works wonders, pulling out odors and leaving fabrics feeling renewed.
It's a simple step that makes your whole living space smell cleaner without harsh chemicals.
Sprinkle a generous layer of baking soda over your upholstered furniture and area rugs. Let it sit for at least 15 minutes—longer if you have pets or strong odors—to give it time to absorb smells. Then vacuum thoroughly using the upholstery attachment for furniture and the standard head for rugs.
You'll notice a fresher scent and a cleaner feel immediately.
Why Baking Soda Works
Baking soda is a natural deodorizer that neutralizes acidic and basic odor molecules. It doesn't just mask smells; it chemically reacts with them to eliminate them. Plus, it's gentle on fabrics and safe for pets and kids, making it an ideal choice for weekly maintenance.
Tips For Best Results
For tougher odors, let the baking soda sit for an hour or even overnight. Test a small hidden area first to ensure colorfastness. Vacuum slowly and overlap your passes to pick up all the powder.
For rugs, go in multiple directions to lift embedded dirt and deodorizer.
When To Do This Task
Tackle this on a day when you have a little downtime—maybe while you're watching a show or waiting for laundry. It's an easy task to pair with other low-effort chores. Aim for once a week, but if you have pets or heavy foot traffic, twice a month might be enough.
22. Weekly: Clean Inside the Microwave
The microwave is one of those appliances that gets splattered, spattered, and forgotten until something starts smelling. A quick weekly steam clean keeps it fresh and prevents baked-on gunk from becoming a scrubbing nightmare. You only need a few minutes and two common kitchen items.
This method uses steam to loosen food residue, making wiping effortless. The lemon adds natural antibacterial properties and a pleasant scent without harsh chemicals. It's safe for all microwaves and takes almost no active effort.
The Steam Clean Method
Fill a microwave-safe bowl with 1 cup of water. Add 3-4 lemon slices or a few tablespoons of lemon juice. Microwave on high for 3 minutes.
Let the bowl sit inside for another 2 minutes without opening the door. The steam will condense on the walls, softening any stuck-on food.
Wipe Down Easily
Remove the bowl carefully—it will be hot. Use a damp microfiber cloth or sponge to wipe the interior. The grime should come off with almost no scrubbing.
Don't forget the ceiling and the door. For stubborn spots, dip the cloth in the lemon water.
Bonus Freshness
After wiping, leave the microwave door open for a few minutes to air dry. The citrus scent lingers, neutralizing odors from last week's fish or popcorn. If you prefer, you can use a few drops of essential oil instead of lemon.
23. Weekly: Do a Laundry Reset
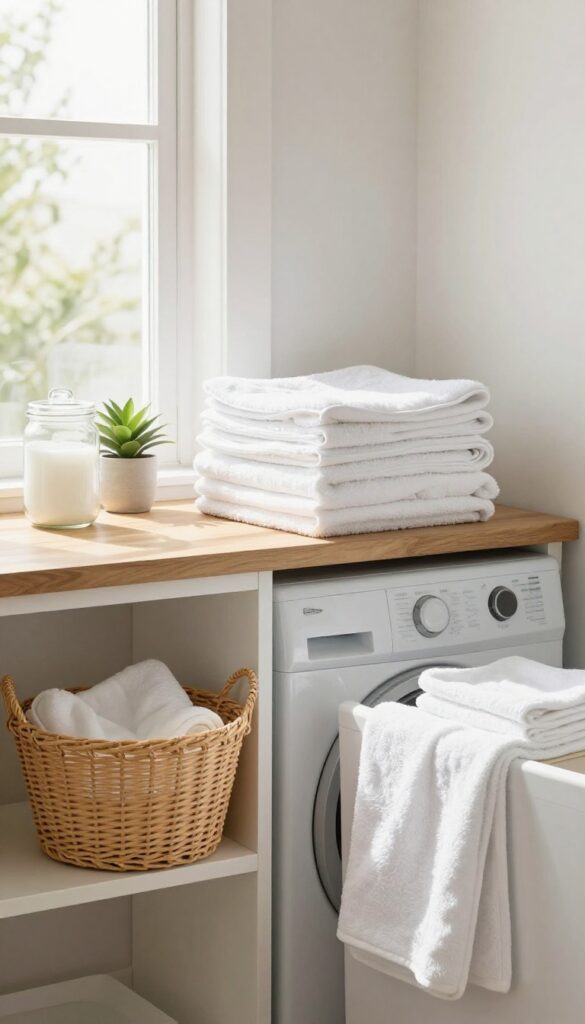
Laundry has a way of taking over your weekend if you let it pile up. A weekly laundry reset keeps clothes, towels, and bedding from becoming a mountain of stress. The goal is simple: wash, dry, fold, and put everything away in one focused session.
Pick one day—usually Sunday or Monday—to run all your loads. Start with sheets and towels, then move to clothes. While the washer runs, strip beds and gather hampers from every room.
This prevents that dreaded "one more load" feeling from dragging into Tuesday.
Batch Like A Pro
Sort by fabric type and temperature to save time. Do all whites together, then darks, then delicates. Use the delay start feature if you have it, so the first load finishes when you're ready to fold.
Keep a laundry basket in the laundry room for immediate folding.
Fold And Put Away Immediately
This is the secret to a fresh home. Once the dryer stops, fold or hang each item right away. If you let clothes sit in the basket, they wrinkle and you'll lose motivation.
Put everything in its designated drawer or closet so your bedroom stays clutter-free.
Don't Forget Linens
Towels and sheets need weekly washing to stay fresh. Wash bath towels on hot with a bit of vinegar to remove odors. Swap bed linens on the same day you wash them, so you never have to make the bed with dirty sheets.
FAQ
How long should each weekly cleaning task take?
Most tasks take 10–15 minutes. The idea is to spread them out so no single day feels overwhelming.
Can I customize the checklist for my home size?
Absolutely. If you have a small apartment, combine tasks or skip ones that don't apply. For larger homes, you might need to repeat some tasks in different zones.
What if I miss a day?
No problem. Just pick up where you left off or combine two tasks the next day. Consistency over perfection is the goal.
Do I need special cleaning products?
Not really. All-purpose cleaner, microfiber cloths, a vacuum, and a mop cover most tasks. You can make your own cleaner with vinegar and water.
How do I stay motivated to follow the checklist?
Set a timer for each task, play music, or reward yourself after completing a week. Seeing your home stay clean is the best motivation.
Conclusion
A weekly cleaning checklist doesn't have to be rigid. Pick the ideas that fit your home and routine, and adjust as needed. The goal is to keep your space fresh without spending your whole weekend scrubbing.
Start with just a few tasks this week. You'll be surprised how much easier it is to maintain a clean home when you break it into small, consistent steps. Your future self will thank you.


