
Opening your closet should feel like a breath of fresh air, not a cloud of dust or a avalanche of wrinkled clothes. But keeping your wardrobe clean and organized can feel like a never-ending battle. Between everyday wear, seasonal changes, and the occasional spill, your clothes and storage space need regular attention.
The good news is that a few simple habits can make a huge difference. You don't need fancy products or hours of free time.
Just practical, straightforward methods that keep your clothes looking great and your closet easy to navigate. These 23 tips cover everything from removing stubborn stains to maximizing shelf space.
1. Sort Laundry by Fabric Type
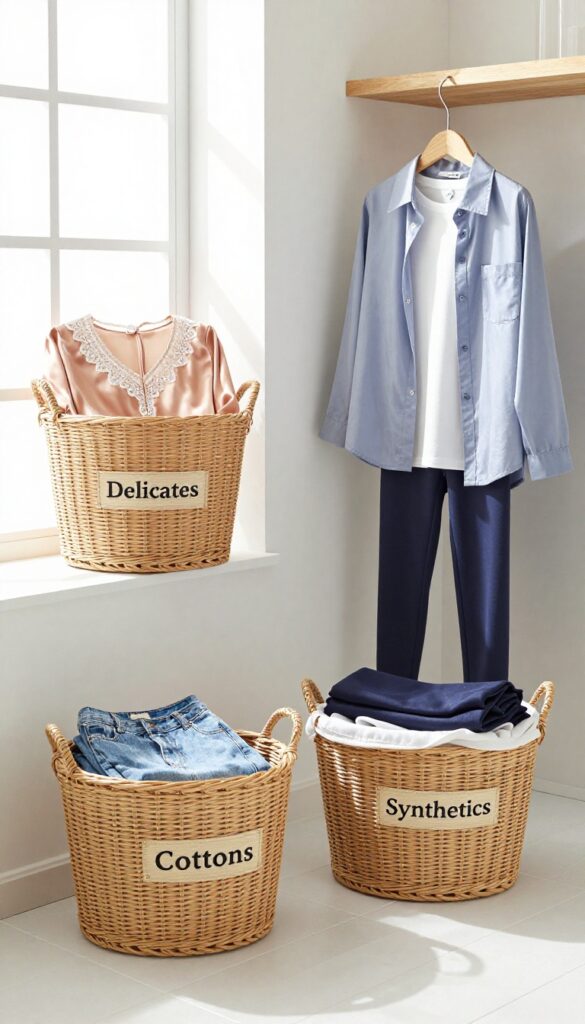
Throwing everything into the same load might save time, but it’s a fast track to ruined clothes. Delicates get snagged, colors bleed, and heavy fabrics can stretch lighter ones out of shape. Sorting by fabric type is a simple step that protects your investment and keeps each piece looking its best.
Group your laundry into three main categories: delicates (silk, lace, wool), cottons (t-shirts, jeans, towels), and synthetics (polyester, nylon, spandex). Wash each group separately using the appropriate cycle and water temperature. This prevents damage like pilling, fading, and misshaping.
Why Fabric Matters
Different fabrics have different care needs. Cotton can handle a vigorous wash, but silk requires a gentle touch. Mixing them can cause abrasion, leading to fuzz balls or tears.
Sorting by fabric also lets you choose the right detergent—like a mild one for delicates or a stain-fighting formula for cottons.
How To Sort Efficiently
Set up three laundry bins or baskets labeled for each fabric type. As you undress, toss items into the correct bin. This saves time on laundry day and reduces the temptation to mix loads.
For heavily soiled items, pre-treat stains before tossing them in.
Bonus: Color Sorting Within Fabric Groups
Even within the same fabric type, separate lights and darks to prevent color bleeding. For example, wash white cottons separately from dark jeans. This extra step keeps whites bright and prevents graying.
2. Pre-Treat Stains Immediately
A fresh stain is your best chance to save a garment. The moment something spills, the clock starts ticking. Waiting even a few hours can turn a simple spot into a permanent mark.
That's why having a stain remover stick or spray within arm's reach is a game-changer. Keep one in your laundry room, another in your bathroom, and maybe even a travel-size one in your bag. When you act fast, you're working with the stain before it sets into the fibers.
And remember: dab, don't rub. Rubbing spreads the stain and damages the fabric. A gentle blot lifts the mark without pushing it deeper.
Pre-treating stains immediately is the single most effective way to keep your clothes looking fresh. The longer a stain sits, the harder it is to remove. Oils, proteins, and dyes bond with fabric over time, making them nearly impossible to get out.
A good stain remover is your first line of defense. Look for one that's enzyme-based for protein stains like blood or grass, or solvent-based for grease and oil. Keep a small bottle in your laundry caddy and another in your bathroom.
When you spot a stain, act within minutes. Apply the remover directly, let it sit for a minute, then blot with a clean cloth. If you're on the go, a stain remover pen or wipe is a lifesaver.
Just dab the area—never rub—and you'll be amazed at how many stains disappear.
Why Speed Matters
Stains set when they dry or when heat is applied. The longer a stain sits, the more it bonds with the fabric fibers. For example, a red wine spill that's blotted immediately might come out completely, but one that dries overnight often leaves a permanent shadow.
The same goes for oil-based stains like salad dressing or makeup. They spread and oxidize, becoming harder to lift. So if you spill, stop what you're doing and treat it right away.
Your future self will thank you.
The Right Way To Blot
When you treat a stain, always blot from the outside in. This prevents the stain from spreading. Use a clean white cloth or paper towel to absorb the liquid.
If you rub, you're grinding the stain into the fibers and damaging the fabric's surface. For thick stains like ketchup or mud, scrape off the excess first with a dull knife or spoon. Then apply your stain remover and blot.
Repeat until no more stain transfers to the cloth. Then wash as usual.
Stain Remover Storage Tips
Make it easy to act fast by storing stain removers where you'll actually use them. Keep a stick or spray in the laundry room near your hamper. Put a travel-size pen in your purse or car.
And stash a small bottle in the bathroom for makeup or toothpaste stains. When you have a remover within arm's reach, you're more likely to use it immediately. Out of sight means out of mind—and stains that set.
3. Use Cold Water for Most Washes
Turning the dial to cold is one of the simplest changes you can make for your clothes and your energy bill. Many people assume hot water cleans better, but modern detergents are designed to work in cold temperatures. Cold water is gentler on fabrics, helps colors stay vibrant, and reduces the risk of shrinking.
It also saves a significant amount of energy since heating water accounts for a large portion of a washing machine's electricity use.
Reserve hot water for items that really need it, like underwear, towels, and heavily soiled work clothes. For everything else—jeans, t-shirts, dresses, and delicates—cold water is the way to go. If you're worried about germs, some machines have a cold wash with an added sanitizing cycle, or you can use a laundry sanitizer.
Cold water also prevents stains like blood and wine from setting, making them easier to remove.
Why Cold Water Works Best
Cold water is less harsh on fibers, so your clothes last longer. It reduces fading and keeps dark colors dark. Plus, it's better for the environment because you're using less energy.
Many detergents now have enzymes that activate in cold water, breaking down dirt and oils effectively.
When To Use Hot Water
Hot water is still useful for killing bacteria and removing heavy grease. Use it for underwear, socks, towels, and bedding. Also, if someone in your home is sick, hot water can help sanitize their clothes.
But for everyday loads, stick with cold.
Tips For Cold Water Washing
Use a detergent formulated for cold water. Pre-treat stains before washing. Don't overload the machine—clothes need room to move.
And if your water is very hard, consider a water softener to improve cleaning performance.
4. Don't Overload the Machine
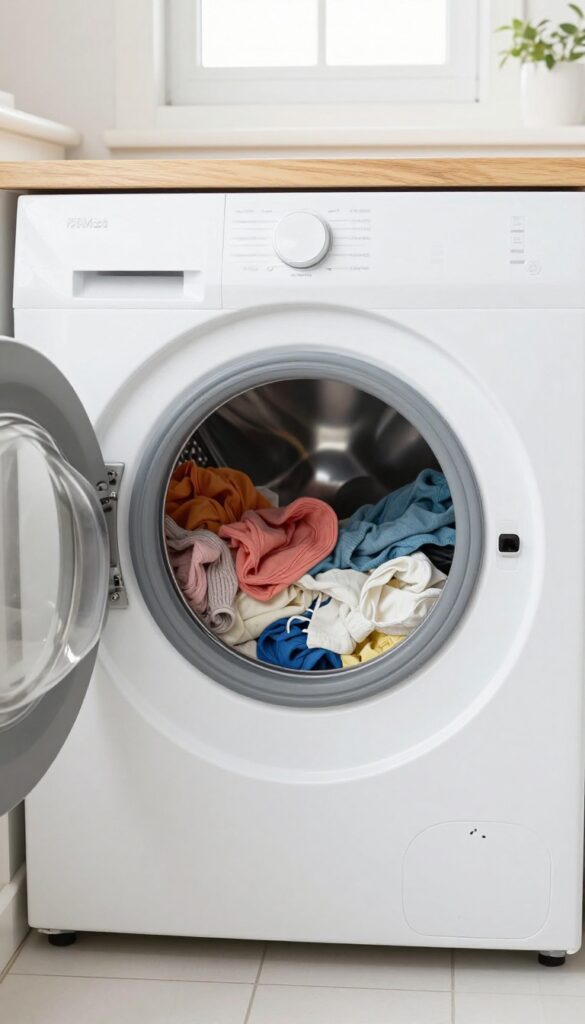
It's tempting to cram as many clothes as possible into one load to save time and energy. But overstuffing the washing machine actually works against you. Clothes need room to tumble freely so water and detergent can reach every fiber.
Why Space Matters
When the drum is packed tight, dirt and detergent get trapped in folds. Clothes come out still dirty, and the extra friction causes pilling and fading. A loosely filled machine cleans better and treats your clothes more gently.
The Fluff Test
A simple way to check: put your hand in the drum and press down. If the clothes compress easily and you can still feel space, you're good. If they feel packed solid, remove a few items.
For bulky items like towels or jeans, leave even more room.
Bonus: Fewer Wrinkles
Overcrowding also leads to deep-set wrinkles that are hard to iron out. With enough space, clothes move freely and come out with far fewer creases. You'll spend less time ironing and more time enjoying your fresh wardrobe.
5. Choose the Right Detergent
Not all detergents are created equal, and picking the wrong one can leave your clothes dull, stiff, or even damaged. The type you choose depends on your laundry habits, the fabrics you wash most, and any skin sensitivities in your household. Getting this simple decision right makes a noticeable difference in how your clothes look and feel after every wash.
Liquid Vs. Powder: When To Use Each
Liquid detergent dissolves quickly and works great on greasy stains and food spills because it can be applied directly. It's also ideal for cold water washes. Powder detergent, on the other hand, is better at lifting ground-in dirt and mud, and it's often more affordable.
Use powder for heavily soiled loads like gardening clothes or kids' play outfits, but make sure it fully dissolves in warm or hot water to avoid residue.
Specialty Detergents For Delicates And Dark Clothes
Delicate fabrics like silk, wool, or lace need a gentle, pH-neutral detergent to prevent damage. Look for labels that say "delicate" or "silk-friendly. " For dark clothes, a detergent formulated for dark colors helps prevent fading and keeps blacks and deep blues looking rich.
These formulas usually have fewer optical brighteners that can make dark fabrics look chalky over time.
Hypoallergenic Options For Sensitive Skin
If you or your family members have eczema, allergies, or easily irritated skin, switch to a hypoallergenic or fragrance-free detergent. These are free from dyes, perfumes, and harsh enzymes that can cause rashes or itching. Brands labeled "free and clear" are a safe bet.
You can also look for plant-based or dermatologist-tested options for extra peace of mind.
6. Add Vinegar to the Rinse Cycle
White vinegar is a laundry MVP that costs pennies and does a ton. It naturally softens fabric, zaps odors, and rinses away leftover detergent that can make clothes feel stiff. Best of all, once your clothes dry, the vinegar smell completely disappears.
Vinegar works by balancing the pH of the rinse water, breaking down alkaline detergent residues. This leaves fibers softer and colors brighter. It’s especially helpful for towels that have lost their fluff or gym clothes that hold onto sweat smells.
To use it, simply add half a cup of distilled white vinegar to the fabric softener dispenser or pour it directly into the rinse cycle. You can do this every wash or just once a month as a deep clean. Avoid using vinegar with bleach, as the combination creates harmful fumes.
Why Vinegar Beats Fabric Softener
Store-bought fabric softeners coat fibers with a waxy layer that can reduce absorbency and trap odors over time. Vinegar, on the other hand, rinses clean without leaving any residue. Your towels stay thirsty, your workout gear stays fresh, and your clothes feel naturally soft without any chemical buildup.
Best Uses For Vinegar In Laundry
Use vinegar for towels, bedding, and synthetic fabrics prone to static or odor. It’s also great for removing mildew smells from forgotten laundry. For a deeper clean, add a cup of vinegar to a hot wash cycle when washing new clothes to set dyes and remove factory chemicals.
What To Avoid When Using Vinegar
Never mix vinegar with bleach or oxygen bleach—it creates toxic chlorine gas. Also avoid using it on delicate fabrics like silk or wool, as the acidity can damage protein fibers. Stick to cotton, linen, polyester, and other sturdy materials.
7. Air Dry Delicates Whenever Possible
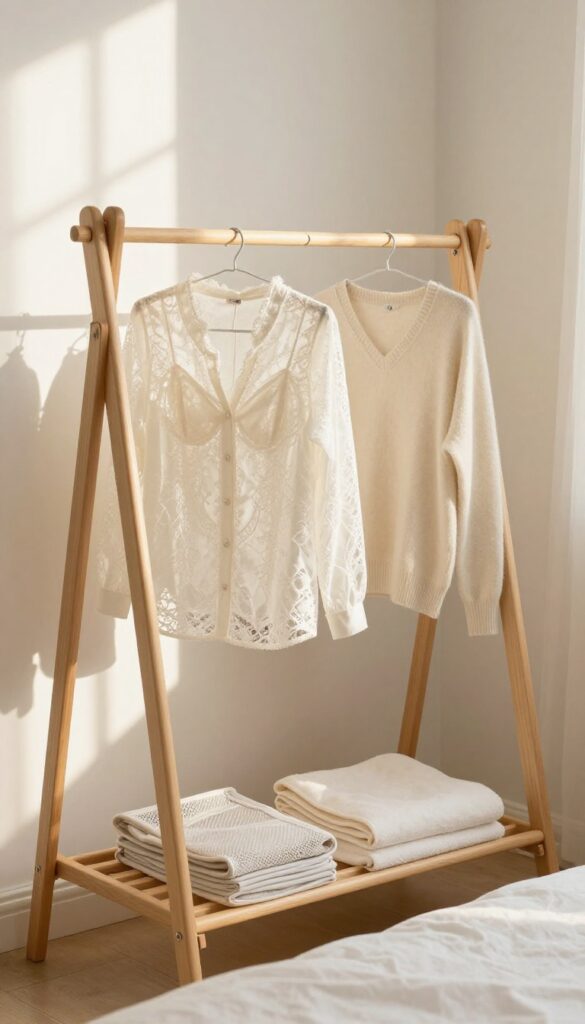
Your dryer might be convenient, but it's also one of the fastest ways to ruin your favorite delicate pieces. High heat can break down elastic fibers, shrink natural fabrics, and cause pilling. Air drying is gentle and helps clothes last longer.
Why Heat Is The Enemy Of Delicates
Elastic in waistbands, bra straps, and cuffs loses its snap when exposed to high heat. Wool and cashmere can shrink or felt. Even cotton can warp.
Air drying avoids all that, preserving the fit and feel of your clothes.
How To Dry Different Fabrics
Lay sweaters and knits flat on a drying rack to prevent stretching. Hang button-down shirts and blouses on padded hangers to keep their shape. For lingerie, use a mesh drying bag or lay flat.
Always reshape items while damp.
Speeding Up Air Drying
If you're short on time, roll damp items in a clean towel to absorb excess moisture before laying them out. Place the drying rack in a well-ventilated area or near a fan. Avoid direct sunlight, which can fade colors.
8. Fold Knits, Don't Hang Them
Sweaters and other knit fabrics are prone to stretching when hung on a hanger. The weight of the fabric pulls down over time, creating bumps at the shoulders and an overall misshapen look. Folding your knitters and storing them on a shelf is the best way to keep their original fit and structure intact.
When you hang a heavy sweater, gravity works against it. The fibers stretch, especially around the neckline and shoulders, leading to permanent distortion. By folding knits and laying them flat, you eliminate that downward pull.
This simple switch preserves the garment's shape and extends its life. Plus, a neat stack of folded sweaters looks tidy and makes it easy to grab what you need without disturbing the rest of your closet.
The Right Way To Fold
Fold sweaters with care to minimize creases. Lay the sweater face down on a flat surface. Fold one sleeve across the back, then the other.
Fold the bottom third up, then fold the top third over. This creates a compact rectangle that stacks well without deep wrinkles. For delicate knits, you can also roll them loosely to save space and reduce creasing.
Choosing The Best Shelf
Store folded knits on a sturdy shelf that's not too high or too low. Avoid shelves that are overcrowded, as tight stacking can still cause creasing. Use shelf dividers or small bins to keep stacks organized and prevent them from toppling.
If you have cashmere or other fine knits, consider storing them in breathable cotton bags to protect against dust.
When Hanging Is Okay
Some knits can handle hanging if you use the right hanger. Choose a wide, padded hanger that supports the shoulders fully. Fold the sweater over the hanger so the weight is distributed evenly.
This works best for lighter knits and cardigans. But for heavy sweaters, folding remains the safer bet.
9. Use Velvet Hangers for Slippery Fabrics
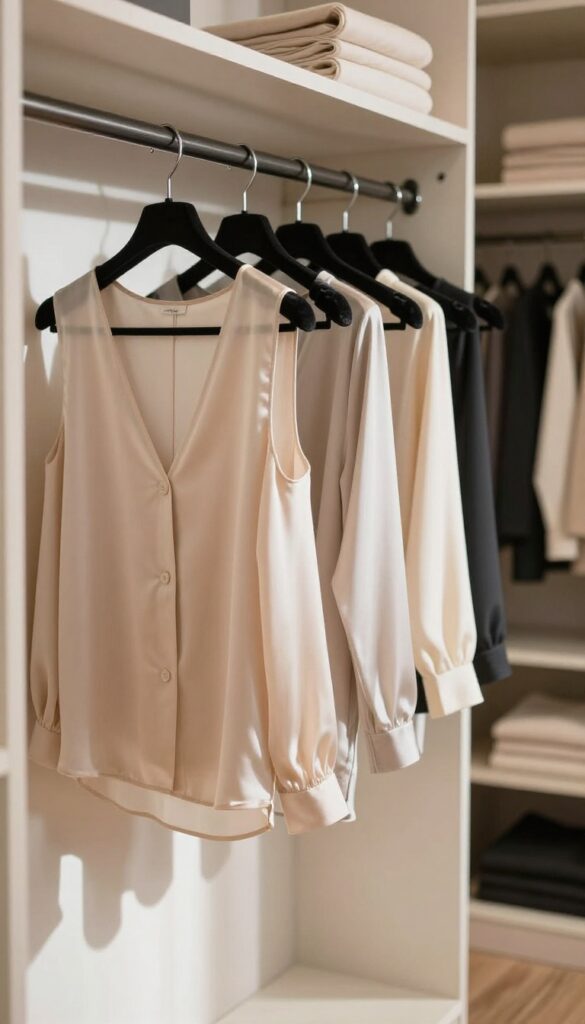
If you've ever watched a silk blouse slide off a plastic hanger and land in a heap on the closet floor, you know the frustration. Velvet hangers are the simple fix. Their soft, grippy surface holds slippery fabrics like silk, satin, and polyester in place, so your clothes stay put and wrinkle-free.
Plus, they're much slimmer than bulky plastic or wooden hangers, which means you can fit more in your closet without creating a mess.
Why Velvet Hangers Work So Well
The secret is the velvet coating. It creates friction that grips the fabric, so even the slinkiest top won't slide off. Unlike plastic hangers that let clothes slip, or wire hangers that leave shoulder bumps, velvet hangers keep everything hanging neatly.
They're also gentle on delicate fabrics—no snags or pulls.
Space-saving Benefits
Velvet hangers are thin, usually only about 1/4 inch thick. That means you can replace bulky plastic or wooden hangers and instantly gain inches of extra rod space. For small closets, this is a game-changer.
You'll be able to see everything at a glance without cramming.
How To Transition To Velvet Hangers
Start by swapping out hangers for your most slippery items: silk blouses, satin dresses, polyester tops, and even some lightweight knits. Buy a pack of 50 or 100—they're affordable. Then, as you put away laundry, replace old hangers one by one.
Within a week, your closet will feel more organized, and you'll stop finding clothes on the floor.
10. Rotate Seasonal Items
When your closet is packed with heavy sweaters in July and swimsuits in January, finding what you need becomes a daily chore. Rotating seasonal items is one of the simplest ways to reclaim closet space and keep your clothes in better condition. Off-season garments just take up room and collect dust when they're not needed.
Storing off-season clothes in bins or under the bed frees up prime closet real estate for the items you actually wear. It also reduces dust accumulation on rarely worn pieces, keeping them fresher for next season. Plus, the act of rotating forces you to evaluate what you truly love and use.
Pick The Right Storage Containers
Clear plastic bins are a solid choice because you can see what's inside without opening them. Vacuum-sealed bags work great for bulky items like winter coats or comforters, shrinking them down to a fraction of their size. Avoid cardboard boxes if you live in a humid area—they can trap moisture and cause mildew.
Label Everything Clearly
A simple label like "Winter Sweaters" or "Summer Tops" saves you from digging through multiple bins when the weather shifts. Use a permanent marker or a label maker, and consider adding a list of contents on the side. This small step makes the whole rotation process faster and less frustrating.
Keep A Transition Zone
Designate a small area in your closet for items that are in between seasons, like light jackets or transitional dresses. This way, you don't have to fully commit to a full swap until the weather has truly changed. It also gives you a buffer zone for pieces you're unsure about donating.
11. Keep a Lint Roller in Your Closet
Pet hair, dust, and lint have a way of showing up at the worst possible moments—right before a meeting or a dinner out. A lint roller is your quick fix. Stash one in your closet so you can do a fast pass over your outfit before you walk out the door.
A lint roller is a small tool that uses adhesive sheets to pick up loose fibers, hair, and dust from fabric. It’s perfect for last-minute touch-ups on wool, cotton, and synthetic blends. Keep it in an accessible spot, like on a hook or in a drawer, so you never have to hunt for it.
Where To Store It
Place the lint roller near your most-worn clothes—maybe on a shelf at eye level or inside a door-mounted organizer. If you have multiple closets, consider one for each. That way, you can grab it without moving from where you’re dressing.
Refill When Needed
Check the adhesive sheets regularly. Once they lose stickiness, peel them off and replace with a new roll. Some lint rollers have disposable heads, while others use refill cartridges.
Keep a spare refill in the same spot so you never run out.
Bonus Uses
Beyond clothes, a lint roller can clean lampshades, upholstery, and even car seats. It’s also great for picking up crumbs from a tablecloth or removing dust from delicate items like silk flowers. Keep one in your car, too, for quick touch-ups on the go.
12. Vacuum Your Closet Floor Regularly
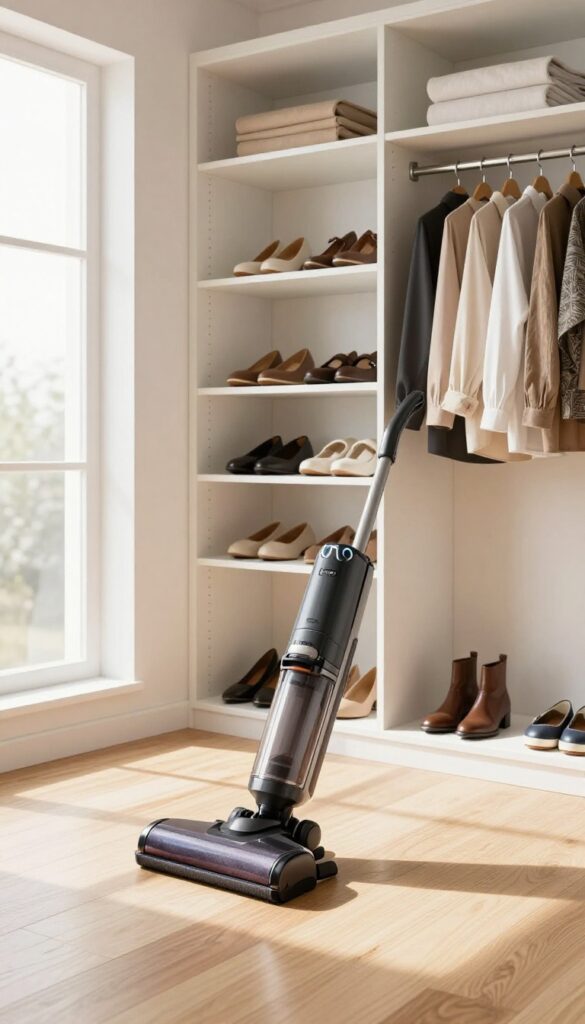
Dust and dirt settle on closet floors and can transfer to clothes. A quick vacuum every two weeks keeps things fresh.
Why Floors Matter
Closet floors collect dust, pet hair, and debris from shoes and bags. When you walk in or pull out clothes, those particles can cling to fabrics. A clean floor means cleaner clothes.
How Often To Vacuum
Aim for every two weeks. If you have pets or wear outdoor shoes in the closet, bump it up to weekly. Set a reminder so it becomes a habit.
Quick Tips For Best Results
Use a crevice tool to reach corners and baseboards. Move shoes and bins aside to get underneath. If you have carpet, go over it twice in different directions to lift embedded dirt.
13. Wipe Down Shelves and Drawers Monthly
Dust and grime don't just sit on surfaces—they transfer to your clothes. A quick monthly wipe-down keeps your wardrobe fresh and prevents stubborn stains from developing over time. It's one of those small tasks that pays off big in the long run.
Grab a damp microfiber cloth and go over every shelf and drawer interior. Pay special attention to corners and edges where dust bunnies like to hide. For wooden shelves, use a slightly damp cloth and dry immediately to avoid warping.
For fabric-lined drawers, a gentle vacuum with a brush attachment works wonders. This simple habit also helps you spot any spills or pests early, before they become a problem.
Choose The Right Cloth
Microfiber is your best friend here. It traps dust instead of pushing it around. Avoid paper towels—they can leave lint behind, especially on dark surfaces.
Don't Forget The Hardware
Drawer pulls and shelf brackets collect dust too. A quick wipe keeps them looking clean and prevents buildup that can snag delicate fabrics.
Add A Protective Layer
Consider lining shelves with acid-free paper or drawer liners. They make future cleaning even easier and add a layer of protection against moisture and rough surfaces.
14. Use Cedar Blocks for Moth Prevention
Moths can quietly destroy your favorite sweaters and scarves before you even notice. Instead of reaching for chemical-laden mothballs, try a natural solution that smells great and works just as well. Cedar blocks are a classic, effective way to keep moths away without any harsh fumes.
Why Cedar Works
Cedar contains natural oils that repel moths and other insects. The scent is pleasant to humans but overwhelming to pests. Unlike mothballs, cedar doesn't leave a chemical residue on your clothes, and it won't irritate your skin or lungs.
Where To Place Cedar Blocks
Tuck a few blocks into your dresser drawers, especially where you store wool, cashmere, or other natural fibers. Place them on closet shelves between stacks of sweaters, or hang a cedar sachet from a hanger. For best coverage, put blocks in every drawer and shelf where vulnerable items live.
Keeping Cedar Effective
Over time, the aromatic oils in cedar fade. To refresh them, simply sand the surface of the block with fine-grit sandpaper every few months. You'll release the oils and restore the moth-repelling power.
Cedar blocks can last for years with occasional sanding.
15. Store Leather and Suede in Breathable Bags
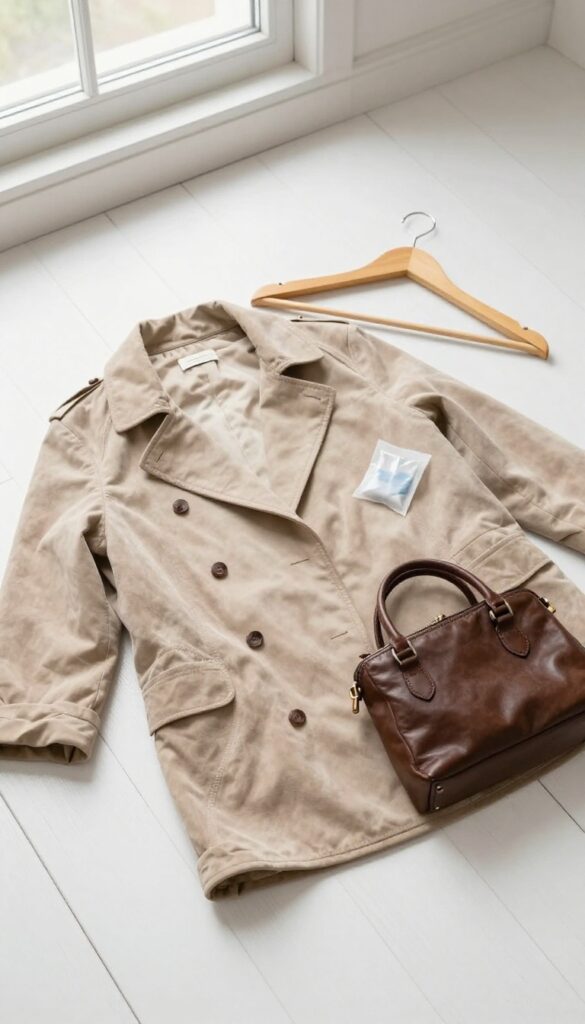
Leather and suede are investment pieces, but they're also high-maintenance when it comes to storage. Tossing them into a plastic dry cleaning bag or a sealed bin can trap moisture and lead to mildew, discoloration, and even permanent damage. The key is to let these natural materials breathe while keeping dust and light at bay.
Plastic bags are a no-go for leather and suede. They create a humid environment that encourages mold growth and can cause the leather to dry out and crack. Instead, use breathable cotton or canvas garment bags.
These allow air circulation while protecting your items from dust, light, and accidental snags. For suede shoes, individual cotton shoe bags work perfectly. Always store leather and suede in a cool, dry place away from direct sunlight, which can fade colors and dry out the material.
If you live in a humid climate, consider adding a silica gel packet or a small dehumidifier to your closet to keep moisture levels in check.
Why Plastic Bags Are The Enemy
Plastic bags might seem convenient, but they're a disaster for leather and suede. They trap moisture, restrict airflow, and can even cause the dyes to bleed or the material to become sticky. Over time, the lack of ventilation leads to musty odors and mildew spots that are difficult to remove.
Always remove plastic coverings from dry-cleaned leather items as soon as you get home.
Choosing The Right Breathable Bag
Look for garment bags made from 100% cotton, canvas, or muslin. These materials allow air to circulate while blocking dust and light. Avoid bags with plastic zippers or vinyl panels.
For jackets, choose a bag that is slightly oversized to prevent crushing the shoulders. For shoes, individual cotton dust bags are ideal—they keep pairs together and prevent scuffs.
Storage Conditions Matter
Even with breathable bags, where you store your leather and suede matters. Keep them in a closet with consistent temperature and humidity. Avoid attics, basements, or garages where conditions fluctuate.
If your closet is prone to dampness, use a moisture absorber or a small dehumidifier. Also, never store leather items while they are damp—let them air dry completely first.
16. Refresh Shoes with Baking Soda
Shoes take a beating, and over time they can start to smell less than fresh. You don't need a fancy spray or a trip to the dry cleaner—baking soda is a simple, powerful deodorizer that works wonders. Just a sprinkle inside each shoe overnight can absorb moisture and neutralize odors, leaving them ready to wear again.
Baking soda is a natural, non-toxic way to keep your shoes smelling clean without harsh chemicals. It's especially useful for sneakers, work shoes, and any pair you wear frequently. The key is to let it sit long enough to do its job—overnight is ideal.
In the morning, simply tap out the powder or use a small brush to remove any residue. For extra freshness, you can add a few drops of essential oil to the baking soda before sprinkling.
Why Baking Soda Works
Baking soda is alkaline, which helps neutralize acidic odors caused by sweat and bacteria. It also absorbs moisture, creating an environment where odor-causing microbes can't thrive. Unlike sprays that just mask smells, baking soda actually removes them.
How To Apply It Right
Remove the insoles if possible and sprinkle a generous layer of baking soda inside each shoe. For deeper cleaning, you can also dust the insoles separately. Let it sit for at least 8 hours—overnight is perfect.
Before wearing, shake out the excess over a trash can or outside. A quick tap on the sole helps remove any clinging powder.
When To Repeat
For shoes you wear daily, a weekly treatment keeps odors at bay. If you notice smells returning sooner, increase the frequency. This method works for leather, canvas, synthetic, and most shoe materials.
Just avoid using it on very delicate fabrics like suede unless you test a small area first.
17. Steam Clothes Instead of Ironing
Ironing can be a tedious chore, especially for delicate fabrics or clothes with lots of seams and details. A handheld steamer offers a faster, gentler alternative that also freshens your clothes between washes. The steam relaxes fibers, removes wrinkles, and kills odor-causing bacteria, making it a versatile tool for wardrobe maintenance.
Why Steaming Beats Ironing
Steamers work by releasing hot vapor that penetrates fabric fibers, relaxing them and releasing wrinkles without the direct pressure of an iron. This makes them ideal for delicate materials like silk, chiffon, and knits that can be damaged by a hot iron. Steaming also sanitizes fabrics, killing up to 99% of bacteria and dust mites, which is great for refreshing clothes that aren't dirty enough to wash.
How To Steam Clothes Properly
Hang the garment on a sturdy hanger and hold the steamer head a few inches away from the fabric. Move the steamer in downward strokes, letting the steam do the work. For stubborn wrinkles, gently pull the fabric taut with your free hand.
Always test on an inconspicuous area first, especially for delicate fabrics. Avoid steaming suede, waxed jackets, or clothes with heat-sensitive embellishments.
When To Reach For A Steamer
Use a steamer for quick touch-ups before heading out, for refreshing clothes that have been stored for a while, or for removing odors from gym wear and outerwear. It's also perfect for de-wrinkling curtains, bedding, and upholstery. Keep a handheld steamer in your closet or laundry room for easy access.
18. Keep a Trash Bag for Donations
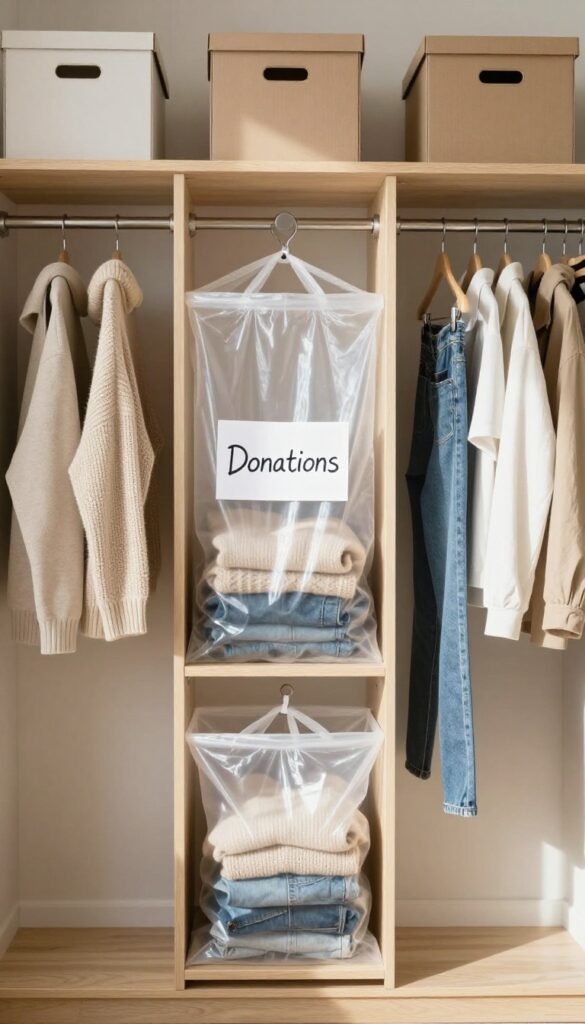
As you sort through your wardrobe, you'll inevitably find pieces that no longer fit, are out of style, or just don't spark joy. Instead of letting them pile up on a chair or taking up precious hanger space, grab a trash bag and designate it for donations right from the start. This simple trick keeps your cleaning process streamlined and ensures those unused items actually leave your home.
Having a donation bag handy transforms your closet purge into a guilt-free, efficient task. You don't have to second-guess every item or worry about where to put the rejects. Just toss them in the bag and keep moving.
At the end, you'll have a clear bag ready to drop off, and your closet will feel instantly lighter.
Make It A Permanent Station
Keep a reusable bag or box in your closet or laundry room year-round. Whenever you try on something and decide it's not working, drop it in immediately. This prevents the dreaded "maybe pile" from taking over your space.
Set A Donation Schedule
Don't let the bag sit for months. Pick a recurring date—like the first Saturday of each month—to take donations to your local charity or thrift store. This keeps your system moving and ensures the bag doesn't become a permanent fixture.
Know What To Toss
Not everything is donation-worthy. Torn, stained, or heavily worn items should be repurposed as rags or recycled. But anything gently used, clean, and in good condition is fair game.
Check your local organization's guidelines to avoid dropping off unusable items.
19. Use Drawer Dividers for Small Items
Drawer dividers are a simple fix that instantly transforms messy drawers into organized spaces. They keep socks, underwear, and accessories separated so you never have to dig around again. A few adjustable dividers can turn chaos into calm in minutes.
Choose The Right Dividers
Look for adjustable or modular dividers that fit your drawer dimensions. Bamboo or plastic options are durable and easy to clean. Measure your drawer before buying to ensure a snug fit.
Sort By Category And Frequency Of Use
Group similar items together—socks in one section, underwear in another, and accessories like belts or scarves in separate compartments. Place frequently used items at the front for easy access.
Maintain The System
Once dividers are in place, commit to putting items back in their designated spots. A quick five-minute reset each week keeps everything tidy. If you notice items overflowing, consider adding more dividers or decluttering.
20. Label Storage Bins Clearly
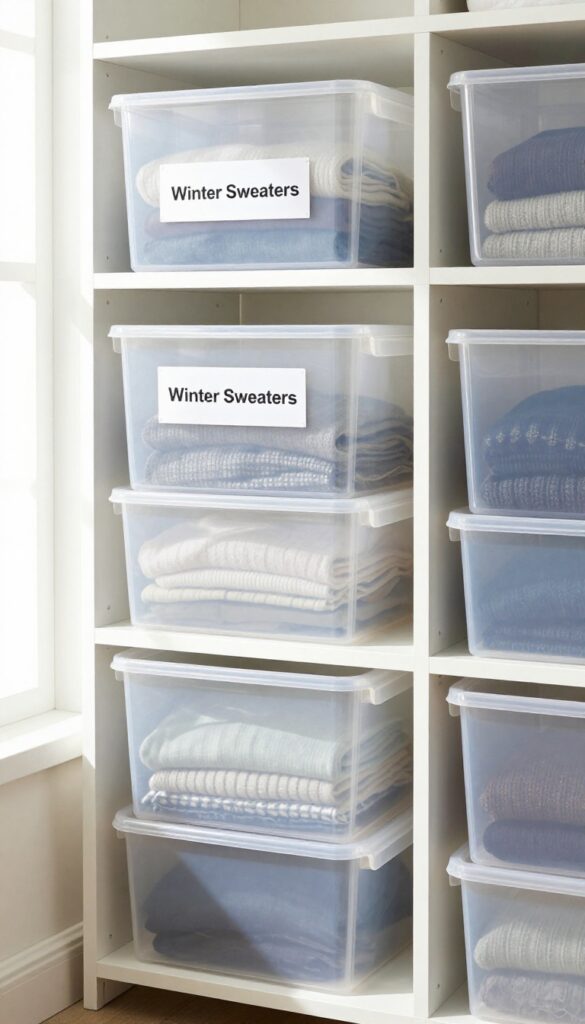
Labels save time when switching seasons. Use a label maker or masking tape to mark bin contents. This small step prevents digging through boxes to find that one sweater or pair of shorts.
Clear labels turn chaotic piles into an organized system. You'll know exactly where everything lives without opening every bin.
Why Labels Matter
When you store off-season clothes, it's easy to forget what's inside each bin. Labels eliminate guesswork. They also help family members put things back in the right place.
Best Labeling Methods
A label maker gives a clean, professional look. For a budget option, use masking tape and a permanent marker. Write the category (e. g. , “Winter Sweaters, ” “Summer Dresses”) and the month/year you stored them.
Where To Place Labels
Stick labels on the front and top of each bin. That way you can read them whether bins are stacked or on a shelf. Use clear packing tape over paper labels to prevent peeling.
21. Wash New Clothes Before Wearing
You might be tempted to wear that new shirt straight out of the bag, but it's worth taking a few minutes to wash it first. New clothes often carry chemical residues from the manufacturing process, including dyes, finishing agents, and even formaldehyde. A quick wash removes these irritants and helps set the colors, so your clothes look better and last longer.
Washing new clothes before wearing is a simple habit that protects your skin and your wardrobe. The chemicals used in production can cause allergic reactions or skin irritation, especially for sensitive skin. Plus, excess dye can transfer onto your skin or other clothes, ruining their appearance.
A single wash cycle with mild detergent is usually enough to make your new garments safe and ready to wear.
Why It Matters
New clothes are treated with various chemicals during manufacturing, such as anti-wrinkle agents, stain repellents, and fabric softeners. These residues can linger on the fabric and cause contact dermatitis or other skin issues. Washing also removes any dirt or germs picked up during handling, shipping, and storage.
How To Wash New Clothes
Check the care label first, then wash with a gentle detergent in cold water. Cold water is less likely to cause shrinkage or color bleeding. For brightly colored items, add a cup of white vinegar to the rinse cycle to help set the dyes.
Avoid using bleach or harsh chemicals that could damage the fabric.
When You Can Skip The Wash
Some items, like outerwear or dry-clean-only pieces, might not need a full wash. For these, airing them out overnight can help reduce chemical odors. But for anything that touches your skin directly, especially underwear and workout clothes, always wash first.
22. Spot Clean Between Full Washes
Not every item needs a full wash after one wear. Spot cleaning small stains and airing out clothes can extend their life and keep them fresh. This habit saves time, reduces wear and tear, and is kinder to your wardrobe and the environment.
The Quick Stain Fix
Treat stains as soon as you notice them. Use a damp cloth and a tiny drop of mild detergent or a stain remover pen. Gently dab—don't rub—to lift the stain without spreading it.
Rinse with a clean damp cloth and let the area air dry.
Air Out, Don't Wash
Many clothes just need a breath of fresh air. Hang them outside or in a well-ventilated area for a few hours. This removes odors from sweat or cooking and reduces the need for frequent washing.
It's especially effective for denim, sweaters, and jackets.
Use A Fabric Freshener
A simple spray of water mixed with a few drops of essential oil can refresh clothes between washes. Lightly mist the garment and let it air dry. This works great for items that aren't dirty but just smell stale from being in the closet.
23. Schedule a Seasonal Deep Clean
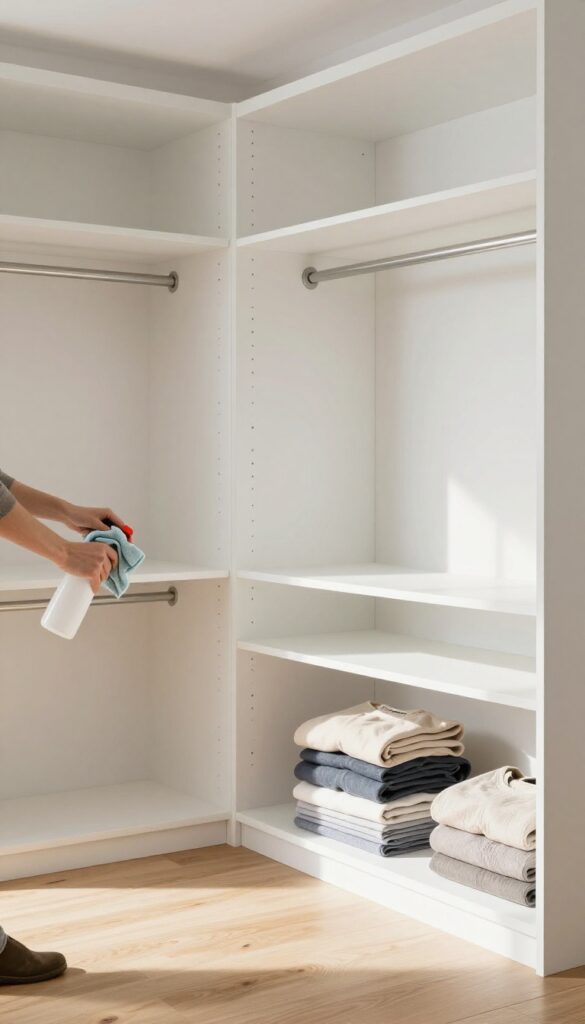
Twice a year, your closet deserves a reset. A seasonal deep clean isn't just about tidying—it's about giving your clothes and storage space a fresh start. Empty everything out, wipe down every surface, and take stock of what you actually wear.
This habit keeps your wardrobe feeling new and prevents clutter from building up.
Mark your calendar for spring and fall. These are natural transition points when you're already swapping out seasonal clothes. A full closet overhaul takes a few hours but pays off in months of easy mornings and neat shelves.
Start With A Complete Empty
Take everything out of your closet—clothes, shoes, accessories, and bins. This gives you a blank slate and lets you see the true state of your storage. While it's empty, vacuum the floor, dust shelves, and wipe down rods and drawers.
Use a gentle cleaner on surfaces to avoid residue that could transfer to clothes.
Sort And Declutter As You Go
As you put items back, sort them into three piles: keep, donate, and toss. Be honest about what you haven't worn in a year. If it's stained, torn, or doesn't fit, let it go.
This is also a great time to check for moth holes or other damage. Only return items that you love and will actually wear.
Reorganize For The Season Ahead
Arrange your keep pile by category and frequency of use. Place off-season items in storage bins or high shelves. Use the deep clean to try a new folding method or rearrange hanging sections.
A fresh layout can make your closet feel twice as big.
FAQ
How often should I clean my wardrobe?
Aim for a light clean every month and a deep clean every season. Regular maintenance prevents dust and clutter from building up.
Can I use bleach on all white clothes?
No, bleach can damage some fabrics like wool or silk. Use oxygen-based bleach for delicate whites.
What's the best way to store wool sweaters?
Fold them and store in a breathable container with cedar blocks to prevent moths. Avoid hanging to maintain shape.
How do I remove musty smells from clothes?
Wash with vinegar in the rinse cycle or soak in baking soda water. Ensure clothes are completely dry before storing.
Is it okay to dry clean all delicate items?
Not necessarily. Some delicates can be hand-washed. Always check the care label first.
Conclusion
A well-organized wardrobe saves you time, money, and daily frustration. You don't need to overhaul everything overnight—start with the tips that address your biggest pain points, like tangled hangers or overflowing drawers. Small, consistent actions build lasting habits.
Pick one or two changes today and let the momentum grow. Before long, your clothes will stay fresher, your space will feel calmer, and getting dressed will actually be enjoyable. Your future self will thank you for the effort.


