Nobody likes staring at scuffed baseboards or dusty fingerprints on their freshly painted walls. But before you reach for harsh chemicals or expensive cleaners, try these 17 clever wall cleaning hacks that use everyday household items.
From toothpaste to dryer sheets, each trick targets a specific type of mark—scuffs, grease, crayon, or dust—without damaging your paint. Whether you're prepping for guests or just tired of looking at that mysterious smudge, these solutions are budget-friendly and surprisingly effective.
Let's get those walls spotless.
1. The Magic Eraser Hack for Stubborn Scuffs
Scuff marks from shoes, furniture, or toys can make even the cleanest walls look messy. The good news? You don't need a special cleaner to erase them.
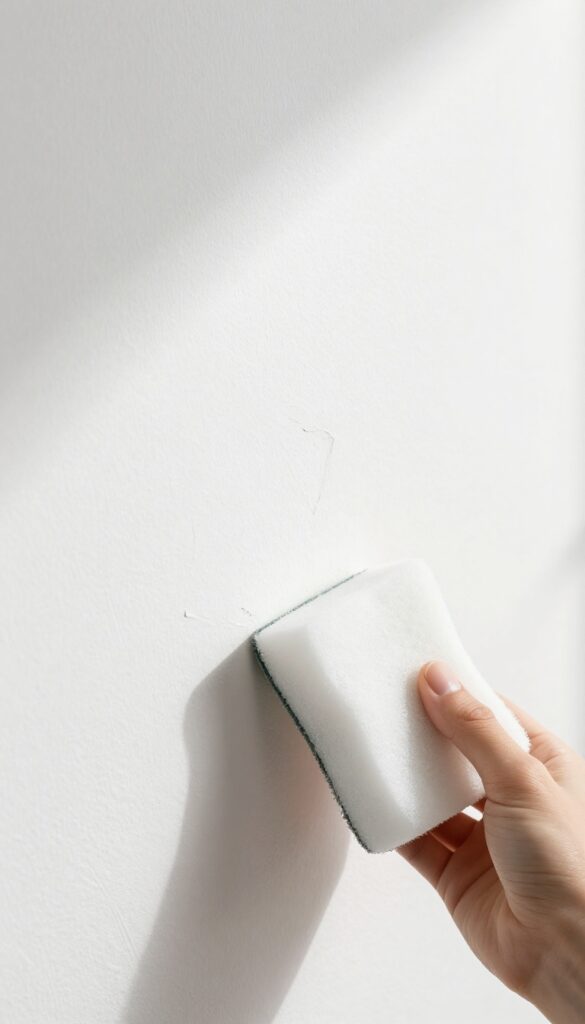
A melamine foam sponge—often sold as Mr. Clean Magic Eraser—works like a charm with just water.
Dampen the sponge slightly, then gently rub the scuff mark in a circular motion. The foam acts like super-fine sandpaper, lifting the mark without damaging most paint finishes. Always test on a small, hidden area first to ensure it won't remove paint or sheen.
This hack is fast, cheap, and chemical-free.
Why It Works So Well
Melamine foam is made of a micro-structured material that creates friction at a microscopic level. When wet, it becomes mildly abrasive yet gentle enough for painted walls. It physically lifts dirt and scuffs without relying on solvents or bleach.
Best Practices For Best Results
Use a light touch—pressing too hard can remove paint or create a dull spot. Work from the outside of the mark inward to avoid spreading. Rinse the sponge frequently as it picks up dirt, and replace it once it starts crumbling.
When To Avoid This Hack
Avoid using magic erasers on flat or matte paint, as they can leave a shiny patch. Also skip them on textured walls or wallpaper, where the abrasion might cause damage. For those surfaces, try a gentler method like baking soda paste.
2. Toothpaste Trick for Crayon and Pencil Marks
Kids love turning walls into canvases, but you don't have to live with the evidence. A simple tube of non-gel white toothpaste can erase crayon and pencil marks without damaging your paint. The mild abrasive in toothpaste lifts pigment gently, making it a safe alternative to harsh scrubbing.
Squeeze a pea-sized dab of non-gel white toothpaste onto a damp microfiber cloth. Rub the mark in a circular motion with light pressure—the paste will foam slightly as it breaks down the crayon or pencil pigment. Wipe away residue with a clean damp cloth, then dry the area.
For stubborn marks, let the toothpaste sit for 30 seconds before rubbing. Avoid gel or colored toothpaste, as they can stain or leave residue.
Why It Works
Toothpaste contains mild abrasives like calcium carbonate or silica that act as a gentle polish. These particles are fine enough to lift pigment from porous wall surfaces without scratching the paint. The foaming agents also help dissolve waxy crayon binders, making the mark easier to wipe away.
Best Surfaces And Limitations
This hack works best on semi-gloss and satin paint finishes. Flat or matte paints are more porous and can absorb the toothpaste, leaving a dull spot. Always test on an inconspicuous area first.
Avoid using on wallpaper or textured walls, as the abrasive can damage the surface.
Pro Tips For Tough Marks
For old or layered crayon marks, apply a thicker layer of toothpaste and let it sit for two minutes before rubbing. Use an old toothbrush to gently work the paste into the mark for extra scrubbing power. After cleaning, rinse with a damp cloth to remove any residue and restore the wall's sheen.
3. Baking Soda Paste for Grease Spots
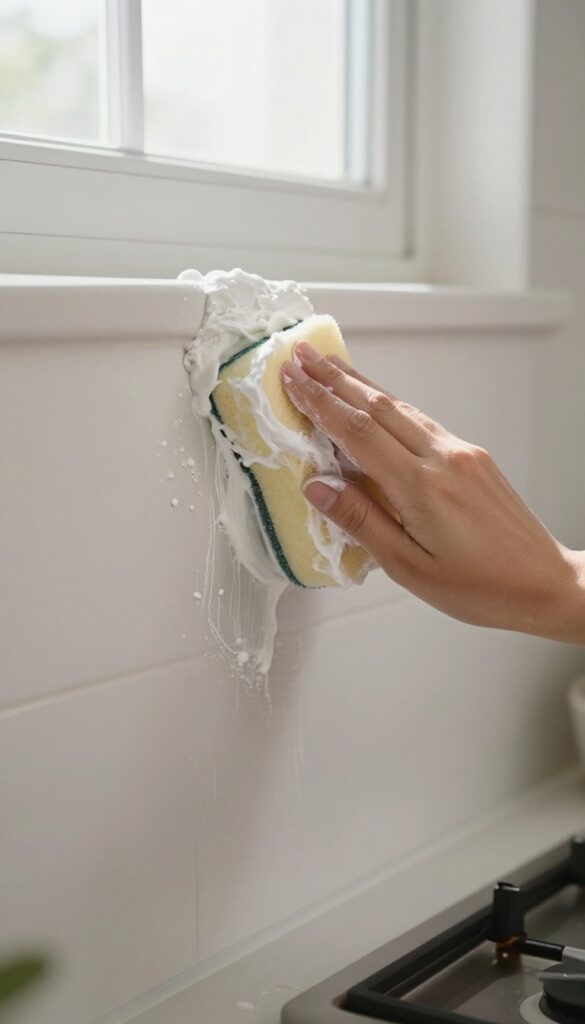
Grease splatters near the stove or dining table can be stubborn, but baking soda handles them without harsh chemicals. This gentle abrasive lifts oil without damaging paint, making it a go-to for kitchen walls. Here's how to make it work.
Baking soda is a mild abrasive that cuts through grease without scratching paint. Mix it with water to form a thick paste, apply to the stain, let it sit, then wipe away. For tough spots, add a drop of dish soap.
Why It Works
Baking soda is alkaline, which helps break down fatty acids in grease. Its fine grit provides gentle scrubbing power, lifting grime from the paint surface without leaving marks. Unlike harsh solvents, it's safe for most wall finishes.
Step-by-step Application
Mix 3 parts baking soda with 1 part water until it forms a spreadable paste. Apply a thick layer to the grease spot using a soft cloth or sponge. Let it sit for 5–10 minutes to break down the oil.
Gently rub in a circular motion, then wipe with a damp cloth. Repeat if needed.
Pro Tips For Best Results
Test on an inconspicuous area first, especially on flat or matte paint. For old or baked-on grease, add a few drops of white vinegar to the paste for extra cleaning power. Avoid scrubbing too hard—let the paste do the work.
4. Vinegar Solution for Dust Buildup
Dust doesn't just settle on shelves—it clings to walls, especially in corners and near vents. Over time, it can make your paint look dull and grimy. A simple vinegar solution cuts through that layer of dust without leaving streaks or residue, and it's safe for most painted surfaces.
Mix equal parts white vinegar and water in a spray bottle. Lightly mist a section of the wall, then wipe with a dry microfiber cloth. The vinegar breaks down the dust's electrostatic cling, so you pick up more in fewer passes.
No need to rinse—just let it air dry. For heavy buildup, let the solution sit for a minute before wiping. Avoid oversaturating to prevent drips on baseboards.
Why Vinegar Works Best
White vinegar is mildly acidic, which helps dissolve the oils and grime that trap dust. Unlike commercial dust sprays, it leaves no chemical residue that attracts more dust later. Plus, it's non-toxic and cheap.
How To Apply Without Streaks
Use a clean microfiber cloth—not paper towels, which can leave lint. Work from top to bottom in small sections. If you see streaks, your cloth is too wet; give it a squeeze.
For textured walls, use a soft-bristle brush attachment on a vacuum first to loosen dust, then follow with the vinegar spray.
When To Avoid This Method
Test on an inconspicuous spot first, especially if your walls are painted with matte or flat finish—vinegar can sometimes dull these. Avoid using on unsealed wallpaper or limewash. If you're unsure, dilute the vinegar further (1: 2 ratio) and test.
5. Dryer Sheet for Static Dust Removal
Dryer sheets aren't just for the laundry room. A used dryer sheet can be your secret weapon against dusty walls. The anti-static properties in the sheet help repel dust, so it doesn't settle back as quickly.
This trick is especially handy for baseboards and corners where dust loves to accumulate.
To use, simply grab a used dryer sheet—one that's still soft but no longer effective for laundry is perfect. Lightly rub it over the dusty surface. You'll see the dust cling to the sheet, and the wall will come away clean.
The anti-static treatment leaves a microscopic barrier that discourages new dust from sticking. This method works on painted walls, wallpaper, and even blinds. It's quick, chemical-free, and makes your cleaning last longer.
For best results, use unscented dryer sheets if you're sensitive to fragrances.
Why It Works
Dryer sheets contain cationic surfactants that neutralize static charge. When you wipe a dusty surface, the sheet attracts and holds dust particles while leaving behind a thin anti-static coating. This coating prevents dust from being attracted back to the surface, meaning your walls stay cleaner for longer.
It's the same reason your clothes come out of the dryer static-free.
Best Surfaces To Use It On
This hack shines on smooth painted walls, baseboards, window sills, and blinds. It's also great for cleaning dusty lampshades and plastic surfaces. Avoid using dryer sheets on unfinished wood or delicate wallpaper, as the chemicals might leave a residue.
Always test a small hidden area first.
Pro Tips For Better Results
Use a fresh dryer sheet for each room to avoid spreading dust. For heavy dust buildup, give the wall a quick vacuum with a brush attachment first, then finish with the dryer sheet. You can also cut a used sheet into smaller pieces for tight spots like corners and behind furniture.
Store used sheets in a sealed bag until you're ready to clean.
6. Eraser Sponge for Pencil and Pen Ink
Pencil marks and ballpoint pen ink don't have to be permanent wall fixtures. Before you grab a magic eraser or paintbrush, try a simple pencil eraser—the kind you used in school. It's surprisingly effective at lifting graphite and some inks without damaging the paint finish, as long as you're gentle.
For pencil marks, a clean white eraser works best. Rub lightly in one direction, and the graphite should lift away. For ballpoint pen ink, test on an inconspicuous spot first—some inks may smear.
If it works, use a fresh eraser and gentle pressure to avoid wearing down the paint. This hack is ideal for small, fresh marks; older or stubborn ink may need a different approach.
Why An Eraser Works
Pencil erasers are designed to lift graphite from paper without tearing it. On walls, the same gentle abrasion removes graphite and some ballpoint inks. The key is using a clean eraser and light pressure—too much force can rub off the paint finish, especially on flat or matte paints.
Step-by-step For Pencil Marks
Start with a clean, white vinyl eraser (pink erasers can leave color). Gently rub the mark in short strokes, brushing away eraser crumbs as you go. If the mark doesn't lift after a few passes, stop—it may be embedded.
For stubborn marks, try a damp cloth first, then the eraser.
Handling Ballpoint Pen Ink
Ballpoint ink can be trickier. Test on a hidden area. If the ink smears, stop—the eraser might spread it.
If it lifts, use a fresh eraser and rub in one direction. For dried or stubborn ink, dab with rubbing alcohol first, then try the eraser. Always finish by wiping the area with a damp cloth.
7. Rubbing Alcohol for Permanent Marker
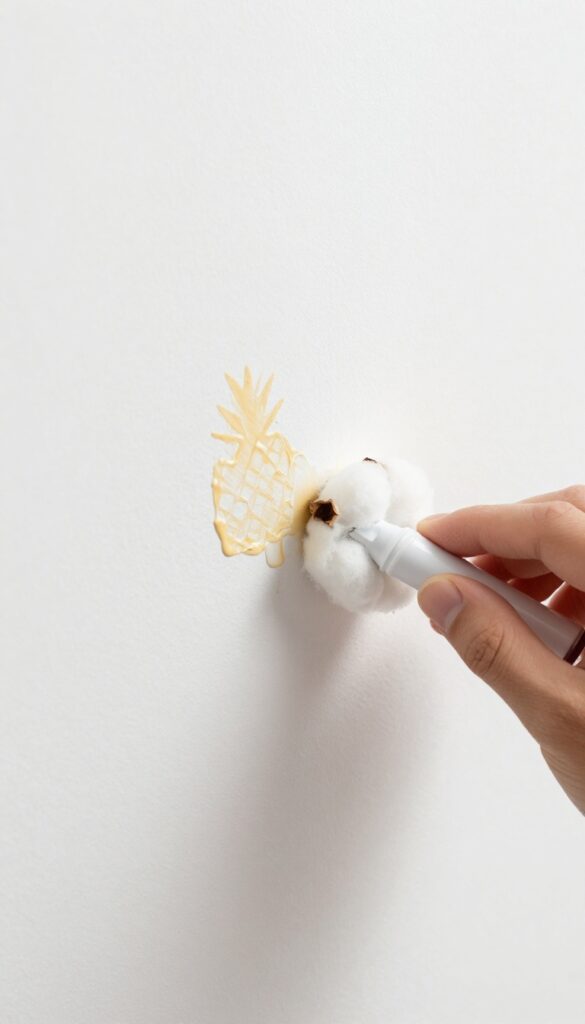
Permanent marker on walls is one of those moments where you might panic—but don't. Rubbing alcohol breaks down the ink's solvents quickly, making it one of the most reliable fixes. You probably already have a bottle in your medicine cabinet.
Dab a cotton ball or soft cloth with rubbing alcohol and gently blot the marker stain. The alcohol dissolves the ink, lifting it from the paint without scrubbing. For stubborn marks, let it sit for a few seconds before blotting.
Rinse the area with a damp cloth afterward to remove any residue and prevent damage to the paint finish.
Why It Works
Permanent marker ink contains solvents that bind to surfaces. Rubbing alcohol is also a solvent, so it re-dissolves the ink, making it easy to wipe away. It's gentle enough for most painted walls but effective enough to erase even dried-on marks.
Step-by-step
First, test the rubbing alcohol on an inconspicuous spot to ensure it doesn't damage your paint. Then, dampen a cotton ball or soft cloth—don't soak it. Blot the stain, working from the outside in to avoid spreading.
Repeat with fresh cotton balls as needed. Finally, wipe the area with a clean, damp cloth to remove any leftover alcohol.
Pro Tips
Use 70% isopropyl alcohol for most walls—it's strong enough but less harsh than higher concentrations. For flat or matte paint, be extra gentle to avoid rubbing off the finish. If the marker is on wallpaper, test a hidden spot first, as alcohol can affect some patterns or adhesives.
8. Dish Soap and Warm Water for General Grime
Sometimes the simplest solution is all you need. Dish soap and warm water might sound too basic, but it’s surprisingly effective at cutting through everyday wall grime—think fingerprints, light dust, and minor smudges. This gentle mix won’t strip paint or leave residue, making it safe for most wall finishes.
Plus, you probably already have both ingredients in your kitchen.
For a quick refresh, mix a few drops of mild dish soap into a bucket of warm water. Dip a soft sponge, wring it out well so it’s damp not dripping, and wipe the wall in small sections. Rinse the sponge frequently in clean water to avoid spreading dirt around.
Work from the top down so drips don’t stain already cleaned areas. This method is especially good for high-traffic zones like hallways and around light switches.
Why Dish Soap Works
Dish soap is a degreaser, so it lifts oily fingerprints and airborne kitchen grease that settles on walls. It’s also pH-neutral, meaning it won’t react with paint or cause discoloration. Unlike all-purpose cleaners with harsh solvents, this mix is gentle enough for daily use without damaging flat or matte finishes.
Best Practices For A Streak-free Finish
Always test a small hidden area first. Use a white sponge to avoid color transfer. Don’t oversaturate the wall—excess moisture can seep into drywall and cause bubbling.
After wiping, go over the area with a dry microfiber cloth to buff away any streaks. For stubborn spots, let the soapy water sit for a minute before wiping.
9. Cornstarch for Greasy Handprints
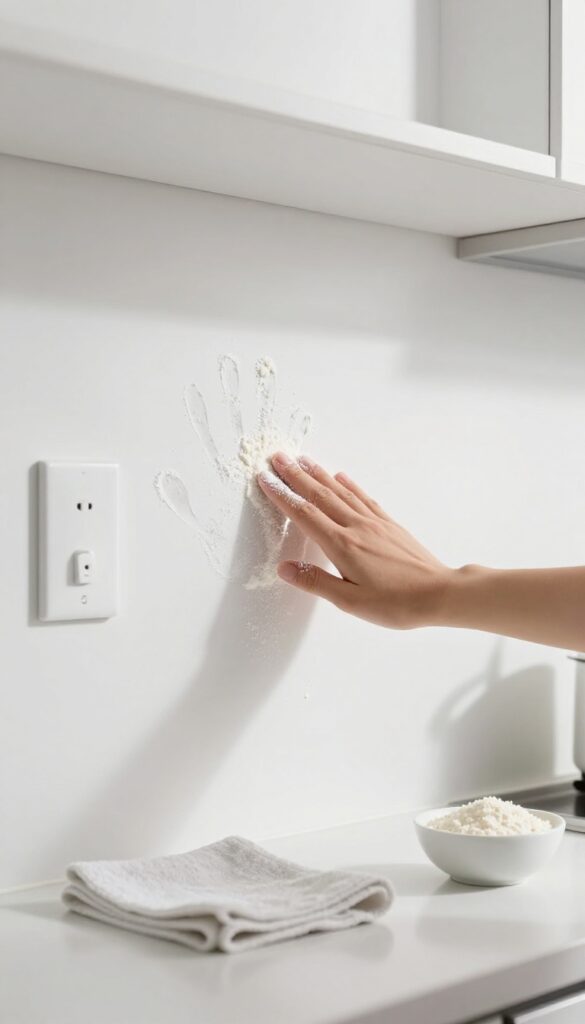
Greasy handprints on walls are a common eyesore, especially in kitchens and hallways near light switches. Before you scrub with harsh cleaners that might strip paint, try a simple pantry staple: cornstarch. It absorbs oil without damaging the finish, making it a gentle yet effective solution.
Cornstarch works like a dry shampoo for your walls—it soaks up the grease so you can wipe it away without spreading the mess. This method is especially useful for flat or matte paint, which can be tricky to clean with liquids. Best of all, it requires minimal effort and no special tools.
How It Works
Grease is oil-based, so water alone won't cut it. Cornstarch is a fine powder that acts as an absorbent, pulling the oil out of the paint pores. Once the powder sits, it binds to the grease, making it easy to brush off.
A quick damp wipe then removes any remaining residue.
Step-by-step Application
Start by sprinkling a generous layer of cornstarch directly onto the greasy handprint. Let it sit for 10 minutes—this gives the powder time to absorb the oil. Use a soft brush or a dry cloth to gently brush off the cornstarch.
Finally, wipe the area with a damp microfiber cloth to reveal a clean, smudge-free wall.
Tips For Best Results
For stubborn prints, let the cornstarch sit longer, up to 20 minutes. If you don't have cornstarch, baby powder or baking soda can work similarly. Always test on a hidden spot first, especially on painted walls, to ensure no discoloration.
Avoid rubbing too hard, as this can push the grease deeper into the paint.
10. Baby Wipes for Quick Touch-Ups
You don't need a full cleaning arsenal for every little mark. Sometimes the fastest fix is something you already have in the nursery—or the diaper bag. Baby wipes are surprisingly effective on walls because they're pre-moistened, gentle, and tough enough to lift smudges without scrubbing away your paint.
Baby wipes are a lifesaver for quick spot cleaning. They work on fingerprints around light switches, food splatters near the dining table, and light dirt along baseboards. The key is to use a gentle dabbing motion rather than aggressive rubbing.
For tougher spots, let the wipe sit on the mark for a few seconds before wiping. Always test on an inconspicuous area first, especially if your walls have a matte finish that can be more delicate.
Why Baby Wipes Work
Baby wipes are formulated with mild cleansers and moisturizers that break down dirt without harsh chemicals. The texture is soft enough to avoid scratching paint, yet the fibers trap dust and grime effectively. They're also alcohol-free in most cases, which means they won't dry out or discolor your wall paint.
Best Uses And Techniques
Use baby wipes on smudges, crayon marks, and light scuffs. For dried-on food or sticky residue, press the wipe against the spot for 10–15 seconds to soften it. Then gently wipe in one direction.
Avoid circular scrubbing, which can create a noticeable sheen on flat paint. After cleaning, let the wall air dry—no rinsing needed.
What To Avoid
Don't use baby wipes on heavily textured walls or wallpaper, as the moisture can seep into crevices and cause peeling. Also avoid using them on fresh paint (less than a month old) or on surfaces that are prone to water damage. For stubborn stains like permanent marker or grease, you'll need a stronger solution.
11. Hair Dryer for Wax or Crayon Melts
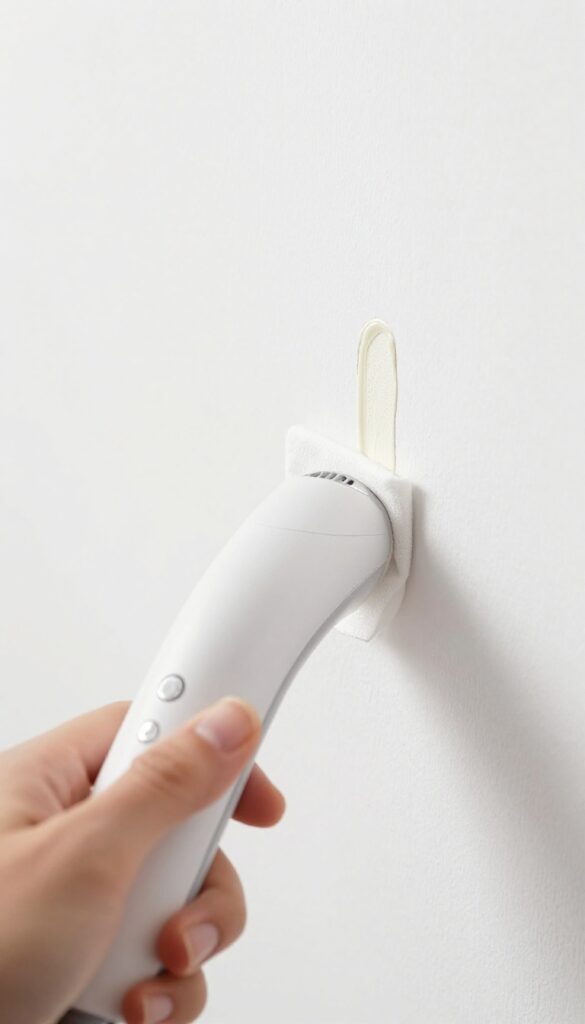
Crayon art on walls is cute until it's on your freshly painted living room. Wax-based marks can be stubborn, but heat is their weakness. A hair dryer on low heat softens the wax, making it easy to wipe away without damaging the paint.
Set your hair dryer to low heat and hold it a few inches from the mark. Move it gently until the wax begins to glisten or soften. Then grab a paper towel or a soft cloth and wipe the melted residue away.
The key is patience—don't rush the heat or you might spread the wax. Avoid scraping with a knife or scrubber, as that can peel the paint. This hack works great for crayon, candle wax drips, and even some lipstick marks.
Why Heat Works Best
Wax and crayon marks are oil-based, so they don't dissolve in water. Heat melts the wax, turning it into a liquid that can be absorbed by a cloth. This method lifts the mark without scrubbing, which protects your wall's finish.
Step-by-step Process
First, test the hair dryer on an inconspicuous spot to ensure the paint can handle low heat. Then aim the dryer at the wax mark, moving it in a circular motion. Once the wax looks shiny or starts to run, blot it with a paper towel.
Repeat if needed, but don't let the wax pool.
What To Avoid
Never use high heat—it can blister the paint or cause it to bubble. Also, avoid rubbing the wax while it's still solid; that can grind it deeper into the wall. If you have textured walls, use a soft toothbrush to gently lift the softened wax after heating.
12. Microfiber Cloth for Dust-Free Shine
Dusting walls might feel like a losing battle—you wipe them down, and within days, the dust is back. The trick isn't working harder; it's working smarter. A simple microfiber cloth can make all the difference, trapping dust instead of just pushing it around.
Here's how to get that dust-free shine without the hassle.
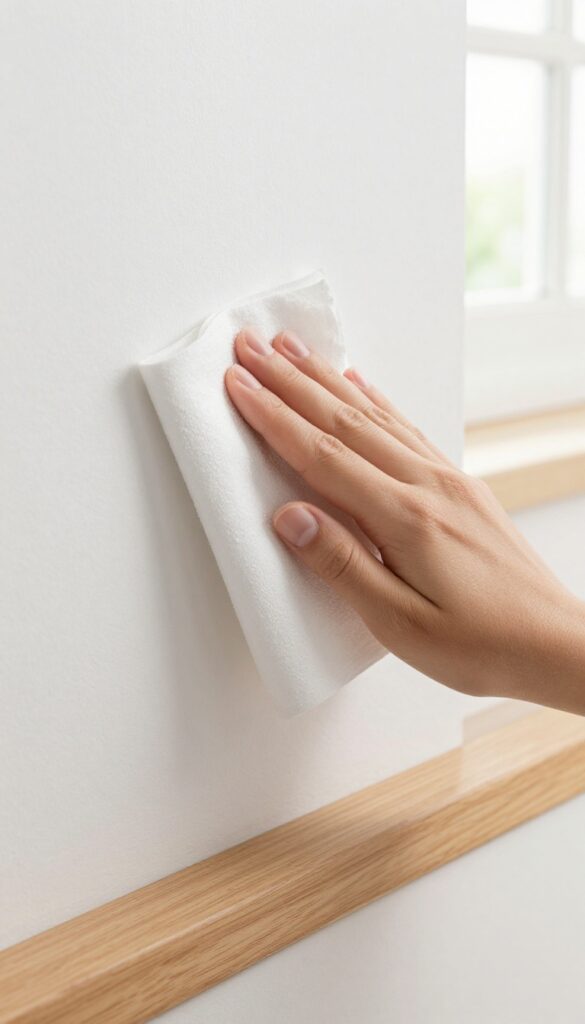
Regular dusting with a dry microfiber cloth keeps walls looking fresh and prevents dust from settling into a stubborn layer. Unlike feather dusters or old rags, microfiber fibers have a static charge that attracts and holds dust particles. For best results, use a clean, dry cloth and work from top to bottom.
Wash the cloth frequently—every few uses—to keep it effective. Avoid fabric softeners, as they coat the fibers and reduce their dust-trapping ability.
Why Microfiber Works
Microfiber is made of ultra-fine synthetic fibers, typically polyester and polyamide, that are split during manufacturing. These split fibers create tiny hooks and spaces that grab dust, dirt, and even bacteria. When dry, the static charge attracts dust like a magnet.
When slightly damp, the fibers can pick up grime without leaving streaks.
How To Dust Walls Properly
Start at the top of the wall—near the ceiling—and work your way down. Use long, overlapping strokes to avoid missing spots. For textured walls, press the cloth gently into the surface to dislodge dust from crevices.
Change to a clean section of the cloth as it gets dirty. Don't use circular motions, which can spread dust around.
Washing And Care Tips
Microfiber cloths need proper care to maintain their effectiveness. Wash them separately from cotton towels or lint-producing fabrics. Use warm water and a mild detergent—no bleach or fabric softener.
Air dry or tumble dry on low heat. Over time, the fibers may lose their grip; replace cloths when they stop picking up dust efficiently.
13. Pumice Stone for Textured Wall Scuffs
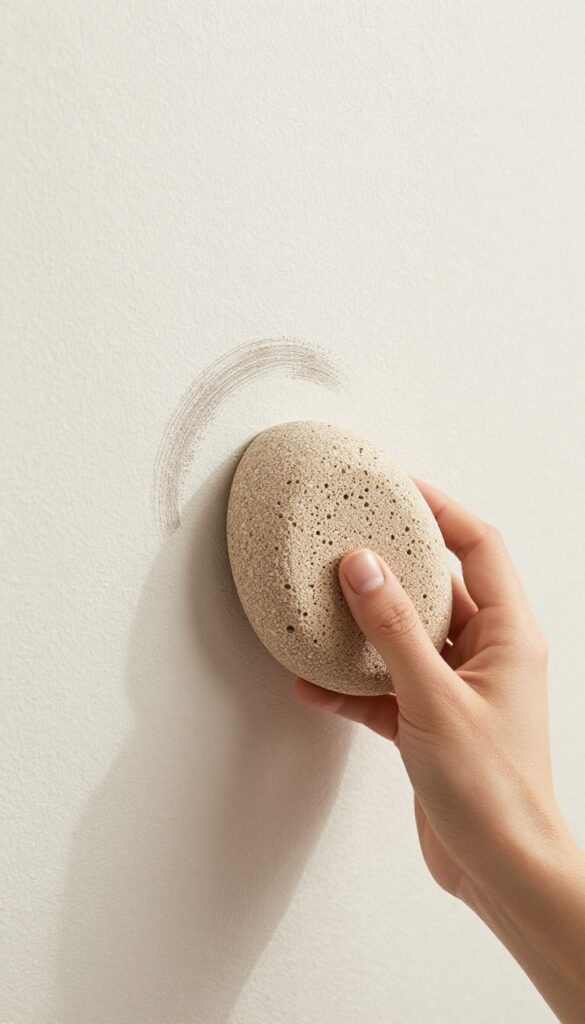
Textured walls like popcorn or orange peel are great at hiding imperfections—until a dark scuff appears right in the middle. Scrubbing with a sponge often flattens the texture, making the mark worse. That's where a pumice stone comes in handy.
It's abrasive enough to erase scuffs but gentle enough to leave the texture intact.
A pumice stone is a lightweight, porous volcanic rock commonly used for removing calluses. Its rough surface acts like fine sandpaper, but because it's soft, it won't gouge or flatten textured wall surfaces. The key is to use it dry and apply light pressure.
You'll see the scuff lift away without damaging the paint or texture underneath.
How To Use A Pumice Stone On Walls
Start with a clean, dry pumice stone. Gently rub the stone over the scuff in a circular motion, using almost no pressure. Let the stone do the work—pressing hard can damage the texture.
Wipe away any dust with a dry cloth. Repeat if needed, but most scuffs disappear after a few light passes.
When To Use This Method
This trick works best on dark, stubborn scuffs caused by shoes, furniture, or toys. It's ideal for textured walls that can't be wiped clean with a damp cloth. Avoid using pumice on flat, smooth walls—it can leave scratches.
Also skip it on delicate or painted surfaces that might chip.
Precautions And Tips
Always test the pumice stone on an inconspicuous area first. If the stone leaves a mark or scratches, stop immediately. Use a fresh, dry stone for best results—wet stones are less abrasive and can smear the scuff.
After cleaning, you can touch up the area with paint if needed, but usually the stone leaves no trace.
14. Lemon Juice for Mildew Spots
Mildew can show up in damp areas like bathrooms or basements, leaving dark, fuzzy spots on walls. Before you reach for bleach, try a natural alternative: lemon juice. Its acidity breaks down mildew without the harsh fumes, and it leaves behind a fresh citrus scent.
To use this hack, simply squeeze fresh lemon juice onto the mildew spots—or use bottled lemon juice if that's what you have. Let it sit for about 15 minutes so the acid can work its magic. Then, scrub gently with a soft brush or sponge, and rinse the area with a damp cloth.
The mildew should lift away easily, and the lemon juice helps prevent it from coming back quickly.
Why Lemon Juice Works
Lemon juice is naturally acidic, which makes it a mild disinfectant and a great mold killer. It breaks down the cell walls of mildew, effectively killing it without the toxic smell of bleach. Plus, it's gentle on most paint finishes, so you don't have to worry about damage.
Best Spots To Use This Hack
This method works especially well on bathroom walls near showers or tubs, and on basement walls that get musty. Avoid using it on unsealed or porous surfaces like unfinished drywall, as the moisture could cause more issues. Stick to painted or sealed walls for the best results.
Tips For Stubborn Mildew
If the mildew doesn't come off after one try, repeat the process or let the lemon juice sit a bit longer. You can also add a pinch of salt to the lemon juice to make a gentle scrub. For really tough spots, follow up with a baking soda paste, but always rinse well afterward.
15. Paint Touch-Up for Deep Stains
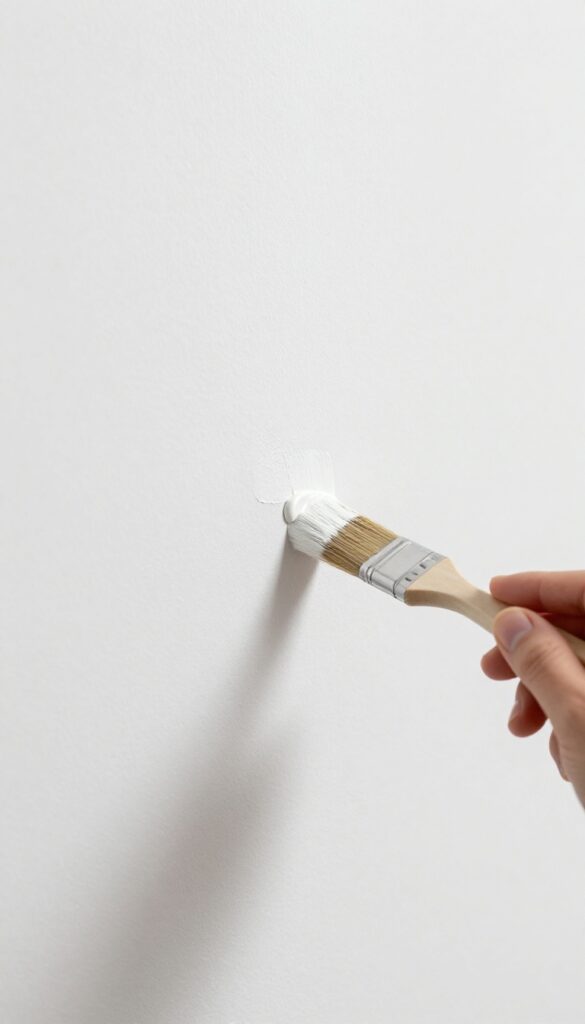
Some stains just won't budge no matter how hard you scrub. When cleaning fails, a little leftover paint can save the day. Keep a small container of your wall color stored away for emergencies—it's the ultimate fix for deep, stubborn marks.
Matching the paint finish is key. Flat paint blends easily, while satin or semi-gloss may require a bit more finesse. Always test on a hidden spot first to confirm the color and sheen still match.
Use A Tiny Brush For Precision
A small artist's brush or a foam brush gives you control. Dip just the tip into the paint and dab lightly over the stain. Avoid loading the brush too much—less is more.
Let it dry completely before deciding if a second coat is needed.
Feather The Edges For A Seamless Blend
Instead of painting a solid patch, lightly feather the edges outward. This means using a nearly dry brush to sweep the wet edge into the surrounding paint. The result is a smooth transition that hides the repair.
When You Don't Have Leftover Paint
No leftover paint? Take a chip to the hardware store for color matching. Or use a clean, damp sponge to dab on a tiny amount of paint for a textured finish that blends with flat walls.
16. Vacuum Brush Attachment for Cobwebs and Dust
Cobwebs in corners and dust settling on walls can make even the cleanest room feel neglected. But you don't need a duster or a ladder—your vacuum cleaner already has the perfect tool for the job.
The soft brush attachment is gentle enough for painted walls but effective at lifting dust and cobwebs without spreading them into the air. It's a quick, mess-free way to maintain walls between deeper cleanings.
Why The Brush Attachment Works
Unlike a dry cloth that just redistributes dust, the vacuum's suction pulls particles directly into the canister. The soft bristles loosen cobwebs without damaging paint or leaving streaks.
Best Technique For Corners And Ceilings
Start from the top and work your way down. For corners, use the crevice tool first to dislodge cobwebs, then follow up with the brush attachment to catch any falling debris. Move slowly to avoid scattering dust.
When To Skip This Method
Avoid using the brush attachment on heavily textured walls like popcorn or stucco—it can snag or pull off material. Stick to smooth or lightly textured surfaces for best results.
17. Lint Roller for Pet Hair and Lint
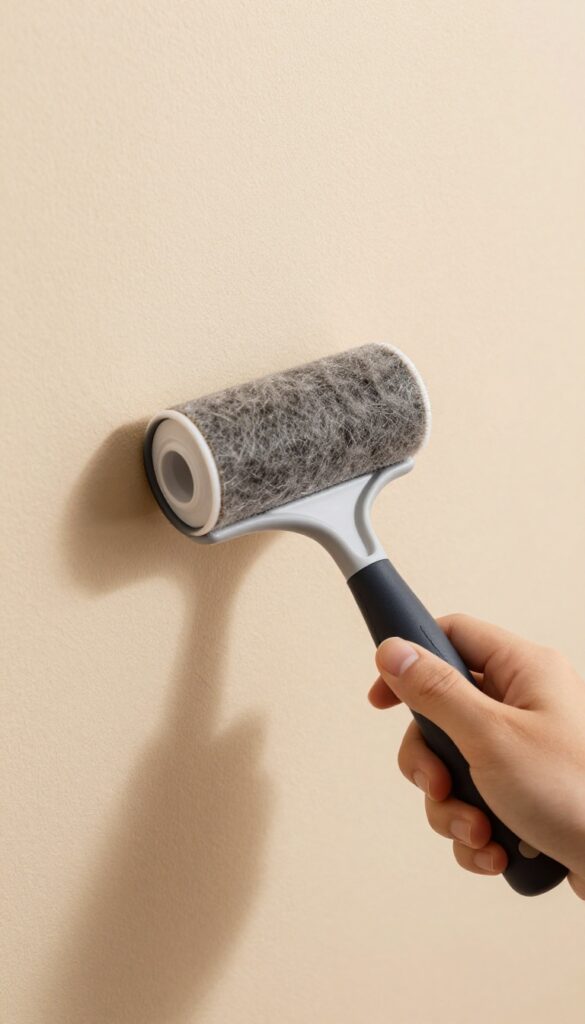
Pet hair and lint have a way of clinging to walls, especially if you have textured surfaces or fabric wall coverings. Instead of wiping them down with a cloth that just pushes the debris around, grab a lint roller. It’s a quick, low-effort hack that picks up fuzz and hair without smearing or leaving residue.
A lint roller works wonders on walls because the adhesive sheet grabs loose particles that dusters and cloths often miss. It’s particularly effective on textured walls like orange peel or knockdown, where pet hair gets trapped in the grooves. Simply roll the lint roller over the affected area in overlapping strokes.
When the sheet gets full, peel it off and continue. For large sections, a wide lint roller (like the ones for furniture) covers more ground quickly. This method is also safe for all paint types and wallpapers, as long as you don’t press too hard.
Best Walls For This Hack
Lint rollers work best on flat, matte, or textured walls. They’re especially useful for fabric-covered walls (like burlap or grasscloth) where vacuuming might snag fibers. Avoid using them on freshly painted walls (cure time of at least 30 days) to prevent lifting paint.
When To Skip The Lint Roller
For heavy dust buildup or greasy residue, a lint roller won’t cut it—it’s designed for dry, loose particles. Also, avoid using it on walls with active peeling paint or wallpaper, as the adhesive might pull more off.
Pro Tip For Stubborn Pet Hair
If pet hair is deeply embedded in texture, try running a dry microfiber cloth over the area first to loosen it, then follow up with the lint roller. This two-step process picks up more without damaging the wall surface.
FAQ
Can I use bleach on painted walls?
Bleach can damage paint and cause discoloration. Instead, use a vinegar solution or a mild dish soap mixture for disinfecting.
How do I clean flat paint without leaving marks?
Use a dry or slightly damp microfiber cloth. Avoid scrubbing hard. For stains, try a magic eraser gently, but test first.
What's the best way to remove nicotine stains from walls?
Mix equal parts vinegar and water, or use a trisodium phosphate (TSP) solution. Wear gloves and rinse well afterward.
How often should I clean my walls?
Dust walls every 1-2 months. Spot clean as needed. A full wall wash is usually needed once or twice a year.
Can I use a pressure washer on exterior walls?
Yes, but use low pressure and keep the nozzle at least 12 inches away to avoid damaging siding or paint.
Conclusion
You don't need expensive products or hours of scrubbing to keep your walls looking fresh. Most marks come off with items you already have in your pantry or cleaning closet. Start with the hack that matches your biggest wall problem—whether it's greasy fingerprints near light switches or mysterious scuffs along the baseboards.
A few minutes of targeted effort can make your whole room feel cleaner. Pick one tip, try it today, and watch those wall worries disappear.


