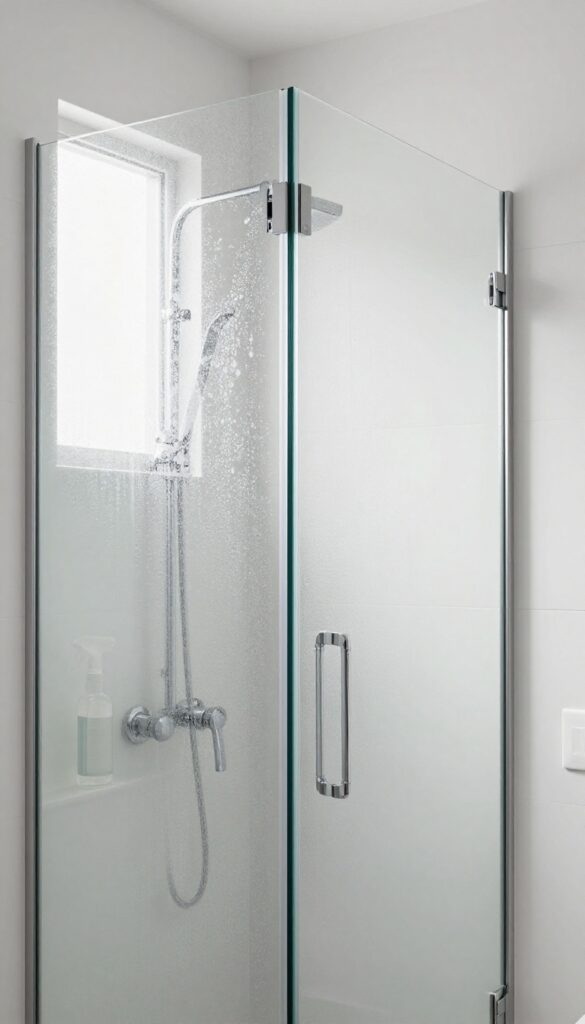
You step into the shower expecting a moment of calm, but cloudy glass doors and sticky residue ruin the vibe. That buildup isn't just unsightly—it can harbor mold and make your bathroom feel less clean.
A few smart cleaning habits can flip that script. You don't need harsh chemicals or hours of scrubbing to get that fresh, spa-like feel.
These 15 ideas target the real trouble spots: soap scum, hard water stains, grimy grout, and musty odors. Each one solves a specific problem so your shower looks and smells amazing with minimal effort.
1. White Vinegar Spray for Hard Water Stains
Hard water stains are the enemy of a sparkling shower. Those cloudy spots on glass doors and chrome fixtures make everything look dull, no matter how much you scrub. White vinegar cuts through mineral deposits naturally, without harsh fumes or extra elbow grease.
For best results, fill a spray bottle with undiluted white vinegar. Mist it generously over affected areas—glass doors, showerheads, faucets, and tile. Let it sit for 10 minutes to break down the calcium and lime.
Then rinse thoroughly with warm water and wipe dry with a microfiber cloth. No scrubbing needed. The acidity dissolves the minerals on contact, leaving surfaces streak-free.
Repeat weekly to prevent buildup. If stains are stubborn, spray again and let it sit longer, or use a soft sponge for gentle agitation. This method is safe for most surfaces, but avoid vinegar on natural stone like marble or granite—it can etch the finish.
Why Vinegar Works So Well
Vinegar is a mild acid that reacts with alkaline mineral deposits. Hard water stains are mostly calcium carbonate, which dissolves easily in acid. Unlike commercial cleaners, vinegar leaves no chemical residue and is safe for septic systems.
How To Apply For Best Results
Use a clean spray bottle and undiluted white vinegar. Spray evenly, then let it sit for 10 minutes. Rinse with warm water and dry with a microfiber cloth to prevent new spots.
For tough stains, soak a paper towel in vinegar and press it against the stain for 15 minutes before rinsing.
Pro Tips For Stubborn Spots
If you have heavy buildup, heat the vinegar slightly in the microwave (30 seconds) before spraying. Warm vinegar works faster. Also, add a few drops of dish soap to help the solution cling to vertical surfaces.
Always test on a small hidden area first, especially on colored grout or metal finishes.
2. Baking Soda Paste for Soap Scum
Soap scum loves to cling to tiles and tubs, creating a dull, sticky film that ruins the fresh feel of your shower. Baking soda steps in as a gentle but effective cleaner that cuts through that grime without scratching surfaces. Mix a paste with water, apply it to the affected areas, let it sit for a few minutes, then scrub with a soft sponge.
Rinse well, and you'll see the difference immediately.
Baking soda is a mild abrasive that breaks down soap scum without damaging tile, glass, or acrylic. Its alkaline nature helps neutralize acids in the scum, making it easier to wipe away. This method works well on fiberglass, porcelain, and ceramic surfaces, but avoid using it on natural stone like marble or granite, as it can etch the finish.
For extra cleaning power, add a few drops of liquid dish soap to the paste. Apply the paste with a damp sponge or cloth, focusing on areas with heavy buildup. Let it sit for 10–15 minutes to loosen the scum, then scrub gently in circular motions.
Rinse thoroughly with warm water and dry with a microfiber cloth to prevent water spots. Repeat weekly to keep soap scum from building up again.
Why Baking Soda Works So Well
Baking soda's fine particles provide just enough abrasion to lift soap scum without scratching. Its mild alkalinity helps dissolve the fatty acids in soap residue, making it easier to rinse away. Unlike harsh chemical cleaners, baking soda is non-toxic and safe for most shower surfaces.
Step-by-step Application
Mix 1/2 cup baking soda with 2–3 tablespoons water to form a spreadable paste. Apply the paste to soap scum spots using a sponge or your fingers (wearing gloves). Let it sit for 10–15 minutes for light buildup, or up to 30 minutes for stubborn layers.
Scrub with a soft sponge or cloth in circular motions, then rinse thoroughly with warm water.
Pro Tips For Best Results
For extra cleaning power, add a squeeze of lemon juice or a splash of white vinegar to the paste—but don't mix vinegar and baking soda in a sealed container, as they'll foam up. Test the paste on a small, hidden area first if you're unsure about surface compatibility. After rinsing, wipe the area dry with a microfiber cloth to prevent new soap scum from forming.
3. Dish Soap and Vinegar for Glass Doors
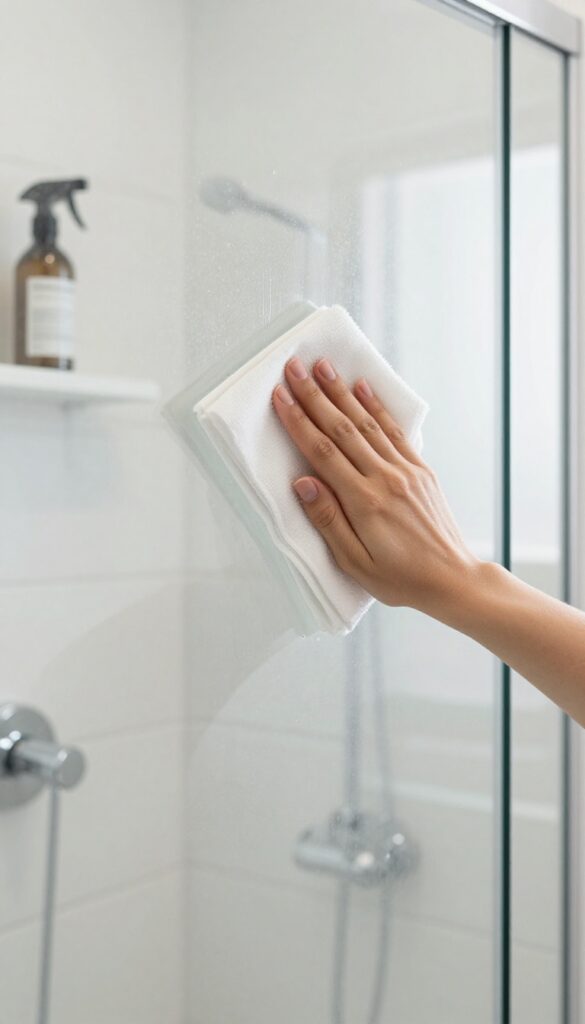
Cloudy shower doors are a common frustration, but this simple DIY spray cuts through the grime fast. The combination of dish soap and white vinegar tackles both soap scum and hard water stains without leaving streaks. You probably already have both ingredients in your kitchen, making this an easy, budget-friendly fix.
Mix equal parts dish soap and white vinegar in a spray bottle. Shake gently to combine—don't worry if it foams a little. Spray the solution generously onto your glass doors, focusing on the cloudiest areas.
Let it sit for 5–10 minutes so the vinegar can break down mineral deposits while the soap lifts grease and residue. Wipe with a damp microfiber cloth, then rinse thoroughly with warm water. For a final streak-free shine, buff the glass dry with a clean microfiber cloth or a squeegee.
Repeat weekly to maintain clarity and prevent buildup from returning.
Why This Combo Works So Well
Dish soap is designed to cut through grease and oils, which are a big part of soap scum. Vinegar is acidic, so it dissolves hard water minerals like calcium and lime. Together, they tackle both layers of grime that make glass look foggy.
The soap also helps the vinegar cling to vertical surfaces longer, giving it more time to work.
Pro Tips For Best Results
Use blue Dawn dish soap if you have it—it's a classic choice that cuts grease effectively. Avoid using too much vinegar on natural stone or unsealed grout, as the acid can etch or damage those surfaces. Always rinse thoroughly after cleaning to remove any soapy residue that could attract new grime.
And for extra shine, finish with a quick squeegee after every shower.
How Often To Do This
For most households, once a week is enough to keep doors crystal clear. If you have hard water, you might need to do it every few days. Between deep cleans, a daily squeegee swipe after showering prevents buildup from forming in the first place.
4. Hydrogen Peroxide for Moldy Grout
Mold in grout lines looks nasty and spreads quickly. Hydrogen peroxide (3%) applied with a small brush kills mold naturally. Let it fizz for 15 minutes, then rinse—no bleach smell.
Moldy grout is a common problem in showers, but hydrogen peroxide offers a simple, non-toxic solution. It’s safe for most surfaces and effective at killing mold spores without the harsh fumes of bleach.
Why Hydrogen Peroxide Works
Hydrogen peroxide is a natural disinfectant that breaks down into water and oxygen. Its fizzing action helps lift mold from porous grout, while the chemical reaction destroys mold cells. Unlike bleach, it doesn’t produce toxic fumes or damage grout over time.
How To Apply It
Pour 3% hydrogen peroxide into a spray bottle or apply directly with a small brush. Spray or brush it onto moldy grout lines, ensuring full coverage. Let it sit for 15 minutes—you’ll see it bubble as it works.
Then rinse with warm water and wipe dry. For stubborn spots, repeat or scrub gently with a soft brush.
Safety And Precautions
Hydrogen peroxide is safe for most tile and grout, but test on an inconspicuous area first. Avoid mixing with other cleaners, especially bleach or ammonia, as this can create harmful gases. Keep it away from colored grout, as it may lighten some dyes.
Store in a dark bottle to maintain potency.
Preventing Future Mold
To keep grout mold-free, improve ventilation by running the exhaust fan during and after showers. Squeegee walls and wipe down grout lines to remove moisture. Apply a grout sealer annually to create a protective barrier.
Regular use of hydrogen peroxide as a weekly maintenance spray can also prevent mold from returning.
5. Lemon Juice for Rust Spots
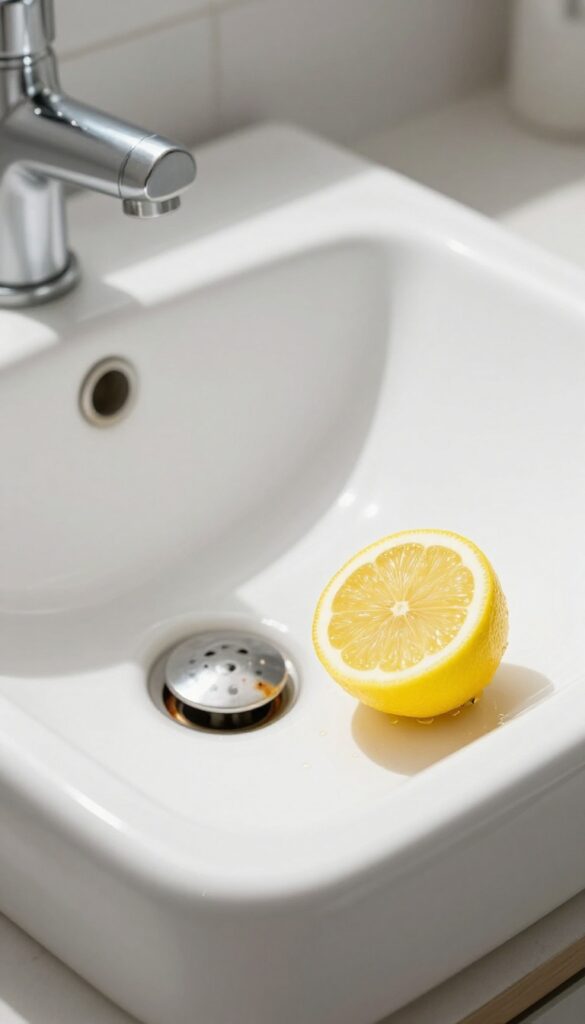
Rust spots from metal fixtures or razor blades can make even the cleanest shower look neglected. They stand out against white porcelain or light tile, and scrubbing often makes them worse. Luckily, a simple lemon does the job without harsh chemicals.
Why Lemon Works
Lemons are packed with citric acid, a natural chelating agent that binds to rust molecules and lifts them from the surface. Unlike abrasive cleaners, lemon juice won't scratch your tub or sink. It's also gentle on your hands and leaves a fresh, clean scent behind.
How To Apply It
Cut a lemon in half and rub the cut side directly onto the rust stain. Squeeze gently as you go to release fresh juice. Let it sit for 10 minutes—don't rush this step.
Then rinse thoroughly with warm water. For stubborn spots, repeat or add a sprinkle of salt to the lemon half for extra gentle abrasion.
Where To Use It Safely
Lemon juice works best on ceramic, porcelain, stainless steel, and fiberglass. Avoid using it on natural stone like marble or granite, as the acid can etch the surface. Also test on a small hidden area first if your fixtures have a coated finish.
6. Magic Eraser for Scuff Marks

Scuff marks on shower walls or doors from shoes or bottles are stubborn. A damp magic eraser wipes them away in seconds—no extra cleaner required.
Why Scuffs Happen
Shower floors and lower walls take a beating. Rubber soles, plastic bottles, and even metal razors leave dark streaks that soap and water can't budge. Over time, these marks build up and make the shower look dingy.
How To Use It Right
Wet the magic eraser slightly and squeeze out excess water. Gently rub the scuff mark in a circular motion. The melamine foam acts like fine sandpaper, lifting the mark without scratching most surfaces.
Rinse the area after to remove any residue.
Where Not To Use It
Avoid magic erasers on glossy or delicate surfaces like acrylic tubs, fiberglass, or some colored fixtures. They can dull the finish. Test on a small hidden spot first.
For those surfaces, try a baking soda paste instead.
7. Shower Squeegee After Every Use
A squeegee is the cheapest, easiest way to keep your shower looking spotless. Running it over glass and tiles after each shower takes about 30 seconds and prevents water spots, soap scum, and mineral deposits from ever setting in. It’s the one habit that makes every other cleaning task easier.
Prevention beats scrubbing every time. A quick squeegee swipe on glass doors and tile walls after each shower cuts down water spots and soap buildup by 90%. Hard water minerals and body oils don’t get a chance to dry and cling, so you avoid that cloudy film that takes serious elbow grease to remove.
Keep a squeegee hanging inside the shower or on a hook nearby so it’s always within reach. Make it part of your post-shower routine—right after you turn off the water, before you step out. For best results, use a squeegee with a rubber blade and wipe it dry occasionally to prevent mildew on the handle.
The Right Squeegee For The Job
Not all squeegees are created equal. Look for one with a high-quality rubber blade that’s soft enough to glide without scratching glass or tile. A stainless steel or plastic handle with a built-in hook makes storage easy.
If your shower has large glass panels, a wider blade (12 to 14 inches) covers more area quickly. For smaller spaces, a compact 6-inch squeegee is fine. Replace the blade when it starts leaving streaks—usually every few months.
How To Squeegee Like A Pro
Start at the top corner of the glass or tile and pull the squeegee horizontally across, overlapping each pass slightly. Wipe the blade with a dry microfiber cloth after every two or three strokes to keep it clean. For doors, work from top to bottom in a single continuous motion on each panel.
Don’t forget the corners and edges—those spots collect water and can develop hard water stains if ignored. A quick final wipe with a dry cloth on the blade and handle prevents drips on the floor.
Make It A Habit
Consistency is key. Hang the squeegee in a visible spot inside the shower so you see it every time. Some people keep a small hook on the shower caddy or attach a suction cup holder to the glass.
If you share a shower, get everyone on board—it only takes seconds. After a week, it becomes automatic. You’ll notice less scrubbing needed on deep-clean days, and your shower will stay sparkling longer.
8. Toothbrush for Tight Corners
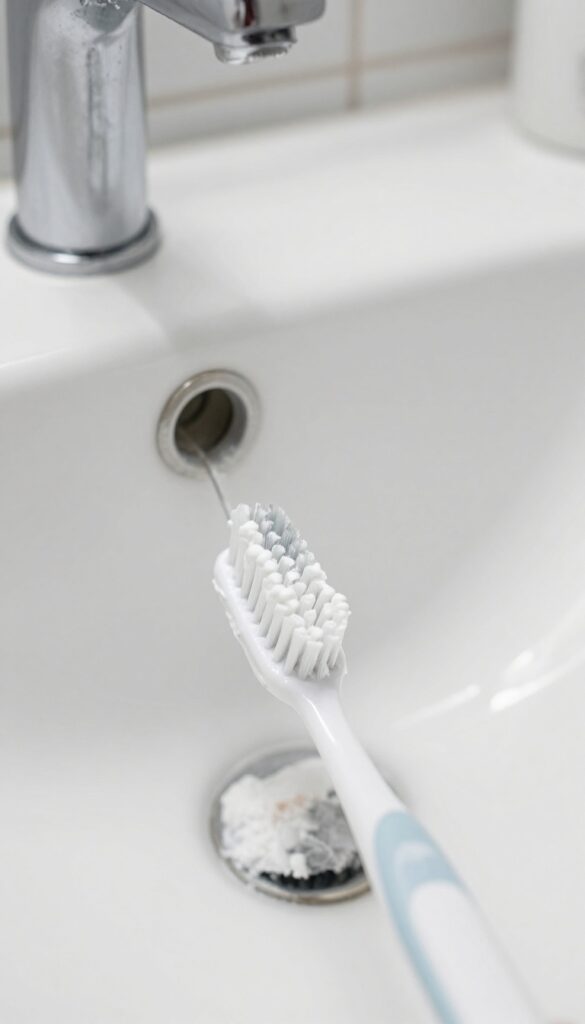
Crevices around fixtures and corners collect grime that a sponge can't reach. An old toothbrush with a dab of baking soda paste works wonders in those tight spots. A few minutes of targeted scrubbing makes a big difference in how clean your shower looks and feels.
The toothbrush is the unsung hero of shower cleaning. Its small head and firm bristles get into the narrow gaps where soap scum and mildew love to hide. You don't need a fancy tool—just a retired toothbrush and a simple paste of baking soda and water.
Dip the brush, scrub the trouble spots, and rinse. It's quick, cheap, and surprisingly effective. Focus on the areas that are hardest to clean: the base of faucets, the corners of soap dishes, the edges of shower caddies, and the seams where tile meets the tub.
These spots often get overlooked during a regular wipe-down, so they build up a stubborn layer of grime. A toothbrush makes short work of it. For extra stubborn buildup, let the baking soda paste sit for a few minutes before scrubbing.
You can also add a drop of dish soap for more cleaning power. Just be sure to rinse thoroughly afterward to avoid any residue.
Where To Focus
Pay special attention to the corners of shower caddies, the base of faucets, and the grout lines around fixtures. These are the spots that sponges miss and where grime accumulates fastest. A toothbrush can reach deep into these crevices without scratching the surface.
How To Make The Paste
Mix three parts baking soda with one part water to form a thick paste. For extra cleaning power, add a squirt of dish soap. Apply the paste to the brush, scrub the target area, and let it sit for a few minutes before rinsing.
This paste is gentle enough for most surfaces but tough on grime.
Pro Tips For Best Results
Keep an old toothbrush dedicated to cleaning so you always have one handy. After scrubbing, rinse the brush clean and let it dry. Replace it every few months or when the bristles start to fray.
For really tight spots, try a nylon grout brush or a small detailing brush.
9. Rubbing Alcohol for Mirror Fog
Foggy mirrors after a hot shower are annoying. You step out ready to start your day, and you can't even see your reflection. Wiping the mirror with rubbing alcohol solves that problem instantly.
Rubbing alcohol prevents fogging and leaves a streak-free shine. It evaporates quickly, so there's no smearing or residue. Just spray a bit on a microfiber cloth and wipe the mirror down.
Reapply weekly for best results.
Why It Works
Alcohol lowers the surface tension of water, so condensation forms in a thin, even layer instead of foggy droplets. That means no blurry reflection, even after a long, steamy shower.
How To Apply
Mix equal parts rubbing alcohol and water in a spray bottle for a gentle solution. Or use straight 70% alcohol for tougher grime. Spray onto a lint-free cloth—never directly on the mirror to avoid drips—and wipe in a circular motion.
Bonus Streak-free Shine
Rubbing alcohol cuts through toothpaste splatters, hairspray residue, and hard water spots. Your mirror will look crystal clear. Follow up with a dry section of the cloth for an extra polish.
10. Essential Oils for a Spa Scent
The right scent can turn a quick rinse into a mini escape. Essential oils add that spa-like aroma without synthetic fragrances. A simple mist after cleaning keeps the shower smelling fresh for hours.
Best Oils For The Shower
Eucalyptus and lavender are top choices. Eucalyptus clears the sinuses and feels invigorating. Lavender promotes relaxation.
Peppermint is great for a morning boost. Tea tree oil adds a clean, medicinal note and also fights mold.
How To Make The Mist
Fill a spray bottle with water and add 10–15 drops of your chosen essential oil. Shake well before each use. Mist the walls and floor after cleaning, or before a shower for an aromatherapy boost.
Avoid spraying directly on acrylic or fiberglass surfaces in high concentration.
Safety Tips
Always dilute oils in water—never apply undiluted. Test on a small hidden area first. Keep the bottle out of reach of children.
If you have pets, check which oils are safe; some, like tea tree, can be toxic to cats and dogs.
11. Drain Snake for Slow Drains
A slow-draining shower is more than an annoyance—it traps water, soap, and debris, creating a breeding ground for mold and mildew. The fix is simpler than you think: a cheap drain snake. This tool physically removes hair and gunk without pouring harsh chemicals down your pipes.
Use it once a month to keep water flowing freely and odors at bay.
Why A Drain Snake Works Better Than Chemicals
Chemical drain cleaners are harsh on pipes and the environment. They also don't always dissolve the clump of hair and soap scum that's causing the slow drain. A drain snake, on the other hand, pulls out the physical blockage.
You can see exactly what you're removing, and it's instantly satisfying. Plus, no toxic fumes or risk of damaging your plumbing.
How To Use A Drain Snake Correctly
Start by removing the drain cover. Insert the snake slowly, turning the handle clockwise as you push it down. When you feel resistance, that's the clog.
Keep turning and gently pull the snake back out—you'll likely see a wad of hair and gunk. Dispose of it in the trash, not the sink. Repeat until water drains freely, then rinse with hot water for a few seconds.
Monthly Maintenance For Odor Prevention
Even if your shower drains fine, running a snake once a month prevents buildup before it becomes a problem. This habit stops the musty smell that often comes from decomposing hair and soap residue. Pair it with a weekly hot water flush (just run the shower on hot for a minute) to keep the drain fresh and clear.
12. Pumice Stone for Toilet Ring Stains
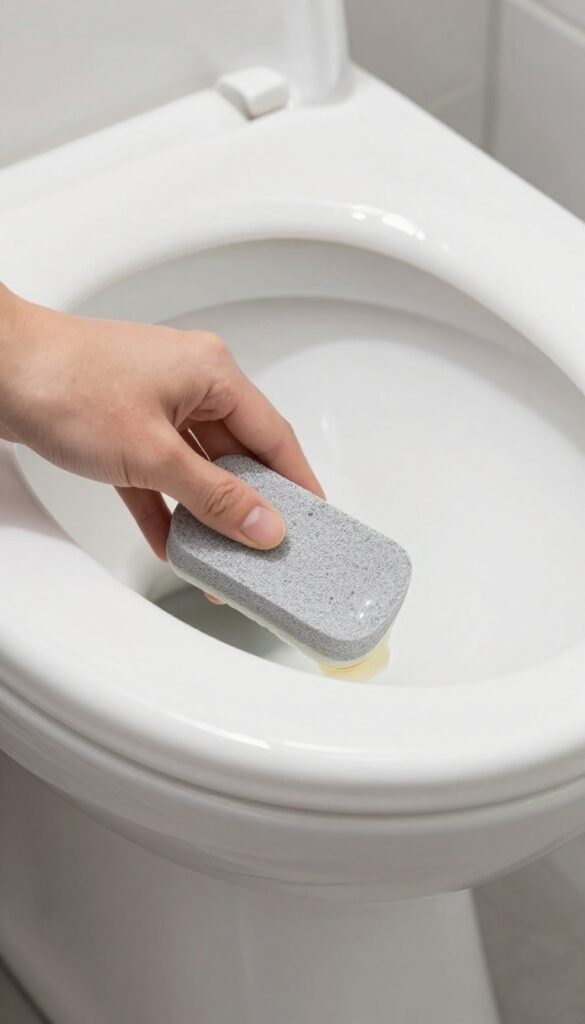
Mineral deposits from hard water can leave stubborn rings in your toilet bowl that regular brushing won't touch. A pumice stone offers a simple, chemical-free solution that respects your porcelain while eroding the buildup.
Why Pumice Works
Pumice is a porous volcanic rock that's abrasive enough to grind away mineral scale but softer than porcelain. When wet, it gently polishes the stain away without scratching the surface—unlike steel wool or harsh scrubbing pads.
How To Use It Safely
First, soak the pumice stone in water for a few minutes until it's fully saturated. Then, while the toilet bowl is wet, lightly rub the stained area with the stone. Use gentle pressure—let the stone do the work.
Rinse and flush to check your progress. Repeat if needed.
Pro Tips For Best Results
Always keep the stone and the bowl wet to avoid scratching. If the ring is thick, start at the edges and work inward. After use, rinse the stone and let it air dry.
It's reusable for months. Never use a dry pumice stone on porcelain—it can leave fine scratches that trap future stains.
13. Steam Cleaner for Deep Grout Cleaning
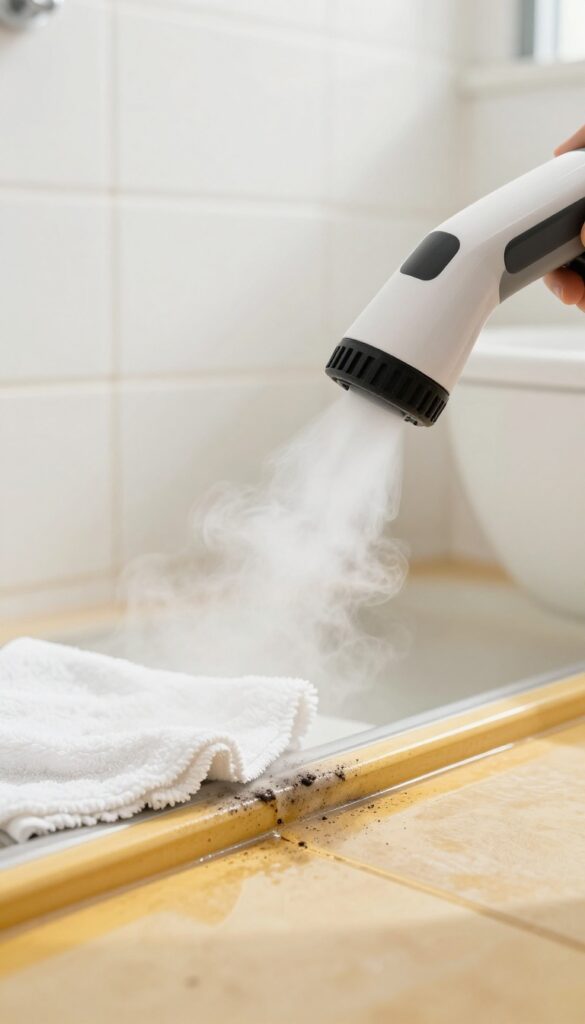
Grout lines that have turned dark or yellowish are tough to fix with a brush alone. A handheld steam cleaner changes the game by using heat and pressure to lift grime from deep within the pores. No harsh chemicals needed, just water and a few passes with the nozzle.
Steam cleaners are a one-time purchase that pays for itself in saved time and effort. They kill mold spores on contact and leave grout looking close to new. For best results, use the small brush attachment and work in sections, wiping away loosened debris with a microfiber cloth.
Why Steam Works
The high temperature (over 200°F) breaks down soap scum, hard water deposits, and organic buildup that scrubbing can't reach. Steam also sanitizes without bleach, making it safer for you and the environment.
How To Use It
Fill the cleaner with distilled water to avoid mineral deposits. Let it heat up, then hold the nozzle against the grout for a few seconds before moving. Wipe away the melted grime immediately with a dry cloth.
Maintenance Tip
After deep cleaning, seal the grout with a penetrating sealer. This prevents future stains and makes routine cleaning much easier.
14. Dryer Sheets for Dust Repelling
Shower walls attract dust and lint like a magnet. A quick wipe with a used dryer sheet adds an anti-static layer that repels dust for days. Plus, it leaves behind a light, fresh scent without any extra effort.
Dryer sheets aren't just for laundry. Their anti-static properties work wonders on shower surfaces, reducing the cling factor that makes dust and lint stick. Use a sheet that's already been through a drying cycle to avoid any residue.
How It Works
The anti-static agents in dryer sheets neutralize the static charge on shower walls. This prevents dust, lint, and even fine particles from settling. The effect lasts several days, cutting down on how often you need to wipe surfaces.
Best Surfaces To Use
Glass shower doors, tile walls, and acrylic panels respond well to dryer sheet wiping. Avoid textured surfaces like stone or matte finishes, as the coating might leave a slight film. Test on a small area first if you're unsure.
Application Tips
Use a used dryer sheet to avoid oversaturating surfaces with fragrance or chemicals. Wipe in one direction to evenly distribute the anti-static agents. No rinsing needed—just toss the sheet after use.
For extra freshness, pair with a weekly deep clean.
15. Weekly Baking Soda and Vinegar Flush
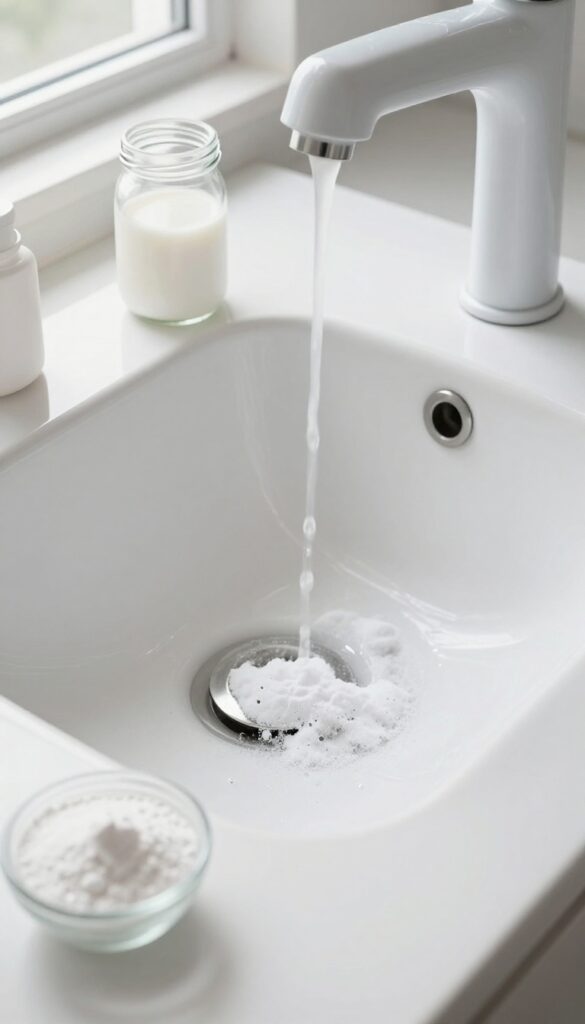
Drain odors and slow drainage can sneak up on you, especially in a shower that gets daily use. A simple weekly flush with baking soda and vinegar keeps things fresh without any harsh chemicals. This fizzy combo breaks down soap scum, hair, and grime that cling to pipe walls, preventing buildup before it becomes a problem.
Pour 1/2 cup baking soda down the drain, then follow with 1/2 cup white vinegar. The fizzing reaction loosens debris and neutralizes odors. Let it sit for 15 minutes, then flush with hot water for a full minute.
That's it—no scrubbing, no expensive products.
Why It Works
Baking soda is a mild abrasive that helps scrub away residue, while vinegar's acidity dissolves mineral deposits and soap scum. Together, they create a fizzy reaction that dislodges gunk from pipe walls. Hot water flushes everything away, leaving drains clean and odor-free.
When To Do It
Stick to a weekly schedule, preferably after your last shower of the day so the solution sits undisturbed. If you notice slow drainage or a musty smell, you can do it more often—just avoid doing it back-to-back days to prevent over-acidifying the pipes.
Pro Tips
Use a drain strainer to catch hair and debris before they go down. For extra cleaning power, add a few drops of tea tree or lemon essential oil to the vinegar for a fresh scent. Never mix this with bleach or commercial drain cleaners—the reaction can release harmful fumes.
FAQ
How often should I clean my shower to keep it spa-like?
A quick squeegee after each use and a weekly wipe-down with a mild cleaner keeps buildup at bay. Deep clean grout and drains monthly.
Can I use bleach on colored grout?
Bleach can discolor colored grout. Stick to hydrogen peroxide or a baking soda paste for safe cleaning.
What's the best way to prevent soap scum?
Switch to liquid soap instead of bar soap, and use a squeegee after every shower. Soap scum forms when bar soap residue mixes with hard water.
Are natural cleaners as effective as chemical ones?
Yes, for most routine cleaning. Vinegar, baking soda, and hydrogen peroxide handle soap scum, hard water, and mold without harsh fumes.
How do I remove hard water stains from glass doors?
Spray undiluted white vinegar, let it sit for 10 minutes, then scrub with a non-abrasive pad. Rinse and dry with a microfiber cloth for a streak-free finish.
Conclusion
You don't need a pricey spa membership to enjoy a fresh, relaxing shower every day. Just a few of these simple cleaning ideas can transform your bathroom into a personal retreat without eating up your weekend. Start with the hack that targets your biggest annoyance—whether that's soap scum, grimy grout, or a foggy glass door—and build from there.
Consistency with even two or three of these methods will keep your shower looking and feeling like new. Pick your favorites, make them a habit, and enjoy that spa-like vibe whenever you step in.


