You scrub the tile surface until it shines, but those grout lines still look dingy and dark. It's frustrating because grout is porous and traps dirt, soap scum, and mildew deep inside. The good news is you don't need harsh chemicals or expensive pros to get bright, clean lines.
With the right techniques and a little patience, you can restore grout to its original color—or even lighter. These 25 tips range from everyday maintenance to deep cleaning hacks that actually work.
Whether you're dealing with bathroom tile, kitchen backsplash, or floor grout, there's a solution here for you. Let's turn those dull lines into a feature you'll be proud of.
1. Start with a Baking Soda Paste
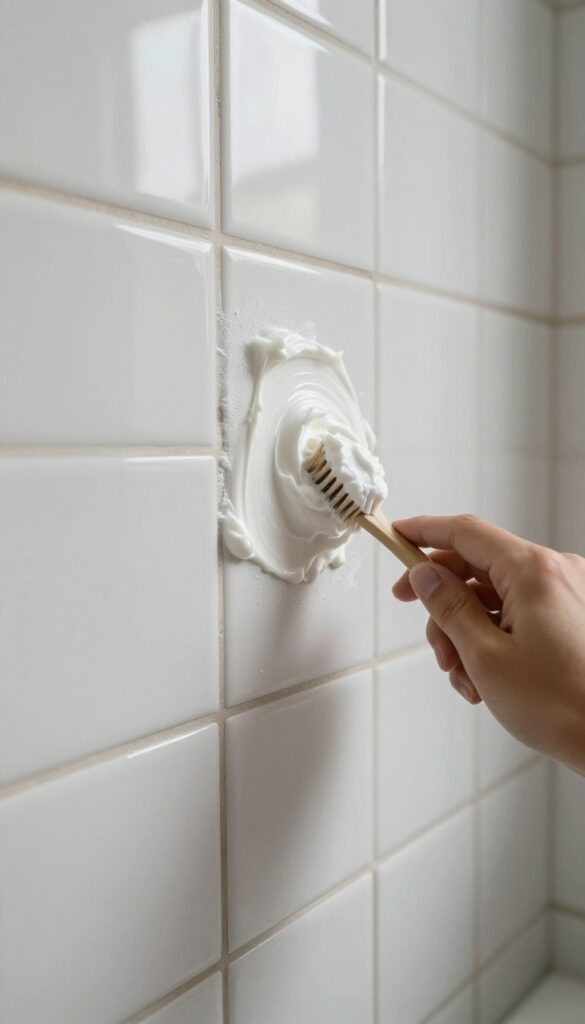
Baking soda is a gentle abrasive that lifts dirt without scratching tile or grout. Mixed with water, it forms a paste that clings to vertical surfaces and seeps into porous grout. This method works best on light to moderate stains and is safe for all tile types.
For a simple, non-toxic clean, mix three parts baking soda with one part water until you get a spreadable paste. Apply it along grout lines using an old toothbrush or a small spatula. Let it sit for 10 minutes so the baking soda can break down grime.
Then scrub in small circles, rinse with water, and wipe dry. Repeat on stubborn spots if needed.
Why Baking Soda Works
Baking soda is mildly alkaline, which helps dissolve acidic dirt and soap scum. Its fine crystals provide gentle friction that dislodges particles from grout pores without damaging the surface. Unlike bleach, it won't discolor colored grout.
When To Use This Method
This paste is ideal for routine maintenance or freshening up grout between deep cleans. It's also a great first step before trying stronger treatments. If stains remain, you can follow up with a hydrogen peroxide or vinegar solution.
Pro Tip For Better Results
Add a few drops of dish soap to the paste for extra grease-cutting power. For tough spots, let the paste dry completely, then scrape it off with a grout brush. The dried residue pulls out embedded dirt.
2. Add Vinegar for Extra Power
Baking soda paste does a solid job on its own, but pairing it with white vinegar takes the cleaning to another level. The chemical reaction between the alkaline baking soda and acidic vinegar creates a fizzy foam that burrows into porous grout and loosens stubborn grime. This one-two punch is especially effective on greasy kitchen backsplashes or soap-scum-coated bathroom tiles.
After applying the baking soda paste, spray a generous layer of white vinegar over it. Let the mixture bubble and fizz for about three to five minutes—the longer you wait, the more dirt it lifts. Then scrub with a stiff brush and rinse with warm water.
The result is noticeably brighter grout with minimal elbow grease.
Why The Fizz Works
That bubbling action isn't just for show. The carbon dioxide released during the reaction helps dislodge dirt particles trapped in the tiny pores of grout. It's like giving each grout line a mini pressure wash without any special equipment.
Best Areas For This Combo
This method shines in kitchens where grease and food residue build up, and in bathrooms where soap scum and hard water stains are common. Avoid using it on natural stone tiles like marble or travertine, as the acid can etch the surface.
Pro Tip For Stubborn Stains
For extra-stubborn spots, make a thicker paste with baking soda and a splash of vinegar instead of water. Apply it directly to the grout, let it dry completely, then scrub off. The dried paste pulls out deep-seated grime as you brush it away.
3. Use Hydrogen Peroxide for Stubborn Stains
Sometimes grout stains just won't budge with gentle cleaners. That's when you need something with a little more bite, but without the harsh fumes of bleach. Hydrogen peroxide is a natural bleaching agent that lifts deep discoloration safely.
Hydrogen peroxide works by releasing oxygen bubbles that break down organic stains like mildew, coffee, and wine. It's especially effective on light-colored grout where yellowing is obvious. For best results, use a 3% solution straight from the bottle.
Direct Application For Light Stains
Pour hydrogen peroxide into a spray bottle and mist it directly onto the grout lines. Let it sit for 10–15 minutes, then scrub with a stiff brush. Rinse with water and wipe dry.
This method works well for general brightening.
Make A Paste For Heavy Discoloration
Mix hydrogen peroxide with baking soda to form a thick paste. Apply it to the grout and let it sit for 20 minutes. The paste clings to vertical surfaces and gives the peroxide more time to work.
Scrub, rinse, and repeat if needed.
Safety And Rinsing Tips
Always test on a hidden area first, especially with colored grout. Hydrogen peroxide can lighten some dyes. Rinse thoroughly after cleaning to remove any residue.
Open windows or turn on a fan to help the area dry quickly.
4. Try a Steam Cleaner for Deep Cleaning
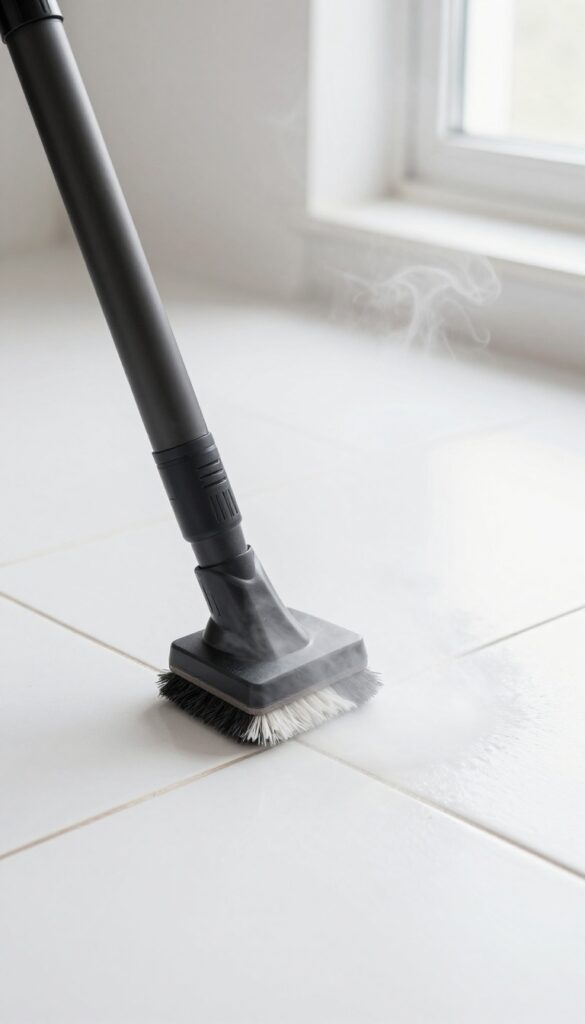
If you've got large areas of grout to tackle—like a kitchen floor or bathroom walls—a steam cleaner can save you hours of scrubbing. These machines heat water to around 200°F and blast high-pressure vapor into the porous grout, loosening dirt, grease, and mildew without any chemicals. The heat also kills bacteria and mold spores, making it a great option for a deeper clean.
Steam cleaners come in handheld or floor-standing models. For grout, a handheld unit with a brush attachment works best because it directs the steam right into the lines. You simply fill the tank, wait for it to heat up (usually a few minutes), then run the brush along the grout lines.
The steam softens the grime, and the brush action lifts it away. Wipe the loosened residue with a microfiber cloth afterward for a streak-free finish.
Why Steam Works So Well On Grout
Grout is porous, so dirt gets trapped deep inside. Steam's high temperature and pressure force the vapor into those tiny pores, dissolving oils and soap scum that regular cleaners can't reach. Plus, the heat sanitizes the surface, which helps prevent mildew from returning quickly.
Best Steam Cleaners For Grout
Look for a model with a grout-specific brush attachment and adjustable steam control. Handheld steamers like the Bissell SteamShot or McCulloch MC1275 are popular choices. For larger jobs, a steam mop with a grout tool can cover more ground.
Avoid using steam on unsealed or damaged grout, as the moisture can worsen cracks.
Tips For Using A Steam Cleaner Safely
Always test on a small, hidden area first. Keep the steamer moving to avoid overheating one spot. Let the grout dry completely after steaming before applying any sealant.
And remember—steam can loosen old grout, so go gently on aging tile lines.
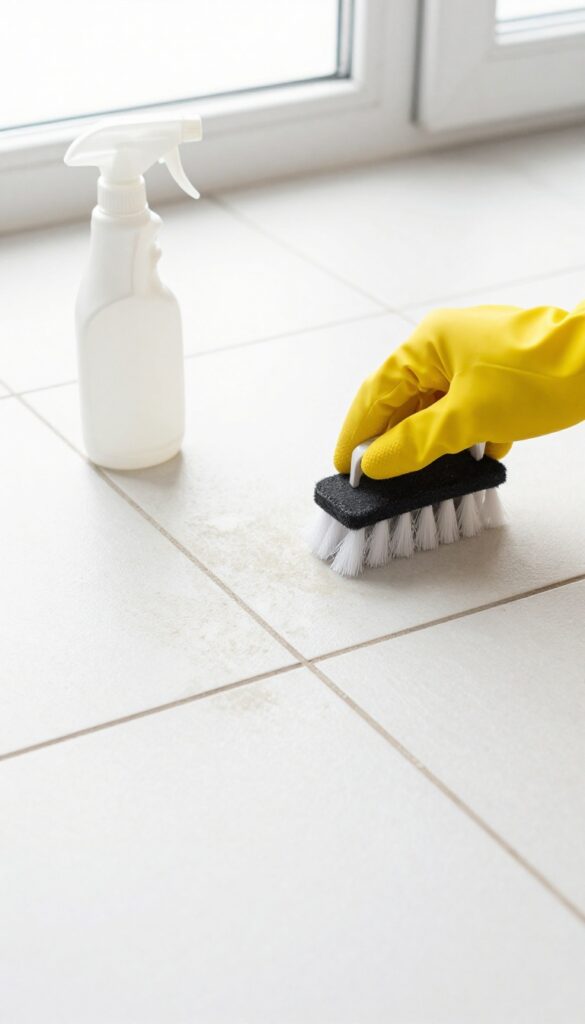
5. Invest in a Grout Brush
You might be tempted to just use a sponge or rag, but grout lines are narrow and porous. A dedicated grout brush makes a world of difference because its stiff bristles can actually dig into the grooves. Without the right tool, you're just moving dirt around.
A stiff-bristled grout brush (or an old toothbrush) is essential. The small head reaches into crevices, and the firm bristles dislodge embedded dirt. This simple swap can cut your scrubbing time in half and give you noticeably brighter lines.
Why A Regular Brush Falls Short
Standard scrub brushes have bristles that are too soft or too wide to fit into grout lines. They skim the surface, leaving the deep grime untouched. A grout brush's narrow head and tough bristles get right into the groove, breaking up the buildup that makes grout look dark.
Choosing The Right Grout Brush
Look for one with a long handle to save your knees and back, and replaceable heads for longevity. Nylon bristles are tough enough for most jobs but won't scratch tile. For extra stubborn stains, a brush with a pointed tip helps you target individual spots.
How To Use It Effectively
Apply your cleaner first and let it sit for a few minutes. Then scrub in a circular motion, focusing on the darkest areas. Rinse frequently to see your progress.
For large floors, attach the brush to a drill with a grout cleaning bit—it's a game changer.
6. Use a Magic Eraser on Light Stains
Melamine foam erasers, often sold as Magic Erasers, are surprisingly effective at buffing away light surface stains from grout. They work like a gentle sandpaper, lifting dirt without damaging the tile. This is a quick, no-fuss solution for touch-ups between deep cleans.
For light stains or day-to-day grime, a dampened melamine eraser can make grout lines look noticeably brighter in seconds. Simply wet the eraser, wring out excess water, and rub gently along the grout lines. No extra cleaners needed.
This method is perfect for spot-cleaning after cooking or before guests arrive.
Why It Works So Well
Melamine foam has a micro-abrasive structure that acts like ultra-fine sandpaper. When dampened, it creates a mild scrubbing action that dislodges dirt particles trapped in the porous grout surface. Unlike bleach or harsh chemicals, it doesn't discolor or damage the grout over time.
Best Practices For Best Results
Always test on an inconspicuous area first, especially if your grout is colored or sealed. Use light pressure—pressing too hard can wear down the grout. Cut the eraser into smaller pieces to get into tight corners.
Replace the eraser when it starts to crumble or looks dirty.
When To Skip This Method
Magic erasers are not designed for deep-set stains or mold. If your grout has dark, ingrained discoloration or mildew, you'll need a stronger cleaner or a deep-cleaning method. Reserve the eraser for surface-level grime and light scuffs.
7. Apply a Grout Sealer After Cleaning
You've put in the work to scrub those grout lines clean. Now it's time to protect them. A good sealer locks in that fresh look and makes future cleaning much easier.
Think of it as invisible armor for your grout.
Sealing grout after cleaning is a game-changer. It prevents dirt, moisture, and stains from penetrating the porous surface. This means brighter lines for longer and less scrubbing down the road.
Here's how to do it right.
Choose The Right Sealer
Not all sealers are the same. For most bathroom and kitchen grout, a penetrating sealer is best. It soaks into the grout and forms a barrier inside, not on top.
Avoid film-forming sealers that can peel or yellow over time. Look for a sealer labeled 'penetrating' or 'impregnating' and check that it's suitable for your grout type (sanded or unsanded).
Prep And Apply Carefully
Make sure grout is completely dry before sealing—wait at least 24 hours after cleaning. Apply the sealer with a small brush or applicator bottle, working it into the grout lines. Wipe off any excess from the tile surface immediately to avoid haze.
Follow the manufacturer's instructions for drying time and a second coat if needed.
Maintain The Protection
Sealed grout still needs regular care, but it's much easier. Clean spills quickly and avoid harsh acidic cleaners that can break down the sealer. Reapply sealer every 6 to 12 months, or when water no longer beads on the grout surface.
This simple habit keeps your tile lines looking bright and new.
8. Make a Bleach Pen for Precision
Gel bleach pens aren't just for whitening shirts—they're a secret weapon for grout. The thick gel stays put on vertical surfaces and seeps into porous lines without dripping onto tile. This lets you target only the grout, avoiding damage to surrounding surfaces.
It's a simple trick that delivers professional-looking results.
Gel bleach pens allow you to apply bleach exactly where needed. Squeeze a thin line along grout, let it sit for 10–15 minutes, then scrub and rinse.
Why A Bleach Pen Works So Well
The gel formula clings to grout lines, even on walls, so the bleach stays where you want it. It's thick enough to penetrate deep into the porous material, breaking down embedded stains. Plus, you control the flow—no messy splashes or wasted product.
How To Use It Step By Step
First, clean the grout surface with a dry cloth to remove loose dirt. Then, squeeze the pen tip directly along the grout line, applying a thin, even bead. Let it sit for 10–15 minutes—don't let it dry completely.
Scrub gently with a stiff brush, then rinse with water. Repeat if needed.
Safety Tips For Best Results
Always test on an inconspicuous spot first, especially if your grout is colored. Wear gloves and open a window for ventilation. Avoid contact with metal fixtures or porous natural stone tiles, as bleach can cause damage.
Rinse thoroughly after scrubbing.
9. Use Oxygen Bleach for Color-Safe Cleaning
If you have colored grout, regular chlorine bleach can be too harsh—it might fade or discolor the pigment. Oxygen bleach, like OxiClean, is a gentler alternative that still lifts dirt and stains. It works by releasing oxygen bubbles that break down grime without damaging the grout's color.
Oxygen bleach is a go-to for colored grout because it's non-chlorinated and color-safe. It's also effective on white grout if you prefer a milder option. The process is simple: mix the powder with warm water to form a paste or solution, apply it to the grout lines, let it sit for 10–15 minutes, then scrub with a brush.
Rinse thoroughly. For tough stains, let it soak longer. This method is especially good for kitchen backsplashes or bathroom floors where you want to avoid bleach fumes.
How To Mix And Apply
For a paste, combine oxygen bleach powder with just enough warm water to form a thick consistency. Spread it over the grout lines using a small brush or sponge. Let it sit for at least 10 minutes—longer for set-in stains.
Scrub gently with a grout brush, then rinse with clean water. For a liquid solution, mix according to package directions and apply with a spray bottle.
Why It's Better For Colored Grout
Chlorine bleach can strip color from tinted grout, leaving it patchy or lighter than intended. Oxygen bleach lifts dirt without altering the grout's original shade. It's also safer for your skin and lungs, making it a good choice for enclosed spaces like bathrooms.
When To Use This Method
Use oxygen bleach for routine deep cleaning every few months, or when you notice grout looking dingy but still intact. It's ideal for colored grout in showers, backsplashes, and floors. Avoid it if your grout is already cracked or crumbling, as soaking could worsen damage.
10. Try a Commercial Grout Cleaner
When home remedies just aren't cutting it, it's time to bring in the big guns. Commercial grout cleaners are specially formulated to break down the toughest grime, mildew, and mineral deposits that regular cleaners leave behind. They're a bit more aggressive, but when used correctly, they can make your grout look brand new.
Commercial cleaners like Zep Grout Cleaner or Grout-Eez use powerful chemicals to penetrate deep into porous grout. Always follow the label instructions to the letter—some need to sit for a few minutes, others require scrubbing. And never skip the patch test: apply a small amount in an inconspicuous spot to make sure it doesn't discolor or damage your grout or tile.
Choosing The Right Product
Not all commercial cleaners are the same. Look for one that targets your specific problem: stains, mildew, or general dirt. Read reviews and check if it's safe for your tile type—some acidic cleaners can etch natural stone.
Application Tips
Apply the cleaner with a small brush or sponge, working it into the grout lines. Let it sit for the recommended time, then scrub gently. Rinse thoroughly with water to remove all residue.
Ventilate the area well—these products can have strong fumes.
Safety First
Wear gloves and eye protection. Keep windows open or use a fan. If you have sensitive skin or respiratory issues, consider a less harsh option or hire a pro.
Always store cleaners out of reach of kids and pets.
11. Use a Toothbrush and Toothpaste
White toothpaste isn't just for your teeth—it can also polish light stains on grout. The mild abrasive in toothpaste gently buffs away discoloration without damaging the tile. It's a quick fix when you're out of specialized cleaners or want a low-chemical option.
Toothpaste works best on light-colored grout with surface-level staining. Gel toothpastes are less effective because they lack the fine abrasives found in white paste. Apply a small amount to an old toothbrush, scrub the grout lines in a circular motion, and let it sit for a minute before rinsing with water.
For tougher spots, add a little baking soda to the toothpaste to boost its cleaning power.
Why White Paste Beats Gel
White toothpaste contains mild abrasives like calcium carbonate or hydrated silica, which physically scrub away stains. Gel formulas rely on detergents and are designed to be gentle on enamel, so they don't have the same polishing effect on grout.
Best Grout Types For This Hack
This trick works wonders on sanded and unsanded grout that's light in color—white, beige, or light gray. Avoid using it on dark or colored grout, as the abrasives can lighten the pigment unevenly.
When To Skip The Toothpaste
If your grout has deep-set mildew, mold, or years of embedded dirt, toothpaste alone won't cut it. It's best for maintenance cleaning or freshening up lightly stained areas between deep cleans.
12. Steam Mop for Floor Grout
If you have large areas of tiled flooring, scrubbing grout on your hands and knees is a workout nobody wants. A steam mop with a grout attachment can cut that job down to a quick walk across the room. The heat and moisture loosen caked-on dirt, and the microfiber pad wipes it away in one pass.
Steam cleaning is especially effective for floor grout because it sanitizes without chemicals. The high temperature kills mold and mildew spores, while the steam pressure pushes debris out of porous grout lines. This method works best as regular maintenance—if grout is heavily stained, you may need to pretreat with a cleaner first.
Choose The Right Attachment
Not all steam mops come with a grout tool. Look for a model that includes a small brush or triangular head designed to focus steam into narrow lines. If yours didn't include one, you can often buy a compatible grout attachment separately.
A nylon bristle brush works better than a hard plastic one—it's gentler on grout but still scrubs effectively.
Prep The Floor First
Sweep or vacuum the tile floor thoroughly before steaming. Loose dust and debris can turn into muddy streaks when hit with steam. For best results, spot-treat any visible stains with a baking soda paste or a commercial grout cleaner, let it sit for a few minutes, then go over the area with the steam mop.
Use Slow, Steady Passes
Rushing with a steam mop is a common mistake. Move the tool slowly along the grout lines so the steam has time to penetrate and loosen dirt. Overlap each pass slightly to avoid missing spots.
After steaming, wipe the floor with a dry microfiber cloth to pick up any leftover moisture and residue.
13. Apply a Grout Colorant or Paint
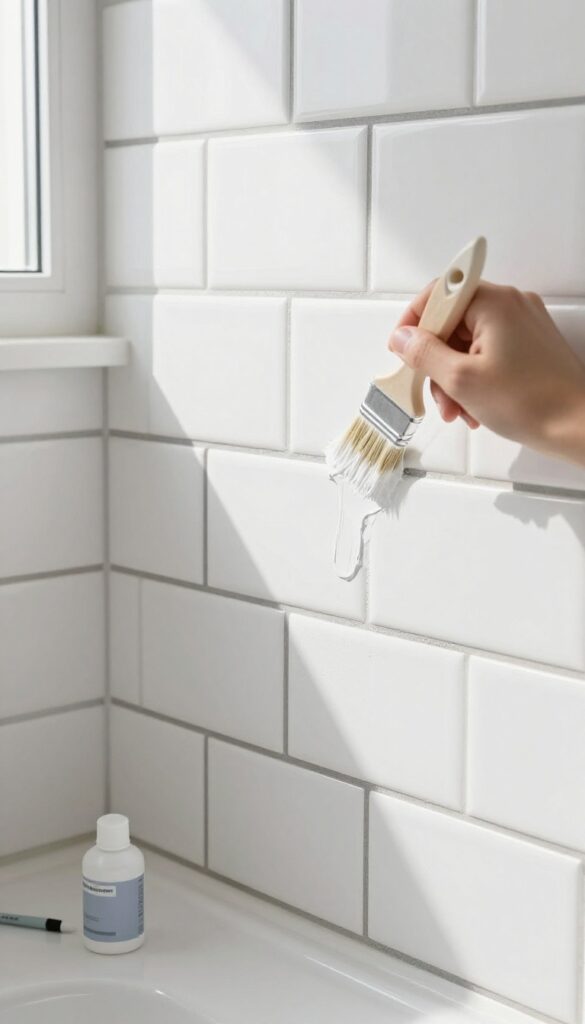
Sometimes no amount of scrubbing can bring back the original color of your grout. Stains have seeped in too deep, or the grout is simply old and discolored. That's when a grout colorant or paint becomes your best friend.
These products work like a magic marker for your tile lines—they cover up stains and seal the grout in one step. The result is a uniform, bright finish that lasts for years. Plus, you can even change the color if you want a fresh look without retiling.
Grout colorants and paints are available in a wide range of shades, from classic white to charcoal and everything in between. They come as pens, bottles with brush applicators, or spray cans. The application is straightforward: clean the grout first, apply the colorant carefully along the lines, and wipe away any excess from the tile surface.
Most products dry quickly and create a protective barrier that resists future stains and mildew.
Choose The Right Product
Not all grout colorants are the same. Look for a water-based, acrylic formula that is specifically designed for grout. These are low-odor, easy to clean up, and safe for most tile types.
Avoid oil-based paints that can yellow over time or peel. Read reviews and pick a brand known for durability and color accuracy.
Prep The Grout Properly
For the colorant to adhere well, the grout must be clean and dry. Use a grout cleaner or a mixture of baking soda and vinegar to remove any dirt, grease, or mildew. Let it dry completely—at least 24 hours if possible.
If the grout is damp, the colorant won't bond and may bubble or peel.
Apply With Precision
Use a grout pen or a small brush to apply the colorant only on the grout lines. Work in small sections, and immediately wipe off any paint that gets on the tile with a damp cloth. For large areas, consider using painter's tape to protect the tile edges.
Apply two thin coats for best coverage, allowing the first coat to dry before adding the second.
Seal The Deal
Many colorants include a sealer, but if yours doesn't, apply a separate grout sealer after the colorant has fully cured. This extra step locks in the color and makes future cleaning much easier. Reapply the sealer every year or two to keep the grout looking fresh.
14. Use a Pressure Washer for Outdoor Grout
Outdoor tile grout takes a beating from dirt, pollen, and weather. A pressure washer is the fastest way to blast away that grime without scrubbing. Just be careful—too much pressure can damage the grout itself.
For patio or pool tile grout, a pressure washer with a narrow tip blasts away dirt. Keep the nozzle moving to avoid damaging the grout.
Choose The Right Nozzle
A 15- or 25-degree tip is ideal for grout lines. Avoid zero-degree tips—they're too aggressive and can gouge out the grout. Test on an inconspicuous area first.
Keep The Wand Moving
Hold the nozzle about 6–12 inches from the surface and move it steadily along the grout lines. Stopping in one spot can erode the grout. Overlap passes to ensure even cleaning.
Follow Up With A Sealant
Pressure washing can strip away old sealant. Once the grout is dry, apply a fresh coat of penetrating sealer to protect against future stains and moisture.
15. Try a DIY Vinegar and Dish Soap Spray
Store-bought grout cleaners can be expensive and loaded with chemicals you might not want around your family or pets. A simple solution of white vinegar, water, and dish soap works just as well on most grout stains. This homemade spray cuts through grease, disinfects, and brightens tile lines without costing much.
Mix equal parts white vinegar and warm water in a spray bottle, then add a generous squirt of dish soap. Shake gently to combine. Spray the mixture directly onto the grout lines, making sure they're fully saturated.
Let it sit for about five minutes to break down grime. Scrub with a stiff nylon brush or an old toothbrush, then rinse with clean water. The dish soap helps lift oily residues, while the vinegar kills mildew and neutralizes odors.
This works best on light to moderate stains; for heavy buildup, you may need a second application or a stronger method.
Why This Combo Works So Well
Vinegar is mildly acidic, which dissolves mineral deposits and soap scum that cling to grout. Dish soap is a surfactant that breaks down grease and lifts dirt particles so they rinse away easily. Together, they tackle the two main culprits of dingy grout—grease and hard water residue.
Plus, vinegar is a natural disinfectant, killing many common household germs and mold spores.
Tips For Best Results
Use a spray bottle with a fine mist to avoid oversaturating the grout. Always test on a small, hidden area first, especially if your tile is natural stone—vinegar can etch certain surfaces. For stubborn spots, let the spray sit for up to 10 minutes before scrubbing.
Rinse thoroughly with water afterward to remove any soapy residue that could attract new dirt.
When To Avoid This Method
Do not use vinegar on unsealed or porous natural stone tiles like marble, travertine, or limestone, as the acid can damage the surface. For these materials, stick to a pH-neutral cleaner. Also avoid this spray if your grout is already failing or crumbling—the moisture might worsen the problem.
In those cases, consider regrouting or sealing first.
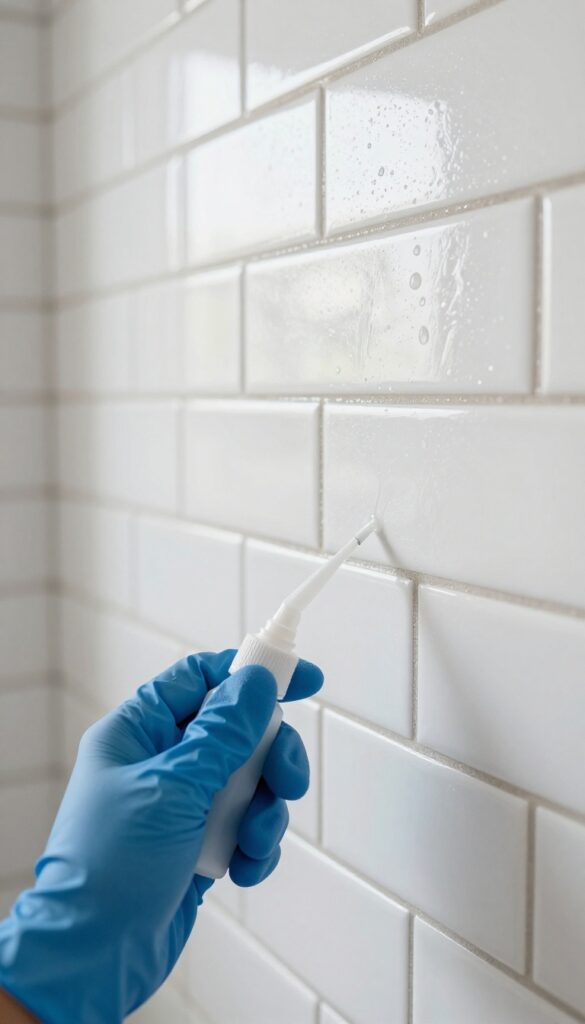
16. Use a Grout Cleaning Pen
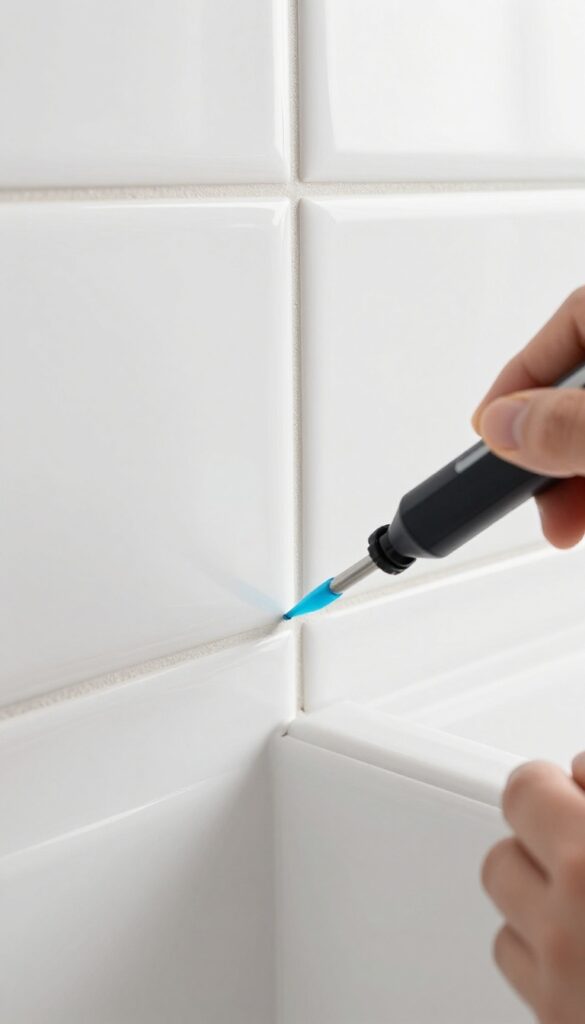
Grout cleaning pens are a game-changer for quick touch-ups. They have a chisel tip that dispenses cleaner directly into the grout lines, making spot cleaning precise and mess-free. No more overspray or wasted product—just targeted cleaning where you need it most.
These pens are perfect for small areas like backsplashes or between countertop tiles. The built-in brush tip scrubs as you apply, so you can tackle stains without extra tools. They're also handy for maintaining grout between deep cleans.
How To Use A Grout Cleaning Pen
Shake the pen well, then press the tip onto the grout line to release the cleaner. Use the chisel edge to work the solution into the grout, scrubbing along the line. Let it sit for a minute, then wipe away residue with a damp cloth.
For tough stains, repeat or let it dwell longer.
Where Grout Pens Work Best
They excel on light stains and everyday grime in kitchens and bathrooms. Use them on ceramic, porcelain, or stone tile—but avoid unsealed natural stone, as the chemicals may etch. They're not ideal for large floor areas, but perfect for refreshing a shower niche or kitchen backsplash.
Pros And Cons Of Grout Pens
Pros: Precise application, no mixing, easy to store. Cons: Can be pricier per use than DIY solutions, and the cleaning power may not match heavy-duty treatments. They're best as a maintenance tool, not a deep-cleaning cure-all.
17. Apply a Paste of Cream of Tartar
Cream of tartar isn't just for baking—it's a surprisingly effective grout cleaner. When mixed with lemon juice, it forms a natural bleaching paste that lifts stains without harsh chemicals. This method is gentle enough for regular use but powerful on light discoloration.
Why It Works
Cream of tartar is a mild acid that breaks down mineral deposits and soap scum. Lemon juice adds acidity and natural bleaching power. Together, they create a paste that penetrates porous grout and lifts dirt without damaging the surface.
How To Make And Apply The Paste
Mix equal parts cream of tartar and lemon juice until you get a thick, spreadable paste. Apply it directly to the grout lines using an old toothbrush or a small spatula. Let it sit for 10–15 minutes—longer for stubborn stains—then scrub gently and rinse with warm water.
Tips For Best Results
Test the paste on a small, hidden area first to ensure it doesn't lighten your grout too much. For tougher stains, let the paste dry completely before rinsing. Avoid using this method on unsealed grout too often, as the acidity can wear down the surface over time.
18. Use a Hair Dryer to Loosen Dirt
Heat can be your secret weapon against stubborn grout grime. A hair dryer isn't just for styling hair—it's a surprisingly effective tool for loosening dried-on dirt and soap scum. The warmth softens the bond between grime and grout, making scrubbing much easier.
Before you reach for harsh chemicals, try a simple hair dryer. Set it to medium or high heat and aim it at the grout lines for about a minute. You'll notice the dirt starting to soften.
Then, immediately scrub with a stiff brush and your favorite cleaner. The heat helps break down residues that have baked onto the grout over time.
Why Heat Works
Grout is porous, and dirt, soap scum, and oils can become almost cemented into the surface. Heat expands the grout slightly and softens the grime, making it easier to lift away. This is especially helpful for old, set-in stains that resist cold cleaning methods.
Best Practices
Work in small sections to keep the grout warm while you scrub. Hold the dryer about 6 inches away and move it constantly to avoid overheating. For extra stubborn spots, apply a baking soda paste before heating—the heat will activate it further.
Safety Tips
Avoid using a hair dryer near water or on wet grout to prevent electrical hazards. Also, don't hold it too close to the tile, as excessive heat could damage some types of tile or grout. Test on a small, hidden area first.
19. Try a Baking Soda and Vinegar Fizz
If you want a chemical-free way to blast through grime, this classic combo is hard to beat. Baking soda and vinegar create a fizzy reaction that helps loosen dirt from porous grout without scrubbing too hard. It's cheap, safe, and surprisingly effective for regular maintenance or tackling mild stains.
Start by sprinkling a generous layer of baking soda over the grout lines. Then fill a spray bottle with white vinegar and spritz it directly onto the baking soda. The mixture will bubble and foam, which helps lift embedded dirt and soap scum.
Let it sit for about 10 minutes to work its magic, then scrub with a stiff brush and rinse with warm water. For best results, use a grout brush or an old toothbrush to get into the lines.
Why The Fizz Works
The chemical reaction between the alkaline baking soda and acidic vinegar produces carbon dioxide gas. Those bubbles help dislodge particles stuck in the grout's pores. It's a gentle but effective way to clean without harsh scrubbing that can damage the grout surface.
When To Use This Method
This method is ideal for light to moderate grout discoloration from everyday dirt and soap residue. It's also great for routine cleaning between deeper scrubs. However, for heavy mold or mildew, you may need a stronger cleaner like hydrogen peroxide or bleach.
Tips For Best Results
Make sure the grout is dry before applying baking soda so it sticks. Use a fine mist of vinegar to avoid flooding the area. Let the fizz do the work—don't scrub immediately.
After rinsing, wipe away excess moisture to prevent new dirt from settling in.
20. Use a Grout Scraper for Thick Buildup
Sometimes a brush or sponge just won't cut it. When you've got years of hardened dirt, old sealant, or even paint splatters stuck in your grout lines, it's time to bring out the big guns: a grout scraper or a utility knife. This tool lets you physically remove the gunk without soaking your tile in chemicals.
Just remember to work carefully—you want to scrape away the buildup, not the grout itself.
A grout scraper is essentially a small, handheld tool with a sharp blade designed to fit into narrow grout lines. You can find them at any hardware store or online for a few dollars. A utility knife works too, but the angled blade of a dedicated scraper gives you better control.
The key is to use gentle, even pressure and keep the blade flat against the grout surface. If you dig in at an angle, you risk gouging or chipping the grout, which can make the lines look worse. Work in short strokes, and wipe away debris frequently so you can see your progress.
When To Use A Scraper
Reach for a scraper when you see thick, crusty deposits that won't budge with cleaning solutions. This often happens in showers where soap scum and hard water minerals have built up over months or years. Old sealant that has yellowed or peeled can also be scraped off before reapplying a fresh coat.
If you're prepping grout for recoloring or sealing, a quick scrape removes loose material and helps the new product adhere better.
Technique Tips
Hold the scraper at a low angle—almost parallel to the tile—so the blade slides along the grout without digging in. Use short, controlled pushes rather than long, sweeping motions. For stubborn spots, you can apply a bit more pressure, but always check that you're not cutting into the grout.
If you hit a patch that's too hard, try softening it first with a steam cleaner or a hot vinegar solution. After scraping, vacuum or wipe away the debris, then clean the area with a damp cloth to remove any dust.
Safety First
Grout scrapers and utility knives are sharp. Always cut away from your body, and wear a pair of work gloves to protect your hands. If you're working on floor grout, kneel on a pad to avoid straining your knees.
Keep the blade clean and replace it when it gets dull—a dull blade requires more force and increases the risk of slipping. And never use a scraper on freshly applied grout; it needs at least 24 to 48 hours to cure.
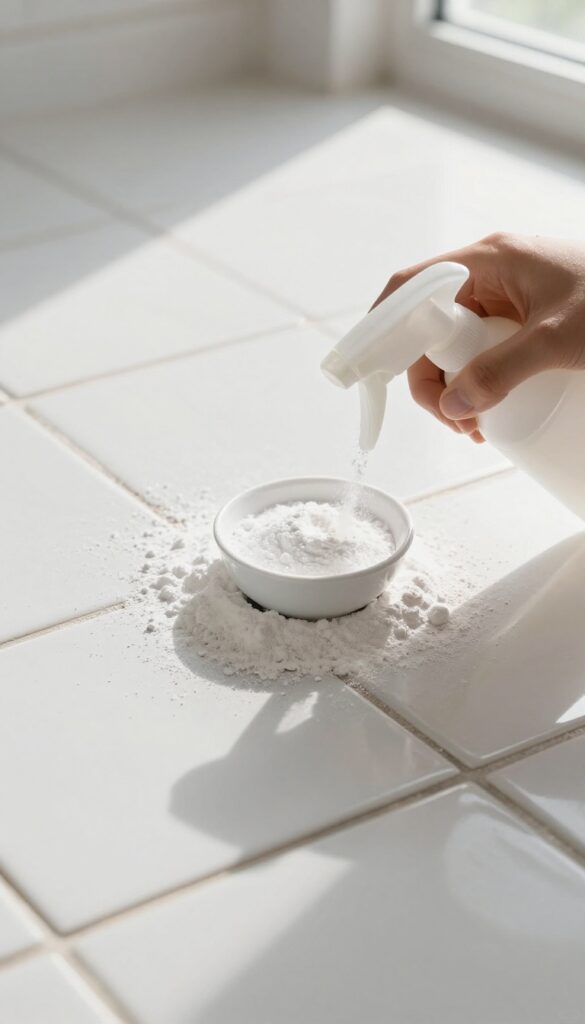
21. Apply a Borax Solution
Borax is a natural mineral that works wonders on grout. Mixed with water, it forms a mild abrasive paste that cuts through dirt without scratching tile. Plus, it deodorizes, leaving your bathroom smelling fresh.
This simple solution is safe for most tile types and doesn't release harsh fumes. It's especially good for light-colored grout that needs a gentle brightening boost.
How To Mix And Apply
Combine equal parts borax and warm water to form a spreadable paste. Apply it to grout lines with an old toothbrush or a grout brush. Let it sit for 10-15 minutes so the borax can break down grime.
Scrubbing And Rinsing
Scrub firmly along the grout lines, focusing on stained areas. Rinse with clean water and wipe away residue with a damp cloth. Repeat if needed for stubborn spots.
Why It Works So Well
Borax has a high pH that helps dissolve acidic dirt and soap scum. Its mild abrasiveness lifts debris without scratching. It's also a natural deodorizer, so it neutralizes musty smells.
22. Use a Steam Cleaner with a Brush Attachment

If you've got a steam cleaner tucked away for floors or upholstery, it's time to put it to work on your grout. Many models come with a small brush head that's perfect for scrubbing tile lines. The combination of high heat, steam pressure, and mechanical scrubbing can break down grime that's been baked in for months.
And the best part? No harsh chemicals needed—just water.
Steam cleaning is a powerful, chemical-free way to deep clean grout. The heat helps loosen dirt and kill mold spores, while the brush agitates the grout surface. It's especially effective on kitchen backsplashes and bathroom walls where grease and soap scum build up.
For best results, hold the steamer at a slight angle and work in small sections, wiping away loosened dirt with a microfiber cloth as you go.
Choose The Right Attachment
Not all brush heads are the same. Look for a stiff nylon or brass bristle brush attachment designed for grout lines. Brass is gentler than steel but still abrasive enough to lift grime.
If your steamer came with a larger floor brush, check if it has a grout-specific accessory or a smaller detail brush. The narrower the brush, the easier it is to target just the grout without hitting the tile surface.
Pre-treat Stubborn Stains
For really tough stains, give the grout a quick pre-treat with a baking soda paste (just mix baking soda with a little water). Apply it to the grout lines, let it sit for a few minutes, then hit it with the steam cleaner. The baking soda acts as a mild abrasive and deodorizer, and the steam will activate it further.
This combo can lift stains that steam alone might leave behind.
Work In Small Sections And Dry Immediately
Steam cleaning loosens dirt, but if you let it dry on the grout, it can redeposit. Work in 2-3 foot sections, steam and scrub, then wipe away the residue with a clean, dry microfiber cloth. Follow up with a dry towel to remove excess moisture.
This prevents water spots and keeps the grout from looking hazy once it dries.
23. Try a Hydrogen Peroxide and Baking Soda Paste
When store-bought cleaners aren't cutting it, a simple DIY paste can work wonders on deeply stained grout. Hydrogen peroxide acts as a gentle bleach, while baking soda provides mild abrasion to lift grime. Together, they create a powerful yet safe solution for brightening tile lines.
This method is ideal for set-in stains that have been lingering for months. The overnight dwell time allows the peroxide to penetrate and break down discoloration without damaging the grout. It's especially effective on light-colored grout where yellowing or dark spots stand out.
Mixing The Paste
In a small bowl, combine about 1/2 cup of baking soda with 2-3 tablespoons of hydrogen peroxide. Stir until it forms a thick, spreadable paste—similar to toothpaste. If it's too runny, add more baking soda; if too thick, add a few drops of peroxide.
Application And Waiting
Use a small spatula or an old toothbrush to apply the paste directly onto the grout lines. Spread it evenly, making sure to fill the grooves. Cover the area with plastic wrap to keep the paste from drying out too quickly.
Let it sit overnight for best results.
Rinsing And Scrubbing
The next day, remove the plastic wrap and spray the area lightly with water. Scrub the grout with a stiff brush to loosen any remaining residue. Rinse thoroughly with clean water and wipe the tile surface dry.
You'll notice a visible difference in brightness.
24. Use a Grout Cleaning Machine
If you've got a large tiled area—like a kitchen floor, a bathroom with a walk-in shower, or even a whole basement—manual scrubbing can take forever. That's where electric grout cleaners come in. These handheld machines spin brushes that do the hard work for you, cutting cleaning time in half.
They're especially effective on stubborn stains that won't budge with a brush.
Electric grout cleaners, such as the Grout Bully or similar models, use rotating brushes to scrub grout lines automatically. They're designed to reach into the grooves without splattering water everywhere. Most come with different brush heads for varying grout widths and textures.
You simply attach the brush, add a cleaning solution, and guide the machine along the lines. The spinning action lifts dirt and grime without you having to apply much pressure. These machines are a worthwhile investment if you maintain multiple tiled areas or if you have physical limitations that make kneeling and scrubbing difficult.
How It Works
The machine typically has a handle with a trigger that spins the brush at high speed. You fill a reservoir with a cleaning solution (or use a spray bottle) and run the brush along the grout lines. The brush's bristles are stiff enough to scrub but not so harsh that they damage the grout.
Some models are cordless for easy maneuverability, while others plug in for consistent power. The key is to move slowly and let the brush do the work—no need to bear down.
Best Uses And Tips
These machines excel on large, uninterrupted tiled surfaces like kitchen floors or bathroom walls. They're less ideal for tight corners or areas with lots of obstacles. For best results, pre-wet the grout lines with a cleaner and let it sit for a few minutes before using the machine.
After scrubbing, wipe away the loosened dirt with a damp cloth or mop. Always test on a small, inconspicuous area first to ensure the brush doesn't scratch the tile.
Maintenance And Care
Rinse the brush head after each use to prevent buildup of cleaning solution and dirt. Check the manufacturer's instructions for cleaning and storing the machine. Replace brush heads when they become worn or frayed.
Keep the machine dry when not in use to extend its life. With proper care, a grout cleaning machine can last for years and make your cleaning routine much easier.
25. Maintain with Weekly Wiping
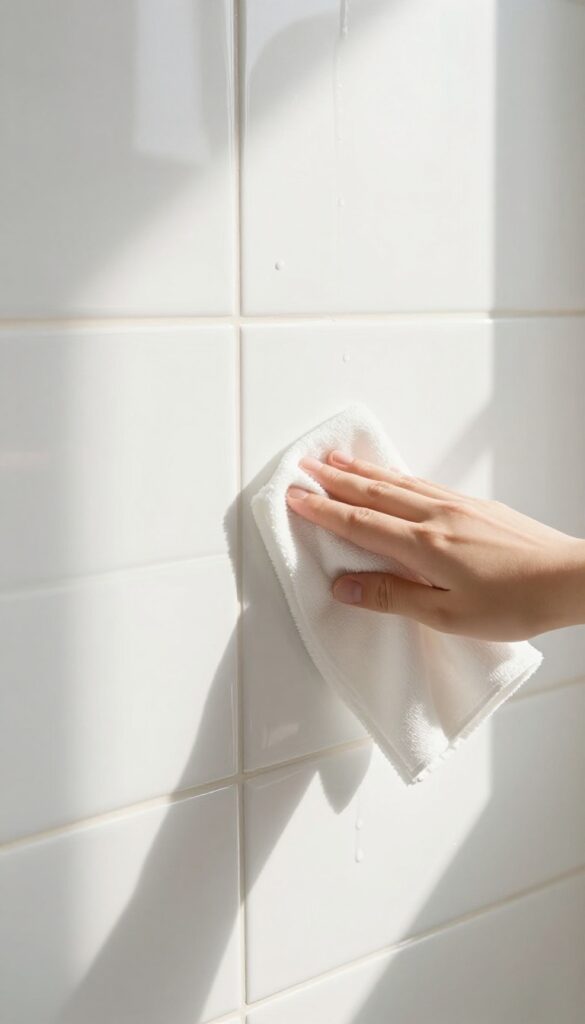
You've put in the hard work to get your grout looking fresh. Now the trick is keeping it that way without spending hours scrubbing every week. A simple habit can make all the difference.
Why Weekly Wiping Works
Grout is porous, so dirt and moisture settle in quickly. By wiping down grout lines weekly, you remove surface grime before it has a chance to penetrate deep into the pores. This prevents the gradual darkening that makes grout look old and dingy.
What To Use For Quick Wipes
You don't need anything fancy. A damp microfiber cloth is often enough for light cleaning. For tougher spots, mix a few drops of mild dish soap with warm water.
Avoid harsh cleaners that can strip sealant or damage grout over time.
Make It Part Of Your Routine
Tie this task to something you already do, like wiping down countertops or mirrors after a shower. Keep a small spray bottle of diluted cleaner and a cloth in the bathroom or kitchen so it's easy to grab. Consistency is key—five minutes a week saves you from deep scrubbing later.
FAQ
How often should I clean grout?
For maintenance, wipe grout weekly. Deep clean every 3–6 months, depending on traffic and moisture. Sealed grout needs less frequent cleaning.
Can I use bleach on colored grout?
Chlorine bleach can discolor colored grout. Use oxygen bleach or a color-safe cleaner instead. Always test in a hidden spot first.
Does vinegar damage grout?
Vinegar is acidic and can etch unsealed grout over time. Use it sparingly and rinse thoroughly. For natural stone tiles, avoid vinegar entirely.
How do I prevent grout from getting dirty?
Seal grout after cleaning to repel moisture and stains. Use a squeegee on shower walls after use, and wipe spills promptly on floors.
What's the fastest way to clean grout?
A steam cleaner with a brush attachment works quickly for large areas. For spot cleaning, a baking soda paste with vinegar fizz is fast and effective.
Conclusion
Bright grout lines can transform the look of any tiled surface, from bathroom walls to kitchen backsplashes. With these 25 tips, you have a toolbox of methods ranging from everyday maintenance to deep cleaning power. Start with the gentlest approach and work your way up as needed.
Once your grout is clean, seal it to keep it looking fresh longer. A little regular care goes a long way in preserving that just-cleaned glow.


