You've just finished a long week, and the last thing you want is to spend an hour scrubbing the bathroom. But a quick weekly reset doesn't have to mean a deep clean every time. With a few smart shortcuts, you can keep your bathroom fresh without the elbow grease.
The key is working smarter, not harder. These 23 hacks target the dirtiest spots with minimal effort, using tools and ingredients you probably already have. Whether it's a steamy shower or a grimy sink, each tip is designed to cut your cleaning time in half.
No fancy products or complicated routines—just straightforward methods that actually work. Ready to reclaim your Saturday mornings?
1. Use a Squeegee After Every Shower
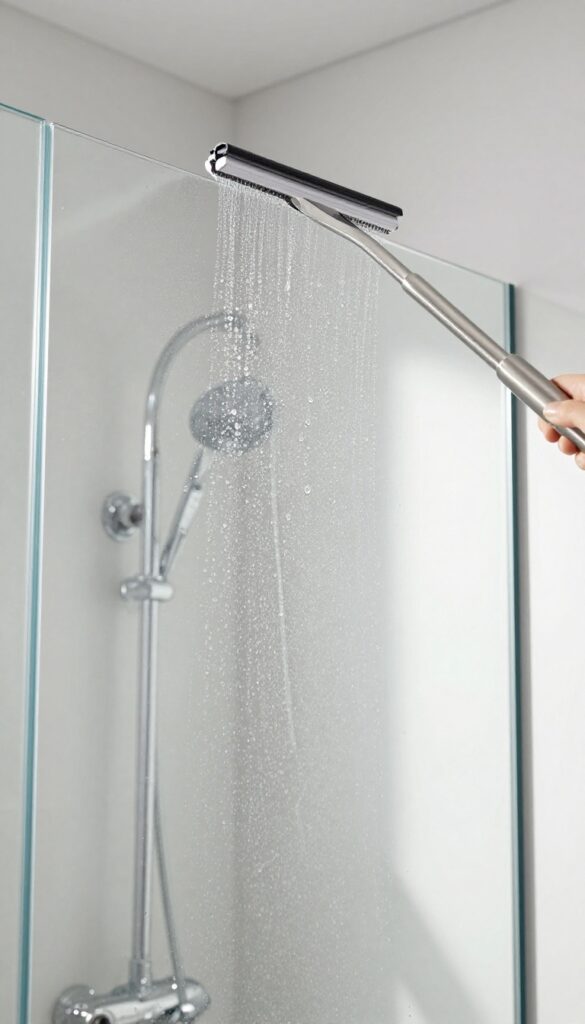
Glass shower doors look great when they're clean, but they show every water spot and soap smear. The trick is to stop the buildup before it starts. A simple squeegee swipe after each shower keeps the glass clear and cuts down your deep-cleaning sessions dramatically.
Hard water stains and soap scum are tough to remove once they've dried. By running a squeegee over wet glass, you remove the minerals and soap residue before they have a chance to bond. This one habit can keep your doors looking like new for months.
It takes less than thirty seconds and saves you from scrubbing with harsh chemicals later.
Why It Works
When water evaporates, it leaves behind calcium, magnesium, and soap film. These combine into a stubborn layer that regular cleaners struggle to dissolve. A squeegee wipes away the water entirely, so there's nothing left to dry into a stain.
It's the same principle as drying your car with a microfiber towel to prevent water spots.
The Right Tool For The Job
Not all squeegees are equal. Look for one with a rubber blade that's soft enough to conform to the glass but firm enough to push water. A stainless steel handle resists rust in the humid bathroom environment.
Keep it hanging inside the shower or on a hook nearby so you never forget to use it.
Make It A Family Habit
Get everyone in the household on board. Keep a small squeegee in the shower and remind family members to give the glass a quick once-over after their rinse. You can even set a rule: last person out squeegees.
After a week, it becomes automatic, and you'll notice the difference right away.
2. Vinegar and Dish Soap for Soap Scum
Soap scum is that stubborn white film that builds up on shower doors and tiles, making them look dingy no matter how often you wipe them down. Commercial cleaners often rely on harsh chemicals, but you can tackle it with two kitchen staples. This simple DIY spray cuts through the grime without the fumes.
Mix equal parts white vinegar and blue Dawn dish soap in a spray bottle. Shake gently to combine—the mixture will thicken slightly. Spray generously onto affected surfaces, let it sit for 10 minutes, then wipe away with a damp microfiber cloth.
For heavy buildup, scrub lightly with a soft sponge before rinsing. The vinegar dissolves mineral deposits while the dish soap breaks down grease and soap residue.
Why This Combo Works
Vinegar is acidic, which helps dissolve hard water stains and soap scum. Dish soap is a surfactant that lifts grime so it rinses away easily. Together, they create a powerful yet gentle cleaner safe for most surfaces.
Best Surfaces To Use It On
This spray works wonders on glass shower doors, ceramic tiles, and fiberglass enclosures. Avoid using it on natural stone like marble or granite, as the acid can etch the surface. Test on a small hidden area first if you're unsure.
Pro Tips For Best Results
For extra stubborn scum, let the spray sit longer—up to 15 minutes. If the mixture dries before you wipe, re-spray to keep it wet. Use a squeegee afterward to prevent future buildup.
Store the bottle in a cool, dark place and shake before each use.
3. Dryer Sheets for Hard Water Spots
Hard water spots can make chrome fixtures and glass look cloudy and neglected. But you don't need a special cleaner to restore their shine. A used dryer sheet is surprisingly effective at buffing away those mineral deposits without scratching surfaces.
Grab a used dryer sheet from the laundry and gently rub it over faucets, showerheads, and glass doors. The mild abrasives and softening agents break down the hard water residue, while the anti-static properties help repel dust and future spots. It's a zero-cost hack that gives you a streak-free finish in seconds.
Why Dryer Sheets Work
Dryer sheets contain fabric softeners and mild abrasives that dissolve mineral deposits without harsh chemicals. The anti-static coating leaves a thin film that repels dust and water, keeping fixtures cleaner longer. Plus, they're non-abrasive, so they won't scratch chrome or glass.
Best Surfaces To Use On
This trick works wonders on chrome faucets, showerheads, glass shower doors, and even mirrors. Avoid using on matte or painted surfaces, as the chemicals might leave a residue. For best results, use a sheet that's already been through the dryer—new ones are too waxy.
How To Get The Best Results
Rub the dryer sheet gently over the spotted area in circular motions. For stubborn spots, dampen the sheet slightly with water. Wipe away any residue with a dry microfiber cloth.
You'll notice a brilliant shine and less buildup over time.
4. Baking Soda Paste for Grout Lines

Grout lines are notorious for trapping dirt and mildew, making them look darker than the day they were installed. But you don't need a harsh bleach cleaner to brighten them up. A simple paste of baking soda and water can tackle that grime without damaging the grout or your lungs.
Mix three parts baking soda with one part water to form a thick paste. Apply it generously along the grout lines using an old toothbrush or a small grout brush. Let it sit for 15 minutes so the baking soda can break down the embedded dirt.
Then scrub in a circular motion, focusing on the darkest spots. Rinse thoroughly with warm water and wipe dry with a microfiber cloth. For extra whitening power, add a splash of white vinegar to the paste, but be careful—the fizzing reaction means you should scrub immediately after mixing.
Why Baking Soda Works Best
Baking soda is mildly abrasive, so it scrubs away grime without scratching the tile or grout. It's also alkaline, which helps dissolve acidic dirt and soap scum. And because it's non-toxic, you can use it around kids and pets without worry.
How To Reach Tight Corners
For those narrow gaps where a toothbrush won't fit, try using an old toothbrush with the bristles cut at an angle. Or use a grout pen filled with a baking soda solution. You can also dip a cotton swab into the paste and work it into tiny crevices.
Preventing Future Grime Buildup
After cleaning, seal the grout with a clear grout sealer to repel moisture and dirt. Reapply the sealer once a year. Also, keep a squeegee in the shower and run it over the tiles after every use to reduce standing water that encourages mildew.
5. Shower Cap for Light Fixtures
Light fixtures in the bathroom are magnets for dust, grime, and moisture, but they're tricky to clean without risking damage. A simple disposable shower cap is the perfect shield. It protects the fixture from drips and cleaning sprays, so you can tackle the rest of the room without worry.
When you're cleaning the bathroom, the last thing you want is water seeping into light fixtures or leaving streaks on glass globes. A shower cap solves that problem in seconds. Just slip it over the fixture before you start spraying or wiping nearby surfaces.
The elastic band keeps it snug, and the plastic repels moisture. Once you're done, remove the cap and your fixture stays dry and clean. It's a zero-effort hack that prevents potential electrical hazards and keeps your lights looking bright.
Why It Works
Shower caps are designed to keep hair dry in a steamy environment, so they're naturally waterproof and fit snugly over most shapes. The elastic edge grips the fixture without scratching, and the plastic creates a barrier that blocks drips, dust, and cleaning solution overspray. It's a perfect repurposing of an everyday item.
How To Do It Right
Grab a clean disposable shower cap from a hotel or a pack from the store. Make sure the fixture is cool to the touch before covering it. Stretch the cap over the entire fixture, tucking any loose edges under the rim if possible.
Clean the rest of the bathroom as usual, then peel off the cap and give the fixture a quick dust if needed. No water spots, no worries.
Pro Tips
Use a clear shower cap so you can still see the light through it—handy if you need to turn it on briefly. For larger fixtures like a chandelier, use two caps overlapping. Reuse the cap a few times by rinsing it and letting it dry, but toss it once it gets grimy.
This hack also works for smoke detectors and vent fans.
6. Dishwasher Tablet for Glass Shower Doors
Glass shower doors look amazing when they're spotless, but they seem to attract soap scum and hard water stains like a magnet. You can scrub with specialized cleaners, but they often leave streaks or require a ton of effort. Here's a game-changer: a simple dishwasher tablet can do the heavy lifting for you.
Drop one dishwasher tablet into a bucket of warm water and let it dissolve. Dip a soft sponge or cloth into the solution, then scrub the glass doors in circular motions. The tablet's enzymes and surfactants break down soap scum and mineral deposits quickly.
Rinse thoroughly with clean water, then squeegee dry for a streak-free shine that lasts.
Why It Works So Well
Dishwasher tablets are formulated to tackle baked-on grease and food residue, which is chemically similar to soap scum. The combination of surfactants, enzymes, and mild abrasives cuts through buildup without scratching the glass. Plus, they rinse clean, leaving no cloudy film behind.
Step-by-step Application
Fill a bucket with 1 gallon of warm water and add one tablet. Wait 2-3 minutes for it to fizz and dissolve completely. Dip a non-abrasive sponge, wring it slightly, and scrub the glass from top to bottom.
Focus on areas with visible spots. Rinse with a hose or a wet microfiber cloth, then dry with a squeegee for best results.
Safety And Precautions
Avoid using this solution on tinted, frosted, or etched glass, as the abrasives may cause damage. Test on a small hidden area first. Wear gloves to protect your skin, and keep the mixture away from natural stone surfaces like marble or granite, as the chemicals can etch them.
7. Lemon Juice for Rust Stains

Rust stains around drains or on metal fixtures can make even a clean bathroom look neglected. Chemical rust removers are harsh and often stink, but you probably have a gentler solution in your kitchen. Lemons and salt work together to lift rust without scrubbing your lungs out.
Cut a lemon in half, dip the cut side in salt, and rub it directly onto the rust stain. Let the juice sit for about five minutes—enough time for the citric acid to break down the rust. Rinse with warm water and wipe dry.
For stubborn spots, repeat the process or let the lemon sit a little longer.
Why This Works
Citric acid in lemon juice is a natural chelating agent, meaning it binds to metal ions like iron in rust and helps lift them away. Salt acts as a mild abrasive, giving you a little extra scrubbing power without scratching porcelain or chrome.
Best Uses
This hack works great on rust rings around sink drains, on chrome faucet bases, and around toilet bolts. Avoid using it on unsealed marble or natural stone, as the acid can etch the surface.
Pro Tips
Use fresh lemons for maximum acidity—bottled juice won't be as effective. After cleaning, rinse thoroughly and dry the area to prevent new rust from forming. A thin layer of clear nail polish over small rust spots on metal can also stop them from spreading.
8. Microfiber Cloth for Mirrors
Mirrors are one of those surfaces that show every smudge, streak, and speck of dust. You can spend ages spraying and wiping, only to find a new streak when the light hits differently. A dry microfiber cloth changes the game entirely.
It picks up residue without leaving lint, and for quick touch-ups, plain water is all you need.
Why Microfiber Works So Well
Microfiber cloths have split fibers that create a static charge, which attracts dust and dirt like a magnet. Unlike cotton rags or paper towels, they don't just push grime around—they trap it. That means you get a truly clean mirror without the haze.
Plus, they're reusable and machine-washable, so you're not wasting paper.
The Water-only Trick
For a quick midweek refresh, skip the spray. Dampen a corner of your microfiber cloth with water, wipe the mirror, then flip to the dry side and buff. The water lifts light smudges, and the dry pass polishes the glass to a streak-free shine.
It's that simple.
Pairing With Your Regular Cleaner
When you do a deeper clean, use your usual glass spray or a mix of vinegar and water. Spray lightly onto the cloth, not the mirror, to avoid overspray dripping down. Then wipe in an S-pattern from top to bottom.
Finish with a dry microfiber cloth to buff out any remaining moisture. No streaks, no lint.
9. Pumice Stone for Toilet Rings
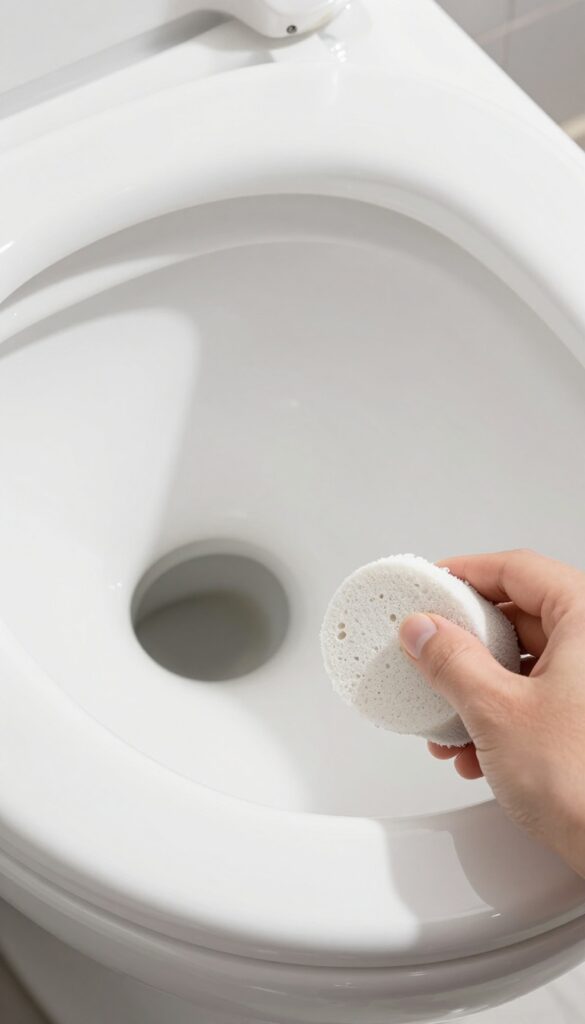
Hard water stains and mineral rings inside the toilet bowl can look stubborn, but they don't have to be. A pumice stone is a surprisingly gentle yet effective tool for removing these deposits without scratching the porcelain. It works by eroding the mineral buildup as you rub, leaving the surface smooth and clean.
Wet the pumice stone thoroughly before use. Gently rub the mineral rings inside the toilet bowl, applying light pressure. The stone will gradually wear away the deposit.
Flush to rinse away the residue. Repeat if needed for stubborn rings. This method avoids harsh chemicals and is safe for regular use.
Why Pumice Works
Pumice is a porous volcanic rock that is softer than porcelain but harder than mineral deposits. When wet, it gently abrades the buildup without scratching the toilet surface. It's ideal for hard water stains, rust rings, and calcium deposits that resist standard cleaners.
How To Use It Right
Always wet the stone and the toilet bowl surface first. Rub gently in a circular motion over the stain. Don't press hard—let the stone do the work.
Flush periodically to check progress. For best results, use a pumice stone designed for cleaning, not a cosmetic one.
When To Avoid
Avoid using pumice on colored or enameled fixtures, as it may scratch the finish. Stick to white porcelain toilets. Also, don't use it on acrylic or fiberglass surfaces.
Test on an inconspicuous area first if you're unsure.
10. Hydrogen Peroxide for Mold
Mold in the bathroom is not just unsightly—it can also be a health hazard. But you don't need harsh bleach to tackle it. Hydrogen peroxide offers a gentler yet effective alternative that kills mold spores and whitens surfaces without the strong fumes.
Spray 3% hydrogen peroxide directly onto moldy caulk or grout. Let it sit for 10 minutes to penetrate and kill the mold. Then scrub with a stiff brush or an old toothbrush.
The peroxide will foam as it works, lifting the mold away. Rinse with water and wipe dry. This method is safe for most surfaces and leaves no chemical residue.
Why Hydrogen Peroxide Works
Hydrogen peroxide is a natural disinfectant that breaks down into water and oxygen, making it eco-friendly. It kills mold spores by oxidizing them, which also helps whiten stained grout. Unlike bleach, it doesn't produce toxic fumes, so you can use it in a small, unventilated bathroom without worry.
Where to Use It
This hack is perfect for moldy caulk around the tub or sink, grout lines on tile floors or walls, and even shower curtains. Avoid using it on delicate fabrics or unsealed natural stone, as it may cause discoloration. Always test on a small hidden area first.
Pro Tips For Best Results
For stubborn mold, make a paste with hydrogen peroxide and baking soda. Apply it to the moldy area, let it sit for 15 minutes, then scrub. To prevent mold from returning, spray hydrogen peroxide weekly on high-moisture areas and let it air dry.
Keep the bottle in a dark place to maintain its potency.
11. Baby Wipes for Quick Touch-Ups
Not every bathroom mess requires a full arsenal of sprays and sponges. Sometimes the fastest solution is already in your diaper bag or under the nursery sink. Baby wipes are surprisingly effective for daily maintenance, and they save you from dragging out heavy cleaners for minor smudges.
Keep a pack of baby wipes under the sink for daily wipe-downs of counters, sinks, and toilet exteriors. They're gentle, effective, and disposable.
Why Baby Wipes Work So Well
Baby wipes are pre-moistened with a mild cleaning solution that cuts through toothpaste splatters, water spots, and dust without leaving residue. They're also alcohol-free, so they won't damage finishes or dry out your skin like some all-purpose cleaners can.
Where To Use Them
Use baby wipes on bathroom countertops, sink basins, faucets, toilet lids and seats, and even the outside of the toilet bowl. They're also great for wiping down light switches, doorknobs, and cabinet fronts that collect fingerprints.
Quick Morning Routine
After you brush your teeth or wash your face, grab a baby wipe and give the sink area a quick once-over. It takes less than 30 seconds, and by the end of the week, you'll have a noticeably cleaner bathroom without any extra scrubbing sessions.
12. Toothbrush for Faucet Bases
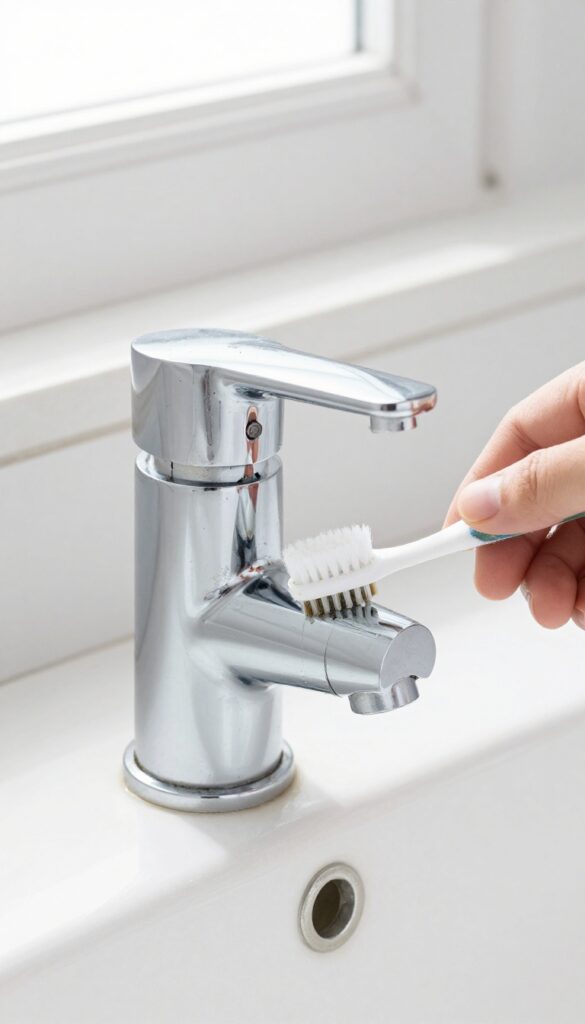
Faucet bases and handles are notorious for trapping grime, toothpaste splatter, and hard water buildup. The narrow crevices make them tough to clean with a standard sponge or cloth. That's where a humble old toothbrush comes in—it's the perfect tool to dig into those tight spots without scratching the finish.
Dip an old toothbrush in white vinegar and scrub around the base of the faucet, focusing on the seam where it meets the countertop. Work the bristles into the handle joints and any decorative ridges. The vinegar dissolves mineral deposits and soap scum, while the bristles lift dirt from every nook.
Wipe away residue with a damp cloth, and your faucet will look like new.
Why Vinegar Works Best
White vinegar is a mild acid that breaks down hard water stains and alkaline grime without harsh chemicals. It's safe for most faucet finishes, including chrome, stainless steel, and brushed nickel. Just avoid using it on untreated brass or natural stone countertops.
Don't Forget The Handles
Faucet handles collect just as much grime, especially underneath where fingers rarely reach. Angle the toothbrush to clean under the handle lever and around the base. For stubborn buildup, let the vinegar sit for a few minutes before scrubbing.
Keep A Dedicated Brush
Designate one old toothbrush specifically for faucet cleaning and store it in a small cup near the sink. That way, you can quickly grab it during your weekly reset without hunting for supplies. Rinse the brush after each use and replace it every few months.
13. Rubbing Alcohol for Stainless Steel
Stainless steel fixtures look great when they're clean, but they show every fingerprint and water spot. Rubbing alcohol cuts through grime and leaves a mirror-like finish without streaks. Plus, it disinfects as you wipe, so you're tackling two jobs at once.
Dab a bit of rubbing alcohol onto a soft microfiber cloth—don't soak it, just dampen it. Wipe down faucets, handles, and even the showerhead. The alcohol evaporates fast, so there's no need to buff or rinse.
For tough spots, let the alcohol sit for a few seconds before wiping. It also works on stainless steel sinks, removing water spots and restoring shine.
Why Alcohol Works Best
Rubbing alcohol is a solvent that dissolves oils, fingerprints, and soap scum without harsh chemicals. It evaporates quickly, preventing the streaks that water-based cleaners leave behind. And it kills germs on contact, making your fixtures both shiny and sanitary.
How To Apply Without Damage
Always use a soft, lint-free cloth—paper towels can scratch. Test on a small hidden area first if you're worried about the finish. Avoid spraying alcohol directly onto fixtures to prevent drips; instead, dampen the cloth.
For brushed stainless steel, wipe in the direction of the grain to avoid visible marks.
Extra Tips For Lasting Shine
After cleaning, apply a tiny drop of baby oil or mineral oil to a cloth and buff the surface. This creates a protective barrier that repels fingerprints and water spots. You'll only need to do this once a month to keep your stainless steel looking pristine.
14. Shaving Cream for Foggy Mirrors
Stepping out of a hot shower only to face a completely fogged-up mirror is frustrating. You end up wiping it with a towel, only to have it fog again minutes later. There's a simple fix that costs pennies and lasts for weeks.
Shaving cream isn't just for shaving. Its surfactants create a thin film that prevents water droplets from forming on glass. Apply a small dollop to a dry microfiber cloth, spread it evenly over the mirror, then buff it off with a clean cloth.
The mirror will stay clear even during the steamiest showers. One application can last up to three weeks, making it a perfect low-effort hack for your weekly reset.
Why It Works
Shaving cream contains stearates and other surfactants that leave a hydrophobic layer on the glass. This layer causes water to sheet off instead of beading up, so fog never forms. It's the same principle behind commercial anti-fog sprays, but way cheaper.
How To Apply It Right
Use a pea-sized amount for a standard bathroom mirror. Spread it in thin, even circles with a dry microfiber cloth. Let it sit for about 30 seconds, then buff it off with a second clean cloth until the mirror is streak-free.
Avoid using too much—it'll leave a hazy residue.
When To Reapply
You'll know it's time to reapply when you start seeing small patches of fog after a shower. Typically, one application lasts two to three weeks, depending on humidity and how often you clean the mirror. It's a quick touch-up that takes less than a minute.
15. Vinegar Soak for Shower Heads
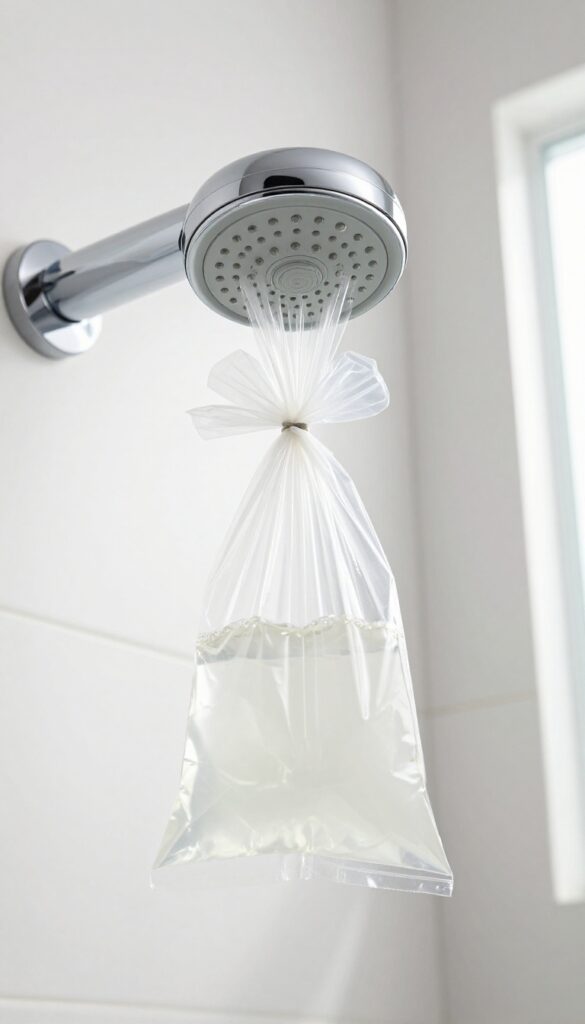
A weak spray or uneven water flow usually means mineral deposits are clogging your shower head. Instead of scrubbing each tiny nozzle, let chemistry do the work. White vinegar dissolves calcium and lime buildup overnight, restoring full pressure with almost no effort on your part.
This hack is as simple as it gets. You only need a plastic bag, a rubber band or twist tie, and enough white vinegar to submerge the shower head. Fill the bag about halfway, then slip it over the head so the nozzles are fully immersed.
Secure the bag in place—a rubber band around the neck of the shower head works well—and leave it overnight. In the morning, remove the bag and run the shower for a minute to flush out loosened debris. For stubborn buildup, you can add a tablespoon of baking soda to the vinegar for extra fizzing action.
Avoid using this method on brass or gold-plated fixtures, as vinegar can damage the finish. If your shower head is fixed and can't be bagged, you can pour vinegar into a small container and hold it against the head for a few minutes, but the bag method is hands-free and more effective.
Why It Works
Hard water contains calcium and magnesium carbonates that build up over time. Vinegar's acetic acid reacts with these deposits, breaking them down into soluble compounds that rinse away easily. The long soak gives the acid time to penetrate thick layers, so even neglected shower heads can be revived.
Pro Tips For Best Results
Use distilled white vinegar—it's cheap and effective. If your shower head has a rubber face, you can also gently rub the nozzles with an old toothbrush after soaking to dislodge any remaining grit. For a fresh scent, add a few drops of lemon essential oil to the vinegar.
Repeat every few months to prevent buildup from returning.
16. Cornstarch for Greasy Spots
Greasy residue around the bathroom sink or near the stove can feel impossible to wipe off with just a damp cloth. Cornstarch, a pantry staple, works like a gentle degreaser without harsh chemicals. It absorbs oil on contact, making cleanup effortless.
Sprinkle a generous layer of cornstarch directly onto greasy areas like the countertop near the sink or the wall above the stove. Let it sit for five to ten minutes—the longer, the better for stubborn spots. Then, wipe away with a damp microfiber cloth.
The cornstarch lifts the grease, leaving surfaces streak-free. For extra tough buildup, make a paste with a little water and scrub gently with a soft sponge.
Where It Works Best
Focus on areas that collect oil and grime: the backsplash near the sink, the top of the toilet tank, and the area around the shower caddy. Cornstarch is safe on ceramic, porcelain, and most sealed stone surfaces. Avoid using it on unsealed natural stone or unfinished wood.
Why It Beats Chemical Sprays
Many commercial degreasers contain ammonia or bleach, which can irritate skin and lungs. Cornstarch is non-toxic and food-safe, so you don't need gloves or ventilation. It's also cheaper and often already in your cupboard.
Plus, it won't leave behind a slippery residue like some sprays.
Pro Tip For Stubborn Spots
For dried-on grease, sprinkle cornstarch and let it sit for 15 minutes. Then spray a little white vinegar on top—it will fizz slightly. Wipe with a damp cloth.
The combination of cornstarch and vinegar cuts through even baked-on grime without scratching.
17. Denture Tablets for Hard-to-Reach Areas
Those little nooks and crannies in your bathroom can be a pain to scrub. But there's a surprisingly simple trick that uses something you might already have in your medicine cabinet: denture tablets. These effervescent tablets are designed to remove stains from dentures, and they work just as well on bathroom grime.
The fizzing action helps lift dirt and mineral deposits from places your scrub brush can't reach.
Toilet Bowl Magic
Drop two denture tablets into the toilet bowl and let them fizz for about 15 minutes. The bubbles work their way under the rim and into the trap, loosening stains and buildup. Give the bowl a quick swish with the toilet brush, then flush.
You'll be amazed at how much cleaner it looks with almost no scrubbing.
Freshen Up Toothbrush Holders
Toothbrush holders can get slimy and stained, especially if they don't drain well. Fill them with warm water and drop in a denture tablet. Let it fizz for 20 minutes, then rinse thoroughly.
The effervescent action cleans the inside surfaces and leaves everything smelling fresh.
Clean Small Accessories
You can also use denture tablets to clean other small bathroom items like razor handles, soap dishes, or even the removable parts of a showerhead. Just submerge them in a glass or bowl of water with a tablet, wait for the fizzing to stop, then rinse and dry. It's an easy, hands-off way to keep those little things looking new.
18. Essential Oils for Fresh Scent
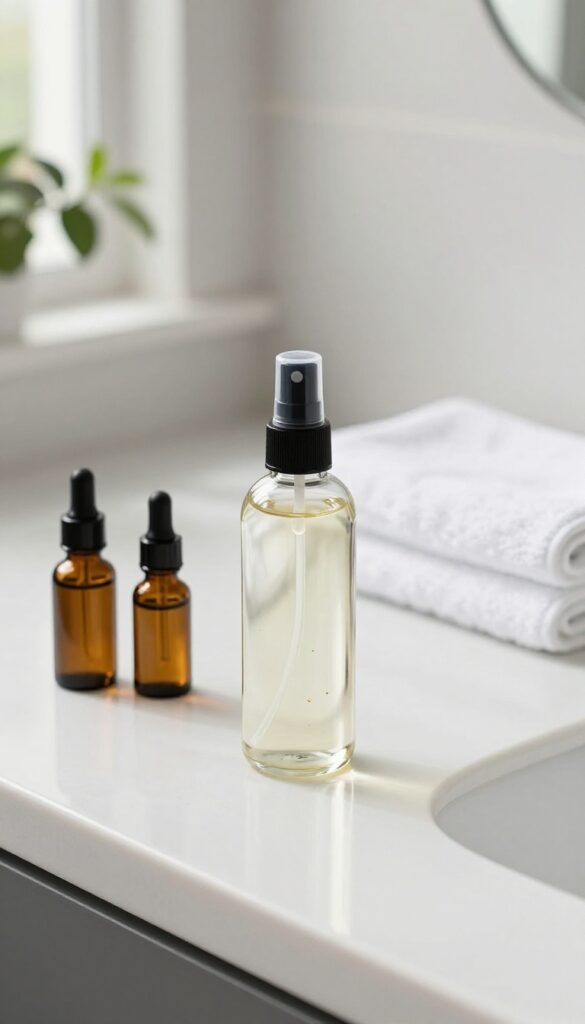
Commercial air fresheners often leave behind a chemical smell that can be overwhelming. Essential oils offer a natural alternative that not only smells great but also adds antibacterial properties to your cleaning routine. A few drops in your spray bottle can transform the bathroom into a spa-like space without the synthetic stuff.
Adding essential oils to your cleaning spray is an easy way to boost both scent and cleaning power. Tea tree oil is a natural disinfectant, while lavender promotes relaxation. Simply add 10–15 drops to a spray bottle filled with water and a splash of vinegar or rubbing alcohol.
Shake well before each use, and you’ll have a fresh, effective cleaner that smells amazing.
Best Oils For Bathroom Cleaning
Tea tree oil is a powerhouse against mold and mildew. Lavender and eucalyptus are great for a calming scent. Lemon or orange oils cut through grease and leave a bright, clean smell.
Peppermint oil is invigorating and can help keep pests away. Stick with pure essential oils, not fragrance oils, for the best results.
How To Make A Diy Essential Oil Spray
Mix 1 cup of water, 1 cup of white vinegar, and 10–15 drops of your chosen essential oil in a spray bottle. For a stronger disinfectant, use rubbing alcohol instead of water. Label the bottle and store it in a cool, dark place.
Shake before each use, and spray on surfaces like counters, sinks, and toilets. Avoid using on granite or marble, as vinegar can damage them.
Safety Tips For Using Essential Oils
Always dilute essential oils before use, as they can irritate skin and surfaces. Keep oils away from pets—especially cats, who can be sensitive to tea tree and citrus oils. Test your spray on a small area first to ensure it doesn’t damage the finish.
If you have respiratory issues, use oils sparingly and ensure good ventilation.
19. Vacuum First, Then Mop
You might be tempted to grab the mop and go, but that's actually a mistake. Mopping a bathroom floor without removing loose hair and dust first just pushes debris around. The result?
Muddy streaks and a floor that still feels gritty.
Start by vacuuming or sweeping the entire bathroom floor. Pay extra attention to corners and under the vanity where hair tends to collect. A cordless stick vacuum or a small dustpan works great.
Once the floor is free of dry debris, your mop can actually clean instead of just redistributing dirt.
Why It Matters
Hair and dust act like sandpaper when you mop over them. They scratch the finish and leave behind a film that attracts more dirt. Removing them first means your mopping solution can work on the actual grime.
Best Tools For The Job
A microfiber dust mop or a vacuum with a hard floor setting is ideal. They trap particles instead of scattering them. If you sweep, use a rubber broom to pull hair out of corners without it sticking to the bristles.
Quick Routine
Spend two minutes vacuuming before you wet the floor. Do this every time you clean, and you'll notice your floors stay clean longer. It also cuts down on the frequency of deep scrubbing.
20. DIY Toilet Bomb for Deep Clean

If you dread scrubbing the toilet bowl, these DIY fizzing bombs are about to become your new best friend. They're easy to make, use common pantry ingredients, and do the heavy lifting for you. Just drop one in, let it fizz, and flush—no scrubbing required.
What You'll Need
Gather 1 cup baking soda, 1/4 cup citric acid, and 1 tablespoon dish soap. You'll also need a mixing bowl, a spoon, and an ice cube tray or silicone mold. Citric acid is available in the canning section of most grocery stores or online.
How To Make Them
Mix the baking soda and citric acid in a bowl. Add the dish soap and stir until the mixture holds together when pressed. If it's too dry, add a few drops of water.
Press the mixture firmly into molds and let them dry overnight. Once hard, pop them out and store in an airtight container.
How To Use
Drop one bomb into the toilet bowl before bed or before leaving for work. Let it fizz and sit for at least 30 minutes or overnight. The fizzing action lifts stains and deodorizes.
Flush to reveal a cleaner bowl with minimal effort.
21. Lint Roller for Hair on Rugs
Bathroom rugs and mats are hair magnets, especially after brushing or drying off. Vacuuming can be noisy and often misses those fine strands embedded in the fibers. A simple lint roller solves this in seconds without dragging out the vacuum.
A lint roller is one of the fastest tools for picking up hair from bathroom rugs and mats. It grabs every strand in one pass, leaving the surface clean and lint-free. Keep one in the bathroom cabinet for quick touch-ups between deep cleans.
Why It Works Better Than A Vacuum
Vacuum cleaners often blow hair around or fail to lift it from low-pile rugs. A lint roller's adhesive sheet grabs hair directly without spreading it. Plus, it's silent and takes just a minute to use.
Best Rugs For This Hack
Lint rollers work best on flat-weave or low-pile rugs. For shaggy or high-pile mats, you might need to press a little harder or use multiple sheets. Cotton bath mats are ideal because the hair sits on the surface.
Pro Tip: Reuse Sheets For Big Jobs
If you're tackling a large rug, don't toss the sheet after one swipe. Peel off the top layer when it's full, and you'll get several uses from a single roller. This saves money and reduces waste.
22. Clothes Steamer for Grout
Grout lines are notorious for trapping dirt and grime, and scrubbing them with a brush can be a real pain. But your clothes steamer isn't just for wrinkles—it's a secret weapon for blasting away grout buildup. The steam loosens dirt without any harsh chemicals, making it a quick and effective cleaning hack.
Why Steam Works On Grout
Steam penetrates porous grout, softening dirt and mildew so they wipe away easily. The heat also kills mold spores, leaving grout cleaner and fresher. Plus, no scrubbing means less wear on the grout itself.
How To Steam Clean Grout
Fill your handheld steamer with water and let it heat up. Direct the nozzle at the grout lines, moving slowly to let the steam work. After steaming a section, wipe the loosened grime with a microfiber cloth.
For stubborn spots, repeat or use a soft brush.
Safety Tips For Steaming
Avoid steaming near electrical outlets or light fixtures. Test on a small, hidden area first to ensure the grout can handle the heat. Always let the steamer cool before refilling.
23. Schedule a Weekly 15-Minute Reset
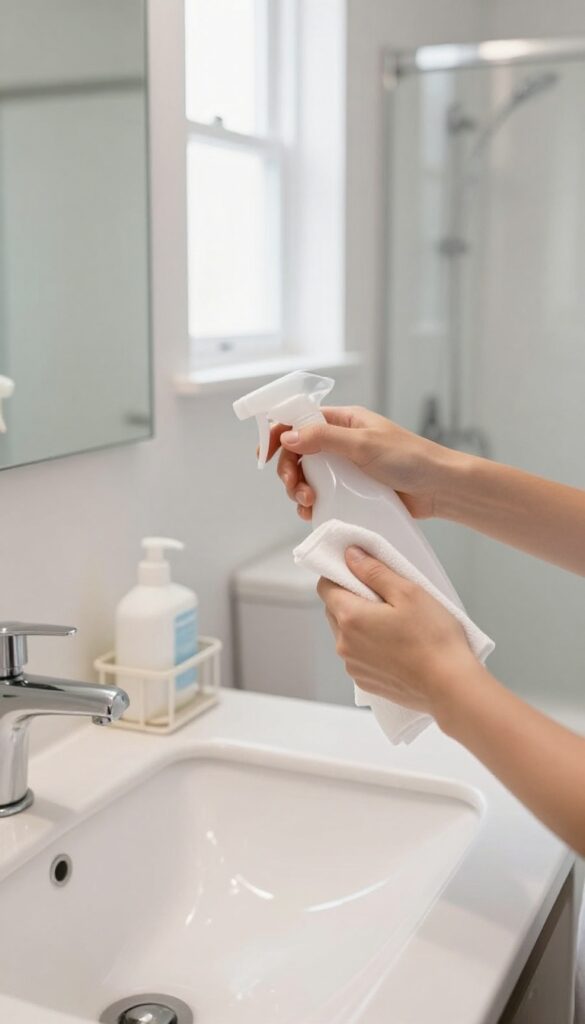
A little consistency goes a long way in keeping your bathroom from turning into a weekend project. Setting aside just 15 minutes each week for a quick reset prevents grime from building up and makes your deep cleans much easier. It's the kind of habit that pays off without you even noticing.
The idea is simple: pick one day and time each week, set a timer for 15 minutes, and do a fast wipe-down of every surface. Focus on the high-touch areas like the sink, counter, toilet handle, and mirror. This short burst of effort keeps things fresh and stops dirt from settling in.
What To Tackle In 15 Minutes
Start with the mirror—spray and wipe quickly. Then hit the sink and counter with an all-purpose cleaner. Wipe down the toilet exterior and handle, and give the shower walls a quick squeegee if you have one.
Finish by sweeping or vacuuming the floor. That's it.
Why It Works
Consistency is the secret. When you clean regularly, you never let soap scum, hard water spots, or mildew get a foothold. A 15-minute reset keeps the bathroom looking and smelling clean without the burnout of a long scrubbing session.
Tips To Make It Stick
Keep your cleaning supplies in a caddy under the sink so you can grab them fast. Use a timer on your phone to stay on track. Pair this reset with another weekly habit, like taking out the trash, so it becomes part of your routine.
FAQ
How often should I deep clean my bathroom?
A deep clean every two to four weeks is usually enough, but weekly touch-ups with these hacks can keep it fresh longer.
Can I use vinegar on natural stone surfaces?
No, vinegar can etch natural stone like marble or granite. Use a pH-neutral cleaner instead.
What's the best way to remove soap scum from glass?
A mixture of vinegar and dish soap works well. Let it sit for 10 minutes before scrubbing with a non-abrasive sponge.
How do I prevent mold in the shower?
Keep the bathroom ventilated, use a squeegee after showers, and spray hydrogen peroxide on mold-prone areas weekly.
Is it safe to use a pumice stone on toilet bowls?
Yes, but always wet the stone first and use gentle pressure to avoid scratching the porcelain.
Conclusion
These 23 hacks prove that a clean bathroom doesn't require hours of scrubbing or expensive products. By incorporating a few of these tricks into your weekly routine, you'll spend less time cleaning and more time enjoying your space.
Start with the ones that target your biggest pain points—whether it's soap scum, hard water stains, or mold. Small changes add up to a bathroom that always feels fresh and ready for the week ahead.


