You step into the shower expecting a refreshing start, but cloudy tiles and sticky residue ruin the mood. Soap scum, hard water deposits, and mildew buildup don't just look bad—they can make the surface feel rough and unclean. The good news?
You don't need harsh chemicals or hours of scrubbing to restore that just-installed shine. These 15 shower cleaning hacks target the root causes of buildup while keeping your tiles clear and grout bright.
Each tip is practical, easy to implement, and designed to cut down on future scrubbing. Whether you're dealing with daily water spots or stubborn mineral crust, these strategies will help you maintain a cleaner shower with less effort.
1. Squeegee After Every Shower
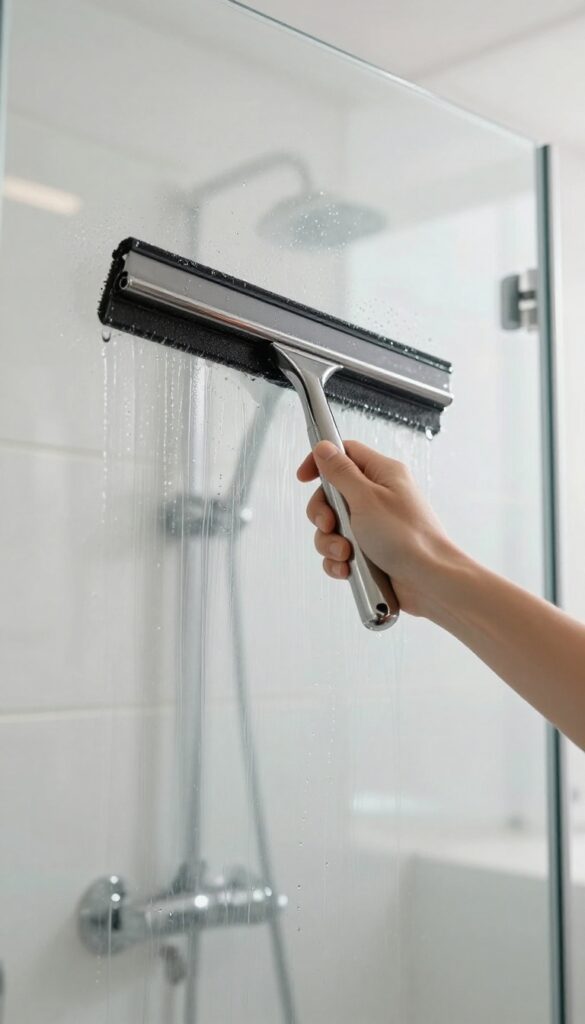
A quick swipe with a squeegee removes water droplets before they dry into spots. This single habit prevents soap scum and mineral buildup on tiles and glass. It takes less than 30 seconds and saves you from scrubbing later.
Using a squeegee after each shower is the simplest way to keep your tiles and glass clear. Water contains minerals that leave white spots when they evaporate. Soap residue mixes with these minerals to form stubborn scum.
By removing the water immediately, you stop the buildup before it starts.
Why It Works So Well
Hard water spots and soap scum form when water sits and dries. A squeegee physically removes the water, so there’s nothing left to leave deposits. Over time, this cuts down on the need for deep cleaning.
Best Technique For Glass And Tile
Start at the top corner of the glass door or tile wall. Pull the squeegee across in overlapping horizontal strokes. Wipe the blade dry with a microfiber cloth between passes to avoid streaks.
Finish with a vertical stroke at the edges.
Choosing The Right Squeegee
Look for a squeegee with a rubber blade that’s at least 10 inches wide. A stainless steel handle resists rust in the humid shower. Keep it hanging on a hook inside the shower so it’s always handy.
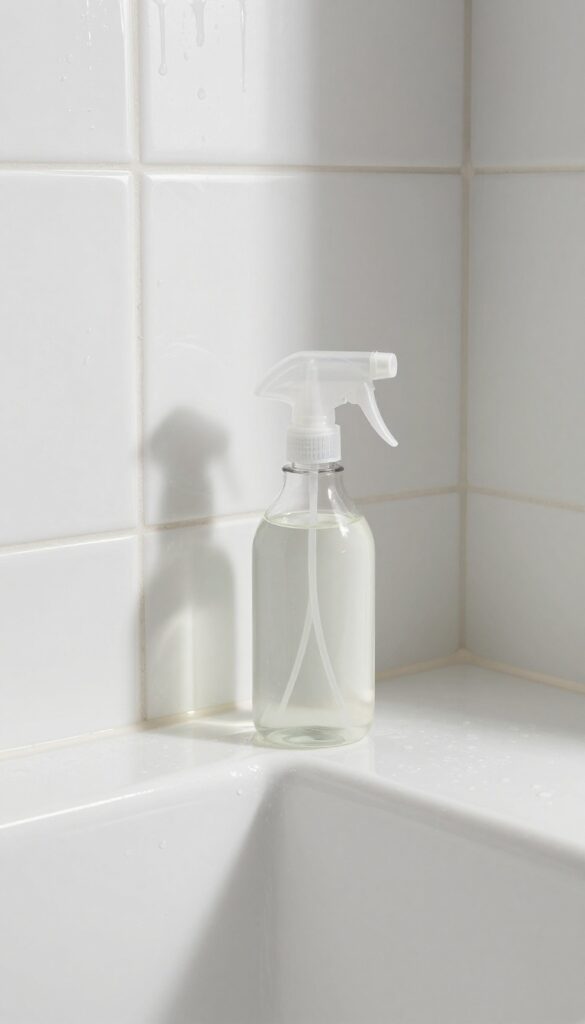
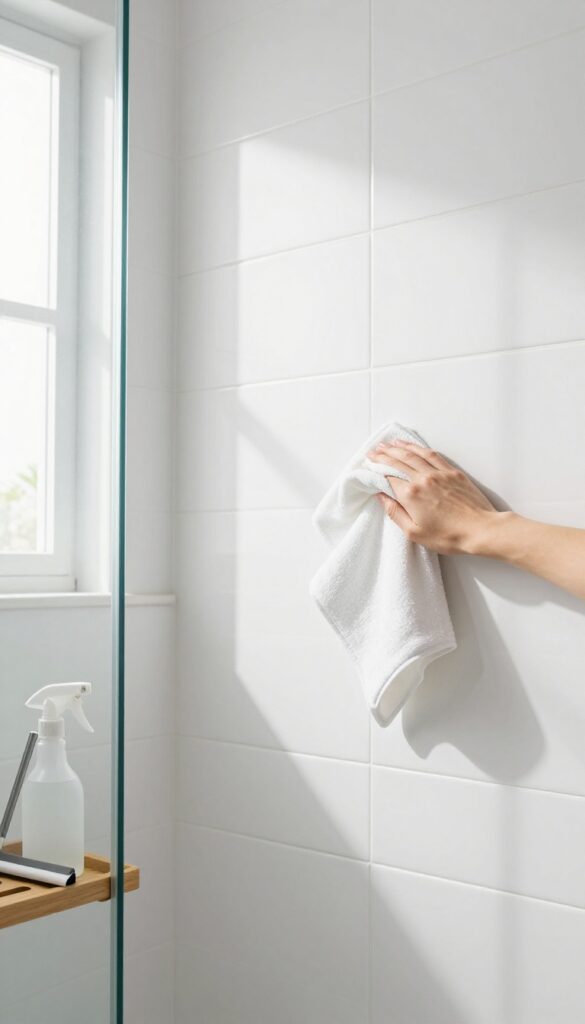
2. Use a Daily Shower Spray
A daily shower spray is the easiest way to prevent buildup before it starts. Instead of scrubbing away soap scum and hard water stains once a week, a quick spritz after every shower keeps surfaces clean and reduces the need for deep cleaning. You can make your own with simple ingredients you probably already have in your kitchen.
A homemade daily shower spray is effective, cheap, and free of harsh chemicals. The key is to use it consistently—right after you shower, while the surfaces are still wet. This prevents water spots and soap residue from drying and bonding to the tile.
The Perfect Diy Recipe
Mix equal parts water and white vinegar in a spray bottle, then add a single drop of dish soap. Shake gently to combine. The vinegar cuts through soap scum and hard water minerals, while the dish soap helps break down oils and body wash residue.
Avoid adding more soap—too much can leave a film.
How To Apply It Right
After your shower, give the walls, door, and fixtures a quick spray—about 3 to 4 pumps per square foot. Let it sit for 30 seconds, then rinse with warm water. No wiping needed.
The vinegar smell disappears as it dries, leaving a clean scent. If you have natural stone tiles, skip the vinegar and use a pH-neutral cleaner instead.
Why It Works So Well
The acid in vinegar breaks down alkaline deposits like soap scum and hard water stains before they harden. Using it daily keeps the surface pH balanced and prevents minerals from bonding to the tile. Over time, you'll notice less scrubbing and a longer-lasting shine.
3. Clean Grout with a Baking Soda Paste
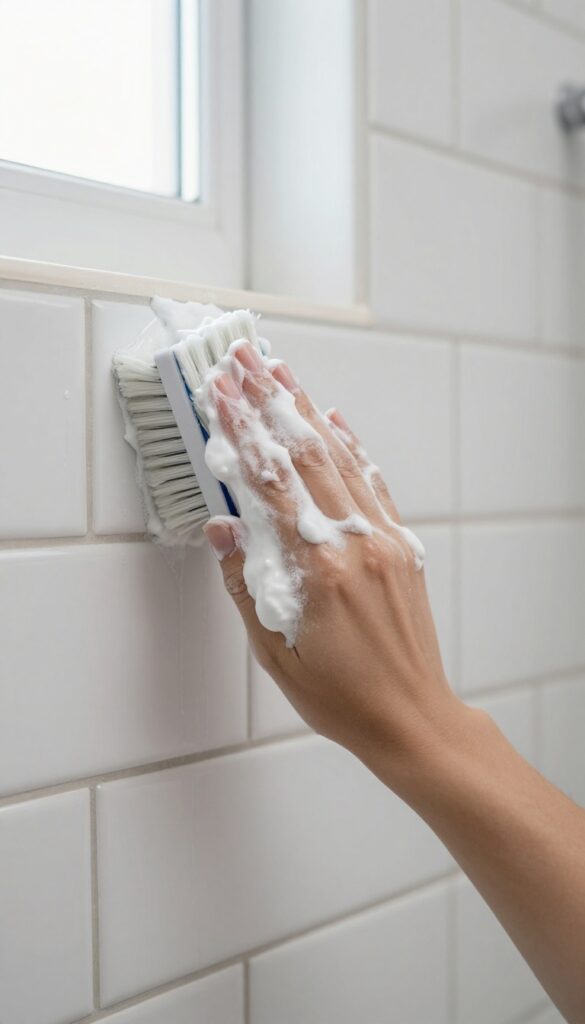
Grout lines are the first place grime shows up. The porous surface traps soap scum and hard water minerals, turning light grout dark and dingy. A simple paste of baking soda and water lifts that embedded dirt without the harsh fumes of bleach-based cleaners.
Mix three parts baking soda with one part water to form a thick paste. Apply it directly to the grout lines using an old toothbrush or a grout brush, pressing it into the grooves. Let it sit for 10 to 15 minutes so the baking soda can break down the grime.
Then scrub with a stiff brush in a circular motion. Rinse thoroughly with warm water. For extra stubborn stains, add a splash of white vinegar to the paste—but only if your grout is sealed, because vinegar can damage unsealed grout.
Why Baking Soda Works
Baking soda is mildly abrasive, so it scrubs away buildup without scratching your tiles. It's also alkaline, which helps dissolve acidic grime like soap scum. Plus, it's odorless and safe to use around kids and pets.
Getting Into Tight Spots
A grout brush with angled bristles reaches deep into narrow lines. If you don't have one, an old electric toothbrush works even better—the vibration loosens dirt that manual scrubbing misses. For corners, use a small detailing brush.
Sealing After Cleaning
Once your grout is clean and dry, apply a penetrating sealer to protect it from future stains. This step cuts down on how often you need to deep-clean. Reapply the sealer every six months for best results.
4. Tackle Hard Water Stains with Lemon Juice
Hard water stains can make your shower look cloudy and neglected. Instead of reaching for a commercial descaler, grab a lemon from your kitchen. The citric acid cuts through mineral deposits naturally, leaving tiles shiny and smelling fresh.
Lemon juice is a mild acid that dissolves calcium and lime buildup without damaging tile or grout. It's cheap, non-toxic, and leaves a pleasant citrus scent. For best results, use fresh lemons rather than bottled juice, as the acidity is higher.
Direct Application Method
Cut a lemon in half and rub the cut side directly onto hard water stains. Apply gentle pressure and let the juice sit for 5-10 minutes. The acid will soften the deposits, making them easy to wipe away with a damp cloth.
Rinse thoroughly afterward to prevent stickiness.
Soaking For Stubborn Spots
For heavy buildup, squeeze fresh lemon juice onto a microfiber cloth or sponge and press it against the stain for 15-20 minutes. You can also mix equal parts lemon juice and water in a spray bottle, spritz the area, and let it soak. Scrub lightly with a soft brush, then rinse.
Safety And Precautions
Lemon juice is acidic, so avoid using it on natural stone tiles like marble or travertine, as it can etch the surface. Always test on an inconspicuous area first. Rinse thoroughly after use to remove any residue that could attract dirt.
5. Use a Magic Eraser on Glass Doors
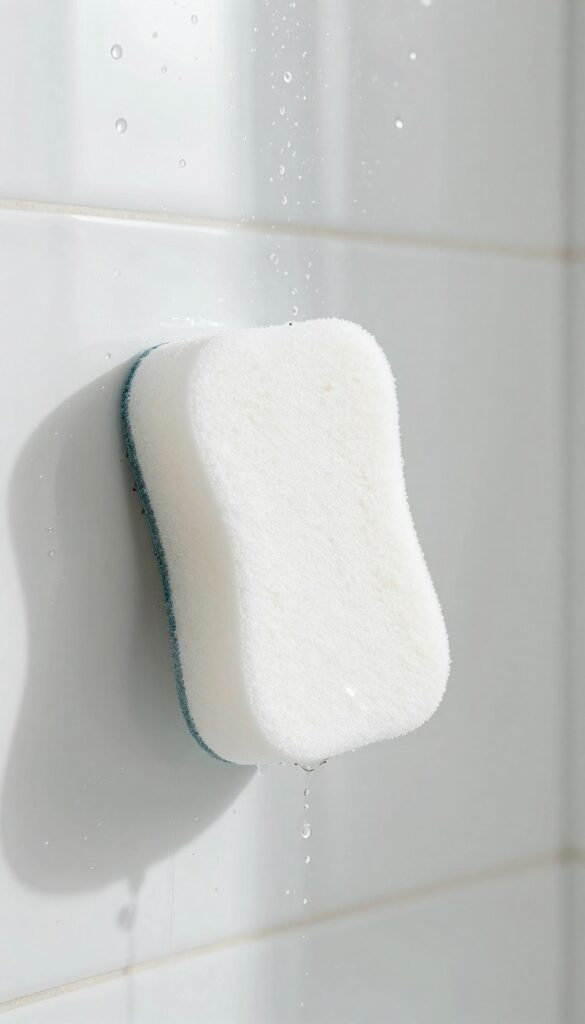
Glass shower doors look great when they're clean, but they show every water spot and soap smear. A Magic Eraser (melamine sponge) is surprisingly effective at cutting through that film without scratching the glass. It's a low-effort fix that delivers high-impact results.
Dampen a melamine sponge and gently wipe glass shower doors. It removes soap scum and water spots without scratching.
Why It Works So Well
Melamine foam acts like ultra-fine sandpaper, lifting away mineral deposits and soap residue. It's gentle enough for glass but tough on buildup. No extra cleaners needed—just water.
How To Use It Right
Wet the sponge until it's soft, then squeeze out excess water. Wipe the glass in circular motions, focusing on cloudy areas. Rinse the door thoroughly afterward to remove any sponge residue.
When To Skip This Hack
Avoid using a Magic Eraser on tinted or coated glass (like low-E coatings), as it may damage the finish. Test on a small hidden spot first. For standard clear glass, it's perfectly safe.
6. Prevent Mildew with a Vinegar Rinse
Mildew loves damp, dark corners of your shower. Instead of waiting for it to appear, a weekly vinegar rinse keeps spores from taking hold. White vinegar is acidic enough to kill mildew on contact and break down the organic matter it feeds on.
Plus, it's cheap, non-toxic, and leaves your bathroom smelling fresh once the vinegar scent fades.
Pour undiluted white vinegar into a spray bottle. After your last shower of the week, spray the vinegar generously over all tiles and grout lines. Let it sit for 10 minutes—this gives the acid time to penetrate and kill mildew spores.
Then rinse thoroughly with warm water. No scrubbing needed. The vinegar also helps dissolve any soap scum or hard water residue that might be present, leaving tiles brighter and less prone to future buildup.
Why Vinegar Works
White vinegar contains acetic acid, which disrupts the cell walls of mildew and mold, killing them effectively. It also neutralizes alkaline deposits from soap and hard water. Unlike bleach, vinegar doesn't produce toxic fumes, making it safer for regular use in enclosed spaces.
Best Practices For Application
For best results, apply vinegar to dry surfaces—mildew absorbs the vinegar better when it's not already wet. Use a spray bottle with a fine mist to cover evenly. Avoid using vinegar on natural stone tiles like marble or travertine, as the acid can etch them.
If you have stone, opt for a pH-neutral cleaner instead.
When To Expect Results
You'll notice fewer mildew spots after just a few weekly treatments. Existing mildew may take 2–3 applications to fully disappear. Consistency is key: make this rinse part of your weekend cleaning routine.
Over time, grout lines stay lighter and tiles maintain their clarity.
7. Deep Clean with a Dish Soap and Vinegar Mix
Sometimes a quick wipe isn't enough. When your tiles have a dull film or sticky residue that regular sprays can't touch, it's time for a deeper clean. This simple DIY mix cuts through grime without harsh fumes.
Combine equal parts blue Dawn dish soap and warm white vinegar in a spray bottle. Shake gently to mix. Spray the solution generously onto tiles and grout.
Let it sit for 10-15 minutes so the vinegar can break down mineral deposits and the soap can lift soap scum. Scrub lightly with a soft brush or sponge, then rinse thoroughly with warm water. Dry with a microfiber cloth for a streak-free shine.
Why This Mix Works
Blue Dawn is a powerful degreaser that cuts through soap scum and body oils. White vinegar dissolves hard water minerals and calcium deposits. Together, they create a non-toxic cleaner that's safe for most tile surfaces.
Best Surfaces To Use It On
This mix is ideal for ceramic, porcelain, and glass tiles. Avoid using it on natural stone like marble or granite, as the acid can etch the surface. Test on a small hidden area first if you're unsure.
Pro Tips For Best Results
Use warm vinegar to boost its cleaning power. Don't let the solution dry on tiles—rinse thoroughly. For stubborn buildup, scrub with a soft-bristle brush and repeat if needed.
Rinse well to avoid any soapy residue.
8. Use a Grout Pen for Stubborn Stains
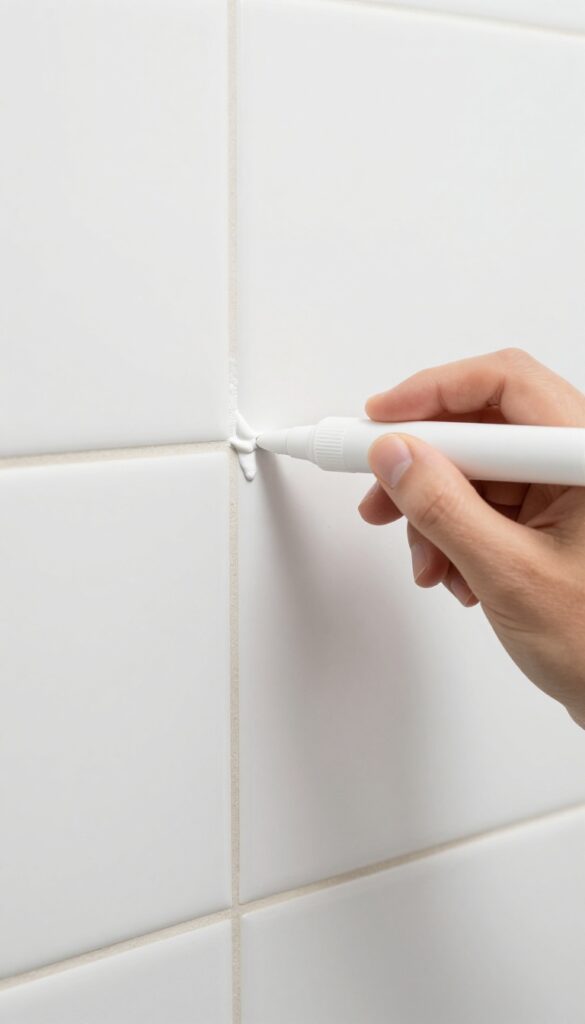
Even after a deep clean, some grout lines refuse to look fresh. Stains from hard water, soap scum, or mildew can leave permanent-looking discoloration. A grout pen is a quick fix that resurfaces those lines without the mess of re-grouting.
Grout pens work like markers, depositing a thin layer of color and sealant over the existing grout. They're ideal for small areas or spot treatments. Just make sure the grout is clean and dry before applying, and let it cure for the recommended time to avoid smudging.
Choose The Right Color
Match your grout pen to your existing grout color as closely as possible. Most pens come in standard shades like white, gray, beige, and black. If your grout is an off-white, a bright white pen might look too stark.
Test in an inconspicuous spot first.
Apply Evenly
Hold the pen at a slight angle and draw along the grout line in one smooth stroke. Apply light pressure to avoid flooding the area. For wider lines, you may need to go over it twice.
Wipe away any excess immediately with a damp cloth.
Let It Cure
After application, keep the area dry for at least 24 hours. Avoid getting water on the grout during this time. Once cured, the pen creates a waterproof seal that resists future stains and makes cleaning easier.
9. Install a Shower Filter
Hard water minerals and chlorine don't just affect your skin and hair—they leave behind stubborn scale and buildup that makes cleaning a chore. A shower filter tackles the problem at its source by removing these culprits before they ever hit your tiles. It's a simple upgrade that pays off with less scrubbing and longer-lasting clean surfaces.
Why Hard Water Creates More Buildup
Hard water contains calcium and magnesium that bond with soap to form a sticky, crusty film. Chlorine can also react with grout and sealants, accelerating wear. A filter reduces these minerals, so soap rinses away cleanly and scale has fewer particles to form around.
What To Look For In A Shower Filter
Choose a filter that targets both sediment and chemical contaminants. Look for models with KDF-55 or activated carbon media—they're effective at reducing chlorine and heavy metals. Also check the flow rate; a good filter won't noticeably reduce water pressure.
Installation And Maintenance Tips
Most shower filters screw directly onto your existing shower arm—no tools required. Replace the cartridge every 6 to 12 months, depending on your water quality and usage. You'll notice less spotting on glass doors and a softer feel to the water almost immediately.
10. Dry the Shower Floor with a Towel
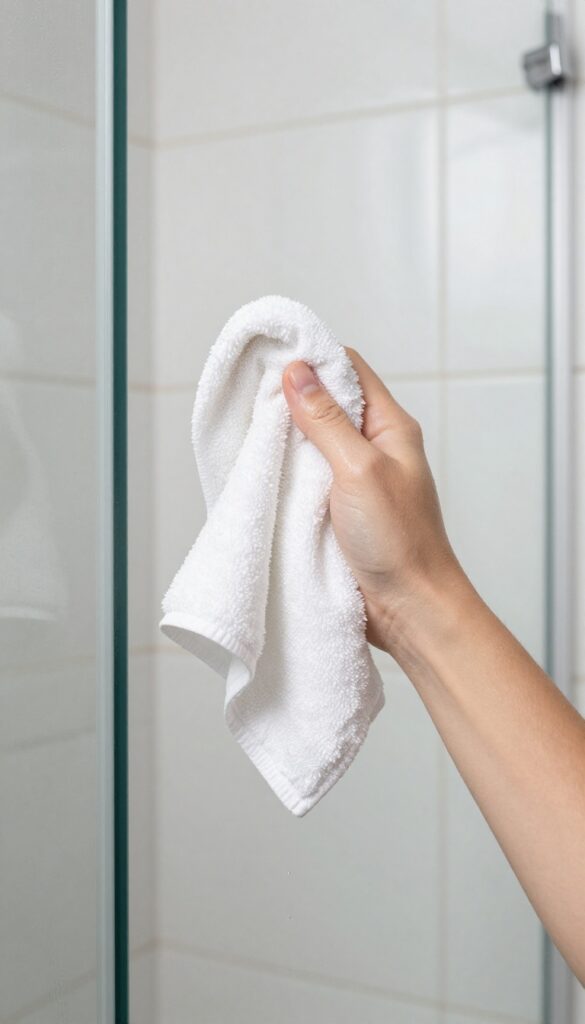
That last rinse feels great, but the water left behind is a breeding ground for soap scum and mildew. A quick towel dry after every shower can make a huge difference in how often you need to deep-clean the floor. It takes less than a minute and keeps your tiles looking fresh longer.
Standing water is the enemy of a clean shower floor. It leaves mineral deposits as it evaporates and gives mildew a damp place to grow. By drying the floor with an old towel after your final rinse, you remove the moisture before it can cause problems.
This simple habit cuts down on scrubbing and keeps grout lines from darkening.
Why It Works
Soap scum and mildew need moisture to form. When you dry the floor immediately, you interrupt that process. The towel also picks up any leftover soap residue that could otherwise dry into a film.
Over time, this prevents the buildup that makes tile look dull and grimy.
Best Towel To Use
Keep a dedicated old bath towel or a microfiber cloth near the shower. Microfiber is great because it absorbs water quickly and doesn't leave lint. Avoid using your good towels—this one will get damp and might develop a smell if not aired out.
Just hang it to dry after use and wash it weekly.
How To Make It A Habit
Tie this task to something you already do, like turning off the water or stepping out of the shower. Keep the towel within arm's reach so you don't have to drip across the bathroom. After a few days, it will feel automatic, and you'll notice your shower stays cleaner with less effort.
11. Use a Pumice Stone on Toilet Bowl Rings (and Shower Stains)
Hard water stains and mineral deposits can be stubborn, but a pumice stone is a surprisingly gentle solution. When wet, it acts like a fine abrasive that lifts buildup without scratching ceramic, porcelain, or glazed tile. It's especially effective on toilet bowl rings, but it works just as well on shower stains that other cleaners can't touch.
Before you start, soak the pumice stone in water for a few minutes—it should be wet, not dry. Gently rub the stained area in a circular motion. You'll see the white or brown residue lift away almost instantly.
Rinse the stone and the surface frequently to check your progress. For shower tiles, focus on mineral crusts around faucets and along the bottom edge where water pools. Avoid using pumice on unglazed tile, marble, or other soft surfaces, as it can cause scratches.
Stick to hard, smooth surfaces like porcelain, ceramic, and glass.
Why Pumice Works Without Scratching
Pumice is a volcanic rock with a porous, abrasive texture. When wet, it becomes soft enough to remove deposits without damaging the underlying surface. The key is to keep it wet and use light pressure.
Dry pumice is too harsh and can leave scratches.
Best Surfaces For Pumice Stone Cleaning
Use pumice on porcelain toilets, ceramic tiles, glazed shower bases, and glass shower doors. Avoid it on fiberglass, acrylic, marble, limestone, or any unsealed natural stone. Test in an inconspicuous spot first if you're unsure.
Tips For Long-lasting Pumice Stones
After each use, rinse the stone and let it air dry completely. Store it in a dry place. If it gets clogged with residue, scrub it with a stiff brush and water.
A single stone can last for months if cared for properly.
12. Steam Clean for Deep Grout Cleaning
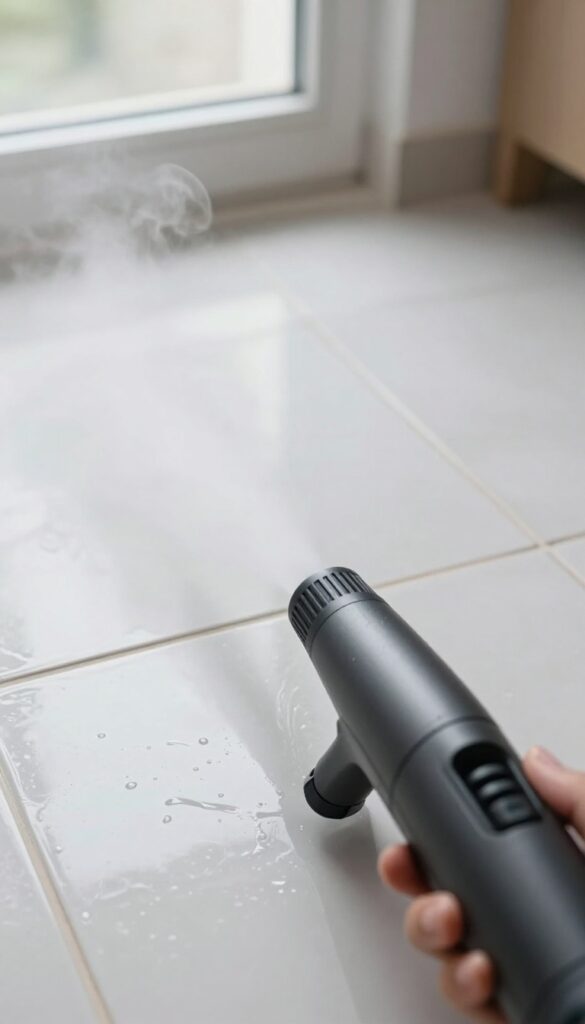
Grout lines are the first place buildup shows, and scrubbing them by hand is exhausting. A handheld steam cleaner changes the game by using high-temperature vapor to loosen dirt, kill bacteria, and sanitize without any chemicals. It reaches deep into porous grout where brushes can't go, making it ideal for monthly maintenance or tackling neglected corners.
Steam cleaning is especially effective for showers with textured tiles or wide grout lines where soap scum and mildew settle. The heat breaks down mineral deposits and organic matter on contact, so you just wipe away the residue with a microfiber cloth. It's also safe for most tile types, including ceramic, porcelain, and natural stone—just check your manufacturer's guidelines first.
For best results, use a steam cleaner with a brush attachment and work in small sections, holding the nozzle about an inch from the surface for a few seconds before wiping.
Why Steam Beats Scrubbing
Hand scrubbing only cleans the surface, while steam penetrates grout pores to lift embedded grime. It also kills mold spores and bacteria without bleach, leaving the area truly clean and reducing regrowth. Plus, there's no rinsing needed—the steam evaporates quickly, so your shower is dry and ready to use sooner.
How To Steam Clean Your Shower Grout
Start by wiping down tiles to remove loose debris. Fill your steam cleaner with water and let it heat up. Attach the small brush nozzle and work in 2-foot sections, moving slowly along grout lines.
After steaming each section, wipe the loosened dirt with a dry microfiber cloth. For stubborn spots, repeat the process or let the steam sit for a few extra seconds.
When To Steam Clean
Aim to steam clean grout every 4 to 6 weeks as part of your regular shower maintenance. If you notice mildew returning quickly or grout looking dingy, increase frequency. Avoid steam cleaning if your grout is cracked or missing—repair it first to prevent moisture from getting behind the tiles.
13. Apply a Tile and Grout Sealer
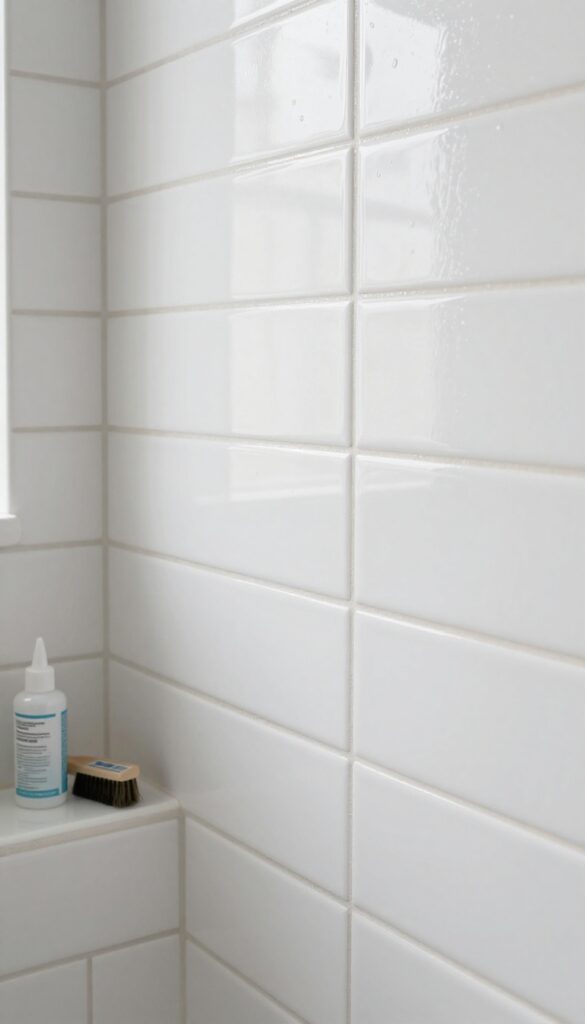
You've scrubbed and scrubbed, but grout still soaks up stains like a sponge. The real game-changer isn't another cleaner—it's a sealer. Once applied, it creates a protective barrier that repels water, soap scum, and dirt.
Future cleanings become a quick wipe instead of a deep scrub.
Sealing isn't complicated, but it does require a clean surface. Start with a deep clean using a grout brush and a mild cleaner. Let everything dry completely for at least 24 hours.
Then apply the sealer with a small brush or applicator, working it into the grout lines. Wipe away excess before it dries to avoid a hazy film. Most sealers need a second coat for best results.
Once cured, your grout will bead water like a freshly waxed car.
Choose The Right Sealer
Not all sealers are the same. For porous grout, look for a penetrating sealer that soaks in and bonds from within. For glazed tiles, a surface sealer works, but be careful not to get it on the tile face.
If your shower has natural stone, use a sealer specifically designed for stone to avoid discoloration.
When To Reseal
A good sealer lasts anywhere from six months to two years, depending on usage and water quality. Test your grout by sprinkling a few drops of water on it. If the water beads up, the sealer is still working.
If it soaks in and darkens the grout, it's time to reseal. Make this a routine check every few months.
Don't Forget The Tile Corners
Grout isn't the only porous surface in your shower. The corners where tiles meet can also absorb moisture and grow mildew. Apply sealer to those joints too, especially along the bottom edge where water pools.
A small artist's brush helps you reach tight spots without making a mess.
14. Use a Toothbrush for Tight Corners
An old toothbrush is one of the handiest tools in your cleaning arsenal. Its small head and stiff bristles can reach into corners, around faucet bases, and along grout lines where larger brushes simply can't fit. This hack turns a discarded item into a precision cleaning instrument that tackles buildup in the spots you usually miss.
Don't throw away your old toothbrush—repurpose it for shower cleaning. The compact size lets you scrub tight spaces without splashing water everywhere. Use it with your favorite cleaner to dislodge grime from around shower caddies, soap dishes, and drain covers.
For extra stubborn spots, dip the bristles in baking soda or a vinegar solution to boost cleaning power.
Targeting Grout Lines
Grout lines are notorious for trapping soap scum and mildew. A toothbrush fits perfectly into the narrow grooves, allowing you to scrub away discoloration without damaging the grout. Apply a paste of baking soda and water, then work it into the lines with the brush.
Rinse thoroughly to reveal brighter grout.
Cleaning Around Fixtures
Faucet bases, showerhead arms, and handle escutcheons collect buildup in their crevices. A toothbrush can navigate these curves and corners to remove mineral deposits and soap residue. Dip the brush in white vinegar for extra descaling power, then wipe away loosened grime with a damp cloth.
Maintaining Shower Caddies And Racks
The nooks and crannies of wire shelves and plastic caddies are magnets for gunk. Instead of struggling with a sponge, use a toothbrush to scrub between wires and around attachment points. This keeps your storage items clean and prevents rust or mildew from forming.
15. Schedule a Weekly Quick Clean
Consistency beats intensity when it comes to shower cleaning. A quick weekly wipe-down prevents soap scum and hard water deposits from bonding to tile surfaces. Set a 10-minute timer, spray a daily shower cleaner, wipe all surfaces with a microfiber cloth, and rinse thoroughly.
This small habit keeps your shower looking fresh and reduces the need for deep scrubbing.
A weekly quick clean is the single most effective way to prevent buildup. By spending just 10 minutes each week, you remove the thin layer of soap scum and minerals before they harden. This routine also helps you spot potential issues early, like mold spots or grout cracks, so you can address them before they become bigger problems.
What You'll Need
Keep a dedicated caddy with a daily shower spray (store-bought or DIY with vinegar and water), a microfiber cloth, and a squeegee. Having everything ready makes the quick clean effortless.
The 10-minute Routine
Spray all tile and glass surfaces. Let it sit for 2 minutes. Wipe from top to bottom with a microfiber cloth.
Use a squeegee on glass doors. Rinse everything with warm water. Done.
Why It Works
Buildup forms when residues dry and crystallize. Weekly cleaning interrupts that cycle, keeping surfaces slick and clean. Over time, you'll notice less scrubbing needed and a longer-lasting shine.
FAQ
How often should I clean my shower to prevent buildup?
For best results, do a quick daily wipe-down with a squeegee or spray, and perform a deeper clean once a week. This routine stops soap scum and mildew from accumulating.
Can I use bleach on colored grout?
Bleach can discolor or damage colored grout. Instead, use oxygen-based cleaners or a baking soda paste to clean without fading.
What's the best homemade shower cleaner?
A mix of equal parts white vinegar and water with a few drops of dish soap works well for daily use. For heavy buildup, use undiluted vinegar or a paste of baking soda and vinegar.
How do I remove hard water stains from glass shower doors?
Try a mixture of vinegar and baking soda, or use a commercial glass cleaner with a non-abrasive sponge. For stubborn spots, a pumice stone (wet) can gently buff them away.
Is it safe to use a magic eraser on shower tiles?
Yes, but test on an inconspicuous area first. Magic erasers are mildly abrasive and can dull glossy tiles if used too vigorously. Use gentle pressure.
Conclusion
Keeping your shower tiles clear and free of buildup doesn't have to be a chore. With these 15 hacks, you can cut down on scrubbing time and enjoy a cleaner, fresher bathroom every day. Start with one or two tips that fit your routine, then add more as you go.
Consistency is the secret—small daily habits prevent big messes later. Your shower will thank you, and so will your weekends.


