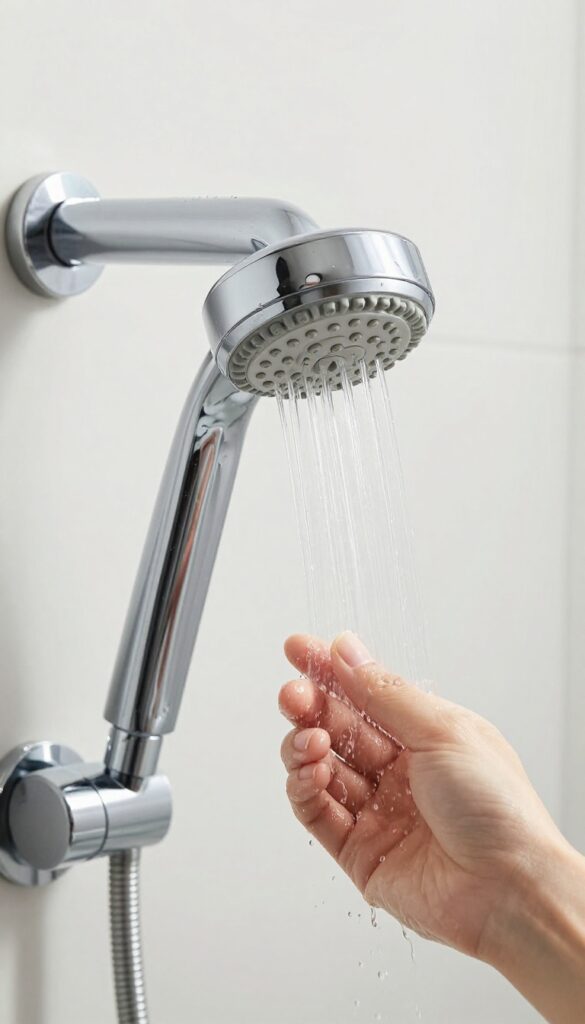
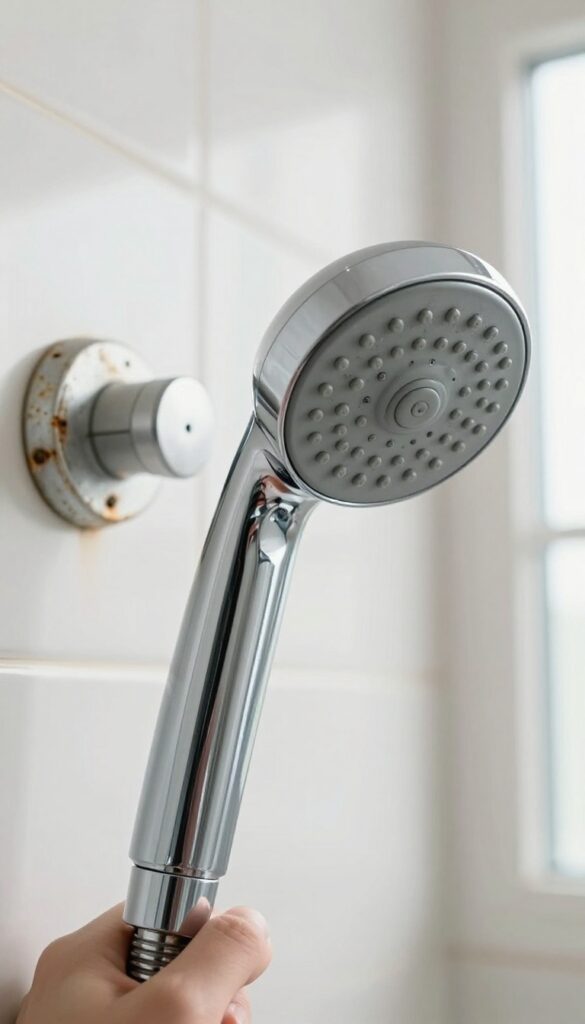
Low water pressure from a clogged shower head is more than annoying—it wastes water and makes every shower feel weak. Mineral deposits from hard water are usually the culprit, building up inside the nozzles over time.
The good news: you don't need a plumber or expensive replacements to restore flow. These 17 cleaning tips use simple household items like vinegar, baking soda, and even a toothpick to break down stubborn scale.
Whether you have a fixed head or a handheld model, there's a method here that works with minimal effort. Let's get your shower back to full pressure.
1. The Classic Vinegar Soak
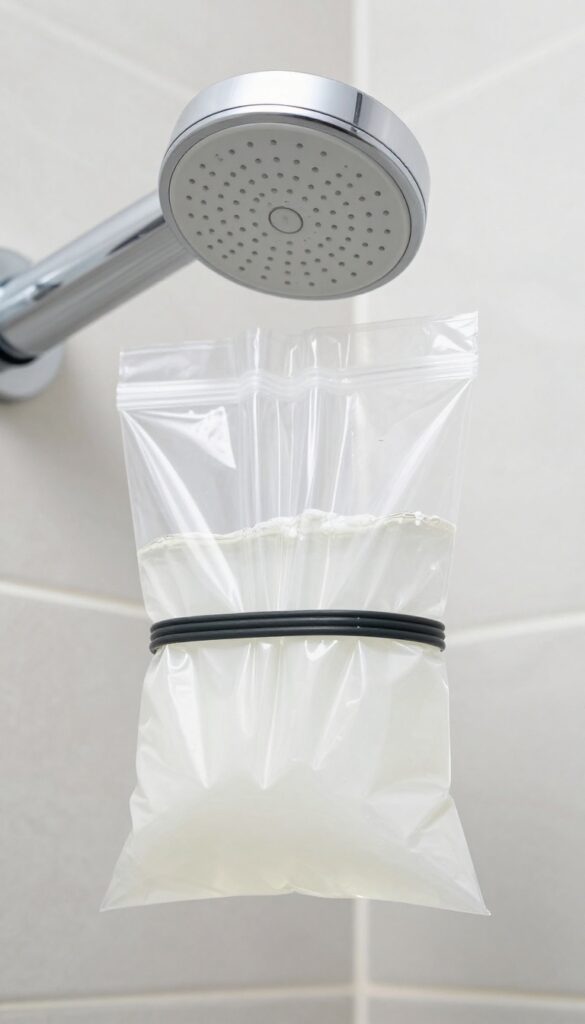
White vinegar is the undisputed champion when it comes to dissolving mineral buildup. The acetic acid in vinegar breaks down calcium and lime deposits without harsh scrubbing. This method works best for removable shower heads, but you can adapt it for fixed models too.
Fill a plastic bag with enough white vinegar to fully submerge the shower head. Secure the bag around the head with a rubber band or zip tie, making sure the nozzles are completely covered. Let it soak overnight—at least 8 hours.
In the morning, remove the bag, turn on the water, and let it run for a few minutes to flush out loosened debris. For stubborn buildup, you can gently scrub the nozzles with an old toothbrush afterward.
Why Vinegar Works
Vinegar is mildly acidic, which reacts with alkaline mineral deposits like calcium carbonate. This reaction turns solid scale into soluble compounds that rinse away easily. It's safe for most metal and plastic shower heads, but avoid using it on brass or gold-plated finishes without checking the manufacturer's guidelines first.
Soaking A Fixed Shower Head
If your shower head is not removable, use a heavy-duty zip-top bag or a small plastic bag. Fill it with vinegar, then carefully drape it over the head so the nozzles are submerged. Secure the bag with a rubber band or tape.
Make sure the bag doesn't leak—place a towel underneath just in case. Let it soak for a few hours or overnight.
After The Soak
Once you remove the bag, turn the water to hot and let it run for a minute or two. This flushes out any remaining vinegar and dislodged particles. If some nozzles are still clogged, use a toothpick or a pin to gently poke each hole.
Then run the water again to clear them.
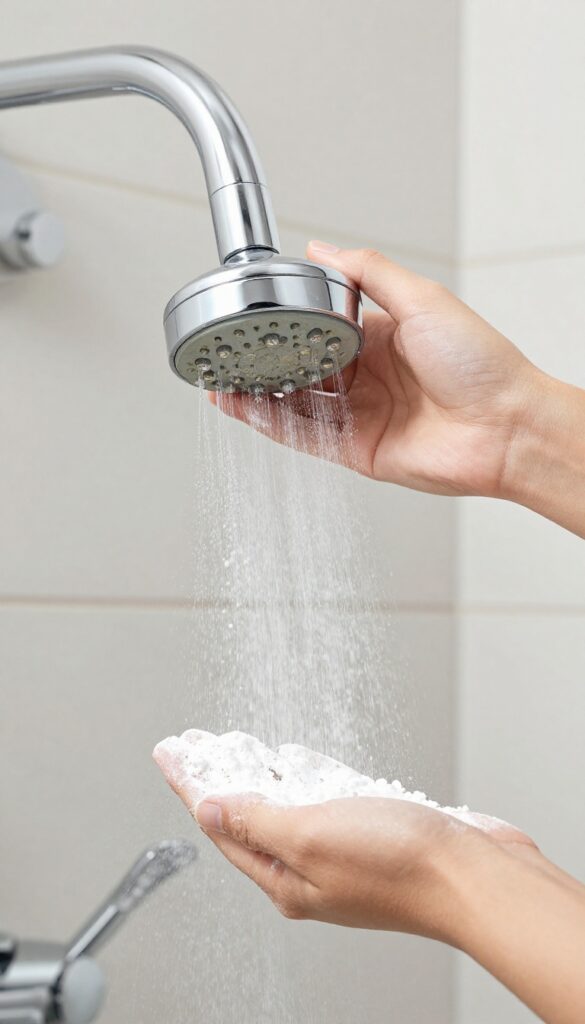
2. Baking Soda Paste for Stubborn Grime
Sometimes vinegar alone isn't enough, especially if your shower head has layers of grime that have built up over months. That's where baking soda steps in. It's mildly abrasive, so it can scrub away residue without scratching metal or plastic surfaces.
This method works best on shower heads that have visible gunk on the outside, not just inside the nozzles.
To make the paste, mix three parts baking soda with one part water in a small bowl. Stir until it forms a thick, spreadable consistency. Apply the paste generously to the shower head, covering all the nozzles and any crusty areas.
Let it sit for about 15 minutes—this gives the baking soda time to break down the grime. Then, grab an old toothbrush and scrub gently. Focus on each nozzle and the crevices where buildup hides.
Rinse thoroughly with warm water. For extra stubborn spots, let the paste sit longer or add a splash of vinegar to create a fizzy reaction that helps lift deposits.
Why Baking Soda Works
Baking soda is a mild alkali that reacts with acidic mineral deposits, helping to dissolve them. Its fine grit provides gentle abrasion, so you can scrub away residue without damaging the finish. It's also non-toxic and safe for all shower head materials, including chrome, stainless steel, and plastic.
Best Practices For Application
Apply the paste in a thick layer—thin coats dry out too quickly and lose effectiveness. Make sure to cover the entire shower head, especially the nozzles where water comes out. If your shower head is fixed in place, use a small brush or sponge to apply the paste.
For handheld models, you can remove it and work over a sink.
When To Use This Method
This method is ideal for shower heads that have visible, crusty buildup on the exterior. It's also great for tackling soap scum mixed with hard water deposits. If your shower head has been neglected for a long time, combine this with a vinegar soak for the best results.
3. Lemon Juice Soak for a Fresh Scent
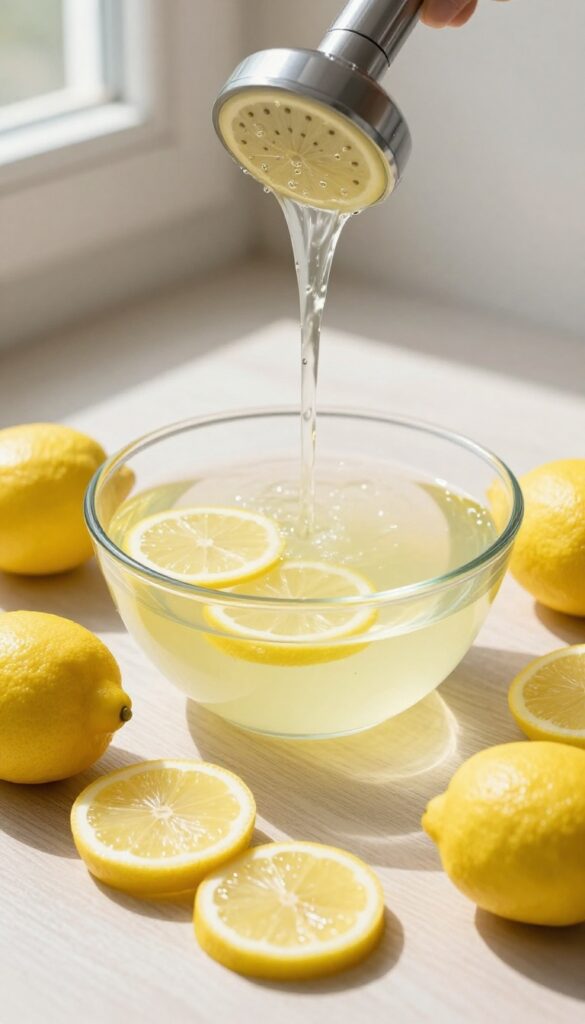
If the sharp smell of vinegar isn't your thing, lemon juice offers a citrusy alternative that works just as well. The citric acid in lemons breaks down mineral deposits while leaving behind a fresh, clean scent. It's a simple swap that makes the cleaning process a lot more pleasant.
Lemon juice is a natural acid that dissolves calcium and lime buildup just like vinegar, but with a much brighter aroma. For this method, you'll need enough lemon juice to submerge the shower head—either bottled or freshly squeezed works fine. Remove the shower head if possible, place it in a bowl or plastic bag filled with lemon juice, and let it soak for about an hour.
After soaking, scrub the nozzles gently with an old toothbrush to dislodge any remaining debris, then rinse thoroughly with warm water. Your shower head will not only flow better but also smell amazing.
Why Lemon Juice Works
Citric acid is a powerful descaler that reacts with alkaline mineral deposits, turning them into soluble compounds that wash away easily. It's slightly milder than vinegar, so it's gentler on rubber and plastic parts, making it a good choice for older or more delicate shower heads.
How To Do A Lemon Juice Soak
Start by removing the shower head. If it's fixed, fill a plastic bag with lemon juice and secure it around the head with a rubber band. Make sure the nozzles are fully submerged.
Let it sit for 60 minutes, then scrub with a soft brush and rinse. For handheld models, just soak the head in a bowl of lemon juice.
Tips For Best Results
Use warm lemon juice for faster descaling—heat activates the acid. If you have stubborn buildup, let it soak longer, up to two hours. After rinsing, wipe the surface with a dry cloth to prevent water spots.
Repeat every few months to keep your shower head in top shape.
4. Toothpick or Pin to Unclog Nozzles
Sometimes mineral deposits are so stubborn that soaking alone won't cut it. That's where a simple toothpick or pin comes in handy. This manual method targets each nozzle individually, breaking up blockages that vinegar can't fully dissolve.
It's a quick, satisfying fix that works especially well on shower heads with small rubber nozzles.
Start by examining your shower head to see which nozzles are blocked. You'll notice uneven spray patterns or water shooting out at odd angles. Take a wooden toothpick or a thin pin and gently poke each nozzle.
Be careful not to push too hard—you don't want to damage the nozzle or push debris further in. You'll feel a slight give as the deposit breaks loose. After you've cleared all the nozzles, follow up with a vinegar soak to flush out the loosened gunk.
This two-step process is effective for both fixed and handheld shower heads.
Why Toothpicks Work Best
Wooden toothpicks are ideal because they're soft enough to avoid scratching metal or plastic, but firm enough to dislodge scale. Pins or needles can work, but they risk scratching or enlarging the nozzle opening. Stick with toothpicks for a safe, effective clean.
When To Combine With Soaking
If you've already tried a vinegar soak and still have low pressure, manual poking is the next step. Conversely, if you poke first, the vinegar soak will reach deeper into the nozzles. For best results, do both: poke, then soak for 30 minutes to an hour.
5. Plastic Bag Method for Fixed Heads
If your shower head is fixed in place and can't be removed, the plastic bag method is your best bet. It's a clever workaround that lets you soak the head without detaching it. All you need is a sturdy plastic bag, some white vinegar, and a rubber band.
This technique is perfect for those who don't want to mess with tools or worry about damaging the fixture. The vinegar does all the work, breaking down mineral deposits while you go about your day. Just make sure the bag is securely fastened so it doesn't leak or slip off.
What You'll Need
Grab a gallon-sized zip-top bag or a thick grocery bag, enough white vinegar to submerge the shower head, and a strong rubber band or twist tie. Avoid thin bags that might tear under the weight of the vinegar.
Step-by-step Instructions
Fill the bag about halfway with vinegar. Carefully lift it over the shower head so the head is fully submerged. Secure the bag's opening around the neck of the shower head with the rubber band, making sure it's tight.
Leave it for at least 2–3 hours, or overnight for heavy buildup. Afterward, remove the bag and run the shower for a few minutes to flush out loosened debris.
Pro Tips For Best Results
If your shower head is angled downward, you may need to prop the bag up with a small stool or tape it in place. For extra stubborn deposits, warm the vinegar slightly (not boiling) before pouring it into the bag—warm vinegar works faster. Always check for leaks before walking away.
6. Descaling with Commercial Cleaners
When natural solutions like vinegar or lemon juice aren't cutting it, commercial descaling products can handle the heavy lifting. These cleaners are formulated to dissolve tough mineral deposits quickly, making them ideal for shower heads that haven't been cleaned in years or have severe buildup. Just be sure to follow the instructions closely and rinse thoroughly to avoid any residue.
Choosing The Right Product
Look for descaling products specifically designed for household fixtures, such as CLR (Calcium, Lime, and Rust remover) or Lime-A-Way. These are strong enough to break down stubborn scale but safe for most metal and plastic shower heads when used correctly. Avoid using harsh acids like undiluted muriatic acid, which can damage finishes.
Application Methods
For removable shower heads, submerge the head in a bowl of the descaling solution for the time recommended on the label—usually 5 to 15 minutes. For fixed heads, fill a plastic bag with the solution, tie it around the neck, and let it soak. After soaking, scrub the nozzles with a soft brush to dislodge any remaining deposits.
Safety And Rinsing
Always wear gloves and work in a well-ventilated area when using commercial cleaners. After descaling, rinse the shower head thoroughly with water for at least a minute to remove all chemical traces. Turn on the water and let it run for another minute before using the shower to ensure no cleaner remains.
7. Cleaning Rubber Nozzles by Rubbing
Many modern shower heads have flexible rubber nozzles designed to resist mineral buildup. But even these can get clogged over time if you don't give them a little attention. The fix is almost too easy: just rub them with your fingers while the water is running.
This simple mechanical action loosens calcium and lime deposits that have formed on the nozzle tips. It's a maintenance trick that takes seconds and can keep your shower head working like new between deeper cleanings. Make it a habit to rub the nozzles every few weeks, and you'll notice a consistent water flow without any harsh chemicals or tools.
Why Rubber Nozzles Need Rubbing
Rubber nozzles are soft and flexible, which means they can be cleaned by friction alone. When you rub them, you're essentially massaging the deposits loose from the openings. This is especially effective if you do it while the water is hot, as heat helps soften the scale.
How To Do It Right
Turn on the shower to a warm setting. Then, using your thumb or fingers, gently rub each nozzle in a circular motion. You'll see white flakes or cloudy water as the deposits break free.
Do this for all the nozzles, then let the water run for a minute to flush out any debris.
When To Combine With Soaking
If your nozzles haven't been cleaned in a while, rubbing alone might not remove all the buildup. In that case, follow up with a vinegar soak (see earlier tips). But for regular maintenance, a quick rub every week or two is often enough to keep water pressure strong.
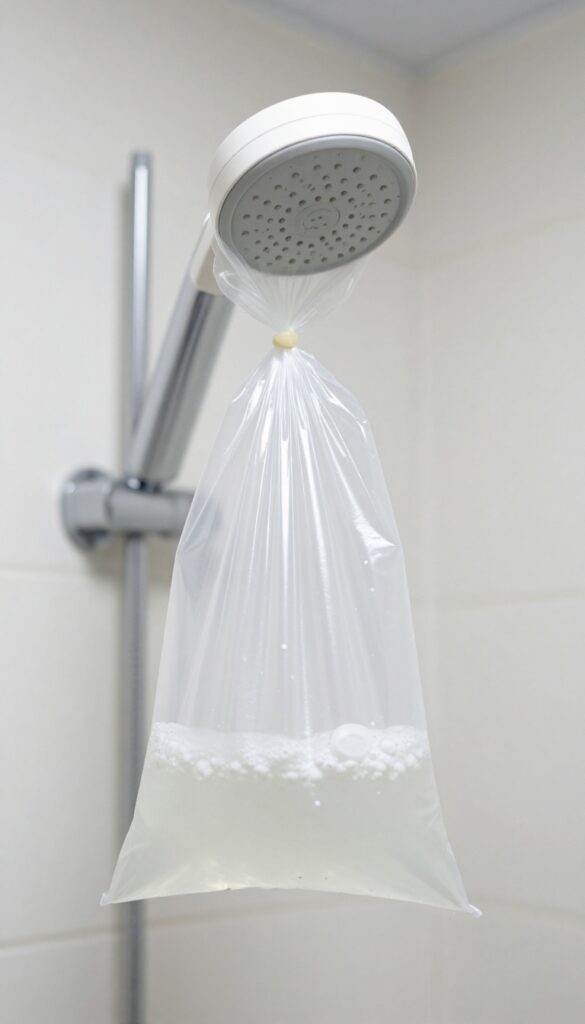
8. Deep Clean with Dishwasher Tablet
Dishwasher tablets aren't just for cleaning dishes—they're surprisingly effective at dissolving stubborn mineral deposits in shower heads. The powerful detergents and water softeners in these tablets break down limescale and soap scum faster than many household cleaners. This method works especially well for shower heads that haven't been cleaned in months or have visible white crust around the nozzles.
Grab a single dishwasher tablet (any brand works) and drop it into a bowl or bucket of warm water. Stir gently until it dissolves, then fully submerge your removable shower head in the solution. Let it soak for about 30 minutes—you'll see the water turn cloudy as the minerals loosen.
After soaking, scrub the nozzles lightly with an old toothbrush to remove any remaining debris, then rinse thoroughly under running water. Reattach the shower head and run the water for a minute to flush out any residue inside. The result is a sparkling clean head with noticeably better water flow.
Why Dishwasher Tablets Work So Well
Dishwasher tablets contain powerful surfactants, enzymes, and water softeners designed to break down tough food residue and mineral deposits. These same ingredients attack calcium and lime scale in shower heads, making them more effective than vinegar for heavy buildup. The tablet's foaming action also helps reach deep into the nozzles.
Best Practices For Soaking
Use warm—not hot—water to avoid damaging plastic or rubber components. Make sure the shower head is completely submerged; if it floats, place a heavy object on top. For handheld models, disconnect the hose first.
For fixed heads, you can fill a plastic bag with the solution and tie it around the head, ensuring the nozzles are fully covered.
Aftercare And Rinsing
Rinsing is crucial because dishwasher tablet residue can be slippery and may leave a film. Run the shower head under tap water for at least a minute, then reattach and let the water flow for another minute. If you notice any lingering suds, repeat the rinse.
This method is safe for most finishes, but avoid using it on brass or antique fixtures without checking the manufacturer's guidelines.
9. Vinegar and Baking Soda Combo
When soaking alone doesn't cut through thick scale, the fizzy reaction of baking soda and vinegar can loosen stubborn deposits. This method is especially useful for shower heads with heavy buildup or those that haven't been cleaned in months. The bubbling action helps break apart mineral crusts without harsh scrubbing.
Start by sprinkling a generous amount of baking soda over the entire shower head, making sure it covers the nozzles. Then fill a spray bottle with white vinegar and spritz it onto the baking soda until it starts fizzing. Let the mixture bubble for about 10 minutes—the reaction works to dissolve calcium and lime.
After the fizzing stops, scrub the surface with a soft brush or old toothbrush, then rinse thoroughly with warm water. For extra-stubborn spots, repeat the process or let it sit longer.
Why This Combo Works
Baking soda is mildly abrasive, helping to physically scrub away residue, while vinegar's acidity dissolves mineral deposits. When combined, they create carbon dioxide bubbles that lift grime from tight spaces like nozzle holes. This one-two punch is safe for most finishes, but avoid prolonged contact on brass or nickel-plated heads.
Best For Fixed Or Handheld Heads
This method works great on both fixed and handheld shower heads. For fixed heads, protect the surrounding tile or tub with a towel to catch drips. Handheld models can be removed and placed in a bowl with the mixture for deeper cleaning.
Just make sure to rinse well afterward to prevent vinegar residue from affecting water flow.
When To Use This Method
Use the vinegar and baking soda combo when you see visible white crust or notice reduced water pressure that soaking alone didn't fix. It's also a good monthly maintenance step for hard water areas. Avoid using it more than once a week, as frequent acid exposure can wear down some finishes over time.
10. Soaking in Coca-Cola
You might not think of soda as a cleaning tool, but cola's phosphoric acid makes it surprisingly effective against limescale. If you have a removable shower head, this is a fun and easy way to break down stubborn deposits without harsh chemicals. Just be prepared for a sweet-smelling bathroom while it works.
Why Cola Works
Phosphoric acid is a common ingredient in many commercial descaling products. In cola, it's diluted but still strong enough to dissolve calcium carbonate—the main component of limescale. The carbonation also helps loosen debris, making rinsing easier.
How To Do It
Remove the shower head and place it in a bowl or plastic bag. Pour enough cola to fully submerge the head. Let it soak for at least 2–3 hours, or overnight for heavy buildup.
After soaking, scrub the nozzles with an old toothbrush and rinse thoroughly with water.
Important Note
Cola contains sugar, which can leave a sticky residue if not rinsed well. Make sure to flush the shower head with warm water for a minute or two after cleaning. Also, avoid this method on brass or gold-plated fixtures, as the acid may damage the finish.
11. Using a Descaling Wand for Hard-to-Reach Spots
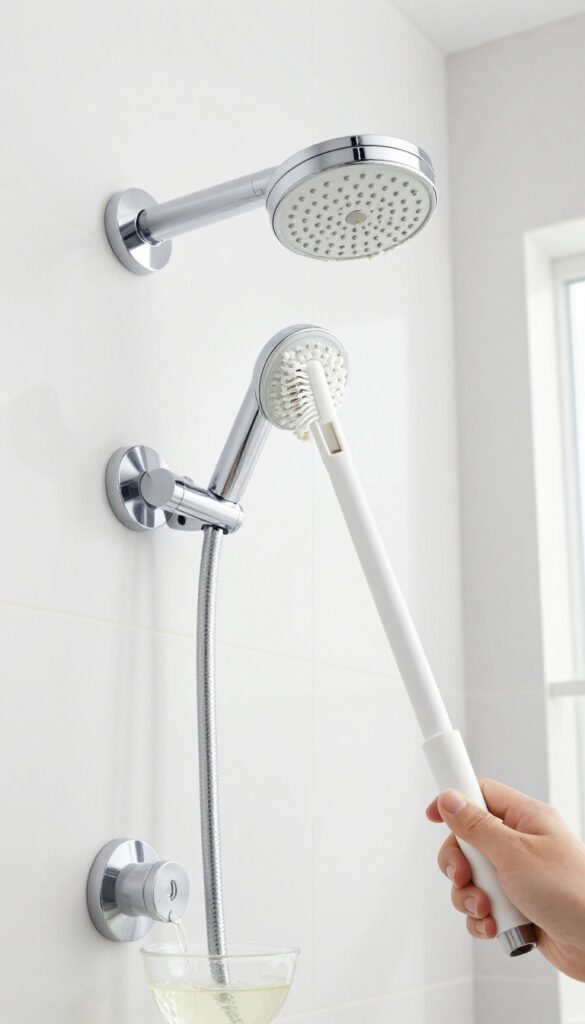
Some shower heads are fixed in place, making it tough to soak or scrub every nozzle properly. That's where a descaling wand comes in handy—a simple tool with stiff bristles designed to clean without removing the head. It's a quick fix for those awkward angles and stubborn mineral deposits.
A descaling wand is essentially a long-handled brush with angled bristles that can reach into tight spaces. You dip it in a descaling solution (like vinegar or a commercial cleaner) and scrub the nozzles directly. This method works especially well for wall-mounted or ceiling-mounted shower heads that can't be detached easily.
How To Use A Descaling Wand
Start by mixing a descaling solution—equal parts white vinegar and warm water works fine. Dip the wand's bristles into the solution, then scrub each nozzle in a circular motion. Focus on any nozzles that look clogged or have visible white buildup.
Rinse the shower head with water afterward to remove loosened debris.
Best For Fixed Shower Heads
If you have a fixed shower head that doesn't detach, a descaling wand is a lifesaver. You can clean it without any disassembly, which saves time and avoids the risk of damaging seals or threads. Just make sure the bristles are stiff enough to break down scale but not so hard that they scratch the finish.
Where To Find A Descaling Wand
You can buy descaling wands at most hardware stores or online retailers. Look for one with a comfortable grip and replaceable bristle heads. Some kits come with a cleaning solution, but you can also use your own vinegar mix.
It's a small investment that keeps your shower head flowing freely.
12. Pressure Washer for Outdoor Showers
Outdoor showers take a beating from the elements, and their shower heads often collect dirt, algae, and mineral deposits that indoor methods can't touch. A pressure washer might sound extreme, but used carefully, it's one of the fastest ways to restore full flow to a heavy-duty or outdoor fixture.
For outdoor or heavy-duty shower heads, a gentle pressure wash can blast away stubborn deposits. Use low pressure to avoid damage.
When To Use This Method
This technique is best for metal or heavy-duty plastic shower heads that are securely mounted. Avoid using a pressure washer on delicate finishes or shower heads with thin rubber nozzles, as the force can cause damage. If your shower head is visibly caked with grime or hasn't been cleaned in months, this is a good option.
Safety First
Always start with the lowest pressure setting and hold the nozzle at least 12 inches away. Use a wide spray pattern rather than a concentrated jet to spread the force. Test a small, inconspicuous area first.
Wear eye protection to avoid splashback.
Step-by-step Cleaning
Remove the shower head if possible, or cover any nearby electronics. Spray from multiple angles, focusing on the nozzle plate and any visible buildup. Rinse thoroughly with clean water afterward to remove any loosened debris.
For extra stubborn spots, repeat or follow up with a vinegar soak.
13. Cleaning the Filter Screen
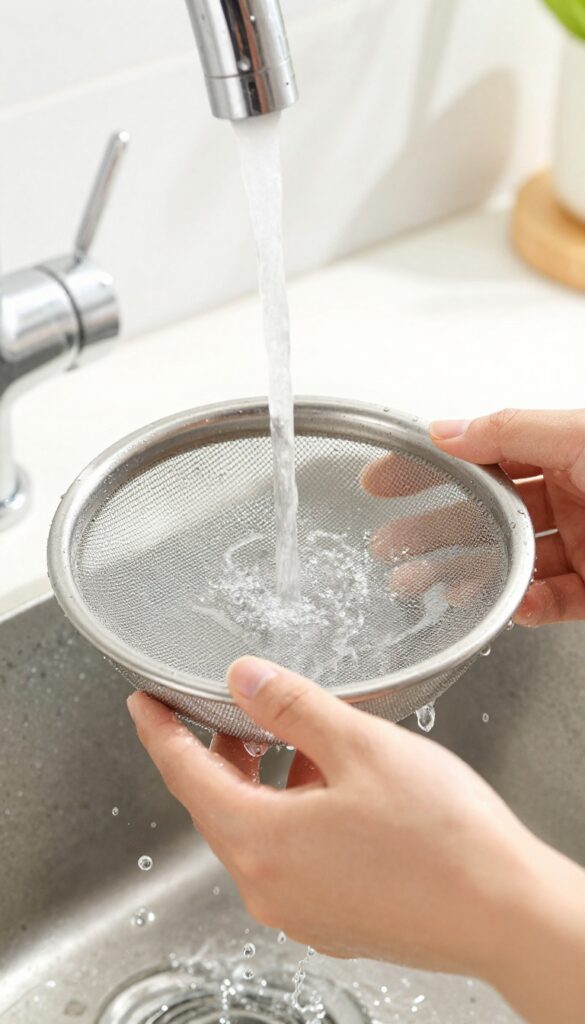
Many shower heads have a small filter screen inside the hose connection or handle. This screen catches large sediment and debris, but it can get clogged over time, reducing water flow. Cleaning it is quick and can make a noticeable difference.
The filter screen is often overlooked, but it's a common cause of low pressure. Removing and rinsing it regularly keeps your shower head working efficiently.
Locating The Screen
The filter screen is usually a small mesh disc located where the hose connects to the shower head or the wall pipe. Unscrew the connection by hand or with a wrench (wrap it in cloth to avoid scratches). You'll see the screen sitting inside the fitting.
Cleaning Steps
Gently pry out the screen with a toothpick or small screwdriver. Rinse it under warm running water to remove loose debris. For stubborn buildup, scrub it gently with an old toothbrush.
If the screen is badly corroded, replace it with a new one from a hardware store.
Reassembly And Test
After cleaning, place the screen back into the fitting and reconnect the hose. Turn on the water to check if flow has improved. If pressure is still low, the screen may need replacement or there's another blockage elsewhere.
14. Preventing Buildup with a Water Softener
If your shower head keeps clogging despite regular cleanings, the real problem might be your water itself. Hard water is packed with calcium and magnesium that leave scale behind. A water softener or inline filter tackles the source, not just the symptoms.
Installing a whole-house water softener removes the minerals before they reach your pipes. That means less scale on every fixture, including your shower head. If a whole-house system isn't in the budget, an inline shower head filter is a cheaper alternative that still makes a big difference.
How Water Softeners Work
Water softeners use ion exchange to swap calcium and magnesium ions for sodium or potassium. The result is soft water that doesn't leave mineral deposits. Your shower head stays cleaner longer, and you'll notice less soap scum on tiles too.
Inline Shower Head Filters
These small filters screw onto the shower arm before the head. They contain media like KDF-55 or activated carbon that reduces chlorine and heavy metals, but some also target scale. Replace the cartridge every 6 months for best results.
Maintenance Tips
Even with a softener, occasional cleaning is still needed. Check the filter screen in your shower head every few months. If you notice a drop in pressure, clean the nozzles with vinegar to remove any remaining buildup.
15. Routine Weekly Wipe-Down
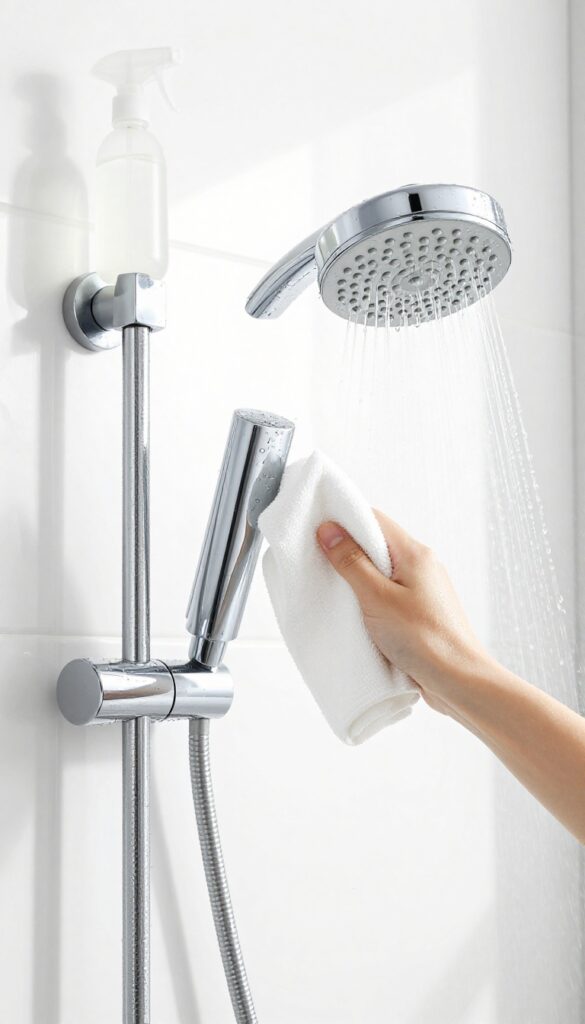
A little regular maintenance goes a long way in preventing buildup before it becomes a problem. You don't need heavy chemicals or deep scrubs—just a few seconds of attention after each shower can keep your shower head flowing freely. Pair that with a quick weekly spray, and you'll rarely deal with clogged nozzles again.
Make it a habit to wipe your shower head dry after every use. A soft microfiber cloth works best to remove water spots and reduce mineral deposits from forming. For extra protection, keep a spray bottle filled with undiluted white vinegar in your bathroom.
Once a week, give the shower head a quick spritz, let it sit for a few minutes, then rinse. This simple routine prevents scale from building up and keeps water pressure strong.
Why Daily Wiping Matters
Hard water leaves behind calcium and magnesium residues every time it dries on the surface. By wiping the shower head after each shower, you remove these minerals before they harden into scale. It also keeps the chrome or finish looking new and reduces the need for deep cleaning.
The Weekly Vinegar Spray Method
Fill a spray bottle with white vinegar and keep it in the shower. Once a week, spray the shower head thoroughly, especially the nozzles. Let it sit for 5–10 minutes—vinegar's acidity dissolves mild limescale on contact.
Then just turn on the water for a minute to rinse everything away. No scrubbing required.
16. Replacing Worn-Out Washers
You've scrubbed, soaked, and picked at every nozzle, but the water pressure is still disappointing. Before you blame the shower head itself, check the small rubber washer inside the hose connection. That tiny ring can be the silent culprit behind weak flow.
A worn or flattened washer creates a gap that lets water bypass the head, reducing pressure. Replacing it is cheap and takes just a few minutes. Here's what to look for and how to swap it out.
Signs Of A Bad Washer
If your shower head leaks around the connection or water trickles out even after cleaning, the washer is likely compressed or cracked. You might also hear a hissing sound from the joint.
How To Replace It
Unscrew the shower head from the pipe. Pull out the old washer—it's usually black or white rubber. Take it to a hardware store to match the size, or buy an assorted pack.
Push the new washer into place, then reattach the head. Tighten by hand only; over-tightening can damage the washer.
Preventing Future Wear
Use a smear of plumber's grease on the washer before installation to help it last longer. Also, avoid using tools to tighten the connection—hand-tight is enough to seal without crushing the rubber.
17. When to Replace the Shower Head
Sometimes no amount of cleaning can save an old shower head. If you've tried every method and the flow is still weak, or you notice rust, cracks, or persistent leaks, it might be time for a replacement. Newer models are designed with better water efficiency and easier maintenance, so upgrading can solve the problem long-term.
Knowing when to replace instead of repair saves you frustration and ensures you're not fighting a losing battle against corrosion or internal damage. Here are the signs to watch for and what to look for in a new shower head.
Signs It's Time To Let Go
If your shower head is more than five years old and has visible rust, mineral crust that won't budge, or cracks around the joints, it's probably done. Also, if water sprays unevenly or drips constantly after cleaning, internal seals may be broken. A replacement is cheaper and more effective than endless repairs.
What To Look For In A New Shower Head
Choose a model with rubber nozzles that are easy to wipe clean—ideal for hard water areas. Look for a water-saving design (like 1. 5 GPM or less) that still delivers strong pressure.
Also consider a handheld or adjustable head for flexibility. Many modern heads come with anti-clog features that reduce future buildup.
Installation Is Easier Than You Think
Replacing a shower head is a simple DIY task. Most attach with a standard threaded connection that you can tighten by hand. Use plumber's tape on the threads to prevent leaks.
You'll have a fresh start in under 15 minutes, and the improvement in water flow will be immediate.
FAQ
How often should I clean my shower head?
For best performance, clean your shower head every 1-3 months. If you have hard water, monthly cleaning helps prevent buildup.
Can I use bleach to clean my shower head?
Bleach is not recommended as it can damage finishes and rubber parts. Stick to vinegar, baking soda, or mild cleaners.
Will vinegar damage my shower head?
White vinegar is safe for most metal and plastic shower heads. Avoid prolonged soaking on brass or gold-plated heads; check manufacturer guidelines.
Why is my water pressure still low after cleaning?
Low pressure could be due to a clogged pipe, faulty valve, or worn-out washer. If cleaning doesn't help, inspect these components or call a plumber.
Can I clean a rainfall shower head the same way?
Yes, but rainfall heads are larger. Use the plastic bag method or a shallow container for soaking. Be gentle to avoid scratching the surface.
Conclusion
Keeping your shower head in top shape doesn't require expensive tools or harsh chemicals. Just a few simple cleaning methods can restore water pressure and extend its lifespan without much effort. Start with the technique that fits your schedule—whether it's a quick vinegar soak or a deep clean with baking soda.
Regular maintenance every few months will save you from dealing with stubborn clogs later. Your shower will feel like new, and you'll enjoy a more refreshing rinse every time.


