You hear the doorbell ring and your eyes dart to the pile of mail on the coffee table. The throw pillows look a little flat, and you're pretty sure there's a dust bunny under the sofa. We've all been there.
Getting your living room guest-ready doesn't have to mean a full day of scrubbing. With the right approach, you can tackle the mess efficiently and still have time to relax before your visitors arrive.
These 20 tips break down the process into manageable steps. Whether you have 15 minutes or a couple of hours, you'll find practical strategies to make your living room shine.
1. Clear the Surfaces First
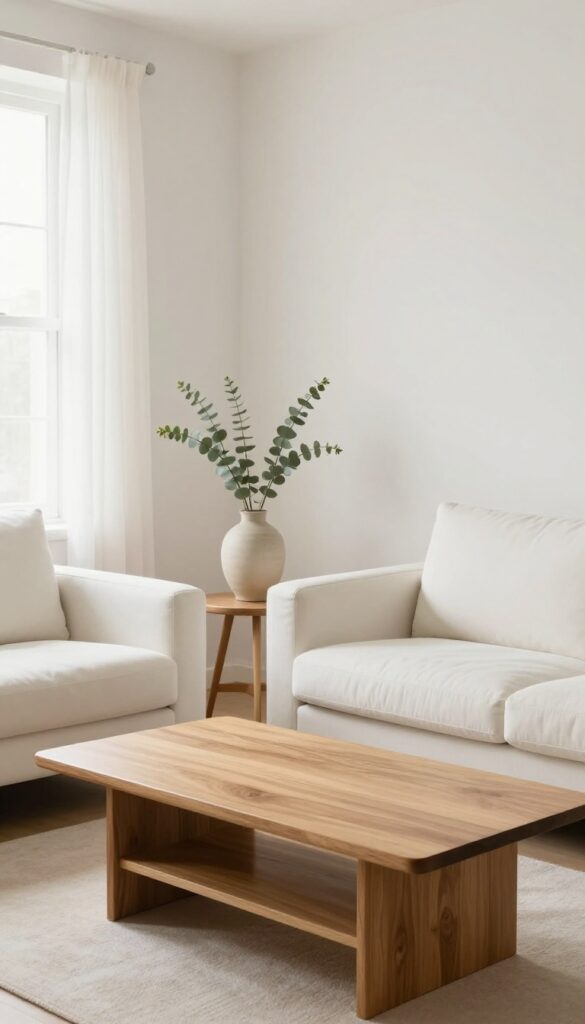
Every surface in your living room collects visual noise—mail, remote controls, coasters, magazines, and random knick-knacks. When guests walk in, their eyes naturally scan these horizontal spaces. A cluttered coffee table or crowded shelf instantly signals chaos, even if the rest of the room is tidy.
That's why the first step to a guest-ready living room is stripping everything down.
Removing everything from your coffee table, side tables, and shelves gives you a blank canvas. You'll see the actual state of your furniture and spot dust or stains you normally overlook. Plus, decluttering these zones makes the room feel instantly larger and more peaceful.
Once the surfaces are bare, you can clean them thoroughly and then add back only what's necessary or decorative.
The Triage Method
Grab a basket or a tray and walk around the room. Pick up every item that doesn't belong on a surface: pens, loose change, old receipts, empty glasses. Drop them into the basket.
This isn't about organizing yet—just clearing the visual field. You can sort the basket later, but for now, the goal is to make every tabletop look intentional.
One-item Rule For Decor
When you put things back, follow the one-item rule: each surface should hold no more than one or two decorative objects. A single vase, a stack of books, or a small tray for remotes is plenty. This keeps the look curated rather than cluttered.
If you have a large collection of candles or figurines, rotate them instead of displaying everything at once.
Don't Forget The Floor
Surfaces aren't just tables. The floor around your sofa, under the coffee table, and near entryways counts too. Shoes, bags, kids' toys, and pet bowls create visual clutter at ground level.
Clear these away first so the room feels open from every angle. A clear floor also makes vacuuming or sweeping more effective.
2. Fluff and Arrange Throw Pillows
Throw pillows take a beating. Between people leaning on them, kids tossing them, and pets claiming them as beds, they can end up flat, lumpy, or stained. Giving them a quick refresh is one of the easiest ways to make your sofa look inviting again.
A few simple moves can transform a tired seating area into a cozy, put-together space.
The Fluff Factor
Start by giving each pillow a good fluff. Grab the corners and shake them out, then punch the center to redistribute the filling. For feather pillows, squeeze and knead them to break up clumps.
This restores volume and makes them look plump and welcoming. If a pillow is permanently misshapen or the filling has shifted beyond repair, it might be time to replace it.
Odd Numbers Look Best
When arranging pillows, stick to odd numbers—three or five works well on a standard sofa. This creates a balanced, visually pleasing look. Place larger pillows at the ends and smaller ones in the middle, or mix sizes for depth.
Avoid symmetrical pairs unless you're going for a formal look; odd groupings feel more relaxed and natural.
Check For Stains And Wear
Take a close look at each pillow cover. Are there visible stains, fading, or fraying? Spot clean removable covers with a mild detergent, or toss them in the washing machine if the care label allows.
For non-removable covers, use a fabric cleaner or a damp cloth. If a pillow is beyond saving, swap it out for a fresh one. A few new pillows can instantly update the whole room.
3. Vacuum Under Cushions and Sofa Crevices
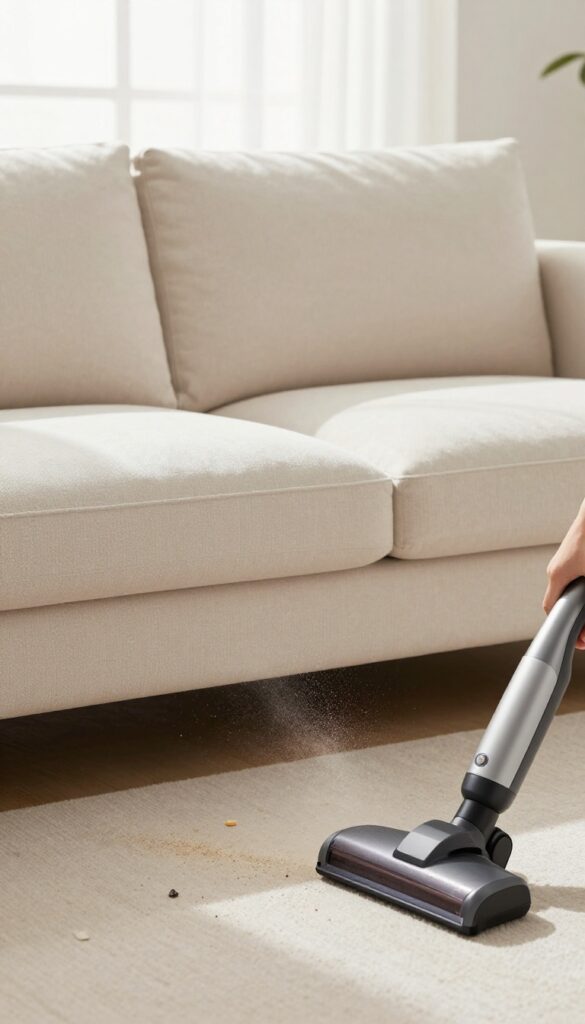
Your sofa sees a lot of action—snacks, pets, and the occasional lost remote. Over time, crumbs and dust settle deep into the cracks, making it a hotspot for hidden grime. A quick vacuum session under the cushions can make a surprising difference in both cleanliness and freshness.
Lift each cushion and use the upholstery attachment to vacuum the exposed area. Pay extra attention to the corners and seams where debris tends to collect. Don't forget the base of the sofa where dust bunnies love to hide.
Use The Crevice Tool Like A Pro
The crevice tool is your best friend for reaching deep into sofa seams and between armrests. Run it along every crevice, especially where the back meets the seat. You'll be amazed at what comes out—coins, popcorn kernels, and dust you didn't know existed.
Don't Skip Under The Cushions
Even if the cushions look clean, the area underneath can be a mess. Lift each cushion and vacuum thoroughly, including the sides and bottom of the cushion itself. This step also helps prevent wear and tear from trapped grit.
Make It A Regular Habit
Set a reminder to vacuum under cushions every two weeks. It takes less than five minutes and keeps your sofa looking and smelling fresh. Your guests will never know the hidden history, but you'll enjoy a cleaner home.
4. Wipe Down Remote Controls and Electronics
Remote controls, gaming controllers, and TV screens are some of the most touched items in your living room, yet they often get overlooked during cleaning. They collect fingerprints, dust, and germs that can be visible to guests. A quick wipe-down makes them look fresh and shows attention to detail.
Gather Your Supplies
You don't need fancy products. Grab a microfiber cloth—it's gentle and picks up dust without scratching. For screens, use a cleaner specifically designed for electronics or a 50/50 mix of distilled water and white vinegar.
Avoid paper towels or harsh chemicals that can damage surfaces.
Tackle The Remote And Controllers
Remove batteries first to avoid damage. Wipe the exterior with a slightly damp cloth, getting into crevices with a cotton swab. For sticky buttons, use a bit of rubbing alcohol on the swab.
Let everything dry completely before reinserting batteries.
Don't Forget The Tv Screen
Turn off the TV to see smudges clearly. Gently wipe the screen in a circular motion with a dry microfiber cloth. For stubborn spots, dampen the cloth slightly—never spray liquid directly on the screen.
Finish by dusting the bezel and vents.
5. Dust from Top to Bottom
Dusting might feel like a never-ending battle, but doing it in the right order makes a huge difference. If you start at the bottom, you're just pushing dust up into the air to settle on everything you already cleaned. That's wasted effort.
Instead, begin with the highest surfaces—ceiling fans, light fixtures, and tall shelves—and work your way down to tables and baseboards. Gravity does the heavy lifting, and you won't have to re-dust a single thing. It's a simple shift that saves time and leaves your living room truly clean.
Start With Ceiling Fans And Light Fixtures
Ceiling fans are dust magnets, especially if you don't use them often. Grab a microfiber cloth or a long-handled duster and wipe each blade carefully. For light fixtures, a dry cloth works best—avoid wet cleaners near electrical parts.
This step prevents dust clouds from raining down on your freshly cleaned furniture.
Work Down To Shelves And Window Sills
Once the high spots are done, move to shelves, picture frames, and window sills. Use a slightly damp cloth to trap dust instead of scattering it. Don't forget the tops of door frames and crown molding—they collect surprising amounts of dust that eventually fall onto lower surfaces.
Finish With Baseboards And Floor Vents
Baseboards and vents are often neglected but they're the final frontier. A quick wipe with a microfiber cloth or a vacuum attachment picks up the last traces of dust. If you've worked top to bottom, you'll notice the floor stays cleaner longer, and your living room feels fresher without extra effort.
6. Spot Clean Upholstery Stains
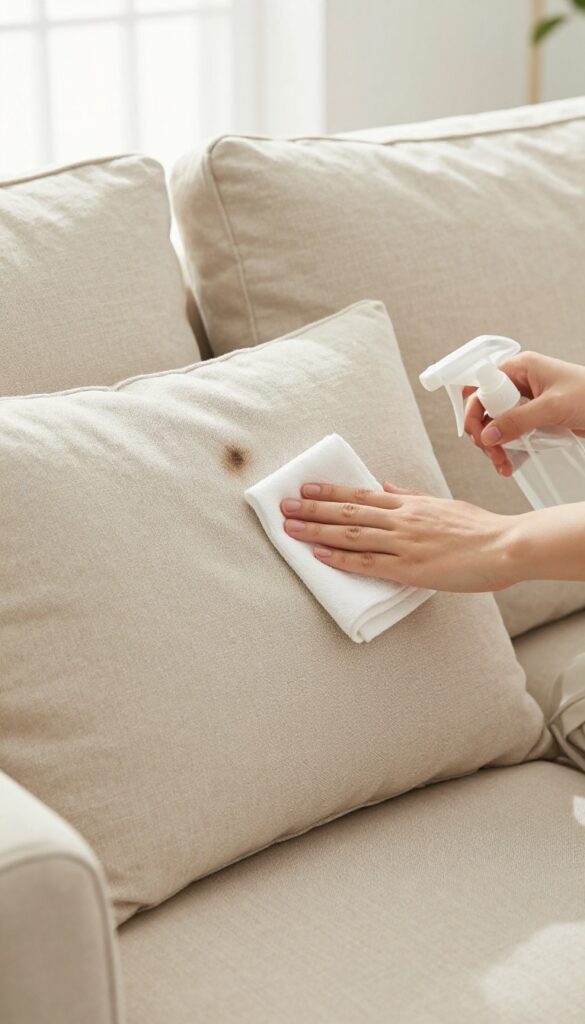
Your sofa and chairs see daily use, so a few stains are almost inevitable. Before guests arrive, take a few minutes to inspect the upholstery and treat any marks you find. A quick spot clean can make the whole room look fresher instantly.
Check cushions, armrests, and backrests for visible spots. Mix a small amount of mild dish soap with warm water, dip a clean cloth into the solution, and blot the stain gently—never rub, as that can push the stain deeper. For tougher stains, use a fabric-safe upholstery cleaner following the product instructions.
Always test on a hidden area first. Once treated, let the area air dry completely.
Identify The Stain Type
Different stains need different treatments. Food spills, pet accidents, and ink marks each respond better to specific cleaners. Check the fabric care tag and choose a cleaner that matches both the stain and the upholstery material.
When in doubt, start with plain water and blot.
Blot, Don't Rub
Rubbing a stain can damage the fabric fibers and spread the mark. Always blot from the outside inward using a clean, white cloth. Continue blotting until the cloth picks up no more stain, then let the area dry naturally.
Dry Thoroughly
After cleaning, open windows or turn on a fan to speed up drying. Damp upholstery can attract dirt or develop mildew. Avoid sitting on the cushions until they are completely dry to prevent new stains or wrinkles.
7. Shake Out or Vacuum Throw Rugs
Throw rugs are magnets for dust, dirt, and pet hair, but they're easy to overlook. A quick shake or vacuum can make a surprising difference in both appearance and air quality. Here's how to handle them without breaking a sweat.
Take Small Rugs Outside
For lightweight rugs, the most effective method is to take them outside and give them a good shake. Hang the rug over a railing or clothesline, or simply hold it by the edges and snap it briskly. You'll be amazed at the cloud of dust that comes out.
Do this over a trash can or away from your door to avoid bringing debris back inside.
Vacuum Both Sides Of Large Rugs
If your rug is too heavy to move, vacuum it thoroughly—but don't stop at the top. Flip the rug over and vacuum the underside as well. This dislodges grit that can damage flooring and releases trapped allergens.
Use a brush attachment for a deeper clean, and go slowly to let the suction pull out embedded dirt.
Don't Forget The Edges
The edges and corners of throw rugs collect the most debris because they're closer to walls and furniture. Run the vacuum along the perimeter, and use a crevice tool to get into tight spots. If your rug has fringe, gently vacuum it with a soft brush attachment to avoid tangling.
8. Organize Magazines and Books
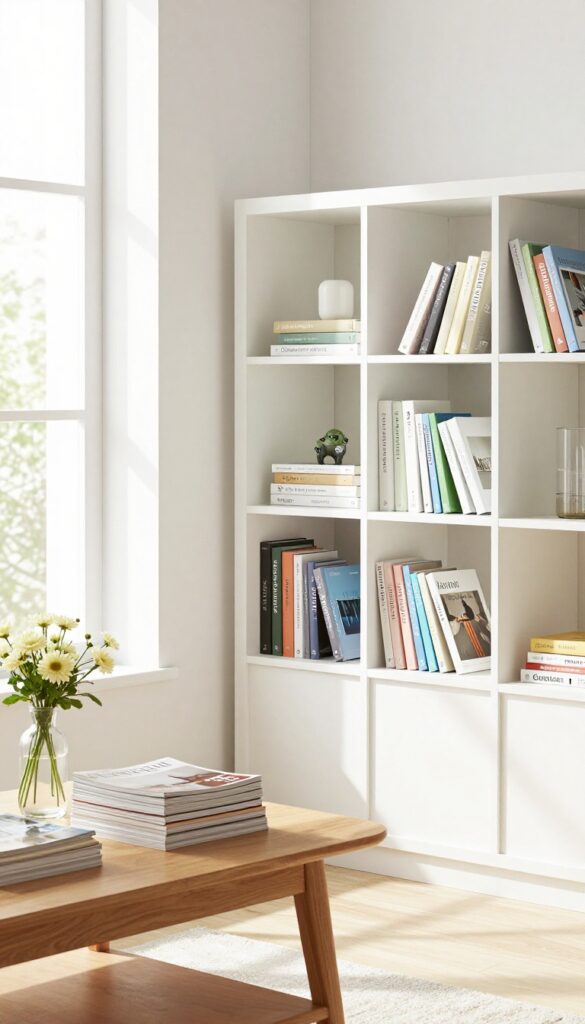
Coffee tables and shelves can quickly become dumping grounds for reading material. A neat stack or a well-arranged shelf instantly makes the room feel more intentional and less cluttered. Plus, it's a quick win that takes just a few minutes.
Sort And Purge First
Before you organize, flip through each magazine and book. Toss anything outdated or damaged. Keep only what you truly enjoy or plan to read.
This step prevents piles from growing back overnight.
Choose A System That Works
For magazines, use a decorative basket or a wall-mounted rack. For books, arrange them by color for a striking visual, or by size for a clean, uniform look. Both methods make it easy to grab a read and put it back.
Maintain The Look Daily
Spend one minute each evening straightening the stacks. Slide books back into place and toss any new mail or catalogs into the recycling bin. This habit keeps your living room guest-ready with minimal effort.
9. Clean Windows and Glass Surfaces
Streaks and smudges on windows and mirrors can make an otherwise clean room feel dingy. Natural light is one of your best allies in making a space feel open and fresh, but it only works if the glass is spotless. A few simple techniques will have your windows, mirrors, and glass tabletops gleaming without leaving residue.
Start by dusting window frames and sills to prevent dirt from turning into mud when you spray cleaner. Then use a high-quality streak-free glass cleaner and a lint-free microfiber cloth or a squeegee for the best results. Work in a zigzag pattern to avoid streaks, and don't forget to clean both sides of windows if possible.
For mirrors, spray the cleaner onto the cloth rather than directly onto the glass to avoid drips. Glass tabletops can be polished with a dry microfiber cloth after cleaning to remove any remaining smudges.
Choose The Right Tools
Not all cloths are created equal for glass cleaning. Microfiber cloths with a high GSM (grams per square meter) are ideal because they trap dust and absorb liquid without leaving lint. Avoid paper towels, which can leave fibers and streaks.
A good squeegee with a rubber blade is also worth investing in for large windows—just wipe the blade clean between passes.
Master The Streak-free Technique
Clean windows on a cloudy day or when the sun isn't directly shining on them. Direct sunlight dries the cleaner too quickly, causing streaks. Spray the cleaner lightly, then wipe in an S-pattern or from top to bottom.
For stubborn spots, use a mixture of equal parts white vinegar and water—it's natural and effective. Finish by buffing with a dry microfiber cloth for a crystal-clear shine.
Don't Overlook Glass Tabletops And Decor
Glass coffee tables and shelf fronts collect fingerprints and dust quickly. Use the same streak-free method, but be gentle to avoid scratching. For glass decor items like vases or picture frames, a quick wipe with a damp microfiber cloth followed by a dry one will do the trick.
Keeping these surfaces clean instantly elevates the whole room.
10. Freshen Up the Air
Even if every surface is spotless, stale air can make a room feel uninviting. Guests notice the atmosphere the moment they walk in, so a quick refresh goes a long way. Luckily, you don't need heavy chemicals or expensive gadgets to make your living room smell amazing.
Let The Breeze In
Crack open a couple of windows for five to ten minutes, even in cooler weather. This simple step pushes out musty air and brings in oxygen. It also helps clear any lingering cooking odors or pet smells before guests arrive.
Use Natural Scents
An essential oil diffuser with a few drops of lemon or lavender adds a clean, subtle fragrance without being overpowering. If you prefer a candle, choose one with a light scent like vanilla or fresh linen. Avoid heavy florals or spicy aromas that might clash with your guests' preferences.
Don't Forget Fabrics
Upholstery and curtains trap odors over time. A fabric refresher spray (or a DIY mix of water and a few drops of essential oil) can work wonders. Lightly mist your sofa, throw pillows, and drapes for an instant freshness boost.
11. Wipe Down Baseboards and Trim
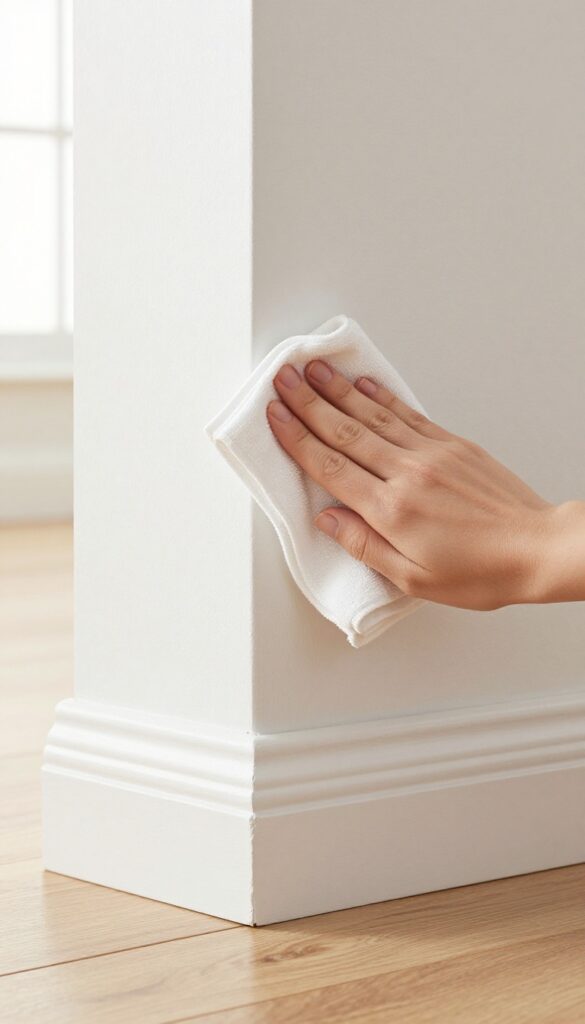
Baseboards and door trim are like the unsung heroes of a clean room. They quietly collect dust, scuffs, and the occasional splash from mopping, but they rarely get the attention they deserve. When guests arrive, those subtle smudges can make the whole space feel a bit neglected.
The good news? Cleaning them is almost effortless and makes a surprisingly big difference.
What You'll Need
Grab a microfiber cloth, a bucket of warm water with a splash of mild dish soap, and a magic eraser for stubborn marks. That's it. No fancy tools required.
Quick Wipe Down
Start at one corner of the room and work your way around. Run the damp cloth along the top edge of the baseboard, then the face. For painted trim, avoid soaking the cloth—damp is best to prevent water damage.
Tackling Scuffs And Stains
For scuff marks from shoes or furniture, a magic eraser works like a charm. Gently rub the mark until it disappears. On wood trim, use a wood-safe cleaner instead to avoid stripping the finish.
Don't Forget The Corners
Dust loves to hide in corners where walls meet baseboards. Use a dry paintbrush or a vacuum with a brush attachment to dislodge the buildup before wiping. This step takes seconds but makes the trim look crisp.
12. Tidy Up Cords and Cables
Cords and cables can turn a clean living room into a visual mess in seconds. They're trip hazards and dust magnets that guests notice immediately. A few simple tricks can make them disappear or at least blend in.
Bundle And Hide Behind The Entertainment Center
Start with the biggest culprit: the TV area. Unplug everything, then use zip ties or velcro straps to bundle cords together. Run them along the edge of the furniture or use a cable raceway that sticks to the wall.
This keeps them out of sight and out of mind.
Use Clips To Keep Charging Cables Off The Floor
Charging cables for phones and laptops often end up tangled on the floor. Attach adhesive cable clips to the side of your sofa or end table. Route the cable through the clip so the end is always within reach but the cord stays off the ground.
Label Cords For Easy Access
If you have multiple devices, label each cord near the plug with a small tag or piece of tape. This makes it easy to unplug the right one without pulling on a tangle. It also helps if you need to move furniture quickly before guests arrive.
13. Clean Light Switches and Door Handles
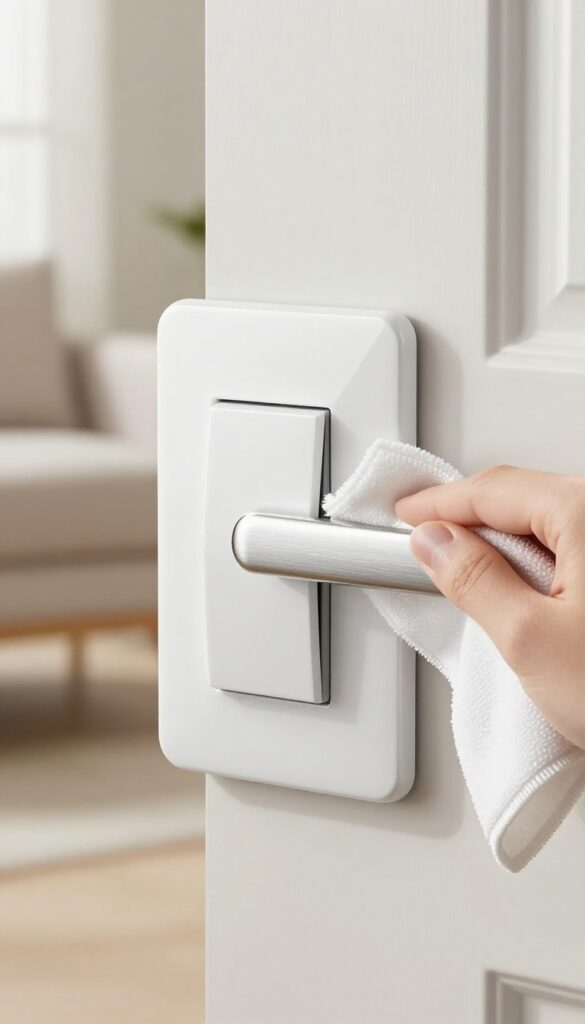
Think about how many hands touch your light switches and door handles every day. These small surfaces are germ magnets, yet they're easy to forget during a quick tidy-up. A simple wipe-down not only cuts down on germs but also leaves those spots looking fresh and shiny for guests.
Why They Matter
High-touch areas like light switches and door handles are hotspots for bacteria and grime. Guests notice when these are smudged or sticky, even if they don't say anything. Cleaning them takes seconds but makes a big difference in how clean your home feels.
Quick And Easy Method
Grab a disinfectant wipe or a microfiber cloth with a dab of all-purpose cleaner. Wipe the entire surface, including the edges and the plate around the switch. For door handles, don't forget the back side and the base.
Let them air dry for a few seconds.
How Often To Do It
Aim to clean these spots once a week, or more often if you have kids or pets. Before guests arrive, give them a quick once-over—it's one of the fastest ways to freshen up a room without any heavy lifting.
14. Refresh Indoor Plants
Plants add life and color to a living room, but dusty or wilted foliage can make the space feel neglected. A quick refresh takes just a few minutes and instantly boosts the room's freshness.
Dusting Leaves
Use a damp microfiber cloth to gently wipe both sides of each leaf. This removes dust that blocks sunlight and makes plants look dull. For larger plants, a quick shower with lukewarm water works too.
Removing Dead Foliage
Snip off any yellow or brown leaves at the base with clean scissors. Also remove fallen leaves from the soil surface to prevent mold and pests. This keeps the plant healthy and looking its best.
Arranging For Impact
Group plants at varying heights using stands or shelves. Place a tall plant in a corner, a trailing one on a shelf, and a small succulent on the coffee table. This creates visual interest and makes the room feel more alive.
15. Vacuum or Sweep Floors Thoroughly
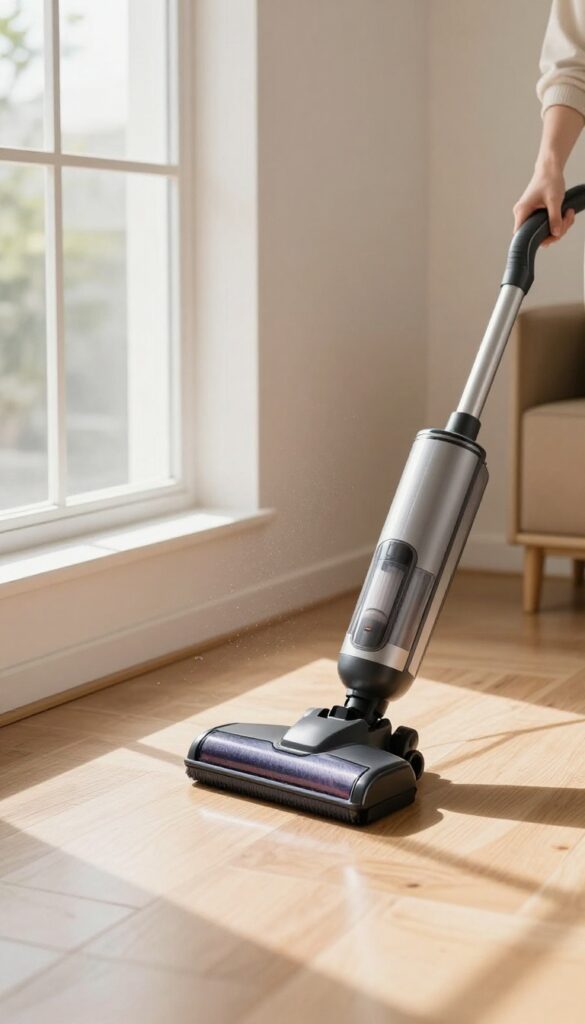
Floors take a beating in a living room—foot traffic, dropped crumbs, pet dander, and dust that settles from the air. A quick once-over with a broom or vacuum might hide the mess, but guests will notice if they walk around barefoot or spot debris in corners. Give your floors the attention they deserve, and your whole room will feel fresher instantly.
Start With The Right Tool
Hardwood, tile, and laminate each need a different approach. Use a soft-bristle attachment for hard floors to avoid scratching, and switch to a motorized brush roll for carpets to lift embedded dirt. If you have pets, a rubber squeegee or a vacuum with a tangle-free brush is a game-changer for pulling hair out of fibers.
Don't Forget The Corners And Edges
Dust and crumbs love to hide where walls meet floors. Use a crevice tool to run along baseboards and in tight corners. For a deeper clean, a microfiber cloth wrapped around a flathead screwdriver can dislodge stubborn grime.
Pay extra attention under radiators and behind floor vents.
Move Furniture When You Can
Slide couches, coffee tables, and bookshelves away from the wall at least once a month. A surprising amount of dust, lost toys, and pet hair accumulates underneath. If moving heavy pieces is too much, use a long-handled duster or a vacuum with an extension wand to reach those dark zones without breaking your back.
Finish With A Microfiber Mop Or Damp Cloth
After vacuuming or sweeping, hard floors still hold fine dust. A quick pass with a microfiber mop (dry or slightly damp) picks up what the vacuum missed. For carpets, a light spot-cleaning of high-traffic areas with a carpet cleaner or a damp cloth can lift stains and refresh the fibers.
16. Mop Hard Floors for a Shine
Hard floors take a beating in a living room—foot traffic, dropped crumbs, and dust that settles from the air. Vacuuming picks up the loose debris, but it's the mopping that really makes the surface gleam. A quick pass with the right cleaner leaves floors looking polished and feeling fresh underfoot.
After vacuuming, grab a mop and a bucket with a cleaner suited to your floor type. For tile, a neutral pH cleaner works well. For wood or laminate, use a product designed for those surfaces to avoid damage.
Work in sections, rinsing the mop frequently, and let the floor air dry. The result is a clean, shiny floor that instantly makes the room feel more welcoming.
Choose The Right Cleaner
Not all floor cleaners are created equal. For sealed hardwood, use a wood-specific cleaner or a mild soap. Laminate floors need a gentle, non-abrasive cleaner to prevent warping.
Tile and vinyl can handle a stronger solution, but avoid anything too harsh that might strip the finish. Always check the manufacturer's recommendations.
Mop Technique Matters
Use a microfiber mop or a flat mop with a washable pad. Dip it in the cleaning solution, wring it out well—you want it damp, not soaking wet. Excess water can damage wood and laminate.
Mop in straight lines, overlapping slightly, and rinse the pad or mop head between passes to avoid spreading dirt.
Don't Forget The Edges And Corners
Baseboards and corners often get missed during mopping. Use a small sponge or a microfiber cloth to wipe along the edges and in tight spots. This extra step ensures a truly clean floor and prevents dust from being pushed into corners.
17. Declutter the Coffee Table
The coffee table is often the centerpiece of the living room, but it can quickly become a dumping ground for remote controls, magazines, and random odds and ends. A cluttered coffee table makes the whole room feel messy, even if everything else is spotless. The fix is simple: edit down what you keep on it and corral the rest.
Start by removing everything from the table. Wipe down the surface, then decide what truly belongs there. Limit yourself to a few decorative items like a candle, a small plant, or a stack of books.
For functional items like remotes and coasters, use a tray to keep them contained and organized. A tray creates a designated spot and makes the table look intentional rather than chaotic.
Choose A Focal Point
Pick one or two statement pieces to anchor the table, such as a ceramic vase or a sculptural bookend. This draws the eye and gives the table purpose. Avoid overcrowding—negative space is your friend.
Corral The Clutter
Use a tray, a small box, or a basket to hold remotes, coasters, and other essentials. This keeps them accessible but visually tidy. Bonus: guests will know exactly where to place their drink.
Keep It Functional
Think about how you actually use the table. If you eat snacks there, a small bowl for nuts or a trivet for hot mugs can be both practical and decorative. Just don't let it become a catch-all.
18. Check and Clean Air Vents
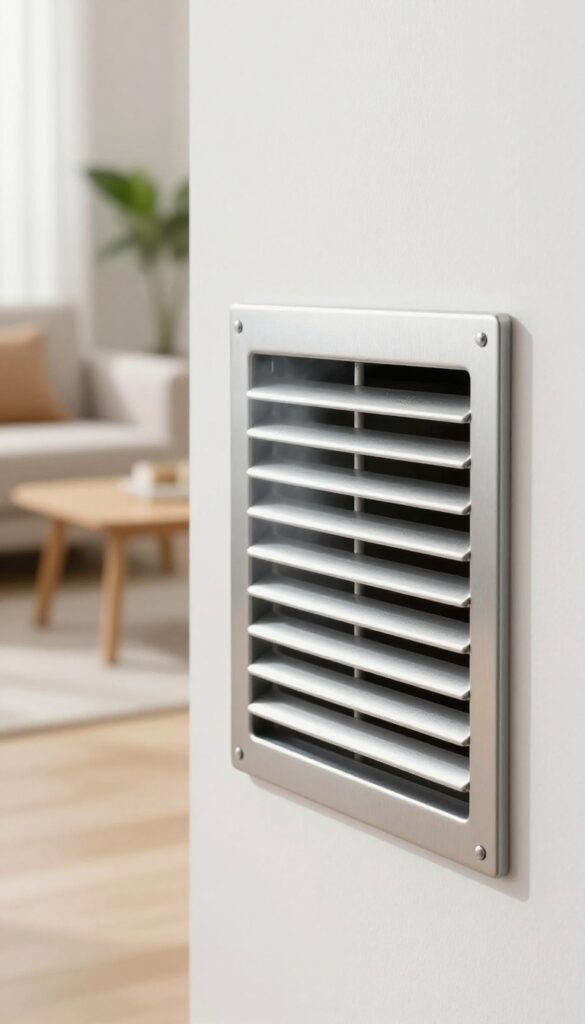
Air vents are easy to overlook, but they play a huge role in how fresh your living room feels. Over time, dust, pet hair, and even mold can build up inside the ducts and on the vent covers. When the heat or AC kicks on, that stuff gets blown right back into the room, coating your furniture and making the air feel heavy.
Why It Matters
Dirty vents don't just look bad—they can affect your health. Dust mites, pollen, and other allergens circulate more freely when vents are clogged. If you or your guests have allergies or asthma, clean vents make a real difference.
Plus, a musty smell from the ducts can ruin the whole vibe of a freshly cleaned room.
How To Clean Them
Start by turning off your HVAC system. Unscrew the vent covers and vacuum the inside of the ducts as far as you can reach using a brush attachment. Wash the covers with warm soapy water, let them dry completely, then screw them back on.
For deeper cleaning, consider hiring a professional duct cleaning service once a year.
Quick Maintenance Tips
To keep vents cleaner longer, vacuum them every time you clean the floors. Replace your HVAC filter every 1–3 months. If you have pets, check vents more often—pet hair accumulates fast.
A little regular attention saves you from a big dusty mess later.
19. Add a Final Touch with a Throw Blanket
A throw blanket is one of those small details that instantly makes a room feel more lived-in and welcoming. It adds a layer of softness and color that can tie the whole space together. Plus, it's practical—guests can grab it if they feel a chill.
Don't just toss the blanket anywhere. Drape it neatly over the arm of the sofa or fold it across the back. Choose a texture that contrasts with your upholstery, like a chunky knit on a smooth leather couch.
This creates visual interest and invites people to snuggle up.
Pick The Right Fabric
Cotton and linen are great for warmer months, while fleece or wool work better in winter. Make sure the blanket is clean and free of pet hair. A quick lint roll before guests arrive makes a big difference.
Coordinate Colors
Use the blanket to pull in an accent color from your rug or pillows. This creates a cohesive look without being matchy-matchy. A neutral blanket with a pop of color can also work well.
Keep It Accessible
Place the blanket where it's easy to grab. If it's folded on a nearby ottoman or basket, guests will feel free to use it. A blanket that's too perfectly arranged might seem off-limits.
20. Do a Quick Walk-Through
After all the dusting, vacuuming, and fluffing, it's easy to miss small details that can throw off the whole vibe. A final walk-through from the doorway gives you a fresh perspective. This is your chance to spot anything that looks out of place and make quick adjustments before guests arrive.
Check The Entry View
Stand at the doorway and scan the room for anything that catches your eye negatively. A crooked picture frame, a lamp cord dangling, or a stack of books that looks messy. Fix these first impressions because that's what guests see when they walk in.
Reset The Balance
Look for areas that feel too full or too empty. Maybe a side table has too many coasters, while the coffee table looks bare. Move a decorative object or two to create visual equilibrium.
The goal is a room that feels intentional and calm.
Final Scent Check
Take a deep breath. Does the room smell fresh? If not, light a candle or open a window briefly.
Avoid heavy artificial scents—a subtle, clean smell is best. This last sensory check can make the room feel truly welcoming.
FAQ
How often should I deep clean my living room?
Aim for a deep clean every 1-2 months, with weekly maintenance like dusting and vacuuming to keep it guest-ready.
What's the fastest way to make a living room look clean?
Declutter surfaces, fluff pillows, and vacuum the main traffic areas. This takes 10-15 minutes and makes a huge visual difference.
How do I remove pet hair from my sofa?
Use a lint roller, a damp rubber glove, or a vacuum with a pet hair attachment. For fabric sofas, a squeegee also works well.
Can I use vinegar to clean my living room?
Yes, a mixture of equal parts water and white vinegar is great for windows, mirrors, and hard surfaces. Avoid it on natural stone or unsealed wood.
How do I keep my living room smelling fresh between cleanings?
Open windows daily, use a bowl of baking soda to absorb odors, and place a few drops of essential oil on a cotton ball near vents.
Conclusion
A guest-ready living room doesn't require a deep clean every time someone knocks. Focus on high-impact areas like floors, surfaces, and seating, and you'll be set in minutes. These 20 tips are designed to help you maintain a welcoming space without the stress.
Pick a few that fit your routine and stick with them. Your living room will always feel fresh and ready for company, even on short notice.


