A bedroom should feel like a retreat, not a storage unit. But between laundry, dust, and clutter, that peaceful vibe can slip away fast. The good news?
A few targeted cleaning hacks can soften the entire space without a full renovation. These ideas focus on making your bedroom feel lighter, cleaner, and more inviting. Think fresh-smelling sheets, dust-free surfaces, and organized drawers that actually stay tidy.
Each hack is simple to try and delivers noticeable results. Ready to turn your bedroom into a softer, calmer haven? Let's dive into 17 practical cleaning hacks that work with your routine, not against it.
1. Refresh Your Mattress with Baking Soda and Essential Oils
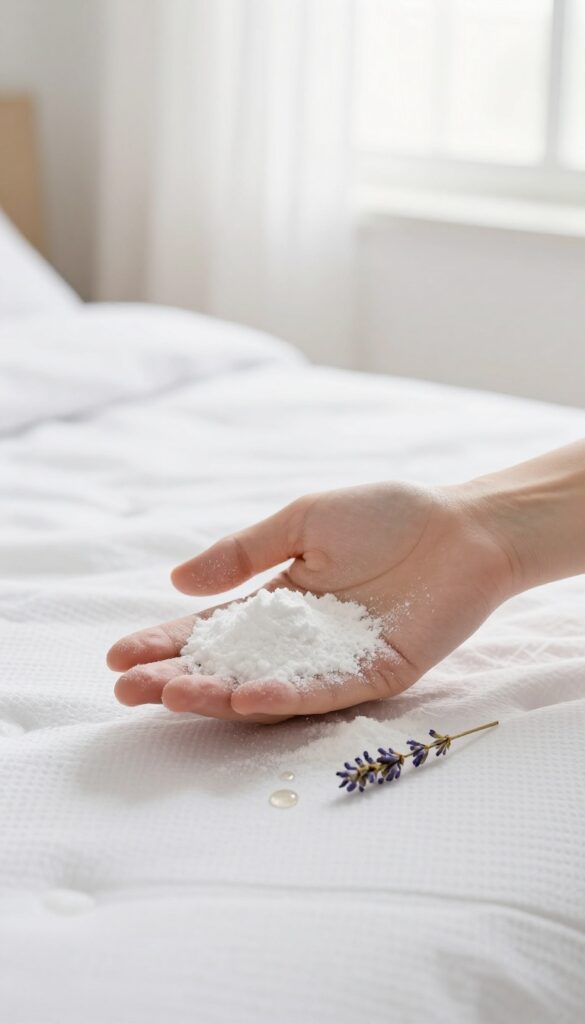
Your mattress works hard every night, absorbing sweat, oils, and dust mites. Over time, it can start to smell stale and feel less inviting. A quick refresh with baking soda and essential oils can bring it back to life without harsh chemicals or expensive sprays.
Sprinkle baking soda mixed with a few drops of lavender oil over your mattress, let it sit for 15 minutes, then vacuum thoroughly. The baking soda neutralizes odors while the lavender leaves a subtle calming scent. This simple hack makes your bed feel fresher and more relaxing.
Why It Works
Baking soda is a natural deodorizer that absorbs moisture and odors. Lavender oil adds a gentle fragrance known for its calming properties. Together, they tackle the root cause of mattress smells without masking them.
How To Do It Right
Remove all bedding first. Sprinkle a generous layer of baking soda mixed with 5-10 drops of lavender oil evenly over the mattress. Let it sit for at least 15 minutes, or longer for deeper odors.
Vacuum using the upholstery attachment to lift everything away.
When To Refresh
Do this every three months or whenever your mattress feels less fresh. It's especially helpful after allergy season or if you've been sick. Regular care extends mattress life and keeps your sleep space truly clean.
2. Use a Lint Roller on Lampshades and Fabric Headboards
Lampshades and fabric headboards are dust magnets that often get overlooked during regular cleaning. A lint roller is the perfect tool to tackle these soft surfaces without any hassle. It lifts dust, pet hair, and lint in seconds, leaving everything looking fresh and new.
Run a lint roller over your lampshades and headboard weekly to keep them dust-free. This quick habit prevents buildup that can dull fabrics and trigger allergies. For best results, use a fresh sheet each time and roll in overlapping strokes.
Why Lint Rollers Work So Well
Lint rollers have a sticky surface that grabs fine particles without damaging delicate fabrics. They're gentle enough for silk or linen lampshades and effective on plush headboards. Unlike vacuum attachments, they don't disturb the fabric's texture or cause fraying.
How To Clean Different Fabrics
For smooth lampshades, roll gently in one direction to avoid tearing. On textured headboards, press firmly and roll in multiple directions to reach crevices. If the roller loses stickiness, peel off the used sheet and continue with a fresh one.
When To Replace Your Lint Roller
Replace the roller when the adhesive no longer picks up dust effectively. Most rollers last for several uses, but heavy-duty cleaning may require more frequent changes. Keep a spare roller in your cleaning caddy for quick touch-ups.
3. Wash Pillows with Tennis Balls for Fluffiness
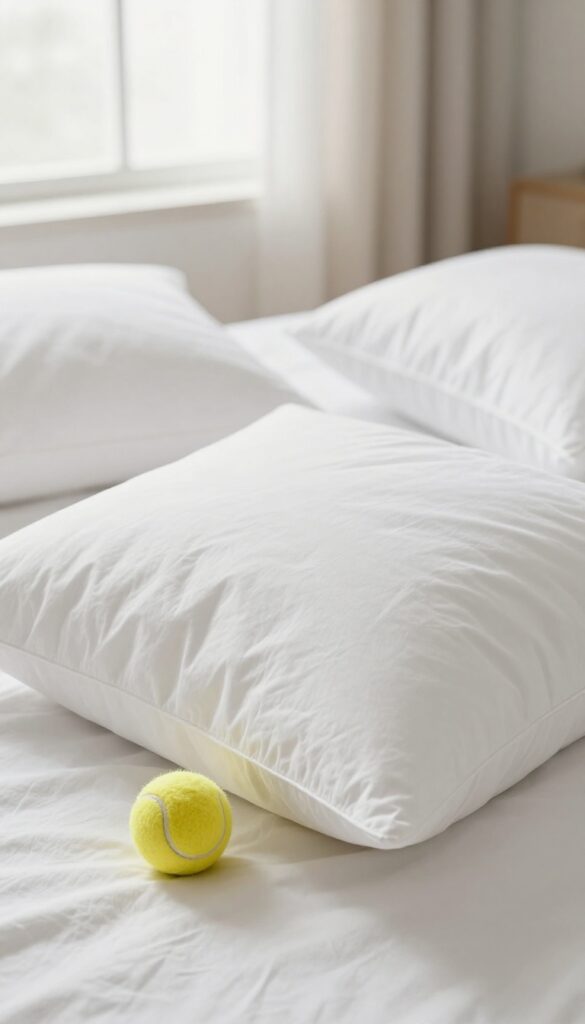
Pillows lose their bounce over time as filling clumps together from sweat, oils, and nightly use. Instead of replacing them, a simple wash with two tennis balls can restore their original loft. The balls thump around in the dryer, breaking up lumps and redistributing the fill evenly.
The result is a pillow that feels plump, supportive, and ready for a good night's sleep.
Why Tennis Balls Work
The constant bouncing action of tennis balls in the dryer physically breaks apart compressed fiber or down clusters. This mimics the effect of professional fluffing without the cost. For best results, use clean, new tennis balls to avoid transferring dirt or dye onto your pillows.
How To Wash Pillows Safely
Check the care label first—most synthetic and down pillows are machine washable. Use a gentle cycle with warm water and a mild detergent. Add an extra rinse cycle to remove all soap residue.
Wash two pillows at once to balance the machine load.
Drying Tips For Maximum Fluff
Tumble dry on low heat with the two tennis balls. Stop every 15 minutes to fluff and check for damp spots. Dry completely to prevent mildew.
For down pillows, add a clean sneaker to the dryer to further break up clumps.
When To Replace Pillows Instead
If washing and drying doesn't restore shape, or if the pillow has yellow stains or a musty smell that won't go away, it's time for a new one. Most pillows last 1 to 2 years, depending on material.
4. Vacuum Under the Bed with a Swiffer or Flat Mop
Under-bed dust bunnies are a sneaky source of allergens and that stale smell. Bending down to reach them is a pain, but a Swiffer or flat mop can do the job without straining your back. Just attach a microfiber cloth and slide it under the bed to collect dust, hair, and debris in minutes.
This hack turns a tedious chore into a quick, no-bend task. The flat head of a Swiffer or mop slides easily under most bed frames, and the microfiber cloth traps dust instead of pushing it around. For best results, use a slightly damp cloth to grab more particles, then switch to a dry one for a final pass.
Do this weekly to keep the air in your bedroom fresher and reduce allergy triggers.
Why It Works So Well
Microfiber is electrostatically charged, so it attracts and holds dust like a magnet. The flat mop head covers a wide area quickly, and the long handle lets you reach the center of the bed without crawling underneath. It’s a simple swap that makes under-bed cleaning almost effortless.
Pro Tips For Best Results
Use a fresh microfiber cloth each time to avoid redistributing dust. If your bed is low, look for a slim Swiffer or a mop with a pivoting head. For extra stubborn spots, spray a little all-purpose cleaner on the cloth.
And don’t forget to vacuum the floor before mopping to remove larger debris.
5. Deodorize Carpets with a DIY Powder
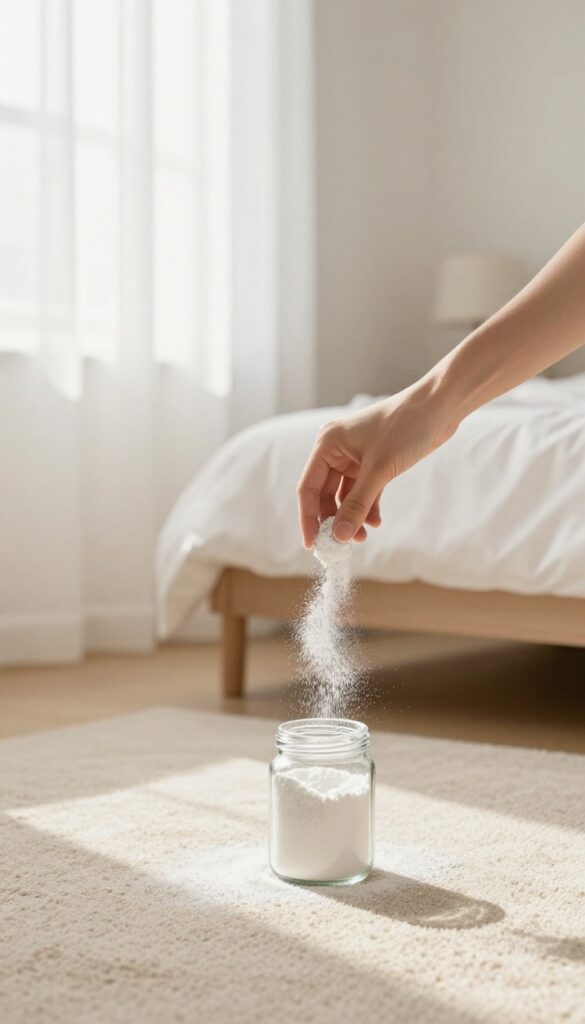
Carpets can trap odors from pets, shoes, and daily life, making your bedroom feel stuffy. A simple homemade powder can freshen them up without harsh chemicals. Just mix baking soda with a few drops of your favorite essential oil, sprinkle it on the carpet, let it sit for 20 minutes, and vacuum thoroughly.
This hack is quick, affordable, and leaves your room smelling naturally clean. Baking soda neutralizes odors, while essential oils add a gentle scent. It's a great way to refresh your space between deep cleanings.
Choose Your Scent
Pick an essential oil that promotes relaxation, like lavender, chamomile, or eucalyptus. Avoid strong citrus oils if you want a calming vibe. Use about 10-15 drops per cup of baking soda for a subtle scent.
Application Tips
Sprinkle the powder evenly over the carpet, focusing on high-traffic areas. Let it sit for at least 20 minutes—longer for tougher odors. Then vacuum slowly to pick up all the powder.
Your room will smell fresh without any synthetic fragrances.
Safety And Storage
Store any leftover powder in an airtight jar. Keep it away from moisture to prevent clumping. This mixture is safe for most carpets, but test a small area first if you have delicate fibers.
6. Organize Cords with Binder Clips
Charging cables have a way of tangling into a messy knot that ruins the calm of your bedside table. Binder clips offer a simple, low-cost fix that keeps cords within reach but out of sight. Clip one to the edge of your nightstand or desk, thread the cable through the metal loops, and watch the clutter disappear.
Why It Works
Binder clips create a dedicated anchor point for your cords, preventing them from sliding off the surface or falling behind furniture. The clip holds the cable steady while you plug and unplug, so you don't have to hunt for the end every time. Plus, they're removable and leave no sticky residue.
How To Set It Up
Choose a medium or large binder clip that can grip the edge of your nightstand or desk. Attach it so the metal loops face outward, then feed your charging cable through the loops. For multiple cords, use several clips spaced apart or a single larger clip with multiple loops.
Bonus Tips
Label each clip with a small sticker or washi tape to identify which cable belongs to which device. You can also clip a small cable organizer or zip tie to the loops for extra management. If your nightstand has a lip, use a clip with a wider opening to ensure a secure fit.
7. Use a Squeegee on Pet Hair from Rugs
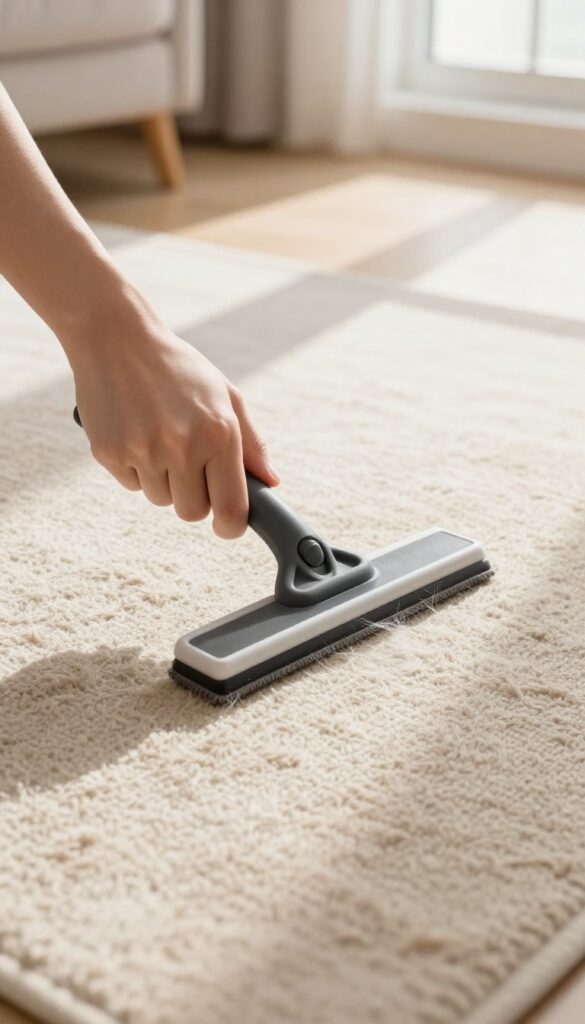
Pet hair can cling to rugs like static, making your bedroom feel less clean no matter how often you vacuum. A rubber squeegee—the same tool you use on windows—can lift that hair in seconds. It works by creating friction that gathers fur into easy-to-pick-up clumps.
This trick is faster than vacuuming and doesn't stir up dust, so your room stays fresher.
Grab a standard rubber squeegee and run it in one direction across your rug. The hair will ball up along the edge. Collect the clumps by hand or with a dustpan.
For low-pile carpets, use short strokes; for shag rugs, go with the grain. This method also works on upholstery and pet beds.
Why It Beats Vacuuming
Vacuum cleaners can push pet hair deeper into carpet fibers, especially on low-pile rugs. A squeegee pulls hair to the surface without tangling the brush roll. It also removes dander and loose dirt, which helps with allergies.
Plus, it's quiet—no loud motor to disturb a sleeping partner.
Best Rugs For This Hack
Flat-weave rugs, low-pile carpets, and wool rugs respond best to squeegeeing. Avoid using it on delicate silk or very high-pile shag, as it may snag fibers. For synthetic rugs, test a small corner first.
The squeegee leaves no residue and won't damage the backing.
Pro Tip For Maximum Hair Removal
Lightly mist the rug with water before squeegeeing. Damp fibers create more static, which helps hair clump faster. After collecting the hair, vacuum the rug to pick up any remaining fine particles.
This two-step process leaves your rug looking like new.
8. Wipe Baseboards with Dryer Sheets
Baseboards and window sills are dust magnets that often get overlooked during regular cleaning. A simple swipe with a dryer sheet not only picks up dust but also leaves a light, fresh scent behind. The anti-static properties help repel future dust, keeping those surfaces cleaner for longer.
Dryer sheets are designed to reduce static in the laundry, and that same property works wonders on dust-prone surfaces. Glide a used or new dryer sheet along baseboards, window sills, and even the tops of door frames. The sheet grabs dust easily and leaves a thin residue that discourages dust from settling again.
It's a quick, low-effort hack that makes a noticeable difference in how clean your bedroom feels.
Why It Works
Dryer sheets contain fabric softeners and anti-static agents that neutralize static electricity on surfaces. Dust particles are often held in place by static, so reducing that charge helps keep them from sticking. The sheet also picks up dust without scattering it into the air, making it a cleaner option than a dry cloth.
How To Do It Right
Use a fresh or lightly used dryer sheet—one that still has some softener left. Glide it along the baseboard or sill in one direction, applying light pressure. For stubborn spots, you can use a slightly damp sheet.
Toss the sheet when it looks dirty, and repeat monthly to maintain the anti-static effect.
Bonus Tip For Scent
Choose a dryer sheet with a scent you enjoy, like lavender or fresh linen. The light fragrance will linger on baseboards and sills, adding a subtle freshness to your bedroom. Avoid heavily perfumed sheets if you're sensitive to smells; unscented options work just as well for dusting.
9. Store Seasonal Bedding in Vacuum Bags
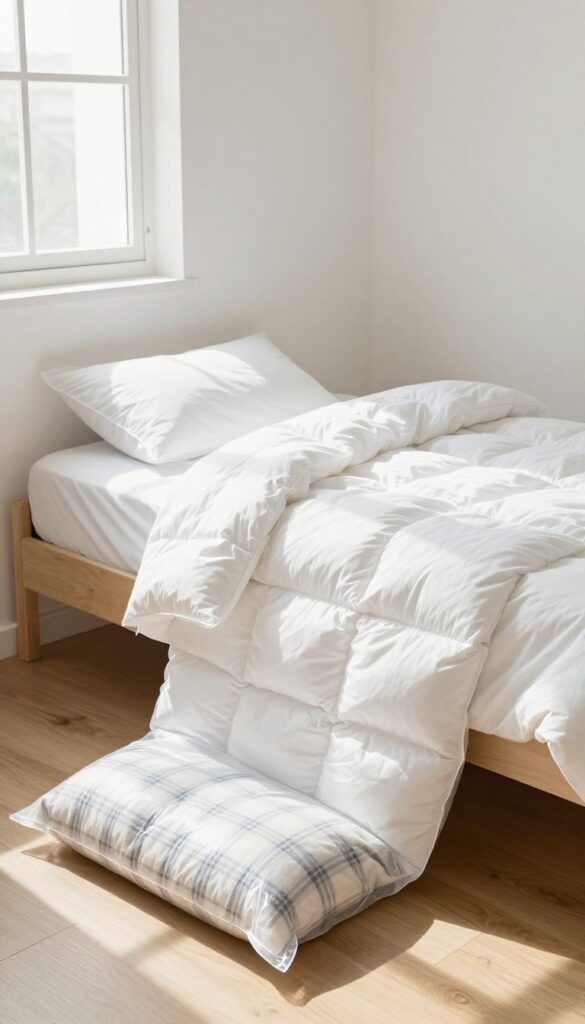
Bulky comforters and extra blankets can eat up closet space and collect dust when not in use. Vacuum-seal bags solve both problems by compressing bedding into slim, stackable packages. They also create a barrier against moisture, dust mites, and odors, so your winter quilts stay fresh until next season.
Vacuum bags are a game-changer for bedroom storage. They shrink bulky items by up to 80%, freeing up valuable closet or under-bed space. Plus, the airtight seal keeps bedding clean and protected from pests.
Just make sure items are completely dry before sealing to prevent mildew.
Choose The Right Bag Type
Look for reusable, heavy-duty vacuum bags with a double-seal zipper. Some come with a built-in pump, but using a vacuum cleaner hose is faster and creates a tighter seal. For delicate fabrics like down comforters, opt for bags with a protective layer to prevent punctures.
Prep Bedding Properly
Wash and dry bedding thoroughly before storing. Even a little moisture can lead to mold inside the sealed bag. Fold items neatly to avoid creases, and consider adding a lavender sachet or cedar block for a fresh scent.
Maximize Storage Space
Stack compressed bags flat under the bed or on high closet shelves. Label each bag with the contents and season so you can grab what you need without opening everything. Rotate bags seasonally to keep your bedroom clutter-free year-round.
10. Clean Windows with Vinegar and Newspaper
Windows are the eyes of your bedroom, and when they're smudged, the whole room feels dimmer. A simple vinegar-and-newspaper trick can restore that crystal-clear sparkle, letting in more natural light and making your space feel instantly airier. This old-school method is cheap, chemical-free, and surprisingly effective.
Mix equal parts white vinegar and water in a spray bottle. Mist the solution onto the glass, then crumple a sheet of newspaper into a ball and wipe in circular motions. The newspaper's texture lifts grime without leaving lint, and the vinegar cuts through grease and residue.
Finish with a dry section of newspaper for a streak-free shine. Avoid paper towels—they often leave fibers behind.
Why Newspaper Works Best
Newspaper has a slightly abrasive texture that scrubs away stuck-on dirt without scratching the glass. Its absorbency also prevents streaking, unlike microfiber cloths that can redistribute oils if not perfectly clean. Plus, it's a great way to recycle old papers.
Pro Tips For A Flawless Finish
Clean on a cloudy day—direct sunlight dries the solution too fast, leaving streaks. Wipe from top to bottom to catch drips, and use a separate dry sheet for the final pass. For tough spots like dried bug splatters, let the vinegar solution sit for a minute before wiping.
Extend The Freshness
Add a few drops of lemon essential oil to the vinegar mixture for a light, natural scent. The oil also helps repel dust, keeping your windows cleaner longer. Store leftover solution in a labeled spray bottle for quick touch-ups.
11. Use a Fabric Steamer to Freshen Curtains and Upholstery
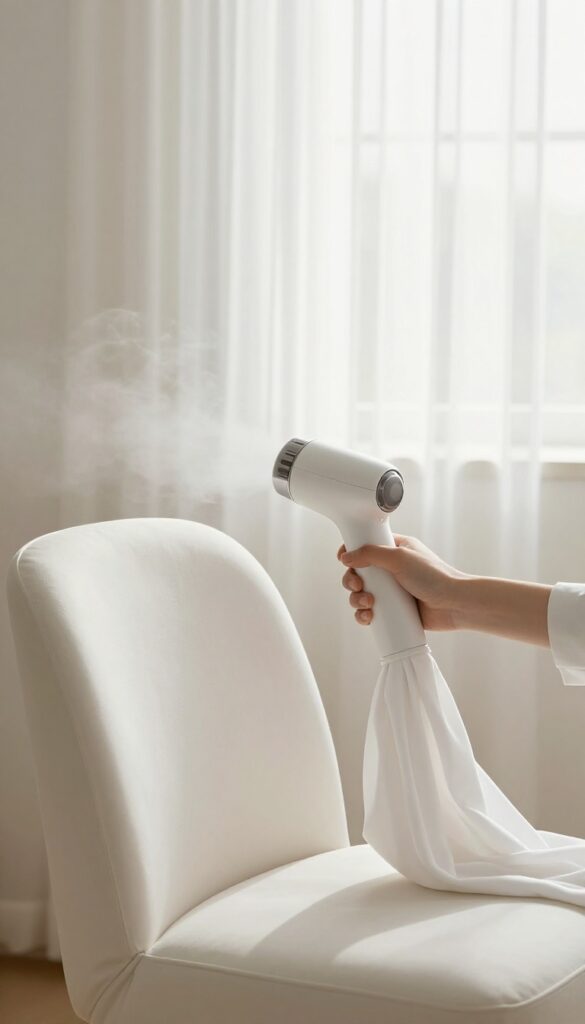
Curtains and upholstered chairs can trap odors, dust, and wrinkles over time, making your bedroom feel less fresh. A handheld fabric steamer offers a quick, chemical-free way to revive these soft surfaces. The heat kills dust mites and loosens dirt, while the steam relaxes fibers for a smooth, clean look.
Steaming is faster than washing and gentler on fabrics. It's especially useful for items that are difficult to remove or dry clean. Plus, the process adds a subtle freshness without heavy perfumes.
Why Steam Beats Washing
Washing curtains or chair covers can be a hassle—taking them down, waiting for them to dry, and rehanging. Steaming cuts that time in half. The high temperature kills dust mites and bacteria, which is a big win for allergy sufferers.
And because you're not soaking the fabric, there's no risk of shrinkage or color bleeding.
How To Steam Curtains And Upholstery
Start by vacuuming the fabric to remove loose dust. Then, fill your steamer with water and let it heat up. Hold the steamer head a few inches from the fabric and move it in slow, overlapping strokes.
For curtains, work from top to bottom. For upholstery, focus on seat cushions and armrests. Let the fabric dry completely before using.
Pro Tips For Best Results
Use distilled water to avoid mineral buildup in your steamer. Test a hidden area first to ensure the fabric can handle heat. For stubborn wrinkles, stretch the fabric taut while steaming.
And don't forget to open a window—steam can increase humidity, so good airflow helps everything dry faster.
12. Add a Drop of Lavender Oil to Your Vacuum Filter
Vacuuming is a chore, but it doesn't have to leave your room smelling like dust and motor. A simple trick with lavender oil can transform the experience and leave your bedroom feeling like a spa. All it takes is one drop and a cotton ball.
The scent of lavender is known for its calming properties, making it perfect for a bedroom. By adding a drop to your vacuum filter or bag, the aroma gets dispersed as you clean, filling the room with a gentle, relaxing fragrance. It's an easy way to make vacuuming feel less like a task and more like a ritual.
How To Do It Right
Grab a cotton ball and add just one drop of pure lavender essential oil. Place the cotton ball inside the vacuum canister or bag, away from the motor and filter. Avoid using more than a drop, as too much oil can damage the vacuum or make the scent overpowering.
Why Lavender Works Best
Lavender is a natural deodorizer and has been shown to reduce stress and promote better sleep. Unlike synthetic air fresheners, it doesn't just mask odors—it leaves a clean, subtle scent that lingers. Plus, it's gentle on sensitive noses.
Safety Tips To Keep In Mind
Always use pure essential oil, not fragrance oils, which can be sticky and harm your vacuum. Replace the cotton ball each time you vacuum to keep the scent fresh. If you have pets, check that lavender is safe for them—some animals are sensitive to essential oils.
13. Declutter Nightstands with a Single Tray
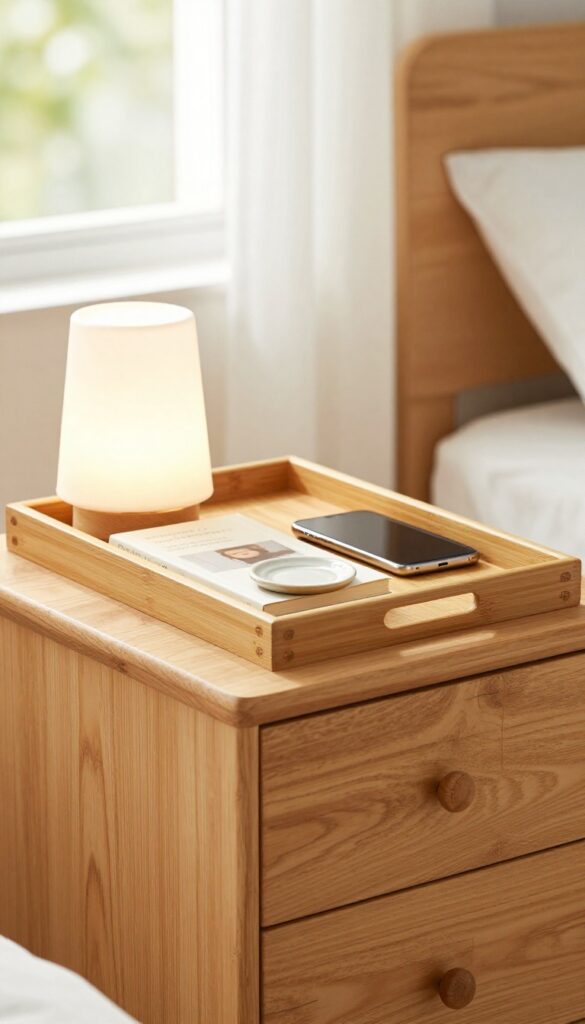
Nightstands are prime real estate for clutter. Phones, glasses, books, water bottles, and random odds and ends accumulate fast, turning a small surface into a chaotic pile. A simple tray changes that by giving everything a designated home.
It creates a neat focal point and prevents random items from spreading.
Grab a tray that fits your nightstand—wood, metal, or ceramic all work. Place your essentials inside: a lamp, a book, your phone, and maybe a coaster. That's it.
The tray acts like a corral, keeping items from sliding around and making dusting a breeze. When you need to clean, just lift the tray and wipe the surface underneath. No more moving individual items.
This one hack instantly makes your nightstand look intentional and organized.
Pick The Right Tray
Choose a tray that's large enough to hold your daily items but not so big that it covers the entire nightstand. A rimmed tray works best to keep things from rolling off. Materials like bamboo, marble, or lacquered wood add a soft, polished look.
Avoid trays with sharp edges that could snag fabrics.
Edit What Goes On The Tray
Limit the tray to three or four items you use every night. A lamp, a book, your phone, and a small dish for jewelry or glasses. Everything else—loose change, receipts, old water bottles—needs to find a home elsewhere.
This editing step is what keeps the tray from becoming a clutter magnet itself.
Maintain The Habit
Once a week, clear the tray completely and wipe it down. Return only the essentials. This quick reset prevents items from multiplying.
If you notice the tray starting to overflow, it's a sign you need to remove something. Consistency is key to keeping your nightstand a calm, soft surface.
14. Dust Ceiling Fans with a Pillowcase
Ceiling fans are dust magnets, and when you turn them on, that dust goes everywhere—especially onto your bed. But cleaning them doesn't have to mean a mess. A simple pillowcase trick makes the job quick and tidy.
Slip a pillowcase over each fan blade, then pull it off to trap dust inside. No mess, no dust clouds falling on your bed. It's one of those cleaning hacks that feels almost too simple, but it works brilliantly.
Why The Pillowcase Method Works
A pillowcase acts like a dust bag. When you slide it over the blade, the dust gets trapped inside the fabric instead of floating into the air. You can then turn the pillowcase inside out over a trash can and shake the dust out.
No need for a ladder or a complicated tool—just a clean pillowcase.
Step-by-step: How To Do It
Start with a clean, dry pillowcase. Stand on a sturdy step stool or ladder so you can reach the fan blades comfortably. Take one blade and slide the pillowcase over the entire length, then gently pull it back toward you.
The dust will stay inside the case. Repeat for each blade. When you're done, take the pillowcase outside or over a trash can, turn it inside out, and shake the dust loose.
Wash the pillowcase afterward.
Pro Tips For A Dust-free Fan
For best results, clean your fan blades every month or two, especially during seasons when you use the fan often. If the dust is caked on, lightly spray the pillowcase with water or a dusting spray before sliding it on. This helps the dust stick to the fabric.
Also, consider cleaning the fan in the morning when you're less likely to disturb your sleep schedule.
15. Use Drawer Dividers from Shoeboxes
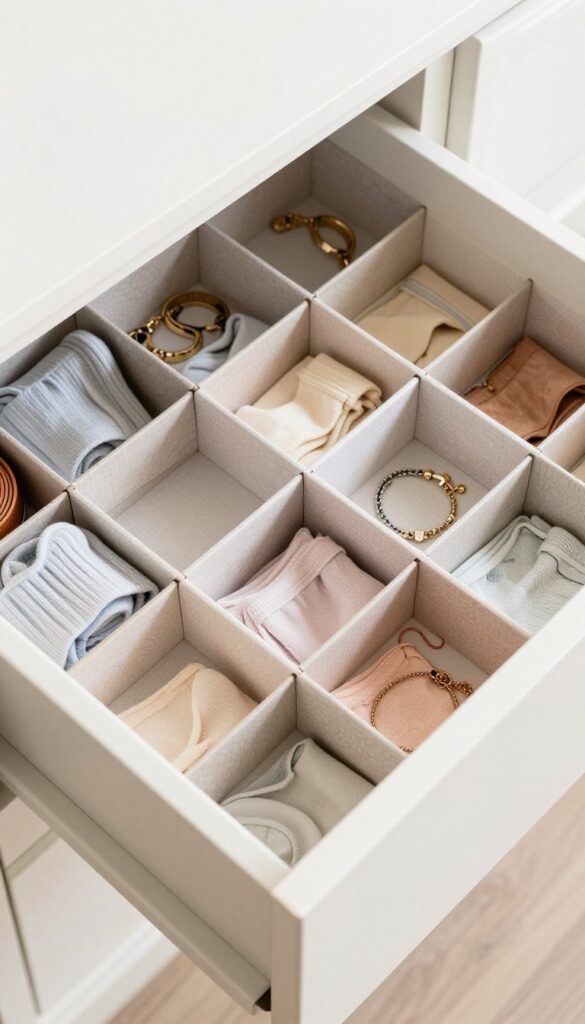
Drawers can quickly become a black hole of mismatched socks and tangled accessories. Before you buy expensive organizers, look at the shoeboxes piling up in your closet. With a few snips, they transform into custom dividers that keep everything in its place.
Shoeboxes are sturdy, free, and the perfect size for most dresser drawers. By cutting them into custom shapes, you can create compartments for underwear, socks, belts, or jewelry. This hack not only saves money but also reduces waste.
Measure And Cut
Start by measuring the depth and width of your drawer. Cut the shoebox lid and base into strips that fit snugly. Use scissors or a utility knife for clean edges.
You can even leave the box intact and cut slots to slide dividers into place.
Arrange For Easy Access
Place dividers to separate items by type or frequency of use. For example, keep everyday socks in the front and seasonal accessories in the back. The dividers prevent piles from toppling over, so you can grab what you need without rummaging.
Customize With Fabric Or Paper
If plain cardboard feels too basic, cover the dividers with wrapping paper or fabric scraps. Use double-sided tape or glue to attach the covering. This adds a personal touch and makes the organizers blend with your drawer's interior.
16. Wipe Down Light Switches and Door Handles Weekly
Light switches and door handles are some of the most touched surfaces in your bedroom, yet they often get overlooked during cleaning. Over time, they collect oils, dirt, and germs from your hands, which can make the room feel less fresh. A quick weekly wipe keeps them spotless and reduces the spread of bacteria, contributing to a cleaner, softer space.
Why These High-touch Areas Matter
Think about how many times you flip a light switch or turn a doorknob each day. Those repeated touches transfer skin oils and grime, which can build up into visible smudges or sticky residue. More importantly, these surfaces can harbor germs that affect your health.
Keeping them clean is a simple way to maintain a hygienic bedroom environment.
Best Cleaning Tools And Products
You don't need anything fancy. A microfiber cloth and a gentle all-purpose cleaner or disinfectant wipe work perfectly. For switches, make sure the cloth is damp, not wet, to avoid moisture seeping into electrical components.
A cotton swab dipped in rubbing alcohol can help clean tight crevices around the switch plate.
Quick Weekly Routine
Set a reminder to wipe down all light switches and door handles in your bedroom once a week. Include closet doors and any drawer pulls you use frequently. This takes less than two minutes but makes a noticeable difference in how clean the room feels.
Pair it with your regular dusting or vacuuming for an efficient cleaning session.
17. End the Day with a 5-Minute Tidy
A calm bedroom starts with a clear surface. When you walk into your room after a long day, the last thing you want is to see clutter staring back at you. That's where a simple nightly reset comes in—just five minutes before bed can make all the difference.
Set a timer for five minutes and move through your room with purpose. Fluff the pillows so they look inviting, fold any throw blankets neatly at the foot of the bed, and clear off nightstands or dresser tops. Put away stray items like books, glasses, or water bottles.
This tiny ritual prevents mess from piling up and trains your brain to associate the bedroom with order and rest.
Why Five Minutes Works
Five minutes is short enough to feel doable every night, but long enough to make a visible difference. It's not about deep cleaning—it's about resetting the visual calm. Over time, this habit becomes automatic, and your room stays consistently tidy without a big weekly effort.
What To Focus On
Prioritize the surfaces you see first when you walk in: the bed, the nightstand, and the floor. Fluffing pillows and smoothing the duvet takes seconds but transforms the look of the room. Clearing off surfaces removes visual noise, and a quick sweep of the floor for shoes or clothes keeps the space feeling open.
Make It A Ritual
Pair your tidy-up with something you already do, like brushing your teeth or putting on pajamas. Keep a small basket or tray on your dresser to catch items that need to be put away later. The goal is to make the habit frictionless so you stick with it.
FAQ
How often should I clean my bedroom for a softer feel?
Aim for a quick tidy daily (5 minutes) and deeper cleaning weekly. Focus on dusting, vacuuming, and washing linens to maintain a fresh atmosphere.
Can I use essential oils directly on my mattress?
No, always mix essential oils with baking soda or a carrier oil first. Direct application can stain or damage mattress fabric.
What's the best way to remove pet hair from bedding?
Use a lint roller or rubber glove. Dampen the glove slightly and run it over sheets and blankets to gather hair into clumps.
How do I keep my bedroom smelling fresh without chemicals?
Open windows daily, use baking soda on carpets, and add a drop of essential oil to your vacuum filter or a diffuser.
Is it necessary to wash pillows regularly?
Yes, wash pillows every 3-6 months to remove dust mites, oils, and odors. Use tennis balls in the dryer to keep them fluffy.
Conclusion
A softer bedroom isn't about buying new furniture or spending hours scrubbing. It's about small, consistent habits that make the space feel lighter and more restful. Each of these 17 cleaning hacks targets a specific area, from fresher linens to clutter-free surfaces.
Try incorporating one or two ideas each week. Over time, you'll notice a calmer, cleaner environment that helps you unwind faster. Your bedroom should be your sanctuary—these hacks help it feel that way every day.


