Last updated on June 27th, 2026 at 03:17 pm
Your patio cushions might look beyond saving after a season of rain, pollen, and spilled lemonade, but they're probably just a few steps away from bouncing back. You don't need harsh chemicals or professional gear to make them look and smell fresh again.
With the right sequence of simple actions, you can lift dirt, erase stains, and protect the fabric for months to come. These 13 steps turn a dreaded chore into a straightforward weekend project that actually delivers results.
Let's walk through each one so your outdoor seating feels like new.
1. Check the Care Tag First
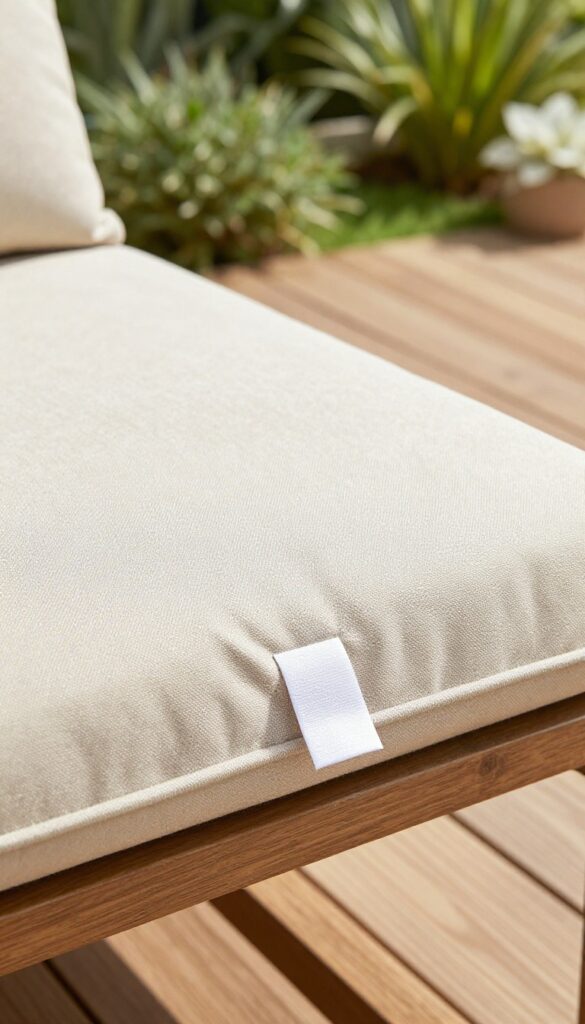
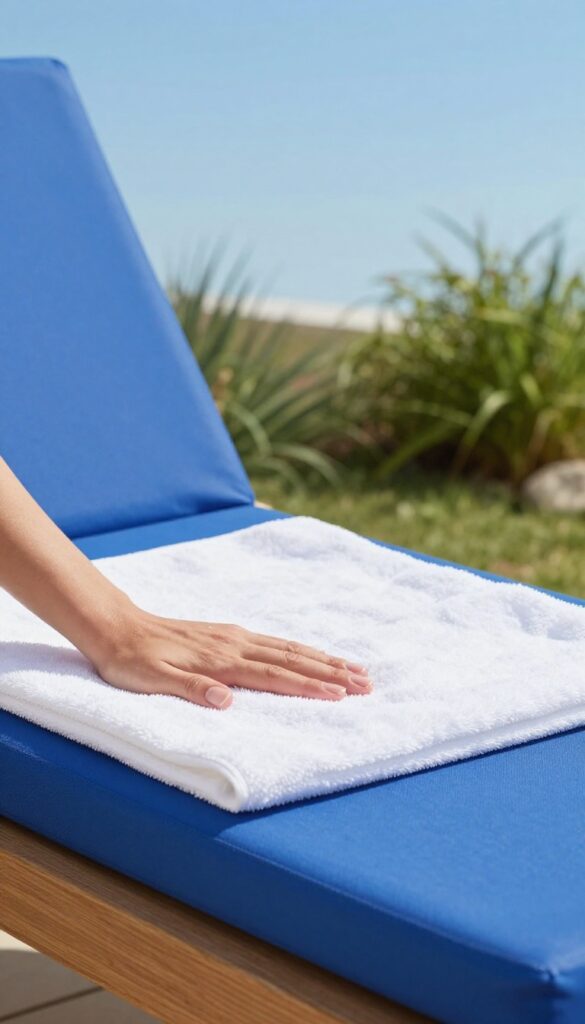
Before you grab any cleaner or scrub brush, take thirty seconds to find the care tag on your cushion. That small white label holds the key to cleaning safely without ruining the fabric. The code printed on it—usually W, S, WS, or X—tells you exactly which cleaning method is allowed.
Skipping this step is the number one reason cushions get damaged during cleaning. Water-based cleaners can set stains on solvent-only fabrics, and harsh chemicals can discolor or weaken the fibers. Knowing the code upfront saves you time, money, and frustration.
What The Codes Mean
W stands for water-based cleaning only. You can use mild soap and water without worry. S means solvent-based cleaning only, so water is off-limits.
WS allows both water and solvent cleaners, giving you flexibility. X means vacuum or brush only—no liquids at all. If the tag is missing or faded, treat the cushion as an X until you test a hidden spot.
Where To Find The Tag
Care tags are usually sewn into a seam on the underside or back of the cushion. Flip the cushion over and look along the zipper line or the edge of the fabric. If you can't find it there, check inside the zippered cover—sometimes the tag is tucked away inside.
What If The Tag Is Gone?
No tag? No problem. Test a small, inconspicuous area with a drop of water and a dab of mild soap.
Blot with a white cloth. If color transfers or the fabric darkens, stick to dry cleaning methods like vacuuming and brushing. When in doubt, go with the gentlest option first.
2. Brush Off Loose Dirt and Debris
Before you introduce any water or cleaning solution, you need to get rid of the dry stuff first. Dust, pollen, leaves, and cobwebs can turn into a muddy mess if you skip this step. A quick dry brushing removes the bulk of surface grime so your cleaner can work on the actual stains, not just wet dirt.
Choose The Right Tool
A stiff-bristled brush works best for woven fabrics like polyester or olefin. Use a soft-bristled brush or a dry microfiber cloth for delicate materials like acrylic or cotton. Avoid wire brushes—they can snag and fray the fibers.
Work In One Direction
Brush in the same direction as the weave to lift dirt without pushing it deeper. Start at the top of the cushion and work your way down. For stubborn debris, use a vacuum with a brush attachment instead of scrubbing harder.
Don't Forget The Crevices
Flip the cushion over and brush the underside, especially along seams and zippers. Crumbs and pollen love to hide there. A quick once-over now prevents mold and staining later.
3. Vacuum Every Crevice
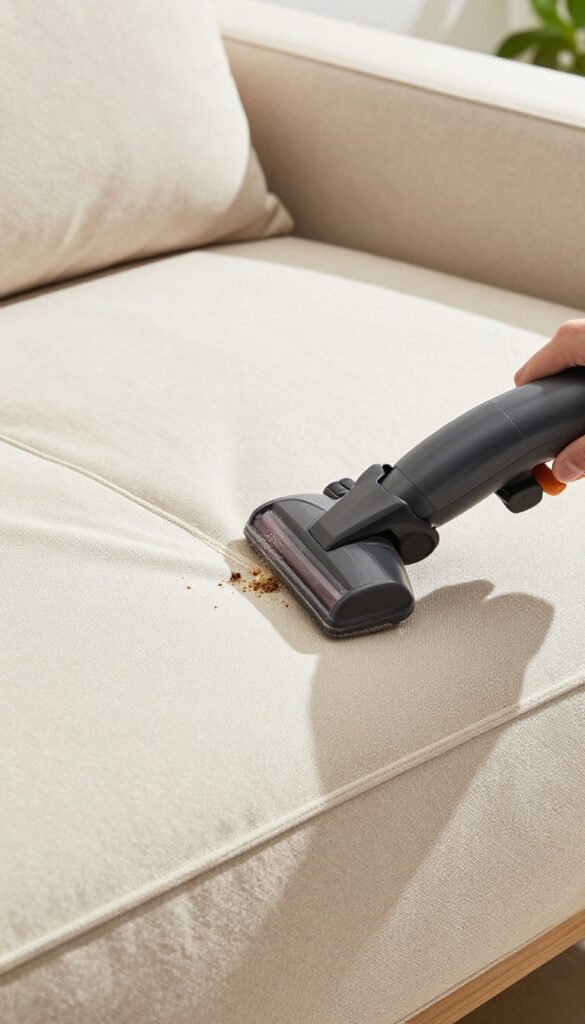
You might think a quick shake or a brush-off is enough, but crumbs and dust love to hide in seams and zipper tracks. A vacuum with an upholstery attachment pulls out the grit that scrubbing alone would just grind deeper into the fabric. This step is especially important before you add any moisture, because wet dirt turns into mud.
Take your time with the vacuum. Work the nozzle along every seam, around piping, and into the crevice where the cushion meets the frame. Don't forget the underside and the zipper channel, where pet hair and pollen collect.
A crevice tool helps reach tight spots, but a soft brush attachment is gentler on delicate fabrics.
Why Dry Cleaning First Matters
Wet cleaning loosens dirt, but it can also push surface grime deeper into the fibers if you haven't removed the loose stuff first. Vacuuming lifts away abrasive particles that would otherwise act like sandpaper when you scrub. It also prevents muddy streaks from forming when you apply your cleaning solution.
The Right Tool For The Job
An upholstery attachment is ideal because it has a wide, flat head with soft bristles that won't snag the fabric. If your vacuum has adjustable suction, use a lower setting on delicate materials like cotton or linen. For outdoor cushions with mesh or quick-dry foam, a handheld vacuum with a brush attachment works just as well.
Don't Skip The Zippers And Seams
Zipper tracks are magnets for crumbs and sand, and they can cause the zipper to jam if left uncleaned. Run the crevice tool along the entire zipper line, then open the zipper halfway and vacuum inside the flap. Seams collect dust and pollen, so go over them slowly from both directions.
4. Spot Test Your Cleaning Solution
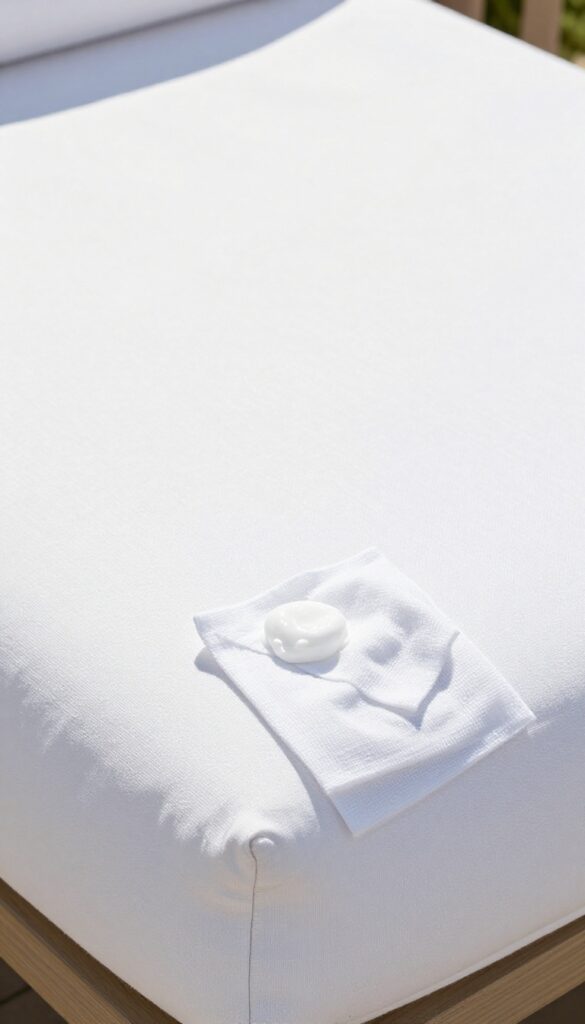
You've mixed up a cleaning solution and you're ready to scrub. But before you go all in, take a moment to spot test. This quick step can save you from a discolored or damaged cushion that's worse than the original dirt.
Spot testing is a safety net that ensures your cleaning solution won't harm the fabric. It's especially important for natural fibers like cotton or linen, which can react unpredictably to detergents. Even dedicated fabric cleaners can cause fading or bleeding on certain dyes.
Choose An Inconspicuous Spot
Flip the cushion over or look for a hidden area, like the bottom or a corner. This way, if the test goes wrong, no one will see it. Make sure the spot is representative of the main fabric, not just a seam or trim.
Apply And Wait
Dab a small amount of your cleaning solution onto a white cloth or cotton swab, then gently rub it on the test spot. Wait at least five minutes—longer if the fabric is thick or heavily soiled. Check for any color transfer, discoloration, or texture change.
Rinse And Evaluate
After the wait, rinse the test area with a little water and blot dry. Compare it to the surrounding fabric. If you see any fading, darkening, or damage, switch to a milder cleaner or try a different product altogether.
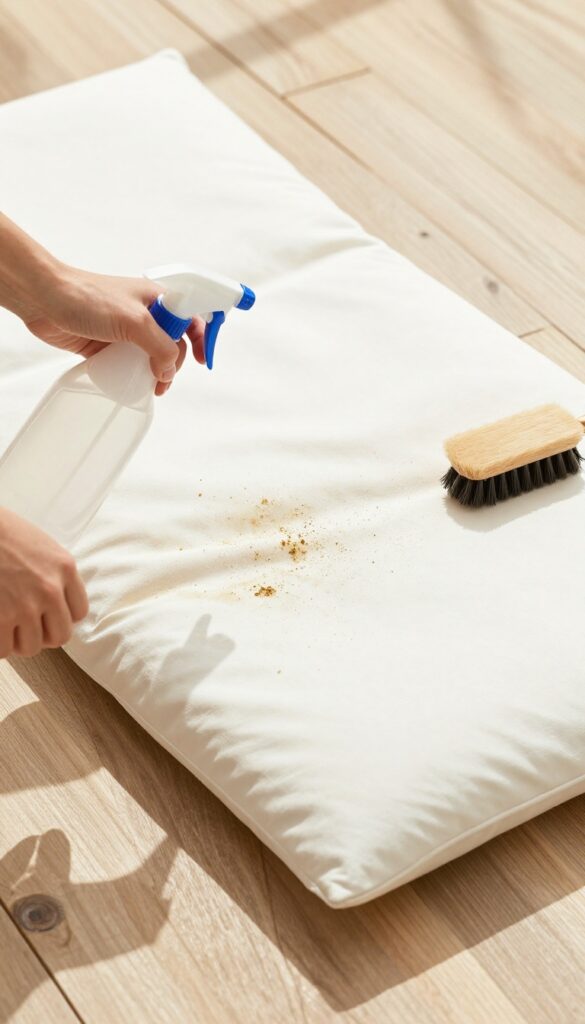
5. Pre-Treat Stubborn Stains
Some stains just won't budge with a simple scrub. Grease from burgers, wine spills, and bird droppings need a little extra attention before you dive into the full wash. A quick pre-treatment breaks down the stain so the main cleaning can lift it away completely.
Targeting tough stains before the main wash gives you a much better chance of removing them entirely. The key is to use a stain remover or a simple household solution that's safe for your fabric. Apply it directly, let it work, then gently scrub.
This step prevents stains from setting further during the wash.
Choose Your Stain Fighter
For grease and oil, a dab of dish soap works wonders. For wine or bird droppings, diluted white vinegar (1 part vinegar to 2 parts water) is effective without being harsh. Always test on a hidden spot first to make sure it doesn't discolor the fabric.
Apply And Wait
Use a clean cloth or sponge to apply a small amount of your chosen remover directly to the stain. Let it sit for 10–15 minutes. This dwell time allows the solution to penetrate and loosen the stain particles.
Scrub Gently
After waiting, use a soft-bristled brush or a sponge to scrub the area in a circular motion. Don't go too hard—you want to lift the stain, not damage the fabric. Rinse the area with a little water to remove any residue before moving on to the full cleaning step.
6. Hand Wash with a Soft Brush
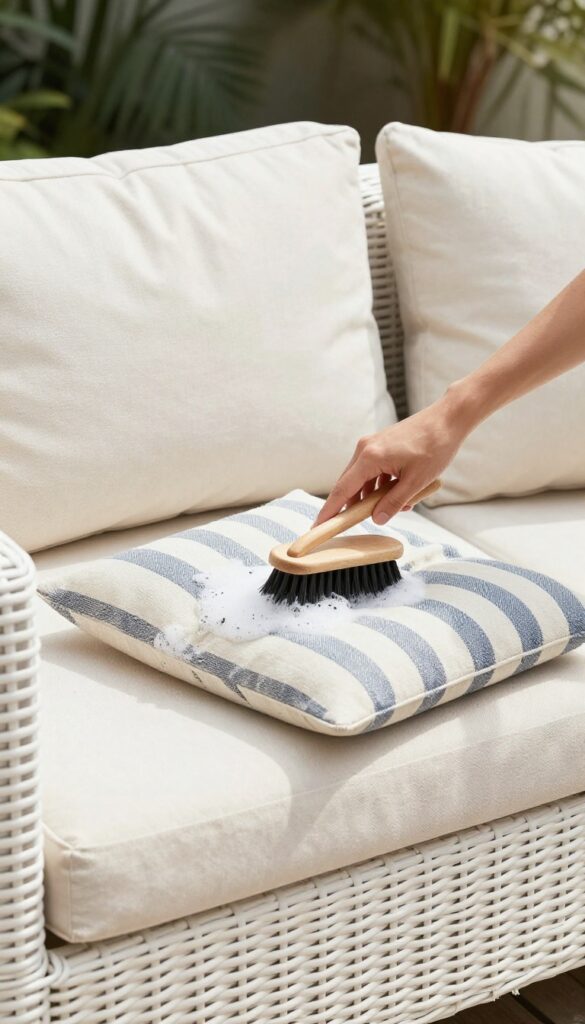
Now that your cushion is prepped and your cleaning solution is ready, it's time to actually scrub. Hand washing gives you control over pressure and coverage, so you can treat stains without damaging the fabric. A soft-bristled brush or sponge is all you need to lift dirt without fraying or pilling.
Choose The Right Brush
Not all brushes are created equal. A soft-bristled brush (like a nail brush or a dedicated upholstery brush) works best for most outdoor fabrics. Avoid wire brushes or stiff scrub pads—they can scratch or abrade the fibers.
If you're dealing with delicate fabric like Sunbrella, a sponge or microfiber cloth is a safer bet.
Dip And Scrub In Circles
Dip your brush into the cleaning solution and gently scrub the cushion using circular motions. Start from the top and work your way down, focusing extra time on any dirty spots or stains. The circular motion helps loosen embedded dirt without pushing it deeper into the fabric.
Don't Forget The Edges And Seams
Dirt loves to hide along the edges, seams, and piping. Pay special attention to these areas by scrubbing along the seam lines. If your cushion has a zipper, avoid getting too much water inside—scrub around it carefully.
A clean seam makes the whole cushion look fresher.
Work In Sections For Even Cleaning
If your cushion is large, divide it into quadrants and scrub one section at a time. This ensures you don't miss spots and that the cleaning solution doesn't dry on the fabric before you rinse. Keep a spray bottle of plain water handy to re-wet any areas that start to dry out.
7. Rinse Thoroughly with a Hose
Once you've scrubbed away the grime, it's time to wash off all that soapy residue. Leftover cleaner can attract dirt, fade fabrics, or cause skin irritation, so a complete rinse is non-negotiable. A garden hose with a spray nozzle is your best friend here—just avoid cranking up the pressure too high.
Start by spraying from the top of the cushion and work your way down. This ensures soap runs off without re-soaking clean areas. Keep the nozzle at a medium setting—enough to dislodge suds but not so forceful that it drives water deep into the foam core.
Pay extra attention to zippers, seams, and piping where suds like to hide. Tilt the cushion vertically to let water run off, and give it a final once-over until no bubbles appear.
Why Low Pressure Wins
High-pressure sprayers might seem efficient, but they can force moisture past fabric coatings and into the cushion fill. Once water gets trapped inside, you're looking at mold, mildew, and a longer drying time. Stick to a gentle, wide spray pattern that covers more area without blasting the fabric.
Check For Hidden Suds
Soap loves to linger in folds, corners, and around zipper tracks. Run your hand over the cushion surface after rinsing—if it feels slippery or smells like cleaner, keep spraying. A quick test: squeeze a small section of fabric.
If white foam appears, you've still got work to do.
The Final Squeeze
After rinsing, gently press the cushion with your palms or a clean towel to remove excess water. Don't wring or twist—that can distort the foam. This step speeds up drying and prevents water from pooling inside the cushion.
8. Squeeze Out Excess Water
After rinsing, your cushions are heavy with water. Getting that moisture out properly is key to preventing mildew and keeping the shape intact. You don't need to wring them like a wet towel—just gentle pressure does the trick.
Use Your Hands First
Start by pressing down firmly with your palms across the entire cushion surface. Work from the center outward to push water toward the edges. Repeat a few times until less water comes out.
Blot With A Clean Towel
Lay a dry, clean towel flat on the cushion and press down. The towel will absorb a surprising amount of moisture. Flip or switch to a dry section of the towel as needed.
This method is especially effective for cushions with thick foam.
Never Wring Or Twist
Twisting or wringing can distort the foam and damage the fabric's waterproof coating. It also creates creases that are hard to remove. Stick to pressing and blotting for a cushion that dries evenly and stays fluffy.
9. Dry in the Shade
You might be tempted to let the sun do the heavy lifting, but direct sunlight is actually one of the worst things for freshly cleaned cushions. UV rays can fade colors and break down fabric fibers, especially when the material is still damp and vulnerable. Drying in the shade takes a bit longer, but it keeps your cushions looking newer for much longer.
After rinsing, your cushions are heavy with water. The key is to let them dry completely without exposing them to harsh sunlight. Place them upright in a shaded, well-ventilated area—under a patio roof, a pergola, or even a large umbrella works well.
If you don't have natural shade, you can drape a light-colored sheet over a clothesline to create a makeshift canopy. Make sure air can circulate around each cushion; don't stack them or press them together. Flip them occasionally so both sides dry evenly.
Depending on humidity and thickness, this can take anywhere from a few hours to a full day. Be patient—tossing a damp cushion back on the furniture invites mildew and mold.
Why Shade Matters
Sunlight contains ultraviolet (UV) rays that break down the chemical bonds in outdoor fabrics like polyester, acrylic, and olefin. When the fabric is wet, those rays penetrate deeper and cause more damage. Fading is the most obvious sign, but the fabric also becomes brittle and loses its water-repellent finish.
Drying in the shade preserves both color and structural integrity.
Best Drying Spots
Look for areas with good airflow but no direct sun. A covered porch, a gazebo, or even a garage with the door open works well. If you're drying on a lawn, lay down a clean tarp or towel to keep the cushions from picking up grass stains.
For faster drying, use a fan to circulate air around them.
How To Tell They're Fully Dry
Don't rely on just the surface feel. Squeeze the cushion in the middle—if you feel any dampness or coolness, it's not ready. Check the zippers and seams, where water often hides.
A moisture meter (the kind used for wood or drywall) can give you a precise reading, but your hand works fine. When the cushion feels room-temperature and dry all the way through, it's good to go.
10. Flip and Repeat for the Other Side
It's easy to focus all your energy on the top of the cushion, but the underside collects just as much dirt, pollen, and moisture. Neglecting it can lead to mildew growth and uneven wear. Flipping the cushion and repeating the cleaning process ensures every surface gets the same fresh treatment.
Once the top side is completely dry, flip the cushion over. You'll likely see a surprising amount of grime on the bottom, especially if the cushion sits directly on a patio surface. Repeat the same steps: spray with cleaning solution, scrub gently, rinse thoroughly, and blot excess water.
Pay extra attention to corners and edges where dirt tends to accumulate. Allow the underside to dry fully before flipping back or storing.
Why The Underside Matters
The underside of outdoor cushions is constantly in contact with dirt, dust, and moisture from the ground or furniture frame. It's a prime spot for mildew spores to take hold, especially in humid climates. Cleaning both sides prevents musty odors and extends the life of the cushion fabric.
Drying Tips For The Bottom
After cleaning the underside, place the cushion on a clean, dry surface—like a towel or a drying rack—to allow airflow underneath. Avoid setting it directly on grass or concrete, which can wick moisture back into the fabric. Flip the cushion periodically to speed up drying and prevent any damp spots.
11. Deodorize with Baking Soda
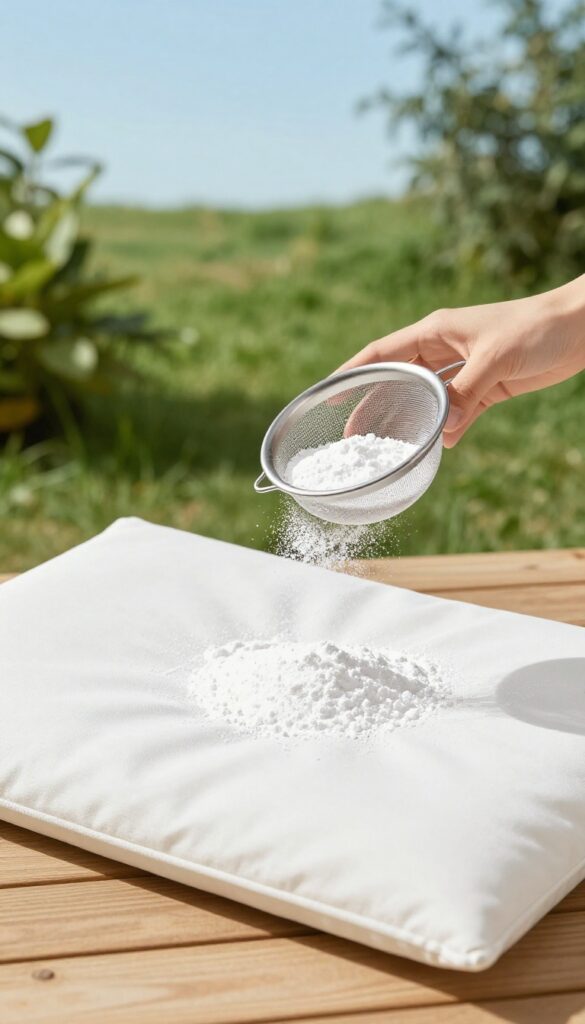
Even after a thorough cleaning, smells can linger deep inside cushion foam. Pet accidents, smoke from the fire pit, or just dampness that hung around too long can leave behind an odor that soap alone can't touch. Baking soda is a gentle, natural deodorizer that pulls those smells out without adding any chemical scent of its own.
This step works best when the cushions are completely dry. If you try it on damp fabric, the baking soda can clump and become hard to remove. Give your cushions a full day in the shade after washing, or use a fan to speed things along.
Once they're dry, you're ready to go.
How To Apply Baking Soda Evenly
Pour baking soda into a fine-mesh sieve or a salt shaker. This helps you dust it over the fabric in a thin, even layer instead of dumping clumps. Cover the entire surface of each cushion, including the sides and underside if those areas have absorbed odors too.
Let It Sit Long Enough
Baking soda needs time to absorb odors. Let it rest on the cushions for at least two hours, but overnight is even better for stubborn smells. If you're dealing with heavy pet odor or mildew smell, give it the full 12 hours.
The longer it sits, the more odor it will pull out.
Vacuum Thoroughly
Use a brush attachment on your vacuum to lift all the baking soda off the fabric. Go over each cushion a couple of times to make sure no white residue remains. Pay extra attention to seams and crevices where powder can hide.
Once it's all gone, give the cushion a sniff — the difference should be noticeable.
12. Apply a Fabric Protector
You've put in the work to clean your cushions, so why let them get wrecked again in a week? A quality fabric protector adds a shield against spills, UV rays, and everyday grime. This final step locks in your effort and keeps cushions looking newer for longer.
Choose The Right Protector
Look for a spray specifically made for outdoor fabrics—something that blocks UV damage and repels water. Avoid general-purpose stain guards that may contain harsh chemicals or cause discoloration. Brands like Scotchgard Outdoor or 303 Fabric Guard are solid choices.
Apply In A Well-ventilated Area
Take the cushions outside or into a garage with the door open. Hold the can about 6–8 inches from the fabric and spray in a steady, sweeping motion. Cover the entire surface evenly, including the sides and seams where dirt tends to sneak in.
Let It Cure Completely
Don't rush this part. Most protectors need 24 to 48 hours to fully bond with the fabric. Keep the cushions dry and out of direct sunlight during curing.
Once set, they'll resist moisture and stains much better than untreated fabric.
Reapply As Needed
Fabric protection isn't permanent. After a few months or a heavy rain, you may notice water no longer beads up on the surface. That's your cue to apply another coat.
A quick re-spray every season keeps the shield strong.
13. Store Properly Off-Season
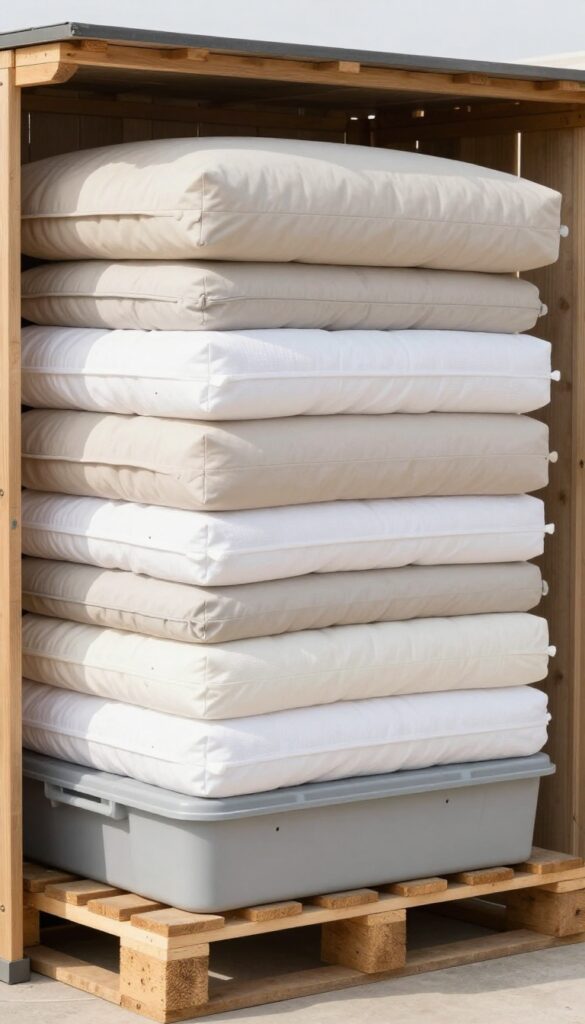
You've put in the work to clean your cushions, so why let them get wrecked again in a week? Proper off-season storage is what keeps them fresh until next spring. A little planning now saves you hours of scrubbing later.
When not in use, store cushions in a dry, ventilated storage bin or cover them with a breathable furniture cover to keep them clean and dry.
Choose The Right Storage Container
Avoid plastic bins that trap moisture—they can lead to mold. Instead, use a ventilated storage box or a heavy-duty fabric bag. If you must use plastic, drill a few small holes for airflow.
Keep Them Elevated
Place cushions on a pallet or shelf inside the storage area. This prevents ground moisture from seeping in and allows air to circulate underneath.
Cover Even Indoors
Even in a garage or shed, dust and pests can settle. Use a breathable furniture cover or an old sheet to keep them clean. Never use non-breathable plastic wrap—it traps condensation.
FAQ
Can I put outdoor cushions in the washing machine?
Only if the care tag explicitly says machine washable. Most outdoor cushions have foam inserts that can be damaged by machine agitation. Hand washing is safer.
How do I remove mildew from outdoor cushions?
Mix equal parts white vinegar and water, spray on the affected area, let sit for 15 minutes, then scrub with a soft brush. Rinse thoroughly and dry in the sun.
What's the best cleaner for outdoor cushions?
A mild dish soap mixed with warm water works for most fabrics. For tougher stains, use a dedicated outdoor fabric cleaner or a solution of oxygen bleach and water.
How often should I clean outdoor cushions?
Give them a quick brush and spot clean every few weeks during use season. A deep clean once or twice a year is usually enough to keep them fresh.
Can I use bleach on outdoor cushions?
Only if the care tag allows it. Chlorine bleach can weaken fibers and cause discoloration. Oxygen bleach (like OxiClean) is a safer alternative for whitening.
Conclusion
Your patio cushions don't have to look tired and faded after a single season. With these 13 steps, you can restore their fresh appearance and extend their life without expensive replacements or harsh chemicals. A little regular maintenance goes a long way.
Pick a method that matches your cushion material and the stain you're facing. Once you've cleaned them, a fabric protector spray helps repel future dirt and moisture. Your outdoor space will stay inviting all summer long.

I’m Pallab Kishore, the owner of Little Pets Realm — an animal lover and pet care enthusiast sharing easy tips, healthy recipes, and honest advice to help every small pet live a happy, healthy, tail-wagging life.


