Last updated on June 27th, 2026 at 03:17 pm
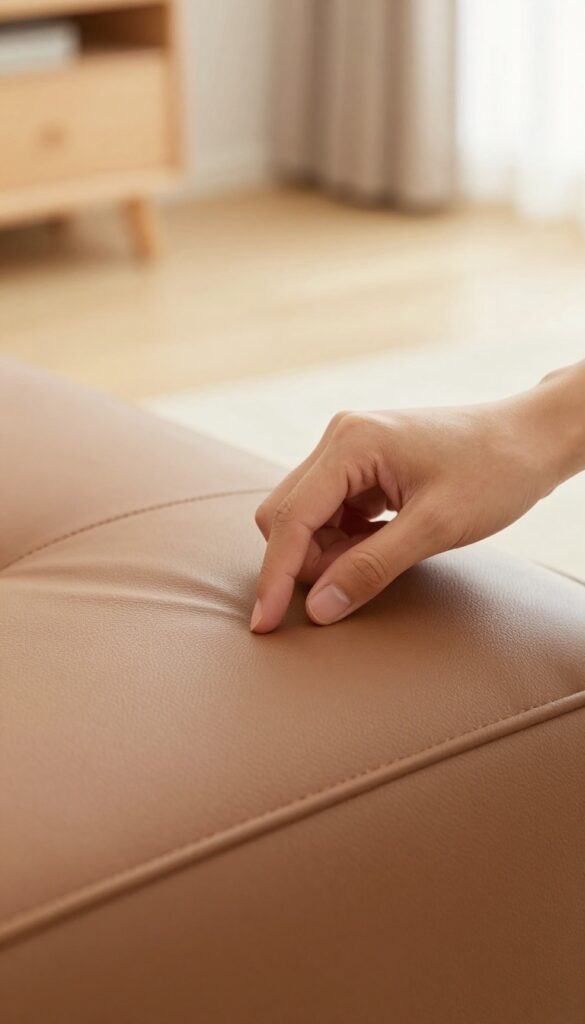
A leather couch adds warmth and class to any room, but it also collects dust, oils, and the occasional spill. Over time, that rich shine can fade into a dull, tired look. The good news?
You don't need harsh chemicals or expensive professionals to bring it back. With the right gentle approach, you can restore your leather couch's natural glow in just 13 straightforward steps. Each step focuses on protecting the material while lifting dirt and reviving its luster.
Whether your couch is aniline, pigmented, or bonded leather, these methods work safely. Let's walk through the process from start to finish.
1. Clear the Couch and Check the Tags
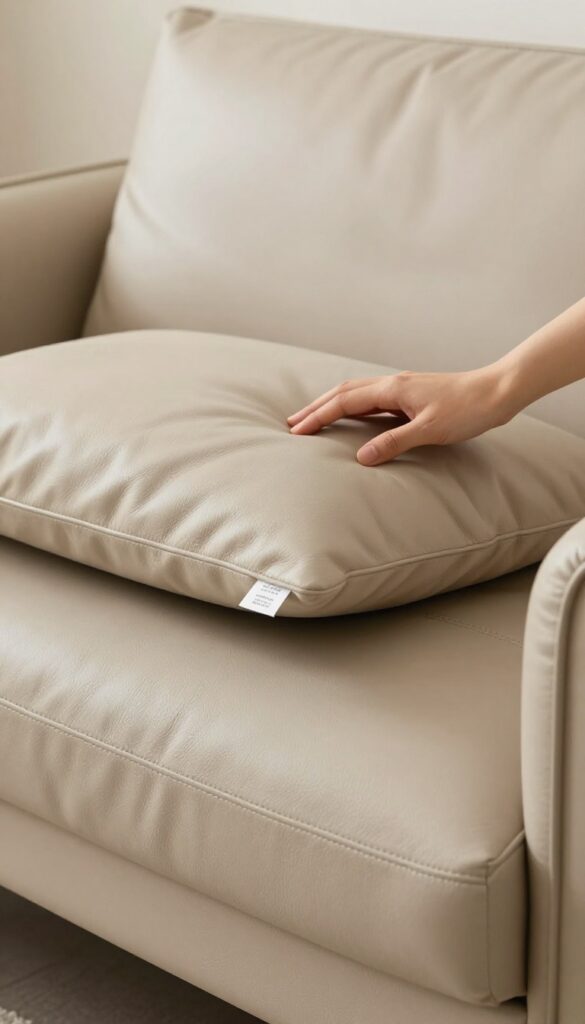
Before you even think about applying any cleaner, you need to clear the deck. That means removing all cushions, pillows, and any debris like crumbs or pet hair. This gives you full access to every surface and prevents dirt from getting ground into the leather during cleaning.
Once the couch is bare, flip the cushions and look for the manufacturer’s tag. It’s usually tucked under a seat cushion or along the bottom edge. The tag will tell you the leather type (aniline, pigmented, or bonded) and often includes a cleaning code: W for water-based cleaners, S for solvent-based, or WS for both.
Ignoring this can ruin your couch. Write down the code before proceeding.
Why Clearing Matters
Cushions and pillows hide dirt and make it hard to work evenly. Removing them also lets you check for loose change or small objects that could scratch the leather when you wipe.
Decoding The Tag
Most tags use a simple letter system. W means water-based cleaner is safe, S means solvent-based only, and WS means either works. If the tag is missing, test any cleaner on a hidden spot first.
What If There’s No Tag?
Don’t panic. You can often identify the leather by touch and appearance. Aniline leather feels soft and shows natural markings, while pigmented leather has a uniform surface.
When in doubt, start with the gentlest option: a damp microfiber cloth.
2. Vacuum Every Crevice and Seam
Dust and grit are leather's worst enemies. They settle into seams, tufts, and under cushions, acting like sandpaper every time someone sits down. A quick vacuum with the right attachment lifts all that abrasive debris before it can scratch the surface.
Before you apply any cleaner or conditioner, give your couch a thorough vacuuming. This step alone prevents micro-scratches and keeps your leather looking newer longer.
Choose The Right Attachment
Always use a soft brush attachment—never the bare nozzle or a beater bar. The soft bristles gently agitate dust from crevices without harming the leather. If your couch has removable cushions, take them off and vacuum both sides and the frame underneath.
Focus On High-traffic Areas
Pay extra attention to the seat seams, armrests, and the crease where the back meets the seat. These spots trap the most dirt. For tufted leather, run the brush in multiple directions to dislodge hidden particles.
Don't Forget Under The Cushions
Lift out each cushion and vacuum the exposed frame and the bottom of the cushion. Crumbs, pet hair, and dust accumulate there and can work their way into the leather over time.
3. Dust with a Microfiber Cloth

After clearing off the big stuff, it's time to tackle the fine dust that settles into every crease and seam. This step is all about surface-level prep — getting the leather completely clean before any conditioner or cleaner touches it. A simple dry dusting can make a huge difference in how the rest of the process goes.
Grab a clean, dry microfiber cloth — the kind you use for glasses or car detailing works perfectly. Microfiber is ideal because its split fibers trap dust rather than just pushing it around. Gently wipe the entire couch, paying extra attention to crevices, tufted areas, and the tops of cushions.
Use a light hand; you're not scrubbing, just lifting. Avoid feather dusters or dry paper towels — they tend to scatter dust into the air or leave lint behind. For tricky spots like piping or button tufts, wrap the cloth around your finger and run it along the grooves.
This quick pass ensures no gritty particles remain to scratch the leather during the next steps.
Why Microfiber Works Best
Microfiber cloths have a static charge that attracts dust like a magnet. Unlike cotton rags, they don't leave fibers behind, and they can trap particles as small as a micron. That means you're actually removing dust, not just relocating it.
Plus, they're reusable — just toss them in the wash after use.
Avoiding Common Dusting Mistakes
Feather dusters might look elegant, but they're terrible for leather. The feathers can scratch the surface, and they simply flick dust into the air, which then settles right back down. Similarly, dry paper towels are too abrasive and can leave tiny scratches on delicate leather finishes.
Stick with microfiber and you're golden.
Don't Forget The Hidden Areas
Dust loves to hide in the gap between the seat and back cushions, under the armrests, and along the bottom edge of the couch. Use the edge of your microfiber cloth to sweep these areas. If your couch has removable cushions, lift them up and dust the frame underneath — you'll be surprised how much collects there.
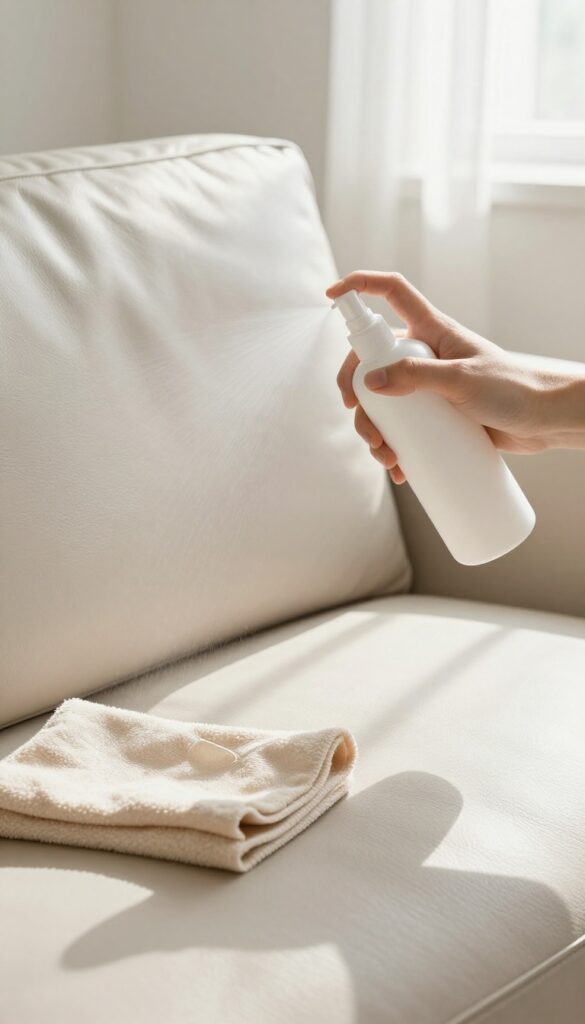
4. Mix a Gentle Cleaning Solution
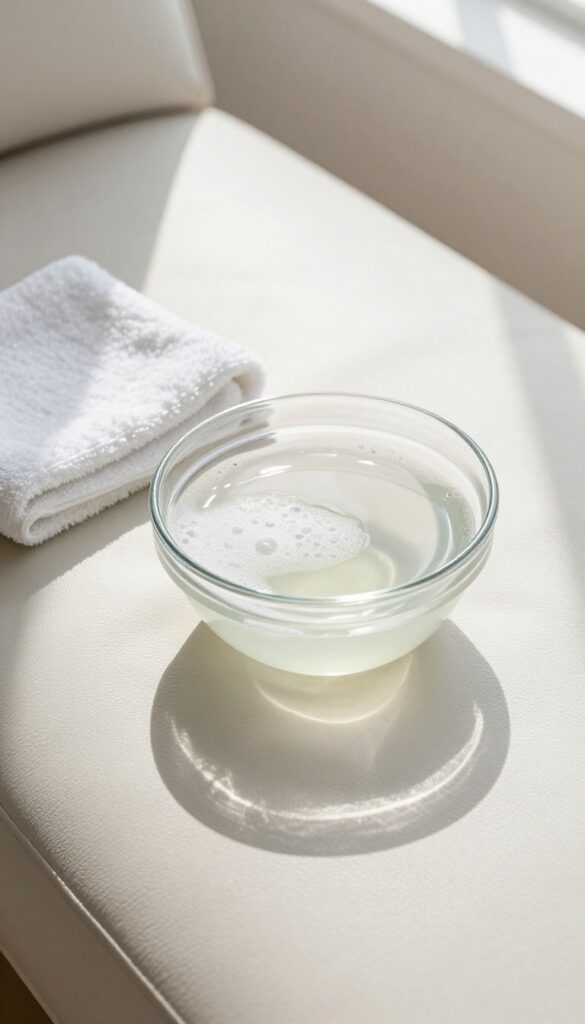
Now that the surface is dust-free, it's time to mix a cleaner that lifts grime without stripping the leather's natural oils. Harsh chemicals can do more harm than good, so stick with a mild, homemade solution. A few simple ingredients from your kitchen are all you need.
Combine a few drops of mild dish soap—like Dawn or a similar gentle brand—with distilled water in a small bowl. Distilled water is best because tap water can leave mineral deposits. Stir gently until you see a few suds.
Dip a soft microfiber cloth into the solution, then wring it out well. The cloth should be damp, not wet. Excess moisture can seep into seams or damage the leather's finish.
Before using it on the whole couch, test the solution on a hidden area, like the back or underside. Wait a few minutes to check for any discoloration or damage. If all looks good, you're ready to clean.
For bonded leather, skip the DIY mix and use a dedicated leather cleaner instead, as bonded leather has a delicate top coat that can react poorly to soap.
Why Distilled Water Matters
Tap water often contains minerals like calcium and chlorine that can leave a cloudy film on leather over time. Distilled water is purified and won't cause that buildup. It's a small switch that makes a big difference in keeping your couch looking its best.
The Test Patch Rule
Always test your cleaning solution on a hidden spot before going all in. Leather can react unpredictably, especially if it's aniline or has a delicate finish. A quick test saves you from a potential disaster on a visible area.
Bonded Leather Needs Special Care
Bonded leather is made from shredded leather fibers glued together with a polyurethane coating. It's less durable and more sensitive to moisture and soap. For bonded leather, use a cleaner specifically designed for it, or even just a barely damp cloth.
5. Spot Clean Stains with Care
Even with regular dusting and gentle cleaning, stains happen. Maybe someone set down a coffee cup, or a pet jumped up with muddy paws. The key is to treat spots quickly and gently, using the right method for each type of stain.
Before you start, test your cleaning solution on a hidden area—like the back or bottom of the couch. Wait for it to dry and check for any discoloration. Once you're sure it's safe, dampen a soft, lint-free cloth with the solution and blot the stain gently.
Never scrub, as that can damage the leather's finish or spread the stain. For oil-based stains like butter or grease, sprinkle cornstarch or baking soda over the spot and let it sit for 15 minutes to absorb the oil. Then vacuum it away.
For ink or dye stains, dab with a cotton swab dipped in rubbing alcohol, but be very careful—alcohol can strip color. Always blot, never rub, and repeat if needed.
Blot, Don't Rub
Rubbing a stain pushes it deeper into the leather fibers and can create a dull, worn patch. Instead, use a clean, damp cloth to blot from the outside of the stain inward. This lifts the stain without spreading it.
Change to a fresh part of the cloth as it picks up dirt.
Treat Oil Stains With Powder
Oil and grease are common culprits on leather couches. Sprinkle cornstarch, baking soda, or talcum powder generously over the stain. Let it sit for at least 15 minutes (longer for set-in stains) to absorb the oil.
Then gently brush or vacuum off the powder. Repeat if a faint ring remains.
Handle Ink And Dye Stains Carefully
Ink stains are tricky because they can set quickly. Dab a cotton swab in isopropyl alcohol (70% or less) and gently blot the ink. Work from the outside in to avoid spreading.
Test on a hidden area first, as alcohol can lighten some leather dyes. For stubborn stains, consider a commercial leather stain remover.
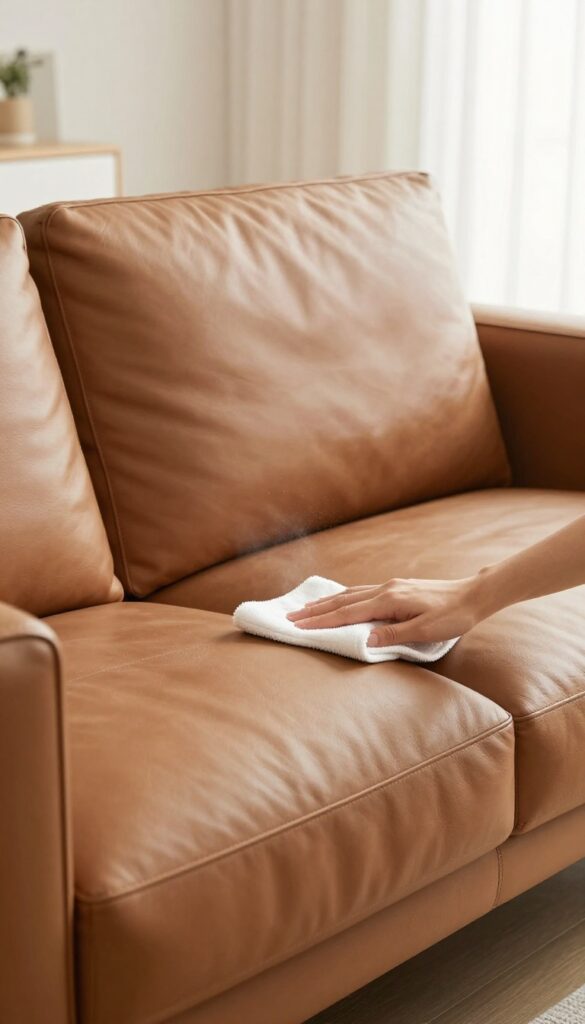
6. Wipe Down the Entire Couch
Once your cleaning solution is ready and tested, it's time to apply it across the whole couch. This step removes the layer of grime that dusting alone can't touch. The key is to work methodically and keep your cloth clean to avoid redepositing dirt.
Dip a soft, lint-free cloth into the cleaning solution and wring it out until it's just damp—not wet. Starting at the top of the couch, wipe down one small section at a time, like a cushion or the backrest. Use gentle, circular motions to lift dirt without rubbing it in.
Rinse the cloth frequently in clean water and reapply solution as needed. Let each section air-dry slightly before moving to the next to prevent over-wetting.
Work In Small Sections
Divide the couch into manageable zones: each cushion, the backrest, arms, and sides. Focus on one zone at a time. This prevents the solution from drying before you wipe it off and ensures even cleaning.
For large couches, you might need to rewet and wring your cloth several times per zone.
Rinse And Repeat
As you wipe, dirt transfers to the cloth. If you don't rinse it out, you'll just smear grime around. After every few passes, rinse the cloth under running water, wring it dry, and dip it back into the solution.
A clean cloth is your best tool for a streak-free finish.
Let It Breathe
After wiping a section, give it a few minutes to air-dry before moving on. This helps the leather absorb any remaining moisture evenly. If you notice water beading on the surface, you're using too much liquid—wring the cloth more thoroughly.
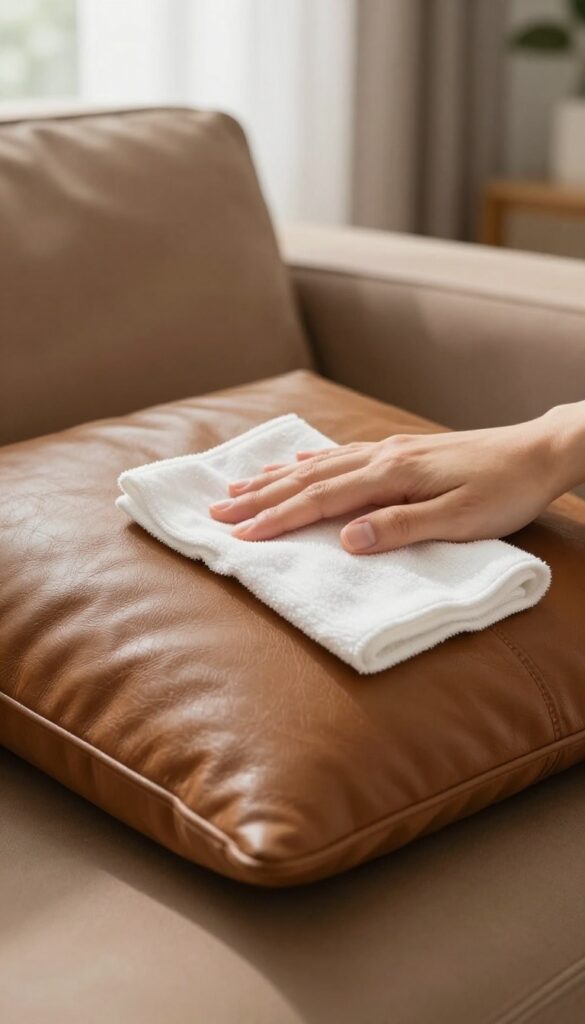
7. Dry Thoroughly with a Soft Towel
Once you've wiped away the cleaning solution, it's tempting to let the couch air dry and move on. But how you dry the leather matters just as much as how you clean it. Rushing this step or using the wrong method can leave water spots, streaks, or even damage the material.
Pat the leather dry with a clean, lint-free towel. Avoid heat sources like hair dryers. Let air dry completely before the next step.
Why Patting Beats Rubbing
Rubbing leather while drying can push moisture deeper into the material or create unsightly streaks. Instead, use a soft, lint-free microfiber cloth and gently pat the surface. This lifts excess moisture without disturbing the leather's finish.
Work in sections, and change to a dry part of the towel as it becomes damp.
Skip The Heat
Never use a hair dryer, space heater, or direct sunlight to speed up drying. Heat can cause leather to crack, warp, or become brittle over time. The safest approach is to let the couch air dry at room temperature.
If your home is humid, point a fan toward the couch on low setting to improve airflow without heating the leather.
Check For Complete Dryness
Leather can feel dry to the touch but still hold moisture in its pores. Before moving to the next step (conditioning or applying a protectant), wait at least 30 minutes to an hour. Press a clean, dry paper towel against the surface—if it comes away dry, you're good to go.
Rushing this step can trap moisture under conditioners, leading to mildew or a sticky feel.
8. Condition to Restore Moisture
Leather is skin, and just like your own skin, it needs moisture to stay supple and avoid cracking. After cleaning, the leather's natural oils are often stripped away, leaving it dry and vulnerable. Conditioning replenishes those oils, restoring flexibility and that soft, rich feel you love.
This step is the difference between a couch that looks cared for and one that looks worn out.
Choose The Right Conditioner
Not all leather conditioners are created equal. Look for a product specifically designed for furniture, not shoes or car seats. Avoid conditioners with silicone, wax, or petroleum, as they can clog pores and cause buildup.
A good conditioner should contain natural oils like lanolin, mink oil, or neatsfoot oil. Test it on a hidden area first to ensure it doesn't darken the leather.
Apply With Circular Motions
Scoop a small amount of conditioner onto a clean, soft cloth—microfiber works great. Rub it into the leather using gentle circular motions. This helps the conditioner penetrate evenly.
Focus on areas that feel dry or stiff, like armrests and seat cushions. Don't drench the leather; a thin, even layer is all you need.
Let It Absorb, Then Buff
After applying, let the conditioner sit for 10–15 minutes. This gives the leather time to drink in the moisture. Then, take a fresh dry cloth and buff off any excess.
You'll notice a soft sheen and a smoother texture. If the leather still feels tacky, you used too much—wipe away the residue. Your couch should feel hydrated, not greasy.
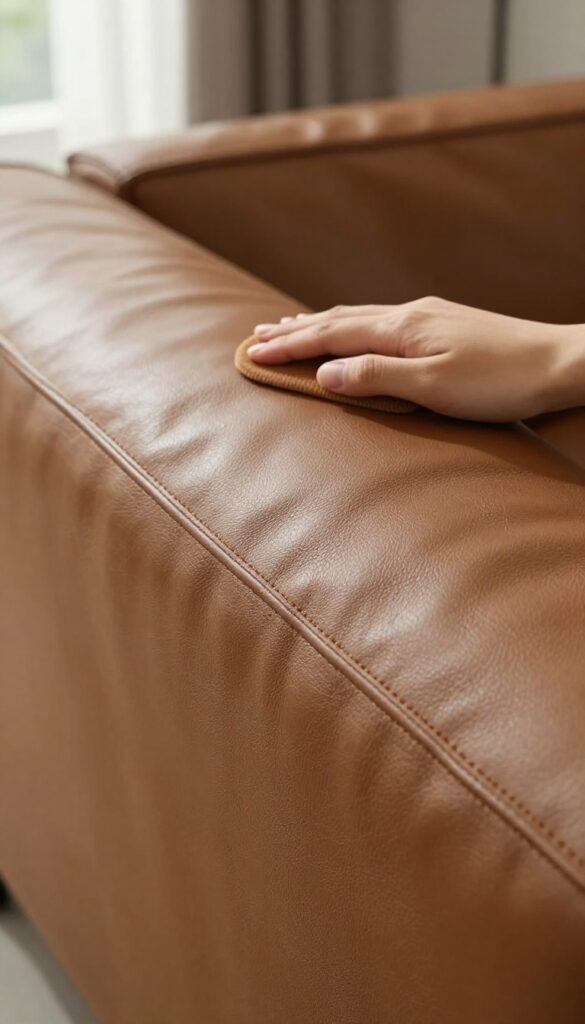
9. Buff for a Natural Shine
Conditioning leaves your leather feeling soft and looking refreshed, but the finish can still look a bit flat. That's where buffing comes in. A quick polish with a dry microfiber cloth brings out a subtle, even shine without making the surface greasy or sticky.
Buffing is the final touch that transforms conditioned leather from dull to radiant. It's a simple step, but it makes a noticeable difference in the overall appearance of your couch.
Why Microfiber Works Best
Microfiber cloths have ultra-fine fibers that trap dust and lift residue without scratching the leather. Unlike cotton or paper towels, they won't leave lint or streaks behind. Use a clean, dry microfiber cloth for the best results.
The Right Buffing Technique
Fold the cloth into a pad and work in small, gentle circles. Apply light pressure—you're polishing, not scrubbing. Start from the top of the couch and work your way down, covering every conditioned area.
The circular motion helps distribute any remaining conditioner evenly and stimulates the leather's natural luster.
How To Check Your Progress
After buffing a section, step back and look at the leather from different angles. You should see a soft, uniform sheen. If some spots still look dull, give them an extra pass.
If the leather feels tacky or looks greasy, you may have used too much conditioner—buff a little more to absorb the excess.
When To Buff Again
Buffing is not a daily task. Do it right after conditioning, which is typically every 6 to 12 months depending on use and climate. In between, you can lightly buff with a dry cloth to restore shine if the couch starts looking tired.
10. Treat Scratches and Scuffs
Everyday use leaves its mark—literally. Light scratches from pet claws, belt buckles, or just sliding across the couch are common. The good news is most of them are fixable without calling in a pro.
The trick is matching the repair method to the depth of the damage. Surface-level scuffs often disappear with a simple rub, while deeper gouges need a bit more help.
Light Scratches: The Finger Rub Trick
For shallow scratches that haven't broken the surface, your own body heat and moisture can work wonders. Rub the area gently with a slightly damp fingertip in a circular motion. The warmth helps the leather fibers relax and bounce back.
If the scratch is still visible after drying, repeat once more. This works best on aniline and semi-aniline leathers.
Persistent Scuffs: Leather Repair Balm
When a damp finger isn't enough, reach for a dedicated leather repair balm or conditioner. Apply a tiny amount to a soft cloth and buff the scuff in small circles. The balm fills in micro-gaps and evens out the color.
Let it sit for a few minutes, then wipe off any excess. Always test on a hidden spot first to make sure it doesn't darken the leather.
Deep Scratches: Touch-up Kits
For scratches that expose the underlying material or leave a visible groove, a leather touch-up kit is your best bet. These kits come with a filler compound and matching colorant. Clean the area first, then apply the filler with a spatula, smoothing it level with the surface.
Once dry, dab on the color using a sponge or fine brush. Finish with a light coat of leather sealant to blend the repair.
11. Protect with a Leather Sealant (Optional)
You've cleaned, conditioned, and buffed your leather couch back to life. Now, if your household includes kids, pets, or just a lot of traffic, you might want an extra layer of defense. A leather sealant or protector spray can help repel spills, reduce fading from sunlight, and keep dirt from settling into the pores.
It's not mandatory, but for high-use couches, it's a smart finishing touch.
When To Consider A Sealant
If your couch is in a busy living room or gets daily use, a sealant adds a sacrificial barrier that takes the brunt of wear. It's also helpful if you have light-colored leather that shows stains easily. For low-traffic rooms or leather that's already coated with a factory finish, you can probably skip this step.
Choosing The Right Product
Look for a spray specifically designed for leather furniture, not a general fabric protector. Water-based formulas are safer and less likely to darken the leather. Avoid silicone-heavy products, which can build up and cause a sticky residue.
A few trusted brands include Leather Honey, Scotchgard for Leather, and Chamberlain's Leather Milk.
How To Apply It Properly
Always test on a hidden area first—like the back or under a cushion—to check for discoloration or texture changes. Shake the bottle well, then hold it about 6 to 8 inches from the surface. Spray in a light, even coat, wiping away any excess with a clean cloth.
Let it dry completely (usually 24 hours) before using the couch. One coat is usually enough, but you can add a second if the manufacturer recommends it.
12. Fluff and Rotate Cushions
Cushions take the brunt of daily sitting, which means they wear out faster than the rest of the couch. Flipping and rotating them regularly spreads the pressure evenly, so no single spot gets flattened or faded. It also gives the leather a chance to breathe and dry thoroughly after cleaning.
Start by removing all loose cushions. If they have zippers, unzip them and fluff the filling by hand or give them a gentle shake. For foam cushions, press and knead the padding to redistribute the material.
Then flip each cushion over and rotate it front to back or side to side, depending on the shape. This simple habit prevents permanent indentations and keeps the couch looking plump and even. Do this every few months, or after each deep clean, to extend the life of your cushions.
Why Rotating Matters
Leather stretches and softens with use, so the spots where you sit most often will develop a different texture and color over time. Rotating cushions ensures that all sides get equal exposure to light and pressure, preventing uneven fading and sagging. It also helps the leather dry uniformly after cleaning, avoiding damp spots that could lead to mildew.
How To Fluff Different Fill Types
For feather or down-filled cushions, give them a good shake and punch to break up clumps. For foam, remove the cover if possible and massage the foam to restore its shape. If the foam feels permanently compressed, consider replacing the insert.
Always let cushions air out for a few hours after fluffing to release trapped moisture.
13. Maintain a Weekly Routine
Getting your leather couch looking its best is one thing; keeping it that way is another. A simple weekly routine prevents dirt buildup and keeps the leather from drying out. Think of it as a five-minute habit that saves you from deep cleaning down the road.
Dusting Is Your First Defense
Grab a soft microfiber cloth and give the entire couch a light once-over every week. This lifts dust, pet hair, and surface grime before it settles into the grain. Focus on crevices and seams where crumbs and debris love to hide.
Spills Don’t Wait—neither Should You
The moment something splashes on the leather, blot it gently with a dry cloth. Don’t rub—that pushes the liquid deeper. For sticky spills, a barely damp cloth followed by a dry one does the trick.
Immediate action prevents stains from setting in.
Condition On A Schedule
Mark your calendar for conditioning every 6 to 12 months, depending on how much use the couch gets. Apply a leather conditioner with a soft cloth, let it soak in for a few minutes, then buff off any excess. This keeps the leather supple and maintains that subtle shine.
FAQ
Can I use vinegar to clean my leather couch?
It's not recommended. Vinegar is acidic and can strip the leather's natural oils, leading to dryness and cracking. Stick to mild soap and water or a dedicated leather cleaner.
How often should I condition my leather couch?
Condition every 6 to 12 months, depending on usage and climate. If the leather feels dry or looks dull, it's time to condition. Avoid over-conditioning, which can make it sticky.
What's the best way to remove ink stains from leather?
Blot the stain with a cotton swab dipped in rubbing alcohol (test first). Work from the outside in. For stubborn stains, consult a professional.
Avoid scrubbing, which spreads the ink.
Is it safe to use baby wipes on leather?
Only if they are alcohol-free and fragrance-free. Even then, use sparingly. Baby wipes can leave residue that attracts dirt.
Better to use a damp microfiber cloth.
Can I use olive oil to condition my leather couch?
No. Olive oil can go rancid, attract dust, and darken the leather. Always use a product specifically designed for leather conditioning.
Conclusion
Your leather couch doesn't have to look dull or dirty. With these 13 gentle steps, you can restore its natural shine and keep it feeling soft for years. Regular dusting and conditioning make all the difference.
Pick a routine that fits your lifestyle—once you see that glow return, you'll want to stick with it. A little care goes a long way toward making your living room feel fresh and inviting every day.

I’m Pallab Kishore, the owner of Little Pets Realm — an animal lover and pet care enthusiast sharing easy tips, healthy recipes, and honest advice to help every small pet live a happy, healthy, tail-wagging life.


