That red wine stain on the carpet doesn't stand a chance. Neither does the sticky syrup puddle on the counter or the grease splatter on the stovetop. With a few pantry staples, you can whip up powerful cleaners that work just as well—if not better—than store-bought sprays.
No harsh fumes, no plastic waste, and no guessing what's in the bottle. These 25 homemade cleaning solutions target specific spills, so you can grab the right mix and get back to your day.
From fresh coffee drips to set-in mud, each recipe is simple, fast, and uses ingredients you probably already have. Let's get cleaning.
1. All-Purpose Vinegar Spray for Countertops
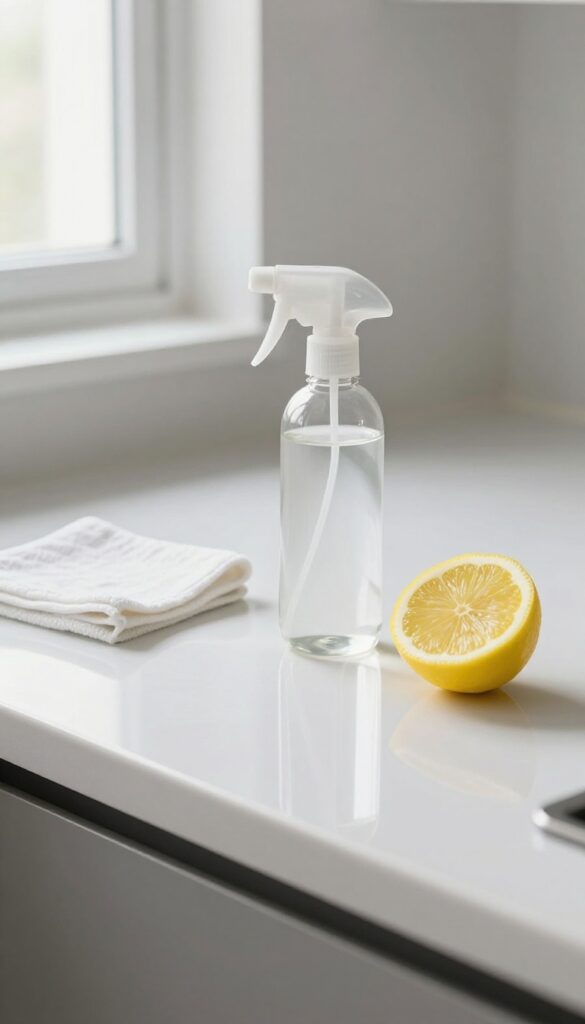
White vinegar is a powerhouse when it comes to cutting through grease and killing bacteria. This simple spray tackles daily messes like food crumbs, sticky spots, and light grime without leaving harmful residue behind. The lemon oil adds a fresh scent that masks the vinegar smell as it dries.
Combine equal parts white vinegar and water in a clean spray bottle. Add 10–15 drops of lemon essential oil if you want a citrusy boost. Shake gently before each use.
Spritz onto countertops and wipe with a microfiber cloth for a streak-free finish. Avoid using on granite or marble, as the acid can etch the surface over time.
Why It Works
Vinegar contains acetic acid, which breaks down grease, dirt, and some bacteria. The water dilutes it enough to be safe for most sealed surfaces, while the lemon oil adds antimicrobial properties and a pleasant scent.
Best Surfaces To Use It On
This spray works well on laminate, tile, stainless steel, and sealed quartz. Always test a small hidden area first. Avoid unsealed stone, hardwood, or waxed surfaces, as vinegar can damage the finish.
Storage And Shelf Life
Store the spray in a cool, dark place. It stays effective for about a month. Shake before each use, as the oil may separate.
Label the bottle clearly so you don't mistake it for water or another liquid.
2. Baking Soda Paste for Carpet Stains
Carpet spills happen fast, but your response can be just as quick. Baking soda and water form a simple paste that lifts fresh stains without harsh scrubbing. It's gentle on fibers yet tough on common culprits like coffee, juice, and wine.
The paste works by absorbing the liquid and pulling it to the surface as it dries. Once the paste is fully dry, you just vacuum it up—along with the stain. No rubbing, no spreading, no fuss.
How To Make And Apply
Mix three parts baking soda with one part water until you get a thick, spreadable paste. Spoon it onto the stain, making sure it's fully covered. Let it sit for at least 30 minutes, or overnight for older stains.
Once dry, vacuum the residue.
Best For Fresh Spills
This method works best on fresh spills that haven't had time to set. Blot up as much liquid as you can first, then apply the paste. For dried stains, try a hydrogen peroxide solution instead.
Variations For Tough Stains
Add a drop of dish soap for greasy stains like butter or salad dressing. For red wine, a sprinkle of salt on the spill before the paste can help draw out more color.
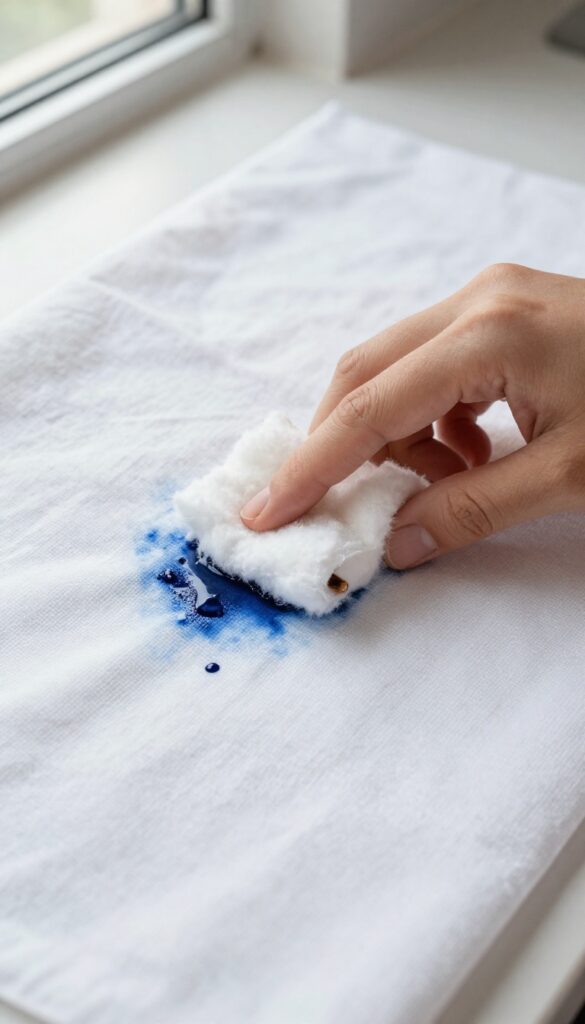
3. Hydrogen Peroxide and Dish Soap for Red Wine
Red wine spills are stressful, but this two-ingredient mix turns panic into action. Hydrogen peroxide lifts the pigment while dish soap breaks down the tannins, making even dried stains easier to remove. You probably have both in your cabinet right now.
Mix 2 parts hydrogen peroxide with 1 part dish soap in a small bowl. Dab the solution onto the stain using a clean cloth or sponge—don't rub, or you'll spread the wine. Let it bubble for a minute, then blot with a dry cloth.
Repeat until the stain fades. Rinse with cold water and blot dry. For set-in stains, let the mixture sit for up to 15 minutes before blotting.
Why This Works
Hydrogen peroxide oxidizes the wine's color compounds, making them colorless. Dish soap emulsifies the wine's oils and tannins, allowing them to be lifted away. Together, they tackle fresh and dried stains without harsh scrubbing.
Best Surfaces To Use It On
This solution is safe for most white or colorfast fabrics, carpets, and upholstery. Test on an inconspicuous spot first, especially on delicate fabrics like silk or wool. Avoid using on dark fabrics, as hydrogen peroxide can bleach them.
Pro Tips For Tough Stains
For stubborn stains, sprinkle a little baking soda on the spot after applying the mixture. The fizzing action helps lift residue. Always blot—never rub—to avoid damaging fibers.
If the stain remains, repeat the process or move to a different cleaning method.
4. Lemon Juice and Salt for Cutting Boards
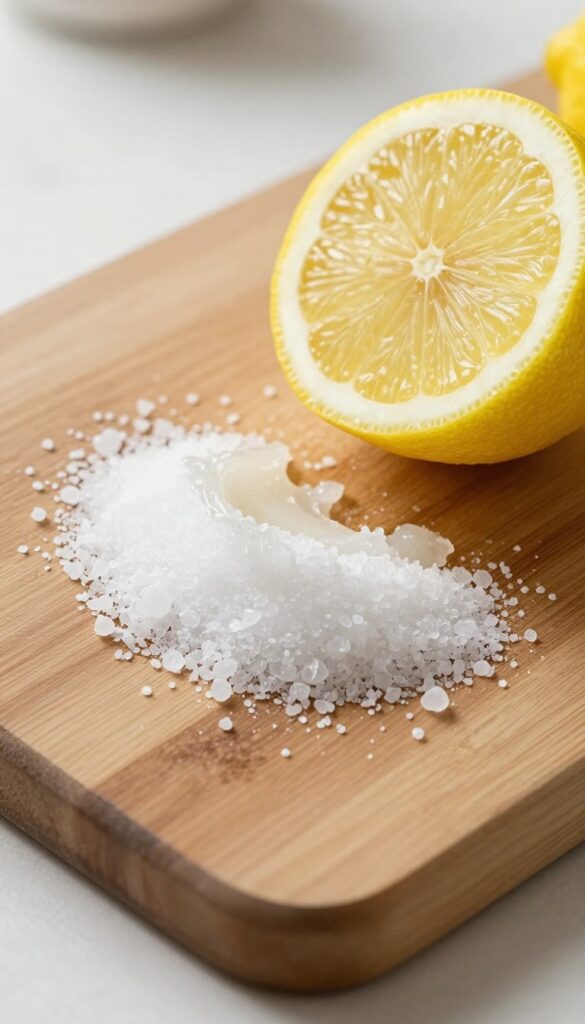
Cutting boards see a lot of action—and a lot of smells. Onion, garlic, and even fish can leave behind odors that linger even after a good scrub. This simple duo of lemon and salt cuts through both stains and smells without any harsh chemicals.
Coarse salt acts as a gentle abrasive that lifts stuck-on bits, while lemon juice’s acidity breaks down oils and neutralizes odors. Together, they leave your board fresh and clean.
Why It Works
Salt scrubs away residue without scratching wood or plastic. Lemon juice contains citric acid, which cuts grease and kills bacteria. The combination deodorizes naturally, leaving a clean citrus scent.
How To Use
Sprinkle a generous layer of coarse salt over the board. Cut a lemon in half and rub the cut side firmly over the salt-covered surface, squeezing gently as you go. Let the mixture sit for about 5 minutes, then rinse with warm water and dry with a clean cloth.
Pro Tips
For stubborn stains, let the lemon-salt paste sit for 10 minutes. Use this method on wooden boards, but avoid letting the lemon sit too long on marble or granite—it can etch the surface.
5. Club Soda for Fresh Juice Spills
Juice spills are a sticky nightmare, especially on carpets or upholstery. The sugar and color can set fast, turning a small mess into a permanent stain. But if you catch it quickly, club soda is your best friend.
The carbonation helps lift the liquid from the fibers while the bubbles push the stain to the surface, making it easy to blot away. No scrubbing, no harsh chemicals—just a fizzy rescue.
Club soda works because of its carbonation and mild acidity. When you pour it on a fresh juice spill, the bubbles help separate the stain from the fabric fibers. The key is to act fast—the sooner you treat it, the better the results.
Blot, don't rub, to avoid spreading the stain.
How To Use It
Pour club soda directly onto the stain while it's still wet. Use enough to saturate the area. Let it fizz for a few seconds, then blot with a clean white cloth.
Repeat until the stain transfers to the cloth. For older spills, let the club soda sit for a minute before blotting.
Why It Works So Well
The carbon dioxide in club soda creates bubbles that lift the stain from the fibers. The slight acidity also helps break down the sugars in the juice, making it easier to remove. Plus, club soda is clear, so it won't leave a residue or cause discoloration.
Tips For Best Results
Always test on an inconspicuous area first. Use a white cloth to avoid color transfer. If the stain persists, mix club soda with a drop of dish soap for extra cleaning power.
Avoid using hot water, as it can set the stain.
6. Cornstarch for Greasy Stovetops
Grease splatters on the stovetop can feel like a permanent fixture, but cornstarch makes quick work of them. This pantry staple acts like a magnet for oil, lifting it away without harsh scrubbing. Just a sprinkle and a short wait, and you're halfway to a spotless cooktop.
Cornstarch is a gentle abrasive that absorbs grease on contact. It's perfect for ceramic, glass, or stainless steel stovetops because it won't scratch. Follow up with vinegar to dissolve any residue and add shine.
How It Works
Cornstarch particles have a porous structure that soaks up oil and grease. When you let it sit, it binds to the grime, making it easy to wipe away without elbow grease. This method is especially effective on warm (not hot) surfaces.
Step-by-step Application
First, let the stovetop cool slightly but stay warm. Sprinkle a generous layer of cornstarch over the greasy spots. Wait 10 minutes—the cornstarch will turn slightly translucent as it absorbs.
Then, wipe with a damp microfiber cloth. Finally, spray with a 50/50 white vinegar and water solution and buff dry for a streak-free finish.
Pro Tip For Stubborn Spots
For dried-on grease, make a paste with cornstarch and a little water. Apply it to the spot, let it sit for 15 minutes, then scrub gently with a soft sponge. Rinse and follow with vinegar spray.
7. Rubbing Alcohol and Water for Glass Streaks
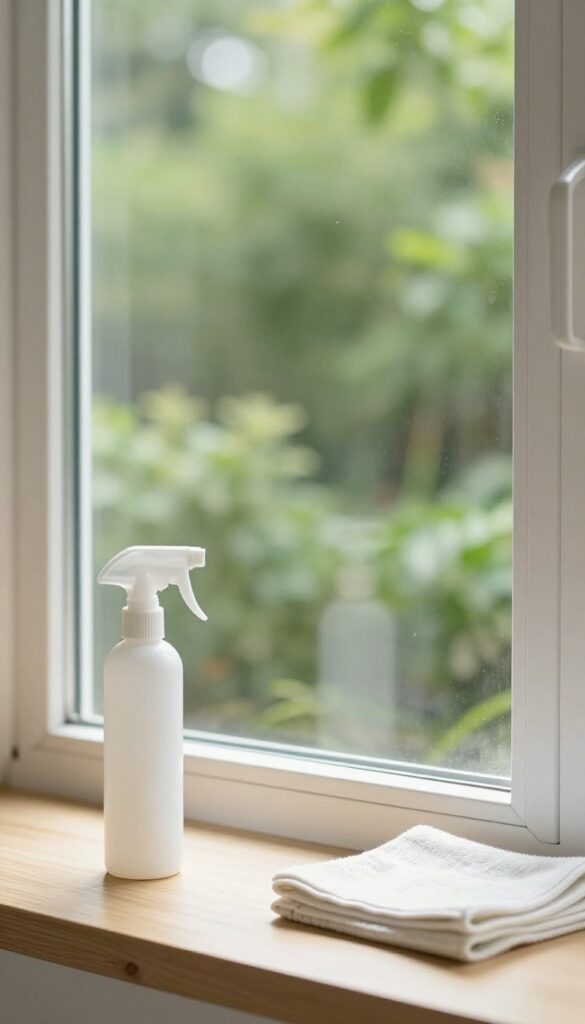
Windows and mirrors can be tricky—one wrong spray and you're left with streaks that catch the light in all the wrong ways. Commercial glass cleaners often leave behind a film or contain ammonia that's harsh on your lungs. This simple three-ingredient mix cuts through grime and dries streak-free every time.
Combine 1 cup rubbing alcohol, 1 cup water, and 1 tablespoon vinegar in a spray bottle. Shake gently to mix. Spray onto the glass surface and wipe immediately with a clean, lint-free microfiber cloth.
The alcohol evaporates quickly, preventing streaks, while the vinegar cuts through grease and fingerprints. For best results, work in a zigzag pattern and avoid cleaning windows in direct sunlight, which can cause the solution to dry too fast.
Why This Combo Works
Rubbing alcohol evaporates much faster than water, which means less time for streaks to form. Vinegar acts as a natural degreaser, breaking down the oils left by fingers or cooking splatters. Together, they create a solution that cleans deeply without leaving residue.
Pro Tips For A Flawless Finish
Use a dedicated microfiber cloth for glass—old rags can leave lint. If you notice streaks, your cloth might be dirty or too wet. Wring it out well before wiping.
For large windows, a squeegee can speed things up: spray the solution, pull the squeegee across in a single motion, and wipe the blade clean between passes.
When To Avoid This Mix
Don't use this solution on tinted windows or coated glass (like some car windshields), as the alcohol can damage the tint or coating over time. Stick to a mild soap-and-water mix for those surfaces.
8. Olive Oil and Vinegar for Wood Furniture
Wood furniture adds warmth to any room, but it also shows every fingerprint, water ring, and dust bunny. Store-bought polishes often leave a greasy film or contain chemicals you don't want near your dining table. This simple two-ingredient mix conditions the wood while giving it a natural sheen—and it even helps camouflage minor scratches.
Combine 1 part olive oil with 2 parts white vinegar in a small bowl. Dip a soft, lint-free cloth into the mixture, wring it out slightly, and rub it into the wood following the grain. The vinegar cleans and disinfects, while the olive oil moisturizes and restores luster.
For light scratches, the oil fills in the tiny grooves, making them less noticeable. Buff with a dry cloth afterward to remove any excess. Use this treatment once a month to keep your wood looking its best.
Why This Combo Works
White vinegar is a mild acid that cuts through grime without damaging the finish. Olive oil is a natural conditioner that penetrates the wood, preventing it from drying out and cracking. Together, they create a polish that's safe for finished wood surfaces like tables, chairs, and cabinets.
Best Woods To Use This On
This solution works well on sealed, finished wood—think oak, maple, cherry, and walnut. Avoid using it on unfinished, raw, or waxed wood, as the oil can soak in unevenly or leave a sticky residue. Always test a small, hidden area first.
Tips For Best Results
Use a microfiber cloth to avoid lint. Apply sparingly—a little goes a long way. For deeper scratches, let the oil sit for a few minutes before buffing.
Store any leftover mixture in a sealed jar for up to a month; shake before each use.
9. Dish Soap and Warm Water for Greasy Dishes
Greasy dishes pile up fast, especially after frying or roasting. A squirt of dish soap in a sink full of warm water is the simplest way to cut through that slick film. Warmth helps loosen the fat, while the soap breaks it down so it rinses away clean.
For plates with baked-on cheese or dried sauce, a splash of white vinegar in the soak water adds extra degreasing power without extra scrubbing.
This classic combination works because dish soap contains surfactants that grab grease molecules, and warm water keeps them from re-solidifying. Vinegar’s acidity helps dissolve mineral deposits from hard water that can trap grease. Together, they make short work of even the stubbornest pans.
Why Warm Water Matters
Cold water lets grease harden and stick. Warm water keeps it liquid so soap can surround and lift it away. Aim for water hot enough to be comfortable to touch but not scalding—about 100–110°F works well.
Adding Vinegar For Stubborn Spots
If a pan has crusted food, fill it with hot water, add a tablespoon of dish soap and a splash of vinegar, then let it sit for 15 minutes. The vinegar softens baked-on bits and cuts through grease that soap alone might leave behind.
Tips For Nonstick And Cast Iron
Nonstick pans need gentle treatment—use a soft sponge and avoid abrasive scrubbers. For cast iron, skip the vinegar unless you plan to re-season immediately, as acid can strip the seasoning. Stick to hot water and a tiny bit of soap, then dry thoroughly.
10. Baking Soda and Vinegar for Drain Clogs
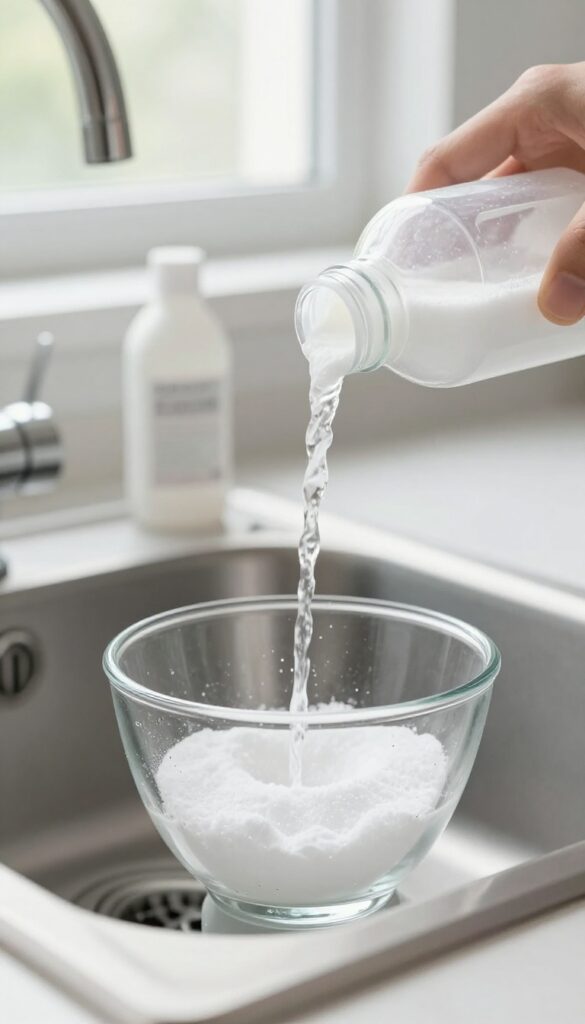
A slow-draining sink is annoying, but you don't need a plumber or harsh chemicals to fix it. Baking soda and vinegar create a fizzy reaction that breaks down grime and clears minor clogs naturally. This duo also deodorizes, leaving your drain fresh without any toxic fumes.
Pour 1/2 cup baking soda down the drain, followed by 1/2 cup vinegar. Cover the drain with a plug or cloth for 15 minutes to let the fizz work. Then flush with hot water for 30 seconds.
Repeat if needed for stubborn clogs.
Why This Combo Works
Baking soda is a mild abrasive that scrubs away buildup, while vinegar's acidity dissolves grease and soap scum. The reaction creates carbon dioxide gas, which pushes debris loose. Together, they tackle clogs without damaging pipes.
When To Use This Method
Best for slow drains from hair, soap, or grease. Not for fully blocked drains—try a plunger first. Avoid if you've used chemical drain cleaners recently, as mixing can cause fumes.
Tips For Best Results
Use boiling water for kitchen sinks to melt grease. For bathroom drains, follow with a wire snake if the clog persists. Do this monthly to prevent buildup.
11. Salt and Lemon for Brass or Copper
Tarnished brass or copper can make even the nicest decor look dull. Before you reach for a commercial metal polish, check your kitchen counter. A lemon and some salt are all you need to bring back that warm, shiny glow.
It’s a classic trick that works fast and smells a whole lot better than chemical cleaners.
Why This Combo Works
Salt acts as a gentle abrasive to scrub away tarnish, while the acid in lemon juice dissolves oxidation. Together, they lift discoloration without scratching the metal underneath. It’s a natural one-two punch that’s been used for generations.
How To Do It Right
Cut a lemon in half and dip the cut side into a small dish of salt. Rub it directly onto the tarnished area using a circular motion. For intricate details or crevices, squeeze some lemon juice into a bowl, add salt to make a paste, and apply with a soft cloth or an old toothbrush.
Let it sit for a minute or two, then rinse thoroughly with water and buff dry with a clean, soft cloth.
A Few Pro Tips
Avoid this method on lacquered brass or copper, as the acid can damage the coating. Always test on a small hidden spot first. For heavily tarnished pieces, you may need to repeat the process.
Once clean, a thin coat of mineral oil or wax can help slow future tarnishing.
12. White Vinegar for Coffee Maker Descaling
Coffee makers hide mineral deposits from hard water, and those deposits slowly ruin your brew’s flavor. White vinegar is the cheapest, most effective descaler you already have in your cabinet. It cuts through calcium and lime without toxic residue.
Descaling with vinegar is a two-step process that takes about 30 minutes. First, fill the water reservoir with equal parts white vinegar and water. Run a full brew cycle (without coffee grounds).
Let the machine sit for 15 minutes, then run a second full cycle with plain water. Repeat the water-only cycle once more to flush out any lingering vinegar smell. Your coffee will taste noticeably cleaner and fresher.
Why Vinegar Works So Well
Vinegar is acidic enough to dissolve alkaline mineral scale but gentle on plastic and metal parts. It’s also food-safe, so you don’t have to worry about chemical residues in your morning cup. Plus, it costs pennies per use.
How Often To Descale
If you use your coffee maker daily, descale every 1–3 months. Signs you need it: longer brew time, louder noise, or a bitter taste. For households with very hard water, monthly descaling keeps the machine running like new.
A Note On Smell
The vinegar smell dissipates completely after one or two plain water cycles. If you’re sensitive to it, add a slice of lemon to the water reservoir during the final rinse. The citrus scent neutralizes any remaining vinegar odor.
13. Rubbing Alcohol for Ink Stains on Fabric
Ink stains from a runaway pen or an exploded printer cartridge can feel permanent, but rubbing alcohol cuts through the dye like a charm. It works on cotton, polyester, and most washable fabrics, dissolving the ink so you can lift it right out. No special skills needed—just a bottle of isopropyl alcohol and a bit of patience.
To tackle an ink stain, place a clean cloth or paper towel under the fabric to catch the ink as it lifts. Dampen a cotton ball with rubbing alcohol and dab the stain, starting from the outer edge and working inward. Blot with a dry cloth to transfer the ink, replacing the cloth underneath as it gets dirty.
Repeat until no more ink comes up, then launder as usual.
Why Rubbing Alcohol Works
Rubbing alcohol is a solvent that breaks down the pigments in most ink formulations, especially water-based and ballpoint inks. It evaporates quickly, so it won't soak deep into the fabric fibers. This makes it far more effective than water alone, which can spread the ink and make the stain worse.
Step-by-step Application
First, test the alcohol on an inconspicuous area of the fabric to check for colorfastness. Then, place a thick layer of paper towels under the stain. Dab the alcohol onto the stain with a cotton ball—don't rub, as that can push the ink deeper.
Blot with a dry paper towel, moving to a clean spot each time. Continue until the stain is gone, then wash the item in warm water with detergent.
Tips For Stubborn Or Old Stains
For set-in ink, let the alcohol sit on the stain for a few minutes before blotting. You can also soak the stained area in a small bowl of rubbing alcohol for 15 minutes. For delicate fabrics like silk or wool, dilute the alcohol with an equal part of water and proceed gently.
Always air-dry the fabric after treating to ensure the stain is fully gone before machine drying.
14. Hydrogen Peroxide for Blood Stains
Blood stains can be stubborn, but hydrogen peroxide is a gentle yet effective solution. It works by breaking down the proteins in blood, making it easy to lift from fabric or hard surfaces. This method is safe for most materials and doesn't require harsh scrubbing.
Hydrogen peroxide is a go-to for fresh or dried blood stains. Its fizzing action helps release the stain from fibers without damaging the material. Always test on an inconspicuous area first, especially on colored fabrics.
How It Works
Hydrogen peroxide releases oxygen bubbles that break down the organic compounds in blood. This lifts the stain from the surface, allowing you to blot it away. It's most effective on fresh stains but can also tackle dried ones with a little patience.
Step-by-step Application
Pour a small amount of 3% hydrogen peroxide directly onto the stain. Let it fizz for a few minutes—don't rub. Blot with a clean, damp cloth, working from the outside in.
Repeat until the stain fades. Rinse with cold water afterward.
Tips For Best Results
Use cold water only, as heat can set the stain. For dried stains, soak the area in hydrogen peroxide for up to 15 minutes before blotting. Avoid mixing with bleach or other cleaners, as this can create harmful fumes.
15. Dish Soap and Hydrogen Peroxide for Grass Stains
Grass stains on jeans or a favorite shirt don't have to be permanent. That greenish mark is actually a combination of chlorophyll and protein, which dish soap and hydrogen peroxide break down beautifully. This two-ingredient mix is gentle enough for most fabrics but tough on the stain, and you probably already have both in your kitchen or bathroom.
Mix 1 tablespoon of dish soap with 2 tablespoons of hydrogen peroxide in a small bowl. Apply the solution directly to the grass stain, using a soft brush or your fingers to work it into the fabric. Let it sit for 5 to 10 minutes, then scrub gently with a soft-bristled brush or an old toothbrush.
Rinse with cold water and launder as usual. For older stains, repeat the process before washing.
Why This Combo Works
Dish soap is a surfactant that lifts dirt and oils from fabric fibers. Hydrogen peroxide acts as a mild bleach that oxidizes the green pigments in grass. Together, they tackle both the protein and chlorophyll components without damaging most colorfast fabrics.
Best Fabrics To Use It On
This solution works well on cotton, polyester, and blends. Test on an inconspicuous area first, especially on dark or delicate fabrics like silk or wool. Avoid using on wool or silk, as hydrogen peroxide can cause damage.
Tips For Stubborn Stains
If the stain remains after washing, mix a fresh batch and repeat the process. For set-in stains, let the solution sit for up to 30 minutes. You can also add a pinch of baking soda to create a gentle abrasive paste for extra scrubbing power.
16. Baking Soda for Mattress Odors
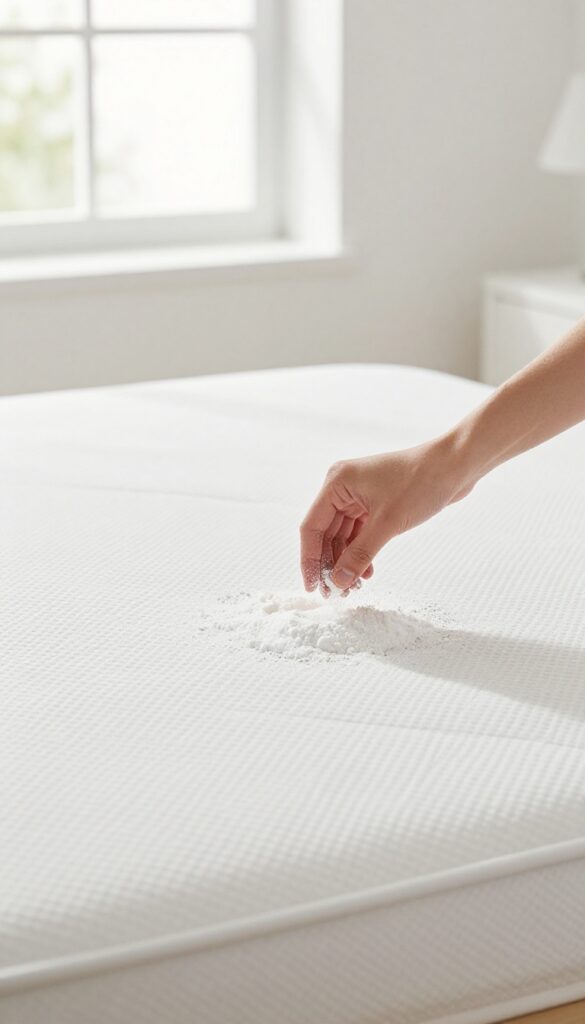
Mattresses absorb sweat, body oils, and dust mites over time, leading to musty smells that can disrupt sleep. Baking soda is a natural deodorizer that neutralizes odors without masking them with artificial fragrances. A simple sprinkle-and-vacuum routine can refresh your mattress and extend its life.
Baking soda works by absorbing moisture and trapping odor molecules. For best results, strip the bed and remove all bedding. Sprinkle a generous, even layer of baking soda over the entire mattress surface, focusing on areas that get the most use.
Let it sit for several hours—ideally overnight—so it has time to pull out embedded smells. Then vacuum thoroughly using the upholstery attachment to remove every trace of powder. This method is safe for most mattress types, including memory foam, but check the care label first.
Repeat every few months to keep your mattress smelling fresh.
Why Baking Soda Works So Well
Baking soda is alkaline, which helps neutralize acidic odor compounds found in sweat and body oils. Its fine, porous structure gives it a large surface area for absorbing moisture and trapping smelly particles. Unlike sprays that just add scent, baking soda actually removes the source of the odor.
Step-by-step Application
Start by stripping all bedding and washing it separately. Sprinkle baking soda liberally over the mattress, using about half a box for a twin or a full box for a king. Use a sieve or your hands to distribute it evenly.
Let it sit for at least 4 hours, but overnight is better. Vacuum thoroughly, making multiple passes to ensure no residue remains.
Boosting The Deodorizing Power
For extra freshness, mix a few drops of essential oil (like lavender or tea tree) into the baking soda before sprinkling. Stir well to avoid clumps. You can also add a thin layer of cornstarch to help absorb moisture from spills.
Avoid using too much oil, as it can stain the mattress.
17. Lemon Juice for Microwave Splatters
Microwave splatters are a fact of life, but scrubbing dried-on food from the interior doesn't have to be. A simple bowl of water with lemon slices can do the heavy lifting for you. The steam loosens stuck-on bits, and the lemon leaves a fresh scent behind.
This method works because the steam softens food residue, making it easy to wipe away with a cloth. The lemon adds a natural antibacterial boost and neutralizes odors. It's a quick, chemical-free way to keep your microwave clean.
How It Works
Fill a microwave-safe bowl with 1 cup of water. Add 2-3 lemon slices or the juice of half a lemon. Microwave on high for 3 minutes.
Let the bowl sit inside for 2 minutes without opening the door. The steam condenses on the walls, softening any stuck-on food.
Wiping Down
Carefully remove the bowl (it will be hot). Use a damp cloth or sponge to wipe the interior. Stubborn spots should come off easily.
For extra grime, dip the cloth in the lemon water. Dry with a clean towel.
Extra Tips
If your microwave has a turntable, remove it and clean separately. For tough baked-on messes, repeat the process or add a tablespoon of vinegar to the water. This method also deodorizes, so it's great after reheating fish or popcorn.
18. Vinegar and Baking Soda for Oven Grease
Oven grease can feel impossible to remove, especially after a few rounds of roasting or baking. But a simple combo of vinegar and baking soda cuts through the grime without harsh chemicals. This method works best on standard ovens and leaves your appliance sparkling clean.
Why It Works
Vinegar is acidic, which helps break down grease and food residue. Baking soda is a mild abrasive that scrubs away stuck-on gunk without scratching surfaces. When combined, they fizz and lift grime, making it easier to wipe away.
How To Apply
Start by removing oven racks. Spray the interior surfaces with white vinegar until they are damp. Then sprinkle a generous layer of baking soda over the vinegar.
Let the mixture bubble and sit for 15 minutes. After that, scrub with a sponge or soft brush, focusing on stubborn spots. Finally, wipe clean with a damp cloth.
Important Precautions
Do not use this method on self-cleaning ovens, as the chemicals can damage the special coating. Also avoid getting the mixture on heating elements or the oven door seal. For best results, tackle grease as soon as possible after cooking.
19. Cornstarch and Water for Grease on Walls
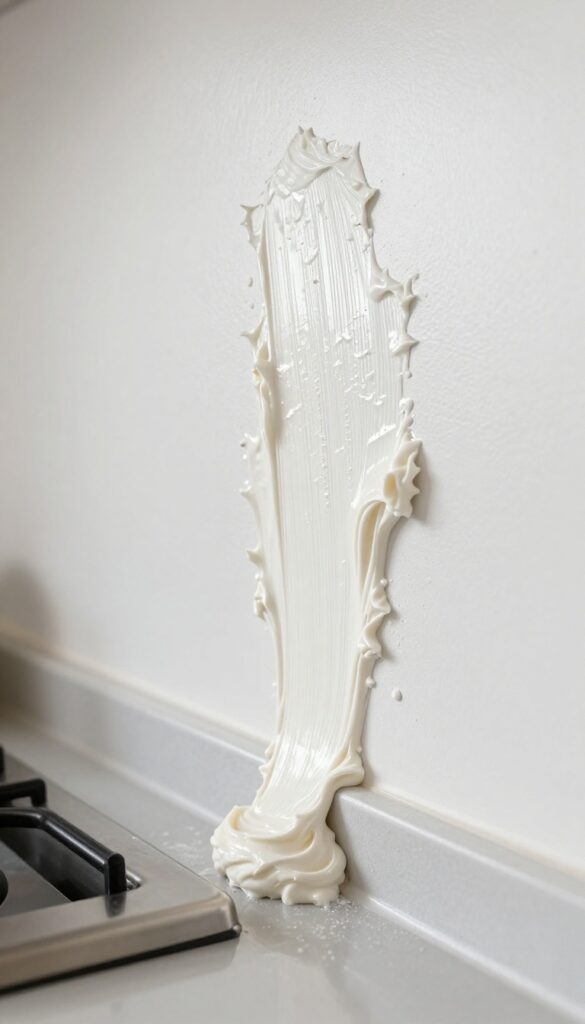
Kitchen walls take a beating from cooking splatters, especially around the stove. Grease can cling to painted surfaces and turn into a sticky film that attracts dust. Instead of scrubbing with harsh chemicals that might strip the paint, try a simple cornstarch paste.
Cornstarch is a natural absorbent that lifts grease without the need for abrasive scrubbing. When mixed with water, it forms a paste that adheres to vertical surfaces long enough to draw out the oil. Once dry, it brushes away easily, taking the grease with it and leaving your walls clean and paint intact.
How To Make The Paste
In a small bowl, mix 2 tablespoons of cornstarch with enough water to create a thick, spreadable paste. The consistency should be similar to toothpaste—not too runny or it will drip. For tougher grease, add a drop of dish soap to boost the cleaning power.
Application Tips For Best Results
Use a clean sponge or your fingers to apply the paste directly onto the greasy spots. Spread it evenly, about 1/8 inch thick. Let it sit for 15–20 minutes until completely dry.
Then, simply brush off the residue with a soft brush or dry cloth. No rinsing needed.
Why It Works Without Damaging Paint
Unlike degreasers that contain solvents, cornstarch is a gentle starch that absorbs oil physically. It won't soften or strip latex or oil-based paints. This method is especially safe for matte or flat finishes, which can be easily damaged by harsh scrubbing or chemical cleaners.
20. Rubbing Alcohol for Sticky Residue
Sticker goo and tape marks are annoying, but they don't require harsh solvents or endless scraping. Rubbing alcohol dissolves the adhesive quickly, letting you wipe it away with almost no effort. It's safe on most surfaces like glass, plastic, and metal, but always test an inconspicuous spot first.
Reach for a cotton ball or soft cloth, dampen it with rubbing alcohol, and press it against the sticky residue for about 30 seconds. The alcohol breaks down the adhesive bonds, so the gunk lifts off with a gentle rub. For stubborn spots, let the alcohol sit a bit longer or use a plastic scraper to nudge it loose.
Finish by wiping the area with a damp cloth to remove any leftover alcohol. This method works great on price tags, sticker remnants, and tape marks from packaging or walls.
Why It Works So Well
Rubbing alcohol is a solvent that dissolves many types of adhesives, especially those used in stickers and tapes. It evaporates quickly, so it won't leave a wet mess or damage most surfaces. Unlike oil-based removers, it doesn't leave a greasy film behind.
Best Surfaces To Use It On
Glass jars, plastic containers, metal appliances, and sealed wood are all fair game. Avoid using it on painted walls or unsealed wood, as it can strip the finish. Always do a quick patch test in a hidden area first.
Pro Tip For Extra Stubborn Goo
If the residue has been sitting for a while, soak a cotton ball in rubbing alcohol and let it sit on the spot for a full minute. Then gently scrape with a plastic card or your fingernail. Repeat if needed—patience pays off.
21. Dish Soap and Vinegar for Shower Doors
Shower doors look great when they're clean, but soap scum and hard water stains can build up fast. Commercial glass cleaners often leave streaks or require heavy scrubbing. A simple mix of dish soap and vinegar cuts through the grime with minimal effort.
Combine 1 cup of white vinegar, 1 cup of dish soap, and 1 gallon of warm water in a spray bottle. Shake gently to mix. Spray the solution generously on glass doors, covering all areas with buildup.
Let it sit for 10 minutes so the vinegar can break down mineral deposits and the soap can lift soap scum. Then rinse thoroughly with warm water and wipe dry with a microfiber cloth for a streak-free shine. For stubborn spots, scrub lightly with a soft sponge before rinsing.
Why This Combo Works
Vinegar is acidic, which dissolves hard water minerals like calcium and magnesium. Dish soap is a surfactant that breaks down grease and soap scum. Together, they create a powerful cleaner that tackles both organic and mineral residues without harsh chemicals.
Tips For Best Results
Use distilled white vinegar for consistent acidity. Avoid using on natural stone or unsealed surfaces. For extra shine, follow up with a squeegee after each shower to prevent future buildup.
If your doors have heavy scaling, let the solution sit longer or apply with a non-abrasive pad.
22. Baking Soda and Vinegar for Toilet Stains
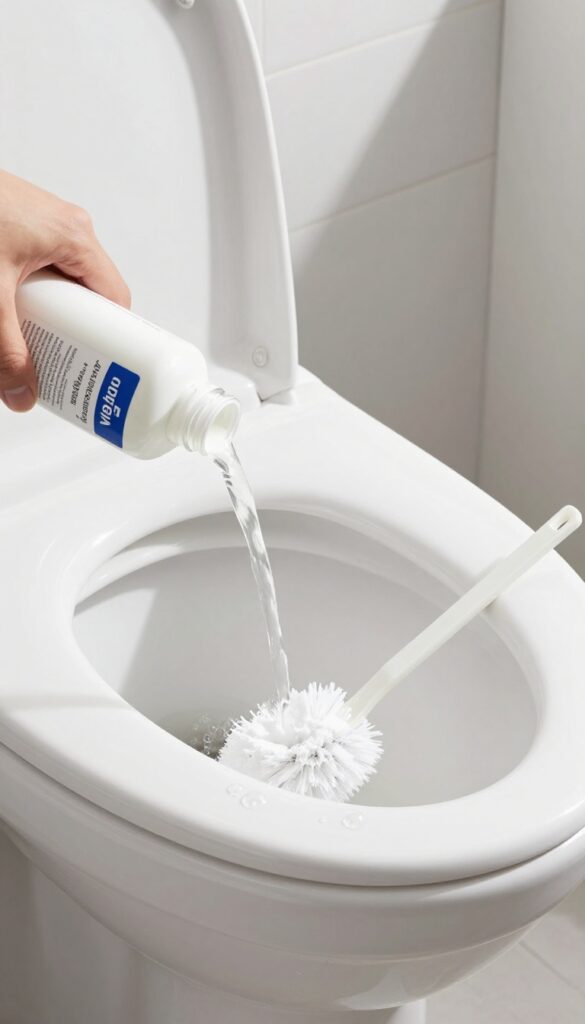
Toilet bowl rings and stubborn stains are no match for this classic fizzy duo. Baking soda gently scrubs while vinegar dissolves mineral deposits and odors. It's cheap, non-toxic, and leaves your toilet fresh without harsh chemicals.
Sprinkle about 1 cup of baking soda evenly around the inside of the toilet bowl, focusing on areas with rings or stains. Then pour 1 cup of white vinegar slowly over the baking soda. The mixture will fizz and bubble, helping to lift grime.
Let it sit for 10 minutes, then scrub thoroughly with a toilet brush. Flush to rinse. For tough stains, repeat or let the mixture sit longer before scrubbing.
Why It Works
Baking soda is a mild abrasive that physically scrubs away residue without scratching porcelain. Vinegar's acidity breaks down alkaline mineral deposits like limescale and hard water stains. The fizzing action helps dislodge dirt from crevices.
Tips For Best Results
Use white vinegar, not apple cider or balsamic, to avoid staining. For extra cleaning power, add a few drops of tea tree or lemon essential oil. Avoid using this method if you have a septic system, as large amounts of vinegar can disrupt the bacterial balance.
Always flush after cleaning to remove all residue.
When To Use A Different Approach
If stains are rust-colored or very old, you may need a pumice stone or a commercial cleaner designed for iron or calcium deposits. Baking soda and vinegar work best for regular maintenance and light to moderate stains.
23. Lemon Juice and Baking Soda for Plastic Containers
Plastic containers are great for leftovers, but tomato-based sauces can leave stubborn orange stains that just won't wash out. You don't need harsh bleach or a new container—just lemon juice and baking soda. This dynamic duo lifts the stain naturally, leaving your containers looking fresh again.
Why It Works
Lemon juice is acidic, which helps break down the lycopene in tomato sauce—the compound responsible for those orange stains. Baking soda is a mild abrasive that scrubs away residue without scratching plastic. Together, they create a gentle yet effective stain-fighting paste.
How To Make And Use The Paste
Squeeze fresh lemon juice into a small bowl and add baking soda a little at a time, stirring until you get a thick paste—about a 1: 2 ratio of lemon juice to baking soda works well. Apply the paste directly to the stained areas inside the container, using your fingers or a soft sponge to rub it in. Let it sit for 15 to 30 minutes, then rinse with warm water and wash as usual.
Tips For Stubborn Stains
For older or set-in stains, let the paste sit longer—up to an hour. You can also add a splash of white vinegar for extra acidity. If the stain persists, repeat the process or try leaving the container in direct sunlight after applying the paste; UV rays can help bleach the stain naturally.
24. Salt and Ice for Red Wine on Carpet
Red wine spills on carpet are stressful, but you don't need fancy stain removers. A simple combo of salt and ice can lift the stain before it sets. The salt absorbs the wine while the ice dilutes it, making blotting much easier.
Act fast—the sooner you treat the spill, the better. Start by pouring a generous layer of salt over the entire wine stain. Make sure it's thick enough to cover the wet area completely.
Then place an ice cube directly on top of the salt. Let the ice melt slowly; as it does, it will dilute the wine, and the salt will soak up the liquid. After about 10 minutes, blot the area with a clean cloth or paper towel.
Repeat if needed, then vacuum up any remaining salt once the carpet is dry.
Why Salt And Ice Work
Salt is a natural absorbent that pulls moisture—and the wine pigments—out of carpet fibers. Ice adds just enough water to dilute the stain without spreading it, making the salt more effective. This method is gentle on carpets and avoids harsh chemicals.
Tips For Best Results
Use plain table salt or kosher salt; avoid iodized salt with additives. Don't rub the stain, as that can push it deeper. Blot gently from the outside in.
If the stain is old, try a mixture of hydrogen peroxide and dish soap instead.
25. Vodka for Mildew on Grout
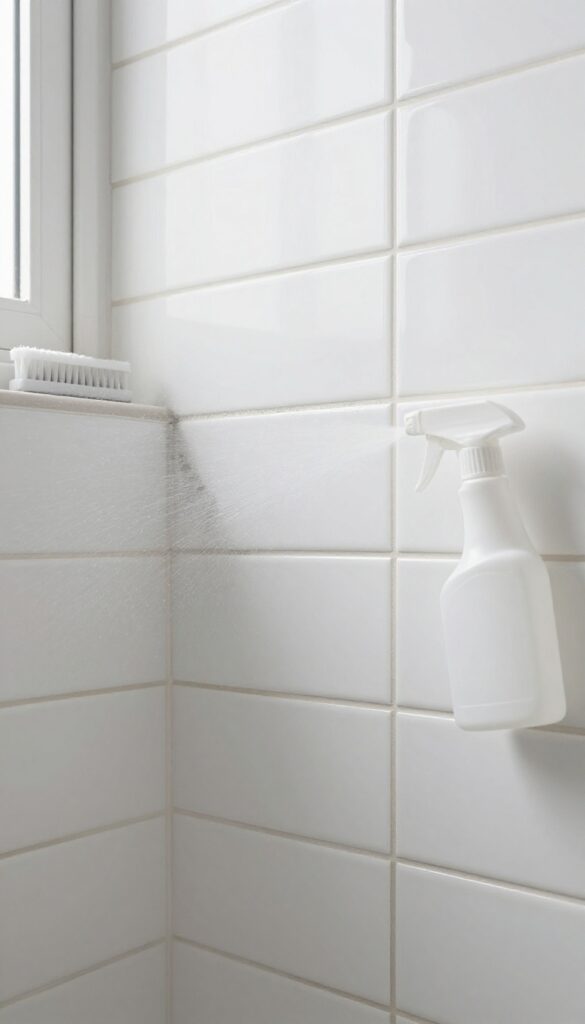
Grout lines in the bathroom or kitchen can develop dark mildew spots that are tough to remove. Vodka, with its high alcohol content, works as a natural disinfectant and mold killer. It evaporates quickly, so it won't leave behind moisture that encourages regrowth.
This simple solution is perfect for spot-treating small areas without harsh chemicals.
Vodka is an effective, non-toxic way to tackle mildew on grout. The alcohol penetrates the porous surface and kills mold spores on contact. Unlike bleach, it doesn't produce strong fumes or damage grout over time.
Plus, it's a great use for that bottle you never opened.
Why Vodka Works
Vodka contains ethanol, which denatures proteins and disrupts the cell membranes of mold and mildew. This makes it a potent antimicrobial agent. Its low surface tension allows it to seep into tiny cracks in grout, reaching spores that scrubbing alone might miss.
And because it evaporates rapidly, it doesn't leave a wet environment that could promote new growth.
How To Apply
Pour plain vodka (80 proof or higher) into a spray bottle. Spray directly onto the mildewed grout until it's saturated. Let it sit for 10 minutes to give the alcohol time to work.
Then scrub with a stiff brush—an old toothbrush works great for grout lines. Wipe away any residue with a damp cloth. No rinsing needed.
Tips For Best Results
Use unflavored vodka; flavored varieties may leave a sticky residue. For stubborn mildew, repeat the process or let the vodka sit longer. Test on an inconspicuous area first if your grout is colored.
Keep a spray bottle under the sink for quick touch-ups after steamy showers.
FAQ
Are homemade cleaning solutions as effective as store-bought ones?
Yes, for most everyday spills. Ingredients like vinegar, baking soda, and hydrogen peroxide are powerful cleaners. They may not disinfect as strongly as bleach, but they're safe and effective for routine messes.
Can I mix vinegar and baking soda together?
Yes, but use them in sequence. When mixed, they fizz and lose potency quickly. For drains or ovens, apply one, then the other, and let the reaction do the work.
How long do homemade cleaners last?
Most last 1-2 weeks if stored in a cool, dark place. Label the bottle and discard if the smell changes or you see mold. For best results, make small batches.
Are these solutions safe for pets and kids?
Generally yes, since they use food-grade ingredients. However, keep all cleaning solutions out of reach. Some essential oils can be toxic to pets, so skip them if you're unsure.
What should I avoid when making homemade cleaners?
Never mix bleach with vinegar or ammonia—it creates toxic fumes. Also avoid using vinegar on stone surfaces like granite or marble, as it can etch them.
Conclusion
Homemade cleaning solutions prove that you don't need a cabinet full of harsh chemicals to handle everyday spills. With just a few pantry staples, you can tackle everything from coffee stains to sticky counters without breaking the bank. These 25 recipes give you safe, effective alternatives that actually work.
Start with the ones that address your most frequent messes, then experiment from there. Your home will smell fresher, you'll cut down on plastic waste, and you'll always have a cleaner ready when accidents happen. Give a few a try this week and see the difference simple ingredients can make.


