Spills, smudges, and sticky spots happen fast. Reaching for a disposable wipe is convenient, but store-bought options can be pricey and full of harsh chemicals. Making your own cleaning wipes is surprisingly simple and lets you control exactly what touches your surfaces.
You probably already have most of the ingredients in your pantry. A roll of paper towels, some basic cleaners, and a few minutes are all it takes. These 23 DIY cleaning wipes ideas cover everything from daily touch-ups to stubborn messes.
Each recipe is designed for a specific task, so you can grab the right wipe for the job. No more guessing or using a harsh cleaner on a delicate surface. Let's get your homemade wipes ready.
1. All-Purpose Citrus Wipes for Everyday Spills
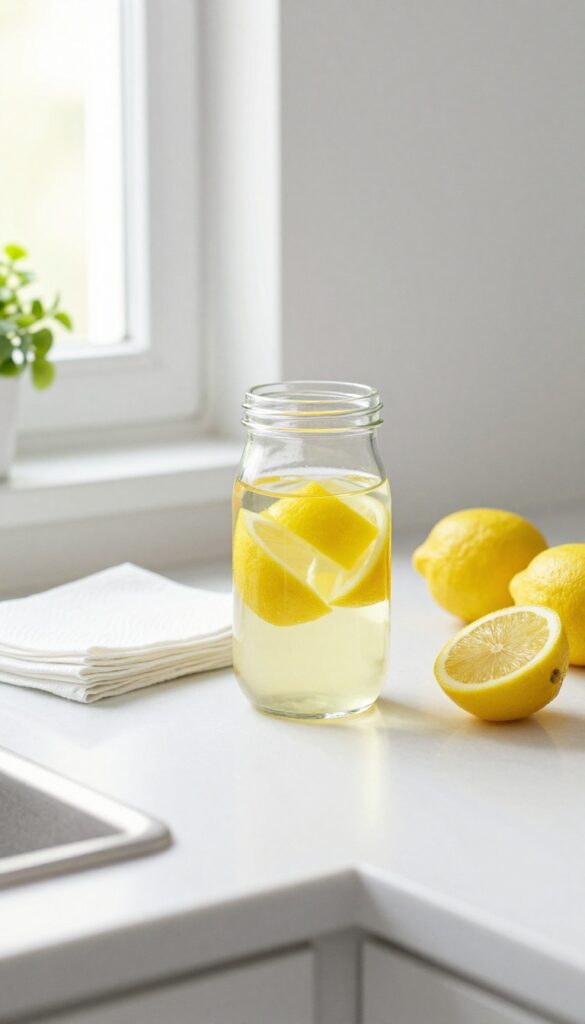
Citrus-infused wipes are a staple for quick cleanups. They tackle grease, grime, and sticky spots while leaving behind a fresh, natural scent. Best of all, you can make a batch in minutes with ingredients you likely have on hand.
These wipes are perfect for countertops, tables, and other hard surfaces. The combination of vinegar and citrus cuts through grease without harsh chemicals. Plus, the lemon peels add a bright fragrance that lingers pleasantly.
How To Make Them
Fill a glass jar with white vinegar and drop in a handful of lemon peels. Let it sit for a week, then strain the liquid. Mix equal parts of this citrus vinegar and water in a container, add a roll of paper towels cut in half, and pull from the center.
Best Uses
Use these wipes on kitchen counters, stovetops, and bathroom sinks. They're gentle enough for daily cleaning but strong enough to handle light grease. Avoid using on granite or marble, as vinegar can dull the sealant.
Customization Tips
Swap lemon for orange or grapefruit peels for a different scent. Add a few drops of tea tree oil for extra antibacterial power. Store in a sealed container to keep wipes moist for up to two weeks.
2. Glass and Mirror Streak-Free Wipes
Nothing ruins a cleaning session faster than streaky windows or mirrors. You wipe and wipe, but the smears just won't go away. The secret to a perfect shine is a simple homemade solution that evaporates before streaks have a chance to form.
These wipes are a game-changer for anyone tired of cloudy glass. The rubbing alcohol dries almost instantly, while a tiny bit of dish soap cuts through grease and grime. Use them on windows, mirrors, shower doors, and glass tabletops for a crystal-clear finish every time.
The Perfect Ratio
Mix 1 cup of rubbing alcohol (70% or 91% works fine) with 1 cup of water and 1 drop of liquid dish soap. Avoid adding more soap—too much leaves a residue. Pour the solution over a roll of paper towels in a container, or spray it onto a microfiber cloth for a reusable option.
Best Uses Around The House
These wipes excel on any smooth, non-porous surface. Use them on bathroom mirrors, glass shower doors, windows, glass tabletops, and even stainless steel appliances for a streak-free sparkle. They also work well on chrome fixtures and picture frame glass.
Pro Tips For A Flawless Shine
Always wipe in one direction—top to bottom or side to side—to avoid redistributing dirt. Use a fresh section of the wipe for each pass. For large windows, a squeegee after wiping gives an even better result.
Store the wipes in an airtight container to prevent the alcohol from evaporating.
3. Kitchen Degreasing Wipes for Stovetops
Stovetop grease can be stubborn, but these DIY degreasing wipes make quick work of baked-on grime. A simple mix of warm water, dish soap, and vinegar cuts through grease without harsh scrubbing or scratching. Keep a container near your stove for effortless cleanup after cooking.
The Perfect Grease-cutting Recipe
Combine 2 cups warm water, 1 tablespoon dish soap, and 1 tablespoon white vinegar in a bowl. Stir gently to avoid sudsing too much. Pour over a half roll of paper towels in a container, pull the center tube, and let absorb for 10 minutes.
The soap breaks down grease while vinegar dissolves residue and deodorizes.
Best Surfaces For These Wipes
These wipes are safe for ceramic, glass, and stainless steel stovetops. Avoid using on unsealed cast iron or aluminum, as vinegar can react. For range hoods, wipe gently to remove grease buildup without damaging the finish.
Always test on a small area first.
Storage And Usage Tips
Store wipes in an airtight container to keep them moist. Use within two weeks for best effectiveness. After wiping, follow with a dry cloth to prevent streaks.
For extra tough spots, let the wipe sit on the grease for a minute before wiping.
4. Bathroom Disinfecting Wipes with Bleach

Bathrooms need a serious clean, especially around toilets and sinks. Bleach-based wipes tackle germs and grime effectively, but you don't have to buy them. A simple DIY version works just as well and costs less.
These wipes are perfect for weekly deep cleans or when someone's been sick. Just remember to use them safely and store them out of reach of kids and pets.
Safe Bleach Ratio For Diy Wipes
The key to effective disinfecting is the right bleach concentration. Mix 1 tablespoon of bleach per quart of water (or 1/4 cup per gallon). This meets CDC guidelines for killing most germs.
Never use more than that, as it can damage surfaces and irritate skin. Always add bleach to water, not the other way around, to avoid splashing.
What You’ll Need
Grab a roll of paper towels, a container with a tight lid, bleach, and water. A half-gallon container works well for a standard roll. You can also use a reusable wipe dispenser.
Label the container clearly with a permanent marker, including the date and a warning about bleach.
How To Make And Use Them
Cut the paper towel roll in half with a serrated knife so it fits in your container. Place it in the container, then pour the bleach mixture over the top. Let it absorb for a few minutes, then pull the center tube out to create a dispenser.
Use these wipes on hard, non-porous surfaces like toilet exteriors, sinks, shower tiles, and countertops. Avoid marble, granite, or other stone surfaces, as bleach can etch them.
Safety Tips To Remember
Always wear gloves when handling bleach wipes to protect your skin. Keep the container sealed when not in use to prevent the bleach from evaporating. Never mix bleach with other cleaners, especially ammonia or vinegar, as this creates toxic fumes.
Replace the solution every week for maximum effectiveness.
5. Gentle Wood Floor Wipes for Quick Touch-Ups
Hardwood floors add warmth to any home, but they show every speck of dust and every little spill. A quick swipe with the wrong cleaner can dull the finish or leave streaks. These DIY wipes are made with a gentle formula that cleans without stripping the sealant.
The magic comes from a simple mix of water, a splash of vinegar, and a few drops of olive oil. The vinegar cuts through grime, while the oil conditions the wood and adds a subtle shine. Keep a stack in an airtight container under the sink for those between-mopping touch-ups.
What You’ll Need
Gather a roll of sturdy paper towels (select-a-size works well), a container with a tight lid, distilled water, white vinegar, and extra virgin olive oil. Optional: a few drops of lemon essential oil for a fresh scent. Avoid using too much oil, as it can leave a sticky residue if overapplied.
How To Make Them
Cut the paper towel roll in half with a sharp serrated knife so it fits your container. Mix 2 cups of distilled water, 1 tablespoon of white vinegar, and 1 tablespoon of olive oil. Pour the solution over the paper towels, close the lid, and flip the container to distribute the liquid evenly.
Let it sit for 5 minutes, then pull from the center.
Best Uses And Tips
Use these wipes only on sealed hardwood floors—never on unfinished or waxed wood. They’re perfect for quick cleanups after meals or pet accidents. For best results, wipe in the direction of the grain and avoid soaking the floor.
Store the container in a cool, dry place and use within two weeks.
6. Granite and Stone Safe Wipes
Natural stone countertops add beauty and value to a home, but they require special care. Harsh chemicals like vinegar or citrus can etch the surface and leave permanent dull spots. These DIY wipes are formulated to be gentle yet effective, keeping your granite or marble looking polished without the risk of damage.
Making your own stone-safe wipes is straightforward. You only need a few ingredients that won't compromise the sealant or finish. The key is avoiding acidic cleaners and sticking to a neutral pH solution.
What You'll Need
Gather a roll of heavy-duty paper towels, a container with a lid, 2 cups of water, 1/4 cup of rubbing alcohol (70% isopropyl), and a drop of liquid castile soap. Do not use vinegar, lemon, or any citrus-based soap.
How To Make Them
Mix the water, rubbing alcohol, and castile soap in the container. Cut the paper towel roll in half so it fits, place it in the container, and pour the solution over the top. Let it absorb for a few minutes, then pull the cardboard tube out.
The wipes are ready to use.
Best Uses And Tips
Use these wipes for daily spills, fingerprints, and light grime on granite, marble, quartz, or other sealed stone. They clean without streaking or leaving residue. Avoid using them on unsealed stone or porous surfaces.
Always test a small hidden area first, and never soak the stone—wipe gently.
7. Stainless Steel Polishing Wipes
Fingerprints, smudges, and water spots can make stainless steel appliances look dull and dirty. Instead of reaching for a commercial polish filled with chemicals, you can make your own polishing wipes that leave a streak-free shine. The secret is a simple mix of water, vinegar, and a few drops of baby oil—the oil buffs out marks and adds a protective layer.
These wipes are perfect for refrigerators, dishwashers, range hoods, and even stainless steel sinks. They work fast and leave a smooth, glossy finish without any residue. Keep a jar near your kitchen sink or laundry room for quick touch-ups whenever smudges appear.
The Perfect Ratio
Mix 1 cup of water, 1/4 cup of white vinegar, and 1 tablespoon of baby oil in a bowl. Stir well, then pour over a half roll of paper towels in a container. The oil separates slightly, so shake or stir the liquid before each use to keep it blended.
Application Tips
Always wipe with the grain of the stainless steel to avoid streaks. Use a dry microfiber cloth afterward to buff the surface for extra shine. These wipes also work on chrome fixtures and other metal surfaces.
Storage And Longevity
Store the wipes in an airtight container to prevent drying out. They stay fresh for up to two weeks. Label the container clearly so you don't confuse them with other cleaning wipes.
8. Microwave Steam Wipes for Caked-On Food
Microwave messes are the worst. That spaghetti sauce explosion from yesterday is now a crusty, stubborn stain. Scrubbing it with a dry paper towel only smears it around.
These microwave steam wipes use the power of heat and moisture to loosen even the most baked-on food in seconds.
The secret is simple: steam. By microwaving a damp paper towel with a splash of lemon juice, you create a burst of steam that softens dried food without any scrubbing. The lemon also cuts grease and leaves a fresh scent.
After 30 seconds, the interior wipes clean with almost no effort.
Why Steam Works So Well
Microwave radiation excites water molecules, turning them into steam. This steam penetrates baked-on food particles, rehydrating them so they lift off easily. No harsh chemicals needed.
Plus, the heat helps kill bacteria.
How To Make Your Steam Wipes
Take a few paper towels and fold them to fit a microwave-safe bowl. Soak them with water and add a squeeze of fresh lemon juice. Microwave on high for 30 seconds.
Let them cool for a moment, then wipe down the interior. Rinse the turntable separately.
Extra Tips For Tough Spots
For really stubborn spots, let the steam sit for a minute after microwaving. You can also add a drop of dish soap to the water. Avoid using too much lemon juice, as it can be acidic on some microwave surfaces.
Always use a microwave-safe bowl.
9. Oven Grease-Cutting Wipes
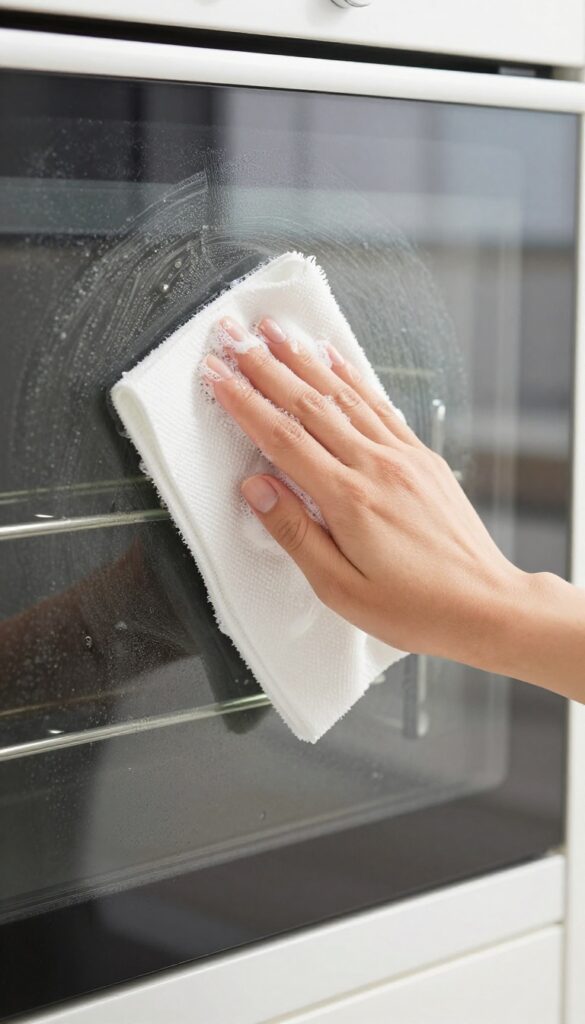
Oven doors and stovetops collect baked-on grease that regular wipes can't touch. These DIY wipes use the power of baking soda and dish soap to break down stubborn grime without scratching surfaces. They're perfect for weekly maintenance between deep cleans, keeping your oven looking presentable.
Mix 2 tablespoons baking soda, 1 tablespoon dish soap, and 1 cup warm water in a bowl. Stir until baking soda dissolves. Cut a roll of paper towels in half, remove the cardboard tube, and place the half-roll in a container.
Pour the mixture over the towels, ensuring they are evenly saturated. Let sit for 5 minutes, then pull from the center. These wipes are mildly abrasive but safe for enamel and glass oven surfaces.
Use them on cool ovens only—never on hot surfaces. Rinse with a damp cloth afterward to avoid residue.
Why This Mix Works
Baking soda is a mild abrasive that lifts burnt-on food without scratching. Dish soap cuts through grease by breaking surface tension. Together, they create a gentle but effective degreaser that's safe for regular use.
How To Use Safely
Always let the oven cool completely before wiping. Apply the wipe in circular motions on greasy spots, then let it sit for 5 minutes. Wipe away with a clean damp cloth to remove any baking soda residue.
Avoid using on self-cleaning oven liners or heating elements.
Storage Tips
Store these wipes in an airtight container to keep them from drying out. They stay fresh for up to two weeks. If they dry out, add a splash of warm water and shake the container gently.
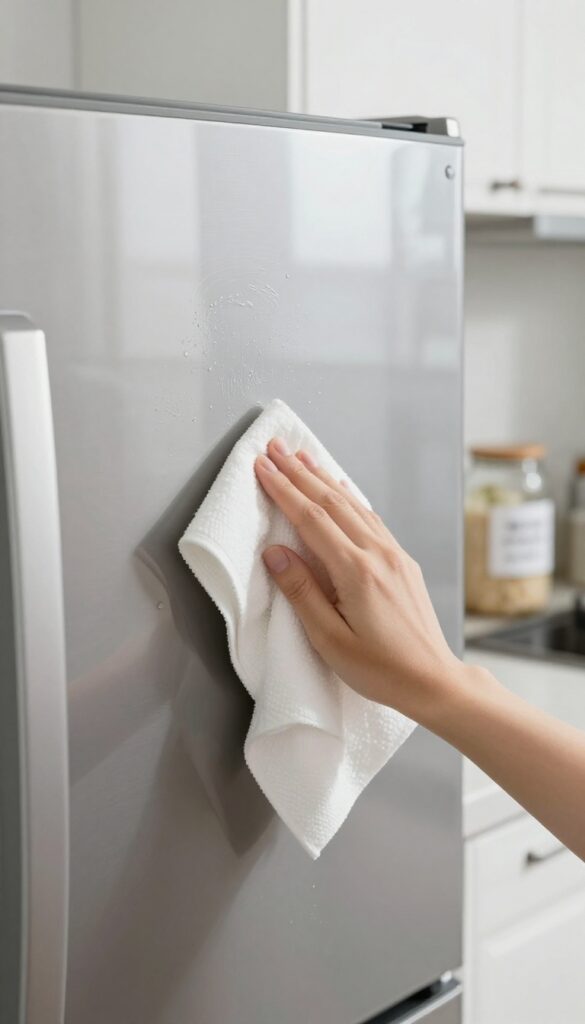
10. Fridge and Freezer Wipes for Spills
Food drips, sauce leaks, and mystery spills happen inside the fridge more often than we like. A dedicated wipe that cleans and deodorizes at the same time makes quick work of these messes. These baking soda wipes are gentle enough for food storage areas but tough on sticky spots.
Mix 2 cups of warm water with 1 tablespoon of baking soda until dissolved. Pour over a half roll of paper towels in a container. Let absorb, then pull from the center.
Use these wipes to clean shelves, drawers, and door bins. The baking soda neutralizes odors while the water lifts spills. No rinsing needed—just wipe and go.
Why Baking Soda Works Best
Baking soda is a mild alkali that breaks down acidic spills like fruit juice or tomato sauce without scratching. It also absorbs odors instead of just covering them up. Unlike vinegar, it won't leave a lingering smell in your fridge.
How To Store And Use
Keep the wipes in an airtight container in the fridge so they're always handy. Use them on glass, plastic, and metal shelves. For dried-on spills, let the wipe sit on the spot for a minute before scrubbing gently.
Replace the roll every two weeks or when the wipes start to dry out.
Customize For Extra Cleaning Power
Add a drop of lemon essential oil for a fresh scent. If you need more degreasing power, mix in a teaspoon of castile soap. Avoid using too much soap—it can leave a residue that affects food taste.
11. Electronics Screen Safe Wipes
Your phone, tablet, and laptop screens collect fingerprints, dust, and smudges daily. Using harsh cleaners or rough paper towels can damage the delicate oleophobic coating or leave scratches. These DIY wipes are gentle yet effective, using only distilled water and a tiny drop of mild soap on a soft microfiber cloth.
Skip the expensive pre-moistened screen wipes and make your own. The key is using distilled water to avoid mineral deposits and a microfiber cloth that won't scratch. A drop of mild dish soap (like Dawn) helps cut grease without leaving residue.
Store the solution in a spray bottle and mist your cloth as needed—never spray directly on devices. For stubborn smudges, let the cloth sit on the screen for a few seconds before wiping.
Why Microfiber Matters
Microfiber cloths trap dust and oil without scratching. Paper towels can be abrasive, especially on anti-glare or matte screens. Use a clean, lint-free microfiber cloth dedicated to screens only.
Wash it separately without fabric softener to maintain effectiveness.
The Perfect Solution Ratio
Mix 1 cup distilled water with 1 drop of mild liquid soap. Too much soap leaves streaks. For extra cleaning power, add 1 drop of isopropyl alcohol (70% or less) but test on a small area first.
Avoid vinegar, ammonia, or bleach—they can strip screen coatings.
Storage And Use Tips
Store your solution in a small spray bottle. Mist the microfiber cloth until damp, not wet. Wipe screens gently in circular motions.
For glasses or camera lenses, use an even lighter touch. Replace cloths when they get dirty to avoid redistributing grime.
12. Leather Furniture Conditioning Wipes
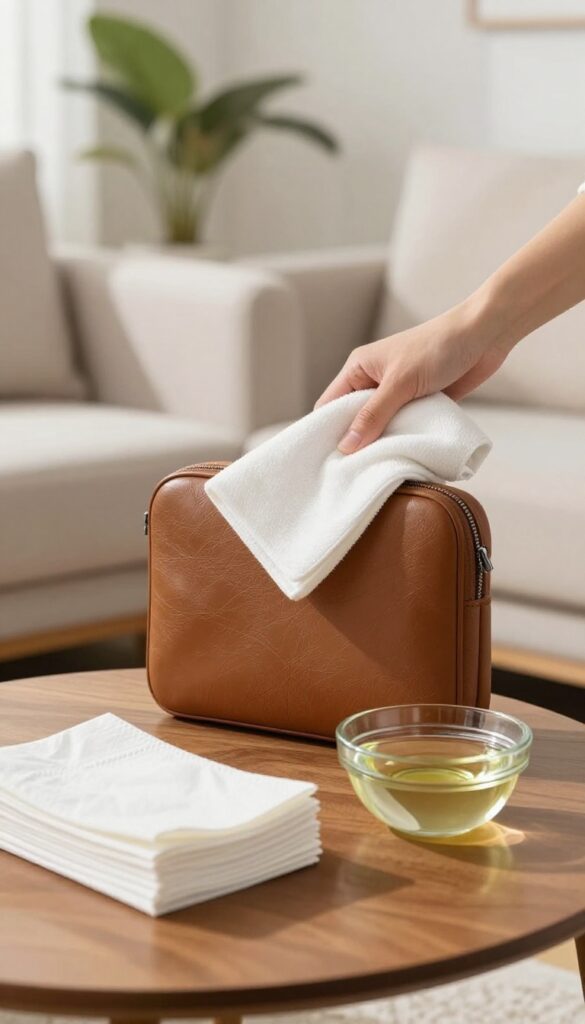
Leather sofas and chairs add warmth to a room, but they show every spill and smudge. Commercial leather cleaners can be expensive and loaded with silicones that build up over time. These DIY conditioning wipes clean gently while keeping the leather soft and supple.
Mix 1 cup distilled water, 1 tablespoon white vinegar, and 1 tablespoon olive oil in a bowl. Stir well. Stack half a roll of paper towels in a container, pour the mixture over them, and let soak for a few minutes.
Pull from the center to use. Wipe leather surfaces gently, then buff with a dry cloth. Always test on a hidden area first to ensure the color doesn't change.
Why Vinegar And Oil Work
Vinegar cuts through dirt and grime without stripping the leather's natural oils. Olive oil replaces lost moisture and adds a subtle shine. Together they create a gentle cleaner that won't dry out the material.
Best Leather Types For This Recipe
This mix works best on finished leather—the kind with a protective coating. Avoid using it on suede, nubuck, or unfinished leather, as oil can darken or stain those surfaces. Stick to the test patch rule.
Storage And Shelf Life
Keep the wipes in a sealed container at room temperature. Use within two weeks, as the oil can turn rancid over time. Shake the container gently before each use to re-emulsify the ingredients.
13. Upholstery Spot Cleaning Wipes
Couches and chairs take a beating. Kids, pets, and everyday life leave behind mystery stains that can set in fast if you don't act. These DIY upholstery wipes are gentle enough for most fabrics but tough on fresh spills.
The key is using rubbing alcohol, which speeds up drying and helps prevent mold or mildew from forming in the cushion foam.
Mix 1 cup water, 1 cup rubbing alcohol, and 1 teaspoon dish soap in a bowl. Stir gently to combine without creating too many suds. Pour the solution over a half roll of paper towels in a container with a lid.
Let the towels absorb the liquid for a few minutes, then pull out the cardboard tube. The wipes are ready to use. When a spot appears, blot—don't rub—the stain with a wipe.
The alcohol evaporates quickly, so the fabric dries fast. Always test on an inconspicuous area first to make sure the solution doesn't discolor the fabric. These wipes are best for fresh stains like coffee, juice, or pet accidents.
For set-in stains, you may need a stronger cleaner.
Why Alcohol Works
Rubbing alcohol is a drying agent. It helps the moisture from the wipe evaporate rapidly, which is crucial for upholstery. If you saturate a cushion with water alone, it can soak into the foam and stay damp for hours or days, leading to musty smells or mold.
Alcohol cuts that risk dramatically.
Best Fabrics To Use These On
These wipes are safe for most synthetic fabrics like polyester, microfiber, and nylon. They also work on cotton blends. Avoid using them on delicate fabrics like silk, velvet, or untreated leather.
Always check the manufacturer's cleaning code on your furniture tag. If it says "W" or "WS, " you're good. If it says "S" (solvent only), skip the water and use a dry solvent cleaner instead.
How To Store And Label
Keep your upholstery wipes in a sealed container near the couch. Label the container clearly so no one mistakes them for a different cleaner. They'll stay fresh for about two weeks.
If the wipes start to dry out, add a splash of water and alcohol in equal parts to refresh them.
14. Carpet Stain Pre-Treatment Wipes
Carpet spills are inevitable, but they don't have to become permanent stains. The key is acting fast with the right pre-treatment. These DIY wipes are soaked in a gentle but effective solution that breaks down spills before they set.
Keep a stack handy in the laundry room or under the sink for quick access when accidents happen.
When a fresh spill hits the carpet, every second counts. Blotting with a dry cloth only goes so far. These pre-treatment wipes contain a mild vinegar and dish soap mixture that lifts stains without damaging fibers.
They're safe for most carpet types and are especially effective on coffee, wine, and juice spills. Simply blot the stain, let the solution sit for a minute, then rinse with a damp cloth.
Why Vinegar Works
White vinegar is a natural stain fighter and deodorizer. It cuts through sticky residues and neutralizes odors without leaving a chemical smell. When combined with a drop of dish soap, it gently breaks down the stain's surface tension, making it easier to lift from carpet fibers.
Best Spills For These Wipes
These wipes excel on fresh, water-based spills like soda, tea, and fruit juice. They also work well on pet accidents and muddy footprints. For oil-based stains like grease or makeup, you'll need a different approach, but for daily mishaps, this is your go-to.
How To Store And Use
Cut a roll of paper towels in half and place it in a container. Mix 1 cup water, 1 cup white vinegar, and 1 teaspoon dish soap. Pour over the towels and pull from the center.
Use one wipe to blot the stain gently, then follow with a clean, damp cloth to rinse. Avoid rubbing, which can push the stain deeper.
15. Pet Mess Enzyme Wipes

Pet accidents happen, and they need special attention. Regular wipes might mask the stain but leave behind odors that encourage repeat offenses. Enzyme wipes break down urine, feces, and vomit at a molecular level, eliminating both the mess and the smell.
These homemade wipes are a game-changer for pet owners.
Mix 1 cup of water with 2 tablespoons of an enzyme cleaner like Nature’s Miracle. Pour over a roll of paper towels in a container, let absorb, and pull from the center. Use within a week for best potency.
These wipes are safe for carpets, upholstery, and hard floors—just test on a hidden spot first.
Why Enzymes Work
Enzymes are biological catalysts that break down organic compounds like proteins and urea. Unlike bleach or vinegar, they don’t just cover up the stain; they digest the waste particles. This means the odor is gone for good, and your pet won’t be drawn back to the same spot.
Best Uses
These wipes are perfect for fresh accidents on carpets, rugs, and pet beds. Blot the area first, then wipe with the enzyme wipe. Let it sit for 10–15 minutes before blotting dry.
For old stains, pre-soak the area with the enzyme solution before wiping.
Storage Tips
Store enzyme wipes in an airtight container at room temperature. Avoid direct sunlight, which can degrade the enzymes. Label the container clearly to avoid using them on non-pet messes.
Make a fresh batch every two weeks for maximum effectiveness.
16. Baby Toy Sanitizing Wipes
Babies explore the world with their mouths, so keeping toys and gear clean is a top priority. Store-bought sanitizing wipes can be harsh on delicate skin and often contain fragrances or chemicals you might want to avoid. These DIY baby toy sanitizing wipes are gentle yet effective, using mild dish soap and water to remove germs and grime without leaving behind harmful residues.
Making your own baby toy wipes is quick and budget-friendly. You'll need a roll of sturdy paper towels, a container with a lid, and a simple solution of water and a few drops of mild dish soap. These wipes are perfect for daily cleanups of plastic toys, teethers, and high chairs.
Just remember to rinse with a damp cloth afterward to remove any soap residue, keeping your little one safe.
What You'll Need
Gather a half-gallon-sized container with a lid, a roll of paper towels (cut in half widthwise), 2 cups of warm water, and 1 teaspoon of mild liquid dish soap. Avoid antibacterial soaps or those with added moisturizers, as they can leave a film.
How To Make Them
Mix the water and soap in the container. Remove the cardboard tube from the paper towels and place the roll cut-side down into the liquid. Let it absorb for a few minutes, then pull the first wipe from the center.
Store at room temperature and use within a week.
Using The Wipes Safely
Wipe down plastic toys, teethers, and high chairs thoroughly. Follow up with a clean, damp cloth to rinse off any soap residue. For silicone or rubber items, a quick rinse under running water is even better.
These wipes are not for fabric or electronic toys.
When To Replace
Make a fresh batch every 5–7 days to prevent bacterial growth. If you notice any mold or off smells, discard immediately. For extra peace of mind, you can add a few drops of grapefruit seed extract, which has natural antimicrobial properties.
17. Car Interior Dashboard Wipes
Your car's dashboard collects dust, grime, and sticky residue from air fresheners or spilled drinks. Commercial dashboard wipes often leave a shiny, greasy film that attracts more dust. These DIY wipes cut through the mess without the glare.
Mix 1 cup of water, 1 tablespoon of white vinegar, and a drop of dish soap in a bowl. Cut a roll of paper towels in half, place one half in the mixture, and let it soak for a few minutes. Pull out the cardboard tube and store the wipes in an airtight container.
They're ready to use whenever your dashboard needs a quick refresh.
Why Vinegar Works
Vinegar is a natural degreaser that breaks down oily residues without harsh chemicals. It evaporates quickly, so you won't have streaks or a sticky feel. The small amount of dish soap helps lift embedded dirt from textured surfaces.
Pro Tip For Sensitive Surfaces
Test the wipe on a hidden spot first, especially if your dashboard has a matte finish. Some coatings can be sensitive to vinegar. If you're worried, swap the vinegar for a teaspoon of rubbing alcohol—it still cuts grime but evaporates even faster.
18. Window Sill and Track Wipes
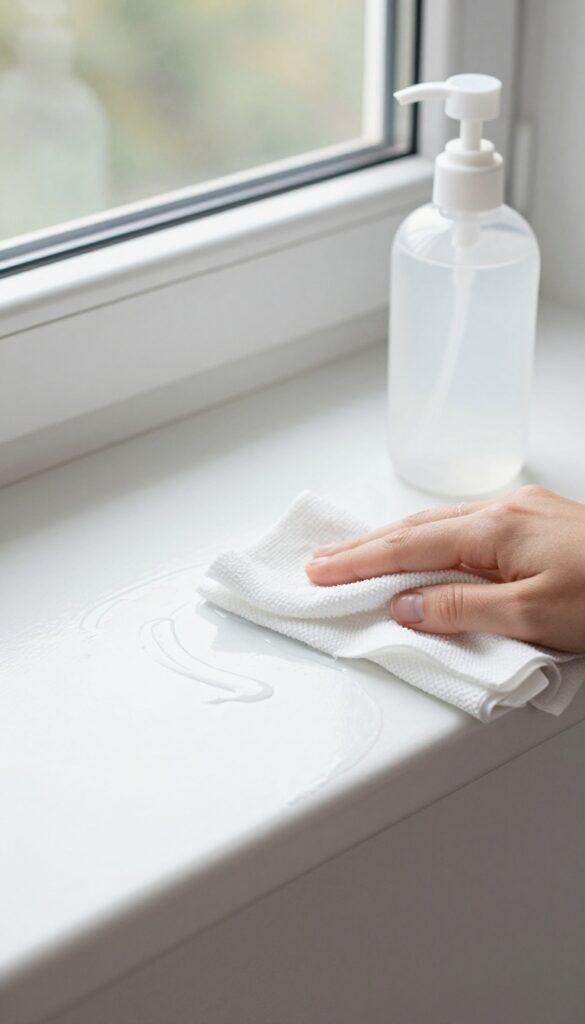
Window sills and tracks collect dust, pollen, and grime that regular cleaning often misses. These areas can get sticky and even moldy, especially after rain or humidity. A dedicated DIY wipe makes it easy to keep them clean without scrubbing for ages.
Mix 1 cup of water, 1/2 cup of white vinegar, and 1 teaspoon of dish soap in a bowl. Pour the solution over a roll of paper towels cut in half, then pull out the cardboard tube. Store in an airtight container.
The vinegar cuts through dirt and mildew, while dish soap tackles grease. For stubborn spots, use an old toothbrush dipped in the solution before wiping.
Why Vinegar Works Best
Vinegar is a natural disinfectant and deodorizer. It breaks down mineral deposits from hard water and kills mold spores without harsh fumes. The smell fades quickly once dry.
Targeting Stubborn Grime
For built-up dirt in tracks, spray the solution directly and let it sit for 5 minutes. Scrub with a toothbrush, then wipe clean with a dry cloth. Repeat if needed.
Storage Tips
Keep these wipes in a sealed container near your cleaning supplies. They stay moist for up to two weeks. Label the container so you don't mistake them for other wipes.
19. Baseboard Dusting Wipes
Baseboards and blinds collect dust faster than you'd think. A dry cloth just pushes it around, and vacuuming every crevice takes forever. These DIY wipes use fabric softener to create an anti-static effect that actually repels dust, so your baseboards stay clean longer.
Mix 1 cup of water with 1 tablespoon of fabric softener in a bowl. Stack a roll of paper towels cut in half, pour the mixture over them, and let it absorb. Store in a sealed container.
The fabric softener reduces static cling, so dust doesn't settle back immediately. Use these wipes on baseboards, window blinds, and even ceiling fan blades. They leave a light fresh scent and a subtle protective layer.
Replace the liquid when the wipes start to dry out.
Why Fabric Softener Works
Fabric softener contains surfactants that coat surfaces with a thin film. This film neutralizes static electricity, which is what attracts dust. Instead of just wiping dust away, you're preventing it from sticking again.
It's a simple trick that saves you from dusting the same spots every few days.
Best Surfaces For These Wipes
These wipes are perfect for smooth, non-porous surfaces like painted baseboards, vinyl blinds, and metal fan blades. Avoid using them on unfinished wood or delicate fabrics, as the softener could leave a residue. For stubborn grime, add a drop of dish soap to the mixture.
Storage And Refill Tips
Keep the wipes in an airtight container or a repurposed wipe dispenser. If they dry out, just add a little warm water mixed with a dash of fabric softener. You can also make a spray version by mixing the same ratio in a spray bottle and using a microfiber cloth.
20. Ceiling Fan Blade Wipes
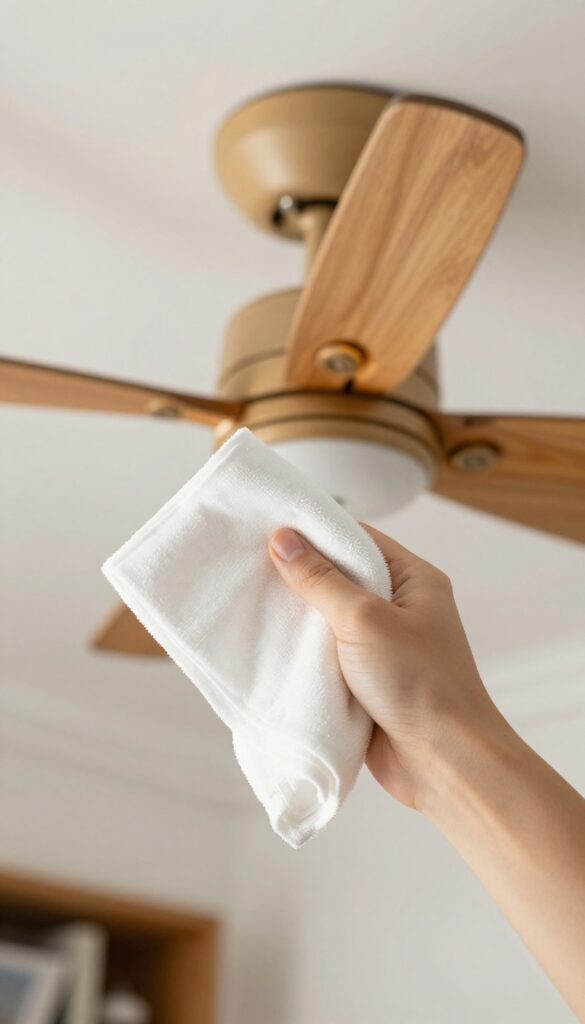
Ceiling fan blades are notorious dust magnets. Wiping them down with a dry cloth often just redistributes the dust into the air. These DIY wipes use a simple water and rubbing alcohol mixture to clean effectively and dry fast, so dust doesn't settle back immediately.
Mix equal parts water and rubbing alcohol in a container. Add a few drops of dish soap if the blades are greasy (common in kitchens). Soak paper towels or a cloth in the solution, wring out excess, and wipe each blade.
The alcohol evaporates quickly, leaving blades clean and less prone to attracting new dust. For best results, wipe both the top and bottom of each blade. This method works on standard wood, metal, or plastic blades.
Why Alcohol Works Best
Rubbing alcohol cuts through grime and evaporates rapidly. This prevents water from seeping into the blade material, which can warp wood or leave streaks. It also sanitizes the surface, killing any mold or mildew that might accumulate in humid rooms.
How To Avoid Drips
Wring out the wipe thoroughly before each blade. A sopping wet wipe will send drips onto your furniture or floor. Work from the center of the blade outward, and use a dry microfiber cloth to catch any excess moisture from the edges.
When To Replace The Wipes
These wipes are reusable if you use a cloth, or disposable if you use paper towels. For a cloth, rinse it out after each use and let it air dry. For paper towels, toss them after cleaning all blades.
The solution stays effective for about a week in a sealed container.
21. Grout Cleaning Wipes
Grout lines trap dirt and mildew, making them look dingy even after mopping. These DIY wipes tackle grime without harsh bleach fumes. Just mix baking soda, water, and a little hydrogen peroxide for a paste that lifts stains and whitens naturally.
Grout is porous and absorbs spills quickly, so regular cleaning keeps it fresh. These wipes are preloaded with a gentle but effective solution that breaks down grime without damaging the grout. The peroxide acts as a mild bleach alternative, brightening without the chemical smell.
What You’ll Need
Grab a roll of heavy-duty paper towels, a quart-sized container, baking soda, water, and 3% hydrogen peroxide. You’ll also need a small bowl and a spoon for mixing.
How To Make Them
Mix ½ cup baking soda with ¼ cup water and 2 tablespoons hydrogen peroxide to form a thin paste. Cut the paper towel roll in half, place one half in the container, and pour the mixture over the top. Let it soak for 5 minutes, then pull the wipes from the center.
How To Use
Wipe the paste onto grout lines, let it sit for 5–10 minutes, then scrub with a brush and rinse. For tough stains, let it sit longer. These wipes are best for spot cleaning, not entire floors.
Storage Tips
Store the container with a tight lid to keep wipes moist. Use within two weeks for best results. If they dry out, add a splash of water and shake.
22. Outdoor Furniture Wipes
Patio furniture takes a beating from the elements. Pollen, bird droppings, and dirt can make your outdoor seating area look neglected. These DIY wipes are perfect for a quick refresh before guests arrive or at the end of a weekend.
What You'll Need
Grab a roll of heavy-duty paper towels, a container with a lid, 2 cups of warm water, 1 tablespoon of dish soap, and 1 tablespoon of white vinegar. That's it. The vinegar helps cut through grime without leaving a sticky residue, and the soap lifts dirt easily.
How To Make Them
Mix the water, dish soap, and vinegar in your container. Cut the paper towel roll in half so it fits, then place it cut-side down into the liquid. Let it soak for a few minutes, then pull out the cardboard tube.
The wipes are ready to use. Store the container with the lid on to keep them moist.
Best Uses And Tips
These wipes work great on plastic, metal, and wood furniture. Wipe down tables and chairs to remove pollen and bird droppings. For tougher spots, let the wipe sit for a minute before scrubbing.
Always rinse with water afterward to prevent any soap film. Avoid using on unfinished or untreated wood.
23. Shoe and Sneaker Freshening Wipes
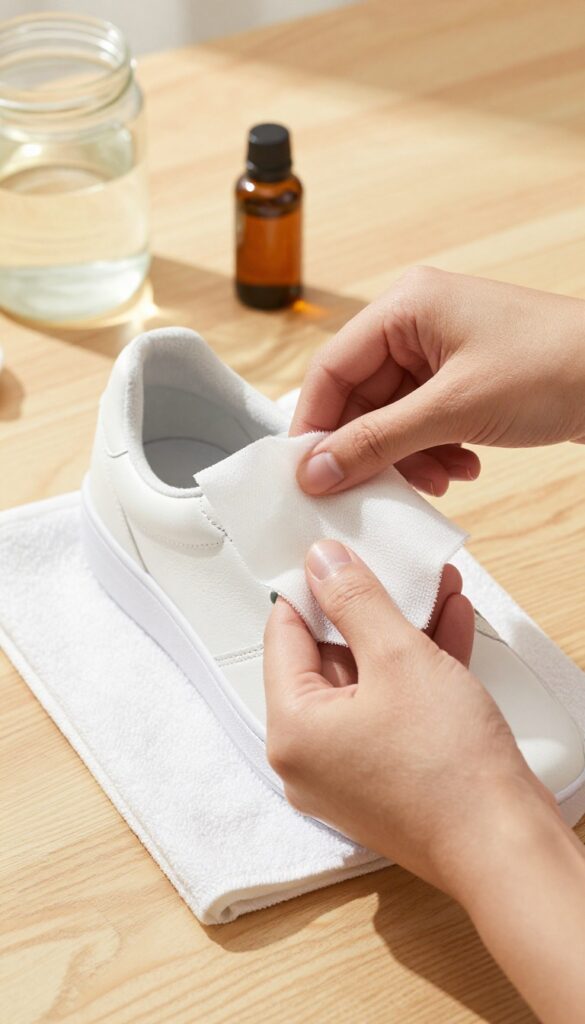
Shoes and sneakers take a beating, and over time they can develop odors that are hard to ignore. Instead of tossing them in the wash or spraying harsh chemicals, these DIY freshening wipes offer a gentle yet effective solution. They disinfect, deodorize, and leave your footwear smelling clean without damaging materials.
Mix 1 cup of water, 1/2 cup of rubbing alcohol, and 10 drops of tea tree oil in a bowl. Stir well, then pour the mixture over a half roll of paper towels placed in a container. Let the towels absorb the liquid for a few minutes, then pull out the center cardboard tube.
Store the wipes in an airtight container. To use, simply wipe the inside of each shoe, focusing on the insole and toe area. Let the shoes air dry completely before wearing.
These wipes are safe for most materials, but test on a small hidden area first.
Why Tea Tree Oil Works
Tea tree oil is a natural antifungal and antibacterial agent. It kills the bacteria that cause foot odor without leaving a strong chemical smell. Plus, it's gentle on skin and fabrics, making it ideal for shoe interiors.
Best Practices For Application
For best results, wipe down shoes after each wear, especially if you've been active. Let the wipes sit for a few minutes before air drying. Avoid soaking the shoes—just a light wipe is enough.
Store the wipes in a cool, dark place to maintain potency.
Customizing Your Freshening Wipes
Feel free to swap tea tree oil with lavender or eucalyptus oil for a different scent. You can also add a tablespoon of white vinegar for extra odor-fighting power. Just be aware that vinegar has a strong smell that fades as it dries.
FAQ
How long do DIY cleaning wipes last?
Most DIY wipes last 1-2 weeks when stored in an airtight container. If you notice mold or a bad smell, toss them and make a fresh batch.
Can I use any paper towel for DIY wipes?
Yes, but thicker, more absorbent paper towels work best. You can also use reusable cloths like cut-up old t-shirts or microfiber towels for a zero-waste option.
Are DIY cleaning wipes safe for all surfaces?
Not always. Avoid vinegar on stone surfaces like granite or marble. Test any new recipe on a small, hidden area first to ensure it doesn't damage the finish.
How do I store DIY wipes to keep them from drying out?
Use an airtight container or a wipe dispenser. Keep the wipes submerged in the liquid solution, or pour the solution over the paper towels and seal tightly.
Can I add essential oils to my DIY wipes?
Absolutely. Add 5-10 drops of essential oils like lemon, tea tree, or lavender for fragrance and additional antibacterial properties. Just ensure the oil is safe for the surface.
Conclusion
With these 23 DIY cleaning wipes ideas, tackling quick messes around the house just got a whole lot easier. Pick a few recipes that match your needs and keep a stash ready for spills, dust, and sticky spots.
You'll save money, reduce waste, and know exactly what's in your cleaning products. Give them a try and see how much simpler your daily cleanup can be.


