A messy bedroom can feel overwhelming, but a fast reset doesn't require hours of scrubbing. With a focused sequence of 15 steps, you can transform your space in under an hour—no expensive products or complicated systems needed.
These steps are designed to build momentum, so each completed task makes the next one easier.
From stripping the bed to refreshing soft furnishings, you'll get a clean, calm room without the burnout.
1. Strip the Bed and Start the Laundry
The fastest way to make a bedroom feel fresh is to remove the biggest fabric items first. By stripping the bed and tossing everything in the wash, you buy yourself precious time—the laundry cycle will run while you tackle the rest of the room. Plus, a bare mattress instantly makes the space look less cluttered, giving you a psychological win right from the start.
Pull off all bedding—sheets, pillowcases, duvet cover, and any decorative pillows—and throw them in the washing machine. Use cold water and a gentle cycle to protect fabrics, and add a scoop of your usual detergent. If you have a stain, pre-treat it before starting the machine.
Once the load is running, you can move on to the next steps without worrying about the laundry.
Why Start With Bedding?
Bedding takes up a lot of visual space, so removing it instantly reduces the mess factor. It also forces you to deal with the bed later, which means you'll finish the room with a freshly made bed—a satisfying finale.
Quick Tip For Efficiency
While the washer runs, gather any other washable items like throw blankets or rug covers. You can add them to the next load or toss them in with the bedding if the machine isn't full. This saves time and energy.
What About Pillows And Mattress Protectors?
If your pillows are machine-washable, toss them in too. Mattress protectors can go in with the sheets. Just check care labels first—some items may need a gentle cycle or air drying.
2. Clear All Surfaces Completely
Once the bed is stripped, your next move is to tackle every flat surface in the room. Nightstands, dressers, desks, window sills—anything that isn't the floor or the bed itself needs to be cleared off. This step is about creating a blank canvas so you can dust, wipe down, and reorganize without clutter getting in the way.
Grab a laundry basket, a tote bag, or even a cardboard box. Go around the room and pick up every item sitting on a surface: lamps, books, glasses, jewelry, remote controls, decorative objects, mail, and random odds and ends. Don't sort yet—just move everything into your container.
This quick sweep instantly makes the room look less chaotic and prepares each surface for a proper clean. Once everything is cleared, you'll see exactly how much dust and grime has built up. That's your cue to grab a microfiber cloth and all-purpose cleaner or a simple dusting spray.
Wipe down every surface from top to bottom, including the edges and any corners where dust bunnies hide. Don't forget the tops of picture frames or mirrors that sit on surfaces—they collect dust too. After dusting, take a moment to assess what you actually need on each surface.
The goal isn't to put everything back exactly where it was—it's to be intentional. Maybe your nightstand only needs a lamp and a book, not a pile of receipts. Maybe your dresser can hold a small tray for everyday items instead of a cluttered collection.
This is your chance to reset the visual balance of the room.
The Basket Method Works Wonders
Instead of moving items one by one to another spot in the room, use a single container to collect everything. A laundry basket or a large tote keeps all the displaced items in one place, so you can sort them after cleaning. This prevents the common trap of shifting clutter from one surface to another without actually reducing it.
Dust Before You Decide
Once surfaces are bare, dust and wipe them down thoroughly. This is the only time you'll have full access to every corner. Use a microfiber cloth that traps dust rather than pushing it around.
For wood surfaces, use a gentle cleaner that won't damage the finish. For glass or mirrored tops, a streak-free spray works best.
Reorganize With Purpose
When you put items back, think about what you use daily versus what's just taking up space. Keep frequently used items like your phone charger, glasses, and a water bottle within easy reach. Store away anything that doesn't belong in the bedroom or that you haven't touched in weeks.
A small tray or dish can corral loose change, keys, and other small items, keeping surfaces tidy.
3. Gather Trash and Recycling
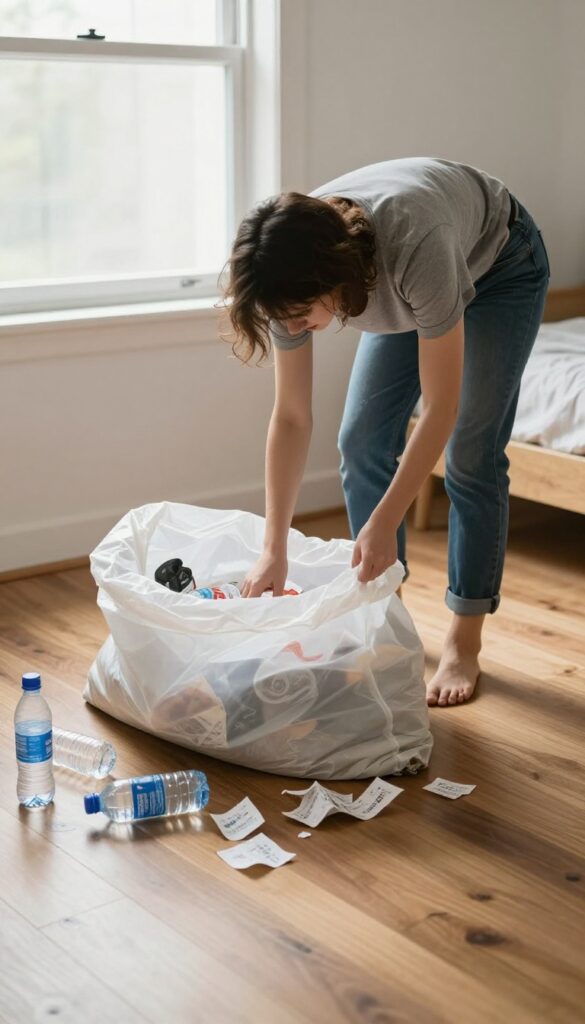
Trash is the easiest thing to remove because you don't have to decide where it goes—it just leaves. Grab a bag and do a quick sweep of your room, picking up anything that's obviously garbage. Old receipts, empty water bottles, used tissues, broken pens, dead batteries—if it's clearly trash, toss it.
Don't overthink it. The goal is to get the obvious junk out so your space feels lighter instantly.
Walk around your room with a trash bag and look for anything that has no business being there. Check your nightstand, desk, floor, and dresser tops. Grab empty snack wrappers, junk mail, expired coupons, and any packaging from online orders.
If it's broken beyond repair, toss it. If it's empty, recycle it. Keep moving quickly—don't stop to sort or organize yet.
Just clear the visual clutter. This step takes five minutes max but makes a huge difference in how clean the room feels.
Start With Surfaces
Your nightstand, desk, and dresser tops are trash magnets. That's where old receipts, empty coffee cups, and random wrappers pile up. Do a quick pass and toss anything that's clearly garbage.
Don't worry about papers you might need—just grab the obvious junk. You'll sort important stuff later.
Check The Floor And Corners
Crumpled papers, empty bottles, and stray wrappers often end up on the floor or in corners. Scan the room from the doorway and pick up anything that shouldn't be there. Also check under your bed and behind your dresser.
A quick grab-and-toss here clears a lot of visual noise.
Don't Forget The Trash Can
If you have a small trash can in your room, empty it into your main bag. No point in leaving a half-full bin when you're already doing a trash sweep. This also prevents odors and makes the room feel fresher.
4. Corral Items That Belong Elsewhere
Once the trash is gone, your next target is anything that doesn’t actually live in your bedroom. That water glass from last night, the library book you meant to return, the pile of mail that migrated from the kitchen—they’re all visual clutter that makes the room feel chaotic. Instead of running around the house putting each item away, grab a basket or a laundry bin and toss everything in.
The goal is to clear surfaces quickly, not to organize the whole house. You’ll deal with the basket later, after your bedroom reset is complete.
This step is all about speed and focus. Don’t get sidetracked by the urge to put each item in its proper place right now. That’s a trap that will pull you out of the room and break your momentum.
By corralling everything into one container, you keep your attention on the bedroom and make huge progress in just a few minutes. Once the basket is full (or the room is clear), set it by the door and move on to the next step. You’ll return those items to their homes after the main reset is done.
What Counts As “elsewhere”?
Anything that doesn’t belong in a bedroom is fair game. Dishes and cups, books from other rooms, clothing that belongs in a different closet, electronics chargers for devices you don’t use in here, paperwork, toys, and random odds and ends. If you wouldn’t normally store it on your nightstand or dresser, it goes in the basket.
Be ruthless—the more you clear, the more peaceful the room will feel.
Why A Basket Works Best
A basket or bin gives you a single, visible target to aim for. It’s faster than making multiple trips, and it prevents you from getting distracted. Plus, when the basket is full, you have a clear visual cue that you’re done with this step.
Choose a container that’s large enough to hold everything but not so big that you start treating it like a storage solution. Laundry baskets, tote bags, or even a cardboard box work perfectly.
Don’t Leave The Room Yet
Resist the temptation to take the basket to its final destination immediately. If you leave the bedroom now, you’ll likely get sidetracked by something else—a dish that needs washing, a book you want to read, or a conversation with a family member. Keep the basket by the door and stay in the room.
Your only job right now is to clear surfaces. The return trip comes later, once the bedroom reset is complete.
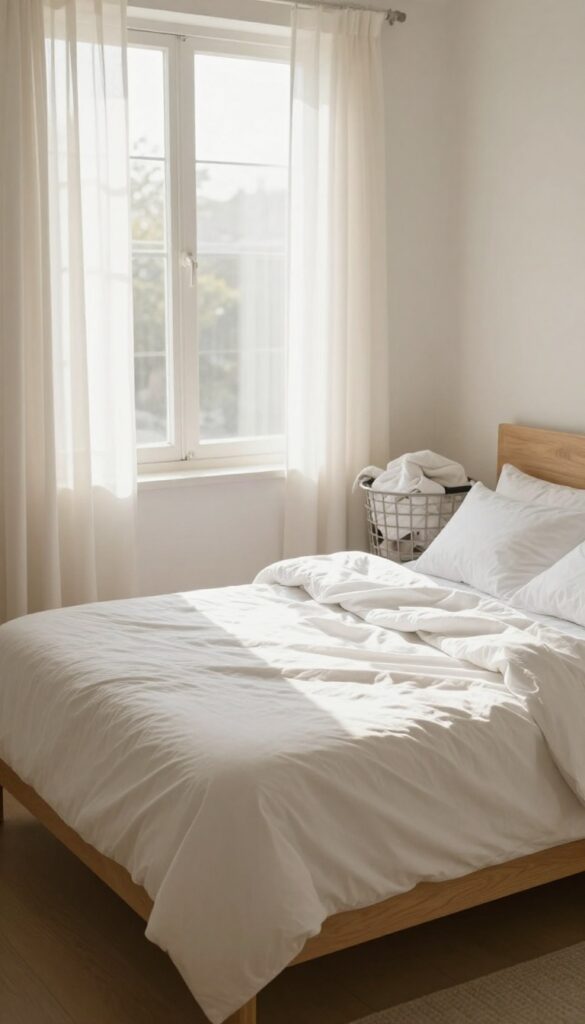
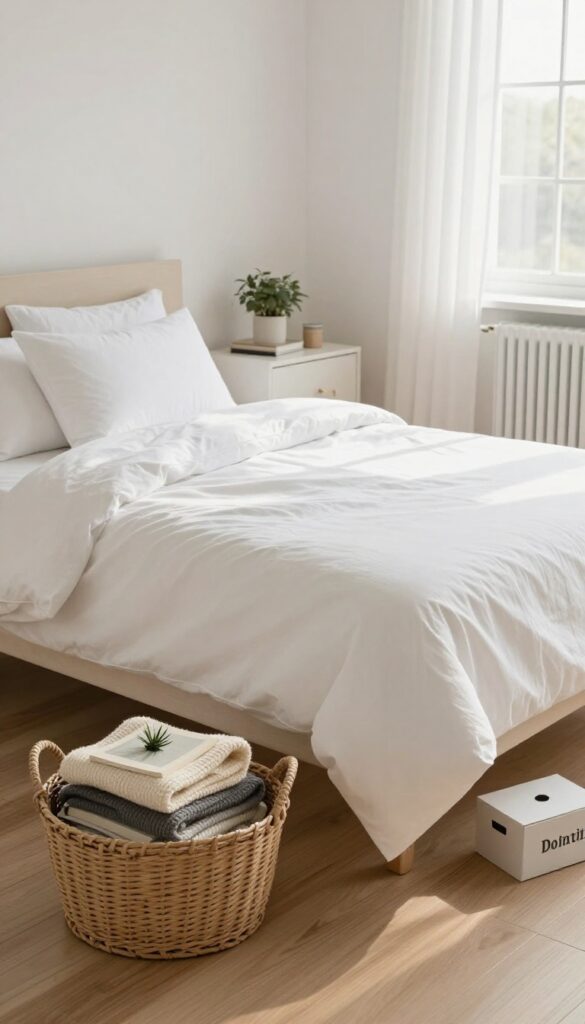
5. Make the Bed with Fresh Linens

Once your laundry is sorted—or if you have a spare set of sheets ready—remaking the bed is one of the quickest visual wins. A neatly made bed instantly signals that the room is under control, even if other areas still need attention. It’s a small effort that pays off big in how the whole space feels.
Choose Crisp, Clean Sheets
Pull out a fresh set of sheets—preferably ones that are already folded and ready to go. If you just washed a load, grab them while they’re still slightly warm for that hotel-like feel. Smooth out wrinkles as you go; a flat, taut fitted sheet makes the rest of the process easier.
Layer For Comfort And Looks
Add a lightweight blanket or duvet, then top with a folded throw or decorative pillows if you like. Layering doesn’t have to be complicated—just a couple of pieces can make the bed look intentional and cozy. Tuck in the corners neatly for a clean finish.
Fluff And Finish
Give your pillows a good fluff before placing them. Arrange them in a way that feels balanced—two sleeping pillows flat, then a couple of shams or accent pillows standing up. Step back and adjust any lumps or uneven spots.
A five-minute bed makeover is totally doable.
6. Dust from Top to Bottom
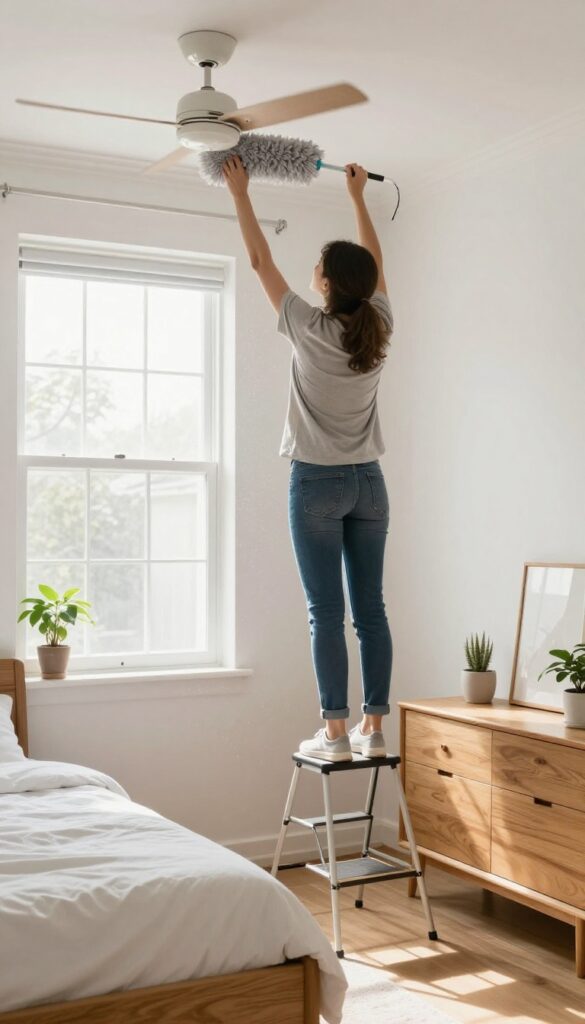
Dust settles everywhere, but if you clean from the floor up, you'll just knock it onto already-cleaned surfaces. The trick is to start high and work your way down, so gravity does half the work. You'll hit ceiling fans, light fixtures, window sills, shelves, and furniture tops in one smooth sweep.
Grab a microfiber cloth or an extendable duster—dry dusting works best. Begin with the highest points: ceiling fans, light fixtures, and the tops of tall furniture. Then move to window sills, picture frames, and shelves.
Finally, wipe down dresser tops, nightstands, and any other flat surfaces. This top-down approach prevents re-dusting and saves time.
Start With Ceiling Fixtures
Ceiling fans and light fixtures collect the most dust because they're out of sight. Use a microfiber cloth or a duster with an extendable handle to reach them. For fan blades, wipe both the top and bottom surfaces.
If you have a ceiling light, dust the shade and any exposed bulbs. This step alone can make the room feel noticeably cleaner.
Work Down To Window Sills And Shelves
After the ceiling, move to window sills, blinds, and any shelves. Dust collects on these surfaces even when windows are closed. Use a damp microfiber cloth for window sills if there's grime, but dry dusting works for shelves.
Don't forget the tops of picture frames and any decorative items—they're dust magnets too.
Finish With Furniture Tops
Finally, wipe down all furniture surfaces: dressers, nightstands, desks, and any other flat areas. Use a microfiber cloth—it traps dust instead of pushing it around. For wooden furniture, follow the grain to avoid streaks.
If you have electronics like a lamp or alarm clock, dust them gently. Once done, you'll have a dust-free room from top to bottom.
7. Wipe Down All Surfaces
Hard surfaces collect dust, fingerprints, and random smudges faster than anything else in the room. A quick wipe-down makes the whole space look cleaner instantly, and it only takes a few minutes. Grab an all-purpose cleaner or a damp microfiber cloth and work your way around the room.
Start With The Largest Surfaces
Begin with your nightstands, dresser, desk, and any shelves. Spray the cleaner onto the cloth, not directly onto the furniture, to avoid overspray on nearby items. Wipe in straight lines to avoid streaks, and pay attention to corners where dust bunnies hide.
Don't Skip The Details
Light switches, door handles, and remote controls are high-touch areas that often get overlooked. A quick swipe with a damp cloth removes oils and grime. Also hit the top edges of picture frames, lamp bases, and any electronics that collect dust.
Finish With Mirrors And Glass
If you have a mirror or glass tabletop, use a glass cleaner or a vinegar-water mix for a streak-free shine. Spray onto the cloth, wipe in a zigzag pattern, then buff dry with a clean part of the cloth. This step adds a polished finish to the room.
8. Clean Mirrors and Glass
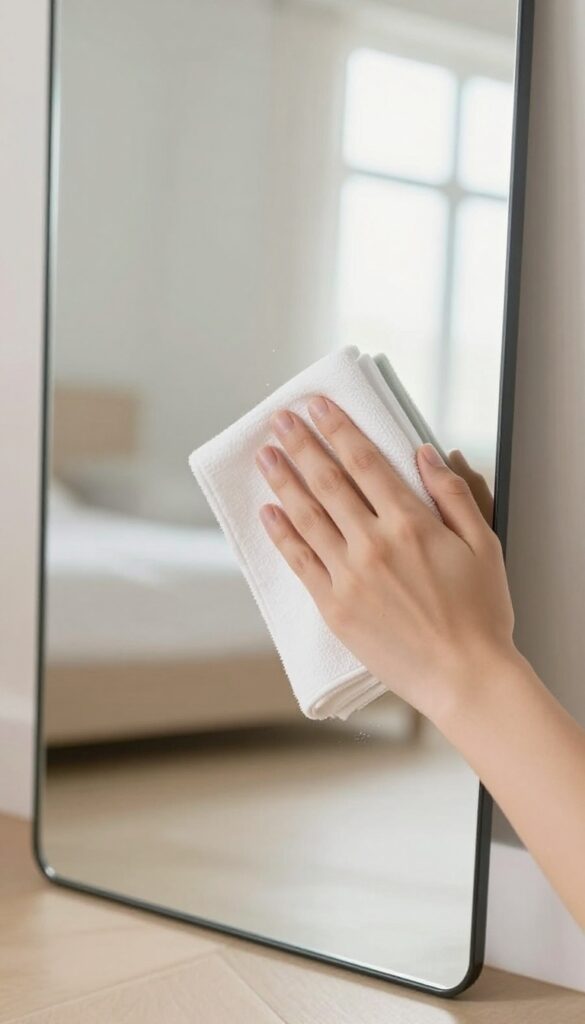
Mirrors and glass surfaces act like magnets for fingerprints, dust, and water spots. Once your hard surfaces are dust-free, tackling these shiny spots gives the room an instant polished look. A few quick swipes and your bedroom will feel cleaner without you having to do much else.
Choose The Right Cleaner
A dedicated glass cleaner works best, but you can also make your own with equal parts water and white vinegar. Avoid ammonia-based products on tinted mirrors or glass. Spray directly onto a microfiber cloth rather than the surface to prevent drips that can streak.
Wipe In The Right Pattern
Start at the top corner and work your way down in an S-shaped or zigzag motion. This prevents you from re-smearing areas you've already cleaned. Use a dry section of the cloth for the final pass to catch any leftover moisture.
Don't Forget Picture Frames
Picture frames and glass tabletops collect dust and smudges too. Wipe them with the same technique, but be gentle around edges to avoid loosening the frame. A quick once-over makes the whole room feel brighter.
9. Vacuum or Sweep the Floor
With all the dust and debris knocked loose from earlier steps, the floor is now the final frontier. Vacuuming or sweeping at this stage ensures you capture everything that settled, leaving your room truly clean. Don't rush—this step makes a visible difference in how fresh the space feels.
Start by clearing the floor of any remaining items like shoes, bags, or small furniture. If you have a vacuum, use the crevice tool along baseboards and corners where dust bunnies hide. For hard floors, a microfiber mop or dry sweeper picks up fine particles better than a traditional broom.
Pay special attention under the bed and behind furniture—these spots accumulate surprising amounts of lint and hair. If your vacuum has a brush attachment, run it over baseboards and any low furniture legs. Finish by spot-cleaning any stains or sticky spots with a damp cloth.
Tackle The Edges First
Corners and edges trap the most debris. Use the crevice tool to run along every baseboard, paying extra attention to corners and behind doors. This prevents dirt from being pushed into the center of the room where it's more visible.
Under The Bed And Furniture
Slide the vacuum wand or a flat mop under the bed, nightstands, and dressers. If you can't reach, use a long-handled duster first to loosen debris, then vacuum. This area often hides dust, pet hair, and lost items.
Final Pass For A Polished Look
Once edges and hidden spots are done, do a slow, overlapping pass across the entire floor. For carpets, go in different directions to lift the pile. For hard floors, use a microfiber pad or damp mop to pick up any remaining dust.
The result should be a floor that looks and feels clean.
10. Spot Clean Walls and Baseboards
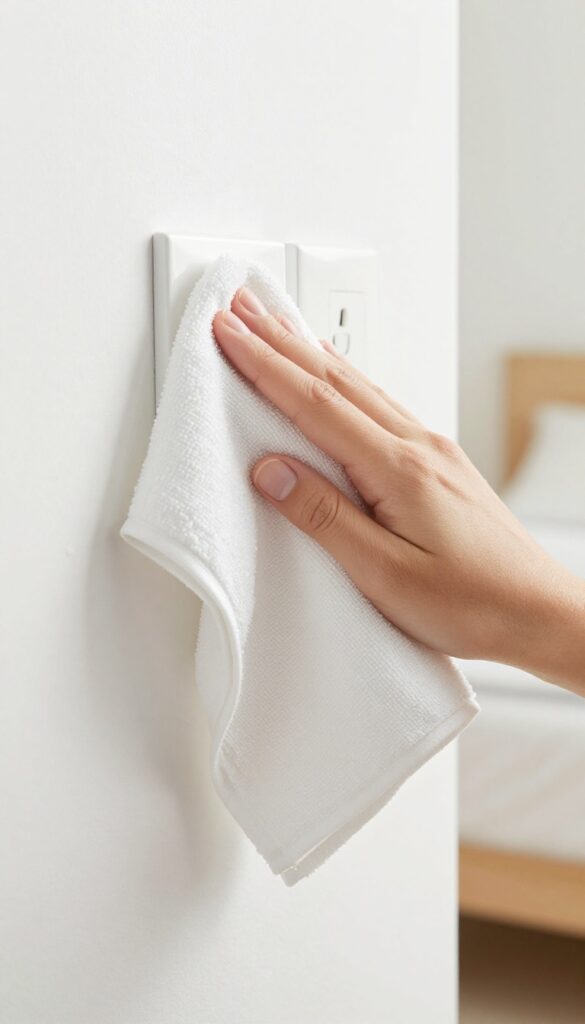
Walls and baseboards are easy to overlook, but they often collect smudges, scuffs, and dust that make a room feel grimy. A quick spot clean can brighten the entire space without a full wipe-down. Grab a damp sponge or magic eraser and target only the visible marks.
Focus on high-touch areas like light switches, door frames, and corners where furniture bumps into walls. Check baseboards for dust bunnies and scuff marks from shoes or vacuum cleaners. A few minutes of targeted cleaning makes a surprising difference in how fresh the room looks.
What You’ll Need
A damp microfiber cloth or sponge works for most marks. For stubborn scuffs, a magic eraser is your best friend—just wet it, squeeze out excess water, and gently rub. Keep a dry cloth nearby to wipe away any residue.
Where To Look First
Start near the door and move clockwise around the room. Check light switches, door handles, and areas behind the bed or desk. Don’t forget the baseboards—run your finger along them to feel for dust, then wipe from top to bottom.
Quick Fixes For Common Marks
Pencil marks and light scuffs usually come off with a damp sponge. For crayon or marker, a dab of toothpaste on a cloth can work wonders. Always test a small hidden area first to avoid damaging the paint.
11. Organize Your Closet or Dresser
After surfaces are clean and the floor is vacuumed, your closet or dresser can make or break the tidy look. A quick 5-minute organization session here keeps visual clutter at bay and makes getting dressed easier tomorrow. Focus on the spots you see first when you walk in.
Open your closet or dresser doors and scan for anything out of place. Stray clothes, lone socks, or shoes scattered on the floor are the main culprits. Spend just five minutes folding, hanging, or pairing items back where they belong.
This small effort creates a huge visual payoff and keeps your reset feeling complete.
Tackle The Floor First
Shoes, bags, and fallen clothes tend to pile up on the closet floor. Kick or pick everything into a small pile, then put each item in its proper spot. Shoes go on a rack or shelf, bags hang on hooks, and clothes go in the hamper or back on hangers.
This clears the most visible area instantly.
Fold And Hang In Plain Sight
Focus on the items hanging or sitting on open shelves—these are what catch your eye. Quickly fold any wrinkled shirts or pants, and rehang anything that slipped off a hanger. Pair loose socks and roll them together.
Even if drawers are messy, a neat visible layer makes the whole room feel organized.
One-minute Surface Wipe
If your dresser top or closet shelf is dusty, give it a quick wipe with a microfiber cloth. This takes under a minute but removes the fine layer of dust that makes surfaces look neglected. It's a small finishing touch that elevates the entire reset.
12. Refresh Soft Furnishings

Soft furnishings take the brunt of daily use, so they often look tired even when the rest of the room is clean. Giving them a quick refresh makes the whole space feel cozier and more put together without any heavy lifting. A few simple fluffs, folds, and shakes can revive your bed, couch, or reading nook in minutes.
Fluff And Plump Pillows
Start with bed pillows and any decorative cushions. Grab each one by the edges and give it a good shake, then punch the center to redistribute the filling. For down or down-alternative pillows, toss them in the dryer on low heat with a couple of dryer balls for five minutes if you want extra fluffiness.
This step alone makes the bed look instantly more inviting.
Straighten Throw Blankets
Throw blankets often end up crumpled or half-hanging off the bed or chair. Fold each one neatly and drape it over the foot of the bed, the arm of a sofa, or the back of a chair. If you have multiple blankets, layer them by size with the largest on the bottom.
A tidy blanket arrangement adds a polished touch without any effort.
Arrange Decorative Cushions
Line up your decorative cushions in a balanced arrangement. For a bed, place the largest ones against the headboard, then layer smaller ones in front. On a chair or sofa, stagger them by color or pattern.
If you have a mix of textures, group similar ones together for a cohesive look. This takes less than a minute but makes the room feel styled.
Shake Or Vacuum Curtains
Curtains trap dust and odors, so give them a quick shake outside or near an open window. If you have a vacuum with a brush attachment, run it gently over the fabric to remove surface dust. For sheer curtains, a light shake is usually enough.
This step freshens up the whole room and helps the air feel cleaner.
13. Tidy Electronics and Cords
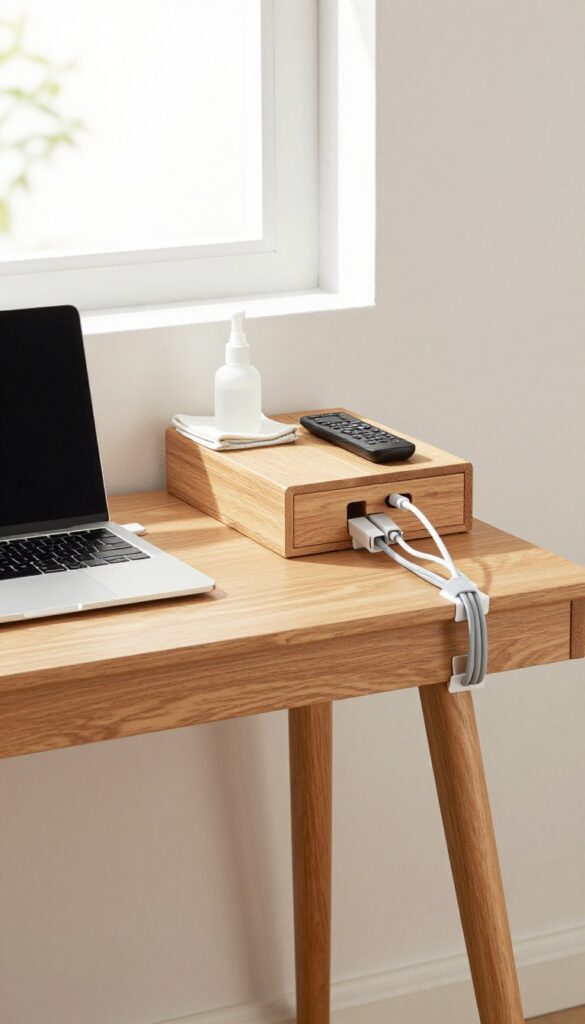
Electronics and cords often create visual clutter even when other surfaces are clean. A few quick moves can make your desk, nightstand, and media area look neat and organized. Plus, wiping down screens and keyboards removes germs and dust, making your space feel fresher.
Wrap And Route Cords
Start by unplugging any devices you don't use daily. Use velcro ties or twist ties to bundle charging cables, and tuck them behind furniture or into a cable management box. For cords that must stay plugged in, route them along the edge of your desk or nightstand using adhesive clips.
This simple step instantly reduces visual chaos.
Wipe Down Screens And Keyboards
Dust and smudges on screens make a room feel dirty. Use a microfiber cloth slightly dampened with water (or a screen-safe cleaner) to gently wipe your monitor, laptop, TV, and phone screen. For keyboards, turn them upside down and tap to dislodge crumbs, then wipe keys with a disinfectant wipe.
Don't forget your mouse and remote controls.
Declutter Device Accessories
Gather all loose chargers, earbuds, and adapters. Keep only what you actually use and store the rest in a labeled drawer or bin. If you have multiple devices, consider a charging station or a multi-port USB hub to reduce cable sprawl.
This also makes it easier to find what you need later.
14. Add a Final Touch of Freshness
You've scrubbed, organized, and put everything back in its place. Now it's time for the sensory payoff that tells your brain the room is truly clean. A pleasant scent or fresh breeze can make all the difference between a room that looks clean and one that feels clean.
Opening a window for even five minutes flushes out stale air and any lingering dust particles from your cleaning efforts. If weather permits, let the cross breeze work its magic while you do a quick final scan. For a cozier vibe, light a candle or use a linen spray on your bedding and curtains.
Scents like lavender, eucalyptus, or fresh cotton reinforce the reset without overwhelming the space.
Let The Air In
Crack a window—even in cold weather, a few minutes of fresh air makes a huge difference. It clears out any cleaning product smells and brings in oxygen that instantly brightens the room. If you have a fan, point it toward the window to speed up circulation.
Choose Your Scent Signature
A candle, essential oil diffuser, or linen spray adds a subtle cue that the room is refreshed. Stick to light, natural scents that won't clash with your other home fragrances. A quick spritz on your pillowcases or curtains can make the whole room smell like a fresh start.
15. Return the Misplaced Items
That basket of things you collected earlier has been sitting in the corner, waiting. Now it's time to finish the job. Returning each item to its proper home is the final touch that keeps your room from sliding back into chaos.
Sort By Destination
Before you start running around, group items by where they belong. Kitchen stuff together, bathroom items together, and so on. This way you make one trip per room instead of zigzagging back and forth.
Put Away, Don't Pile
Resist the urge to drop things on a counter or table with the intention of dealing with them later. Take the extra ten seconds to open the drawer, hang the shirt, or place the book on the shelf. That moment of effort now saves you from a future mess.
Keep A Donation Box Handy
As you return items, you'll inevitably find things that don't have a place because they're no longer needed. Have a small box or bag nearby for donations or trash. Letting go of unused items prevents them from becoming clutter again.
FAQ
How long does this bedroom reset take?
Most people can finish all 15 steps in 30 to 45 minutes, depending on the size of the room and how much clutter has built up.
Do I need special cleaning products?
No. Basic supplies like a microfiber cloth, all-purpose cleaner, glass cleaner, and a vacuum or broom are enough. You can use DIY solutions like vinegar and water.
What if I don't have time to do all 15 steps?
Focus on the high-impact steps: make the bed (step 5), clear surfaces (step 2), and vacuum (step 9). Even those three will make a noticeable difference.
How often should I do a full bedroom reset?
Aim for once a week to maintain a tidy room. If that's too much, every two weeks is still effective.
Can I involve my kids in this process?
Absolutely. Assign age-appropriate tasks like making the bed, dusting low shelves, or putting away toys. It teaches responsibility and speeds up the reset.
Conclusion
A clean bedroom doesn't require hours of scrubbing. These 15 steps break the task into manageable chunks so you can reset your space in under an hour. Start with the first few steps and build momentum from there.
You'll be surprised how quickly the room transforms when you focus on one zone at a time. Give it a try tonight and wake up to a calmer, more organized room tomorrow.


