
Grout lines are the unsung heroes of bathroom tiles—until they get dirty. Over time, soap scum, mildew, and everyday grime turn those once-white lines into a dingy mess. The good news?
You don't need harsh chemicals or expensive services to bring them back to life. This list covers 23 realistic grout cleaning ideas, from pantry staples to specialized tools. Whether you're on a tight budget or ready to invest in a steam cleaner, there's a method here that fits your effort level.
No fluff, just practical solutions that actually work. Let's dive into the ideas that will make your bathroom tile lines look fresh again.
1. Baking Soda and Vinegar Paste
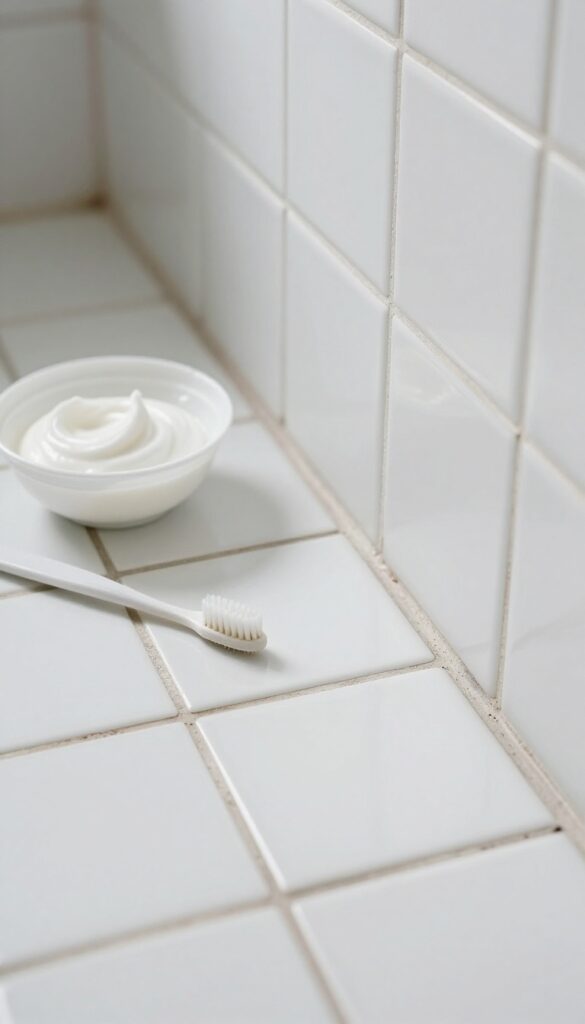
Baking soda and vinegar are a classic cleaning duo that works wonders on grout. The fizzy reaction helps lift dirt from porous surfaces, while the mild abrasiveness of baking soda scrubs away stains without scratching tiles. This method is perfect for light to moderate grime and costs just pennies per use.
To make the paste, mix three parts baking soda with one part white vinegar until it forms a thick, spreadable consistency. Apply it directly to the grout lines using an old toothbrush or a small spatula. Let it sit for 5–10 minutes—you'll see it fizz as it works.
Then scrub gently in circular motions, focusing on stained areas. Rinse with warm water and wipe dry with a cloth. For extra stubborn spots, let the paste sit longer or add a few drops of dish soap.
Why It Works So Well
The chemical reaction between baking soda (a base) and vinegar (an acid) produces carbon dioxide bubbles that help dislodge dirt and grime from deep within the grout pores. Baking soda's fine grit provides gentle abrasion, while vinegar cuts through soap scum and mild mildew. This combination is safe for most tile types, including ceramic and porcelain.
Tips For Best Results
Always test on a small, hidden area first to ensure your tiles aren't damaged. Use a stiff-bristled brush for deeper cleaning, but avoid wire brushes that can scratch. If the paste dries before you rinse, simply dampen it with a little water.
For tougher stains, repeat the process or let the paste sit for up to 30 minutes.
When To Skip This Method
Avoid using this paste on unsealed or natural stone tiles like marble or travertine, as the acid can etch the surface. Also, if your grout is heavily moldy or deeply stained, you may need a stronger solution like hydrogen peroxide or a commercial grout cleaner.
2. Hydrogen Peroxide and Baking Soda
If your grout is more gray than white, hydrogen peroxide and baking soda make a powerful brightening team. The peroxide lifts stains while the baking soda provides gentle abrasion. This combo works especially well on light-colored grout that has yellowed or darkened over time.
Mix baking soda with enough hydrogen peroxide to form a thick paste—similar to toothpaste. Apply the paste to the grout lines using an old toothbrush or a small applicator brush. Let it sit for about 10 minutes so the peroxide can penetrate and break down discoloration.
Scrub gently with the brush, then rinse thoroughly with warm water. For stubborn spots, you can add a few drops of dish soap to the mix. This method is safe for most tile types, but always test on an inconspicuous area first.
Why It Works
Hydrogen peroxide is a natural bleaching agent that oxidizes organic stains like mildew and soap scum. Baking soda acts as a mild abrasive that helps scrub away surface grime without scratching the tile. Together, they create a fizzing action that loosens dirt deep within the grout pores.
Best Application Tips
Work in small sections so the paste doesn't dry out before you scrub. Use a grout brush or an old toothbrush with stiff bristles for maximum scrubbing power. If the paste dries, reapply a fresh layer.
Rinse with a damp cloth or sponge to avoid leaving residue behind.
When To Use This Method
This is ideal for light-colored grout that needs brightening, especially in bathrooms with low ventilation where mildew is common. It's also a good choice for grout that's stained from hair dye, makeup, or other cosmetic products. Avoid using it on dark grout, as the peroxide may lighten it unevenly.
3. Lemon Juice and Cream of Tartar
When you want a natural cleaner that actually tackles tough grout stains, lemon juice and cream of tartar make a surprisingly effective team. The acid in lemon juice breaks down soap scum and mineral deposits, while cream of tartar adds gentle abrasion without scratching tiles. Together, they form a paste that lifts grime from deep within grout lines.
This is a great option if you prefer non-toxic ingredients and already have both items in your kitchen pantry.
To use this method, mix equal parts lemon juice and cream of tartar until you get a thick paste. Apply it directly to the grout lines using an old toothbrush or a small brush. Let it sit for about 15 minutes so the acid has time to work on the buildup.
Then scrub the grout with a stiff brush, using circular motions to dislodge dirt. Rinse thoroughly with warm water and wipe away any residue with a damp cloth. For stubborn stains, you can let the paste sit longer or apply a second round.
This method works best on white or light-colored grout, as the lemon juice can have a mild bleaching effect.
Why This Combo Works
Lemon juice contains citric acid, which dissolves alkaline deposits like soap scum and hard water minerals. Cream of tartar is a mild abrasive that helps scrub away physical grime without scratching tile surfaces. The paste consistency also helps the mixture cling to vertical grout lines, giving it more contact time.
Best Grout Types For This Method
This paste is safe for most sealed grout and ceramic or porcelain tiles. Avoid using it on unsealed natural stone like marble or travertine, as the acid can etch the surface. Always test on a small hidden area first to make sure it doesn't discolor your grout.
Pro Tips For Better Results
For extra cleaning power, add a tablespoon of baking soda to the paste. Use a grout brush or an old electric toothbrush to save elbow grease. Rinse well after scrubbing—any leftover residue can attract more dirt.
If your grout is heavily stained, repeat the process or let the paste sit for up to 30 minutes.
4. Oxygen Bleach Soak
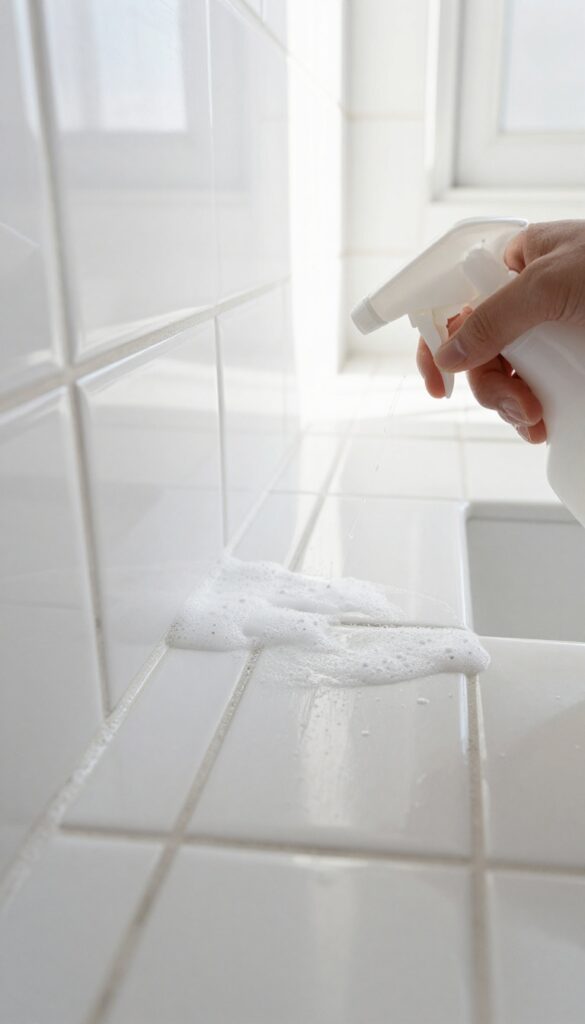
Oxygen bleach is a gentler alternative to chlorine bleach that still packs a punch against organic stains like mildew. Unlike harsh chemicals, it breaks down into water and oxygen, making it safer for your bathroom surfaces and the environment. This method works best on grout that's discolored from mold, mildew, or soap scum buildup.
To use oxygen bleach, mix a scoop of powdered oxygen bleach (like OxiClean) with warm water according to the package directions. Apply the solution to the grout lines using a spray bottle or sponge, making sure they're fully saturated. Let it sit for at least 30 minutes—longer for tough stains.
Then scrub with a stiff brush and rinse thoroughly with clean water. You'll notice the grout lightening as the oxygen bubbles lift the stains away.
Why Oxygen Bleach Works
Oxygen bleach works through oxidation, which breaks down the chemical bonds in organic stains. Unlike chlorine bleach, it doesn't produce harsh fumes or damage colored grout. It's also safe for most tile types, including ceramic and porcelain.
Tips For Best Results
For maximum effectiveness, use hot water to activate the bleach. Apply the solution on a dry day or ensure good ventilation. If stains persist, extend the soak time or make a paste with less water for a thicker application.
Always test on a small, hidden area first.
When To Avoid This Method
Avoid oxygen bleach on unsealed natural stone tiles like marble or travertine, as it can etch the surface. Also, don't use it if your grout is already crumbling or damaged, as the soaking could worsen the issue.
5. Toothbrush and Dish Soap
Sometimes the simplest tools are the most effective. An old toothbrush paired with a drop of dish soap is perfect for quick touch-ups when you don’t want to mix up a batch of anything fancy. This method is gentle enough for daily use but still lifts light grime and soap scum from grout lines.
It’s a go-to for keeping tiles looking fresh between deeper cleans.
The toothbrush-and-dish-soap method is all about convenience and speed. You probably already have both items in your home, so there’s no special shopping trip required. The soft bristles of a toothbrush are ideal for scrubbing narrow grout lines without damaging the surrounding tile.
Dish soap cuts through grease and soap scum effectively, while warm water helps loosen dirt. This approach works best for light maintenance—if your grout is heavily stained or moldy, you’ll need a stronger solution. But for a weekly spruce-up, it’s hard to beat.
Why It Works
Dish soap is a surfactant, meaning it reduces surface tension and helps lift dirt away from the grout. The toothbrush bristles get into the porous texture of the grout, dislodging particles that a cloth might miss. Warm water activates the soap and makes scrubbing easier.
Together, they create a low-effort cleaning combo that’s safe for all tile types.
When To Use This Method
Reach for this technique when you notice light discoloration or a bit of soap buildup on your grout. It’s perfect for a quick clean before guests arrive or as part of a regular bathroom maintenance routine. Avoid using it on deep-set stains or black mildew—those require a more aggressive approach.
For best results, do this every week or two to prevent grime from building up.
Pro Tips For Better Results
Use a toothbrush with stiff bristles for more scrubbing power, but not so stiff that it scratches tile. Dip the brush in warm soapy water and scrub in a circular motion along the grout lines. Rinse the brush frequently to avoid spreading dirt.
After scrubbing, wipe the area with a damp microfiber cloth to remove residue. For extra cleaning power, add a splash of white vinegar to the soapy water—but test on a small area first to ensure it doesn’t affect your tile’s finish.
6. Grout Brush with Long Handle
Your knees and lower back will thank you for this one. A grout brush with a long handle lets you scrub tile lines while standing upright, which makes the task far less punishing. It’s a simple tool, but it changes the whole experience of cleaning grout.
Pair the brush with your go-to cleaner—whether that’s a baking soda paste, oxygen bleach solution, or a commercial grout cleaner. The stiff bristles dig into the porous surface of the grout, lifting embedded dirt that a sponge or cloth can’t reach. Work in small sections, scrubbing back and forth along each line.
Rinse with water and wipe away residue with a microfiber cloth. For stubborn spots, let the cleaner sit for a few minutes before scrubbing.
Why A Long Handle Matters
Standard scrub brushes force you to hunch over or kneel, which quickly becomes uncomfortable. A long-handled brush keeps your spine aligned and your knees off the hard bathroom floor. You can apply more pressure without straining, and you’re less likely to skip hard-to-reach spots like behind the toilet or the corner of the shower.
Choosing The Right Brush
Look for a brush with stiff, durable bristles—nylon is a good choice. The handle should be at least 30 inches long and have a comfortable grip. Some brushes come with angled heads that make it easier to reach grout lines near the wall or floor junction.
Avoid brushes with bristles that are too soft; they won’t get into the pores of the grout.
Best Cleaners To Use With It
The brush is just the tool; the cleaner does the heavy lifting. A thick paste of baking soda and water works well for light stains. For mildew or deeper grime, try a mixture of hydrogen peroxide and baking soda.
If you prefer a commercial product, choose one that’s labeled for grout and safe for your tile type. Always test a small hidden area first.
7. Steam Cleaner for Grout
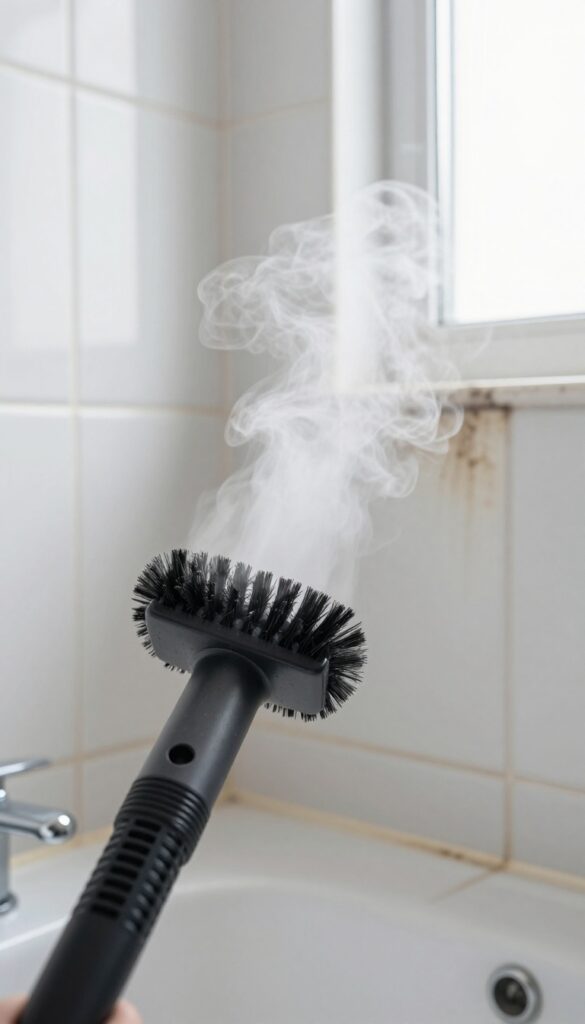
A handheld steam cleaner blasts hot steam into grout pores, loosening dirt and killing mold. Follow manufacturer instructions for tile-safe use. Ideal for deep cleans.
Steam cleaning is a game-changer for grout that’s been neglected for months. The high temperature breaks down grime without chemicals, and the steam penetrates deep into porous lines. It’s especially effective on mildew and soap scum that scrubbing alone can’t remove.
Why Steam Works On Grout
Grout is porous, so dirt gets trapped inside. Steam’s heat expands the grout slightly, releasing debris. The moisture then flushes it out.
Plus, steam at 200°F+ kills mold spores and bacteria on contact.
Choosing The Right Steamer
Look for a handheld steamer with a brush attachment and adjustable steam control. Avoid units that spit water—dry steam is best. Brands like Bissell or McCulloch offer tile-specific models.
Test on an inconspicuous area first to ensure no tile damage.
Step-by-step Steam Cleaning
- Vacuum or sweep the floor to remove loose debris. 2.
Fill the steamer with distilled water (prevents mineral buildup). 3. Attach the brush and let it heat up.
- Work in small sections, holding the steamer over grout lines for 5–10 seconds. 5.
Wipe away loosened grime with a microfiber cloth. Repeat if needed.
Safety Tips For Tile And Grout
Never use steam on cracked tiles or loose grout—it can worsen damage. Avoid prolonged steaming on natural stone (marble, travertine) as heat may cause etching. Always follow your steamer’s manual and let grout dry completely before sealing.
8. Magic Eraser on Grout
Melamine foam erasers, commonly sold as Magic Erasers, are one of those cleaning tools that seem almost too good to be true. They work through micro-abrasion, meaning they gently sand away surface stains without the need for harsh chemicals. For grout lines that are dirty but not deeply stained, this can be a quick and satisfying fix.
Dampen a melamine foam eraser and run it along the grout lines. You'll see the dirt transfer onto the eraser as it lifts away. This method is especially good for light-colored grout where surface grime is obvious.
No scrubbing with a brush is needed—just a few passes and the grout looks noticeably cleaner. Keep a spray bottle of water handy to keep the eraser damp as you work.
How It Works
The magic is in the foam's structure. Melamine foam has extremely hard micro-crystals that act like fine sandpaper. When dampened, these crystals create friction that lifts dirt and stains from the grout surface.
It's gentle enough for most grout types but effective against everyday buildup.
Best Uses And Limitations
This method shines on light surface stains like soap scum and light mildew. It won't work well on deep-set stains or mold that has penetrated the grout. Also, avoid using it on unsealed grout, as the abrasion could wear it down over time.
Always test in an inconspicuous area first.
Pro Tips For Best Results
Cut the eraser into smaller strips to fit grout lines precisely, reducing waste. Work in small sections and rinse the eraser frequently to avoid redepositing dirt. For stubborn spots, let the damp eraser sit on the stain for a minute before wiping.
And remember, these erasers wear down quickly—one eraser may only cover a small bathroom.
9. Bleach Pen for Spot Treatment
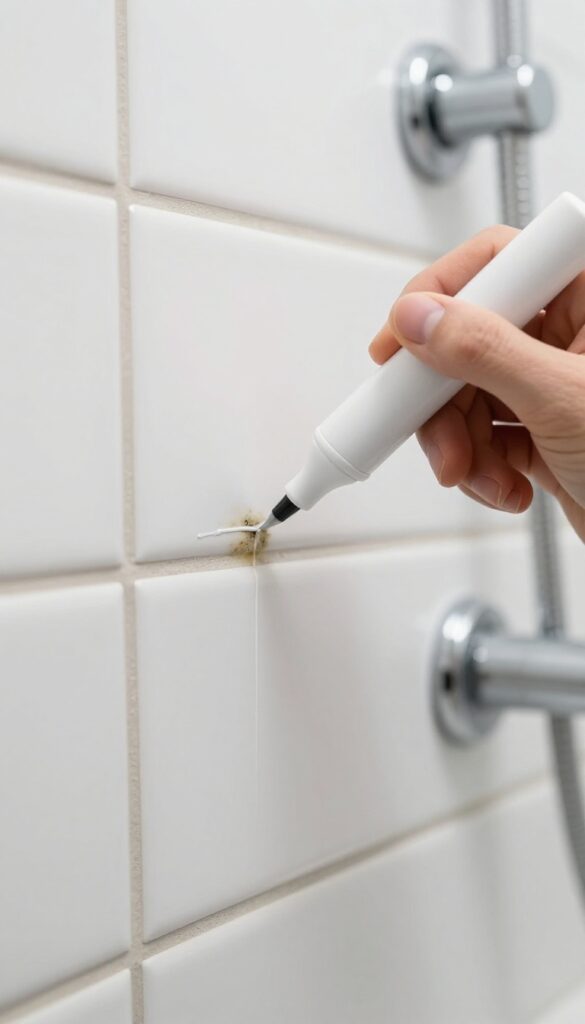
When you've got one or two stubborn spots that refuse to budge, a bleach pen is your precision weapon. Unlike pouring bleach everywhere, a pen lets you target exactly where the mildew or stain is, without risking damage to surrounding tile or grout. It's especially handy for small areas like around the showerhead or behind the faucet.
Bleach pens are inexpensive and easy to find at any grocery or hardware store. The gel formula clings to vertical surfaces, so it won't drip onto clean grout or tile. Just make sure to use it in a well-ventilated bathroom and wear gloves to protect your skin.
How To Apply
Squeeze a thin line of bleach gel directly onto the stained grout. Spread it gently with the pen tip if needed. Let it sit for about 5 minutes—longer if the stain is heavy, but never exceed 10 minutes to avoid bleaching tile.
Then scrub lightly with a small brush or rinse with water.
Safety First
Bleach can discolor colored grout or damage certain tile finishes, so test on an inconspicuous spot first. Keep the pen away from metal fixtures and fabric. Rinse thoroughly after treatment to remove all residue.
When To Use This Method
This is best for occasional spot cleaning, not whole-floor grout lines. If you have widespread mildew, consider a stronger solution or a steam cleaner. But for those random dark spots that appear overnight, a bleach pen is quick and effective.
10. Grout-Specific Cleaner Spray
Not all cleaners are created equal, and that's especially true for grout. A dedicated grout cleaner spray is formulated to penetrate porous grout lines, breaking down the soap scum and hard water deposits that general bathroom sprays often leave behind. These products are widely available at hardware stores and online, and they take the guesswork out of mixing your own solution.
Using a grout-specific spray is straightforward: spray it on the grout lines, let it sit for the recommended time (usually 5–10 minutes), scrub with a stiff brush, and rinse thoroughly. Many formulas also contain bleach or oxygen-based cleaners that help brighten the grout without damaging the tile. For best results, apply the spray to dry grout and work in small sections so it doesn't dry out before you scrub.
What To Look For
Choose a cleaner labeled for bathroom grout, ideally one that targets soap scum and hard water stains. Avoid products with harsh acids if you have natural stone tiles, as they can etch the surface. Gel-based sprays are great for vertical surfaces because they cling better and don't drip as much.
Application Tips
Always test the spray on a hidden area first to check for colorfastness. Use a grout brush or an old toothbrush for tight lines. For extra stubborn stains, let the cleaner sit a few extra minutes, but don't let it dry completely.
Rinse with warm water and wipe away residue with a damp cloth.
When To Use It
This method works well for regular maintenance cleaning every few weeks. It's also a good first step before trying heavier methods like steam cleaning or bleaching. If your grout is heavily soiled, you may need to repeat the process or follow up with a stiff scrub brush.
11. Toothpaste for Small Areas
White toothpaste (not gel) can be a surprising grout cleaner when you need a quick fix for small, dirty spots. The mild abrasives in toothpaste help scrub away grime without scratching tiles, making it a handy option for touch-ups between deeper cleans. Plus, you probably already have a tube in your bathroom cabinet.
Toothpaste works best on isolated stains or narrow grout lines where you don't want to mix a whole batch of cleaner. Simply squeeze a small amount of white toothpaste onto an old toothbrush, scrub the grout in a circular motion, then wipe away with a damp cloth. The paste lifts dirt and leaves a fresher look in seconds.
Why White Toothpaste Works
White toothpaste contains mild abrasives like calcium carbonate or silica, which physically scrub away surface stains. Gel toothpaste lacks these abrasives and won't be as effective. Stick to plain white paste for the best results.
Best Spots To Use It
This method is ideal for small areas like the grout around a sink faucet, a shower caddy bracket, or a single stained line near the tub. It's not meant for large floors or entire walls—save those for stronger cleaners.
Tips For Better Results
Use a dedicated toothbrush and apply firm pressure while scrubbing. For stubborn spots, let the toothpaste sit for 5 minutes before scrubbing. Rinse thoroughly with water to avoid any sticky residue.
12. Borax and Water Solution
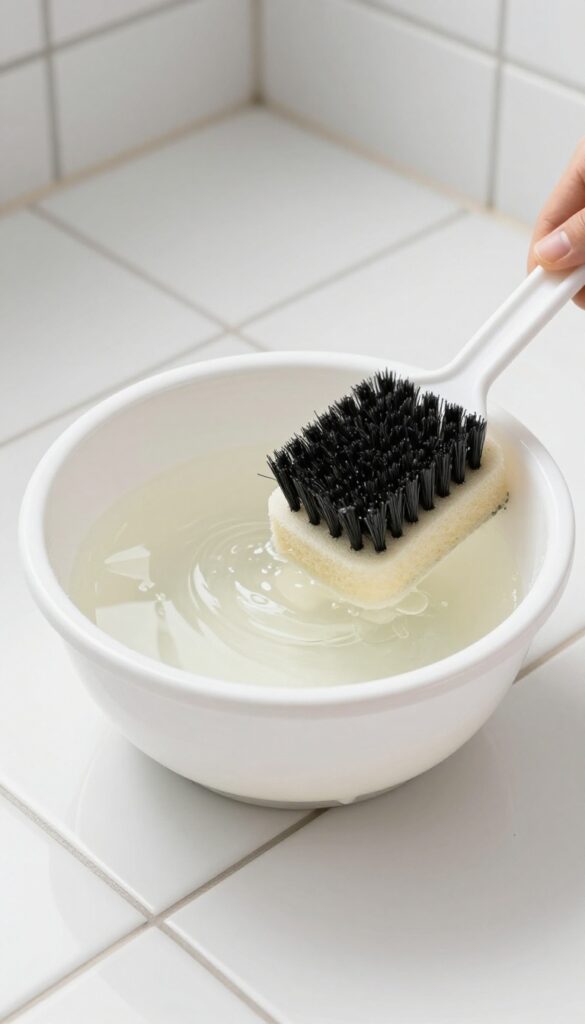
Borax is one of those old-school cleaning agents that actually earns its reputation. This natural mineral (sodium borate) has been used for decades to tackle grease, grime, and even mold. When mixed with warm water, it creates a mildly alkaline solution that breaks down dirt without the harsh fumes of bleach or ammonia.
It's safe on most grout types and won't damage tile surfaces, making it a go-to for regular maintenance or light-to-moderate staining.
To use borax on grout, start by mixing one part borax with two parts warm water in a bowl. Stir until the borax is fully dissolved—you should have a slightly cloudy liquid. Dip a soft sponge or a stiff-bristled brush (depending on how stubborn the dirt is) into the solution and apply it generously to the grout lines.
Let it sit for 5 to 10 minutes so the minerals can work on the grime. Scrub in a circular motion, focusing on the darkest areas. Rinse thoroughly with clean water and wipe dry with a microfiber cloth.
This method is especially effective on soap scum and everyday buildup. For tougher spots, you can make a thicker paste by using less water and applying it directly to the stain, letting it dry before scrubbing off.
Why Borax Works So Well
Borax has a high pH (around 9. 5), which helps saponify fats and oils—basically turning grease into a water-soluble soap that rinses away easily. It also has mild bleaching properties that can lighten discolored grout without the risk of yellowing that chlorine bleach sometimes causes.
Plus, it's a natural fungicide, so it helps prevent mildew from returning.
Best Practices For Application
Always test borax on an inconspicuous grout area first, especially if your grout is colored or sealed. While borax is gentle, some sealants may react. Use a dedicated grout brush or an old toothbrush for precision.
Avoid letting the solution dry on the surface, as it can leave a white residue. Rinse thoroughly and dry with a clean cloth to avoid water spots.
When To Skip This Method
Borax isn't ideal for heavy mold infestations or deep-set stains that have been ignored for years. In those cases, you might need a stronger cleaner like hydrogen peroxide or a commercial grout bleach. Also, if your grout is unsealed and very porous, the borax solution could soak in and take longer to rinse out.
Stick to this method for routine cleaning or light discoloration.
13. Pumice Stone for Tough Stains
Hard water stains and mineral deposits can make grout look beyond saving. But before you give up, try a pumice stone. This volcanic rock is surprisingly effective at scrubbing away stubborn buildup without harsh chemicals.
Just wet it first and use gentle pressure—it works like a gentle abrasive that lifts stains without damaging the grout.
Pumice stones are ideal for tackling those white, crusty deposits that regular cleaners can't touch. They're especially safe on porcelain tiles, but avoid using them on polished or soft surfaces. The key is to keep the stone wet and move it in short, light strokes.
You'll see the stain fade as the pumice wears down slightly, exposing fresh abrasive surface.
How To Use A Pumice Stone On Grout
Start by wetting both the pumice stone and the grout line. Gently rub the stone over the stained area using light pressure. Rinse frequently to check your progress and remove debris.
Stop once the stain is gone—over-scrubbing can wear down grout over time.
Where It Works Best
Pumice stones excel on hard, non-porous tile surfaces like porcelain and ceramic. They're perfect for removing calcium deposits, soap scum rings, and rust stains. Avoid using them on natural stone, marble, or glossy tiles, as they can cause scratching.
Pro Tips For Best Results
Always use a dedicated pumice stone for cleaning—don't reuse one from your bathroom routine. Keep the stone wet to reduce friction. For extra stubborn spots, dip the stone in a mixture of water and mild dish soap.
Replace the stone when it becomes too smooth to be effective.
14. White Vinegar Spray
White vinegar is a powerhouse cleaner that cuts through soap scum and mildew without introducing harsh fumes into your bathroom. It's cheap, non-toxic, and already sitting in your kitchen cabinet. For grout that's looking dull but not deeply stained, vinegar can restore brightness with minimal effort.
Fill a standard spray bottle with undiluted white vinegar. Mist the grout lines generously, then let the vinegar sit for about 10 minutes to break down grime and mineral deposits. Scrub with a stiff-bristled brush or an old toothbrush, working the solution into the pores.
Rinse thoroughly with warm water and wipe dry with a microfiber cloth. The acetic acid in vinegar naturally disinfects and deodorizes, leaving your bathroom smelling fresh—not like a chemical lab.
Why Vinegar Works So Well
Vinegar's mild acidity dissolves alkaline residues like soap scum and hard water stains. It also kills many common bathroom mold spores on contact. Unlike bleach, vinegar won't produce toxic fumes when mixed with other cleaners (though you should still avoid mixing it with bleach on purpose).
Best Practices For Vinegar Cleaning
Always test vinegar on an inconspicuous grout area first, especially if your grout is unsealed or colored. Vinegar can etch natural stone tiles, so keep it away from marble, limestone, or travertine. For best results, use undiluted vinegar—diluting reduces its cleaning power.
If the smell bothers you, open a window or run the exhaust fan.
When Vinegar Isn't Enough
If your grout is heavily stained or has black mildew that won't lift, vinegar alone might not cut it. In that case, follow up with a baking soda paste (mix baking soda with a little water) and scrub again. The fizzing action helps lift stubborn dirt.
For deep-set mold, switch to a hydrogen peroxide or oxygen bleach cleaner.
15. Baking Soda and Water Scrub
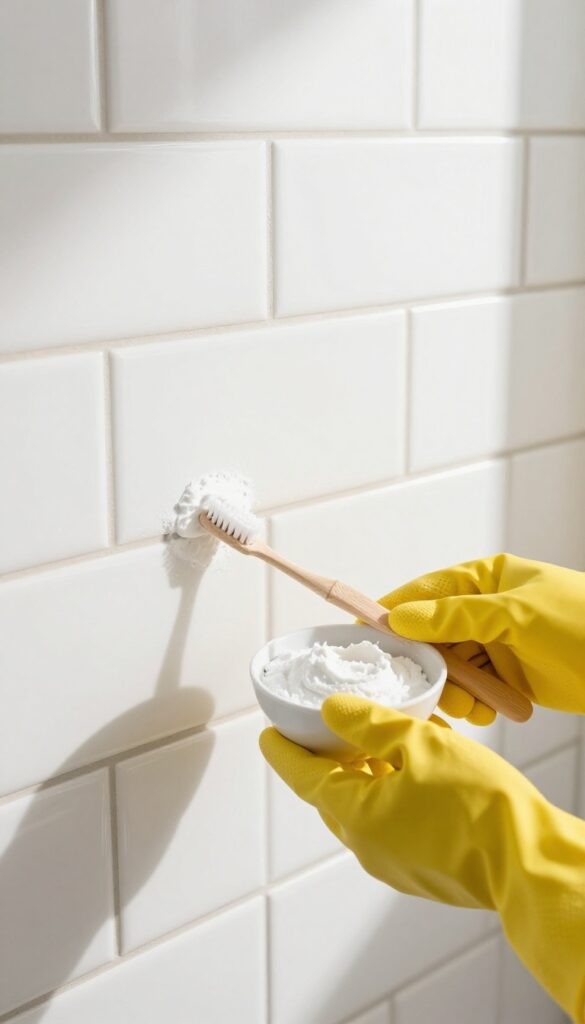
Sometimes the simplest solutions work best. Baking soda is a mild abrasive that lifts grime without scratching tile or damaging grout. Mixed with water, it forms a paste that clings to vertical surfaces and gets into porous lines, making it a go-to for regular maintenance cleaning.
Why It Works
Baking soda is alkaline, which helps break down acidic dirt and grease. Its fine particles provide gentle scrubbing action that dislodges surface grime without eroding the grout. Plus, it's non-toxic and safe for frequent use, making it ideal for households with kids or pets.
How To Make The Paste
In a small bowl, mix three parts baking soda with one part water. Stir until it forms a thick, spreadable paste. Adjust the ratio if needed—add more baking soda for a thicker consistency or more water for a thinner one.
Let it sit for a minute to activate.
Application Tips
Apply the paste directly onto the grout lines using an old toothbrush or a grout brush. Scrub in a circular motion, focusing on stained areas. Let it sit for 5-10 minutes for tougher stains, then scrub again.
Rinse thoroughly with water and wipe dry with a cloth.
When To Use This Method
This scrub is perfect for light to moderate grout discoloration and routine cleaning. It's not strong enough for deep-set mold or heavy mildew, but it works wonders for keeping grout bright between deeper cleans. Use it weekly or bi-weekly for best results.
16. Grout Sealer After Cleaning
Cleaning grout is only half the battle. Once those lines are bright and fresh, you want them to stay that way. That's where grout sealer comes in.
It's a simple step that adds a protective layer, making future cleaning much easier and less frequent.
Why Sealer Matters
Grout is porous by nature, which means it soaks up moisture, soap scum, and stains like a sponge. A good sealer fills those tiny pores and creates a barrier. This prevents dirt from penetrating deep into the grout, so spills and splashes stay on the surface where they can be wiped away easily.
Choosing The Right Sealer
You'll find two main types: penetrating sealers and membrane-forming sealers. Penetrating sealers soak into the grout and protect from within, while membrane sealers sit on top. For bathroom grout, a penetrating sealer is usually the better choice because it doesn't alter the look or texture.
Look for a product labeled for bathroom use and follow the manufacturer's instructions.
When And How To Apply
Apply sealer only after the grout is completely clean and dry. Use a small brush or a sealer applicator to work it into the grout lines. Wipe off any excess from the tile surface immediately to avoid hazy residue.
Most sealers need a few hours to cure, so keep the bathroom dry during that time. Reapply every 6 to 12 months, or whenever water stops beading on the grout surface.
17. Hydrogen Peroxide Spray
Hydrogen peroxide isn't just for first aid—it's a surprisingly effective grout cleaner. The 3% solution you find at the drugstore works by releasing oxygen bubbles that lift dirt and kill mold spores on contact. It's especially good for whitening grout that's turned gray or yellow from moisture.
How It Works
Pour 3% hydrogen peroxide into a spray bottle and mist it directly onto the grout lines. The bubbling action starts immediately as the peroxide breaks down organic matter. Let it sit for about 10 minutes—you'll see the foam carry away grime.
Then scrub with a stiff brush and rinse with warm water.
Why It's A Good Choice
Hydrogen peroxide is non-toxic and doesn't leave harsh chemical residue, making it safe for homes with kids or pets. It also disinfects as it cleans, tackling mold and bacteria that cause odors. Plus, it's cheap and easy to find—no special order required.
Tips For Best Results
Test on a small, hidden area first to make sure it doesn't discolor your grout. For stubborn stains, mix hydrogen peroxide with baking soda into a paste and apply it like a mask. Avoid using it on colored grout, as it may lighten the pigment.
18. Dishwasher Tablet Trick
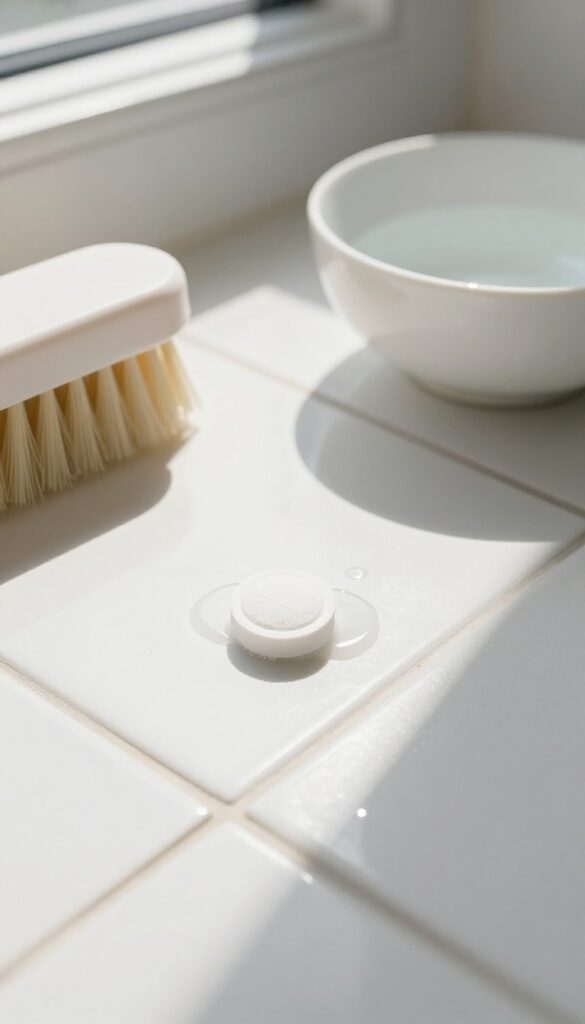
Dishwasher tablets aren't just for dishes. Their enzyme-powered formula is surprisingly effective at breaking down the soap scum and food residue that builds up on grout. You probably already have a tablet under the sink, making this a zero-cost experiment worth trying.
Drop one tablet into a bowl of warm water and let it dissolve completely. Dip a stiff brush into the solution and work it into the grout lines. Let it sit for 15 minutes so the enzymes can do their job, then scrub again and rinse with clean water.
The result is noticeably brighter grout with minimal effort.
Why It Works
Dishwasher tablets contain enzymes and surfactants designed to break down grease, starch, and protein-based stains. These same compounds attack the organic grime that darkens grout, lifting it away without harsh scrubbing.
Best Uses
This trick works best on lightly to moderately soiled grout. For heavy mildew or deep-set stains, you may need a stronger cleaner, but for everyday buildup, it's a surprisingly effective quick fix.
Pro Tip
Use a tablet labeled "enzyme" or "natural" for best results. Avoid gel packs—they don't dissolve evenly. If the grout is still dingy after one round, repeat with a fresh tablet solution.
19. Ammonia for Greasy Grime
When soap scum and body oils build up, grout can feel sticky and look yellowed. Ammonia cuts through that greasy layer fast. Mix one part ammonia with four parts water, apply to the grout, scrub with a stiff brush, and rinse thoroughly.
The key is ventilation—open a window or run the exhaust fan. This isn't for daily use, but it's a knockout punch for heavy buildup.
Ammonia is a strong degreaser, making it ideal for bathrooms where soap scum and oils accumulate. It's especially effective on grout near shower walls and sinks. Always wear gloves and avoid mixing with bleach, which creates toxic fumes.
Test on a small hidden area first, as ammonia can discolor some grout sealants.
When To Use Ammonia
Reserve ammonia for grout that feels greasy or has visible yellowing from soap scum. It's overkill for light dust or mildew. Use it after other cleaners have failed, maybe once every few months.
Application Tips
Apply the solution with a spray bottle or sponge. Let it sit for 5–10 minutes to break down grime. Scrub with a grout brush or an old toothbrush, then rinse with warm water.
Wipe dry to prevent residue.
Safety First
Ammonia fumes are strong. Work in a well-ventilated space, and consider a mask if you're sensitive. Keep away from children and pets.
Never combine with chlorine bleach—it creates dangerous chloramine gas.
20. Grout Paint or Pen
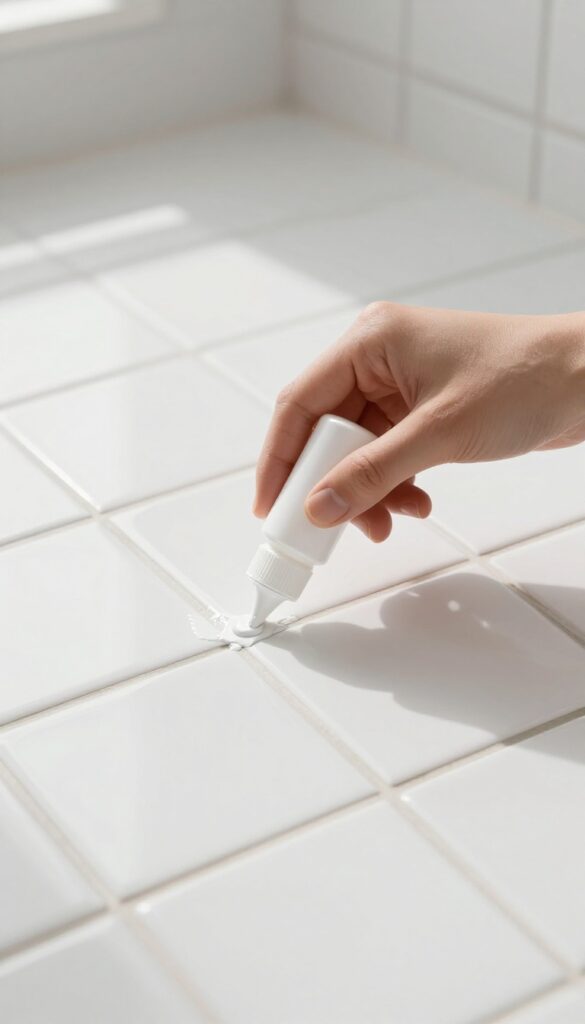
Not every grout problem requires deep scrubbing or chemical treatments. Sometimes you just want a quick visual fix without the elbow grease. That's where grout paint or a grout pen comes in handy.
These products let you color over stained lines, instantly making them look fresh and uniform.
Grout paint and pens are essentially cosmetic cover-ups. They don't clean the grout, but they do hide discoloration from soap scum, mildew, or age. The result can be surprisingly satisfying, especially if your grout is structurally sound but just looks tired.
It's a low-effort way to buy yourself more time before a full regrout.
Choosing The Right Color
Match your existing grout color as closely as possible. Most brands offer a range of whites, grays, and beiges. If your grout is a custom shade, test a small area first.
Some paints dry slightly darker or lighter than they appear in the bottle.
Application Tips
Clean the grout lines first with a mild cleaner and let them dry completely. Apply the paint or pen carefully along each line, staying within the grooves. Wipe away any excess that gets on the tile surface immediately.
One coat is usually enough, but you can add a second for deeper coverage.
Durability And Maintenance
Grout paint is not permanent. It can wear off over time, especially in high-moisture areas or where there's frequent scrubbing. Expect to touch it up every few months.
It's best used as a temporary refresh or for low-traffic areas like a guest bathroom.
21. Cornstarch Paste for Oil Stains
Oil-based stains from lotions, hair products, or body oils can leave grout looking greasy and discolored. Cornstarch naturally absorbs oils, making it a simple, chemical-free solution. This method works best on fresh or set-in oil spots without damaging the grout.
Make The Paste
Mix equal parts cornstarch and water in a small bowl until you get a thick, spreadable paste. For tougher stains, use a little less water so the paste is slightly thicker. You want it to stick to the grout lines without dripping.
Apply And Let It Work
Use an old toothbrush or your finger to press the paste into the stained grout lines. Cover the area completely. Let the paste sit for at least 30 minutes, or up to an hour for stubborn stains.
As it dries, the cornstarch pulls the oil out of the porous grout.
Scrape And Rinse
Once the paste is dry and cracked, scrape it off with a plastic scraper or the edge of a credit card. Vacuum up any loose powder, then rinse the area with warm water. Wipe with a clean cloth—the stain should be noticeably lighter or gone.
22. Electric Spin Scrubber
If your wrists ache after scrubbing grout, it's time to let a machine take over. Cordless electric spin scrubbers with grout brush attachments spin at high RPM to blast away embedded dirt without you breaking a sweat. They're especially handy for large bathrooms or multiple tiled areas where hand scrubbing would take forever.
Why It Works So Well
The spinning action creates friction that dislodges grime from deep within the grout pores. Unlike a manual brush, the scrubber maintains consistent pressure and speed, so you don't have to bear down hard. Most models come with interchangeable brush heads, including a pointed grout brush that fits right into the lines.
Best Practices For Best Results
Wet the grout lines with a cleaner first—let it sit for a few minutes. Then run the spin scrubber along the lines, moving slowly to let the bristles work. Rinse frequently to avoid redepositing dirt.
For stubborn spots, apply a baking soda paste and let it dwell before scrubbing.
What To Look For In A Scrubber
Choose a cordless model with a long battery life (at least 30 minutes). A variable speed trigger gives you control for delicate versus heavy-duty jobs. Make sure it comes with a grout-specific brush head—some kits include multiple sizes.
Water resistance is a plus for bathroom use.
23. Professional Grout Cleaning Service
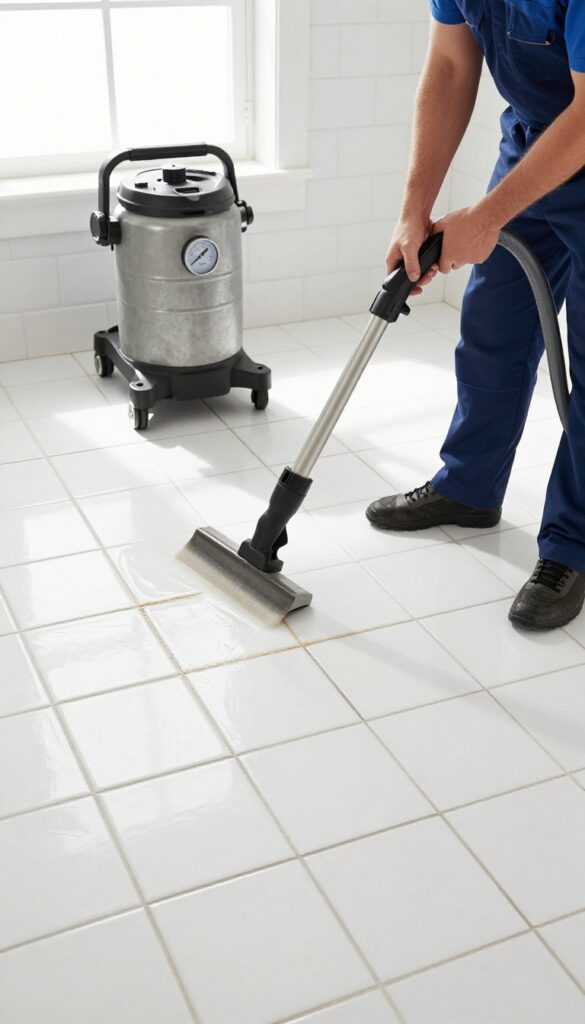
Sometimes, despite your best efforts, grout just won't budge. Maybe it's years of buildup, or perhaps the grout is too far gone for DIY methods. That's when calling in the pros makes sense.
Professional grout cleaners use industrial-grade equipment—think steam cleaners, high-pressure washers, and powerful extraction tools—that can restore grout to near-new condition without damaging the tile. It's an investment, but one that can save you hours of frustration and deliver results you simply can't achieve at home.
Professional grout cleaning services are ideal for deep-set stains, heavily soiled bathrooms, or large areas. They typically start with a pre-treatment to loosen grime, then use hot water extraction or steam cleaning to flush out dirt. Some also apply a sealant afterward to protect the grout from future stains.
The cost varies, but expect to pay between $200 and $500 for a standard bathroom, depending on square footage and condition. It's a worthwhile option if you're selling your home or just want a fresh start without the elbow grease.
What To Expect From A Pro
Most services begin with an inspection to assess grout condition and tile type. They'll then apply a cleaning solution, let it dwell, and use a machine to scrub and extract. The process is thorough and often takes 1–3 hours for a typical bathroom.
After cleaning, they may recommend sealing to extend the results.
When To Call In The Pros
Consider professional cleaning if DIY methods haven't worked, if the grout is crumbling or missing, or if you have delicate tiles that could be damaged by harsh scrubbing. It's also a good choice before regrouting or if you simply lack the time or physical ability to do it yourself.
Cost Vs. Benefit
While hiring a pro costs more than a DIY approach, it can save you from buying expensive equipment or risking tile damage. Plus, the results often last longer, especially if sealing is included. For many homeowners, the convenience and effectiveness are well worth the price.
FAQ
How often should I clean bathroom grout?
For maintenance, clean grout every 2-4 weeks with a mild cleaner. Deep clean every 3-6 months, depending on usage and ventilation.
Can I use bleach on colored grout?
Bleach can discolor or lighten colored grout. Test on an inconspicuous area first, or use a color-safe cleaner instead.
Does vinegar damage grout?
Vinegar is safe for cement-based grout but can etch natural stone tiles. Avoid using it on marble, limestone, or travertine.
How do I prevent grout from getting dirty?
Seal grout after cleaning, wipe down tiles after showers, use a squeegee, and ensure proper ventilation to reduce moisture.
What is the best homemade grout cleaner?
A paste of baking soda and hydrogen peroxide is highly effective for whitening and removing mildew without harsh chemicals.
Conclusion
Grout cleaning doesn't have to be a dreaded chore. With the right approach—whether it's a quick baking soda scrub or a thorough steam cleaning—you can keep your bathroom tile lines looking fresh. Start with the method that matches your time and budget, and work your way up if needed.
Remember, consistency is key.
A little regular maintenance goes a long way in preventing deep stains. Pick a couple of ideas from this list and make them part of your cleaning routine. Your bathroom will thank you.


