
Moldy grout lines can turn a clean shower into an eyesore. The porous nature of grout makes it a magnet for moisture and mold, but you don't need harsh chemicals or expensive services to fix it.
With the right techniques, you can restore your tile lines to their original brightness. These 25 tips cover everything from everyday prevention to deep cleaning methods.
Whether you prefer natural solutions or commercial products, there's a strategy here that will work for your situation. Let's dive into the most effective ways to tackle moldy shower grout and keep it from coming back.
1. Start with a Baking Soda Paste
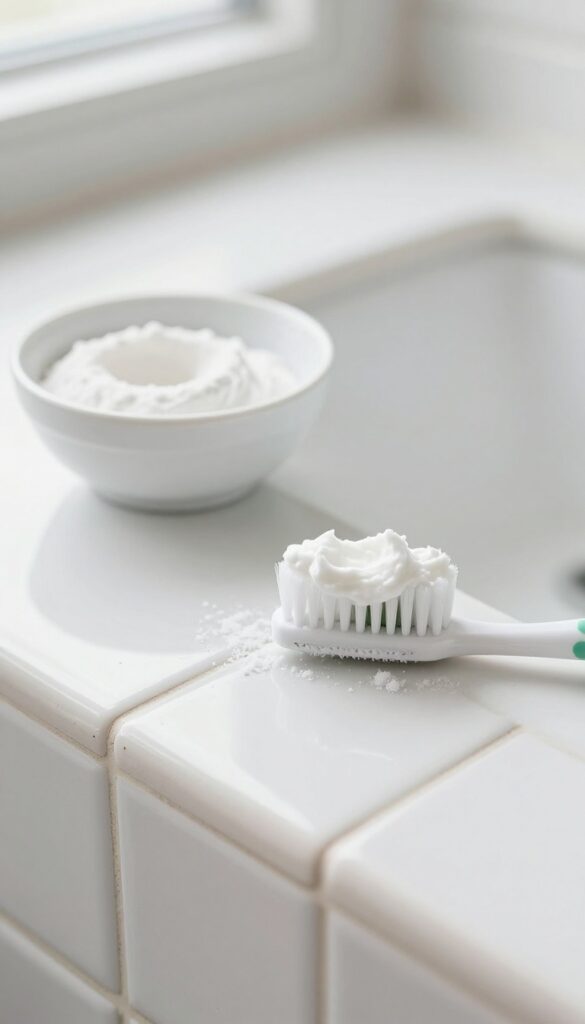
Baking soda is a gentle yet effective cleaner that won't harm your grout. Mixed with water, it forms a paste that clings to vertical surfaces and works into the porous grout lines. This method is perfect for light to moderate mold and mildew buildup.
To make the paste, combine three parts baking soda with one part water in a small bowl. Stir until it reaches a thick, spreadable consistency. Apply the paste directly onto the grout lines using an old toothbrush or a small spatula, making sure to work it into the grooves.
Let it sit for 10 minutes to allow the baking soda to break down the mold. Then, scrub vigorously with a damp toothbrush. Rinse the area with warm water and wipe away any residue with a clean cloth.
For stubborn spots, repeat the process or add a few drops of white vinegar to the paste for extra cleaning power. This natural approach is safe for all grout types and won't release harsh fumes.
Why Baking Soda Works
Baking soda is mildly alkaline, which helps dissolve organic matter like mold and mildew. Its fine abrasive texture scrubs away surface stains without scratching the grout. Unlike bleach, it doesn't damage the grout's structure or discolor colored grout over time.
Step-by-step Application
Mix 3 parts baking soda with 1 part water to form a thick paste. Apply it generously to the grout lines using an old toothbrush. Let it sit for 10 minutes to penetrate.
Scrub in circular motions, then rinse thoroughly with warm water. Wipe dry to prevent new mold growth.
When To Use This Method
This technique works best for light to moderate mold on well-maintained grout. If the grout is heavily stained or crumbling, you may need a stronger cleaner or professional help. Use it weekly as a preventive treatment to keep mold at bay.
2. Use White Vinegar for Light Mold
White vinegar is a powerhouse for tackling light mold on grout. Its mild acidity kills mold spores and dissolves grime without the harsh fumes of bleach. Best of all, it's safe for most tile surfaces and costs pennies per use.
Spray undiluted white vinegar directly onto the grout lines. Let it sit for 5–10 minutes to penetrate the porous surface. Scrub gently with a soft brush, then rinse with warm water.
For stubborn spots, repeat or add a sprinkle of baking soda before scrubbing.
Why Vinegar Works
Vinegar contains acetic acid, which disrupts mold cell membranes and breaks down mineral deposits. Unlike bleach, it doesn't just bleach the mold—it kills it. Plus, it's non-toxic and safe for septic systems.
Application Tips
Use a spray bottle for even coverage. Work in small sections to keep the vinegar from drying out. After scrubbing, rinse thoroughly—residual vinegar can attract dirt if left to dry.
Open a window or turn on the fan to speed drying and reduce the smell.
When To Avoid Vinegar
Don't use vinegar on natural stone tiles like marble or limestone—the acid can etch the surface. Stick to pH-neutral cleaners for those materials. Also avoid mixing vinegar with bleach, which creates toxic chlorine gas.
3. Try Hydrogen Peroxide for Stubborn Spots
Sometimes mold needs a stronger punch. Hydrogen peroxide is a natural bleach alternative that kills mold without the harsh fumes of chlorine. It's safe for most grout and tile surfaces when used correctly.
How To Apply It
Pour 3% hydrogen peroxide into a spray bottle or dip a cotton ball directly into the bottle. Spray or dab it onto the moldy grout lines, making sure they're fully saturated. Let it sit for about 10 minutes — you'll see it fizz as it breaks down the mold.
Then scrub with a stiff brush and rinse with warm water.
Why It Works On Grout
Hydrogen peroxide releases oxygen bubbles that lift mold and mildew from porous surfaces. Unlike bleach, it doesn't produce toxic fumes, and it breaks down into water and oxygen, making it environmentally friendly. It's especially effective on light to moderate mold stains.
Safety And Tips
Always test on a small, hidden area first to ensure it doesn't discolor your grout or tile. Avoid mixing hydrogen peroxide with vinegar or bleach, as that can create harmful gases. For best results, use it in a well-ventilated bathroom and wear gloves to protect your skin.
4. Bleach Dilution for Heavy Mold
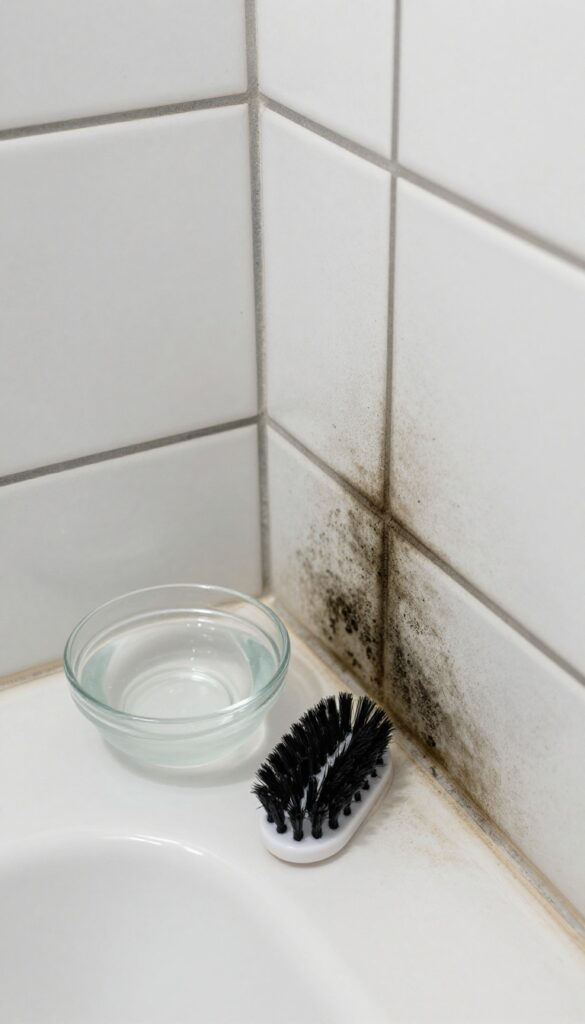
When mold has taken a firm hold on your grout, it's time to bring out the big guns. Bleach is a proven mold killer, but using it full strength can damage grout and release harsh fumes. The key is proper dilution and careful application to get results without causing harm.
Mixing one part bleach with three parts water creates a solution strong enough to kill mold but gentle enough for most grout. Apply it with a small brush directly to the moldy lines, let it sit for five minutes, then scrub gently and rinse thoroughly. Always work in a well-ventilated area and avoid getting bleach on colored grout, as it can cause discoloration.
Why Dilution Matters
Undiluted bleach can eat away at grout over time, making it more porous and prone to future mold. A 1: 3 ratio is the sweet spot—strong enough to kill mold spores but safe for your tile and grout. Plus, it reduces harsh fumes and makes rinsing easier.
Application Tips For Best Results
Use a stiff-bristled brush or an old toothbrush to work the solution into the grout lines. Let it sit for exactly five minutes—any longer and you risk damage. Scrub in a circular motion, then rinse with warm water.
For stubborn spots, repeat the process rather than increasing bleach concentration.
Safety Precautions
Bleach fumes can be irritating, so open a window or turn on the exhaust fan. Wear gloves and old clothes, and keep the solution away from your eyes and skin. Never mix bleach with ammonia or vinegar, as this creates toxic gas.
After cleaning, run the shower for a few minutes to clear the air.
5. Steam Clean for Deep Penetration
A handheld steam cleaner blasts hot steam into grout pores, killing mold and loosening dirt. It's chemical-free and effective for large areas. Just wipe away the residue after steaming.
Steam cleaning is a game-changer for moldy grout because it reaches deep into the porous surface without chemicals. The high temperature kills mold spores and loosens embedded grime, making it easy to wipe clean. This method is especially useful for large showers where scrubbing every line would take forever.
Plus, it's eco-friendly and safe for most tile types.
Why Steam Works So Well
Steam penetrates grout pores better than any liquid cleaner. The heat denatures mold proteins, killing them instantly. It also breaks down soap scum and dirt that cling to the grout surface.
Unlike bleach, steam doesn't leave residue or damage grout over time.
How To Steam Clean Grout
Fill your steam cleaner with water and let it heat up. Use the small brush attachment to focus steam directly on grout lines. Work in small sections, holding the nozzle against the grout for a few seconds.
Wipe away the loosened dirt with a microfiber cloth before it dries. For stubborn mold, repeat the process.
Tips For Best Results
Always test steam on an inconspicuous tile area first to ensure it won't damage the finish. Keep the steam moving to avoid overheating one spot. After cleaning, ventilate the bathroom to reduce moisture.
For maintenance, steam clean monthly to prevent mold from returning.
6. Oxygen Bleach for Colored Grout
Colored grout adds a nice design touch, but it can be tricky to clean without ruining the hue. Chlorine bleach might zap mold, but it'll also zap the color. That's where oxygen bleach comes in.
Oxygen bleach, like OxiClean, is a gentler alternative that's safe for colored grout. It works by releasing oxygen bubbles that lift mold and stains without fading the pigment. Mix it with warm water according to package directions, apply the paste or solution to the grout lines, let it sit for about 15 minutes, then scrub with a soft brush.
Rinse thoroughly. This method is effective for light to moderate mold and keeps your grout looking vibrant.
Why Oxygen Bleach Works
Unlike chlorine bleach, which chemically alters pigments, oxygen bleach uses oxidation to break down organic matter like mold. It's non-toxic and won't produce harsh fumes, making it safer for indoor use. The bubbling action also helps dislodge dirt from porous grout.
How To Apply It Right
For best results, use warm water to activate the oxygen bleach. Create a thick paste for vertical surfaces so it sticks. Apply generously, let it sit without drying out (cover with plastic wrap if needed), then scrub with a stiff nylon brush.
Avoid metal brushes that can scratch grout.
When To Repeat
Oxygen bleach may need a second application for stubborn mold. If you still see spots after the first round, repeat the process. It's gentle enough to use weekly for maintenance without damaging colored grout.
7. Use a Grout Brush for Better Scrubbing
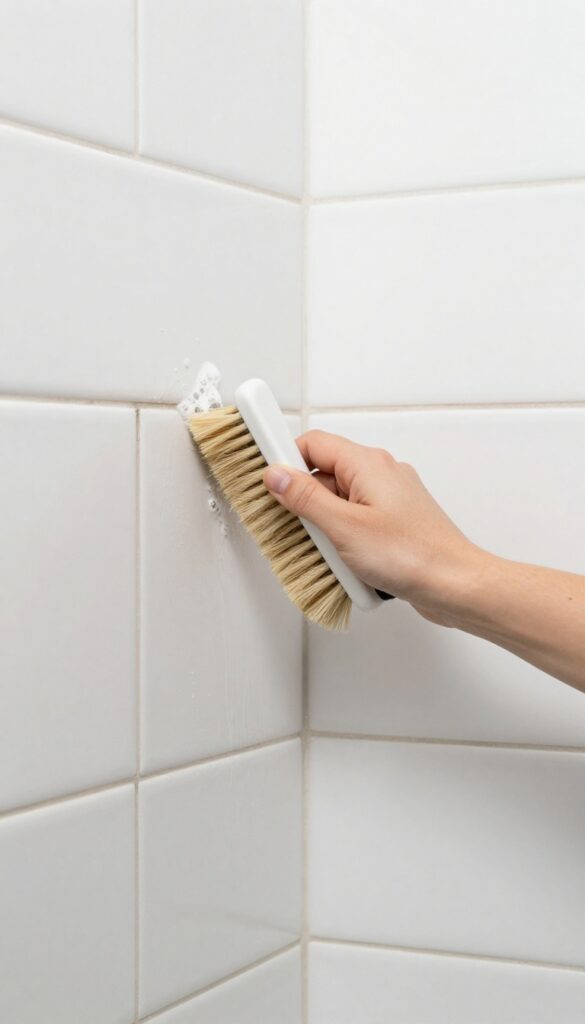
Scrubbing grout by hand with a regular sponge or cloth often doesn't cut it. The porous texture and narrow grooves demand a tool that can get deep into the lines without wearing you out. That's where a dedicated grout brush comes in.
A stiff-bristled brush—or even an old toothbrush—gives you the leverage and abrasion needed to loosen embedded mold and grime. For larger areas, you can attach a brush head to a drill and let the power tool do the heavy lifting. It's a simple swap that makes a world of difference.
A grout brush is a small investment that pays off fast. Its angled bristles reach into crevices that sponges miss, and the stiff fibers break up mold without scratching tile. Using the right tool also saves your hands and wrists from fatigue.
For really stubborn spots, a drill brush attachment spins at high speed to scrub away years of buildup in seconds. Just be sure to use a brush with nylon or stiff plastic bristles—wire brushes can scratch or damage grout.
Manual Brushes Vs. Drill Attachments
Manual grout brushes are great for spot cleaning and small bathrooms. They're cheap, easy to control, and work well with homemade cleaners. Drill attachments, on the other hand, are ideal for large tiled areas or heavy mold.
They scrub faster and more uniformly, but you need to be careful not to press too hard or you could wear down the grout. Start on a low speed and test in an inconspicuous spot.
How To Scrub Effectively
Wet the grout lines with your chosen cleaner first, then let it sit for a few minutes to soften the mold. Scrub in a back-and-forth motion along the grout line, not across it, to avoid splashing. For drill brushes, hold the drill steady and let the brush do the work—no need to push.
Rinse with warm water and wipe away residue with a microfiber cloth.
Choosing The Right Brush
Look for a brush with a comfortable handle and bristles that are stiff but not abrasive. A curved or angled head helps reach corners and edges. If you're using a drill, pick a brush with a ¼-inch hex shank that fits most drills.
Nylon bristles are a safe bet for all tile types. Replace brushes when bristles start to fray or lose stiffness.
8. Apply a Commercial Grout Cleaner
Sometimes DIY solutions just don't cut it. When mold has deeply embedded into your grout, commercial cleaners offer a powerful alternative. Products like Zep Grout Cleaner or Clorox Grout Whitener are specifically formulated to break down tough mold and mildew quickly.
They can save you time and elbow grease, but you need to use them correctly to get the best results.
Commercial grout cleaners are designed for maximum effectiveness against mold, mildew, and stains. They often contain stronger active ingredients than household products, so they work faster and require less scrubbing. However, it's important to follow the instructions carefully to avoid damaging your grout or tiles.
Always test in an inconspicuous area first, especially if you have colored or natural stone tiles.
Choose The Right Product
Not all commercial cleaners are the same. For moldy grout, look for products specifically labeled as grout cleaners or mold removers. Zep Grout Cleaner and Whitener is a popular choice that uses a thick bleach-based formula to cling to vertical surfaces.
Clorox Grout Whitener works similarly and is great for brightening dingy lines. If you prefer something less harsh, consider oxygen-based cleaners like OxiClean, which are gentler but still effective.
Application Tips For Best Results
Start by spraying or applying the cleaner directly onto the grout lines. Let it sit for the recommended time—usually 5 to 10 minutes—but don't let it dry completely. Use a stiff-bristled brush to scrub the grout, working in small sections.
For stubborn spots, you may need to reapply and let it sit longer. Rinse thoroughly with water after scrubbing to remove any residue, which can attract more dirt if left behind.
Safety First
Many commercial grout cleaners contain bleach or other strong chemicals. Always wear gloves and ensure good ventilation when using them. Avoid mixing different cleaners, as this can create toxic fumes.
Keep the area well-ventilated by opening a window or running the bathroom fan. If you have pets or children, keep them away until the area is completely dry.
9. Try a Magic Eraser for Light Stains
Not every grout problem needs a heavy-duty scrub session. For light surface mold and everyday grime, a melamine foam eraser—commonly known as a Magic Eraser—can be surprisingly effective. It works like a super-fine sandpaper, gently lifting stains without scratching the tile.
Keep one on hand for quick touch-ups between deeper cleans.
How It Works
Magic Erasers are made of melamine foam, which becomes mildly abrasive when dampened. As you rub it along grout lines, the foam breaks down and lifts away mold and dirt. It's ideal for light, surface-level stains that haven't penetrated deep into the porous grout.
Best Practices
Always dampen the eraser first—using it dry can cause it to crumble too fast. Gently rub along the grout lines with light to medium pressure. Avoid scrubbing too hard on glossy tiles, as the abrasive action can dull the finish.
Rinse the area afterward to remove any foam residue.
When To Use It
This method shines for weekly maintenance or spot-cleaning between deep cleans. If you notice a little mold starting to form, a quick pass with a Magic Eraser can stop it from spreading. But for thick, embedded mold or mildew, you'll still need a stronger cleaner or a grout brush.
10. Use a Toothbrush and Toothpaste
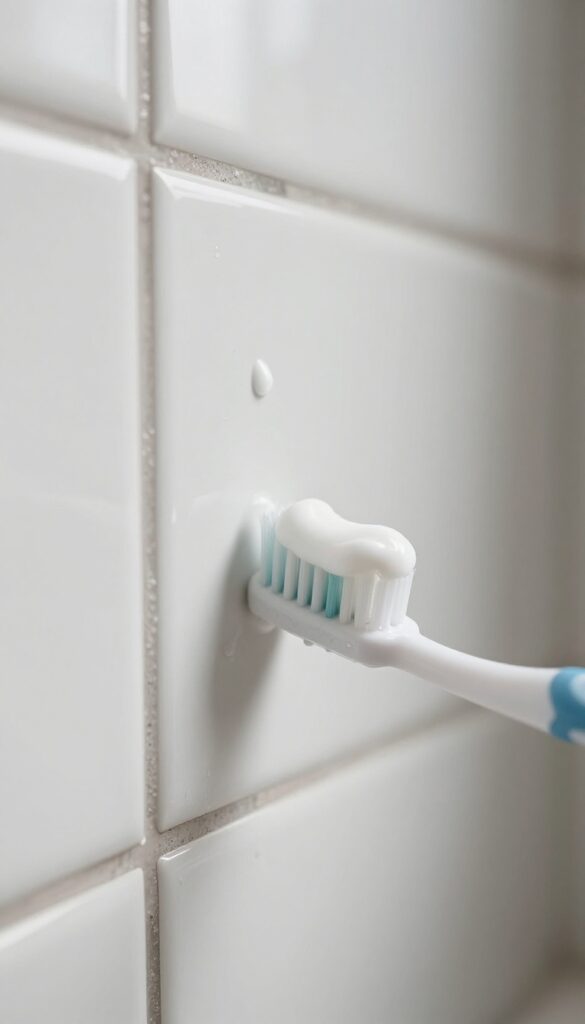
White toothpaste isn't just for your teeth. Its mild abrasive action can buff away surface grime from grout lines without scratching tiles. This trick works best on small, localized spots where mold hasn't penetrated too deep.
Plus, it leaves behind a clean, minty scent that freshens up the shower.
Toothpaste is a surprisingly effective cleaner for small grout areas. The mild abrasives gently polish away stains, while the foaming action helps lift dirt. It's a quick, non-toxic fix that uses something you already have in your bathroom.
Why Toothpaste Works
White toothpaste contains mild abrasives like calcium carbonate or silica, which physically scrub away surface stains. Unlike gel toothpastes, white formulas don't have dyes that could transfer to porous grout. The foaming agents also help penetrate tiny crevices, loosening mold spores.
How To Apply It
Squeeze a pea-sized amount of white toothpaste onto an old toothbrush. Scrub the grout lines in a circular motion, focusing on the darkest spots. Let it sit for a few minutes, then rinse with warm water.
For stubborn areas, repeat the process or let the paste sit longer before rinsing.
When To Use This Method
This technique is ideal for small patches of mold or discoloration, like around the showerhead or soap dish. It's not meant for large areas or deep-set mold. If the grout is heavily stained or crumbling, you'll need a stronger cleaner or replacement.
11. Borax Solution for Mold Prevention
If you want to stop mold before it starts, Borax is a secret weapon you probably already have in your laundry room. This natural mineral works as a mild disinfectant and mold inhibitor without the harsh fumes of bleach. The best part?
You apply it once and it keeps working long after.
Mixing a simple Borax solution is one of the easiest ways to keep grout mold-free. Unlike bleach, which evaporates quickly, Borax leaves behind a residue that prevents mold spores from taking hold. It's safe for most tile and grout types, and it won't damage the surface or discolor colored grout.
How To Mix And Apply
Combine 1 cup of Borax with 1 gallon of hot water. Stir until the powder is mostly dissolved. Apply the solution to your grout lines using a spray bottle or sponge.
Let it dry completely without rinsing. The white residue that appears is normal and will disappear as it dries.
Why It Works Long-term
Borax has a high pH that creates an alkaline environment mold hates. Once dry, it forms a thin protective layer that inhibits fungal growth for weeks. For best results, reapply every month or after heavy shower use.
Safety Tips
Borax is considered safe for household use, but avoid inhaling the powder. Wear gloves if you have sensitive skin. Test on a small hidden area first, especially if you have natural stone tiles, as Borax can be too alkaline for some materials.
12. Tea Tree Oil as a Natural Fungicide
Tea tree oil is a powerful essential oil known for its antifungal and antibacterial properties. It's a natural alternative to bleach that kills mold without harsh fumes. Plus, it leaves a fresh, medicinal scent that many find pleasant.
To use tea tree oil against moldy grout, mix 1 teaspoon of tea tree oil with 1 cup of water in a spray bottle. Shake well to combine, then spray directly onto the moldy areas. Let it sit for at least 10 minutes—no rinsing needed.
The oil will continue to work over time, preventing regrowth. This solution is safe for most tile and grout, but always test on a small hidden spot first.
Why Tea Tree Oil Works
Tea tree oil contains terpinen-4-ol, a compound that disrupts mold cell membranes and inhibits spore germination. Unlike bleach, it penetrates porous grout to kill mold at the root. It's also biodegradable and non-toxic when diluted, making it safe for households with kids or pets.
Application Tips For Best Results
For heavy mold, apply the solution generously and let it sit for an hour or overnight. Use a soft brush to gently scrub before rinsing if you prefer. Reapply weekly to maintain a mold-free shower.
Store the mixture in a labeled bottle and shake before each use.
Safety And Storage
Tea tree oil can cause skin irritation in concentrated form, so avoid direct contact with undiluted oil. Keep the spray bottle out of reach of children. The solution stays effective for up to a month when stored in a cool, dark place.
13. Hydrogen Peroxide and Baking Soda Combo
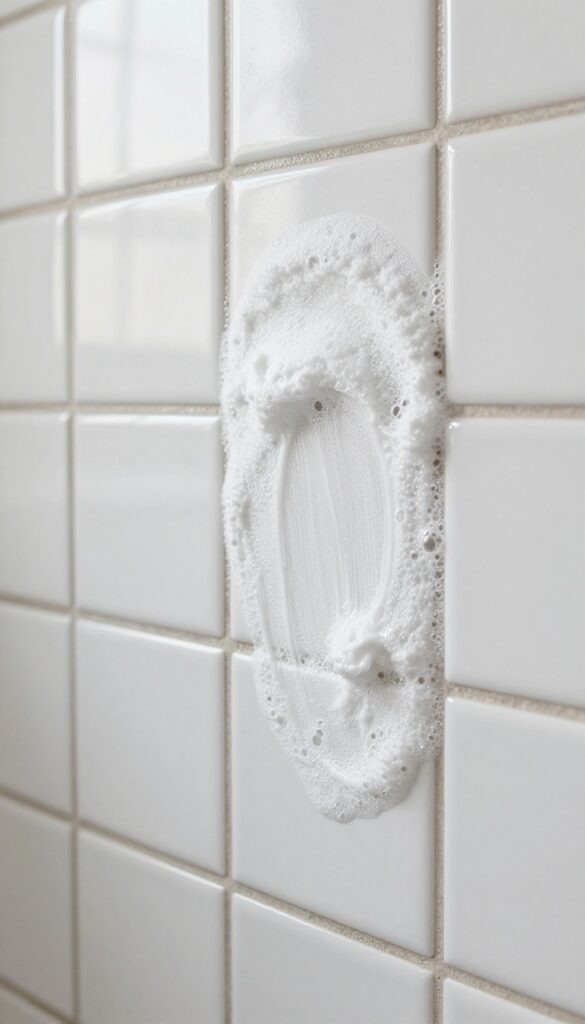
When water alone isn't cutting it for your grout paste, hydrogen peroxide steps in as a powerful alternative. This common household item bubbles up on contact with baking soda, creating a gentle yet effective cleaning reaction that lifts deep-set mold and mildew stains from porous grout lines.
The combination of hydrogen peroxide and baking soda creates an oxygenated paste that penetrates grout pores and breaks down organic stains without harsh fumes. It's safe for most tile types and doesn't require protective gear beyond gloves.
How To Make The Paste
Mix ½ cup of baking soda with about 2 tablespoons of 3% hydrogen peroxide until it forms a thick, spreadable paste. Add more peroxide if it's too dry, or more baking soda if it's too runny. The paste should cling to vertical grout lines without dripping.
Application And Wait Time
Apply the paste generously over the grout lines using an old toothbrush or a small spatula. Let it sit for 10 minutes. During this time, you'll see small bubbles forming as the peroxide reacts with the mold and dirt.
This bubbling action helps lift stains from deep within the grout.
Scrubbing And Rinsing
After 10 minutes, scrub the grout with a stiff-bristled brush. The paste will have loosened most of the grime, so you won't need to scrub hard. Rinse thoroughly with warm water and wipe away any residue with a damp cloth.
Repeat on stubborn spots if needed.
Safety And Precautions
Always test on a small, hidden area first, especially if your grout is colored or sealed. Hydrogen peroxide can lighten some dyes. Wear gloves to avoid skin irritation, and avoid mixing with bleach or ammonia, as that can create toxic fumes.
14. Use a Grout Sealer After Cleaning
You put in the work to get your grout clean. Now make sure it stays that way. A good grout sealer acts like a raincoat for your tile lines, blocking moisture and mold from sneaking back in.
Once your grout is completely dry, apply a penetrating sealer. It soaks into the porous material and creates a protective barrier. Water beads up instead of soaking in, and mold has a much harder time taking hold.
Reapply every 6 to 12 months to keep the protection strong. It's a small step that saves you from repeat deep cleans.
Choose The Right Sealer
Not all sealers are the same. Look for a penetrating sealer designed for grout, not a surface sealer that can peel or yellow. Water-based sealers are easier to apply and clean up, while solvent-based ones may last longer.
Pick one that matches your grout type and shower use.
Apply Evenly And Let It Soak
Use a small brush or applicator to work the sealer into the grout lines. Wipe away any excess from the tile surface before it dries. Let it soak in for the time recommended on the label, then buff off any leftover residue.
Proper application ensures full coverage and long-lasting results.
Test Before You Seal
Not sure if your grout needs sealing? Sprinkle a few drops of water on it. If the water beads up, the sealer is still working.
If it soaks in and darkens the grout, it's time to reseal. This quick test helps you stay on top of maintenance without guessing.
15. Improve Bathroom Ventilation
Mold thrives in damp, still air. If your bathroom stays humid long after a shower, you're basically inviting mold to settle into every grout line. Improving ventilation is one of the simplest and most effective ways to prevent mold from growing in the first place.
Good airflow dries out surfaces quickly, robbing mold of the moisture it needs to survive. It also helps reduce musty odors and keeps your bathroom feeling fresher overall. The best part?
This fix requires no scrubbing or chemicals—just a habit change.
Run The Exhaust Fan The Right Way
Most people turn on the fan when they step in the shower and shut it off when they step out. That's not enough. Moisture lingers in the air and on surfaces for much longer.
Run the fan during your entire shower and for at least 30 minutes afterward. If your fan is on a timer, set it for 30–60 minutes. If it's on a light switch, leave it on after you turn off the lights.
Open A Window Or Door
If your bathroom has a window, crack it open during and after showers—even in winter. The cross-breeze helps carry humid air outside. No window?
Leave the bathroom door open after showering to let moisture escape into drier parts of your home. Just make sure the fan is still running.
Upgrade Your Fan If Needed
An old or weak exhaust fan might not move enough air to make a difference. Check the CFM (cubic feet per minute) rating—bathrooms need at least 50 CFM for small spaces and 1 CFM per square foot for larger ones. If your fan is noisy but ineffective, consider replacing it with a quieter, more powerful model.
Some even come with humidity sensors that turn on automatically.
16. Squeegee Walls After Each Shower
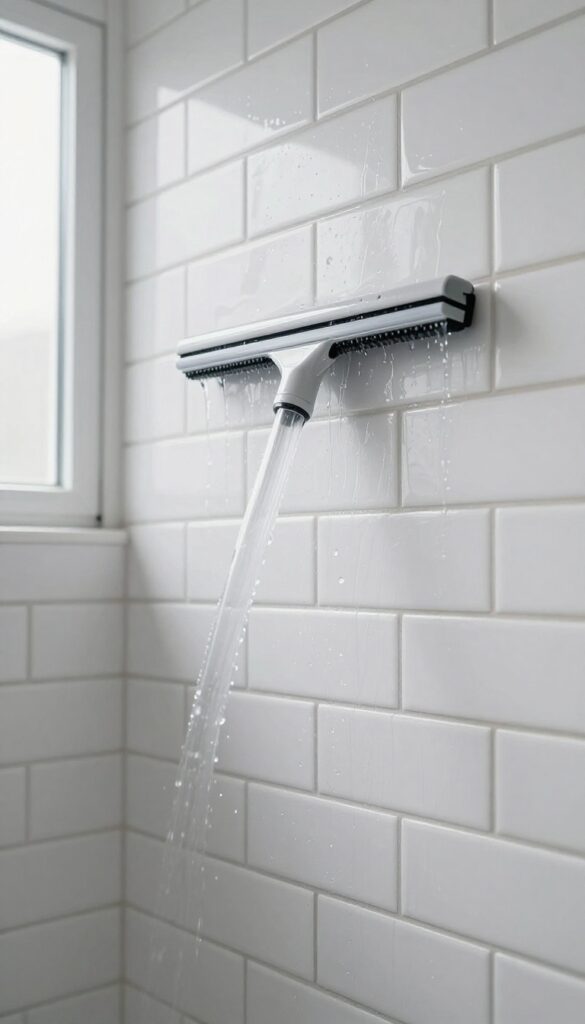
A squeegee might seem like a small tool, but it makes a huge difference in keeping grout mold-free. After every shower, running a squeegee over your tile removes the standing water that mold needs to grow. This 30-second habit cuts moisture dramatically and helps your grout stay cleaner longer.
Moisture is mold's best friend. By using a squeegee, you're removing the water that would otherwise sit in grout pores and feed mold spores. It's the simplest prevention method and requires zero chemicals.
Why It Works
Grout is porous, so water seeps in and stays there. A squeegee wipes away surface water before it can soak in. Less moisture means less food for mold, and your grout stays dry between showers.
Best Technique
Start at the top corner and pull the squeegee across in overlapping strokes. Work your way down, wiping the blade with a towel every few passes. Focus on the grout lines—those are where water hides.
Pick The Right Squeegee
A rubber-blade squeegee with a comfortable handle is best. Look for one with a hook so you can hang it in the shower. A microfiber cloth can also work in a pinch, but a squeegee is faster and more effective.
17. Dry Grout Lines with a Towel
Squeegeeing the tiles is a great first step, but it doesn't get everything. Grout is porous and holds onto moisture deep inside the lines. A quick towel dry after each shower can make a big difference in preventing mold growth.
After you squeegee the walls, grab a clean, dry microfiber cloth. Run it along the grout lines to soak up any leftover water. This removes the moisture that mold needs to thrive.
It only takes a minute, but it's one of the most effective prevention habits you can adopt.
Why Microfiber Works Best
Microfiber cloths are designed to absorb many times their weight in water. They also trap dirt and bacteria, so you're not just moving moisture around. Use a fresh cloth each time or rinse it out between uses to avoid spreading any existing mold spores.
Make It A Daily Habit
Consistency is key. If you dry the grout lines every day after showering, you'll drastically cut down on moisture buildup. Keep a dedicated towel or cloth in the bathroom and hang it to dry after use.
Swap it out every few days to keep it fresh.
Don't Forget The Corners
Corners and edges where tile meets tile or tile meets the wall are prime spots for moisture to linger. Pay extra attention to these areas when drying. A quick wipe can prevent mold from taking hold in those hard-to-reach places.
18. Use a Mold-Resistant Grout for Repairs
If you're tackling a regrouting project, the type of grout you choose matters more than you might think. Standard grout is porous and soaks up moisture like a sponge, which is why mold keeps coming back. Mold-resistant grout contains antimicrobial additives that actively fight mold growth, giving you a much better chance of keeping those tile lines clean.
Switching to mold-resistant grout is a smart upgrade when you're already doing repairs. It costs a bit more upfront, but it saves you time and effort on future cleanings. The antimicrobial properties are built into the grout, so they don't wash away over time.
This makes it especially valuable for shower floors and other constantly wet areas.
What Makes It Different
Mold-resistant grout typically contains agents like Microban or silver ions that inhibit mold and mildew growth. Unlike sealers that sit on the surface, these additives are mixed into the grout itself, providing protection throughout the material. You get long-lasting defense without extra steps.
Where to Use It
Focus on high-moisture zones: the shower floor, corners, and around the drain. These spots are most prone to mold, so upgrading the grout there makes the biggest difference. If you're regrouting the whole shower, using mold-resistant grout everywhere is even better.
Application Tips
Follow the manufacturer's mixing instructions carefully—too much water can dilute the antimicrobial properties. Apply it firmly into the joints, and wipe off excess promptly. After curing, you can still seal it for extra protection, though it's not always necessary.
19. Apply a Grout Colorant or Paint
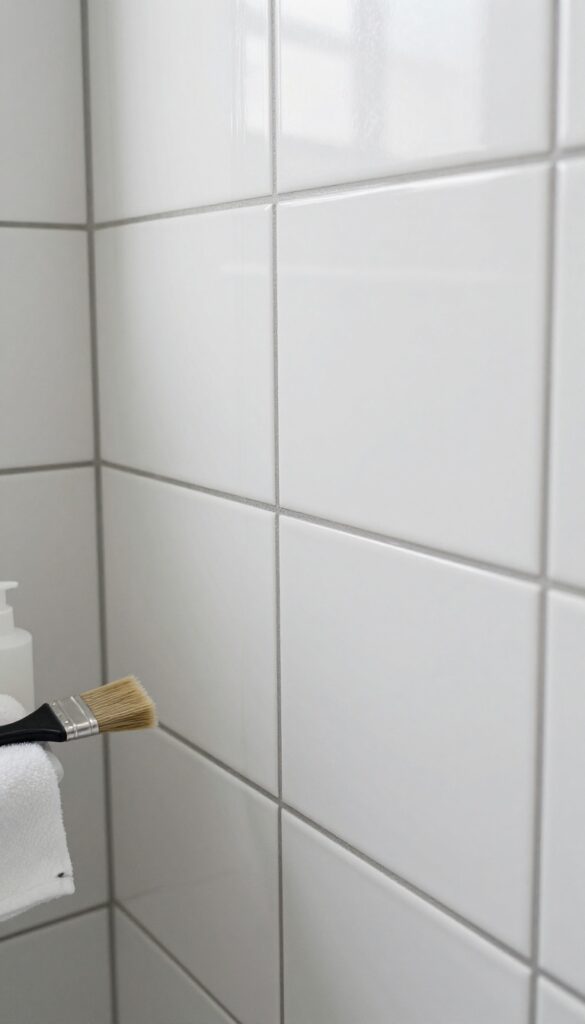
Grout colorant is a game-changer for anyone tired of scrubbing moldy lines. It's essentially a paint-and-sealer combo that bonds to the grout, creating a waterproof barrier that mold can't penetrate. You can pick a shade that blends in with your tiles for a seamless look or go darker to hide future stains.
Grout colorants are a two-in-one solution: they recolor your grout and seal it at the same time. The acrylic or epoxy-based formula forms a protective layer that repels water and resists mold growth. Unlike regular sealers, colorants actually fill in tiny pores in the grout, giving mold fewer places to hide.
Application is straightforward—just clean the grout thoroughly, tape off the tiles, and paint it on with a small brush or applicator bottle. One coat is usually enough, but a second coat adds extra durability. The result is a fresh, uniform look that lasts for years with minimal upkeep.
Choosing The Right Colorant
Most brands offer a palette of standard grout colors, but you can also mix custom shades. If your tiles are white or light, a matching colorant keeps things subtle. For a bold look, try a darker color like charcoal or navy—it hides dirt and adds contrast.
Just make sure the colorant is labeled for bathroom use and is mold-resistant.
Prep Work Matters
For the colorant to stick, the grout must be clean and dry. Use a grout cleaner or a mixture of baking soda and vinegar to remove any existing mold. Let it dry completely for at least 24 hours.
If the grout is cracked or crumbling, repair it first with a grout repair compound. Skipping prep can lead to peeling or uneven coverage.
Application Tips For A Pro Finish
Apply the colorant in thin, even coats using a fine-tipped applicator. Work in small sections and wipe off any excess from the tile surface immediately with a damp sponge. A steady hand and patience are key—rushing can cause smudges.
Once dry, the colorant is fully cured in about 24 hours, and you can use the shower normally.
20. Try a UV Light for Mold Detection
Sometimes mold hides where you can't see it. A UV blacklight makes the invisible visible. Shine it in a dark bathroom, and any mold on grout will glow, helping you pinpoint exactly where to scrub.
Using a UV light is a simple, low-cost way to inspect your shower grout thoroughly. It reveals mold that might be missed by the naked eye, especially in corners or behind fixtures. This targeted approach saves time and ensures you don't leave any mold behind.
How Uv Lights Work On Mold
Mold contains fluorescent compounds that glow under ultraviolet light. A standard UV blacklight (365-395 nm wavelength) works best. Turn off the bathroom lights, let your eyes adjust for a minute, then scan the grout lines.
Mold will appear as a bright green, yellow, or white glow.
Using The Results To Clean Smarter
Mark the glowing spots with a pencil or tape. Then apply your chosen cleaner directly to those areas. This targeted method reduces scrubbing time and prevents spreading mold spores to clean areas.
After cleaning, recheck with the UV light to confirm the mold is gone.
Safety Tips When Using Uv Lights
Never look directly into the UV light, as it can damage your eyes. Use gloves to avoid skin exposure. Also, some non-mold substances like detergent residues or minerals can glow, so learn to distinguish mold's characteristic glow from false positives.
21. Use a Pressure Washer on Outdoor Showers
Outdoor showers and poolside tile lines face constant moisture and sun exposure, which can turn grout into a moldy mess fast. While indoor methods work for smaller areas, a pressure washer brings serious firepower to large or stubborn outdoor grout stains. Just be careful with the settings to avoid blowing out the grout entirely.
A pressure washer with a grout cleaning attachment blasts away mold from outdoor shower tiles. Start with a low-pressure nozzle (around 1, 200 PSI) and test on a small section. Hold the wand at a 45-degree angle, moving in steady strokes.
Rinse thoroughly afterward to remove any loosened debris. This method works best on well-maintained grout that isn't already crumbling.
Choose The Right Attachment
Standard spray nozzles can damage grout. Use a rotating turbo nozzle or a dedicated grout cleaning attachment. These concentrate the water stream without excessive force.
Some models have a built-in detergent reservoir for added cleaning power.
Protect Surrounding Surfaces
Cover nearby plants, furniture, and electrical outlets with plastic sheeting. Pressure washer spray can send debris flying. Also, wear safety goggles and closed-toe shoes to stay safe from splashback.
Post-cleaning Care
After pressure washing, seal the grout to prevent future mold growth. Use a penetrating sealer designed for outdoor use. Reapply every year or as recommended by the manufacturer.
22. Avoid Abrasive Cleaners on Sealed Grout
Sealed grout is a protective barrier that keeps moisture and mold at bay. But that barrier can be stripped away by harsh abrasive cleaners. Scrubbing powders, scouring pads, and gritty pastes might seem effective, but they slowly wear down the sealer, leaving grout vulnerable to staining and mold growth.
Stick to pH-neutral cleaners or the mild methods listed throughout this article. If you notice water soaking into grout instead of beading up, it's time to reapply sealer. A simple test: sprinkle a few drops of water on the grout.
If they absorb quickly, your sealer is gone.
Why Abrasives Damage Sealed Grout
Grout sealer creates a thin, invisible film that repels water and stains. Abrasive cleaners act like sandpaper, scratching and thinning that film over time. Once the sealer is compromised, moisture seeps in, mold takes hold, and you're back to scrubbing deep-set stains.
What To Use Instead
Reach for pH-neutral cleaners, mild dish soap, or a simple vinegar-water solution (1: 1 ratio) for routine cleaning. For tougher spots, try a baking soda paste or hydrogen peroxide. These gentle options clean effectively without stripping the sealer.
How To Know When To Reseal
Perform the water bead test every few months. If water no longer beads up, it's time to reseal. Clean the grout thoroughly, let it dry for 24 hours, then apply a penetrating sealer.
This simple step extends the life of your grout and keeps mold at bay.
23. Clean Grout Monthly as Maintenance
You already know prevention beats cure, but making it a habit is key. A monthly quick scrub stops mold before it gets a foothold. This isn't about deep cleaning—just a light refresh that keeps grout looking good and smelling fresh.
Monthly maintenance is simple and fast. Mix baking soda and vinegar into a paste, scrub with a soft brush, and rinse. That's it.
No harsh chemicals, no elbow grease required. Do this once a month, and you'll rarely need a deep clean.
Why Monthly Matters
Mold spores are everywhere. They land on grout, and if moisture lingers, they grow. Monthly cleaning disrupts that cycle.
It's like brushing your teeth—you don't wait for cavities. A consistent scrub keeps grout lines bright and mold-free.
Set A Reminder
Pick a date—first Saturday, payday, whatever works. Set a phone reminder. Keep a small brush and baking soda in your shower caddy.
When the reminder pops, spend five minutes scrubbing. It becomes automatic after a couple months.
What To Use
Baking soda and vinegar are gentle and effective. For tougher spots, add a drop of dish soap. Avoid bleach—it can damage grout over time.
A soft toothbrush or grout brush works best. Rinse well after scrubbing to remove residue.
24. Replace Grout if Mold Persists
Sometimes no amount of scrubbing or sealing can fix grout that has become too porous or damaged. If mold keeps returning despite your best efforts, it might be time to start fresh. Replacing the grout may sound daunting, but with the right tools it's a straightforward DIY job that permanently solves the problem.
When mold repeatedly resurfaces even after deep cleaning and sealing, the grout itself is likely compromised. Over time, grout can crack, crumble, or lose its protective seal, creating tiny crevices where moisture and mold thrive. Removing the old grout and applying new, sealed grout eliminates the root cause and gives you a clean slate.
This approach is more labor-intensive than cleaning, but it's the only surefire way to stop persistent mold.
Assess Whether Replacement Is Necessary
Before tearing out all your grout, test a small section. Scrub it thoroughly with a bleach-based cleaner or hydrogen peroxide, let it dry completely, and then apply a grout sealer. Wait a week.
If mold reappears in that spot, the grout is too porous to save. Also check for cracks, crumbling, or discoloration that won't scrub out—these are signs the grout has degraded.
Remove Old Grout The Right Way
Use a manual grout saw or an oscillating multi-tool with a grout removal blade. Work carefully to avoid chipping the surrounding tiles. Remove grout to a depth of at least half the tile thickness.
Vacuum out all dust and debris, then wipe the joints with a damp cloth to remove any residue. Let the area dry completely before applying new grout.
Apply Fresh Grout And Seal Immediately
Mix your grout according to package directions—use a sanded grout for joints wider than 1/8 inch, unsanded for narrower ones. Press the grout firmly into the joints with a rubber float, then wipe away excess with a damp sponge. After the grout has cured (check the manufacturer's time), apply a penetrating sealer.
Reapply sealer annually to keep mold at bay.
25. Call a Professional for Severe Cases
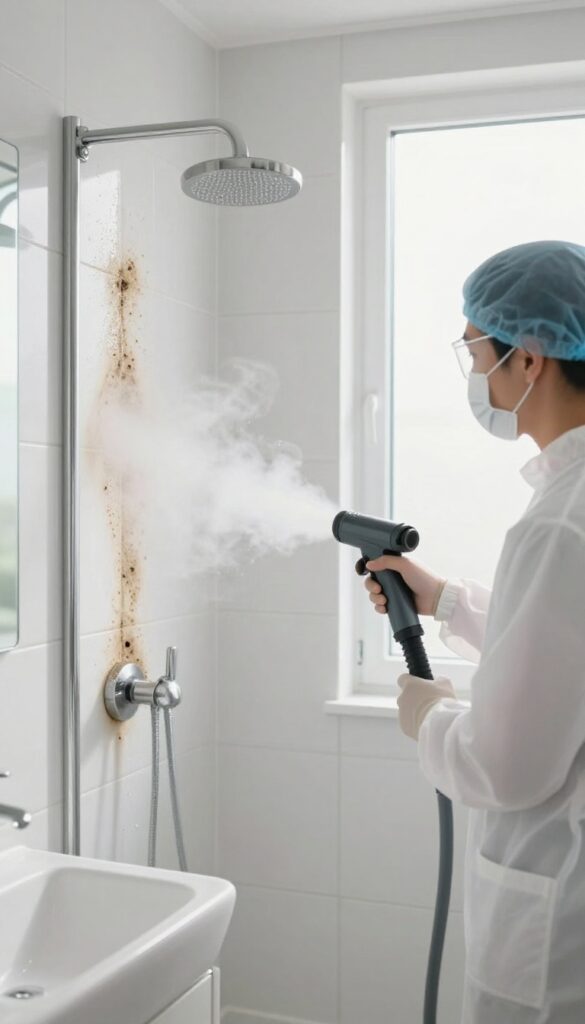
Sometimes DIY methods just aren't enough. When mold covers large areas or keeps returning despite your best efforts, it's time to bring in the pros. Professional cleaners have access to industrial-grade products and equipment that can tackle deep-set mold without damaging your tiles.
When To Wave The White Flag
If you've tried multiple cleaning methods and the mold comes back within weeks, or if the affected area is larger than a few square feet, a professional can assess the situation. They'll also check for underlying moisture issues that might be feeding the mold.
What Professionals Bring To The Table
Commercial-grade cleaners, steam cleaners, and sometimes even dry ice blasting can remove mold from porous grout more effectively than store-bought products. They also have protective gear to handle harsh chemicals safely.
Long-term Prevention After Professional Treatment
After a deep clean, ask the pro about sealing or even regrouting if needed. They can recommend a maintenance routine to keep the mold at bay. It's an investment that can save you time and frustration down the road.
FAQ
What kills mold on shower grout instantly?
A bleach solution (1 part bleach to 3 parts water) kills mold quickly. Apply it, let sit for 5 minutes, scrub, and rinse. For a natural option, hydrogen peroxide works in about 10 minutes.
Can I use vinegar on grout every day?
It's not recommended. Vinegar is acidic and can eventually degrade grout if used too frequently. Stick to weekly or bi-weekly use for cleaning, and use a squeegee daily for prevention.
How do I prevent mold from coming back on grout?
Keep the shower dry by using a squeegee and towel after each use, improve ventilation, and apply a grout sealer every 6-12 months. Regular monthly cleaning also helps.
Is it safe to mix bleach and vinegar for grout cleaning?
No, never mix bleach and vinegar. The combination produces toxic chlorine gas, which is dangerous to inhale. Always use them separately and rinse thoroughly between applications.
When should I replace grout instead of cleaning it?
Replace grout if it's cracked, crumbling, or if mold keeps returning despite thorough cleaning and sealing. Old, porous grout can't be fully restored and will continue to harbor mold.
Conclusion
Moldy shower grout doesn't have to be a permanent problem. With these 25 tips, you can choose the methods that fit your schedule and preferences, from quick daily habits to deep cleaning sessions. The key is consistency—regular maintenance keeps mold at bay and extends the life of your grout.
Start with the simplest solution that matches your mold level, and work your way up if needed. Your tile lines can look fresh and clean with just a little effort. Pick a tip and give it a try today.


