Dull, discolored grout can make even the cleanest bathroom tiles look neglected. You scrub the tile surface until it shines, but those porous lines trap dirt, soap scum, and mildew deep inside, refusing to budge.
The good news is you don't need harsh chemicals or expensive pros to get bright, clean lines—just a few clever DIY techniques. From everyday pantry staples like baking soda and vinegar to surprising helpers like toothpaste and bleach pens, these 15 ideas target grout from every angle.
Each method is practical, affordable, and designed to restore your tile's original brilliance without the elbow grease. Ready to turn those dingy lines into a feature you'll be proud of?
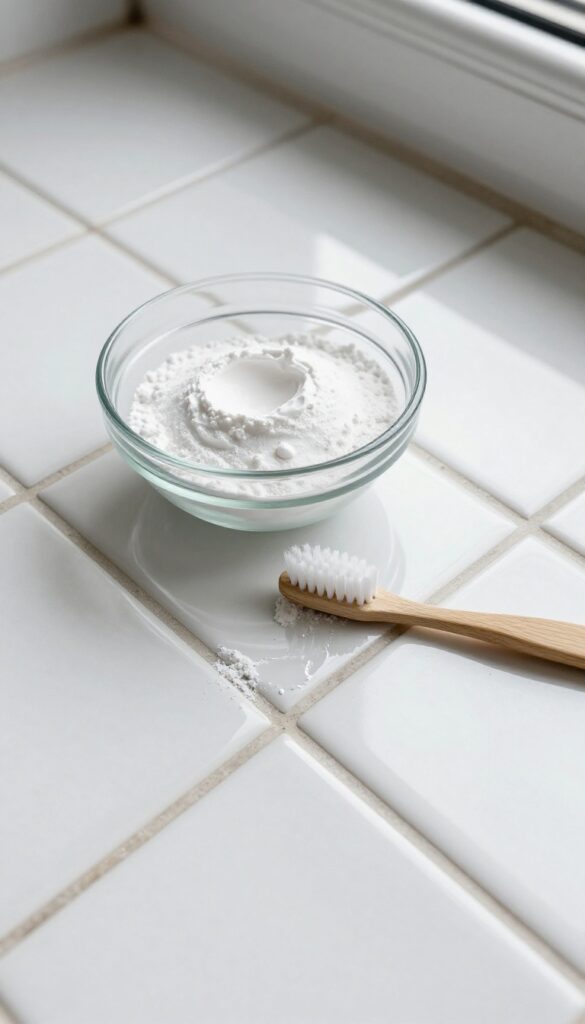
1. Baking Soda and Vinegar Paste
Baking soda and vinegar are the dynamic duo of natural cleaning. When mixed into a paste, they create a gentle abrasive that scrubs away grime without scratching tiles. The fizzing action helps lift dirt from deep within grout pores, while vinegar cuts through soap scum and kills mild mildew.
It's cheap, non-toxic, and smells fresh after rinsing.
This method works best on light to moderate grout stains. For heavy buildup, you may need to repeat or let the paste sit longer. Always test on an inconspicuous area first, especially if you have natural stone tiles.
Mixing The Perfect Paste
Combine three parts baking soda with one part white vinegar. Stir until it forms a thick, spreadable paste. If it's too runny, add more baking soda; if too dry, add a few more drops of vinegar.
The mixture will fizz initially—that's normal. Let it settle for a minute before applying.
Application And Scrubbing
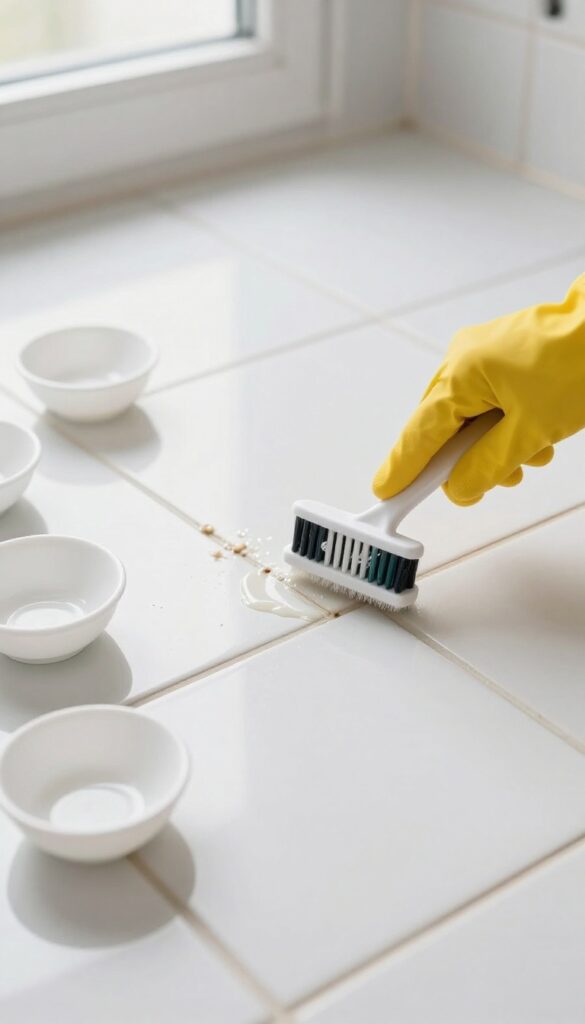
Use an old toothbrush or a grout brush to apply the paste directly onto the grout lines. Work it in with circular motions, making sure to fill the grooves. Let it sit for 5–10 minutes to allow the fizzing action to penetrate.
Then scrub again, focusing on stained areas. Rinse with warm water and wipe away residue with a damp cloth.
When To Use A Stiffer Brush
For stubborn, set-in dirt, switch to a stiff-bristled brush or a grout cleaning tool. The paste provides lubrication, so you won't scratch the tile. If the grout is particularly porous, you can also add a few drops of dish soap to the mixture for extra grease-cutting power.
2. Hydrogen Peroxide and Baking Soda
If your grout is looking more gray than white, hydrogen peroxide and baking soda can bring it back to life. This combo creates a gentle bleaching paste that lifts stains without the harsh fumes of bleach. It's especially good for light-colored grout that's just lost its sparkle over time.
Mix baking soda with enough hydrogen peroxide to form a thick paste—think toothpaste consistency. Spread it over the grout lines, let it sit for about 10 minutes, then scrub with a stiff brush. Rinse with water and watch the grout brighten.
For extra stubborn spots, add a squirt of dish soap to the mix.
Why This Works So Well
Hydrogen peroxide is a natural oxidizer that breaks down organic stains like mildew and soap scum. Baking soda provides gentle abrasion to scrub away dirt without scratching tiles. Together, they create a fizzing action that lifts grime from deep within the grout pores.
Best Grout Types For This Method
This paste is safe for most sealed and unsealed grout, but it's ideal for white or light-colored grout. Dark grout may lighten slightly, so test in an inconspicuous spot first. Avoid using on unsealed natural stone tiles, as peroxide can etch the surface.
Pro Tips For Maximum Brightness
For a deeper clean, cover the paste with plastic wrap after applying to keep it from drying out. Let it sit for 20–30 minutes instead of 10 for heavily stained areas. Rinse thoroughly and dry with a microfiber cloth to prevent new stains from setting.
3. Lemon Juice and Cream of Tartar
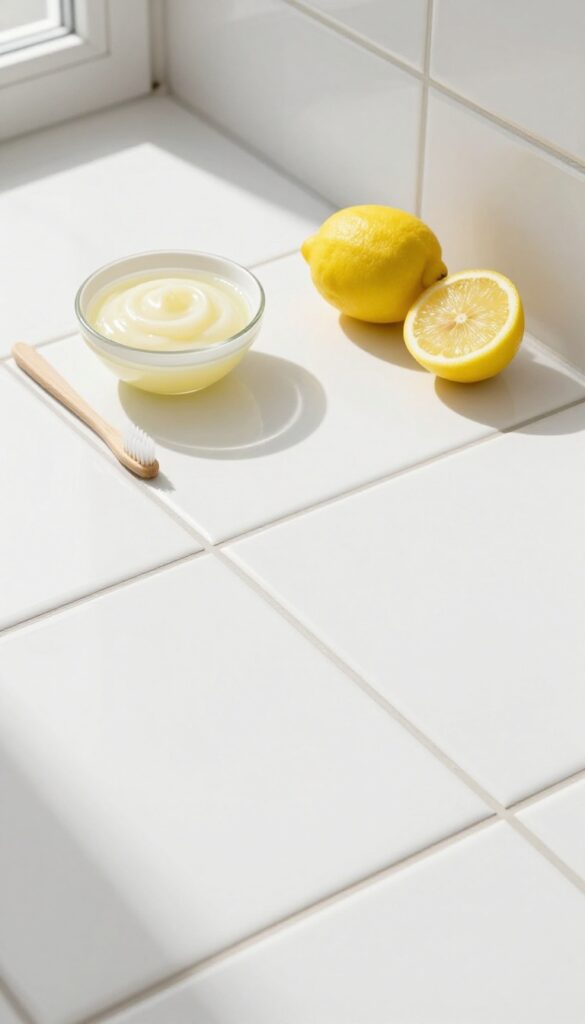
When pantry staples team up, grout doesn't stand a chance. Lemon juice brings natural acidity to break down soap scum and mineral deposits, while cream of tartar adds gentle abrasion without scratching. Together they form a paste that tackles discoloration and leaves behind a fresh citrus scent.
This dynamic duo works best on lighter grout colors where brightening is the main goal. The citric acid in lemon juice is a natural degreaser that lifts embedded grime, and the cream of tartar acts as a mild polishing agent. It's safe for most tile types, including ceramic and porcelain, but avoid using it on natural stone like marble or travertine, as the acid can etch the surface.
How To Mix And Apply
Combine two tablespoons of lemon juice with enough cream of tartar to form a thick paste—about three tablespoons should do. Stir until smooth. Using a small brush or an old toothbrush, apply the paste directly to the grout lines.
Let it sit for 15 minutes so the acid can work its magic. Don't let it dry completely; if it starts to harden, spritz a little water on it.
Scrubbing And Rinsing
After the wait, scrub the grout lines with a stiff-bristled brush. You'll see the paste darken as it lifts dirt. For stubborn spots, apply a second coat and let it sit another 10 minutes.
Rinse thoroughly with warm water and wipe away residue with a damp cloth. Repeat if needed, but usually one treatment is enough for moderate staining.
When To Use This Method
This idea is perfect for routine maintenance or when grout has yellowed from soap buildup. It's also great for brightening grout around sinks and countertops where mild stains accumulate. Because the ingredients are food-based, it's safe for households with kids or pets.
Just be sure to test a small hidden area first to confirm your tile can handle the acidity.
4. Oxygen Bleach Soak
For grout stains that have settled deep into the porous material, a gentle but powerful oxygen bleach soak can work wonders. Unlike chlorine bleach, oxygen bleach is safe for colored grout and tiles, lifting organic stains without harsh fumes or discoloration. This method is especially effective on old, neglected grout lines in showers and around tubs.
Oxygen bleach breaks down into hydrogen peroxide and soda ash when mixed with water, releasing active oxygen that penetrates grout pores to oxidize stains. It's non-toxic and biodegradable, making it a favorite for eco-conscious cleaners. The key is giving it enough time to work—at least 30 minutes, or longer for stubborn spots.
Always test on an inconspicuous area first, especially if your grout is painted or sealed.
What You'll Need
Oxygen bleach powder (like OxiClean or a generic brand), warm water (not hot, as hot water deactivates the bleach), a spray bottle or small bucket, a stiff-bristled brush, and a sponge or cloth. For vertical surfaces, a spray bottle helps keep the mixture in place.
Step-by-step Instructions
Mix the oxygen bleach powder with warm water according to package directions (usually 1 scoop per quart). Spray or pour the solution onto the grout lines until they're saturated. Let it sit for 30 minutes—longer if stains are heavy.
Scrub with a stiff brush, then rinse thoroughly with clean water. Wipe away excess moisture with a sponge or cloth.
Pro Tips For Best Results
For extra-stubborn stains, make a paste with less water and apply it directly to the grout. Cover the area with plastic wrap to keep it moist and active. Don't let the solution dry on the surface, as it can leave a residue.
Rinse well and dry with a towel to prevent new stains from forming.
5. Steam Cleaning

Steam isn't just for ironing wrinkles out of clothes—it's a powerhouse for blasting grime out of grout lines. A handheld steam cleaner with a grout attachment delivers high-temperature vapor that penetrates deep into porous surfaces, loosening dirt, soap scum, and mildew on contact. The heat also kills mold spores and bacteria without any chemicals, making it a safe choice for bathrooms where kids or pets might hang out.
After steaming, a quick wipe with a microfiber cloth lifts away the loosened residue, leaving your grout looking noticeably lighter and cleaner.
Why Steam Works So Well
Steam cleaning uses heat and pressure to break down grime that scrubbing alone can't reach. The high temperature (typically above 200°F) melts sticky residues and kills mold, mildew, and bacteria on contact. Because steam is just water vapor, there's no chemical residue left behind.
This makes it ideal for bathrooms where you want a deep clean without introducing harsh fumes or risking damage to surrounding tile.
Best Practices For Grout Steam Cleaning
Start by vacuuming or sweeping loose debris from the grout lines. Fill your steam cleaner with distilled water to avoid mineral buildup. Move the grout attachment slowly along each line, allowing the steam to work for a few seconds before moving on.
Work in small sections, and immediately wipe away the loosened grime with a clean microfiber cloth or sponge. For stubborn spots, you can repeat the process or follow up with a soft brush. Always let the grout dry completely before applying any sealant or walking on it.
What To Avoid
Don't use steam on damaged or cracked grout, as the moisture can worsen the problem. Avoid steam cleaning on unsealed natural stone tiles like marble or travertine, as the heat and moisture can cause damage. Also, never point the steam nozzle at your face or skin—the steam is extremely hot.
And steer clear of using any cleaning chemicals in the steam cleaner's tank; plain water is all you need.
6. Toothbrush and Dish Soap

Sometimes the simplest tools work best. A humble toothbrush paired with a drop of dish soap can tackle light grout grime without any fancy equipment. This method is perfect for quick touch-ups between deeper cleans, keeping your grout looking fresh with minimal effort.
Dish soap cuts through grease and soap scum, while the toothbrush bristles reach deep into grout lines. It's gentle enough for daily use but effective enough to brighten dull areas. Best of all, you probably have both items in your bathroom right now.
Why Dish Soap Works
Dish soap is designed to break down oils and greasy residues, which is exactly what builds up on grout from soap and body oils. It's mild enough not to damage tile or grout, making it safe for regular use. Plus, it rinses away cleanly without leaving a sticky film.
How To Scrub Effectively
Wet the toothbrush and add a drop of dish soap. Scrub along the grout lines using short, firm strokes. Focus on one small section at a time.
Rinse the brush frequently to avoid redepositing dirt. After scrubbing, wipe the area with a damp cloth or rinse with water.
When To Use This Method
This technique is best for light to moderate grime, not deep-set stains or mildew. Use it weekly as a maintenance step to prevent buildup. For tougher jobs, pair it with a baking soda paste or follow up with a bleach pen for stubborn spots.
7. Magic Eraser
You don't always need a dedicated grout cleaner to get results. Sometimes the simplest tools work best. A melamine sponge, often sold as a Magic Eraser, is essentially a super-fine abrasive that lifts dirt without scrubbing hard.
Dampen it, give your grout lines a few gentle passes, and watch surface stains disappear like magic. No chemicals, no fumes, just clean lines.
The Magic Eraser is a quick fix for surface-level grout stains and scuffs. It's especially good for light cleaning between deep scrubs. Just dampen the sponge, squeeze out excess water, and rub along the grout lines with light pressure.
The sponge wears down as you use it, so cut off the dirty corner to expose a fresh surface. Rinse the area with water after you're done to remove any residue. This method is safe for most tile types, but test on a hidden spot first if you have delicate or unglazed tiles.
Why It Works So Well
Melamine foam has a unique open-cell structure that acts like extremely fine sandpaper. When wet, it creates a mild abrasive action that lifts dirt and grime without scratching hard surfaces. It's gentle enough for daily use but effective enough to remove soap scum, hard water spots, and light mildew stains from grout.
Best Practices For Best Results
Always start with a clean, damp sponge—never use it dry, as that can be too abrasive. Work in small sections and rinse the sponge frequently. For stubborn spots, let the damp sponge sit on the stain for a minute before rubbing.
After cleaning, wipe the area with a damp cloth to remove any loosened dirt. Avoid using Magic Erasers on natural stone or unsealed grout, as they can cause damage.
When To Skip This Method
If your grout is deeply stained or has mold growing below the surface, a Magic Eraser won't reach it. It only tackles surface dirt. For deeper issues, you'll need a stronger cleaner or a steam cleaner.
Also, don't use it on textured tiles or matte finishes, as it may leave a shiny spot.
8. Borax and Water Paste
Borax is one of those old-school cleaning powders that still outperforms many modern products. When mixed into a thick paste with water, it becomes a gentle abrasive that lifts grime without scratching tile. Plus, it naturally whitens and deodorizes, so your bathroom smells fresh as it cleans.
This method is ideal for light to moderate grout discoloration. The paste clings to vertical surfaces, giving the borax time to break down soap scum and mildew. It's also non-toxic and safe for septic systems, making it a smart choice for eco-conscious households.
How To Make And Apply The Paste
Mix 1/2 cup of borax with enough warm water to form a spreadable paste—think toothpaste consistency. Use an old toothbrush or a grout brush to work the paste into the grout lines. Let it sit for 15–20 minutes so the borax can penetrate stains.
Scrubbing And Rinsing Tips
After the paste dries slightly, scrub vigorously with a stiff brush. Focus on stubborn spots, adding a little water if the paste hardens. Rinse thoroughly with clean water and wipe away residue with a damp cloth.
Repeat on heavy stains.
Why Borax Works So Well
Borax has a high pH that helps dissolve fatty acids and mineral deposits. It also inhibits mold growth, so your grout stays cleaner longer. Unlike bleach, it won't yellow or damage colored grout over time.
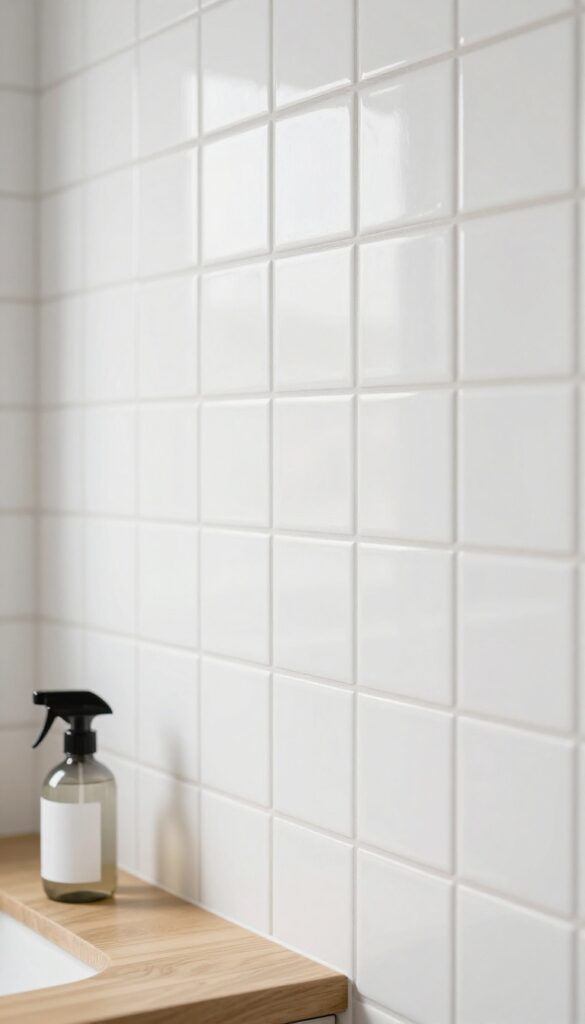
9. White Vinegar Spray
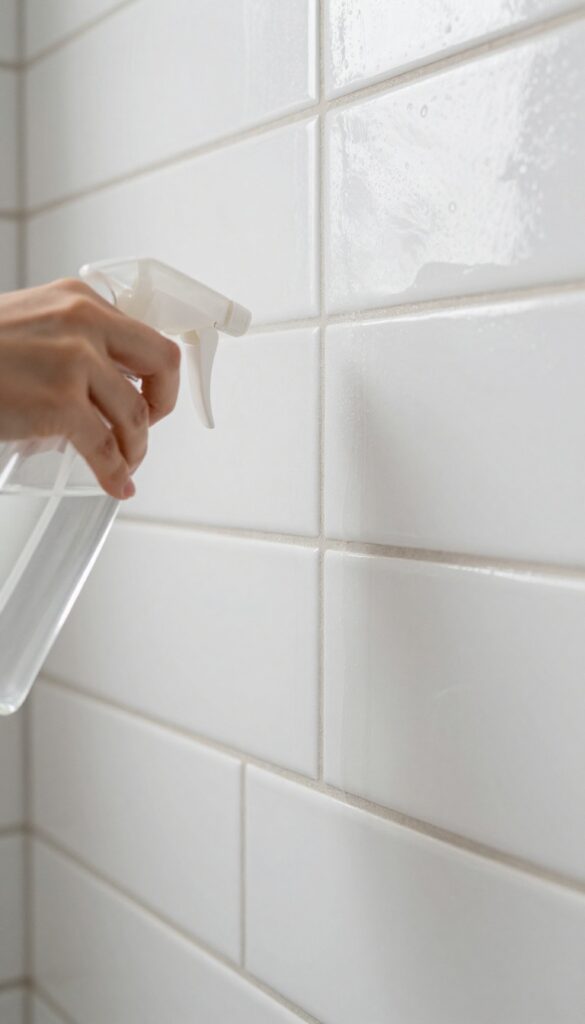
White vinegar is a staple in many natural cleaning routines, and for good reason. Its mild acidity cuts through soap scum and lifts light grout stains without introducing harsh fumes. When you need a quick, low-effort refresh for bathroom grout, this spray-and-wait method delivers consistent results.
This method relies on the acetic acid in vinegar to break down alkaline buildup like soap scum and mineral deposits. Unlike bleach, vinegar won't discolor colored grout, making it a safe choice for non-white tiles. However, it's not strong enough for set-in mold or deep stains—use it as a maintenance tool or for light discoloration.
How To Apply
Fill a spray bottle with undiluted white vinegar. Spray directly onto grout lines until they're saturated but not dripping. Let it sit for 5 minutes—any longer and the vinegar may start to dull tile glaze.
Scrub with a stiff grout brush or an old toothbrush, then rinse thoroughly with warm water. Wipe away excess moisture with a microfiber cloth.
Best Results
For best results, use this method weekly to prevent buildup. It works especially well on shower walls and bathroom floors where soap scum accumulates quickly. Avoid using vinegar on natural stone tiles like marble or travertine, as the acid can etch the surface.
Boost The Power
If stains are stubborn, mix equal parts vinegar and baking soda into a paste. Apply the paste, let it fizz for 10 minutes, then scrub. The fizzing action helps lift grime from deep within the grout pores.
Rinse thoroughly afterward.
10. Hydrogen Peroxide Spray
Hydrogen peroxide isn't just for first aid kits—it's a surprisingly effective grout cleaner that whitens and disinfects without harsh fumes. This common household item breaks down into water and oxygen, making it an eco-friendly choice for tackling discolored lines. Best of all, it works on most grout colors without bleaching or damaging the surrounding tiles.
Spray 3% hydrogen peroxide directly onto the grout lines, covering them generously. Let it sit for about 10 minutes to allow the bubbles to lift dirt and kill mildew. Scrub with a stiff brush, then rinse with warm water.
For extra stubborn stains, mix hydrogen peroxide with baking soda into a paste and apply before scrubbing.
Why Hydrogen Peroxide Works
Hydrogen peroxide is a mild oxidizing agent that breaks down organic matter like soap scum and mildew. Its bubbling action helps dislodge particles from porous grout, while its antibacterial properties sanitize the surface. Unlike bleach, it doesn't produce toxic fumes, making it safer for enclosed bathrooms.
Best Application Methods
For routine cleaning, use a spray bottle with a fine mist to avoid oversaturation. For deep stains, soak a cloth in hydrogen peroxide and press it against the grout for 15 minutes before scrubbing. Always test on a small, hidden area first to ensure your grout doesn't lighten unexpectedly.
When To Avoid This Method
Avoid hydrogen peroxide on colored or painted grout, as it can cause fading. Also, don't use it on natural stone tiles like marble or travertine, as it may etch the surface. Stick to ceramic, porcelain, or standard cement-based grout for best results.
11. Bleach Pen Application
When you have a few stubborn spots that refuse to lighten up, a bleach pen offers surgical precision. Unlike pouring bleach into a bowl and hoping for the best, a gel pen lets you trace exactly along the grout line, keeping the bleach off your tile surfaces. This method is especially handy for vertical walls or tight corners where a spray might run or miss the mark.
For concentrated stain removal, a bleach pen is hard to beat. The thick gel clings to the grout, giving it time to penetrate and lift deep-set discoloration. It's also a great option for maintenance between deeper cleanings, keeping your grout looking fresh without a full scrub session.
How To Apply The Bleach Pen
Start with dry grout for best results. Squeeze a thin, even bead of gel directly onto the grout line, following the contour of the tile. Don't glob it on—just enough to cover the stain.
Let it sit for 10 to 15 minutes. You'll see the gel start to foam or change color as it works.
Rinsing And Safety Tips
After the dwell time, rinse thoroughly with warm water. A damp cloth or a spray bottle works well to remove all residue. Make sure no bleach remains on the tile surface, as it can etch or discolor certain materials.
Open a window or run the exhaust fan to keep fumes low. Wear gloves to protect your hands.
When To Use This Method
Bleach pens excel at spot treatment—think a single dark line near the shower caddy or a ring around the drain. They're less ideal for large areas because the gel can be time-consuming to apply. Use them for quick fixes between deep cleans, or to target stains that other methods left behind.
12. Toothpaste and Baking Soda
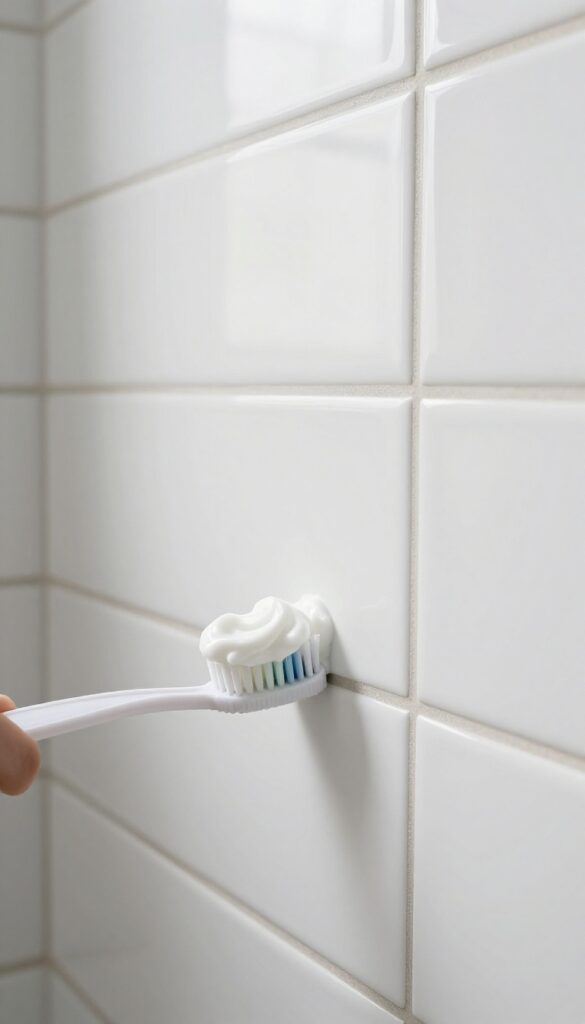
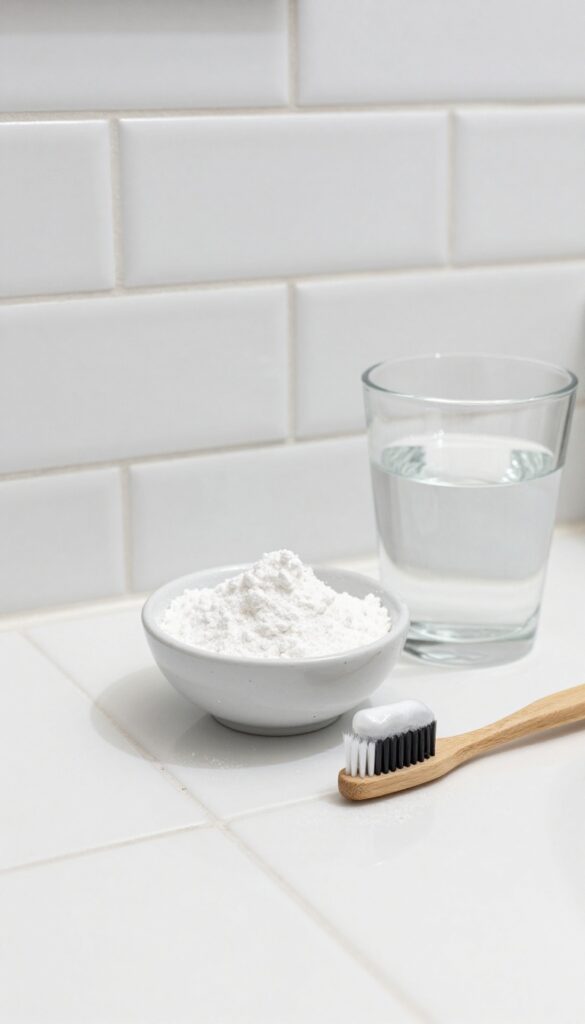
Your bathroom cabinet might already hold one of the best grout cleaners: plain white toothpaste. When mixed with baking soda, it creates a gentle abrasive paste that polishes grout without scratching tiles. This combo works especially well on light-colored grout that has lost its brightness.
Toothpaste contains mild abrasives like silica or calcium carbonate, which help lift surface stains. Baking soda adds extra scrubbing power and deodorizes. Together, they form a thick paste that clings to vertical grout lines, making it easy to work into crevices.
This method is non-toxic and safe for most tile types, including ceramic and porcelain.
How To Make The Paste
Squeeze about two tablespoons of white toothpaste (not gel) into a small bowl. Add one tablespoon of baking soda and stir until it forms a thick, spreadable paste. If it's too dry, add a few drops of water.
Too runny? Add more baking soda.
Application And Scrubbing
Use an old toothbrush or a grout brush to apply the paste directly onto the grout lines. Work it in with small circular motions, focusing on stained areas. Let it sit for 5–10 minutes so the abrasives can break down grime.
Then scrub again before rinsing with warm water.
Rinsing And Results
Wipe away the paste with a damp cloth or sponge, rinsing frequently. You'll notice the grout looks visibly whiter and cleaner. For stubborn spots, repeat the process.
Avoid using this on unsealed grout too often, as abrasives can wear down the surface over time.
13. Rubbing Alcohol and Water
Rubbing alcohol isn't just for disinfecting cuts—it's a surprisingly effective grout cleaner that cuts through grease and soap scum fast. When mixed with water, it creates a solution that evaporates quickly, leaving grout lines clean and streak-free. This method works especially well on kitchen backsplashes or bathroom tiles near sinks where oily residues build up.
Mix equal parts rubbing alcohol and water in a spray bottle. Spray the solution generously onto the grout lines and let it sit for 3–5 minutes to break down grime. Scrub with a stiff-bristled brush, then rinse with warm water.
The alcohol helps dissolve sticky residues without leaving a soapy film behind.
Why It Works So Well
Rubbing alcohol is a solvent that dissolves oils and greasy buildup that water alone can't touch. It also evaporates quickly, which means less moisture seeps into the grout pores, reducing the risk of mildew growth. Plus, it's safe on most tile surfaces and won't damage grout when used occasionally.
Best Uses And Tips
This solution is ideal for grout in high-traffic areas like around sinks, stoves, or bathroom vanities. For extra stubborn spots, add a few drops of dish soap to boost grease-cutting power. Avoid using on unsealed grout too often, as alcohol can dry it out over time.
Always test in an inconspicuous area first.
14. Cornstarch and Water Paste
Cornstarch is usually found in the kitchen, but it can work wonders on grimy grout. When mixed into a paste with water, it turns into a gentle yet effective cleaner that lifts embedded dirt and absorbs oils without scratching tiles. This method is especially handy for light cleaning between deep scrubs.
To use this method, mix three parts cornstarch with one part water until you get a spreadable paste. Apply it directly onto the grout lines with a small brush or your finger, making sure to fill the grooves. Let it sit for about 15 to 30 minutes—longer for tougher stains—until it dries completely.
Once dry, scrub the paste off with a stiff brush, then rinse with warm water. The dried cornstarch pulls out oils and grime as you brush, leaving the grout noticeably cleaner and brighter.
Why Cornstarch Works
Cornstarch is a natural absorbent. It soaks up grease, soap scum, and other oily residues that stick to grout. Unlike abrasive powders, it’s gentle enough for daily use and won’t damage tile or grout seals.
Plus, it’s non-toxic and safe around kids and pets.
Best Spots To Use It
This paste is perfect for lightly soiled grout in low-moisture areas like bathroom walls or backsplashes. It’s less effective on deep-set mold or mildew, but works great as a maintenance cleaner between heavy-duty treatments.
Pro Tip For Stubborn Stains
For extra cleaning power, add a teaspoon of white vinegar or lemon juice to the paste. The mild acid helps break down mineral deposits without making the mixture too harsh. Just avoid using vinegar if your grout isn’t sealed, as it can weaken unsealed grout over time.
15. Commercial Grout Cleaner (DIY Style)
Store-bought grout cleaners often contain harsh chemicals and come with a hefty price tag. But you can whip up a homemade version that works just as well using three simple ingredients you probably already have in your kitchen. This DIY cleaner is powerful enough to tackle tough stains and mildew, yet gentle enough for regular use.
The Perfect Ratio
Mix 1 part baking soda with 1 part hydrogen peroxide in a small bowl. Add a squirt of dish soap—just enough to make a spreadable paste. The baking soda acts as a mild abrasive, hydrogen peroxide whitens and disinfects, and dish soap cuts through grease and soap scum.
Application And Wait Time
Use an old toothbrush or a small brush to apply the paste directly onto the grout lines. Let it sit for 15 minutes to allow the hydrogen peroxide to penetrate and break down stains. For extra-stubborn spots, you can leave it on for up to 30 minutes.
Scrubbing And Rinsing
After the wait time, scrub the grout with a stiff brush in circular motions. You'll see the grime lift away almost immediately. Rinse thoroughly with warm water and wipe dry with a clean cloth.
Your grout will look noticeably brighter after just one treatment.
FAQ
How often should I clean bathroom grout?
For maintenance, clean grout every 2-4 weeks. Deep clean every 3-6 months depending on humidity and usage.
Can I use bleach on colored grout?
Bleach can discolor colored grout. Test in an inconspicuous area first or use a non-bleach alternative like hydrogen peroxide.
What is the best DIY grout cleaner for mold?
Hydrogen peroxide or oxygen bleach are effective against mold. Apply, let sit, scrub, and rinse thoroughly.
How do I prevent grout from getting dirty quickly?
Seal grout after cleaning to repel moisture and stains. Also, use a squeegee on tiles after showers to reduce soap scum buildup.
Is it safe to mix vinegar and baking soda in a closed container?
No, mixing them in a closed container can cause pressure buildup. Always mix in an open bowl and use immediately.
Conclusion
Your grout doesn't have to stay dingy. With these 15 DIY ideas, you can pick the ones that fit your cleaning style and tackle the toughest stains. Start with the gentlest method and work your way up.
Once your grout is bright, seal it to keep it that way longer. A little regular care makes a big difference.


