Nothing kills a relaxing bath faster than a ring of grime around the tub. You scrub, but soap scum and hard water stains cling stubbornly to the surface.
These 25 tips cut through the buildup with simple, effective techniques that actually work. From everyday sprays to deep-cleaning pastes, each method targets a specific problem so you can restore that smooth, fresh shine without wasting time or money.
Whether your tub is porcelain, acrylic, or fiberglass, you'll find the right solution here. Let's turn bathtub cleaning from a chore into a quick win.
1. Start with a Dry Tub

Most people grab a spray bottle and go to town on a wet tub. That's a mistake. Water on the surface dilutes your cleaner, making it less effective at breaking down soap scum and grime.
A dry tub gives the cleaning agents a direct shot at the buildup, so they can work the way they were designed to.
Before you spray or scrub anything, take a dry cloth or a squeegee and wipe the tub completely dry. This step takes just a minute but pays off big. You'll use less product, scrub less hard, and see better results.
It's the single easiest way to level up your cleaning game without buying anything new.
Why Dry Works Better
Cleaning products rely on surfactants and solvents to dissolve dirt. When water is already present, those ingredients get spread thin and lose potency. On a dry surface, the cleaner stays concentrated where you need it.
Think of it like degreasing a pan—you wouldn't add water first.
The One-minute Prep Trick
After your last shower or bath, grab a microfiber cloth and give the tub a quick wipe-down. It takes less than a minute. You're not deep cleaning yet—just removing standing water.
This small habit makes your actual cleaning session faster and more effective.
When To Skip This Step
If you're using a cleaner that requires a wet surface (like some foaming sprays or bleach-based products), check the label. But for most everyday cleaners, dry is the way to go. When in doubt, test a small spot first.
2. Use Baking Soda for Gentle Scrubbing
Baking soda is a powerhouse cleaner that doesn't get enough credit. It's cheap, non-toxic, and works wonders on bathtub grime without harsh chemicals. A simple paste or dry scrub can lift soap scum and leave surfaces smooth.
Sprinkle baking soda on a damp sponge and scrub in circular motions. It's mildly abrasive, safe for most surfaces, and cuts through soap scum without scratching. For tougher stains, mix baking soda with a little water to form a paste, let it sit for 15 minutes, then scrub.
Rinse thoroughly to avoid residue.
Dry Scrub For Light Soap Scum
For daily buildup, skip the paste. Just dampen your sponge, sprinkle baking soda directly on it, and scrub the tub in circles. The fine grit lifts soap residue without extra effort.
Rinse well and wipe dry for a streak-free finish.
Baking Soda Paste For Stubborn Rings
Mix three parts baking soda with one part water to create a thick paste. Apply it to bathtub rings or hard water spots and let it sit for 10–15 minutes. The paste breaks down grime, making it easy to wipe away with a soft cloth.
This method is gentle enough for acrylic tubs.
Boost With Vinegar For Extra Power
After scrubbing with baking soda, spray white vinegar on the surface. The fizzing action helps dislodge any remaining dirt. Let it bubble for a minute, then rinse.
This combo is excellent for removing soap scum and leaving a bright shine.
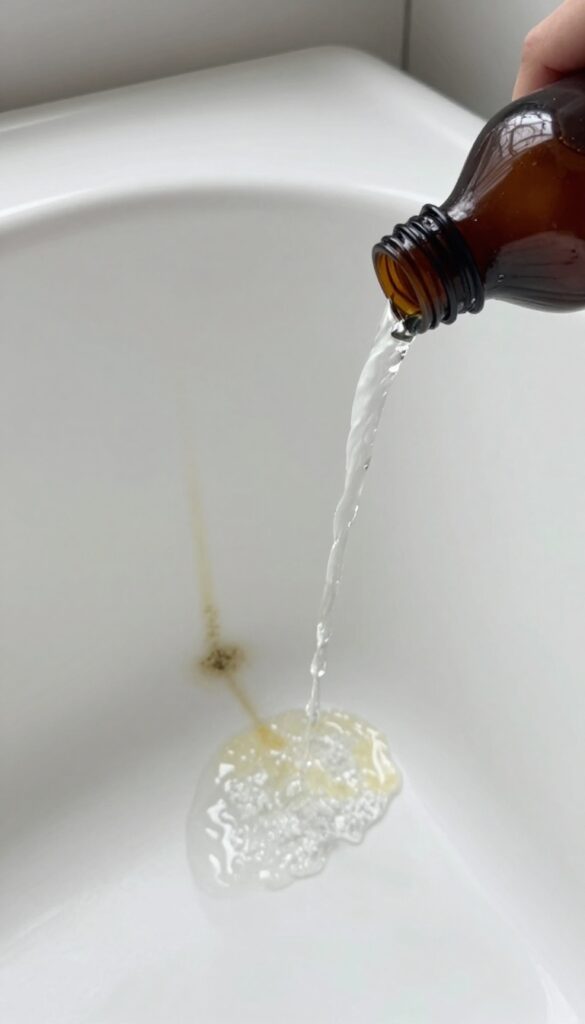
3. White Vinegar for Hard Water Stains
Hard water stains are the stubborn white or chalky deposits left behind by mineral-rich water. They can make even a clean tub look dull and neglected. White vinegar cuts through that buildup without harsh chemicals, using simple chemistry to dissolve calcium and lime.
Spray undiluted white vinegar directly on the mineral deposits and let it sit for 15 minutes. The acetic acid breaks down the alkaline minerals, making them easy to wipe away. For thick stains, soak paper towels in vinegar and press them against the affected area to keep the acid in contact longer.
After the wait, scrub with a soft brush or sponge and rinse thoroughly. The vinegar smell fades quickly once dry, leaving your tub shiny and residue-free.
Why Vinegar Works So Well
White vinegar is a mild acid that reacts with the calcium carbonate in hard water stains. This reaction turns the solid deposit into a soluble compound that rinses away easily. Unlike bleach or ammonia, vinegar won't damage most tub surfaces when used correctly.
Best Application Method
Use a spray bottle for even coverage. For vertical surfaces, spray generously and let the vinegar drip down. For stubborn rings around the waterline, soak a cloth in vinegar and lay it over the stain for 15 minutes before scrubbing.
Always rinse with warm water afterward to remove any residue.
Safety And Surface Tips
Test vinegar on a small hidden area first, especially on natural stone or unsealed surfaces. Avoid using vinegar on marble, granite, or other porous stones as the acid can etch them. For acrylic or fiberglass tubs, vinegar is safe but don't let it sit longer than 15 minutes to prevent dulling.
4. Hydrogen Peroxide for Tough Stains
When bleach feels too harsh but stains won't budge, hydrogen peroxide steps in as a gentle yet effective alternative. It's especially good for whitening grout, lifting mildew stains, and brightening the tub without those strong chemical fumes. Just a simple pour and wait—no scrubbing required.
How To Apply It
Pour 3% hydrogen peroxide directly onto the stain or mildew spot. For vertical surfaces, soak a paper towel or cloth in peroxide and press it against the stain. Let it sit for 30 minutes—longer for older stains.
Then rinse thoroughly with water. No scrubbing needed for most stains; the peroxide does the work.
Best Uses For Your Tub
Hydrogen peroxide works wonders on white porcelain and fiberglass tubs where yellowing or light mildew has set in. It's also great for grout lines around the tub. Avoid using it on colored acrylic or painted surfaces, as it may cause fading.
Test in a small hidden area first.
Safety And Storage Tips
Keep hydrogen peroxide in its original dark bottle, away from light, to maintain its potency. It's safe for septic systems and won't harm pets once rinsed. Never mix it with vinegar or bleach—that creates toxic fumes.
Store it out of reach of children.
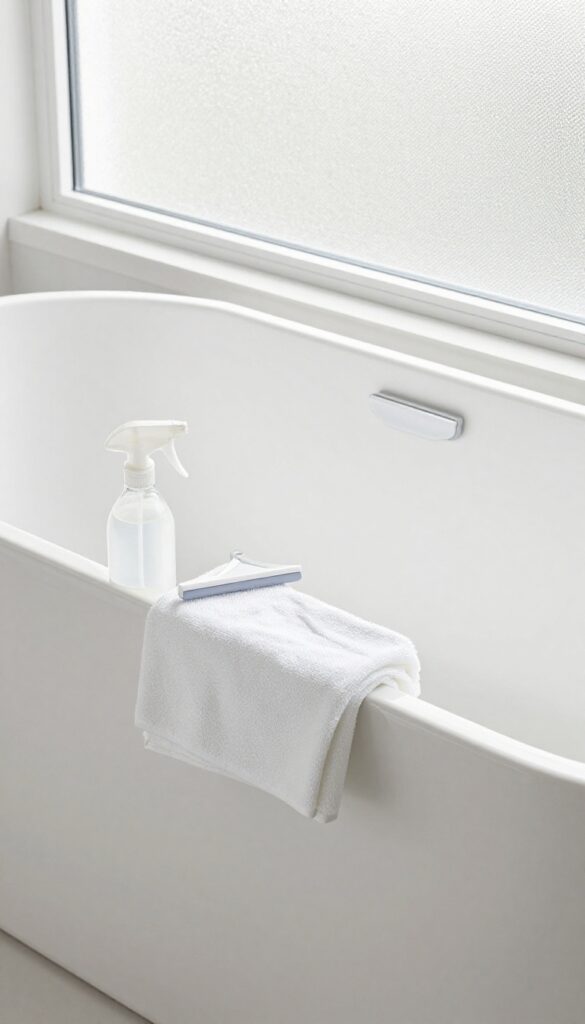
5. Dish Soap and Vinegar Spray for Daily Use
A quick daily spray can save you from heavy scrubbing later. This two-ingredient mix targets soap scum and hard water before they set in. It's gentle enough for daily use but tough on buildup.
Mix equal parts blue dish soap and white vinegar in a spray bottle. Shake gently to combine. After each bath, spritz the tub walls and floor, let it sit for a minute, then wipe with a damp cloth or sponge.
The vinegar cuts through mineral deposits while the dish soap lifts grease and soap residue. No rinsing needed unless you prefer it. This routine keeps your tub fresh and reduces the need for deep cleans.
Why This Combo Works
Blue dish soap contains surfactants that break down oily soap scum. White vinegar is acidic, dissolving hard water minerals like calcium and lime. Together, they tackle both organic and mineral grime without harsh chemicals.
The vinegar smell fades quickly once dry.
Best Practices For Daily Spraying
Use a dedicated spray bottle and label it. Spray after every bath or shower, especially if you have hard water. Focus on areas where water pools.
Wipe with a microfiber cloth or squeegee for streak-free results. Avoid using on natural stone or unsealed grout—vinegar can etch those surfaces.
When To Skip The Spray
If your tub is made of marble, granite, or other acid-sensitive materials, skip the vinegar. For those surfaces, use a pH-neutral cleaner instead. Also avoid this spray on unsealed grout lines; vinegar can weaken them over time.
6. Cream of Tartar for Rust Spots
Rust spots on a bathtub can feel impossible to remove without harsh chemicals. But cream of tartar—a common baking ingredient—pairs with hydrogen peroxide to create a gentle paste that lifts rust without scratching the surface. This method works especially well on porcelain and fiberglass tubs where abrasive cleaners might do more harm than good.
Why This Combo Works
Cream of tartar is a mild acid that breaks down rust particles, while hydrogen peroxide adds a gentle bleaching action. Together, they form a non-toxic paste that targets stains without damaging the tub's finish.
How To Apply It
Mix equal parts cream of tartar and hydrogen peroxide to form a thick paste. Apply it directly to the rust spots, let it sit for 10–15 minutes, then scrub gently with a soft cloth or sponge. Rinse thoroughly with water.
Tips For Best Results
For stubborn stains, let the paste dry completely before rinsing. You can also add a few drops of lemon juice for extra acidity. Always test on a small hidden area first to ensure compatibility with your tub's surface.
7. Magic Eraser for Stubborn Rings
Bathtub rings can be incredibly stubborn, especially if they've built up over time. A melamine foam eraser—often sold as a magic eraser—is a surprisingly effective tool for this job. It works like super-fine sandpaper, lifting embedded grime without the need for harsh liquid cleaners.
Simply dampen the eraser, give it a gentle squeeze, and rub the ring in a circular motion. You'll see the grime transfer to the eraser as the tub surface becomes smooth and clean again.
A melamine foam eraser is a gentle abrasive that can tackle bathtub rings without scratching most surfaces. It's especially useful for acrylic and fiberglass tubs, where harsh scrubbing can cause damage. The key is to use light pressure and let the foam do the work.
Rinse the area afterward to remove any residue, and you'll be left with a streak-free shine.
How It Works
Melamine foam has a microporous structure that acts like ultra-fine sandpaper. When dampened, it creates a mild abrasive action that lifts dirt and soap scum from the surface. Unlike liquid cleaners that rely on chemicals, the eraser physically removes grime, making it ideal for tough rings without leaving chemical residue.
Best Practices
Always dampen the eraser first—never use it dry, as it can be too abrasive. Test on a small, inconspicuous area first, especially on colored or glossy finishes. Use gentle, circular motions and avoid pressing too hard.
If the eraser gets dirty, simply cut off the soiled portion or grab a fresh one. Rinse the tub thoroughly after use to remove any foam particles.
When To Avoid
Do not use melamine foam on unsealed natural stone, marble, or highly polished surfaces, as it can cause etching. It's also not recommended for non-stick coatings or delicate enamel. For standard porcelain, acrylic, or fiberglass tubs, it's safe and effective.
8. Lemon Juice for a Natural Shine
If you prefer a chemical-free cleaner that smells amazing, grab a lemon from the fridge. The natural acidity cuts through soap scum and grime without harsh fumes. Plus, it leaves your bathroom smelling like fresh citrus.
Cut a lemon in half, dip the cut side into a small dish of salt, and scrub the tub surface directly. The citric acid breaks down grease and soap residue, while the salt acts as a gentle abrasive. Focus on stained areas or soap scum lines.
Rinse thoroughly with warm water and wipe dry for a streak-free shine. For extra cleaning power, squeeze some lemon juice into a spray bottle and mist the tub before scrubbing. This method is safe for porcelain, acrylic, and fiberglass tubs, but avoid using it on natural stone surfaces like marble or granite, as the acid can etch them.
Why It Works So Well
Lemon juice contains citric acid, a natural compound that dissolves mineral deposits and soap scum. Salt adds just enough grit to lift dirt without scratching most tub finishes. Together, they create a simple, non-toxic scrub that's tough on grime but gentle on surfaces.
Step-by-step Application
Start by wetting the tub surface slightly. Cut a lemon in half and sprinkle a teaspoon of salt on the cut side. Scrub in a circular motion, applying light pressure.
Work in small sections, especially around the drain and corners where buildup collects. Let the juice sit for a couple of minutes, then rinse with warm water. Dry with a microfiber cloth to prevent water spots.
When To Use This Method
This technique is perfect for weekly or bi-weekly cleaning to maintain shine and prevent heavy buildup. It's also great for a quick refresh between deep cleans. Use it when you want a natural alternative to bleach or commercial cleaners, or when you're out of your usual supplies.
9. Avoid Abrasive Cleaners on Acrylic
Acrylic tubs are popular for their sleek look and easy installation, but they come with one big downside: they scratch like crazy. That shiny surface can turn dull and cloudy if you use the wrong cleaning tools or products.
The golden rule for acrylic tubs is simple: never use anything abrasive. That means no scouring powders, no steel wool, no stiff brushes, and no harsh scrub pads. Even a seemingly gentle powdered cleaner can leave permanent micro-scratches that trap dirt and make the tub look dingy over time.
Stick To Liquid Cleaners
Liquid cleaners are your best friend here. They dissolve soap scum and grime without any gritty particles that can scratch. Look for pH-neutral or mild formulas specifically labeled safe for acrylic.
A simple mix of dish soap and warm water works great for daily cleaning.
Use Soft Cloths Only
Microfiber cloths, soft sponges, or old cotton t-shirts are perfect for acrylic tubs. Avoid anything with a rough texture, even if it claims to be non-scratch. Always rinse the cloth well to remove any trapped debris that could act like sandpaper.
What To Do If You Already Scratched It
If you've already noticed fine scratches, don't panic. You can buff them out with a specialized acrylic polish or a very fine automotive rubbing compound. Apply it gently with a soft cloth in circular motions, then rinse thoroughly.
For deep scratches, you might need a professional refinishing kit.
10. Use a Squeegee After Every Bath
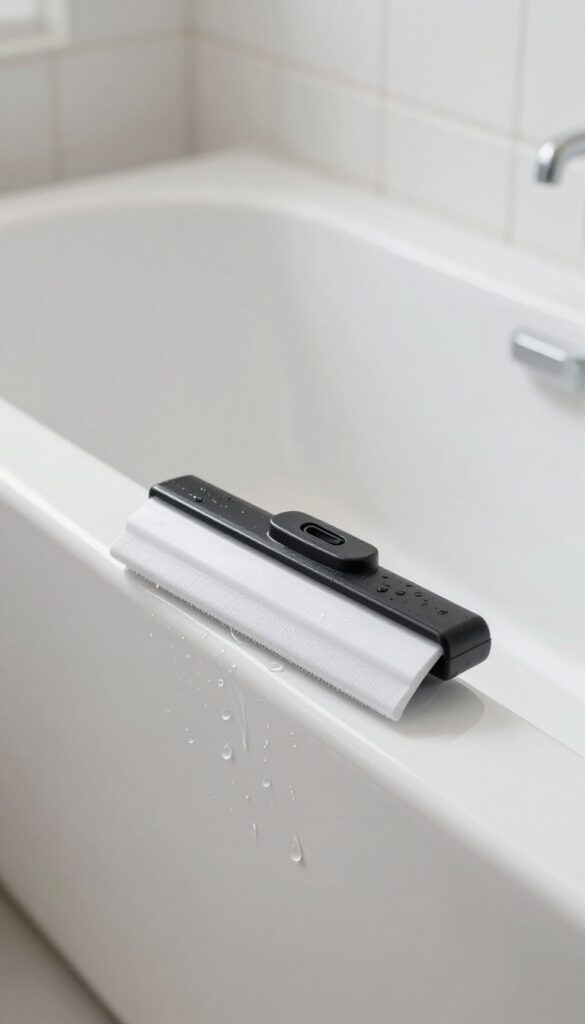
You already have a squeegee for your windows, so why not grab one for the tub? It's the simplest habit you can adopt to keep your bathtub looking clean between deep scrubs. Running a squeegee over the walls and floor after each bath takes just 30 seconds, but it stops soap scum and hard water spots before they even form.
Water droplets left to dry on your tub create those cloudy mineral deposits and stubborn soap residue. A quick squeegee sweep removes the water, leaving the surface nearly dry. Over time, this cuts down your cleaning frequency by half and keeps that fresh shine going longer.
Which Squeegee Works Best?
Look for a small, handheld squeegee with a rubber blade, ideally one with a hook so you can hang it right in the shower. Avoid metal blades on acrylic or fiberglass tubs—they can scratch. A silicone blade is gentle on all surfaces and glides smoothly.
How To Squeegee Without Streaks
Start at the top of the tub wall and pull the squeegee down in overlapping strokes. Wipe the blade with a dry cloth after each pass to prevent water from dripping back onto the clean surface. For curved tubs, use short, angled strokes to follow the contour.
Make It A Family Habit
Hang the squeegee within easy reach and remind everyone to use it after their bath or shower. After a week, it becomes second nature. You'll notice less grime, fewer cleaning sessions, and a tub that always looks freshly wiped.
11. Deep Clean with Oxygen Bleach
Oxygen bleach is a gentler alternative to chlorine bleach that still packs a punch against stains and grime. It works by releasing oxygen bubbles that lift dirt without damaging your tub's finish. This method is especially effective for removing yellowing or stubborn residue that regular cleaners miss.
For a thorough deep clean, oxygen bleach is your best friend. It's safe for most tub materials including porcelain, acrylic, and fiberglass, and it doesn't leave behind harsh fumes. The soaking action reaches into crevices and along the waterline, dissolving buildup that scrubbing alone can't tackle.
How To Use It
Start by checking your oxygen bleach package for the correct powder-to-water ratio. Typically, you'll add a scoop or two to warm water as it fills the tub. Swish the water to dissolve the powder completely, then let the tub soak for at least an hour—longer for tough stains.
After soaking, drain the water and rinse the tub thoroughly with clean water. You'll notice a brighter, cleaner surface with minimal effort.
Best For Stubborn Stains
Oxygen bleach excels at removing organic stains like tea, coffee, or rust from hard water. It also works wonders on dingy white tubs that have lost their luster over time. For extra stubborn spots, apply a paste of oxygen bleach and water directly to the stain, let it sit for 15 minutes, then scrub gently before the full soak.
12. Toothbrush for Grout and Edges
Grout lines and the seam where the tub meets the wall are prime real estate for grime and mildew. A standard sponge can't reach into those narrow gaps, so grime builds up until it looks like a dark, fuzzy border. An old toothbrush is the perfect tool to get into those tight spots and scrub them clean.
Mix baking soda with a little water to form a thick paste. Dip the toothbrush into the paste and scrub the grout lines and edges in small circles. The bristles work the paste into the pores of the grout, lifting dirt and mildew.
Rinse with warm water and wipe dry. For extra stubborn stains, add a splash of white vinegar to the paste, but test on a hidden area first to avoid damaging the grout sealant.
Why A Toothbrush Works Best
The small, stiff bristles of a toothbrush can reach into grout lines and corners that a sponge or cloth misses. The narrow head lets you apply pressure directly to the grime without scrubbing the surrounding surface. Plus, you can angle the brush to follow the curve of the tub edge.
Baking Soda Paste Recipe
In a small bowl, mix three parts baking soda with one part water until it forms a spreadable paste. Add a few drops of dish soap for extra grease-cutting power. Apply the paste to the grout and let it sit for 5 minutes before scrubbing.
This gives the baking soda time to break down the grime.
Preventing Future Buildup
After each bath, use a squeegee or towel to dry the edges and grout lines. This removes moisture that mildew needs to grow. Once a week, spray the grout with a 50/50 water and vinegar solution and let it air dry.
This keeps the grout clean and reduces the need for deep scrubbing.
13. Rinse Thoroughly to Avoid Residue
You’ve scrubbed every inch, and the tub looks spotless. But if you skip a thorough rinse, that victory is short-lived. Leftover cleaner residue doesn’t just dull the finish—it attracts new dirt and can make the surface dangerously slippery.
A good rinse is the final step that locks in your hard work.
Why Residue Matters
Even natural cleaners like vinegar or baking soda leave a film if not fully rinsed. That film grabs onto soap scum and minerals, creating a fresh layer of grime almost immediately. Worse, some chemical residues can irritate skin or cause slips.
A quick rinse isn’t enough—you need to make sure every drop of cleaner is gone.
The Hot Water Method
Use the hottest water your tap can deliver—heat helps dissolve and flush away residues. Fill a bucket or use a detachable showerhead to rinse from top to bottom, paying extra attention to corners and edges where suds hide. Let the water run for a minute or two, then wipe down with a clean, damp microfiber cloth to catch any lingering residue.
Check For Slipperiness
After rinsing, run your hand over the surface. If it feels slick or soapy, you missed some cleaner. Rinse again until the tub feels smooth and clean, not slippery.
A simple test: splash a little water on the surface—it should sheet off evenly, not bead up on residue.
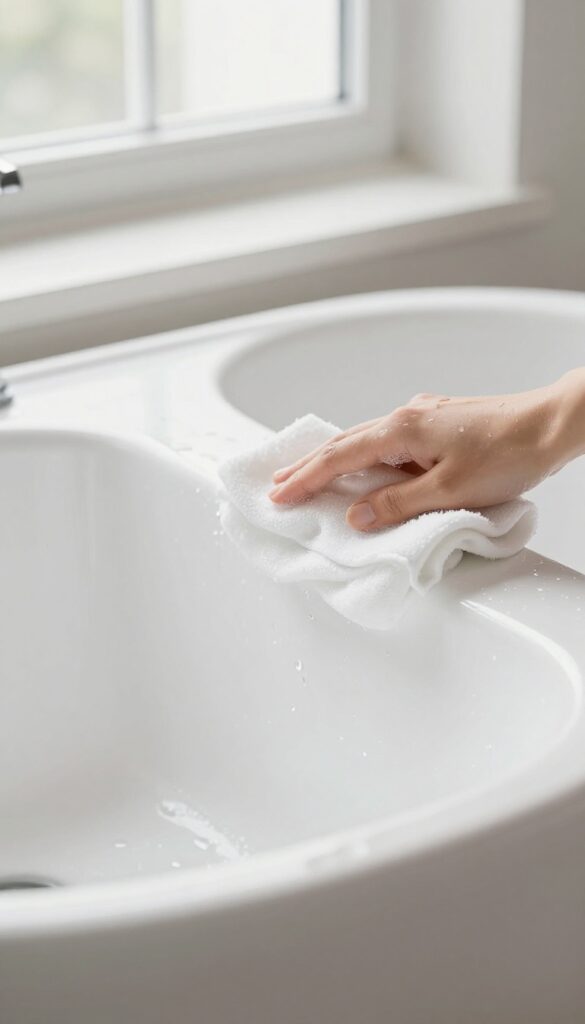
14. Dry with a Microfiber Cloth
You’ve scrubbed, rinsed, and the tub looks spotless. But if you let it air dry, water spots and mineral deposits will ruin that fresh shine. A simple microfiber cloth is all you need to lock in the clean.
Why Microfiber Works Best
Microfiber cloths are designed to trap moisture and dust without leaving lint behind. Unlike cotton towels, they don’t shed fibers that stick to damp surfaces. The ultra-fine strands also polish the surface as you wipe, giving you a streak-free finish that lasts.
The Right Technique
Start at the top of the tub and work your way down. Use a fresh, dry side of the cloth for each section to avoid spreading water around. For curved areas, bunch the cloth slightly to get into every nook.
Finish by wiping the rim and any adjacent tiles.
Keep Your Cloths Clean
Dirty microfiber cloths lose their effectiveness. Wash them separately from cotton items using mild detergent—no fabric softener, as it clogs the fibers. Air dry or tumble on low heat.
Replace cloths once they start leaving streaks or feeling rough.
15. Use a Pumice Stone on Porcelain
For those stubborn, built-up stains that laugh at your regular scrubbing, a pumice stone is a game-changer. It's a natural volcanic rock that gently abrades the surface, lifting away deposits without damaging the porcelain's hard glaze. Just make sure you wet both the stone and the tub first, and test it on a small hidden area before going all in.
A pumice stone works like a gentle eraser for tough stains. Wet the stone thoroughly, then rub it lightly over the stain in a circular motion. The stone slowly wears down, carrying the stain with it.
Rinse frequently to check your progress. This method is especially effective on hard water rings, rust spots, and mineral deposits that other cleaners can't touch.
When To Reach For A Pumice Stone
Use a pumice stone only on porcelain or ceramic tubs with a hard, glossy finish. Avoid it on acrylic, fiberglass, or any surface that scratches easily. If you're unsure, test on an inconspicuous spot.
The stone should feel smooth, not gritty, against the glaze.
How To Use It Safely
Always wet the stone and the stain area. Keep the stone wet while you work—dry rubbing can scratch. Apply light pressure; let the stone do the work.
Rinse the area often to see if the stain is gone. Once the stain is removed, wash the tub with a mild cleaner to remove any stone dust.
Where To Find Pumice Stones
You can buy pumice stones at hardware stores, home improvement centers, or online. Look for ones labeled for cleaning—they're often shaped with a handle for easier grip. Some are even attached to a stick for better reach.
They cost just a few dollars and last through many uses.
16. Prevent Mildew with Ventilation

Mildew loves a damp bathroom. After a hot bath, moisture lingers on every surface, creating the perfect breeding ground for those black spots. The simplest fix?
Better airflow. Running the bathroom fan during your bath and for at least 20 minutes afterward pulls humidity out before it settles. If you don't have a fan, crack a window or leave the door open.
This small habit keeps your tub cleaner between scrubs.
Why Ventilation Matters
Mildew spores are everywhere, but they only grow when moisture hangs around. A steamy bathroom without airflow gives them the time they need to take hold. By reducing humidity, you starve mildew before it starts.
Your cleaning efforts last longer, and you'll see less buildup on the tub walls and caulk.
Fan Timing Tips
Turn the fan on before you run the water—it starts pulling out moisture from the get-go. Keep it running for at least 20 minutes after you're done. If your fan is weak, clean the cover and check the vent hose for blockages.
A quiet, powerful fan makes a big difference.
No Fan? No Problem
Open a window wide after bathing to create cross-ventilation. Leave the bathroom door open so air circulates. You can also use a portable dehumidifier or even a small fan aimed at the tub area.
Every bit of airflow helps.
17. Try a Commercial Tub and Tile Cleaner
Sometimes, homemade solutions just don't cut it, especially when layers of soap scum and hard water stains have built up over months. That's when it's time to bring in a commercial tub and tile cleaner. These products are formulated with stronger ingredients to dissolve stubborn grime quickly, saving you elbow grease and frustration.
When you need heavy-duty cleaning, a dedicated tub and tile cleaner can be a lifesaver. Instead of scrubbing for ages, you spray it on, let it sit for a few minutes, then scrub and rinse. The key is to choose a product that specifically targets soap scum and hard water deposits, not just a general bathroom cleaner.
Look for labels that mention "soap scum remover" or "hard water stain remover" for best results.
How To Use It Right
Start by spraying the cleaner generously over the stained areas. Let it sit for the time recommended on the bottle—usually 5 to 10 minutes. Don't let it dry out, or it can leave residue.
Then scrub with a non-abrasive sponge or brush, rinse thoroughly with warm water, and wipe dry with a microfiber cloth. Always test on a small hidden spot first, especially if your tub is acrylic or fiberglass.
What To Look For
Not all commercial cleaners are created equal. For tough soap scum, look for products with surfactants that break down oils. For hard water stains, acidic formulas with ingredients like citric acid or hydrochloric acid work best.
Avoid bleach-based cleaners if you have colored grout, as they can cause fading. Also, check that the product is safe for your tub's material—porcelain, acrylic, and fiberglass each have different tolerances.
Top Picks To Consider
Some popular and effective options include Scrubbing Bubbles Bathroom Grime Fighter, CLR Bath & Kitchen Cleaner, and Zep Acidic Bathroom Cleaner. For eco-friendly choices, Method Bathroom Cleaner and Seventh Generation Tub & Tile are good bets. Read reviews to see which one works best for your specific stain type.
18. Use a Scrub Brush with Extendable Handle
Bending over the tub to scrub every corner can leave your back aching before the job is half done. A scrub brush with an extendable handle changes the game entirely. It lets you stand upright while reaching the far end of the tub, making the whole process faster and more comfortable.
Pair the brush with your favorite cleaner—whether it's a store-bought spray or a homemade mix—and work in sections. The long handle gives you leverage, so you can apply consistent pressure without straining. Rinse thoroughly after scrubbing to avoid residue.
Choose The Right Bristle Firmness
Soft bristles are gentle on acrylic and fiberglass tubs, while medium bristles work well on porcelain. Avoid stiff bristles that could scratch the surface. Many extendable brushes come with interchangeable heads, so you can swap based on your tub material.
Work In Overlapping Strokes
Start at one end and move in overlapping strokes to cover every inch. The extendable handle makes it easy to reach the back wall and corners without twisting your body. This method ensures no spot is missed.
Rinse The Brush After Each Use
Clean the brush head with hot water and let it dry to prevent bacteria buildup. Some models are dishwasher safe, making maintenance a breeze. A well-cared-for brush lasts longer and stays hygienic.
19. Tackle Mildew with Bleach Gel
Mildew loves to hide in the caulk and grout lines around your tub, turning them dark and unsightly. A bleach gel or pen is the perfect weapon because it stays put on vertical surfaces instead of running off like a liquid. This targeted approach whitens those stubborn spots without soaking the entire tub.
Standard bleach sprays often drip away before they can work, but a thick gel clings right where you need it. Apply a generous bead of bleach gel directly onto the mildew stains along caulk or grout lines. Let it sit overnight—the longer contact time breaks down the mold at its roots.
In the morning, rinse thoroughly with warm water and watch the dark spots disappear. For extra-stubborn areas, repeat the process or gently scrub with an old toothbrush after rinsing.
Why Gel Beats Liquid
Liquid bleach runs off vertical surfaces almost immediately, reducing its effectiveness. A gel formula stays in place, allowing the bleach to penetrate deep into porous grout and caulk. This means less product waste and better results with minimal effort.
Application Tips For Best Results
Before applying, wipe the area dry so the gel adheres properly. Use a steady hand to draw a thin line of gel directly over the mildew spots. Avoid spreading it too thin—you want a visible layer.
Let it sit undisturbed for at least 8 hours, preferably overnight.
Safety And Ventilation
Bleach fumes can be strong, so open a window or turn on the bathroom fan. Wear gloves to protect your skin, and keep the bathroom door closed to prevent pets or kids from wandering in. Rinse thoroughly after treatment to remove any residue.
20. Polish with Baby Oil for Extra Shine
You've scrubbed and rinsed, but the tub still looks a little dull. That's where baby oil comes in. A quick polish after cleaning adds a mirror-like shine and leaves a protective barrier that keeps grime from sticking.
Baby oil is mostly mineral oil, which fills microscopic pores on the tub surface. This creates a slick, water-repellent finish that makes future cleaning easier. Just a few drops go a long way, so don't overdo it.
How To Apply It Right
Start with a clean, dry tub. Put 3-4 drops of baby oil on a soft microfiber cloth. Buff the entire surface in circular motions, focusing on areas that look dull.
Let it sit for a minute, then wipe off any excess with a dry part of the cloth.
Which Tubs It Works Best On
This trick works great on acrylic, fiberglass, and porcelain tubs. Avoid it on textured or non-slip surfaces, because the oil can make them slippery. Stick to smooth finishes for the best results.
How Often To Polish
Once every two weeks is plenty. Too much oil can attract dust and leave a greasy feel. A light polish after your regular deep clean keeps the shine without buildup.
21. Clean the Drain to Prevent Odors
A fresh-smelling tub isn't just about the surface. That funky odor drifting up from the drain can ruin the whole experience. Fortunately, clearing the drain is simple with items you already have in your kitchen.
Why Drains Get Stinky
Soap scum, hair, and grime build up inside the drain over time. Bacteria feast on that gunk and produce sulfur gases, which smell like rotten eggs. The odor gets worse when water sits in the pipes.
The Baking Soda And Vinegar Combo
Pour one cup of baking soda directly down the drain. Follow it with one cup of white vinegar. The fizzing action breaks up the slimy buildup.
Let it bubble for 15 minutes, then flush with hot water for a full minute.
When To Repeat This
Do this every two weeks to keep odors away. If the smell persists, the clog might be deeper. In that case, use a drain snake to pull out hair and debris before the baking soda treatment.
22. Use a Steam Cleaner for Deep Sanitizing
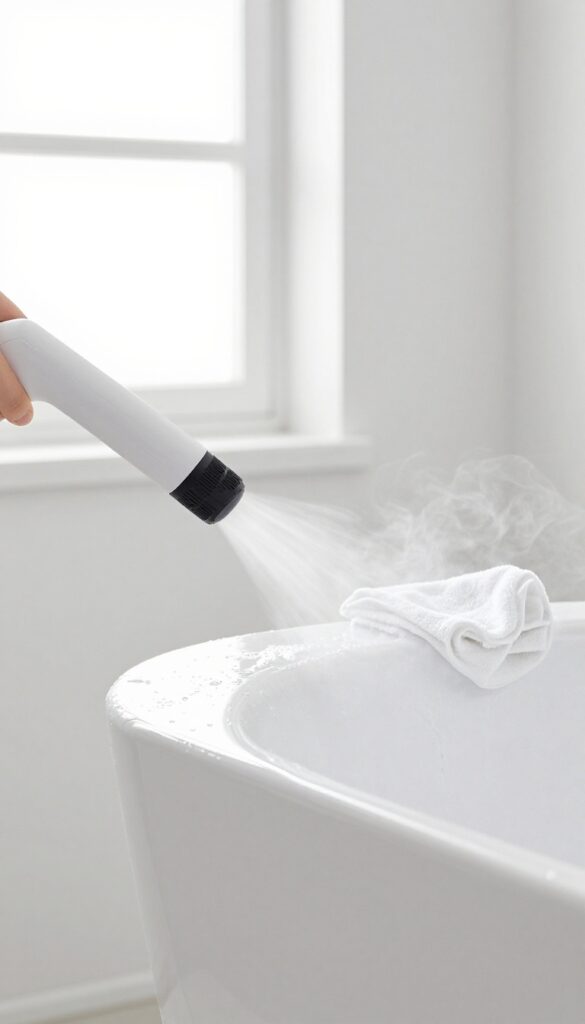
If you want to go beyond scrubbing and truly sanitize your bathtub, a steam cleaner is a game changer. It uses high-temperature steam to blast away grime, kill bacteria, and loosen stubborn deposits without any harsh chemicals. This method is especially effective for deep cleaning and for those who prefer a chemical-free approach.
A handheld steam cleaner delivers a concentrated jet of steam that penetrates soap scum and mildew. The heat kills up to 99. 9% of germs and bacteria, making it ideal for a thorough clean.
After steaming, simply wipe away the loosened residue with a clean microfiber cloth. It's quick, effective, and leaves your tub sparkling.
Why Steam Works So Well On Bathtubs
Steam cleaning is effective because the high temperature softens and dissolves tough buildup like soap scum, hard water stains, and mildew. The steam also reaches into crevices and corners where a sponge can't go. Plus, it sanitizes without the need for bleach or other harsh chemicals, making it safe for all tub materials, including acrylic and fiberglass.
How To Steam Clean Your Tub
Start by filling the steam cleaner's water tank and letting it heat up according to the manufacturer's instructions. Hold the nozzle a few inches from the tub surface and move it slowly over the area, focusing on stained or grimy spots. Use the brush attachment for scrubbing if needed.
After steaming, wipe the surface with a dry microfiber cloth to reveal a clean, shiny finish.
Tips For Best Results
For heavily soiled tubs, pre-treat with a mild cleaner or vinegar spray before steaming. Always test a small, inconspicuous area first to ensure the steam doesn't damage the finish. Work in sections to avoid letting the steam cool too quickly.
And don't forget to steam the caulk and grout lines—they'll look brand new.
23. Seal Grout Annually
Grout lines around the tub are like sponges—they soak up moisture, soap residue, and dirt. Over time, this leads to dark stains and mildew that no amount of scrubbing can fully remove. The fix is simpler than you think: a yearly application of grout sealer creates a protective barrier that keeps water and grime out.
Sealing grout isn't a difficult job, but it makes a huge difference in how long your tub stays clean. Once sealed, grout repels water and resists staining, so you spend less time scrubbing and more time enjoying a fresh-looking bathroom. Here's how to do it right.
Why Annual Sealing Matters
Unsealed grout is porous, which means it absorbs everything that touches it—bathwater, soap scum, body oils. That's why grout lines often look dingy even when the rest of the tub is spotless. A coat of sealer fills those tiny pores and creates a nonstick surface.
Mildew and mold have a harder time taking hold, and routine cleaning becomes much more effective.
Choosing The Right Sealer
Not all sealers are the same. For bathroom grout, look for a penetrating, water-based sealer that's specifically labeled for use on tile and grout. Avoid film-forming sealers that can peel or yellow over time.
If your grout is already stained, consider a color-enhancing sealer that darkens the grout slightly and hides discoloration while protecting it.
How To Apply Grout Sealer
Start with clean, dry grout. Clean the area thoroughly and let it dry for at least 24 hours. Apply the sealer using a small brush or a foam applicator, working it into the grout lines.
Wipe away any excess from the tile surface before it dries. Let it cure according to the manufacturer's instructions—usually 24 to 48 hours—before exposing the grout to water.
Maintenance Tips After Sealing
Once sealed, grout still needs regular care, but it's much easier. Wipe down the tub area after each use to reduce moisture buildup. Clean with a mild, non-abrasive cleaner weekly.
Reapply sealer every 12 months to maintain protection. A simple water drop test can tell you when it's time: if water beads up on the grout, the seal is still working; if it soaks in, reseal.
24. Avoid Mixing Cleaners
Mixing cleaning products might seem like a good way to tackle tough stains, but it's a dangerous mistake. Certain combinations, like bleach and ammonia, create toxic chloramine gas that can cause severe respiratory damage. Even bleach and vinegar produce harmful chlorine gas.
The safest approach is to stick with one cleaner at a time and always rinse the surface before switching to another product.
When you're dealing with stubborn bathtub grime, it's tempting to combine cleaners for extra power. However, many household cleaning products contain chemicals that react dangerously when mixed. For example, bleach mixed with ammonia releases toxic fumes that can be fatal in enclosed spaces.
Similarly, mixing bleach with acidic cleaners like vinegar or lemon juice produces chlorine gas. Always read labels carefully and never mix products unless the instructions explicitly say it's safe.
Know The Dangerous Combos
The most hazardous mixtures involve bleach. Never combine bleach with ammonia (found in many glass cleaners and all-purpose cleaners), vinegar, or other acids. Hydrogen peroxide mixed with vinegar creates peracetic acid, which is corrosive and can irritate skin, eyes, and lungs.
Even seemingly harmless combinations like baking soda and vinegar, while safe, can cause messy reactions if done in a closed container.
Stick To One Cleaner Per Session
To avoid accidental mixing, use only one cleaning product per scrubbing session. If you need to switch to a different cleaner, rinse the tub thoroughly with water and dry it with a towel before applying the new product. This simple step prevents chemical reactions and ensures each cleaner works as intended.
Read Labels And Ventilate
Always read the warning labels on your cleaning products. They usually list incompatible substances. Additionally, work in a well-ventilated area by opening windows or turning on an exhaust fan.
If you accidentally mix cleaners and notice a strong, irritating odor, leave the area immediately and call poison control.
25. Establish a Weekly Routine
Consistency is the secret to a bathtub that always looks good. Instead of waiting until grime builds up, a quick weekly habit keeps things fresh with almost no effort. You'll spend less than 10 minutes and avoid the need for heavy scrubbing later.
A weekly routine doesn't have to be complicated. Just a quick wipe-down and spray after your last shower of the week can prevent soap scum and hard water stains from setting in. This small investment of time pays off by keeping your tub looking clean and shiny without the need for harsh chemicals or elbow grease.
Pick A Day And Stick To It
Choose a specific day—maybe Sunday evening or Saturday morning—and make it part of your weekly cleaning checklist. When it becomes a habit, you won't even think about it. Consistency is key; missing a week can lead to buildup that's harder to remove.
Use A Daily Spray For Touch-ups
Between weekly cleanings, a daily spray can help. Keep a bottle of diluted vinegar or a gentle bathroom cleaner in the shower and give the tub a quick mist after each use. This breaks down soap residue before it hardens, making your weekly wipe-down even faster.
Gather Your Tools Ahead Of Time
Keep a dedicated microfiber cloth and a spray bottle of your preferred cleaner under the sink or in a caddy. Having everything ready means you can complete the task in minutes without hunting for supplies. A small squeegee can also help remove excess water after showers, reducing mineral deposits.
FAQ
How often should I clean my bathtub?
For best results, do a quick wipe-down after each use and a thorough cleaning once a week. This prevents soap scum and hard water stains from building up.
Can I use bleach on my bathtub?
Yes, but only on porcelain or enamel tubs. Avoid bleach on acrylic or fiberglass as it can cause yellowing. Always dilute and rinse thoroughly.
What is the best natural cleaner for bathtubs?
A paste of baking soda and water works well for gentle scrubbing. White vinegar is great for hard water stains. Both are safe for most surfaces.
How do I remove yellow stains from an old bathtub?
Try a paste of hydrogen peroxide and cream of tartar. Apply, let sit, then scrub. For severe stains, a pumice stone (on porcelain) or oxygen bleach soak may help.
Why does my bathtub feel slippery after cleaning?
Residue from cleaners or soap can cause slipperiness. Rinse the tub thoroughly with hot water after cleaning and wipe dry with a microfiber cloth.
Conclusion
A sparkling bathtub doesn't require a whole weekend of scrubbing. Just a few of these simple tips can tackle your biggest trouble spots—like soap scum rings or stubborn stains—without harsh chemicals. Start with the method that addresses your most annoying issue and build from there.
Consistency with even a handful of these tricks will keep your tub looking fresh and inviting. Pick your favorites, make them a habit, and enjoy a cleaner, more relaxing soak every time. Your bathroom will thank you.


