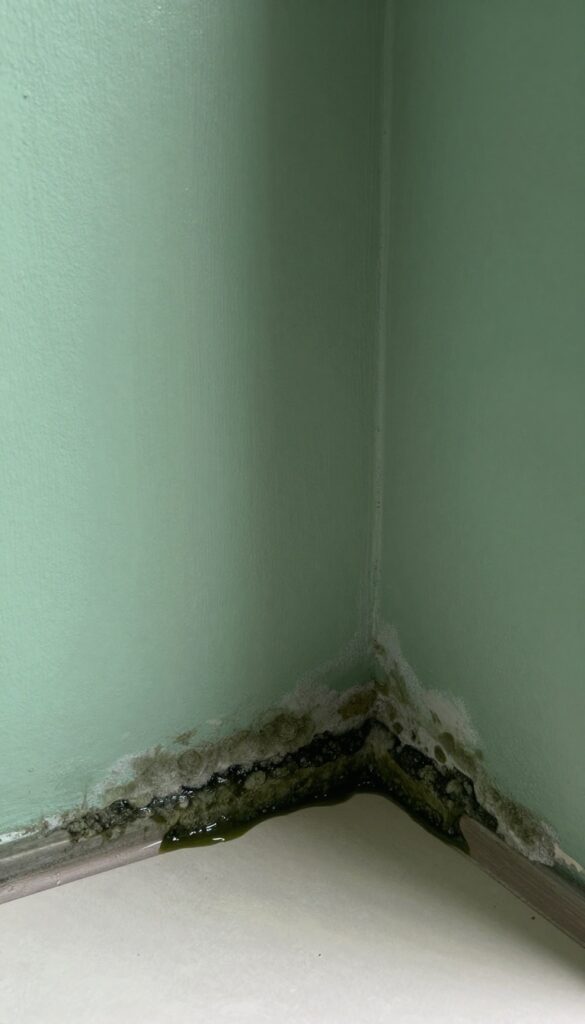
Mold creeping into your walls and corners isn't just unsightly—it can trigger allergies and damage your home's structure. But before you reach for bleach or panic, know that most household mold problems are fixable with the right approach.
These 20 tips break down exactly how to clean safely, prevent regrowth, and keep your living spaces healthier without harsh chemicals or costly professionals.
Whether you're tackling a small patch in the bathroom or a musty corner in the basement, you'll find practical steps that actually work.
1. Identify the Type of Mold Before Cleaning
Before you grab a scrub brush, take a close look at what you're dealing with. Different molds require different cleaning approaches, and using the wrong method can actually make things worse. Black mold (Stachybotrys) is more toxic and often needs professional removal, while common mildew is easy to tackle with household products.
Knowing what you're up against saves time and keeps you safe. Here's how to tell them apart and choose the right strategy.
Black Mold Vs. Mildew: Spot The Difference
Black mold typically looks dark greenish-black, slimy, and grows in consistently damp areas like water-damaged drywall. Mildew is lighter—gray, white, or yellow—and powdery, often found on bathroom grout or shower curtains. A quick test: dab a cotton swab in diluted bleach.
Mildew lightens in a minute; black mold may not change color.
Why It Matters For Cleaning
Using bleach on porous surfaces like drywall can feed black mold beneath the surface, making it spread. Mildew responds well to vinegar or hydrogen peroxide. For black mold, you'll need a commercial mold killer or professional help if the patch is larger than a few square feet.
When To Call A Pro
If you see black mold covering more than 10 square feet, suspect it's inside your HVAC system, or you have health symptoms like breathing trouble, stop DIY and call a certified mold remediator. Your safety comes first.
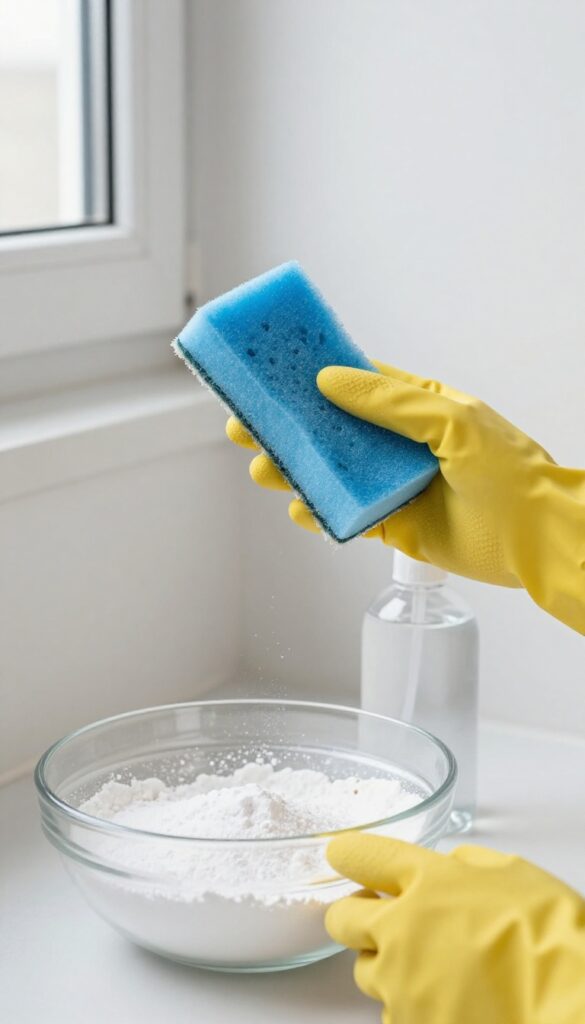
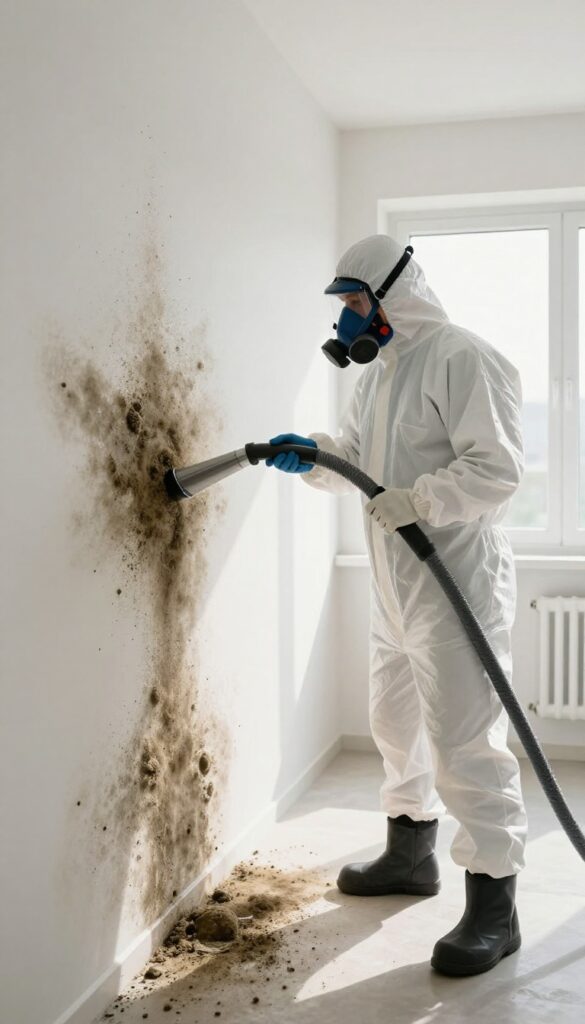
2. Gear Up with Proper Safety Equipment
Mold cleanup isn't a job for bare hands. Spores can irritate your skin, eyes, and lungs, especially if you're sensitive. Before you touch any moldy surface, put on the right gear to keep yourself safe.
Gloves That Block Irritants
Choose long rubber or nitrile gloves that extend past your wrists. Regular latex gloves may tear too easily. Gloves prevent direct contact with mold and cleaning chemicals, which can cause rashes or burns.
Eye Protection Is Non‑negotiable
Goggles that seal around your eyes stop spores from floating in. Even a tiny speck can cause redness or infection. Safety glasses with side shields work well, but avoid vented styles that let particles in.
Why An N95 Mask Matters
Standard dust masks don't filter mold spores. An N95 respirator (or higher) blocks at least 95% of airborne particles. It's a small step that makes a big difference for your respiratory health.
3. Ventilate the Area Thoroughly
Mold spores are lightweight and travel easily through the air. If you start scrubbing without proper airflow, you're essentially stirring up spores that can land elsewhere in your home and start new colonies. Good ventilation protects both your health and your cleaning results.
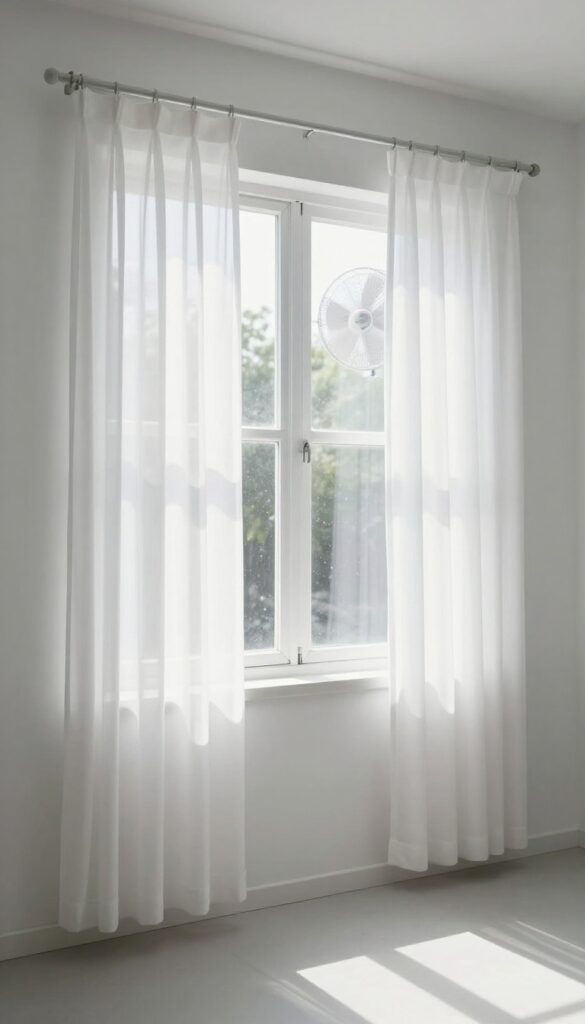
Open windows and doors to create cross-ventilation. Position a box fan in a window blowing outward to pull spores out of the room. Avoid fans that blow air around the room without exhausting it outside—that just spreads spores.
Keep the area ventilated for at least 30 minutes after you finish cleaning.
Use Exhaust Fans
Bathroom and kitchen exhaust fans help remove moisture and airborne spores. Run them continuously while you clean and for an hour afterward. Make sure the fan vents to the outside, not just into the attic.
Seal Off Adjacent Rooms
Close doors to other rooms and cover vents with plastic sheeting if possible. This prevents spores from drifting into clean areas. Tape the edges of the plastic to create a temporary seal.
Wear A Respirator
An N95 mask or better is essential when cleaning mold. Even with good ventilation, spores can be inhaled. Don't rely on a dust mask—it won't filter out mold spores effectively.
4. Use White Vinegar for Non-Porous Surfaces
White vinegar is a surprisingly effective mold killer for non-porous surfaces like tile, glass, and sealed countertops. Its acetic acid can destroy up to 82% of mold species, making it a safer alternative to bleach. Best of all, it's cheap, non-toxic, and you probably already have a bottle in your pantry.
White vinegar works best on hard, non-porous surfaces where mold can't hide deep inside. It's gentle enough for daily use but strong enough to tackle stubborn patches. Just remember: vinegar is acidic, so avoid using it on natural stone, unsealed grout, or wood—it can etch or damage those materials.
How To Apply Vinegar For Maximum Mold Kill
Pour undiluted white vinegar into a spray bottle. Mist the moldy area generously, making sure the surface is wet but not dripping. Let it sit for at least an hour—the longer, the better.
The vinegar smell will fade as it dries. After an hour, scrub with a brush or sponge and wipe clean with water. No rinsing is needed, but you can if the vinegar scent lingers.
When To Skip Vinegar And Choose Something Else
Vinegar isn't a one-size-fits-all solution. On porous surfaces like drywall, wood, or unsealed grout, vinegar can't reach mold roots and may even worsen the problem by adding moisture. For those materials, consider hydrogen peroxide or a commercial mold remover.
Also, vinegar won't kill every mold type—some species are resistant—so if mold returns, switch to a different method.
Safety Tips For Vinegar Mold Cleaning
Never mix vinegar with bleach—this creates toxic chlorine gas. Wear gloves and a mask to avoid direct contact with mold spores. Open windows for ventilation.
Test a small hidden area first, especially on painted surfaces, as vinegar can sometimes strip paint or cause discoloration.
5. Try Hydrogen Peroxide for Stubborn Spots
When mold digs into porous surfaces like grout, wood, or drywall, vinegar and bleach often fall short. Hydrogen peroxide steps in as a gentler but effective alternative. Its bubbling action lifts mold from deep within cracks and crevices without releasing toxic fumes.
Plus, it breaks down into harmless water and oxygen, making it safe for everyday use around kids and pets.
Hydrogen peroxide at 3% concentration is your go-to for porous materials. Spray it directly onto the moldy area, let it sit for 10 minutes to penetrate, then scrub with a soft brush. Rinse with water and dry thoroughly.
For tougher spots, repeat or let it foam longer. Always test on an inconspicuous area first, especially on colored surfaces, as peroxide can have a mild bleaching effect.
Why Peroxide Works On Porous Surfaces
Unlike bleach, which mostly stays on the surface, hydrogen peroxide seeps into tiny pores and kills mold at the root. The oxygen bubbles help dislodge spores trapped in grout lines, unsealed wood, and textured walls. It’s also less likely to damage materials over time compared to harsh chemicals.
Step-by-step Application
Start by ventilating the area. Pour 3% hydrogen peroxide into a spray bottle. Saturate the moldy spot, let it fizz for 10 minutes, then scrub with a stiff brush or sponge.
Wipe away residue with a damp cloth and dry completely. For stubborn patches, apply a second time and let it sit longer before scrubbing.
Safety And Storage Tips
Hydrogen peroxide degrades quickly when exposed to light, so store it in a dark bottle in a cool cabinet. Wear gloves to protect your skin from irritation. Avoid mixing peroxide with vinegar or bleach—this creates toxic gases.
Keep it out of reach of children, though it’s much safer than many commercial mold killers.
6. Baking Soda Paste for Gentle Scrubbing
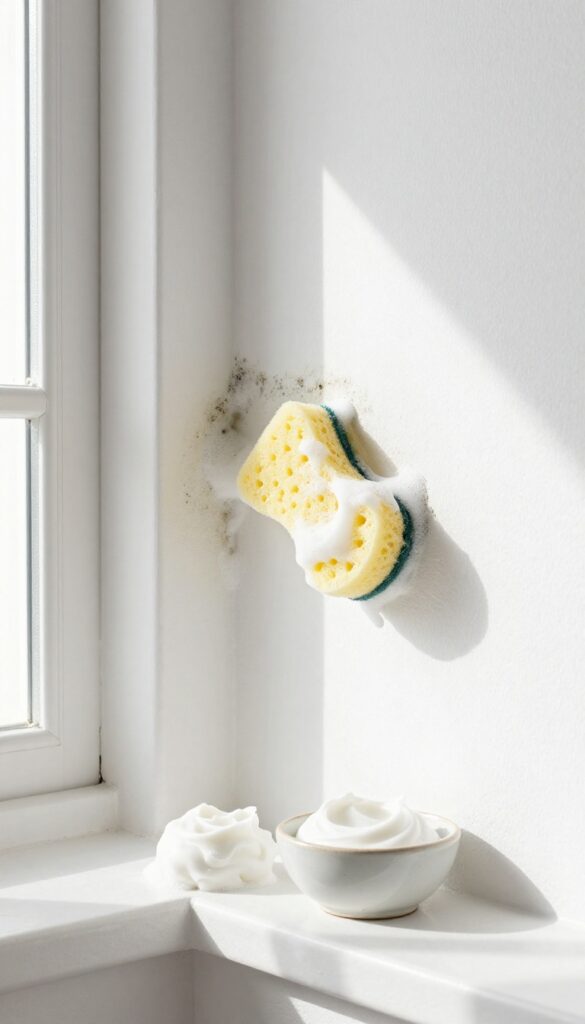
When you need a mild abrasive that won't damage paint or surfaces, baking soda is your go-to. It's gentle enough for walls and corners but effective at lifting mold stains. Plus, it naturally absorbs odors, leaving your space smelling fresh.
Making The Paste
Mix three parts baking soda with one part water in a small bowl. Stir until it forms a thick, spreadable paste. Add a few drops of tea tree oil for extra mold-killing power if you like.
Application And Scrubbing
Apply the paste directly to the moldy area using an old toothbrush or a soft sponge. Let it sit for 5–10 minutes to loosen the mold. Gently scrub in circular motions—no need to press hard.
Rinse with water and wipe dry.
Why It Works
Baking soda is mildly alkaline, which helps break down mold spores and neutralize odors. Unlike bleach, it won't release harsh fumes or discolor surfaces. It's safe for most walls, corners, and even grout.
When To Use This Method
This paste is ideal for small, surface-level mold patches on painted walls, tiles, or sealed wood. For deep or stubborn mold, you may need a stronger cleaner afterward.
7. Tea Tree Oil as a Natural Fungicide
If you prefer a natural approach to mold removal, tea tree oil is a powerful option. It's a natural fungicide that kills mold spores without the harsh fumes of bleach or ammonia. Plus, it's safe to use around pets and kids once dry.
Tea tree oil works well on small to medium mold patches on walls, corners, and even grout. It's especially useful in areas where you want to avoid chemical residues, like kitchens or bedrooms. The oil penetrates porous surfaces and stops mold from coming back quickly.
How To Mix And Apply
Mix 1 teaspoon of tea tree oil with 1 cup of water in a spray bottle. Shake well, then spray directly onto the moldy area. Let it sit for at least an hour—no need to rinse.
The smell is strong at first but fades within a day or two.
Best Surfaces For Tea Tree Oil
This solution works great on painted walls, tiles, sealed wood, and even fabric. Avoid using it on unsealed wood or porous stone, as the oil may stain. Test on a small hidden spot first to be sure.
Safety And Storage Tips
Tea tree oil can irritate skin, so wear gloves when spraying. Keep the solution in a labeled bottle out of reach of children. It stays effective for several weeks if stored in a cool, dark place.
8. Borax for Deep Cleaning
Borax is a natural mineral that works wonders on mold, especially when you need a deeper clean without harsh fumes. It's affordable, easy to find, and safe for most surfaces when used correctly. This method is ideal for walls, corners, and even laundry areas where mold tends to hide.
To use borax, dissolve 1 cup of borax in 1 gallon of hot water. Apply the solution to the moldy area with a scrub brush or sponge, working it into the surface. Let it sit for 10–15 minutes to penetrate, then scrub again.
Wipe away excess moisture with a clean cloth. No need to rinse thoroughly—the borax residue helps prevent future mold growth.
Why Borax Works
Borax has a high pH that disrupts mold's cell structure, killing it on contact. It also absorbs moisture, making the environment less hospitable for regrowth. Unlike bleach, borax doesn't release toxic fumes, so it's safer for indoor use.
Best Surfaces For Borax
Borax is great for non-porous surfaces like tile, glass, and sealed countertops. It also works on porous materials like wood and drywall, but test a small area first to avoid discoloration. Avoid using on unsealed natural stone, as it can etch the surface.
Safety Tips
Wear gloves and goggles when handling borax, as it can irritate skin and eyes. Keep the area well-ventilated. Although borax is natural, it's not safe to ingest, so store it away from children and pets.
9. Avoid Bleach on Porous Surfaces
Bleach is a go-to cleaner for many, but it's actually a bad choice for porous materials like drywall, wood, and unsealed grout. The reason is simple: bleach can't penetrate deep into these surfaces. It only kills mold on the very top layer, leaving the roots untouched.
Worse, the water in bleach solutions can soak into porous materials, providing moisture that helps mold regrow from within.
Instead of reaching for bleach on porous surfaces, opt for cleaners that can penetrate and kill mold at the root. Hydrogen peroxide (3%) is a safer alternative that bubbles into crevices and kills mold without toxic fumes. White vinegar is another option—it can penetrate some porous surfaces and disrupt mold growth.
For stubborn mold on wood or drywall, consider a borax solution (1 cup borax per gallon of water) which both kills mold and inhibits future growth without damaging the material.
Why Bleach Fails On Drywall And Wood
Bleach is a harsh chemical that works by oxidizing surface stains, but it doesn't soak into porous materials. Drywall and wood are like sponges—mold can grow deep inside the pores. Bleach only bleaches the surface, leaving the underlying mold alive.
Plus, the water in bleach solutions adds moisture, which can actually encourage more mold growth behind walls or under paint.
Better Alternatives For Porous Materials
Hydrogen peroxide is a gentle yet effective mold killer that penetrates porous surfaces. Apply it directly, let it fizz for 10 minutes, then scrub and wipe. White vinegar is another safe bet—spray it on undiluted, wait an hour, then scrub.
For tougher jobs, borax mixed with water creates a paste that clings to vertical surfaces and kills mold without damaging the material.
When Bleach Is Actually Okay
Bleach is fine on non-porous surfaces like tile, glass, and sealed countertops. It's also useful for disinfecting after mold removal on hard surfaces. But never use it on drywall, wood, or unsealed grout.
If you're unsure, test a small hidden area first. For porous surfaces, stick with the gentler alternatives to avoid worsening the problem.
10. Dry the Area Completely After Cleaning
You've scrubbed, wiped, and rinsed—but if you leave walls and corners damp, you're practically inviting mold back. Moisture is mold's best friend, and even a thin film of water can trigger regrowth within hours. Drying thoroughly is the final, non-negotiable step that locks in your hard work.
After cleaning, grab a clean, dry microfiber cloth and go over every surface you treated. Pay special attention to corners, crevices, and any spots where water might pool. For larger areas, set up a fan pointing at the wall and let it run for at least an hour.
If you have a dehumidifier, crank it up in the room to pull lingering moisture from the air. This step is especially critical in bathrooms, basements, and other humid zones. Don't rush it—touch the wall with your hand; it should feel completely dry before you call it done.
Use Towels For Immediate Absorption
Right after rinsing, blot the area with a clean, absorbent towel. Press firmly to soak up as much water as possible. Switch to a dry section of the towel as it gets wet.
This prevents drips from running down the wall and seeping into baseboards or cracks.
Speed Up Drying With Fans
Position a box fan or oscillating fan to blow directly across the cleaned surface. Air movement accelerates evaporation, especially in corners where air circulation is poor. Keep the fan running for at least 30 minutes, then check with your hand.
If the area still feels cool or damp, let it run longer.
Dehumidifiers For Persistent Humidity
If your home has high humidity (above 50%), a dehumidifier is a game-changer. Run it in the room for a few hours after cleaning to pull moisture from the air and walls. This is particularly important in basements, laundry rooms, or after a heavy rain.
Aim for a relative humidity of 30–50% to discourage mold regrowth.
Check Hidden Spots
Don't forget behind furniture, under sinks, or inside cabinets where you cleaned mold. These spots often stay damp longer. Open doors and pull items away from walls to let air circulate.
Use a small fan or a hair dryer on a cool setting to reach tight corners.
11. Fix Leaks and Water Intrusion Immediately
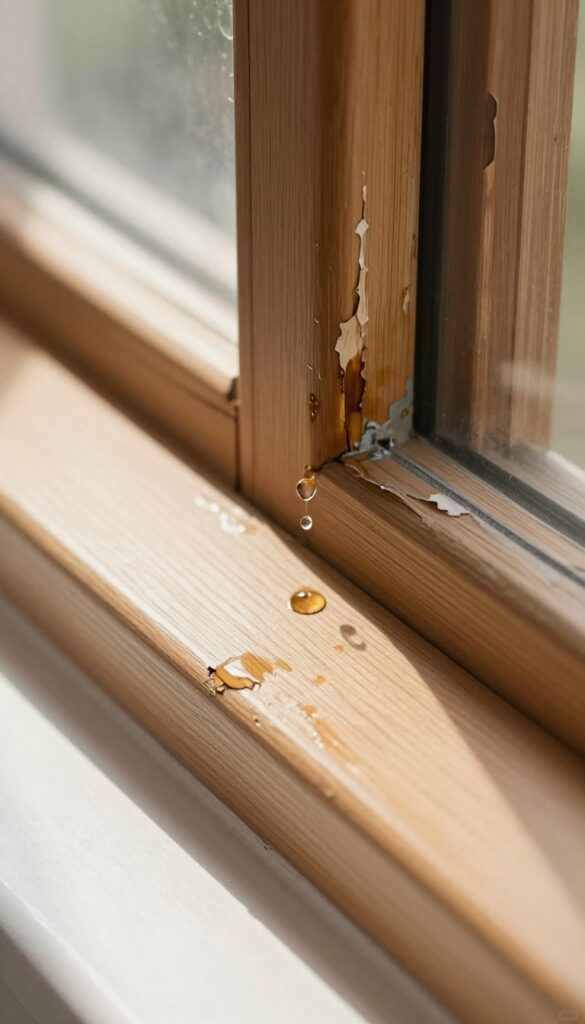
A persistent drip or a small roof leak might seem harmless, but moisture is mold's best friend. Even a tiny water intrusion can keep walls and corners damp long enough for spores to settle and grow. The faster you stop the source, the less chance mold has to take hold.
Inspect pipes, roofs, and windows for leaks. Even small drips can create a mold-friendly environment.
Check Common Leak Spots First
Start with the usual suspects: under sinks, around toilet bases, near window frames, and along the roofline. Look for water stains, peeling paint, or warped wood. Don't forget less obvious areas like behind washing machines or under refrigerators.
Fix Small Leaks Before They Grow
A dripping faucet or a loose pipe joint can be tightened or replaced in minutes. For roof leaks, patch small holes with roofing cement or call a pro if the damage is extensive. The key is to act before water seeps into drywall or wood.
Dry The Area Thoroughly After Repairs
Once the leak is fixed, dry out the affected area completely. Use fans, open windows, or a dehumidifier. If the material is still damp after a day, you may need to remove and replace it to prevent hidden mold growth.
12. Improve Air Circulation in Problem Areas
Stale, still air is a breeding ground for mold spores. When moisture lingers and air doesn't move, those dark corners and tight spaces become prime real estate for mold growth. The good news is that a few simple changes to your home's airflow can make a huge difference.
Moving furniture a few inches away from walls allows air to circulate behind it, preventing moisture from getting trapped. In bathrooms, running the exhaust fan during and for 20 minutes after showers removes humidity. Keeping closet doors open—even just a crack—lets air flow and discourages mold from taking hold.
Pull Furniture Away From Walls
Sofas, dressers, and beds pushed flat against walls block airflow, creating a perfect microclimate for mold. Slide them out at least 2 to 3 inches to let air move behind. This simple habit can prevent that musty smell and hidden mold patches.
Use Exhaust Fans The Right Way
Bathroom fans are often underused. Run them during your shower and leave them on for at least 20 minutes after you're done. Make sure the fan vents outside, not into the attic—otherwise you're just moving moisture to another hidden spot.
Keep Closet Doors Open
Closets are notorious for poor ventilation. Leave doors open as much as possible, especially if the closet is on an exterior wall or in a damp area. If privacy is a concern, use louvered doors that allow air to pass through.
13. Use a Dehumidifier to Keep Humidity Low
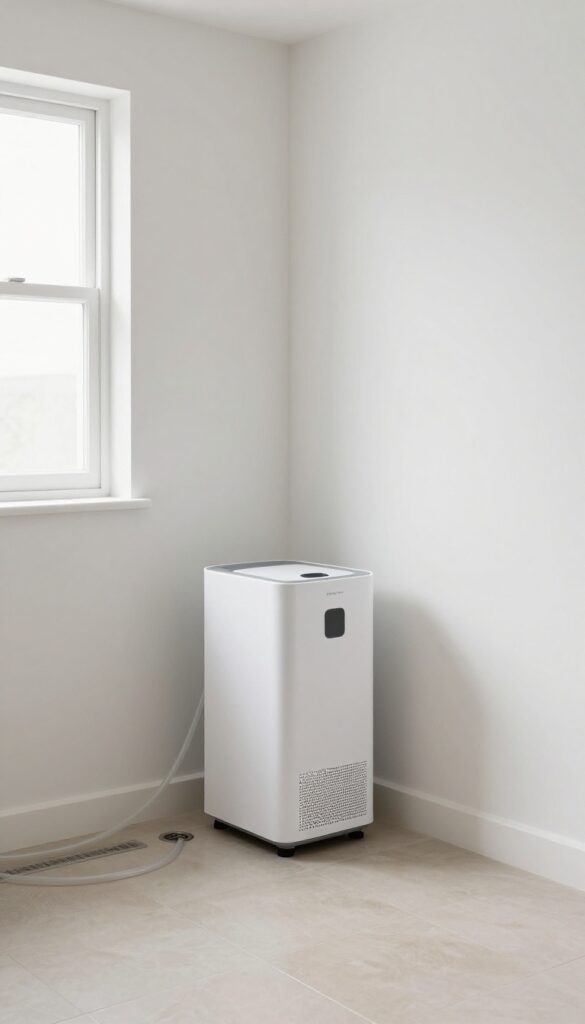
Mold needs moisture to thrive, and the easiest way to cut off its supply is to control the humidity in your home. A dehumidifier is a simple, effective tool that pulls excess water from the air, making it harder for mold to grow on walls and corners. This is especially important in naturally damp areas like basements, bathrooms, or laundry rooms.
Keeping indoor humidity below 50% is the sweet spot for mold prevention. A dehumidifier can help you maintain that level consistently, especially during humid seasons or in rooms with poor ventilation. Place it in the dampest part of your home, empty the collection tray regularly, and watch the difference it makes.
Where To Place Your Dehumidifier
For maximum effectiveness, put the dehumidifier in the room that feels most humid or has a musty smell. Basements are prime candidates, but bathrooms after showers and kitchens after cooking also benefit. Keep it away from walls and furniture to allow proper air circulation.
Choosing The Right Size
Dehumidifiers come in different capacities, measured in pints per day. A small unit (30–50 pints) works for a single room, while larger units (50–70 pints) are better for whole basements or open areas. Check the square footage recommendation on the box to get the right fit.
Maintenance Tips
Empty the water tank daily, or connect a hose for continuous drainage if your unit supports it. Clean the filter every few weeks to keep it running efficiently. A well-maintained dehumidifier not only fights mold but also improves overall air quality.
14. Wipe Down Walls After Showering
A quick squeegee or towel dry after showers prevents moisture from settling on bathroom walls and corners. Mold needs a damp surface to grow, and bathrooms are the perfect environment. By making this a habit, you eliminate the moisture that mold relies on.
Why This Simple Step Works
After a hot shower, steam condenses on every surface. If left to air dry, that moisture seeps into grout, paint, and drywall. A quick wipe removes the water before it has a chance to soak in.
It's the easiest way to keep mold from getting a foothold.
Best Tools For The Job
A squeegee is fast and leaves glass doors streak-free. For tiled walls, a microfiber cloth works well—it absorbs moisture without leaving lint. Keep a dedicated towel or squeegee in the shower so you can grab it right after you step out.
Don't Forget The Corners
Corners and edges are where moisture lingers longest. Use the corner of your towel or a small squeegee to get into those tight spots. Pay extra attention to the ceiling corners and behind the shower curtain where airflow is limited.
15. Apply Mold-Resistant Paint
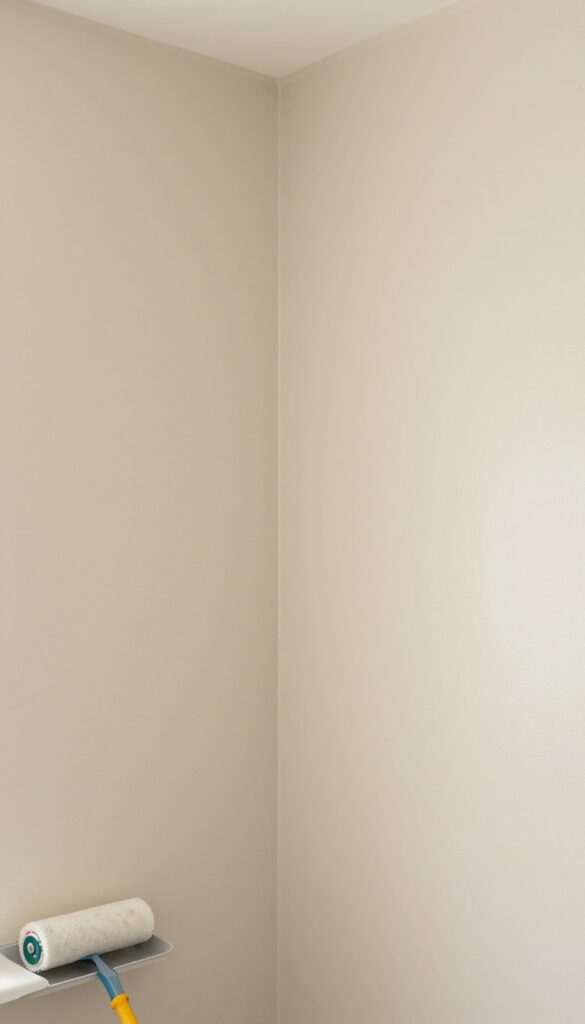
You've scrubbed and disinfected the area, but standard paint won't stop mold from coming back. Mold-resistant paint is formulated with antimicrobial agents that actively discourage regrowth, giving you a long-term shield. It's a smart final step after cleaning, especially in high-moisture rooms.
Why Regular Paint Falls Short
Ordinary paint lacks the additives needed to fight mold. Over time, moisture seeps through, and spores find a food source in the paint's organic binders. Mold-resistant paints contain fungicides that inhibit growth, making them essential for bathrooms, basements, and kitchens.
How To Apply For Best Results
Start with a clean, dry surface. Use a mold-killing cleaner, then rinse and let dry completely. Apply a mold-resistant primer first—it seals the surface and adds an extra layer of protection.
Follow with two coats of mold-resistant paint, allowing proper drying time between coats.
Where to Use It
Focus on areas prone to moisture: bathroom walls and ceilings, laundry rooms, basement corners, and behind appliances. You can also use it on exterior walls in humid climates. For best results, pair with a dehumidifier or ventilation fan.
16. Seal Grout and Caulk in Bathrooms
Cracked or missing grout isn't just an eyesore—it's an open invitation for moisture to sneak behind your tiles. Once water gets in, mold finds a perfect, hidden home. Re-caulking and sealing are simple fixes that block those damp hiding spots for good.
Start by inspecting all grout lines and caulk seams in your shower, tub, and sink areas. Any gaps, cracks, or discoloration are signs that moisture is getting through. Scrape out old, damaged caulk and grout with a utility knife or grout saw.
Clean the area thoroughly and let it dry completely before applying new sealant. Use a high-quality silicone caulk for corners and joints, and a grout sealer for the lines. Reapply every year or as needed to maintain a waterproof barrier.
Why Grout And Caulk Fail
Over time, water and cleaning chemicals break down caulk and grout. Shrinking, cracking, and peeling create tiny channels where moisture collects. Mold spores love these damp, dark crevices and multiply quickly.
Step-by-step Re-caulking
Remove old caulk completely with a caulk remover tool or razor blade. Clean the surface with rubbing alcohol to remove residue. Apply a bead of mold-resistant silicone caulk, smooth it with a wet finger or tool, and let it cure for 24 hours before exposing it to water.
Sealing Grout Lines
After cleaning grout lines, apply a penetrating grout sealer with a small brush or applicator. Wipe off excess immediately. Let it dry according to the product instructions.
This creates a protective layer that repels water and makes future cleaning easier.
17. Check and Clean HVAC Systems
Your heating and cooling system might be spreading mold spores throughout your home without you knowing it. When air ducts or filters get dirty, they become a highway for mold to travel from one room to another. Keeping your HVAC system clean is a simple but powerful way to reduce mold indoors.
If you've been battling mold in multiple rooms, your HVAC system could be the culprit. Mold spores can settle in ductwork, on coils, or inside the unit itself, and every time the fan runs, those spores get blown into your living spaces. Regular maintenance stops this cycle and keeps the air cleaner.
Change Filters Frequently
A dirty filter doesn't just reduce airflow—it also traps moisture and dust, creating a perfect environment for mold. Check your filter monthly and replace it at least every three months, or more often if you have pets or allergies. Use a filter with a MERV rating of 8 or higher to catch smaller particles.
Inspect Ductwork For Moisture
Leaky ducts or poor insulation can cause condensation inside the ductwork, especially in humid climates. Have a professional inspect your ducts for signs of moisture, mold growth, or damage. Sealing and insulating ducts can prevent condensation and stop mold before it starts.
Clean The Drip Pan And Coils
The drip pan under your air handler collects condensation, and if it's not draining properly, standing water becomes a mold magnet. Clean the pan with a mixture of water and mild detergent, and ensure the drain line is clear. Also, have the evaporator coils cleaned annually to remove any buildup.
18. Use Exhaust Fans When Cooking or Bathing
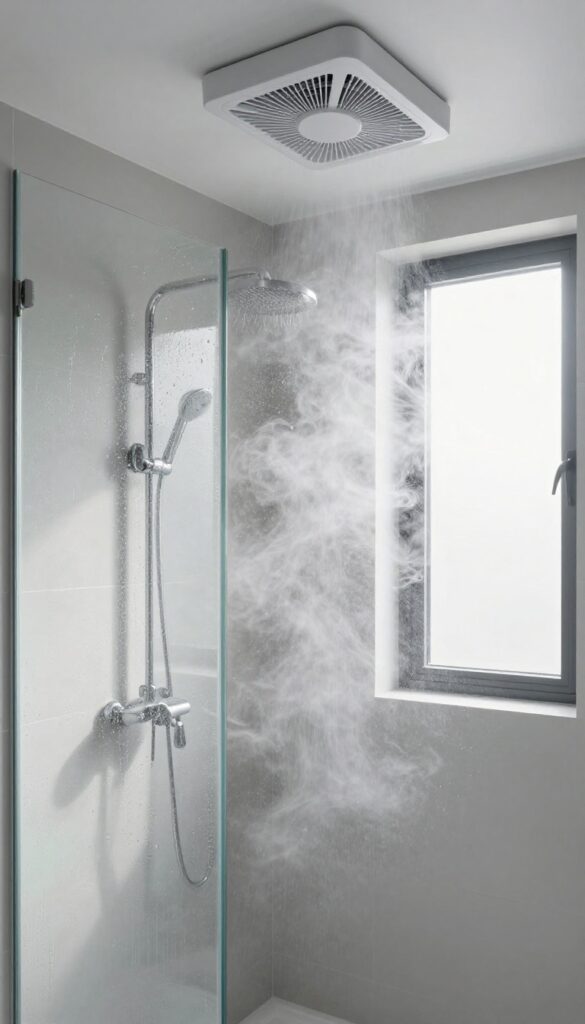
Steam from hot showers and boiling pots doesn't just fog up your mirrors—it saturates the air with moisture that eventually settles on walls and corners. Exhaust fans are your first line of defense against this invisible threat, but only if you use them correctly.
Why Timing Matters
Most people turn the fan off the moment they step out of the shower or finish cooking. That's a mistake. The air remains humid for much longer.
Running the fan for at least 20 minutes after steam-producing activities ensures the excess moisture is pulled outside before it can condense on surfaces.
Check Your Fan's Capacity
Not all fans are created equal. A fan that's too weak for your bathroom or kitchen won't do the job. Look for a fan rated for your room size—typically measured in cubic feet per minute (CFM).
For bathrooms, aim for at least 50 CFM; larger rooms may need 100 CFM or more.
Keep The Path Clear
A fan can't work if it's blocked by dust or debris. Clean the fan cover regularly and make sure the exhaust duct isn't kinked or clogged. Also, keep the bathroom door slightly open while the fan runs to allow fresh air to circulate, which helps the fan pull moisture out more efficiently.
19. Inspect Corners and Behind Furniture Regularly
Mold loves dark, undisturbed spots where airflow is minimal. Corners and the spaces behind large furniture are prime real estate for hidden growth. By making inspections part of your routine, you catch problems before they spread.
Set a monthly reminder to move furniture and peek into corners. Use a flashlight to check for discoloration or musty odors. Early detection means easier cleanup and less risk to your health.
Where Mold Hides Most
Behind sofas pushed against walls, under curtains that touch the floor, and in closets with poor ventilation. These areas trap moisture from daily living.
How To Inspect Effectively
Pull furniture away from walls at least once a month. Shine a bright light along baseboards and corners. Look for black, green, or white spots and sniff for a damp, earthy smell.
What To Do If You Find Mold
Small patches can be wiped with a vinegar solution or hydrogen peroxide. For larger areas, consider a commercial mold cleaner. Improve airflow by rearranging furniture or adding a small fan.
20. Know When to Call a Professional
Not every mold problem is a DIY job. If the affected area is larger than 10 square feet—about the size of a 3×3 foot patch—or you suspect toxic black mold (Stachybotrys chartarum), it's time to bring in a certified mold remediation specialist. These pros have the equipment, training, and containment protocols to handle serious infestations safely.
Attempting to clean large mold colonies yourself can release thousands of spores into the air, making the problem worse and putting your health at risk. Professionals use negative air pressure, HEPA filtration, and industrial-grade antimicrobials to remove mold without spreading it. They also know how to identify hidden mold inside walls, under flooring, or in HVAC systems.
If anyone in your home has asthma, allergies, or a weakened immune system, professional help is even more critical.
Red Flags That Say 'call A Pro'
Look for these signs: mold covering more than a 3×3 foot area, a strong musty odor that won't go away, visible mold after repeated cleaning, or water damage that's been ignored for weeks. Also, if you see black or dark green mold with a slimy texture, it could be toxic. Don't guess—get a professional assessment.
How To Choose A Reliable Specialist
Search for certified mold remediators through the Institute of Inspection, Cleaning and Restoration Certification (IICRC) or the National Organization of Remediators and Mold Inspectors (NORMI). Ask for references, check online reviews, and get multiple quotes. A good pro will inspect first, provide a written plan, and explain containment and drying steps before any cleaning begins.
FAQ
Can I use bleach to kill mold on walls?
Bleach is effective on non-porous surfaces like tile, but not on porous materials like drywall or wood. It only kills surface mold and may allow regrowth deeper within.
How do I prevent mold from coming back after cleaning?
Keep humidity below 50%, fix leaks, improve ventilation, and use mold-resistant paint. Regular cleaning and drying of damp areas also help.
Is black mold dangerous?
Some black mold (Stachybotrys) can produce toxins that cause respiratory issues. If you suspect toxic black mold, consider professional removal.
What natural ingredients kill mold?
White vinegar, hydrogen peroxide, baking soda, tea tree oil, and borax are effective natural mold killers. They are safer than harsh chemicals.
How often should I check for mold in my home?
Inspect high-moisture areas like bathrooms, kitchens, and basements monthly. After heavy rain or plumbing issues, check more frequently.
Conclusion
Mold doesn't have to be a permanent problem. With these 20 tips, you can clean existing mold and create an environment where it struggles to grow. Start with the simplest fixes—like vinegar and better ventilation—and work your way up.
Your walls and corners will thank you, and so will your lungs. A mold-free home is a safer, healthier place to live. Take it one step at a time, and you'll see real results.


