You vacuum the floors and wipe down counters every week, but grime still builds up in places you rarely think about. That sticky residue on cabinet doors, the dust lurking behind the fridge, and the soap scum on shower walls—they all need a deeper approach.
Deep cleaning isn't about scrubbing harder; it's about targeting the spots that routine cleaning misses. A full home refresh doesn't have to take a whole weekend if you break it into manageable tasks.
These 25 ideas will guide you through every room, focusing on the areas that collect the most hidden dirt. You'll end up with a home that feels genuinely clean, not just tidy.
1. Degrease Kitchen Cabinet Doors
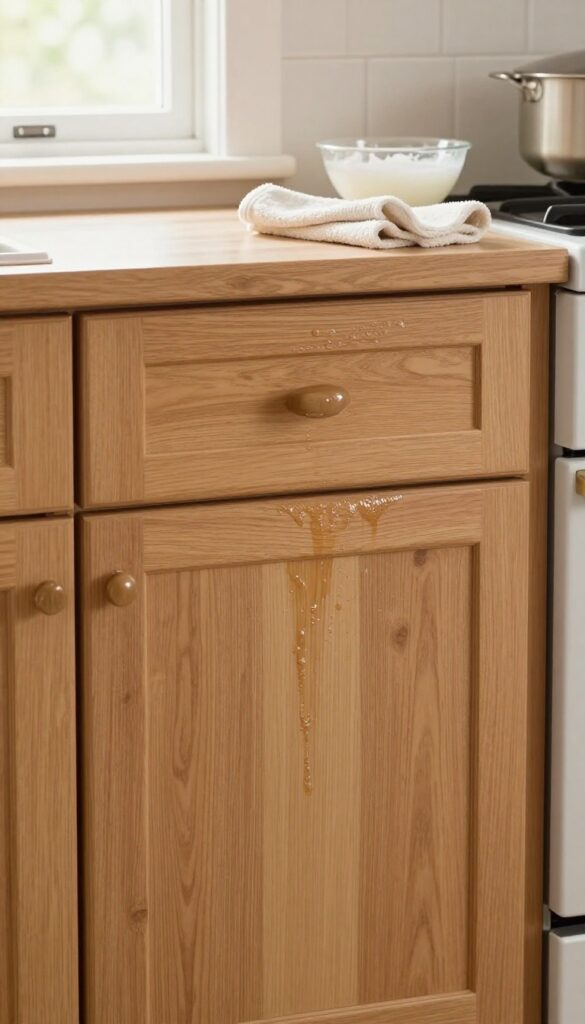
Kitchen cabinets are magnets for grease and grime, especially the ones near the stove. Over time, cooking oils and steam create a sticky film that traps dust and dulls the finish. A proper degreasing session restores their original look and prevents buildup from hardening into stubborn residue.
You don't need harsh chemicals to cut through kitchen grease. A simple solution of warm water and a few drops of dish soap works wonders. For tougher spots, add a splash of white vinegar or a teaspoon of baking soda.
Work from top to bottom, and don't forget the handles and edges where grime hides.
What You'll Need
Grab a bucket of warm water, mild dish soap, a soft microfiber cloth, and an old toothbrush for crevices. White vinegar or baking soda can boost cleaning power for stubborn areas. Avoid abrasive sponges that might scratch the cabinet finish.
Step-by-step Cleaning
Start by wiping down the top edges of the cabinets, then move to the doors and handles. Use the toothbrush dipped in soapy water to scrub around hinges and corners. Rinse the cloth frequently and dry the surfaces with a clean towel to prevent water spots.
Maintenance Tips
To keep cabinets cleaner longer, wipe them down weekly with a damp cloth. Install a range hood to reduce airborne grease. For wood cabinets, apply a furniture polish or wood conditioner every few months to protect the finish.
2. Descale the Coffee Maker
Your coffee maker works hard every morning, but mineral deposits from tap water slowly build up inside. That buildup doesn't just affect performance—it can make your coffee taste bitter or flat. Descaling is a simple fix that restores both flavor and efficiency.
Over time, calcium and limescale accumulate in the water reservoir and internal tubing. This forces the machine to work harder and can lead to clogs or uneven brewing. A regular descaling routine keeps your coffee maker running smoothly and extends its lifespan.
Why Vinegar Works Best
White vinegar is a mild acid that dissolves mineral deposits without harsh chemicals. It's cheap, readily available, and safe for most coffee makers. Just mix equal parts water and white vinegar—enough to fill the reservoir.
Step-by-step Descaling Process
Pour the vinegar-water solution into the reservoir and start a brew cycle. Once it finishes, let the machine sit for 15-20 minutes to let the vinegar work. Then run two full cycles with fresh water to rinse out any vinegar taste.
How Often To Descale
If you have hard water, descale every month. For soft water, every three months is enough. A good rule of thumb: if your coffee starts tasting off or the brew cycle takes longer, it's time to descale.
3. Scrub the Oven Interior
Ovens take a beating. Every spill, splatter, and drip bakes into a stubborn layer that eventually smokes and smells every time you preheat. The good news is you don't need harsh chemicals to cut through that buildup.
A simple paste made from baking soda and water does the heavy lifting with zero fumes.
Start by removing the oven racks and any loose debris. Mix a thick paste of baking soda and water—about three parts baking soda to one part water—and spread it over the interior surfaces, avoiding the heating elements. Let it sit overnight so the paste can break down the baked-on grease.
The next day, spray the dried paste with white vinegar to create a gentle fizzing reaction. Wipe everything clean with a damp cloth, rinsing frequently. For extra-stubborn spots, use a plastic scraper or a non-scratch scrub pad.
The racks can soak in a sink full of hot water and dish soap while you work.
Why Baking Soda Works Best
Baking soda is mildly abrasive, so it scrubs without scratching the oven's enamel coating. It also neutralizes acidic food residues and absorbs odors. Combined with the vinegar reaction, it lifts grime that commercial cleaners often require multiple applications to remove.
How To Prevent Future Buildup
Place a baking sheet on the lower rack to catch drips from pies, casseroles, or roasted vegetables. Wipe up spills as soon as the oven cools, before they bake on again. A quick monthly wipe-down with a damp cloth will keep the interior fresh and reduce the need for deep scrubbing.
What About Self-cleaning Ovens?
Self-cleaning cycles can work, but they generate intense heat and smoke, and the process can be hard on oven components. Many manufacturers now recommend using the manual baking soda method instead. It's safer, more energy-efficient, and just as effective.
4. Wash Refrigerator Coils
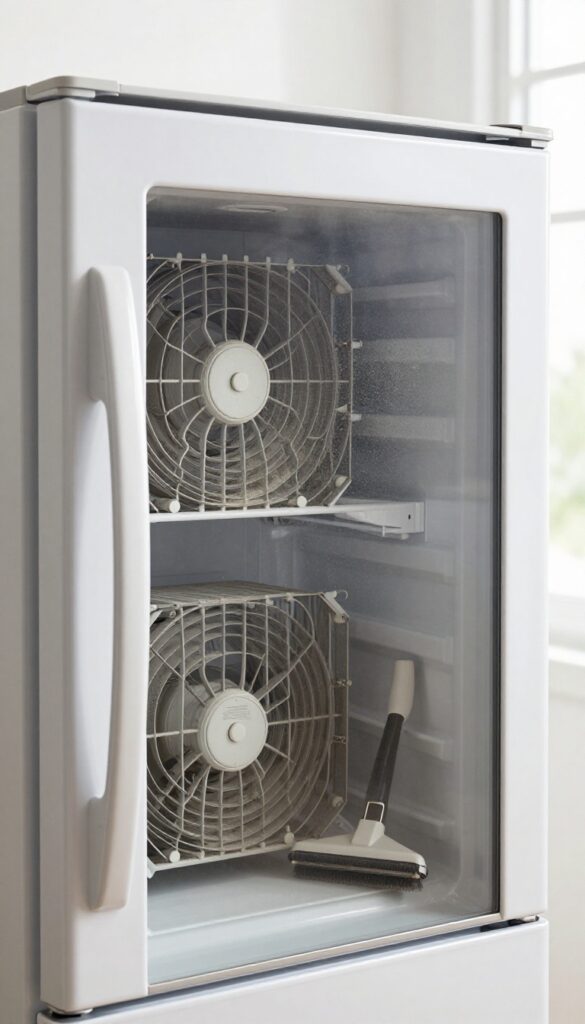
Your fridge runs all day, every day, but those coils in the back or underneath rarely get any attention. When they're caked with dust, the compressor has to work overtime, which hikes up your electric bill and shortens the appliance's life. Cleaning them is a quick win for both efficiency and longevity.
Why It Matters
Dirty coils force the fridge to run longer and harder, using more energy. According to some estimates, cleaning them can improve efficiency by up to 30%. That translates to noticeable savings on your utility bill and a cooler, more consistent temperature inside.
What You'll Need
You only need a vacuum with a brush attachment, a coil cleaning brush (optional but handy), and a flashlight. Unplug the fridge first for safety. If your coils are underneath, remove the front grille—usually it snaps off or requires a screwdriver.
Step-by-step Cleaning
Vacuum the coils thoroughly, working from top to bottom if they're on the back, or side to side if they're underneath. Use the brush attachment to loosen stubborn dust, then vacuum again. Don't forget to clean the floor area under the fridge while you're at it.
Replace the grille and plug the fridge back in.
How Often To Do It
Aim for every six months. If you have pets that shed a lot, check them every three months. Set a reminder on your phone—it's easy to forget, but the payoff is worth it.
5. Sanitize the Kitchen Sink Drain
Your kitchen sink drain sees it all—food scraps, soap, grease. Over time, a biofilm of bacteria builds up inside the pipes, causing funky smells and even attracting fruit flies. A quick scrub on the surface won't fix what's lurking below.
This deep-cleaning trick uses common pantry staples to neutralize odors and kill germs without harsh chemicals.
Pour about half a cup of baking soda down the drain, then follow with a cup of white vinegar. The fizzing reaction helps dislodge gunk and deodorize. Let it sit for 10 minutes—longer if the smell is strong.
While you wait, scrub the drain stopper with an old toothbrush and dish soap. Finally, boil a kettle of water and flush the drain slowly to wash away residue. Do this once a month to keep your sink fresh.
Why The Drain Needs Special Attention
The dark, damp environment inside pipes is perfect for bacteria and mold. Even if your sink looks clean, the drain can harbor E. coli and other pathogens. Routine dishwashing doesn't generate enough heat or agitation to sanitize that area, so a targeted treatment is necessary.
Step-by-step: The Baking Soda And Vinegar Method
Start by removing any visible debris from the drain. Pour 1/2 cup baking soda directly into the opening. Follow with 1 cup white vinegar.
Cover the drain with a plug or a damp cloth to keep the fizz inside. Wait 10 minutes. Meanwhile, scrub the rubber gasket and stopper with a brush.
Then boil a full kettle of water and pour it down the drain slowly to flush everything out.
Extra Tips For Stubborn Odors
If smells persist, try adding a few drops of lemon essential oil to the baking soda before pouring. You can also drop a couple of lemon peels down the garbage disposal and run it with cold water for a fresh scent. For serious buildup, repeat the process weekly until the odor is gone.
6. Remove Soap Scum from Shower Doors
Shower doors take the brunt of daily use, and over time, hard water and soap combine to form a stubborn, cloudy film. That haze doesn't just look unappealing—it can make your whole bathroom feel dingy. The good news is you don't need harsh chemicals to cut through it.
Why Vinegar Works Best
White vinegar is acidic enough to dissolve mineral deposits without damaging glass. A 50/50 mix with water creates a safe, effective spray. Let it sit for 15 minutes to break down the scum, then scrub gently with a non-abrasive pad.
Rinse thoroughly and dry with a microfiber cloth to prevent new spots.
Tackling Stubborn Build-up
For doors that haven't been cleaned in a while, you might need a second application. After the first round, if residue remains, spray again and use a razor blade scraper at a 45-degree angle. Keep the glass wet to avoid scratches.
Finish with a squeegee to remove all traces of solution.
Preventing Future Scum
Once your doors are sparkling, maintain them with a daily or weekly routine. After each shower, use a squeegee to wipe down the glass—this takes seconds and stops minerals from settling. For extra protection, apply a glass sealant designed for showers every few months.
7. Deep Clean Grout Lines

Grout might seem like a minor detail, but it's one of the first places your bathroom or kitchen starts to look worn. Porous by nature, grout absorbs moisture, soap scum, and dirt, turning from light to dark over time. The good news is you don't need harsh chemicals to bring it back to life—just a little elbow grease and common pantry staples.
Start by mixing baking soda and water into a thick paste. Apply it generously over the grout lines, then grab an old toothbrush and scrub firmly. Once you've worked the paste in, spray white vinegar over the area—it will fizz and lift the grime.
Let it sit for five minutes, then rinse with warm water and wipe dry. For stubborn stains, add a few drops of dish soap to the paste or use a grout brush with a handle for larger areas.
Why Grout Gets So Dirty
Grout is essentially cement, which means it's full of tiny pores. Every time water hits your tiles, some of it seeps into those pores, carrying soap residue, body oils, and dust. Over time, this mixture dries and hardens, creating a dark film that regular mopping can't remove.
That's why a targeted scrub is necessary.
The Baking Soda And Vinegar Method
This combo is a classic for a reason. Baking soda is a mild abrasive that scrubs without scratching, while vinegar cuts through grease and dissolves mineral deposits. Together they create a chemical reaction that helps lift embedded dirt.
Just remember to rinse thoroughly afterward, as leftover residue can attract more dirt.
Preventing Future Grime
Once your grout is clean, seal it with a grout sealer to create a protective barrier. This makes future cleaning much easier—dirt and moisture won't penetrate as deeply. Reapply the sealer every six months, and in between, wipe down tiled surfaces after showers to reduce standing water.
8. Wash Shower Curtain and Liner
Plastic liners and fabric curtains collect soap scum, mildew, and mold over time. A quick wipe-down between showers isn't enough to keep them truly clean. Giving them a proper wash makes your bathroom feel fresher and helps prevent musty odors.
Start by removing the curtain and liner from the hooks. Check the care label on fabric curtains—most can go in the washing machine with a regular detergent and a half-cup of baking soda. Add a few towels to the load to help scrub the fabric gently.
For plastic liners, machine washing can cause tearing, so hand scrubbing is safer. Lay the liner flat, sprinkle baking soda over soap scum spots, spray with white vinegar, and scrub with a soft brush. Rinse thoroughly in the shower with warm water.
Rehang both to dry completely before folding or storing to prevent mildew growth.
Machine Wash Fabric Curtains
Remove the curtain and toss it in the washing machine with warm water and your regular detergent. Add half a cup of baking soda to boost cleaning and deodorize. Including a couple of bath towels helps agitate the fabric and scrub away grime.
Run a gentle cycle, then hang the curtain back up to air dry—avoid the dryer to prevent shrinkage.
Hand Scrub Plastic Liners
Plastic liners are too delicate for the washing machine. Instead, lay the liner flat on a clean surface or keep it hanging in the shower. Sprinkle baking soda over any soap scum or mold spots, then spray with white vinegar until it fizzes.
Let it sit for 10 minutes, then scrub with a soft brush or sponge. Rinse thoroughly with warm water from the showerhead.
Prevent Future Buildup
After washing, always let the curtain and liner dry fully before folding or closing them. Pull the liner taut after each shower to help water run off instead of pooling. Spraying the liner weekly with a mix of water and a few drops of tea tree oil can inhibit mold growth without harsh chemicals.
9. Disinfect Toothbrush Holders
Your toothbrush holder sits in a warm, damp bathroom environment, making it a perfect spot for bacteria, mold, and even toothpaste residue to accumulate. Every time you grab your brush, you could be transferring germs right back into your mouth. It's one of those items we rarely think to clean, but it deserves regular attention.
Toothbrush holders often have narrow openings that trap moisture and debris, creating a breeding ground for microbes. A simple rinse isn't enough to kill bacteria. You need a deeper clean to ensure your oral hygiene routine isn't compromised by a dirty holder.
The good news is that disinfecting them is quick and easy with items you already have at home.
Soak In Hot, Soapy Water
Fill a sink or bowl with hot water and add a few drops of dish soap. Submerge the toothbrush holder completely and let it soak for at least 10 minutes. Use a small brush—like a bottle brush or an old toothbrush—to scrub the inside and outside, especially around the openings.
Rinse thoroughly with clean water and let it air dry completely before putting your toothbrushes back.
Dishwasher Method For Safe Materials
Check if your toothbrush holder is dishwasher-safe (most ceramic, glass, and plastic ones are). Place it on the top rack and run a hot cycle with your regular detergent. The high heat and detergent will sanitize it effectively.
Avoid this method for holders with metal accents or painted finishes that might chip or fade.
Weekly Maintenance Tips
To keep bacteria at bay between deep cleans, rinse your toothbrush holder with hot water after each use and shake off excess moisture. Store it in a well-ventilated area, away from the toilet to avoid airborne particles. Consider swapping to a holder with individual slots that allow better airflow, reducing moisture buildup.
10. Vacuum Under and Behind Furniture

You might vacuum the middle of the room every week, but the spaces under your sofa, bed, and dresser often get ignored for months. Dust bunnies, pet hair, and lost items accumulate in these dark corners, affecting your indoor air quality and making your home feel less clean. Moving heavy furniture isn't always easy, but there are smart ways to reach those hidden areas without straining your back.
Start With The Sofa And Beds
These are the biggest dust collectors because they sit low and are rarely moved. If you can, slide the sofa or bed away from the wall and vacuum the floor underneath. Use the crevice tool to get along baseboards and corners.
For beds, also vacuum the mattress seams and the bed frame to remove dust mites and allergens.
Tackle Heavy Dressers And Cabinets
For pieces that are too heavy to shift, use a flat, extendable duster or a microfiber cloth attached to a yardstick. Slide it under the furniture to gather dust. Then follow up with the vacuum's crevice tool to suck up what you loosened.
This method works well for entertainment centers and bookshelves too.
Don't Forget Behind Appliances
Refrigerators, washing machines, and dryers are notorious for trapping dust and lint. Pull them out carefully—use a furniture slider if needed—and vacuum the floor and the back of the appliance. This also helps your appliances run more efficiently by improving airflow.
11. Wash Windows Inside and Out
Natural light transforms a room, but dirty windows block it. Dust, pollen, and smudges build up on glass, making your home feel dimmer than it is. A thorough window wash restores brightness and clarity.
Start by removing dust and cobwebs from the window frame and sill. Mix a few drops of mild dish soap with warm water in a bucket. Dip a squeegee into the solution, then wipe the blade dry.
Starting at the top, pull the squeegee down in a straight line, wiping the blade after each pass. Use a microfiber cloth to catch any drips along the edges. For exterior windows, use a long-handled squeegee or hire a professional for upper floors.
What You'll Need
A squeegee, bucket, mild dish soap, microfiber cloths, and a sponge or soft scrubber. Avoid ammonia-based cleaners on tinted windows.
Pro Tips For Streak-free Glass
Work on a cloudy day to prevent the solution from drying too fast. Use a second clean microfiber cloth to buff away any remaining streaks. Clean window screens separately with a soft brush and soapy water.
How Often To Deep Clean Windows
Aim for twice a year, but if you live near a busy road or in a dusty area, quarterly cleaning keeps them clear.
12. Clean Light Fixtures and Ceiling Fans
Ceiling fans and light fixtures are dust magnets that often get overlooked during routine cleaning. Over time, dust buildup on fan blades reduces airflow and spreads allergens every time you turn them on. Light shades also collect grime that dims the brightness in your room, making it feel darker than it actually is.
Dust Fan Blades The Right Way
Use a microfiber cloth or an old pillowcase to trap dust instead of just pushing it into the air. Wipe each blade from the center out, and if there's heavy buildup, use a mild all-purpose cleaner. For ceiling fans that haven't been cleaned in a while, you might need to go over them twice.
Wash Glass Shades And Covers
Remove glass shades from your fixtures and soak them in warm, soapy water for about 10 minutes. Gently scrub with a soft sponge to remove yellowed residue or bug debris. Rinse thoroughly and let them air dry completely before reattaching to avoid water spots.
Don't Forget The Bulbs And Hardware
Wipe exposed bulbs with a dry microfiber cloth—never wet, to avoid breakage. Dust the fixture's base and any decorative metal parts with a damp cloth. This simple step can noticeably brighten a room without changing a single bulb.
13. Dust Baseboards and Crown Molding
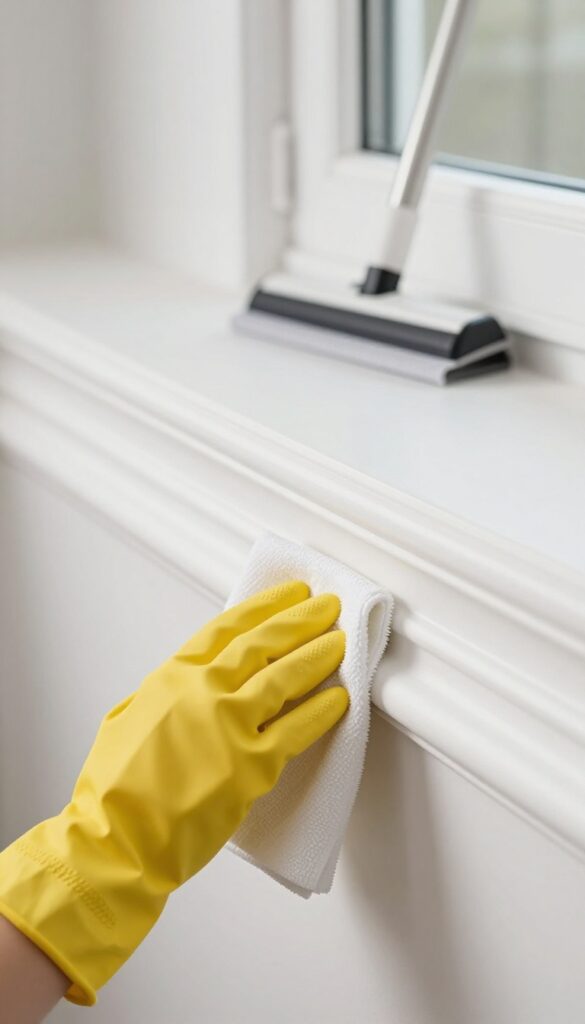
Baseboards and crown molding are like the unsung heroes of your walls—they frame the room but often get ignored until they're visibly grimy. Over time, they collect dust, cobwebs, and scuff marks that make even a clean room look dingy. The good news is that cleaning them is quick and doesn't require any fancy tools.
Start by vacuuming the baseboards with a soft brush attachment to remove loose dust and cobwebs. Then, wipe them down with a damp microfiber cloth—plain water works for light dust, but for scuff marks, a little dish soap or all-purpose cleaner does the trick. For crown molding, use a microfiber duster on an extension pole to reach high spots without climbing a ladder.
A dryer sheet is a game-changer: after cleaning, rub it along the baseboards to create a static-repelling layer that keeps dust away longer. Make this a monthly habit, and you'll notice how much fresher your rooms look.
Why Baseboards Get So Grimy
Baseboards are at floor level, so they catch dust kicked up from walking, pet dander, and even carpet fibers. Crown molding, being high up, collects airborne dust and cobwebs that settle over time. Both are out of the line of sight, so they're easy to overlook during weekly cleaning.
The Best Tools For The Job
A microfiber cloth is your best friend—it traps dust instead of pushing it around. For tight corners, use a soft-bristled brush or an old toothbrush. A dryer sheet is a clever trick: its anti-static properties help repel dust, so you don't have to clean as often.
For high crown molding, a telescoping duster with a microfiber head saves you from balancing on a chair.
How To Prevent Future Dust Buildup
After cleaning, spray a thin layer of furniture polish or a mixture of water and fabric softener onto a cloth and wipe the baseboards. This creates a protective barrier that dust slides off. Also, vacuum or sweep floors more frequently—less dust on the floor means less dust on the baseboards.
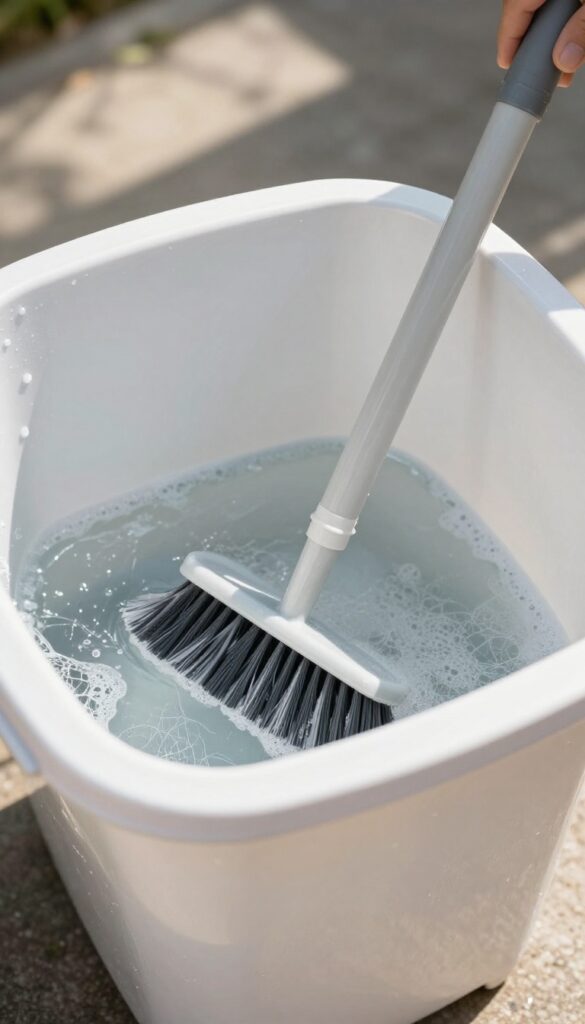
14. Deep Clean Carpets and Rugs
Carpets are like sponges for dirt, allergens, and odors. Even with regular vacuuming, deep-set grime builds up in the fibers, especially in high-traffic areas and near entryways. A thorough carpet cleaning not only refreshes the look of your floors but also improves indoor air quality.
Rent a steam cleaner or use a carpet shampooer for best results. Focus on high-traffic zones like hallways, living room paths, and spots under furniture. Pre-treat stains with a carpet cleaner or a DIY solution of vinegar and water.
Work in sections, overlapping passes to avoid streaks, and let the carpet dry completely before walking on it. For area rugs, consider taking them outside for a shake or using a rug cleaner attachment.
Pre-treat Stains And High-traffic Areas
Before you start the deep clean, spot-treat any visible stains with an appropriate cleaner. For high-traffic areas, apply a carpet pre-spray or a mixture of water and mild detergent. Let it sit for 5-10 minutes to loosen dirt, then agitate with a brush or the machine's attachment.
Use The Right Machine And Technique
Rent a steam cleaner from a hardware store or use a home carpet shampooer. Fill with hot water and the recommended cleaning solution. Move the machine slowly over the carpet, making two passes: one with solution and one with just water to rinse.
Avoid oversaturating, as too much moisture can lead to mold or mildew.
Dry Thoroughly To Prevent Odors
After cleaning, open windows or turn on fans to speed up drying. Avoid walking on the carpet until it's completely dry, which can take 6-12 hours. Place towels or mats at doorways to prevent dirt from being tracked onto the damp carpet.
15. Wash Throw Pillow Covers and Blankets
Decorative pillows and throw blankets add warmth and style to your living room, but they also trap dust, pet dander, and body oils. Over time, that cozy look can turn into a hidden source of allergens. Giving them a proper wash not only freshens up the room but also extends their life.
Check The Care Label First
Before tossing anything in the wash, look at the tag. Many pillow covers are machine washable on a gentle cycle, but some require hand washing or dry cleaning. Blankets vary too—wool and cashmere need special care.
When in doubt, spot clean with a mild detergent to avoid damage.
Machine Washing Tips
For machine-washable items, zip pillow covers closed to prevent snagging. Use cold water and a gentle cycle with a small amount of detergent. Avoid fabric softener—it can break down fibers and reduce fluffiness.
Dry on low heat or air dry to keep the shape intact.
Spot Cleaning For Delicates
If the item is too delicate to wash, spot clean with a damp cloth and mild soap. For stubborn stains, make a paste of baking soda and water, apply it, let it sit for 15 minutes, then gently blot. Always test on an inconspicuous area first.
How Often To Do This
Aim to wash throw pillow covers and blankets every two to three months. If you have pets or allergies, increase frequency to once a month. Regular cleaning keeps them fresh and reduces dust buildup in your living space.
16. Organize and Wipe Out Kitchen Drawers
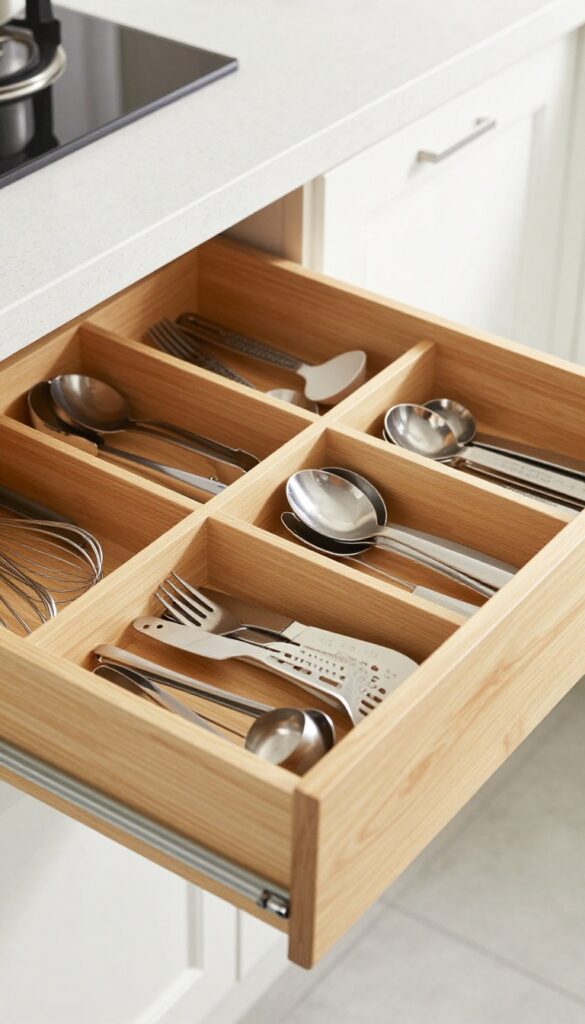
Kitchen drawers are prime real estate for crumbs, sticky spills, and mismatched utensils. Over time, they become a catchall for clutter and grime that regular wipe-downs miss. A thorough clean-out not only makes your drawers look better but also helps you find what you need faster.
Start by removing everything from each drawer. Toss expired coupons, broken gadgets, and duplicate spatulas. Vacuum the drawer interior with a crevice tool to pick up crumbs and debris.
Then wipe down all surfaces with a damp cloth and mild cleaner, paying extra attention to corners and edges where sticky residue hides. Let drawers dry completely before reorganizing.
Sort And Declutter First
Before cleaning, group similar items together—utensils, gadgets, measuring tools. Donate or discard anything you haven't used in the past year. This step makes the actual cleaning easier and prevents you from putting back junk.
Deep Clean The Drawer Interior
Use a vacuum with a brush attachment to remove loose debris. Follow up with a spray of all-purpose cleaner or a vinegar-water solution. For stubborn sticky spots, let the cleaner sit for a minute before wiping.
Dry thoroughly to prevent warping or mold.
Reorganize With Dividers
Invest in adjustable drawer dividers or use small bins to separate categories. Place frequently used items near the front. Consider a cutlery tray for silverware and a dedicated section for cooking utensils.
This keeps drawers tidy and functional.
17. Clean Behind the Toilet
The gap between the toilet and the wall is a prime hiding spot for dust bunnies, hair, and mystery grime. Because it's hard to see and reach, it often gets skipped during regular bathroom cleaning. A few simple tools can make this awkward area spotless without straining your back.
Start by removing any items stored near the toilet, like a trash can or toilet brush holder, so you have clear access. Use a long-handled duster with an extendable pole to sweep the floor and wall behind the toilet. For stubborn grime, attach a microfiber cloth to a ruler or yardstick with a rubber band, then wipe the area.
If the buildup is heavy, spray the cloth with an all-purpose cleaner before wiping. Finish by vacuuming the floor with a crevice tool to catch any loose debris.
Tools That Make It Easy
A long-handled duster is your best friend here—it reaches deep without you having to crouch. A microfiber cloth wrapped around a ruler works great for tight spaces. If you have a steam cleaner, use the angled nozzle to blast away grime without scrubbing.
Prevent Future Buildup
Once it's clean, consider placing a slim wastebasket or a small shelf in front of the gap to block dust from accumulating. Alternatively, give the area a quick sweep with your duster every time you clean the toilet—it only takes a few seconds.
18. Wash Bathroom Rugs and Mats
Bathroom rugs and mats do a lot of work—they soak up water, catch dirt, and keep your feet warm. But all that moisture makes them a breeding ground for bacteria and mildew. A quick shake or vacuum isn't enough; they need a proper wash to stay fresh and hygienic.
Most bathroom mats can go in the washing machine, but check the care tag first. Use hot water and a good dose of detergent to kill germs and break down soap residue. Skip the fabric softener—it can coat the fibers and reduce absorbency.
After washing, dry thoroughly on high heat or in the sun until completely dry. Even a little leftover dampness can lead to musty smells.
How Often To Wash
Aim to wash bathroom rugs every one to two weeks, depending on use. If your mat sits right outside the shower, it gets wet multiple times a day—weekly washing is best. In a guest bathroom that sees less traffic, every other week is fine.
Dealing With Stubborn Odors
If your mat still smells after washing, add a cup of white vinegar to the rinse cycle. Vinegar neutralizes odors and helps remove leftover detergent buildup. For really stubborn smells, let the mat soak in a vinegar-water solution for 30 minutes before running a full cycle.
Drying Tips For Fluffy Mats
Thick, plush mats take longer to dry and can trap moisture in the middle. Tumble dry on low heat with a couple of clean tennis balls or dryer balls to fluff the fibers. If air drying, hang the mat over a railing or drying rack, flipping it occasionally so both sides dry evenly.
19. Wipe Down Walls and Switch Plates
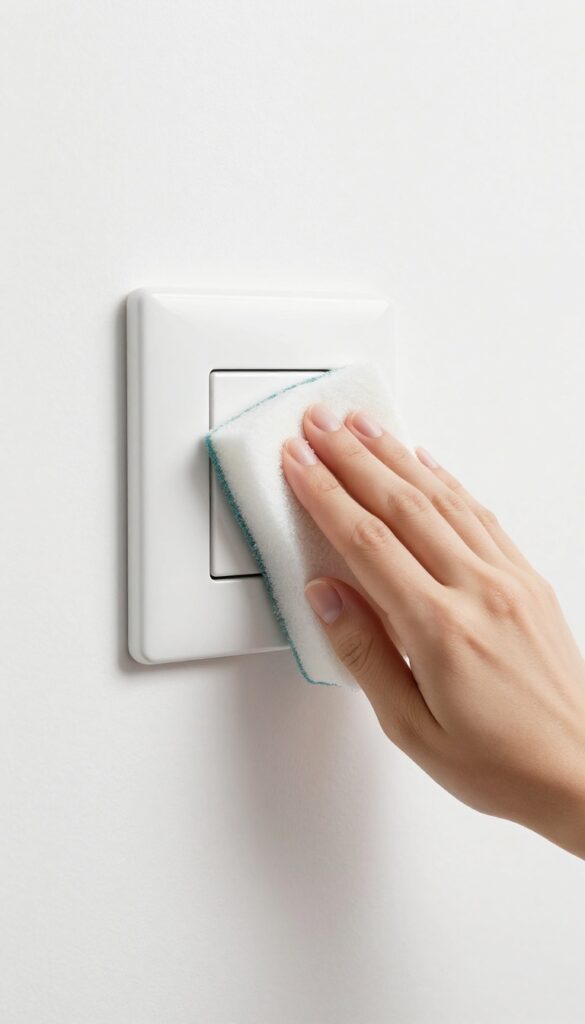
Walls don't get nearly enough attention during regular cleaning, but they collect dust, fingerprints, and scuffs over time. Light switches and door frames are especially grimy because hands touch them constantly. A quick wipe-down makes a surprising difference in how fresh a room feels.
Start by dusting walls with a microfiber cloth or a vacuum brush attachment to remove loose dirt. Then mix a small amount of mild dish soap with warm water. Dip a soft sponge, wring it well, and gently scrub spots in a circular motion.
Avoid soaking the wall—too much moisture can damage paint. Rinse with a clean damp cloth and dry with a towel. For switch plates, unscrew them carefully and wash separately in soapy water, then dry completely before reattaching.
This prevents water from seeping into the electrical box.
What You'll Need
Grab a microfiber cloth, a soft sponge, mild dish soap, a bucket of warm water, a screwdriver (for switch plates), and a dry towel. Optional: a magic eraser for stubborn marks on washable paint.
Pro Tips For Best Results
Test any cleaner on a hidden spot first to ensure it doesn't damage the paint. Use a separate cloth for rinsing to avoid leaving soap residue. For high-touch areas like light switches and door edges, consider adding a quick wipe to your weekly routine—it takes less than a minute per switch.
20. Clean Inside the Microwave
Microwaves take a beating from splattering food, and those dried-on bits can get stubborn. The good news is you don't need harsh chemicals or elbow grease to get it sparkling. A simple steam trick does the job in minutes.
The Lemon Steam Method
Fill a microwave-safe bowl with water and add a few slices of lemon or a splash of vinegar. Microwave on high for 3 minutes until the mixture comes to a boil and steams up the interior. Let it sit for 2 more minutes without opening the door so the steam can loosen the grime.
Wipe Away The Mess
Carefully remove the hot bowl using oven mitts. The interior will be warm and moist, making it easy to wipe down with a soft cloth or sponge. All those crusty food bits should come off without scrubbing.
For stubborn spots, dip the cloth in the lemon water and let it sit for a minute.
Don't Forget The Turntable And Door
Take out the glass turntable and wash it with warm soapy water, or run it through the dishwasher if it's safe. Wipe the door seal and the outside of the microwave with a damp cloth. A clean microwave not only looks better but also heats food more evenly.
21. Vacuum Upholstery and Mattresses
Your sofa and bed might look clean, but they're actually dust mite hotels. Dead skin cells, pet dander, and dust settle deep into the fibers. An upholstery attachment makes quick work of it, but you need to be thorough.
Remove all cushions and vacuum every surface, including the back, arms, and base. For mattresses, strip the bedding and vacuum the top, sides, and seams. Pay extra attention to crevices where debris hides.
Why It Matters
Dust mites thrive in upholstery and mattresses. Regular vacuuming reduces allergens and keeps your furniture fresher longer.
How To Do It Right
Use the crevice tool for edges and seams. Go over each area slowly, overlapping strokes. For mattresses, flip it and vacuum both sides if possible.
How Often
Aim to vacuum upholstery monthly and mattresses every season. More often if you have pets or allergies.
22. Wash Trash Cans Inside and Out
Trash cans are workhorses that rarely get a proper cleaning. Even with a liner, spills, leaks, and sticky residues build up over time, creating odors and attracting pests. A deep scrub of your bins—both kitchen and bathroom—makes a noticeable difference in how fresh your home smells.
Start by taking the cans outside. Remove any remaining trash and rinse them with a hose to loosen debris. Apply a disinfectant cleaner or a mixture of dish soap and hot water.
Scrub the inside and outside with a stiff brush or sponge, paying attention to the bottom and lid. Rinse thoroughly and let them dry completely in the sun before relining. Sunlight helps kill bacteria and eliminate odors naturally.
Why It Matters
Trash cans are a breeding ground for bacteria and mold, especially in damp environments like the kitchen. Regular cleaning prevents foul smells from permeating the room and reduces the risk of attracting fruit flies or ants.
Best Cleaning Solutions
Use a bleach solution (1 part bleach to 10 parts water) for deep disinfection, or a vinegar and water mix for a more natural approach. Baking soda can help absorb odors—sprinkle it inside after drying.
Maintenance Tips
Wipe down the inside of your trash can with a disinfectant wipe every time you change the bag. This quick habit keeps buildup minimal and extends the time between deep cleans.
23. Clean Air Vents and Replace Filters
Your HVAC system works hard to keep your home comfortable, but dirty vents and clogged filters sabotage its performance. Dust, pet dander, and pollen build up inside the ducts and blow straight into your living spaces every time the air kicks on. Cleaning your vents and swapping out filters is one of the most impactful deep cleaning tasks you can do—it improves air quality and helps your system run efficiently.
Start by removing all vent covers from floors, walls, and ceilings. Use a screwdriver to take them off and set the screws aside in a small container so you don't lose them. Vacuum the exposed duct opening with a hose attachment to pull out loose dust and debris.
Then wash the vent covers in warm, soapy water and scrub with a soft brush to remove caked-on grime. Rinse thoroughly and let them dry completely before reattaching. While they're off, check your HVAC filter and replace it if it looks dirty or has been more than three months since the last change.
Why Dirty Vents Matter
When vents are caked with dust, every heating or cooling cycle recirculates allergens throughout your home. That can trigger sneezing, coughing, or itchy eyes—especially for anyone with asthma or allergies. Clean vents also help your system move air more freely, which can lower your energy bills.
How To Clean Vent Covers Properly
Fill a sink or bucket with warm water and a few drops of dish soap. Submerge the covers and let them soak for 10–15 minutes to loosen stubborn dirt. Use a soft brush or old toothbrush to scrub the grille slats and corners.
Rinse with clean water and dry with a microfiber cloth or let them air dry on a towel.
Filter Replacement Tips
Check your filter monthly and replace it every 1–3 months depending on usage and whether you have pets. Mark the date on the filter frame with a marker so you remember when it was last changed. Choose a filter with the right MERV rating for your system—higher isn't always better if it restricts airflow.
24. Wipe Down Electronics and Screens
TVs, monitors, laptops, and tablets are magnets for dust, fingerprints, and smudges. Over time, that layer of grime can dull the display and even affect performance. A quick wipe with the wrong cleaner can damage screens, so it's important to use the right tools.
Start by turning off and unplugging the device. This makes smudges easier to see and reduces the risk of electrical shock. Use a dry microfiber cloth to gently remove loose dust.
For stubborn fingerprints, lightly dampen the cloth with distilled water or a 50/50 mix of distilled water and white vinegar. Never spray liquid directly onto the screen—it can seep into edges and cause damage. For keyboards, turn them upside down and tap out crumbs, then use compressed air to blow out debris between keys.
Wipe keys with a cloth slightly dampened with isopropyl alcohol. For remote controls and gaming controllers, use alcohol wipes or a cloth with a bit of rubbing alcohol to disinfect. Let everything air dry fully before plugging back in.
Screen-safe Cleaning Solutions
Avoid glass cleaners, paper towels, or abrasive cloths—they can strip anti-glare coatings or scratch the surface. Stick to microfiber cloths and plain water or a dedicated screen cleaner. For greasy smudges, a tiny drop of dish soap in water works, but rinse the cloth well to avoid residue.
Don't Forget The Ports And Vents
Dust can clog cooling vents and ports, causing devices to overheat. Use a soft brush or compressed air to gently clean USB ports, headphone jacks, and speaker grills. For larger vents on desktop computers, a vacuum with a brush attachment can help—just keep it on low suction.
25. Declutter and Wipe Pantry Shelves

Pantry shelves are often the most neglected surfaces in the kitchen. Crumbs, sticky spills, and expired items accumulate over time, making it harder to find what you need. A thorough reset not only removes grime but also streamlines your cooking routine.
Start by taking everything out of the pantry. Group items by category—canned goods, spices, snacks, baking supplies—and check expiration dates. Toss anything past its prime or that you know you won't use.
While the shelves are empty, vacuum up crumbs and dust, then wipe down each shelf with a damp cloth and mild cleaner. Pay special attention to corners and edges where debris hides. Once dry, line shelves with easy-to-clean shelf liners or non-slip mats.
When you put items back, arrange them with the oldest in front and group like items together. Use clear bins or baskets for small packets and loose items. This makes grabbing ingredients quick and keeps the pantry tidy longer.
Toss And Sort
Empty every shelf and inspect each item. Check expiration dates and look for signs of pests or damage. Discard anything expired, stale, or unlikely to be used.
Group remaining items by type—canned goods, pasta, snacks, baking supplies—to make reorganization easier.
Scrub And Sanitize
Vacuum crumbs and dust from shelves and corners. Wipe down all surfaces with a damp microfiber cloth and a gentle all-purpose cleaner or vinegar solution. Don't forget the door racks and the floor of the pantry.
Let everything dry completely before putting items back.
Organize For Easy Access
Use clear bins, baskets, or lazy Susans to corral small items and keep similar products together. Place frequently used items at eye level and heavier items on lower shelves. Label shelves or containers if it helps.
Adopt a first-in, first-out system by rotating older items to the front.
FAQ
How often should I deep clean my house?
Aim for a deep clean every 3 to 6 months, depending on your household size, pets, and allergies. High-traffic areas may need more frequent attention.
What's the difference between deep cleaning and regular cleaning?
Regular cleaning focuses on surface-level tasks like sweeping and dusting. Deep cleaning targets hidden grime, such as behind appliances, inside ovens, and in grout lines.
Can I use vinegar on all surfaces?
No. Vinegar is acidic and can damage natural stone, waxed wood, and some electronics. Always test on a small area first.
How do I remove tough oven grease without chemicals?
Make a paste of baking soda and water, spread it over the grease, let it sit overnight, then wipe with a damp cloth. For stubborn spots, use a plastic scraper.
What's the best way to clean grout?
Apply a baking soda paste, spray with vinegar, let it fizz, then scrub with a stiff brush. Rinse with water and dry. For deep stains, use a commercial grout cleaner.
Conclusion
A deep clean doesn't happen overnight, but these 25 ideas give you a clear roadmap to tackle every corner of your home. Start with the areas that bother you most and work through the list at your own pace. Each task you complete makes the next one feel easier.
The result isn't just a cleaner house—it's a space that feels lighter, fresher, and truly yours. Pick one idea this weekend and see how good it feels to make real progress. Your home will thank you.


