A deep bathroom clean goes beyond wiping counters and scrubbing the toilet. It’s about tackling the hidden grime that builds up in corners, grout lines, and shower fixtures over time.
These 23 steps take you from ceiling to floor, leaving every surface refreshed and sanitized. You’ll work through each zone methodically, so nothing gets overlooked.
Ready to give your bathroom the reset it deserves? Let’s dive in.
1. Clear Everything Out
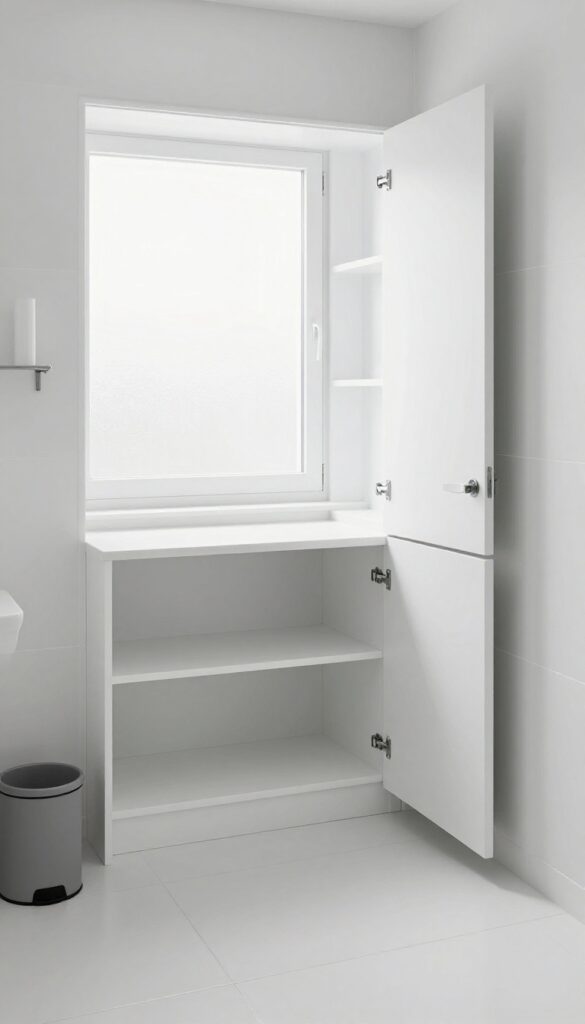
Before you can scrub, you need space. Removing every single item from your bathroom might feel like extra work, but it’s the only way to reach the dirt hiding under bottles, behind the toilet, and along baseboards. Plus, it keeps your shampoo and lotions safe from harsh cleaning chemicals.
Start by taking out all toiletries, towels, bath mats, rugs, and decorative accessories. Empty the shower caddy, medicine cabinet, and vanity drawers. Move small trash cans and hampers out of the room entirely.
This step turns your bathroom into a blank canvas, letting you work faster and more thoroughly without knocking things over or missing spots.
Sort As You Go
While you’re clearing, take a moment to check expiration dates on products. Toss anything that’s old, empty, or unused. Group like items together—hair products, skincare, first aid—so they’re easier to put back later.
This mini-declutter makes your bathroom feel more organized instantly.
Don’t Forget The Floor
Rugs and bath mats trap dust, hair, and moisture. Pull them up and set them aside to wash or shake out later. A bare floor lets you mop or scrub every inch without obstacles.
While you’re at it, check under the sink and behind the toilet for any stray items that rolled out of sight.
2. Dust Ceiling Corners and Light Fixtures
You might not think to look up, but ceilings collect a surprising amount of dust and cobwebs. Over time, that debris can fall onto freshly cleaned surfaces, undoing your hard work. Knocking it out first keeps everything else cleaner longer.
Start With Ceiling Corners And Crown Molding
Attach a microfiber duster or a soft brush to an extendable wand. Gently sweep along the corners where walls meet the ceiling, and pay extra attention to crown molding if you have it. Cobwebs often hide in these spots, so take your time and look from different angles.
If you see stubborn dust, a vacuum with a brush attachment works well too.
Don't Forget Vents And Exhaust Fans
Bathroom vents and exhaust fans are notorious for collecting dust bunnies. Use the same extendable duster to wipe the vent covers, or remove them and rinse with soapy water if they're washable. For ceiling-mounted light fixtures, a dry microfiber cloth is usually enough—just make sure the bulbs are cool to the touch first.
Finish With Light Fixtures And Bulbs
Dust on light bulbs can dim the brightness and make the room feel less clean. Wipe each bulb gently with a dry cloth, and clean the fixture's base and any glass shades. If you have recessed lights, use a duster designed for tight spaces.
This simple step instantly makes the bathroom feel brighter and fresher.
3. Scrub the Walls and Baseboards
Walls and baseboards are easy to overlook, but they collect a surprising amount of bathroom grime. From splashes near the sink to dust bunnies along the floor, these surfaces need a good scrub to truly refresh the room.
Choose The Right Cleaner
A mild all-purpose cleaner or a mix of warm water and dish soap works well for painted walls. Avoid abrasive scrubbers that can damage the finish. For stubborn spots near the toilet or sink, a dab of baking soda paste can lift grime without scratching.
Work Top To Bottom
Start at the top of the wall and work your way down. This prevents dirty water from dripping onto already-cleaned areas. Use a soft sponge or microfiber cloth, and rinse frequently in clean water.
Pay extra attention to the area behind the toilet and around the sink—those spots often get splashed but rarely wiped.
Don't Skip The Baseboards
Baseboards trap dust, hair, and grime that splashes up during cleaning. Wipe them down with the same mild cleaner, using a small brush or old toothbrush to get into corners and along the top edge. A final pass with a dry cloth removes excess moisture and prevents water damage.
4. Deep Clean the Shower Head
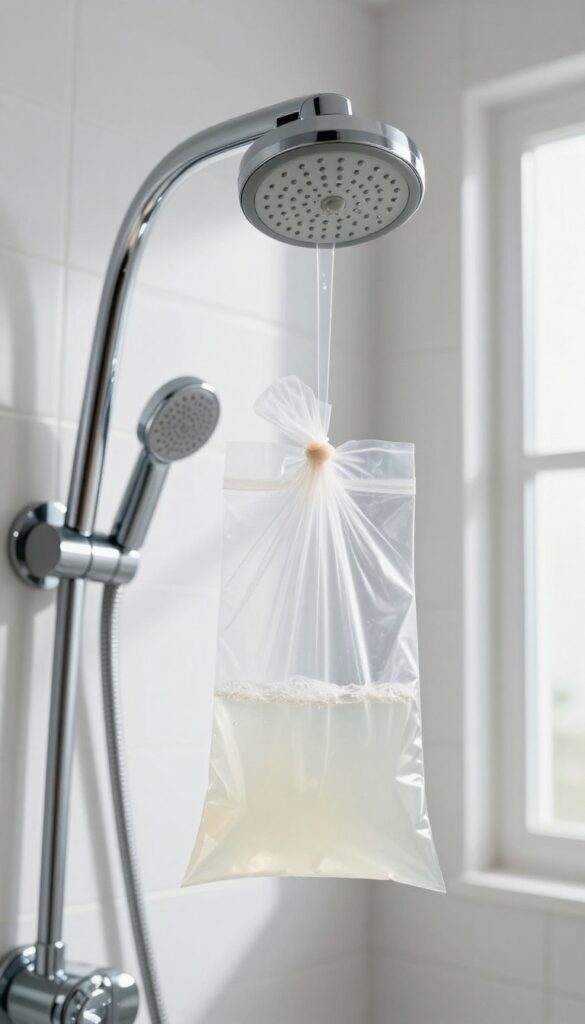
Your shower head works hard every day, but it can get clogged with mineral deposits over time. That buildup not only reduces water pressure but also creates a breeding ground for bacteria. A deep clean restores performance and keeps your shower feeling fresh.
Start by filling a plastic bag with white vinegar and securing it over the shower head with a rubber band. Let it soak overnight to dissolve calcium and lime scale. In the morning, remove the bag and run the shower for a few minutes to rinse away any residue.
For stubborn buildup, gently scrub the nozzles with an old toothbrush. This simple step makes a noticeable difference in water flow and cleanliness.
Why Vinegar Works Best
White vinegar is mildly acidic, which breaks down alkaline mineral deposits without damaging metal or plastic finishes. It’s cheap, non-toxic, and readily available. Avoid harsh chemicals that can corrode the shower head’s surface.
Step-by-step Soaking Method
Fill a quart-sized zip-top bag halfway with white vinegar. Place it over the shower head so the nozzles are fully submerged. Secure the bag with a rubber band or twist tie.
Let it sit for at least 6 hours or overnight. Remove and run hot water for 2 minutes to flush out loosened debris.
Aftercare For Lasting Results
Wipe the shower head dry with a soft cloth to prevent water spots. Repeat this deep clean every 3 to 6 months, depending on your water hardness. Regular maintenance keeps mineral buildup from returning.
5. Tackle Shower Door Tracks
Shower door tracks are a magnet for grime. Soap scum, hard water deposits, and even mold can build up in those narrow grooves, making your glass doors look dirty no matter how much you clean the panels. The good news is you don't need harsh chemicals to get them spotless.
Start by spraying the tracks with white vinegar and letting it sit for a few minutes to loosen the buildup. Then, dip an old toothbrush or a small nylon brush into the vinegar and scrub along the entire length of the track. For stubborn gunk, use a toothpick or a small screwdriver wrapped in a cloth to dig out debris.
Once you've scrubbed, rinse thoroughly with warm water and wipe dry with a microfiber cloth. Keeping the tracks dry after each shower will help prevent future mold and soap scum.
Tools You'll Need
Grab a spray bottle filled with white vinegar, an old toothbrush or small scrub brush, a toothpick or small flathead screwdriver, a microfiber cloth, and a bowl of warm water for rinsing. That's it—no special products required.
Step-by-step Cleaning
First, spray the tracks generously with vinegar and let it sit for 5–10 minutes. Then, dip your brush in vinegar and scrub vigorously along the entire length of the track. Use the toothpick to dislodge any compacted gunk from the corners.
Rinse with warm water by pouring it slowly over the tracks or using a spray bottle. Finally, wipe everything dry with a microfiber cloth to prevent water spots and mildew.
Prevention Tips
After every shower, use a squeegee on the glass doors and wipe the tracks with a dry cloth. This simple habit removes standing water and reduces soap scum buildup. Once a week, spray the tracks with a vinegar solution and let it air dry to keep mold at bay.
6. Clean Glass Shower Doors
Glass shower doors look great when they’re spotless, but hard water stains and soap scum can turn them cloudy fast. A simple DIY solution cuts through that buildup without harsh chemicals. Here’s how to get them sparkling again.
Mix Your Cleaning Solution
Combine equal parts white vinegar and dish soap in a spray bottle. The vinegar breaks down mineral deposits, while the dish soap cuts through soap scum. Shake gently to mix.
Apply And Let It Sit
Spray the solution generously over the glass. Let it sit for 10–15 minutes so it can penetrate the grime. For heavy buildup, you can leave it a bit longer.
Scrub Gently
Use a non-abrasive scrub pad or a soft sponge to work the solution into the glass. Focus on areas with visible spots. Avoid steel wool or harsh scrubbers that could scratch the surface.
Rinse And Squeegee
Rinse the glass thoroughly with warm water. Then use a squeegee to remove all water from the surface. This prevents new spots from forming and leaves a streak-free shine.
7. Scrub Tile and Grout
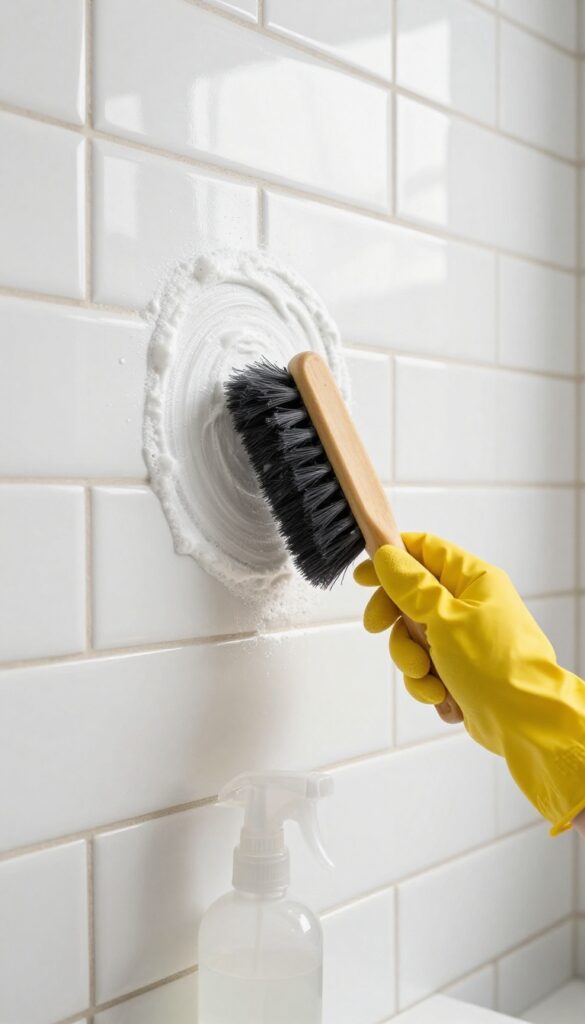
Tile and grout take a beating in a bathroom. Over time, grout lines darken with soap scum, mildew, and mineral deposits. A deep scrub can bring them back to life without harsh chemicals.
Make A Baking Soda Paste
Mix baking soda with a little water until it forms a thick paste. Spread it over the grout lines using an old toothbrush or a grout brush. Let it sit for about 10 minutes to loosen the grime.
Activate With Vinegar
Spray white vinegar directly onto the baking soda paste. It will fizz and bubble, which helps lift dirt from the porous grout. Work in small sections so the mixture stays active.
Scrub And Rinse
Use a stiff-bristled brush to scrub the grout lines in a circular motion. Focus on stained areas. Rinse thoroughly with warm water and wipe the tiles dry.
For stubborn stains, repeat the process or use a grout cleaner.
8. Descale the Faucets and Handles
Faucets and handles see constant contact with water, soap, and hands, making them prime targets for hard water buildup and fingerprints. Over time, mineral deposits form a crusty layer that dulls the finish and makes fixtures look older than they are. Descaling them regularly restores shine and keeps them working smoothly.
Start by soaking a few clean cloths in white vinegar—distilled works best for mineral removal. Wrap one cloth around each faucet base and another around the handles, making sure the vinegar-soaked fabric makes full contact with the deposits. Let them sit for about 15 minutes; the acetic acid in the vinegar breaks down calcium and lime without harsh scrubbing.
After the soak, remove the cloths and gently scrub any remaining residue with a soft sponge or an old toothbrush for tight spots. Rinse thoroughly with water and dry with a microfiber cloth to prevent new water spots. For stubborn buildup, a paste of baking soda and vinegar can be applied with a soft brush before rinsing.
Why Vinegar Works Best
White vinegar is mildly acidic, which dissolves mineral deposits without damaging chrome, stainless steel, or brushed nickel finishes. Unlike commercial descalers, it’s non-toxic, cheap, and safe for septic systems. Just avoid using it on unsealed natural stone or brass fixtures without a protective coating.
Tools You’ll Need
Gather white vinegar, clean microfiber cloths, a soft sponge or toothbrush, and a dry polishing cloth. Optional: a spray bottle for easier application, and rubber bands to hold cloths in place around handles.
Preventing Future Buildup
Wipe down faucets and handles after each use with a dry cloth to remove water droplets before they evaporate and leave minerals behind. Weekly vinegar wipes or a spray-on water spot remover can keep fixtures looking new with minimal effort.
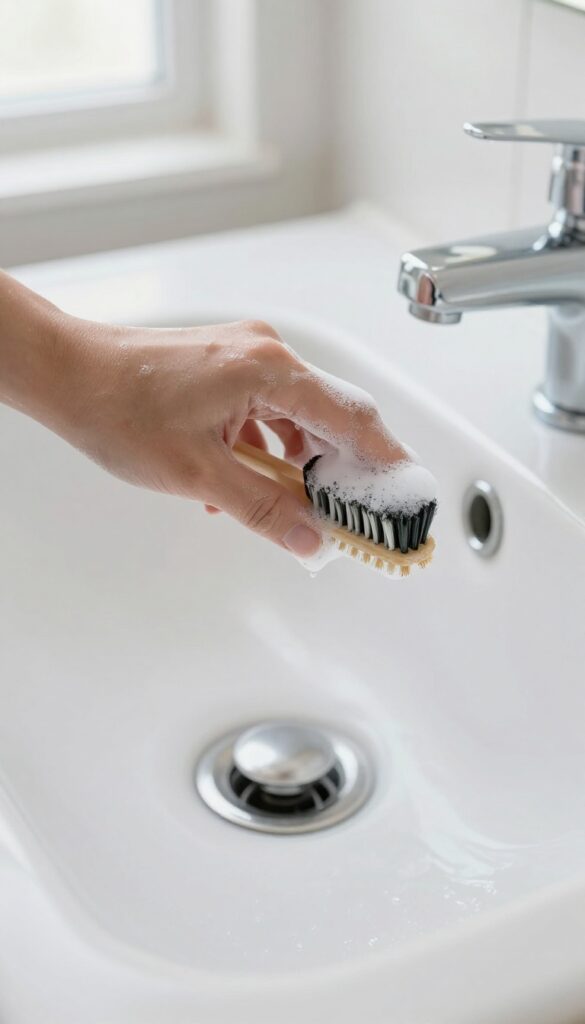
9. Clean the Sink and Countertops
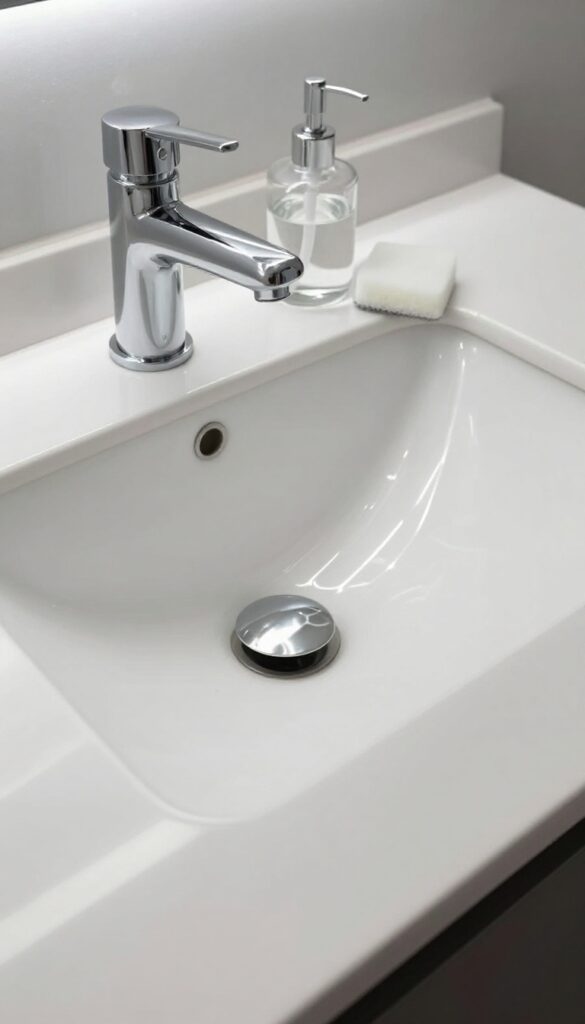
The sink and countertops are workhorses in any bathroom, collecting toothpaste splatters, soap residue, and stray hairs daily. A thorough clean here makes the whole space feel fresher instantly. Focus on the basin, faucet, and surrounding counter area, paying extra attention to the drain and soap dispenser zones where grime loves to hide.
Start With The Right Cleaner
Choose a non-abrasive cleaner to avoid scratching the sink or countertop surface. A gentle all-purpose spray or a mild baking soda paste works well for porcelain, ceramic, or quartz. Avoid harsh chemicals that could damage finishes.
Scrub The Basin And Faucet
Squirt cleaner into the sink and scrub the entire basin with a soft sponge, including the sides and bottom. For the faucet, use a damp cloth to wipe down the body, handle, and base. Don't forget the aerator — unscrew it and soak in vinegar if it's clogged.
Tackle The Drain And Soap Dispenser
The drain area often collects gunk. Use an old toothbrush to scrub around the drain stopper and rim. For the soap dispenser, remove the pump and clean the nozzle and bottle with warm soapy water.
Rinse everything thoroughly.
Finish With Countertops And Backsplash
Wipe down the entire countertop surface, moving items aside to reach every spot. Don't ignore the backsplash or the edge where the counter meets the wall. Dry with a microfiber cloth to prevent water spots.
10. Disinfect the Toilet Exterior
The toilet exterior is a high-touch surface that often gets less attention than the bowl. But germs and grime love to hang out on the tank, lid, seat, and base. A thorough wipe-down with a good disinfectant keeps things sanitary and fresh.
Start by spraying or wiping the toilet tank and lid, then move to the seat (both sides) and the base. Don't forget the flush handle—it's one of the germiest spots in the bathroom. Use a microfiber cloth or disinfectant wipes, and let the surface stay wet for the contact time recommended on the label.
Finally, pull the toilet away from the wall slightly to clean the area behind it, where dust and dirt accumulate.
Choose The Right Disinfectant
Not all cleaners kill the same germs. Look for a disinfectant spray or wipes that are EPA-registered and effective against bacteria and viruses. Bleach-based cleaners work well, but hydrogen peroxide or quaternary ammonium compounds are gentler on surfaces and less harsh on your nose.
Work Top To Bottom
Start at the top of the tank and work your way down to the base. This prevents dirty drips from re-contaminating already cleaned areas. Use a separate cloth for the seat and base to avoid cross-contamination.
Don't Skip The Crevices
The hinges under the seat, the gap between the tank and bowl, and the base where it meets the floor are prime spots for grime. Use a small brush or an old toothbrush to scrub these tight areas before wiping.
11. Deep Clean the Toilet Bowl
The toilet bowl hides stains and bacteria even after regular cleaning. A deep clean removes mineral deposits and discoloration, leaving it truly sanitized. This method uses common household ingredients for a powerful, chemical-free result.
The Baking Soda And Vinegar Reaction
Start by pouring one cup of baking soda into the toilet bowl, followed by one cup of white vinegar. The mixture will fizz vigorously, helping to loosen grime and stains. Let it sit for about 10 minutes to work its magic.
Scrubbing And Flushing
After the fizzing subsides, scrub the entire bowl with a toilet brush, paying extra attention to under the rim and the waterline. Flush to rinse. If stains remain, repeat the process or let the mixture sit longer before scrubbing again.
Tackling Stubborn Stains
For hard water rings or rust stains, make a paste of baking soda and a few drops of water. Apply it directly to the stains, let it sit for 15 minutes, then scrub. You can also use a pumice stone on porcelain bowls, but wet it first to avoid scratching.
12. Wash the Shower Curtain and Liner
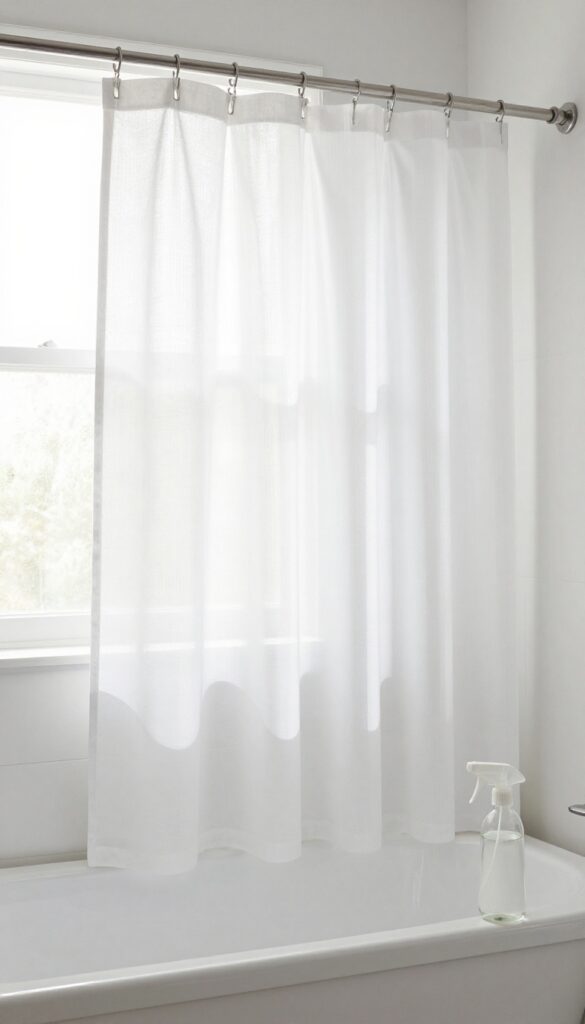
Your shower curtain and liner are constantly exposed to moisture, soap scum, and mildew. They can quickly become a breeding ground for bacteria and unsightly stains if not cleaned regularly. Giving them a proper wash not only freshens up your bathroom but also extends their life.
Start by removing the curtain and liner from the hooks. Check the care label on fabric curtains—most can go in the washing machine. For plastic liners, a simple wipe-down often does the trick, but if they're heavily moldy, it's best to replace them.
Machine Wash Fabric Curtains
Toss your fabric shower curtain in the washing machine with a regular dose of detergent and add a little bleach (if safe for the fabric) to kill mildew. Use warm water and run a gentle cycle. To prevent wrinkling, hang it back up immediately after the wash—don't put it in the dryer.
Wipe Down Plastic Liners
For plastic or vinyl liners, fill a spray bottle with equal parts white vinegar and water. Spray the liner generously, let it sit for 10 minutes, then scrub with a soft brush or sponge. Rinse thoroughly with warm water and hang to dry.
This removes soap scum and prevents mildew buildup.
When To Replace Instead
If your plastic liner has persistent mold stains that won't come off, or if it's torn or brittle, it's time for a new one. Fabric curtains can last longer, but replace them if they develop holes or a musty odor that won't wash out.
13. Clean the Exhaust Fan
The exhaust fan works hard to pull moisture and odors out of your bathroom, but it often gets ignored during cleaning. Over time, dust and grime build up on the blades and cover, making the fan less effective and noisier. Giving it a proper clean improves airflow, reduces humidity, and helps prevent mold growth.
Remove And Wash The Cover
Start by turning off the fan at the circuit breaker for safety. Most covers simply unclip or have a few screws. Gently pop it off and soak it in warm water with a few drops of dish soap.
Use a soft sponge to scrub away dust and grease, then rinse and let it dry completely before reinstalling.
Vacuum The Fan Blades And Housing
With the cover off, use a vacuum with a brush attachment to suck up loose dust from the blades and interior housing. For stubborn dirt, wipe the blades with a damp microfiber cloth. Be careful not to bend them.
This step alone can significantly boost the fan's performance.
Check The Duct And Exterior Vent
If you have access to the ductwork or the exterior vent cover, give them a quick inspection. Clear any visible debris or lint that might be blocking airflow. A clean duct means the fan can exhaust moisture more efficiently, keeping your bathroom fresher longer.
14. Wipe Down Cabinet Doors and Drawers
Cabinet fronts and drawer faces collect fingerprints, grease, and splatters just like any other surface, but they often get skipped during routine cleaning. Over time, that buildup can make the finish look dull or feel sticky. A quick wipe-down restores their original shine and keeps the whole bathroom feeling fresh.
Choose The Right Cleaner
Mild dish soap mixed with warm water works for most cabinet finishes—laminate, painted wood, or thermofoil. Avoid harsh chemicals or abrasive scrubbers that can strip the finish. For stubborn grease near handles, a dab of white vinegar on a soft cloth cuts through grime without damage.
Work From Top To Bottom
Start at the top of each cabinet door and wipe downward to prevent drips from running over already-cleaned areas. Use a separate section of the cloth for drawer faces to avoid transferring dirt from handles to the surface. Don't forget the edges and the underside of the cabinet lip.
Pay Extra Attention To Hardware
Knobs and pulls are germ magnets because they’re touched every time you open a cabinet. Use a cotton swab dipped in cleaner to get into crevices around the base of the hardware. Dry everything with a microfiber cloth to prevent water spots.
15. Organize Inside Cabinets

Cabinets can quickly become chaotic catchalls for half-used bottles, forgotten products, and random clutter. Organizing them not only makes your bathroom look tidier but also saves time when you’re getting ready. Plus, it’s a chance to toss expired items and wipe away any spills or dust that have accumulated.
Start by removing everything from your cabinets. Wipe down all shelves with a gentle cleaner to remove residue and dust. Check expiration dates on medications, skincare, and makeup—toss anything past its prime.
Group remaining items by category: hair care, body care, oral care, first aid, etc. Use small bins or trays to keep categories together, making it easy to grab what you need. Consider clear containers so you can see contents at a glance.
Label bins if you share the space with others. Return items in a logical order—place daily-use products at eye level and less-used items on higher or lower shelves.
Declutter First
Before organizing, purge ruthlessly. Expired sunscreen, dried-out nail polish, and empty bottles have no place in a refreshed bathroom. Be honest about what you actually use—if it’s been sitting untouched for a year, it’s time to let it go.
Group By Use
Sort items into logical groups: hair styling tools and products, skincare, dental care, and first aid supplies. This makes it simple to find what you need without rummaging. Use drawer dividers or small baskets to keep each group contained and upright.
Maximize Vertical Space
Stackable bins, risers, or shelf dividers help you use every inch of cabinet height. Store taller bottles in back, shorter ones in front. Consider over-the-door organizers for the inside of cabinet doors to hold smaller items like razors or cotton balls.
16. Clean the Mirror
A streak-free mirror makes the whole bathroom feel cleaner. But if you spray cleaner directly onto the glass, it can drip onto the frame or counter, leaving residue. The trick is to apply the cleaner to your cloth first, then wipe in a pattern that avoids leaving streaks.
Spray glass cleaner on a microfiber cloth (not directly on the mirror) and wipe in a zigzag pattern to avoid streaks. Buff dry with a clean cloth.
Why The Zigzag Pattern Works
Wiping in a zigzag or S‑pattern prevents you from spreading cleaner back over areas you’ve already dried. This reduces the chance of streaks because you’re not redistributing the cleaning solution. Start at the top and work your way down so any drips get caught by the next pass.
The Right Cloth Matters
Microfiber is ideal because it picks up grime without leaving lint. Avoid paper towels—they can leave fibers and streaks. Use one damp microfiber cloth for cleaning and a second dry one for buffing.
If you don’t have a second cloth, let the mirror air dry a moment before buffing with the same cloth flipped to a dry side.
Tackle Stubborn Spots
For dried toothpaste or water spots, dampen the cloth with a little white vinegar before applying glass cleaner. The vinegar helps dissolve mineral deposits. Let the vinegar sit for 30 seconds, then wipe clean.
This also helps prevent future buildup.
17. Scrub the Tub
Your bathtub takes a beating from soap scum, body oils, and hard water deposits. Over time, that buildup can make the surface feel rough and look dingy. A thorough scrub restores its shine and keeps it sanitary.
Start by choosing a cleaner that matches your tub material—non-abrasive is key to avoid scratching acrylic or fiberglass. For a natural option, mix baking soda with a little water to form a paste. Apply the cleaner or paste to the entire tub surface, including the sides and corners.
Let it sit for 10 minutes to break down grime. Then, scrub with a sponge or soft brush, working in circular motions. Rinse thoroughly with warm water and wipe dry with a clean cloth to prevent water spots.
Choosing The Right Cleaner
Check your tub's material before grabbing any cleaner. For porcelain or enamel, a mild bathroom spray works fine. For acrylic or fiberglass, stick with baking soda or a cleaner labeled safe for these surfaces.
Avoid bleach or harsh abrasives that can dull the finish.
Focus On Problem Areas
Pay extra attention to the drain area, corners, and any textured surfaces where grime hides. Use an old toothbrush to scrub around the drain and along the rim. If you have stubborn stains, make a paste of cream of tartar and hydrogen peroxide and let it sit for 30 minutes before scrubbing.
Rinsing And Drying Tips
After scrubbing, rinse the tub thoroughly with warm water. Any leftover cleaner can leave a residue that attracts dirt. Dry the tub with a microfiber cloth to prevent water spots and soap scum from forming again quickly.
18. Clean the Drain Covers
Drain covers trap hair, soap scum, and gunk that can slow drainage and cause odors. Giving them a proper clean helps keep water flowing and your bathroom smelling fresh.
Remove the drain covers carefully—most pop off with a flathead screwdriver or just lift out. Scrub them with an old toothbrush and dish soap to remove all visible debris. Then pour ½ cup baking soda down the drain, followed by ½ cup white vinegar.
Let the mixture fizz for 15 minutes to break down buildup inside the pipe. Finally, flush with a kettle of boiling water (or very hot tap water if you have PVC pipes) to wash everything away.
Why Drain Covers Need Extra Attention
They’re the first line of defense against clogs, but they also collect the grossest bathroom gunk. Hair and soap residue create a biofilm that traps bacteria and causes smells. Cleaning them regularly prevents slow drains and keeps your bathroom hygienic.
The Baking Soda And Vinegar Reaction
This classic combo works because the fizzing action helps dislodge grime from pipe walls. Let it sit for a full 15 minutes—don’t rush it. The reaction is most effective when it has time to penetrate the buildup.
Hot Water Flush: The Final Step
Boiling water melts soap scum and flushes away loosened debris. If you have PVC pipes, use very hot tap water instead to avoid damage. Run the water for at least 30 seconds to ensure everything clears.
19. Wipe Light Switches and Outlets
Light switches and outlet covers are some of the most touched surfaces in your bathroom, yet they're often forgotten during deep cleaning. They collect fingerprints, dust, and even toothpaste splatter. A quick wipe-down makes a surprising difference in how clean the room feels.
Why These Get Grimy Fast
Every time you flip the switch or plug in a device, oils and dirt transfer from your hands. In a bathroom, moisture and product residue add to the buildup. Over time, switches can develop a sticky film that attracts more dust.
Best Tools For The Job
Use a microfiber cloth slightly dampened with a gentle disinfectant or all-purpose cleaner. Avoid soaking the cloth—too much moisture can seep into the switch mechanism. For tight crevices around the switch plate, a cotton swab dipped in cleaner works well.
Drying Is Non-negotiable
After wiping, immediately go over the area with a dry microfiber cloth. This prevents moisture from getting behind the cover and causing damage or mold. It also eliminates streaks, leaving a polished look.
Don't Forget The Walls Around Them
The wall surface near switches often shows smudges and scuffs from hands. Wipe a few inches around each switch and outlet with the same damp cloth. This small extra step ties the whole clean together.
20. Vacuum and Mop the Floor
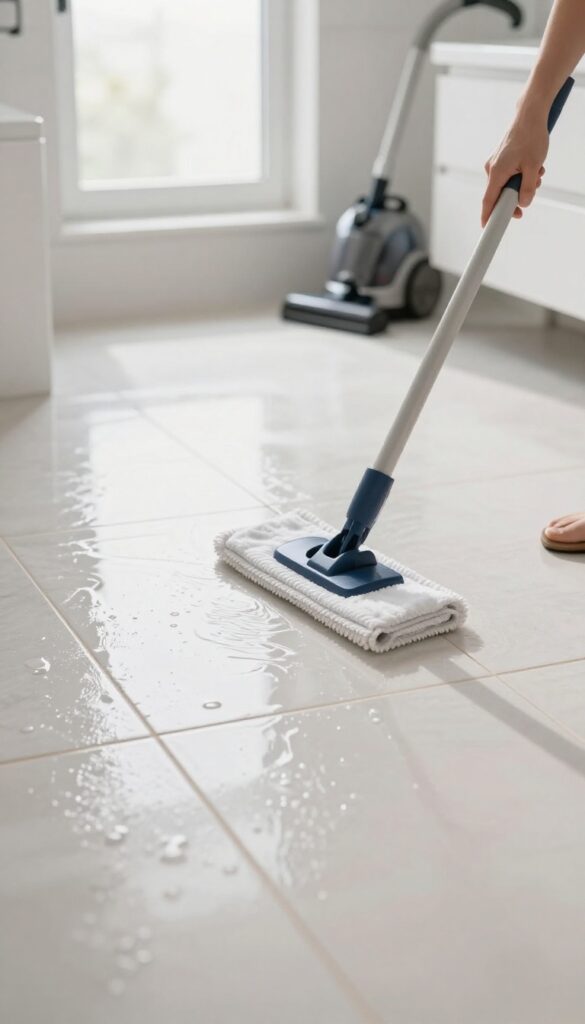
After scrubbing walls, fixtures, and cabinets, the floor has collected all the dust, hair, and splashes you've loosened. Now it's time to give it a thorough cleaning. Vacuuming first removes dry debris so mopping doesn't just push dirt around.
Then a proper mop job leaves the floor truly clean and fresh.
Vacuum Every Nook And Cranny
Start by vacuuming the entire floor, including corners, along baseboards, and under the vanity. Use a crevice tool to reach tight spots where hair and dust accumulate. Don't forget the area behind the toilet and any floor vents.
This step prevents dirt from turning into mud when you mop.
Spot-treat Stubborn Grime
If you have tile floors, check the grout lines for dark spots or mildew. Use a stiff grout brush or an old toothbrush with a baking soda paste to scrub those areas. For vinyl or laminate, focus on sticky spots near the toilet or sink.
Let any cleaner sit for a minute before scrubbing.
Mop With The Right Cleaner
Choose a floor-safe cleaner appropriate for your flooring type—avoid harsh chemicals that can damage sealants. Use a microfiber mop or a sponge mop, working from the farthest corner toward the door. Rinse the mop head frequently and change the water if it gets dirty.
Let the floor air-dry completely before stepping on it.
21. Clean the Trash Can
The trash can is one of the most overlooked items in a bathroom deep clean. Over time, it collects dust, grime, and sometimes leaks from trash bags. A quick wipe isn't enough when you're aiming for a full refresh.
Empty the can completely and take it outside or to a well-ventilated area. Spray the inside and outside with a disinfectant cleaner, let it sit for a few minutes, then scrub with a brush or sponge. Rinse thoroughly with water and dry with a clean cloth.
Let it air dry completely before putting in a new liner.
Why It Matters
A dirty trash can can harbor bacteria and odors that spread into the bathroom. Even with a liner, moisture and small spills can accumulate at the bottom. Cleaning it regularly prevents musty smells and keeps the space truly fresh.
What You'll Need
Disinfectant spray or bleach solution, a scrub brush or sponge, rubber gloves, and a microfiber cloth. If the can has stubborn stains, a paste of baking soda and water works well.
Pro Tips
For plastic cans, avoid abrasive scrubbers that can scratch the surface. If your can is metal, check for rust spots and treat them promptly. Let the can dry upside down to ensure no water pools inside.
22. Refresh Towels and Bath Mat
Your towels and bath mat work hard every day, absorbing water and trapping dead skin cells, soap residue, and bacteria. Over time, they can develop a musty smell or lose their softness, even if you wash them regularly. A deep clean for these fabrics is a simple but impactful step in your bathroom refresh, leaving them fresh, fluffy, and ready to use.
Start by separating your towels and bath mats from other laundry. Wash them in hot water with a cup of white vinegar added to the rinse cycle to break down detergent buildup and kill bacteria. Then run a second cycle with your regular detergent and a half cup of baking soda for extra odor removal.
Dry them on high heat until completely dry—dampness invites mildew. For bath mats with rubber backing, air dry or use low heat to prevent the backing from cracking.
Why Vinegar And Baking Soda Work
Vinegar is a natural deodorizer and disinfectant that cuts through residue without harsh chemicals. Baking soda neutralizes odors and boosts cleaning power. Together, they restore fabric softness and absorbency without the coating left by fabric softeners.
Drying Tips For Longevity
Always dry towels and mats thoroughly. Shake them out before tossing in the dryer to fluff fibers. If you air dry, do so in direct sunlight or a well-ventilated area.
For rubber-backed mats, avoid high heat to prevent the rubber from becoming brittle.
23. Final Touches and Airing Out
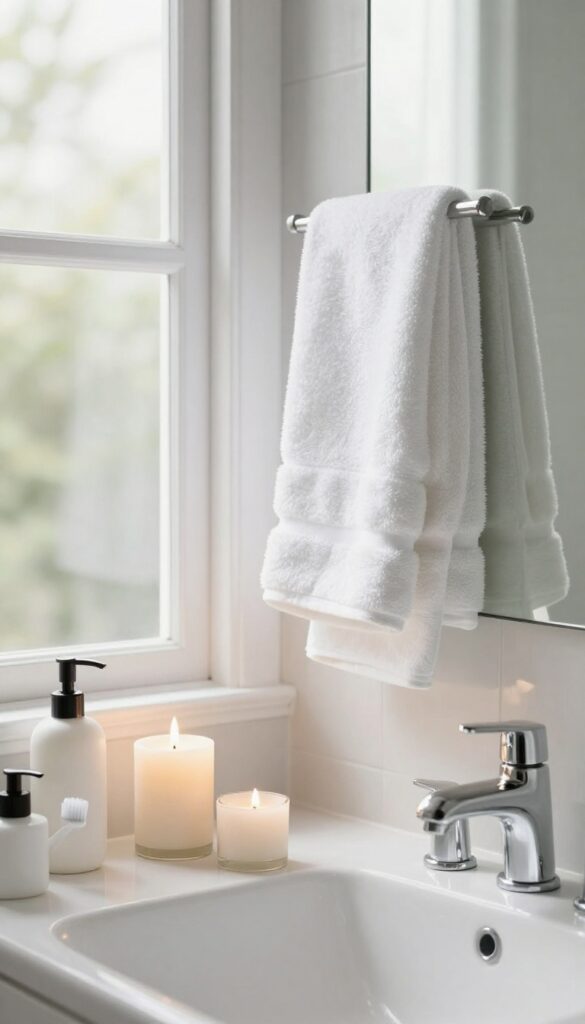
You've scrubbed, rinsed, and polished every corner. Now it's time to put the finishing touches on your deep clean. This last step is about restoring order and letting your bathroom breathe before you step back and admire the results.
Return Items To Their Places
Bring back your toothbrush holder, soap dispenser, and any decorative items you removed. Arrange them neatly so everything has a home. This simple act transforms a clean space into an organized, inviting one.
Let The Room Air Out
Open a window or turn on the exhaust fan to circulate fresh air and dry any remaining moisture. If you prefer a scent, light a candle or use a natural room spray. A fresh-smelling bathroom completes the deep clean experience.
Admire Your Work
Take a moment to appreciate the sparkle on the faucets, the streak-free mirrors, and the fresh towels. You've put in the effort, and now your bathroom is deeply clean and welcoming. Enjoy the satisfaction.
FAQ
How often should I deep clean my bathroom?
Aim for a deep clean every 1-3 months, depending on usage and household size. High-traffic bathrooms may need monthly attention.
Can I use bleach on grout?
Yes, but dilute it and test in an inconspicuous area first. Bleach can lighten colored grout, so use a grout-specific cleaner for colored grout.
How do I prevent soap scum on shower doors?
Squeegee the doors after each shower and apply a glass protectant or wax every few weeks to repel water and soap residue.
What's the best way to clean a shower head without removing it?
Fill a plastic bag with white vinegar, secure it over the shower head with a rubber band, and let it soak overnight. Rinse and run the water for a few minutes.
How do I remove hard water stains from toilet bowls?
Use pumice stone (wet it first) to gently rub stains, or apply a commercial hard water stain remover. Avoid metal scrubbers that can scratch porcelain.
Conclusion
A truly deep bathroom clean goes beyond surface shine—it tackles the hidden grime that builds up over months. By working through these 23 steps, you've given every corner the attention it deserves, from grout lines to shower heads. Now that your bathroom is spotless, the key is keeping it that way without starting from scratch each time.
A quick daily wipe-down and a weekly once-over will make your next deep clean much easier. Enjoy the fresh, sanitized space you've earned.


