
You walk through the door after a long day, and the last thing you want is to face a messy kitchen or a cluttered living room. Cleaning doesn't have to be a dreaded marathon.
With the right approach, you can keep your home tidy without sacrificing your evenings or weekends. These 25 tips are designed to help you clean smarter, not harder.
They focus on efficiency, prevention, and small habits that add up to big results. Whether you're a busy parent, a working professional, or just someone who wants a cleaner home with less effort, these strategies will make a real difference.
1. Make Your Bed Every Morning

Starting your day by making the bed instantly makes the bedroom look tidier and sets a productive tone. It takes less than two minutes and prevents the room from feeling chaotic. This small win can kickstart a chain reaction of positive habits.
Making your bed is the simplest way to bring order to your space. It creates a visual anchor of calm in your bedroom, which can reduce stress throughout the day. Plus, it's a quick task that builds momentum for tackling other chores.
The Two-minute Rule
Keep it simple: straighten the sheets, fluff the pillows, and pull up the comforter. No need for hospital corners or decorative throws. The goal is a neat appearance, not perfection.
Build A Morning Ritual
Pair bed-making with another habit like opening the curtains or stretching. This creates a consistent routine that signals your brain it's time to start the day. Over time, it becomes automatic.
Why It Reduces Stress
A made bed instantly makes the room feel more organized. Coming home to a tidy bedroom can lower cortisol levels and improve your mood. It's a small effort with big mental health benefits.
2. Use a Timer for Quick Tidy-Ups
Cleaning feels overwhelming when you think about everything that needs to be done. A timer breaks that mental barrier by giving you a clear, short window to work. You'll be amazed at how much you can accomplish in just 10 or 15 minutes of focused effort.
Set a timer for 10 or 15 minutes and race to declutter surfaces, put away items, and wipe down counters. This prevents cleaning from feeling endless and keeps you focused. When the timer goes off, you're done—no guilt, no lingering.
Why Timers Work
Timers create a sense of urgency that cuts through procrastination. Knowing you only have 10 minutes makes it easier to start, and the countdown keeps you moving. It also prevents burnout because you're not committing to hours of work.
How To Use The Timer Method
Pick one room or one task—like clearing the coffee table or wiping kitchen counters. Set your timer and go. Don't stop to organize drawers or deep clean; just tackle the visible mess.
When the timer rings, step back and enjoy the instant improvement.
Make It A Daily Habit
Do one timer session every day, perhaps right before dinner or after work. Over a week, these short bursts keep your home consistently tidy without any major cleaning sessions. It's a low-effort way to stay on top of clutter.
3. Keep Cleaning Supplies in Each Room
Ever notice how a small spill turns into a stubborn stain because you couldn't find a rag in time? The simple trick of stashing cleaning supplies in every room eliminates that delay. When wipes and spray are already in the room, you act immediately—and that prevents messes from becoming major cleaning projects later.
The key is convenience. If you have to walk to a different floor or dig under the sink for supplies, you’re far less likely to clean up in the moment. By placing a small caddy or basket in high-traffic areas, you remove that barrier.
You’ll find yourself wiping down counters, cleaning mirrors, and tackling spots as soon as they happen.
What To Stock In Each Room
For the kitchen: all-purpose spray, disinfecting wipes, a microfiber cloth, and a sponge. In the bathroom: a glass cleaner, a toilet brush with a holder, and a dedicated cloth for the sink. In living areas: a multi-surface wipe or a spray with a soft cloth for dusting and quick cleanups.
Keep it minimal—just enough to handle daily messes without clutter.
Choosing The Right Caddy
A caddy with a handle makes it easy to carry supplies from room to room when you do a deeper clean. Look for one with compartments to keep bottles upright. For bathrooms, a small over-the-toilet shelf or a tension rod caddy works well.
In the kitchen, a countertop basket or a drawer organizer keeps everything accessible but out of sight.
The One-minute Cleanup Habit
When supplies are within arm’s reach, a quick wipe-down takes less than a minute. After cooking, spray the stove and counters and give them a fast wipe. After a shower, mist the glass door and squeegee it.
These tiny habits prevent grime buildup and reduce the need for deep cleaning sessions.
4. Adopt the 'One-Touch' Rule
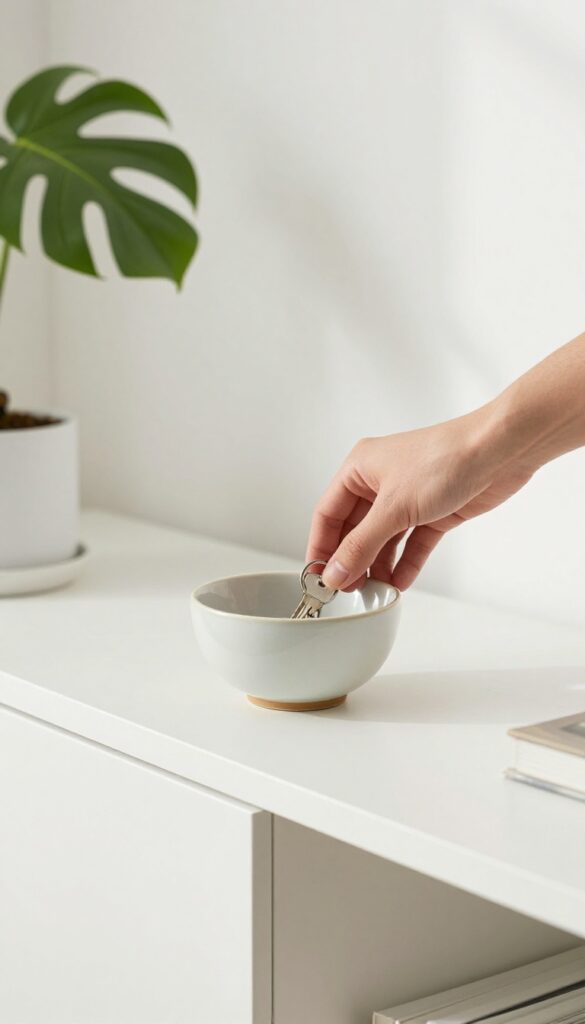
How many times have you picked up a jacket, a book, or a remote, only to set it down on the nearest surface because you were too busy or distracted? That small habit creates piles that grow into clutter mountains. The one-touch rule is a simple mental shift: when you pick something up, deal with it immediately—put it away, toss it, or file it.
That's it. No more second touches.
The one-touch rule saves time by eliminating the need to re-sort, re-organize, or re-handle items. It also reduces decision fatigue because you're not constantly asking yourself 'where does this go? ' later. Over a week, you'll reclaim minutes that add up to hours.
And your home stays consistently tidy without extra effort.
Start With High-traffic Zones
Focus on areas where clutter tends to collect: entryway tables, kitchen counters, and coffee tables. Every time you walk through, commit to one-touching anything out of place. A mail pile?
Sort it immediately. A stray shoe? Put it in the closet.
Within days, these surfaces will stay clear naturally.
Pair It With A Designated Home
The rule only works if everything has a logical home. If you don't know where the scissors belong, you'll set them down. Take an afternoon to assign a spot for common items—keys, remote, chargers, bags.
Label drawers if needed. Once you have a system, one-touching becomes automatic.
Apply It To Cleaning Tools Too
Don't just apply the rule to clutter. When you finish wiping a counter, rinse and put away the cloth immediately. After vacuuming, wrap the cord and store the vacuum.
This prevents the 'I'll put it away later' trap that leads to half-finished chores and messy closets.
5. Clean as You Cook
The kitchen often takes the brunt of daily mess, but it doesn't have to stay that way. By weaving small cleaning tasks into your cooking routine, you can finish dinner with a nearly spotless kitchen instead of a disaster zone. It's about using those built-in waits—when water boils, sauce simmers, or bread bakes—to knock out quick chores.
This approach turns passive waiting into active tidying. The key is to identify the lulls in your recipe and use them strategically. Over time, it becomes second nature, and you'll rarely face a post-meal cleanup marathon.
Wash As You Go
While your pasta water heats or your oven preheats, wash the cutting board, knife, and measuring cups you just used. Rinse and load mixing bowls into the dishwasher. By the time the main dish is ready, most of the prep mess is already gone.
Wipe Down Surfaces Between Steps
Keep a damp sponge or cloth handy and quickly wipe the counter after each prep stage. Splatters from chopping veggies or mixing sauces won't have time to dry and harden. A 30-second wipe now saves a 10-minute scrub later.
Put Away Ingredients Immediately
After you measure out spices or pour oil, return the bottle to the cabinet or pantry right away. Don't set it aside for later. This prevents counter clutter and ensures you don't forget to put things away until the next morning.
6. Use Microfiber Cloths for Dusting
Dusting can feel like a pointless chore when you see particles floating right back onto surfaces. The secret weapon? Microfiber cloths.
These little wonders trap dust in their fibers instead of just pushing it around. A slightly damp cloth works even better for grabbing stubborn grime.
Microfiber cloths are a game-changer for quick, effective dusting. They're reusable, washable, and far more efficient than traditional dusters or rags. Keep a stack handy for daily touch-ups or weekly deep cleans.
Why Microfiber Works Better
Microfiber is made of ultra-fine synthetic fibers that create a static charge, attracting dust like a magnet. Unlike cotton cloths that spread dust, microfiber locks it away until you rinse the cloth. This means less airborne particles and fewer sneezes.
How To Use Them Right
For best results, slightly dampen the cloth with water—not soaking wet. Wipe surfaces in a gentle, sweeping motion. Use dry cloths for electronics and delicate items.
Wash cloths after each use to maintain their effectiveness.
Save Money And Reduce Waste
One microfiber cloth can replace hundreds of paper towels. Wash them in warm water with mild detergent, and they'll last for years. This not only cuts down on cleaning costs but also helps the environment.
7. Vacuum in Patterns
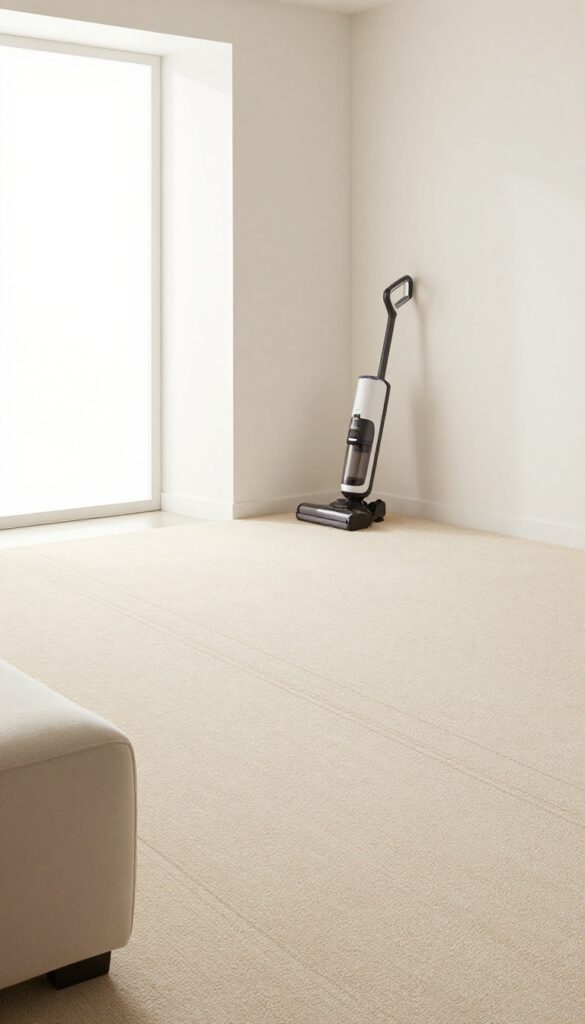
Most people push a vacuum cleaner back and forth in random directions, hoping for the best. That approach leaves behind hidden dirt and forces you to go over the same spots multiple times. A simple shift in technique—vacuuming in deliberate patterns—can cut your cleaning time in half and leave carpets noticeably cleaner.
Instead of rushing through the room, choose a pattern and stick to it. Straight lines or overlapping rows ensure every inch gets covered. This method works because it prevents you from missing strips of carpet and reduces the temptation to re-clean areas you already did.
Start From The Far Corner
Begin vacuuming at the farthest corner of the room and work your way toward the door. That way, you never walk across a freshly cleaned area. It also forces you to cover the entire floor systematically without backtracking.
Overlap Each Pass By A Few Inches
When you move the vacuum forward, overlap the previous strip by about two to three inches. This simple habit catches any debris the first pass missed and ensures no narrow gaps are left untouched. It takes almost no extra time but dramatically improves results.
Switch Directions On Different Days
If you vacuum the same room every week, alternate between horizontal and vertical passes. This lifts carpet fibers in different directions, dislodging embedded dirt that settles along the grain. It also helps your carpet wear more evenly over time.
8. Declutter Before You Clean
You can scrub a countertop all you want, but if it's buried under mail and coffee mugs, you're just moving stuff around. Cleaning around clutter is like trying to mop a floor full of boxes—it doesn't work. The simple act of picking up clothes, toys, and papers first transforms your cleaning session from frustrating to effective.
When you clear surfaces before wiping or vacuuming, you actually remove dirt instead of just shifting it. Plus, you save time because you're not working around obstacles. Make it a habit: spend five minutes tidying before you start any cleaning task.
Your future self will thank you.
The Five-minute Pickup
Set a timer for five minutes and race around each room grabbing anything that doesn't belong. Clothes go in the hamper, toys in the bin, mail in the recycling. This quick reset makes the actual cleaning faster and more satisfying.
Clear Surfaces, Clear Mind
A cluttered counter or table is visually overwhelming and makes cleaning feel like a chore. Once you clear it, you can actually wipe down the surface properly. You'll also notice how much calmer the room feels.
Work From Top To Bottom
After decluttering, dust and clean from high surfaces down to low ones. This way, any debris that falls lands on surfaces you haven't cleaned yet. It's a simple order that prevents rework.
9. Use a Squeegee on Shower Walls
That cloudy film on your shower glass isn't a mystery—it's hard water minerals and soap residue building up over time. The good news is you can stop it before it starts with a simple tool that costs under ten dollars. A squeegee takes about thirty seconds to use after each shower, and it eliminates the need for harsh chemical cleaners and heavy scrubbing later.
It's one of those habits that feels small but pays off in a big way.
Why It Works So Well
When water dries on glass or tile, it leaves behind calcium, magnesium, and soap scum. Over weeks, those deposits bond to the surface and become stubborn stains. By removing the water immediately, you prevent the minerals from ever settling.
The squeegee's rubber blade wipes away nearly all moisture, so there's nothing left to evaporate and leave residue.
The Right Technique
Start at the top corner of your shower door or wall and pull the squeegee down in a straight, overlapping stroke. Wipe the blade with a dry cloth after each pass to keep it clean. Work your way across the entire surface, then do the same for the door.
For curved or textured tile, use a microfiber cloth instead—it grabs water from uneven surfaces better than a squeegee.
When To Squeegee Vs. When To Deep Clean
Daily squeegeeing won't replace a monthly deep clean, but it will make that deep clean much easier. You'll still need to tackle grout lines and corners with a brush now and then. However, the glass and smooth tile will stay crystal clear with just the squeegee routine.
If you notice water spots forming after a few days, you might need to replace the squeegee blade—it wears out over time.
10. Create a Weekly Cleaning Schedule
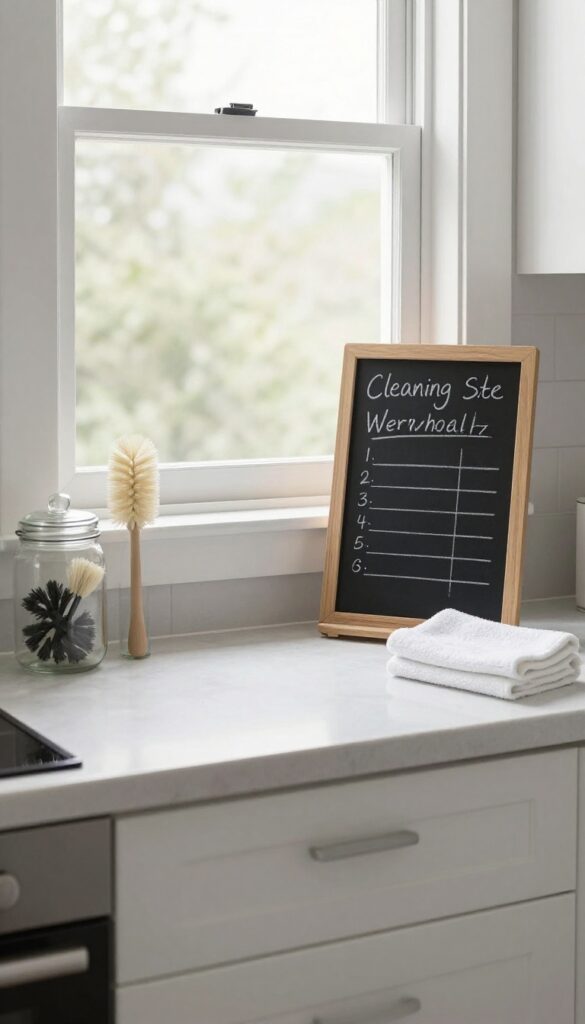
A cleaning schedule is your secret weapon against chaos. Instead of tackling everything at once, you spread tasks across the week so no single day feels overwhelming. This way, your home stays consistently clean without those frantic weekend scrubbing sessions.
A weekly schedule turns cleaning from a dreaded marathon into manageable daily habits. By assigning specific tasks to each day, you ensure every area gets attention while avoiding burnout. It also helps you spot patterns—like which rooms get messiest—so you can adjust as needed.
Pick A Rhythm That Fits Your Life
Start by listing the main cleaning tasks: bathrooms, kitchen, dusting, vacuuming, mopping, and tidying. Then assign them to days based on your energy levels and free time. For example, tackle bathrooms on Monday when you're fresh, and save light dusting for Wednesday.
The key is consistency, not perfection.
Keep Each Day Short And Focused
Limit each day's tasks to 15–30 minutes. A focused burst is more effective than hours of aimless cleaning. Use a timer if needed.
For instance, Monday: bathrooms (15 min), Tuesday: dusting and surfaces (15 min), Wednesday: vacuum high-traffic areas (20 min). Short sessions prevent fatigue and build momentum.
Adjust As You Go
Your schedule isn't set in stone. After a week, review what worked and what didn't. Maybe Tuesday's dusting felt too light, or Thursday's kitchen deep-clean was too heavy.
Tweak days or combine tasks to better match your routine. The goal is a schedule that feels natural, not forced.
11. Soak Showerheads in Vinegar
A weak, uneven spray from your showerhead is often caused by mineral deposits clogging the nozzles. Instead of replacing it or scrubbing each tiny hole, let vinegar do the work. This overnight soak restores water pressure and keeps your shower feeling fresh.
Hard water leaves calcium and lime buildup inside your showerhead, reducing flow and creating a breeding ground for bacteria. White vinegar dissolves these minerals naturally without harsh chemicals. The process is simple: fill a plastic bag with vinegar, secure it over the showerhead with a rubber band, and let it soak overnight.
In the morning, remove the bag, rinse the showerhead, and run the water for a few minutes. You'll notice a stronger, more even spray and a cleaner appearance.
Why Vinegar Works Best
White vinegar is mildly acidic, which breaks down alkaline mineral deposits like calcium carbonate. Unlike commercial descalers, it's non-toxic, inexpensive, and safe for most metal and plastic showerheads. Just avoid using it on brass or gold-plated fixtures, as the acid can damage the finish.
For those, dilute the vinegar with equal parts water or use a specialized cleaner.
Step-by-step Soaking Method
Start by unscrewing the showerhead if possible, or leave it attached. Fill a quart-size zip-top bag with enough white vinegar to submerge the head. Secure the bag with a rubber band or twist tie, making sure the showerhead is fully covered.
Let it soak for at least six hours or overnight. After soaking, remove the bag and scrub away any loose debris with an old toothbrush. Run the shower on hot for a few minutes to flush out residue.
Maintenance Tips For Lasting Results
Prevent future buildup by wiping the showerhead dry after each use. If you have hard water, consider a monthly vinegar soak to keep it clear. You can also install a showerhead filter to reduce mineral content.
For stubborn clogs, use a pin to gently poke through each nozzle after soaking. Regular care extends the life of your fixture and keeps water pressure optimal.
12. Use a Lint Roller for Lampshades
Fabric lampshades are dust magnets. Every time you turn on a lamp, the heat creates airflow that pulls dust right onto the shade. Vacuuming can be awkward and sometimes damages the fabric, but there's a simpler tool that works like magic.
A lint roller is your best friend for cleaning fabric lampshades. The sticky sheets grab dust and pet hair in seconds without pushing it deeper into the fibers. It's faster than dragging out the vacuum and much gentler on delicate shades.
Keep a lint roller in a drawer near your lamps, and you can freshen up a shade in under a minute. For best results, roll in one direction and use a fresh sheet for each pass. This trick works on pleated, velvet, and even some silk shades, but always test an inconspicuous spot first.
Why It's Better Than Vacuuming
Vacuum cleaners often have too much suction for lampshades. The force can pull at the fabric, loosen seams, or even bend the frame. A lint roller is gentle and precise.
You can target specific dusty areas without disturbing the rest of the shade. Plus, there's no cord to untangle or attachment to swap.
How To Get The Best Results
Start at the top of the shade and work your way down in overlapping strips. Use a new sheet when the current one loses its stickiness. For extra stubborn dust, press firmly and roll slowly.
If your shade has a textured pattern, try rolling diagonally to reach into crevices.
When To Avoid This Method
Avoid lint rollers on paper or very delicate antique shades. The adhesive can sometimes leave residue or pull off paint or finish. For those, stick to a soft brush attachment on low suction.
Also, skip this method if the shade is wet or damp—the adhesive won't work properly.
13. Clean Your Microwave with Steam
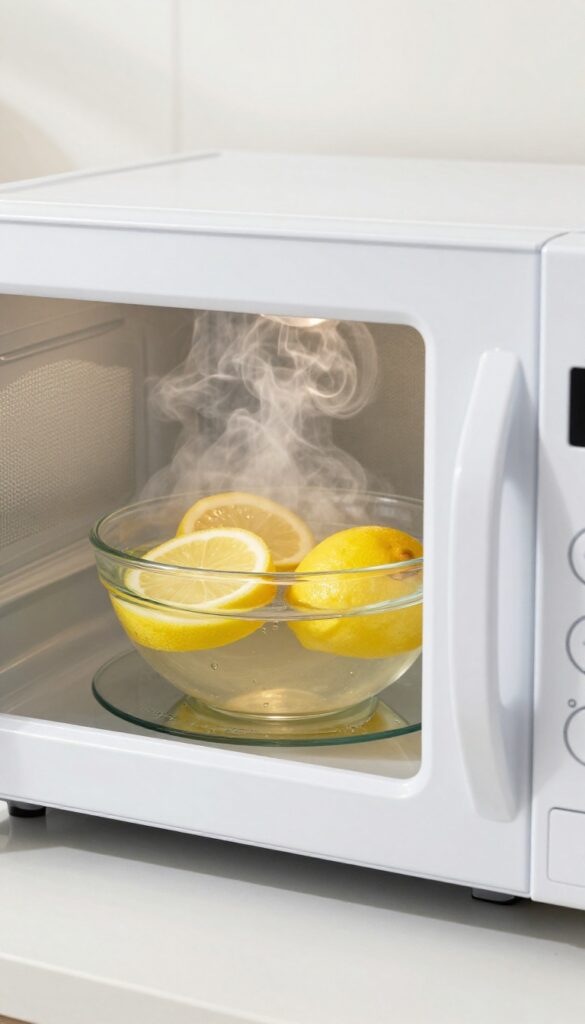
Dried-on food splatters inside the microwave can be a pain to scrub. But there's a simple trick that uses steam to loosen everything up. Place a bowl of water with lemon slices inside and run the microwave for three minutes.
The steam softens the grime, and you just wipe it away.
Why Steam Works So Well
Steam penetrates baked-on food particles, rehydrating them so they release from the surface. The lemon adds a fresh scent and helps cut through grease naturally. No harsh chemicals needed.
Step-by-step Instructions
Fill a microwave-safe bowl with one cup of water. Add a few lemon slices or a tablespoon of lemon juice. Microwave on high for three minutes.
Let the bowl sit inside for two more minutes to maximize steam. Then carefully remove the bowl and wipe the interior with a damp cloth.
Extra Tips For Stubborn Stains
For really tough spots, dip your cloth in the warm lemon water and scrub gently. You can also add a splash of white vinegar to the water for extra cleaning power. Avoid using abrasive scrubbers that might damage the microwave's interior.
14. Keep a Trash Bag for Donations
Decluttering and cleaning often go hand in hand, but the process can stall if you don't have a clear plan for items you no longer need. A simple trick is to keep a dedicated trash bag or box for donations as you clean. This small habit prevents unwanted items from piling up in corners and makes the donation process seamless.
When you're tidying a room, it's tempting to set aside things you want to donate on a chair or in a pile. But those piles quickly become clutter themselves. Instead, grab a trash bag or a box and label it "Donate.
" As you come across items you no longer use—clothes, books, kitchen gadgets, decor—drop them straight into the bag. No second-guessing, no temporary holding spots. At the end of your cleaning session, tie up the bag and place it by the door.
When the bag is full, schedule a pickup or drop it off. This method keeps your space clear and your donation routine consistent.
Make It A Permanent Station
Designate a spot in your home, like a corner of the laundry room or a shelf in the garage, for a donation bag or box. Keep it visible and accessible. Whenever you find something you don't need, put it directly there.
This turns decluttering into a continuous, low-effort habit rather than a once-a-year purge.
Use A Timer To Avoid Overthinking
If you struggle with deciding what to keep, set a timer for 10–15 minutes per room. Quickly scan each item and ask yourself: Have I used this in the past year? Does it bring me joy?
If the answer is no, into the donation bag it goes. The timer creates urgency and prevents you from getting stuck on sentimental items.
Donate Immediately When Full
Once your bag or box is full, don't let it sit around. Schedule a donation pickup or drop it off within the week. Many charities offer free pickup services, making it easy.
Keeping a full donation bag in your home defeats the purpose—it becomes clutter itself. Move it out promptly to maintain the momentum.
15. Use a Toothbrush for Grout
Grout lines are notorious for trapping dirt and grime, making tile floors and walls look dingy. But you don't need expensive specialty brushes to get them clean. An old toothbrush is the perfect tool for this job—its small head and stiff bristles can reach deep into narrow grout lines that larger brushes miss.
For extra cleaning power, mix a paste of baking soda and water, apply it to the grout, and scrub with the toothbrush. It's a simple, cost-effective method that brings back the original brightness of your tiles.
Why A Toothbrush Works Best
Toothbrushes are designed to clean tight spaces, making them ideal for grout. They give you precise control so you can focus on stained areas without scrubbing the entire tile. Plus, you probably have an old one lying around—why not put it to good use before tossing it?
Making A Baking Soda Paste
Mix three parts baking soda with one part water to form a thick paste. Apply it directly to the grout lines and let it sit for 5-10 minutes. The paste will loosen dirt and grime, making the scrubbing process much easier and more effective.
Tips For Stubborn Stains
For tough stains, add a few drops of white vinegar to the paste to create a fizzing reaction that helps lift dirt. Scrub gently but firmly, and rinse with water afterward. Avoid using too much vinegar on natural stone tiles, as it can damage the surface.
16. Wipe Down Sinks Daily
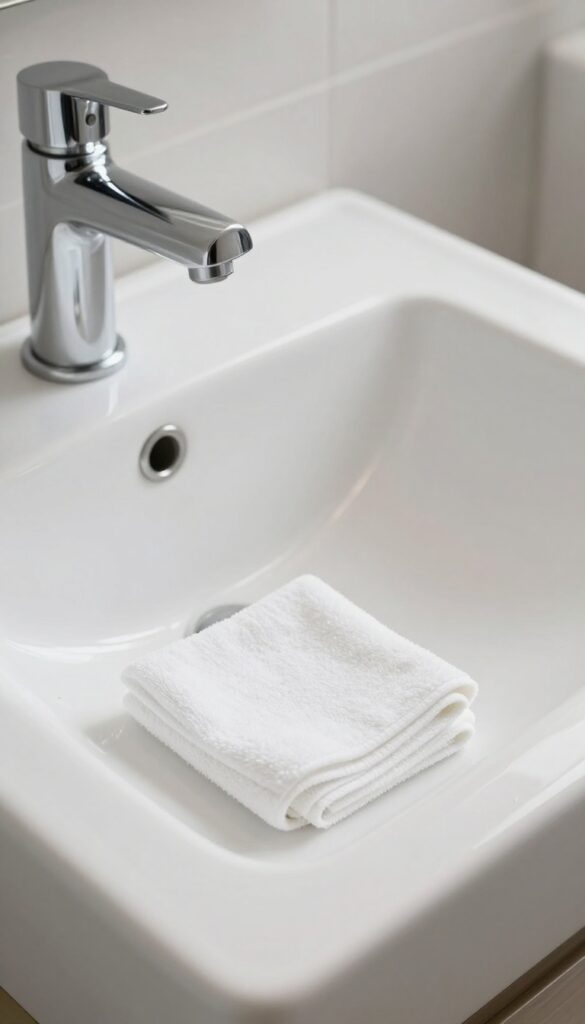
Sinks take a beating every day. Toothpaste splatters, soap residue, and water spots accumulate fast. A quick daily wipe prevents buildup and keeps them looking like new.
This 30-second habit saves you from deep scrubbing later.
The 30-second Routine
After brushing your teeth or washing dishes, grab a dry cloth or paper towel. Give the sink a quick once-over, focusing on the faucet handles and basin. That's it.
No sprays needed if you do it right after use.
Choose The Right Cloth
Microfiber cloths work best because they trap grime without scratching. Keep one under each sink so you're never hunting for a rag. Wash them weekly to avoid bacteria buildup.
Tackle Stubborn Spots Weekly
Even with daily wipes, hard water stains or toothpaste residue can set in. Once a week, sprinkle baking soda on a damp sponge and scrub gently. Rinse well.
This keeps your sink sparkling without harsh chemicals.
17. Use a Dryer Sheet on Baseboards
Baseboards collect dust and grime faster than you'd think, especially in high-traffic areas. Wiping them down can feel like a low-priority chore that never makes it to your list. But there's a clever trick that takes just seconds: grab a used dryer sheet and run it along the baseboards.
The anti-static properties help repel dust, so they stay cleaner longer. Plus, you get a subtle fresh scent without any extra effort.
Rubbing a used dryer sheet along baseboards repels dust and leaves a light scent. It's a quick way to keep baseboards clean longer.
Why It Works
Dryer sheets are designed to reduce static cling in the laundry, and that same property works on baseboards. The sheet leaves a thin, anti-static coating that prevents dust from settling as easily. This means less frequent dusting and a cleaner look for weeks.
How To Do It
Take a dryer sheet that's already been through the laundry—no need for a fresh one. Simply run it along the top edge and face of the baseboard. For stubborn spots, use a slightly damp cloth first, then follow up with the dryer sheet.
No bending or scrubbing required.
Extra Tips
Pair this trick with a quick vacuum of the floor before you start. You can also use the same sheet on other dust-prone surfaces like blinds or ceiling fan blades. Just toss the sheet when it's dirty—no rinsing or storing needed.
18. Clean Your Dishwasher Monthly
Your dishwasher works hard to keep your dishes spotless, but it needs a little TLC too. Over time, grease, food particles, and soap scum can build up, leading to unpleasant odors and less effective cleaning. A monthly deep clean keeps it running smoothly and smelling fresh.
Running an empty cycle with a cup of white vinegar on the top rack helps dissolve mineral deposits and grease. Follow up with a sprinkle of baking soda on the bottom for a second cycle to neutralize odors and polish the interior. This simple routine prevents buildup and extends your dishwasher's life.
Why Vinegar Works
White vinegar is a mild acid that cuts through hard water stains and soap residue. When heated during a cycle, it breaks down grime that regular washes miss. Just place a cup of vinegar upright on the top rack so it distributes evenly.
The Baking Soda Boost
After the vinegar cycle, sprinkle a cup of baking soda across the bottom of the dishwasher. Run a short hot cycle. Baking soda absorbs lingering odors and gives the interior a gentle scouring, leaving it fresh and shiny.
Don't Forget The Filter
Many dishwashers have a removable filter at the bottom. Rinse it under warm water monthly to remove trapped food debris. A clean filter improves water flow and prevents odors from forming in the first place.
19. Use a Pillowcase for Ceiling Fans
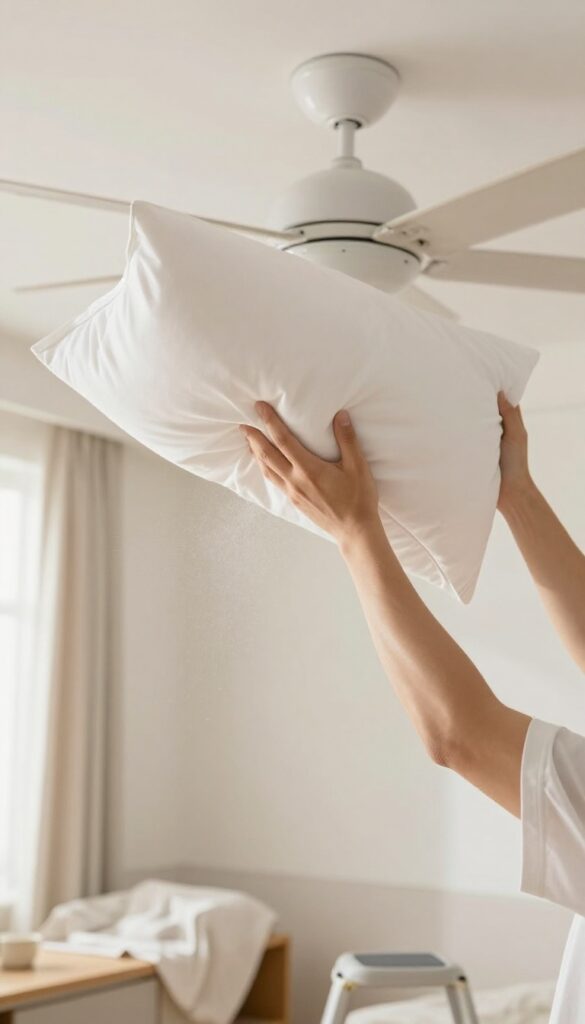
Ceiling fans are dust magnets, and cleaning them usually means dust raining down on your furniture and floor. There's a clever hack that makes the job nearly mess-free. Grab an old pillowcase and slide it over each fan blade, then pull it back off—the dust stays trapped inside the fabric.
This simple trick saves you from having to wipe down surfaces after cleaning the fan. It's fast, requires no special tools, and works on any standard ceiling fan blade. Plus, you can toss the pillowcase in the wash and reuse it next time.
Why It Works So Well
The pillowcase acts like a dust trap. When you slide it over the blade, the fabric collects dust on contact. Pulling it off in one smooth motion prevents dust from flying into the air or falling onto the floor.
No need for a ladder and a wet rag that just smears dirt around.
Step-by-step In Seconds
Stand on a sturdy step stool or ladder so you can reach the blades comfortably. Take a clean pillowcase and slip it over one blade, covering it completely. Gently pull the pillowcase back toward you, letting the dust fall inside.
Repeat for each blade. Shake the pillowcase outside or empty the dust into the trash.
Bonus Tips For Best Results
Use an old pillowcase you don't mind getting dusty. For extra stubborn grime, lightly dampen the pillowcase with water or a gentle cleaner before sliding it on. Clean your ceiling fan regularly—once a month is enough to keep dust from building up and spreading through the room.
20. Keep a Caddy for Bathroom Cleaning
Bathroom cleaning often feels like a scavenger hunt—you grab a spray from under the sink, a sponge from the kitchen, and a cloth from the laundry room. By the time you've gathered everything, your motivation has already fizzled. A simple caddy changes all that.
A portable cleaning caddy keeps all your bathroom essentials in one spot. Fill it with all-purpose cleaner, glass spray, a scrub brush, microfiber cloths, and a squeegee. Then just grab the handle and go.
No more hunting for supplies mid-task. When you're done, return the caddy to its home—under the sink or in a closet—so it's ready for next time. This one habit shaves minutes off every cleaning session and makes the whole process feel less like a chore.
What To Put In Your Caddy
Start with the basics: a multi-surface cleaner, a glass cleaner, a scrub brush with stiff bristles for grout, a toilet bowl cleaner, and a pack of microfiber cloths (color-code them if you like). Add a squeegee for mirrors and shower doors, and maybe a small bottle of hydrogen peroxide for mildew. Keep it simple—you don't need a dozen products.
The goal is to have everything you actually use, not everything you own.
How To Use The Caddy System
Each time you clean the bathroom, grab the caddy and start at the farthest point from the door. Work your way back, using the same tools in each room. When you finish one bathroom, carry the caddy to the next.
No back-and-forth trips. After the last room, wipe down the caddy itself (it gets grimy too) and restock anything that's running low. This system turns a scattered, frustrating task into a smooth, efficient routine.
Why It Reduces Stress
Knowing exactly where everything is eliminates decision fatigue. You don't have to pause and wonder which cleaner works on the shower or where you left the scrub brush. The caddy becomes a visual cue that it's time to clean, and once you start, there's no stopping to search.
That flow keeps you in the zone, and finishing feels satisfying instead of draining.
21. Use a Squeegee on Windows
Windows can be one of the most frustrating things to clean. No matter how careful you are, streaks and smudges seem to appear out of nowhere. A squeegee changes that completely.
A squeegee is a simple tool that gives you professional-looking windows without the hassle. It works by pulling the water and cleaning solution off the glass in a smooth, even motion, leaving no residue behind. The key is to wipe the blade with a dry cloth after each pass, so you're not just dragging dirty water across the glass.
Start at the top and pull down in a straight line, overlapping each stroke slightly. For best results, use a bucket of warm water with a few drops of dish soap or a dedicated window cleaner. The squeegee will make the job faster and more satisfying, and your windows will stay clean longer because there's no leftover film to attract dust.
Why A Squeegee Works Better
Paper towels and cloths often leave lint or tiny fibers behind, which create streaks. A squeegee's rubber blade glides over the glass, pushing the liquid off completely. It also covers more surface area in one pass, so you finish in half the time.
The Right Technique
Start at the top corner and pull the squeegee horizontally across the glass, slightly overlapping each stroke. After each pass, wipe the blade with a clean, dry cloth. This prevents water from dripping down and causing new streaks.
Finish by wiping the edges with a microfiber cloth.
When To Use It
Use a squeegee on all smooth glass surfaces: windows, shower doors, mirrors, and even glass tabletops. It's especially handy after a deep clean or when you notice smudges from fingerprints or hard water spots. For outdoor windows, a squeegee with a long handle makes the job safe and easy.
22. Clean Your Washing Machine
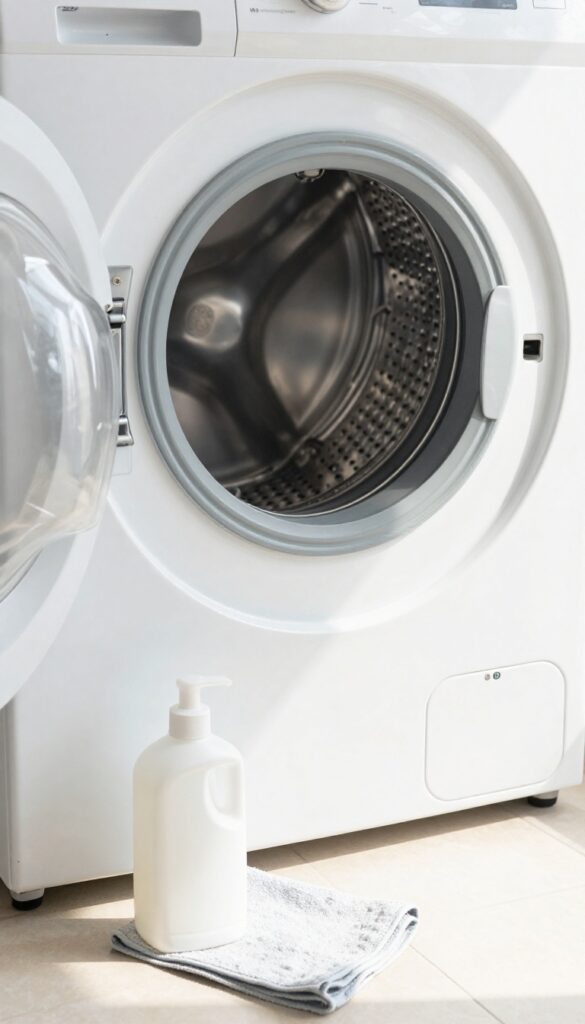
Your washing machine works hard, but it also needs a little maintenance to keep performing at its best. Over time, detergent residue, fabric softener buildup, and mold can accumulate inside the drum, hoses, and seals. This not only causes musty odors but can also leave your clothes less fresh.
Running a monthly cleaning cycle is simple and makes a big difference. You can use white vinegar or a specialized washing machine cleaner. Just pour two cups of vinegar into the detergent dispenser or directly into the drum, then run a hot, empty cycle.
For front-loaders, wipe the rubber gasket afterward to prevent mold. This routine removes buildup, eliminates odors, and keeps your machine efficient, which can also extend its lifespan.
Why Monthly Cleaning Matters
Mold and mildew thrive in the warm, damp environment of a washing machine, especially in front-loaders with rubber seals. Left unchecked, they can cause unpleasant smells and even transfer spores to your clothes. Detergent residue also builds up over time, reducing cleaning effectiveness and potentially causing machine errors.
A monthly clean prevents these issues and keeps your laundry smelling fresh.
What You Need
The simplest option is white vinegar—it's cheap, natural, and effective. Pour two cups into the detergent drawer or directly into the drum. Alternatively, use a commercial washing machine cleaner tablet or powder, following the package instructions.
You'll also need a microfiber cloth to wipe the door seal and exterior after the cycle.
Step-by-step Process
Start by removing any clothes or items from the drum. Add the vinegar or cleaner. Select the hottest, longest cycle your machine offers (usually labeled "Clean Washer" or "Heavy Duty").
Let it run empty. Once done, wipe the rubber gasket with a dry cloth to remove moisture. For extra freshness, leave the door open for a few hours to air out the interior.
23. Use a Broom for Cobwebs
Cobwebs in high corners and on ceilings are annoying, but dragging out a ladder every time feels like overkill. A broom can be your best friend here—with a simple hack, you can reach those webs without stretching or balancing on tiptoes. Just attach a microfiber cloth to the broom head using a rubber band.
The cloth traps the cobwebs instead of just pushing them around, and the rubber band keeps it secure. You'll sweep away dust and webs in one smooth motion, no ladder required.
Why Microfiber Works Best
Microfiber cloths are designed to grab and hold dust, not just move it. When you wrap one around your broom head, it acts like a sticky trap for cobwebs. The fibers create static electricity that pulls in even the finest strands, so you don't have to chase webs around.
Plus, microfiber is gentle on painted walls and ceilings, so no scratches or marks.
The Rubber Band Trick
A rubber band is the secret to keeping the cloth in place. Simply lay the microfiber cloth flat over the broom head, then wrap a rubber band around the bristles and cloth near the base. Make sure it's snug but not too tight—you want the cloth to stay put but still be removable for washing.
This setup takes seconds and holds through multiple swipes.
How To Sweep Without A Mess
Start from the top of the cobweb and sweep downward in one long, gentle motion. The cloth will catch the web, and any loose dust will fall onto the cloth rather than the floor. If the web is thick, you might need a second pass.
After you're done, shake the cloth outside or toss it in the laundry. No dust clouds, no ladder, no stress.
24. Store Cleaning Tools Properly
Tossing wet mops and brooms into a closet might seem harmless, but it's a fast track to mildew and broken bristles. Proper storage keeps your tools in good shape and ready to use—plus it prevents that musty smell from spreading to your cleaning supplies.
Hanging mops and brooms upside down allows air to circulate around the heads, drying them completely. For brushes, store them bristle-up so the bristles don't get bent or misshapen. A simple wall rack or over-the-door organizer can transform a cluttered closet into an efficient cleaning station.
Hang Mops And Brooms To Dry
Moisture is the enemy of mop heads and broom bristles. After use, hang them on a hook or a dedicated rack with the head facing down. This prevents water from pooling at the base, which leads to mildew and odors.
If you don't have wall space, use a tension rod inside a closet or a over-the-door hanger.
Store Brushes Bristle-up
Scrub brushes and toilet brushes should be stored with the bristles pointing up. This keeps them from flattening or bending out of shape. It also allows any trapped water to drip away, keeping the bristles clean and dry.
A simple cup or holder works perfectly.
Use A Caddy For Smaller Tools
Keep sponges, scrubbers, and gloves in a ventilated caddy or basket. Avoid sealing them in airtight containers—airflow is key. A caddy also makes it easy to carry everything from room to room, saving you trips back and forth.
25. Reward Yourself After Cleaning

Cleaning can feel like a never-ending loop of effort with no payoff. But what if you could turn that cycle into something you actually look forward to? The secret is simple: pair a small reward with each cleaning session.
That positive association can shift your mindset from dread to anticipation.
Rewards don't need to be big or expensive. The idea is to give yourself something pleasant immediately after you finish a task. This creates a dopamine hit that reinforces the behavior, making it more likely you'll repeat it next time.
Over time, your brain starts linking cleaning with a little treat, not a punishment.
Choose Your Reward Wisely
Pick something you genuinely enjoy but rarely allow yourself. It could be a fancy coffee, a 15-minute guilt-free scroll through social media, or an episode of your favorite show. Keep it small enough that you won't feel tempted to skip cleaning just to get the reward, but meaningful enough to feel like a win.
Use A Timer To Stay On Track
Set a timer for 20 or 30 minutes and clean as fast as you can. When the timer goes off, stop and collect your reward. This gamifies the process and prevents burnout.
You'll be amazed how much you can accomplish in a short, focused burst when a treat is waiting.
Make It A Habit Loop
Consistency is key. After a few days of cleaning and rewarding yourself, the routine becomes automatic. You'll start craving that little reward, and cleaning becomes the price of admission.
Before long, you might even find yourself looking forward to a quick tidy-up.
FAQ
How often should I deep clean my house?
Aim for a deep clean every 3 to 6 months, focusing on areas like ovens, grout, windows, and behind appliances. Regular weekly maintenance makes deep cleaning easier.
What is the best way to clean hardwood floors?
Sweep or vacuum regularly to remove grit, then mop with a damp (not wet) mop using a cleaner specifically designed for hardwood. Avoid excess water to prevent damage.
How can I remove stubborn stains from carpets?
Blot the stain immediately, then apply a mixture of white vinegar and water (1: 1). Let it sit for 5 minutes, blot again, and repeat if needed. For tough stains, use a carpet cleaner.
What is the most efficient cleaning order for a room?
Start from the top (ceiling fans, shelves) and work your way down to floors. Clean dry surfaces first, then wet surfaces. This prevents dust from settling on already cleaned areas.
How do I keep my house smelling fresh without harsh chemicals?
Open windows daily for ventilation, use baking soda in carpets and trash cans, simmer citrus peels and cinnamon on the stove, and use essential oil diffusers for natural scents.
Conclusion
Cleaning doesn't have to be a source of stress or a time drain. By incorporating these small, smart habits into your routine, you can maintain a clean home with much less effort. Start with just one or two tips that resonate with you, and build from there.
Over time, these strategies will become second nature, freeing up your energy for the things that truly matter. A cleaner home and a calmer mind are within reach.


