
You've finally gathered all the right cleaning tools, but now they're taking over your tiny laundry room or crammed under the sink. That jumble of bottles and brushes makes every chore feel harder than it needs to be. A few smart storage tweaks can turn that chaos into a system that actually works.
Small spaces demand creative solutions that don't eat up precious square footage. The ideas here focus on using vertical space, hidden spots, and multi-purpose containers to keep supplies accessible yet out of sight. No expensive renovations required.
Ready to reclaim your cleaning closet and streamline your routine? These 25 storage ideas are designed for tight quarters and real-life messes.
1. Over-the-Door Shoe Organizer for Spray Bottles
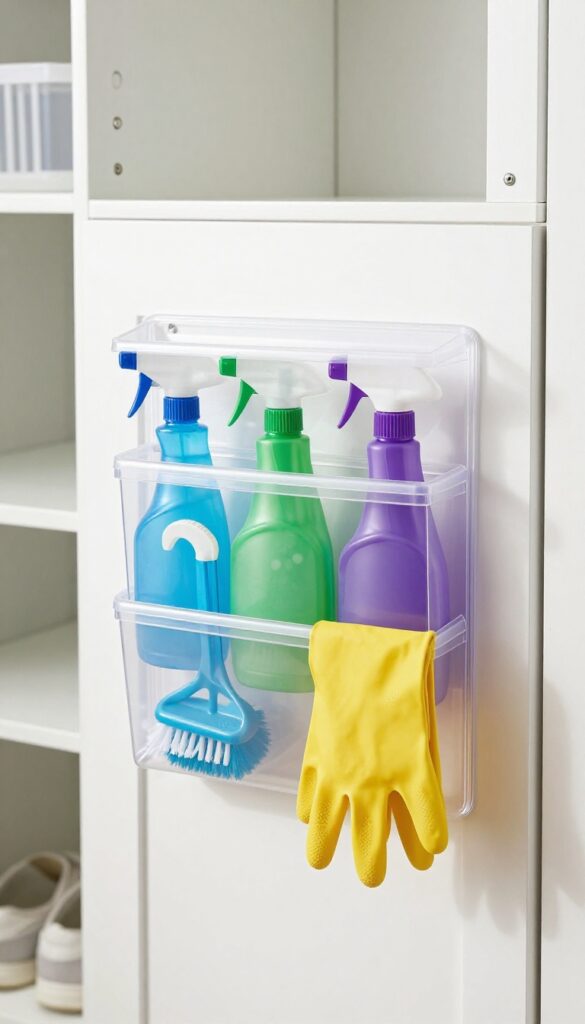
Repurpose a clear shoe organizer on the back of a pantry or utility closet door to hold spray bottles, scrub brushes, and gloves. Each pocket keeps items visible and easy to grab. This trick turns wasted door space into a cleaning caddy that doesn't take up any floor or shelf room.
Shoe organizers aren't just for shoes. The clear plastic ones with individual pockets are perfect for corralling spray bottles of all sizes. You can slide a bottle into each pocket, and the clear material lets you see exactly what you need at a glance.
It also works great for holding scrub brushes, dusters, and even a pair of rubber gloves in the bottom pockets. The best part? It hangs on the back of a door, so it uses space that would otherwise be empty.
Choose The Right Organizer
Look for a clear, over-the-door shoe organizer with pockets that are at least 6 inches wide and 4 inches deep. Avoid fabric ones that hide your supplies. A 24-pocket version gives you plenty of room for all your essentials without feeling cluttered.
Arrange By Frequency Of Use
Put your most-used all-purpose cleaner and glass spray in the top rows where they're easiest to reach. Store heavier bottles like floor cleaner or bleach in the middle or lower pockets to keep the organizer balanced. Tuck small items like scrub brushes and microfiber cloths in the bottom pockets.
Bonus: Label The Pockets
Use a label maker or adhesive labels to mark each pocket with the product name. This helps everyone in the household put things back in the right spot. It also makes restocking a breeze since you can see at a glance what's running low.
2. Magnetic Strips for Metal Tools
If you've got a collection of metal cleaning tools—scissors, tweezers, small dustpans, even spray bottle nozzles—they're probably taking up valuable drawer or counter space. A magnetic strip mounted inside a cabinet or on a wall can hold them neatly in place, freeing up room and keeping everything visible and within reach. This trick works especially well in tight spots like under the sink or inside a broom closet, where every inch counts.
Magnetic strips are a game-changer for small-space cleaning storage. They're inexpensive, easy to install, and instantly declutter your drawers. Plus, they keep your most-used tools front and center so you can grab them without digging around.
Where To Mount Them
The best spots are inside cabinet doors (like under the kitchen sink), on the wall of a utility closet, or even on the side of a metal shelving unit. Make sure the surface is clean and dry before attaching. For heavy tools, use screws instead of adhesive strips to ensure they stay put.
What To Store
Stick with metal tools only—scissors, tweezers, small dustpans, lint rollers, and even metal-handled scrub brushes. Avoid storing spray bottles or plastic items, as they won't stick. You can also use magnetic hooks to hang lightweight items like rubber gloves or microfiber cloths.
Pro Tips For Maximum Use
Group similar tools together on the same strip, like all scissors or all dusting tools. If you have multiple strips, label the cabinet door or wall area so everyone in the household knows where things go. For a cleaner look, paint the strip to match your cabinet interior or wall color.
3. Tension Rod Under the Sink
Under-sink cabinets are notorious black holes for cleaning supplies. Bottles get pushed to the back, leaky spray nozzles soak everything, and you end up buying duplicates because you can't find the original. A tension rod changes that dynamic by turning that awkward vertical space above the plumbing into prime real estate.
This trick costs under $10 and takes thirty seconds to install. No tools, no drilling, no permanent changes. Just a simple rod that holds your spray bottles upside down so they're always ready to use and never dripping on your shelves.
The beauty of this idea is its simplicity. You're using a tension rod—the same kind you'd use for a shower curtain—but instead of hanging fabric, you're hanging spray bottles by their triggers. The upside-down position keeps the nozzle primed and prevents leaks from pooling on your cabinet floor.
Plus, it frees up shelf space for larger containers or bulk refills.
Choosing The Right Rod
Not all tension rods are created equal. For this hack, you want a rod that extends to fit snugly between the walls of your under-sink cabinet. Measure the width of your cabinet before buying.
A rod that's too short will slip, and one that's too long won't fit. Look for a rod with rubber ends to grip the cabinet walls without scratching. A spring-loaded rod works best because it stays put even when you're grabbing bottles.
Arranging Bottles For Easy Access
Hang the most-used bottles toward the front and less-frequent ones toward the back. Group by type: all-purpose cleaners together, glass cleaners together, bathroom sprays together. If your rod is long enough, you can even hang multiple rows by installing two rods at different depths.
Just make sure there's enough clearance between the rod and the cabinet door so bottles don't get knocked off when you close it.
What About Heavy Bottles?
Standard tension rods can hold a surprising amount of weight, but there are limits. Stick to bottles under 32 ounces. For heavier containers like laundry detergent or fabric softener, keep those on the shelf below.
If you're worried about the rod slipping, you can add a dab of clear silicone caulk to the ends for extra grip—it's removable later but holds strong in the meantime.
4. Stackable Bins for Categorization
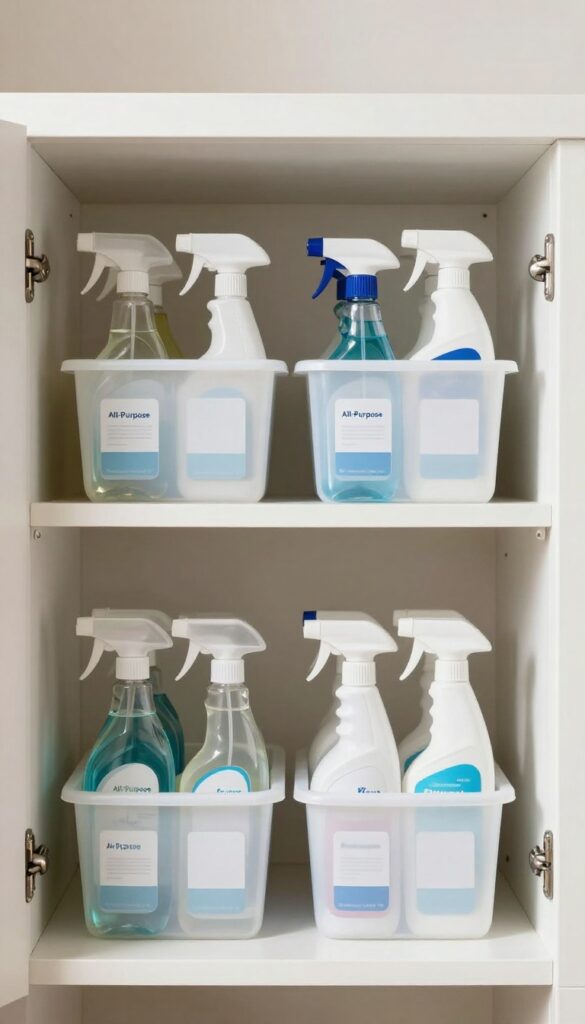
Clear, stackable bins are a game-changer for small cleaning supply storage. They let you group items by category—all-purpose cleaners, bathroom products, floor care—and see everything at a glance. No more digging through a dark cabinet to find the glass spray.
Label each bin clearly, and you'll grab exactly what you need in seconds.
Stackable bins maximize vertical space in cabinets, closets, or on shelves. They keep similar items together and prevent bottles from toppling over. Plus, they're easy to pull out and carry to another room if needed.
Choose The Right Size
Opt for bins that fit your shelf depth and height. Standard 12×12 inch bins work well for most cabinets. For tall spray bottles, look for bins at least 10 inches high.
Measure your space first to avoid wasted gaps.
Label Like A Pro
Use a label maker or simple chalkboard stickers. Write categories like "Kitchen Cleaners, " "Bathroom, " or "Floor Care. " Clear labels mean anyone in the household can put things back in the right spot.
Stack Strategically
Place heavier bins on the bottom and lighter ones on top. If your cabinet is deep, stack two bins in front and two behind. Use sturdy bins with locking lids so they don't wobble.
5. Wall-Mounted Pegboard System
A pegboard is one of the most flexible storage solutions you can install. It turns an empty wall or the inside of a cabinet door into a customizable command center for your cleaning tools. You can rearrange hooks and baskets as your collection changes, so it grows with you.
Start with a small pegboard panel—about 2×2 feet is plenty for a cleaning station. Mount it on a wall near your cleaning area or inside a tall cabinet door. Use peg hooks for long-handled brushes and dusters, small baskets for spray bottles and sponges, and cup hooks for microfiber cloths.
The beauty is that you can move everything around without drilling new holes. Paint the pegboard to match your wall or leave it natural for a workshop vibe.
Choosing The Right Pegboard
Standard hardboard pegboards are cheap and easy to cut, but metal pegboards hold heavier items without sagging. For inside a cabinet, a flexible plastic pegboard can be trimmed to fit odd dimensions. Make sure you use the right pegboard accessories—hooks with rubber tips stay put better.
Layout Tips For Maximum Utility
Group items by frequency of use: keep daily spray bottles at eye level, store bulky dusters on longer hooks below, and reserve top hooks for items you rarely grab. Use small baskets for sponges and gloves so they don't clutter the hooks. Leave some empty hooks for future additions.
Installation Without Damaging Walls
If you're renting or don't want permanent holes, use adhesive pegboard mounting strips rated for the weight. For a door installation, use over-the-door hooks or a lightweight pegboard that attaches with strong double-sided tape. Always check the weight limit and distribute items evenly.
6. Rolling Cart for Multi-Room Use
A slim rolling cart is a workhorse for small-space cleaning. It keeps your go-to supplies organized and lets you wheel them from the kitchen to the bathroom to the living room without carrying armloads of bottles. Look for a narrow cart—12 inches wide or less—that can slide into the gap between the fridge and counter or beside a washer and dryer.
The key is to stock it with only the essentials you use daily, so it stays light and easy to move.
A rolling cart turns your cleaning routine into a one-stop mobile station. Instead of hunting for supplies in different cabinets, you grab the cart and go. It also frees up under-sink space for bulkier items like a mop bucket or vacuum attachments.
Choose a cart with wire or mesh shelves so spills drain through and don't pool. Add a small caddy on top for sponges and scrub brushes, and hang a microfiber cloth over the handle for quick wipe-downs.
What To Stock On Your Cart
Keep it minimal: one all-purpose cleaner, glass cleaner, disinfectant wipes, a scrub brush, and a roll of paper towels. Add a small spray bottle of water for quick dusting. If you have pets, include a lint roller.
The goal is to have everything you need for a 10-minute tidy-up without extras that clutter the cart.
Where To Park It
Store the cart in a hallway closet, laundry room, or a narrow gap between furniture. If you have a pantry, slide it next to the brooms. In an apartment, tuck it behind the bathroom door or in a corner of the kitchen.
The cart should be within easy reach but out of the main traffic flow.
Customize With Hooks And Bins
Attach small hooks to the side of the cart for hanging dustpans, gloves, or a reusable spray bottle. Use small bins on the bottom shelf for sponges, scrub pads, and trash bags. Label each bin so everything has a home.
This prevents the cart from becoming a jumble and keeps you from overstocking.
7. Lazy Susan for Corner Cabinets
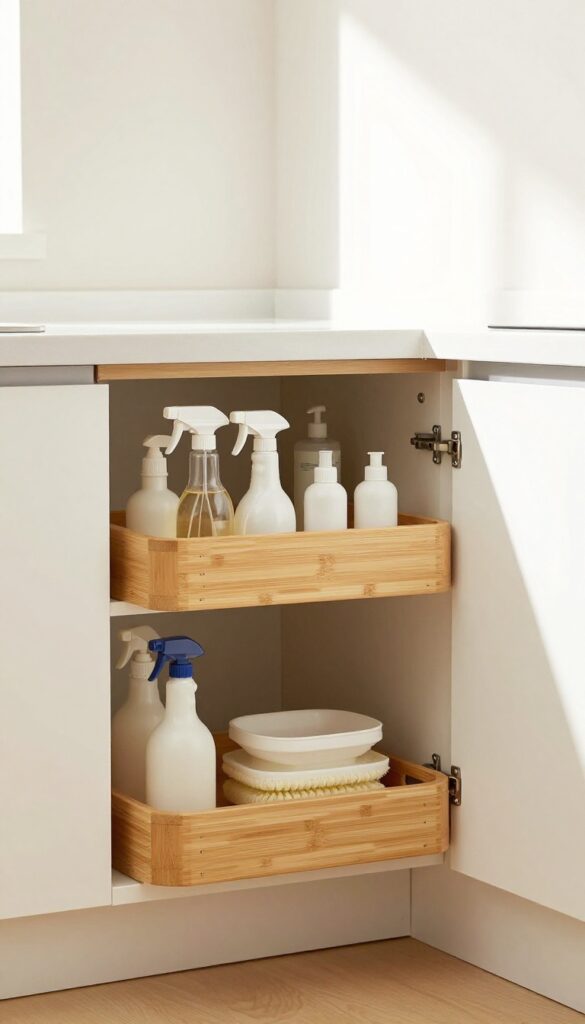
Corner cabinets and deep under-sink spaces are notorious for swallowing bottles whole. You know the drill—you buy a new spray cleaner, shove it in the back, and forget it exists until you move out. A lazy Susan spins that mess into order, letting you grab whatever you need without playing archaeologist.
A lazy Susan turns dead space into a functional carousel. Choose a sturdy, non-slip model with a raised lip to keep bottles from sliding off during spins. Place it on the bottom shelf of a corner cabinet or under the sink, then group like items together—all-purpose cleaners on one side, glass sprays on the other.
Now you can rotate the whole setup with one hand while holding a sponge in the other.
Pick The Right Size And Material
Measure your cabinet base before buying. A 12-inch diameter lazy Susan fits most standard cabinets, but if you have a deep corner, go for a larger one. Avoid wire or mesh models—they let small bottles tip over.
Instead, choose a plastic or bamboo turntable with a non-slip surface. Bamboo looks nicer and resists moisture better in damp under-sink areas.
Arrange By Frequency Of Use
Place daily-use items like dish soap and all-purpose spray on the outer edge of the lazy Susan. Reserve the center for less-used bottles like oven cleaner or floor wax. If your cabinet is deep enough, stack a second lazy Susan on a riser for double the spin action.
Just keep the weight balanced so the turntable rotates smoothly.
Bonus: Use A Two-tier Lazy Susan
For tall cabinets, a two-tier lazy Susan doubles your storage without taking up more floor space. Put sponges, scrub brushes, and small bottles on the top tier, and larger spray bottles on the bottom. This works especially well under a kitchen sink where you need quick access to both dish tools and cleaning liquids.
8. Drawer Dividers for Small Items
A junk drawer full of sponges, scrub brushes, and gloves is a recipe for frustration. Drawer dividers turn that chaos into a neat, organized system where everything has its place. Adjustable dividers are especially handy because they can be rearranged as your supplies change.
Choose The Right Dividers
Look for expandable or interlocking dividers that fit your drawer dimensions. Bamboo or plastic options work well and are easy to clean. Metal dividers with a non-slip base stay put even when you're rummaging.
Sort By Frequency Of Use
Place items you reach for daily—like dish soap or a scrub sponge—in the front compartments. Store backup gloves, extra pads, or specialty brushes toward the back. This way, you're not digging through rarely used items to get to the essentials.
Label The Compartments
Use a label maker or simple chalk labels to mark each section. It helps everyone in the household know where things go, making it easier to maintain the system. Plus, it adds a polished look to an otherwise utilitarian drawer.
9. Hanging Baskets from Shelves
The space under a shelf is often overlooked, but it's prime real estate for storing lightweight cleaning supplies. By attaching small wire baskets to the underside of a shelf, you can keep extra rags, microfiber cloths, or dusting wands within easy reach without taking up any shelf space. This trick works especially well in utility closets, under-sink cabinets, or above a washer and dryer.
Hanging baskets turn dead space into functional storage. They keep frequently used items visible and accessible, so you're not digging through a pile to find a cloth. Plus, they're easy to install and remove for cleaning.
What To Store
Stick with lightweight items like microfiber cloths, dusting mitts, scrub brushes, or small spray bottles. Avoid heavy bottles or metal tools that could strain the basket or shelf. You can also store disposable gloves or trash bags rolled up tight.
Installation Tips
Use adhesive hooks or small screws to attach the basket securely to the shelf's underside. Make sure the basket is level and won't swing. If you're renting, adhesive hooks work well and remove cleanly.
For a sturdier hold, screw-in cup hooks or small L-brackets are better.
Best Locations
Try hanging baskets under a shelf in the laundry room for dryer sheets and stain removers. In the kitchen, use them under the sink cabinet to hold sponges and scrub brushes. In a bathroom, they can store extra washcloths or toilet brush refills.
10. PVC Pipe for Long-Handled Tools
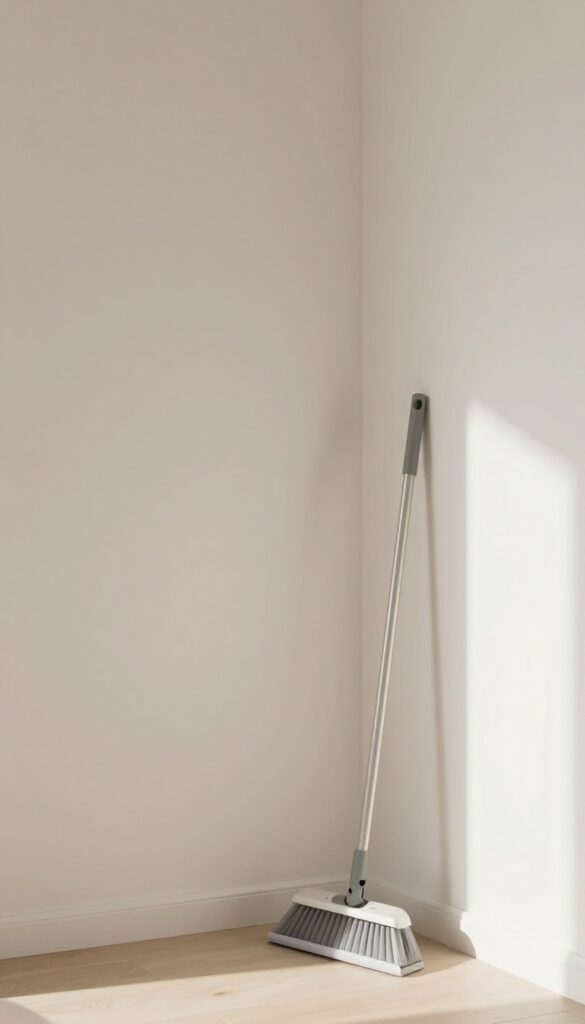
Mops and brooms always seem to end up in a tangled heap on the floor or wedged behind the washing machine. A simple PVC pipe can solve that mess without taking up extra space. This trick is cheap, easy to install, and works in almost any closet or cabinet.
Grab a length of PVC pipe wide enough to fit your mop or broom handle. Cut it to match the height of your cabinet or closet interior. Secure it vertically against the back wall using pipe clamps or heavy-duty adhesive strips.
Slide each tool into the pipe, and they'll stand upright without tipping over. You can even group several pipes together for different tools.
Why It Works So Well
Long-handled tools are awkward because they're top-heavy. A PVC pipe keeps them centered and prevents them from leaning or falling. It also frees up floor space that would otherwise be taken by a bucket or stand.
Customizing For Your Space
Measure the depth of your cabinet first. If it's shallow, use a smaller diameter pipe or cut it at an angle to make sliding easier. You can also paint the pipe to match your decor or label each one for specific tools.
Installation Tips
Use adhesive strips rated for the weight of your tools. For a more permanent solution, screw pipe clamps into the cabinet wall. Make sure the pipe sits level so tools don't get stuck.
11. Adhesive Hooks Inside Cabinet Doors
Cabinet doors are one of the most underused storage surfaces in any home. They offer a hidden spot to stash frequently used cleaning tools without cluttering countertops or shelves. A few sturdy adhesive hooks can turn that blank interior into a grab-and-go station for dustpans, aprons, or spray bottles.
Stick adhesive hooks on the inside of cabinet doors to hang dustpans, aprons, or reusable spray bottles. Keeps them out of sight but instantly accessible.
Choose The Right Hooks
Not all adhesive hooks are created equal. Look for ones rated to hold at least 2–3 pounds, with a strong bond that won't peel off in humid conditions. Command hooks are a popular choice because they remove cleanly, but heavy-duty options with foam tape work well for heavier items like spray bottles.
Hang Items You Reach For Daily
Think about what you grab most often: a dustpan and brush, a microfiber cloth, or a spray bottle of all-purpose cleaner. Hang these on the inside of the cabinet door under your sink or in the laundry room. You'll save a step every time you clean.
Avoid Overloading The Door
Too much weight can warp the cabinet door or weaken the adhesive bond over time. Stick to lightweight items and distribute hooks evenly. If you need to hang something heavy, consider a screw-in hook instead of adhesive.
12. Tiered Shelf Risers
Tiered shelf risers are a simple way to double your usable counter or shelf space without any installation. They lift the back row of bottles so every label is visible and reachable. No more pushing tall spray bottles aside to grab the one behind them.
A tiered riser turns a flat surface into stadium seating for your cleaning supplies. You can find them in plastic, bamboo, or wire—choose one that matches your cabinet or counter. They work especially well under the sink or on a laundry room shelf where depth is limited but height is available.
Pick The Right Size
Measure your shelf or counter depth before buying a riser. Standard risers are about 10–12 inches deep, which fits most cabinets. If you have a deeper space, look for adjustable or extra-wide models that won't leave wasted space behind the riser.
Group By Frequency Of Use
Place your daily-use sprays and wipes on the front tier and backup bottles or specialty cleaners on the back tier. This keeps your most-used items within easy reach while still keeping everything organized and visible.
Use With Pull-out Drawers
If you have a pull-out base cabinet drawer, a tiered riser fits perfectly inside. It prevents bottles from rolling around when you open and close the drawer. Just make sure the riser is narrow enough to slide in and out without catching.
13. Vacuum-Sealed Bags for Bulky Items
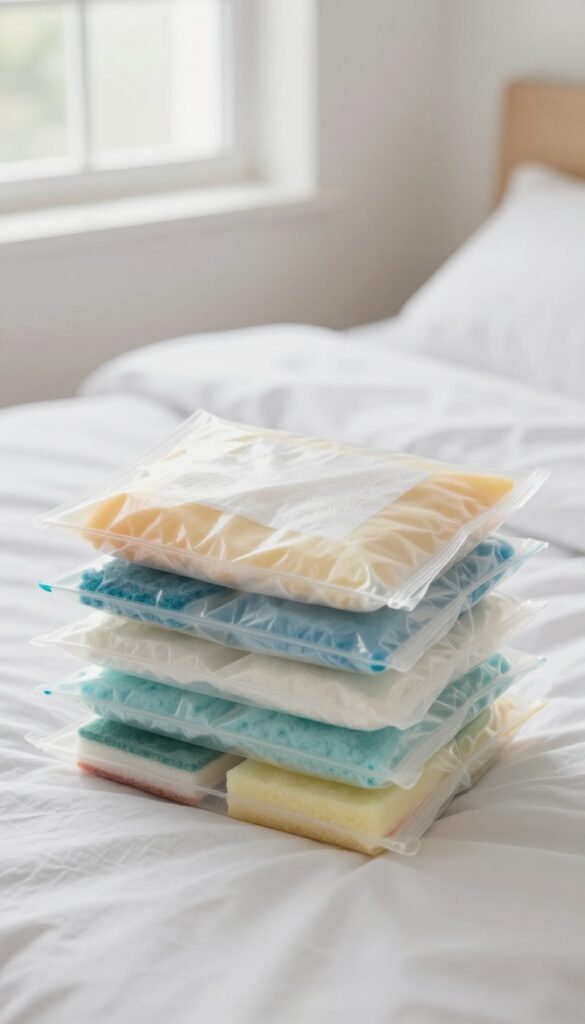
Extra sponges, bulk packs of cloths, and seasonal cleaning tools take up way too much space in a small home. Vacuum-sealed bags are a game-changer for compressing these bulky items into flat, stackable packages. You can tuck them under the bed or on a high shelf without sacrificing storage for everyday essentials.
Vacuum-sealed bags aren't just for clothes and bedding. They work perfectly for cleaning supplies that you don't need to access daily. By removing the air, you shrink the volume by up to 80%, freeing up valuable real estate in your limited storage areas.
This method is especially useful for items that come in large quantities or are used seasonally.
What To Vacuum-seal
Think about items you buy in bulk: extra microfiber cloths, sponge refills, or even dusting mitts. Seasonal tools like holiday-specific cleaning brushes or rarely used attachments can also go in. Just make sure everything is completely dry before sealing to prevent mold or mildew.
Where To Store Them
Once compressed, these bags are flat and easy to slide under the bed, into a storage ottoman, or on the top shelf of a closet. You can also stack them in a clear bin for easy identification. Label each bag with a permanent marker so you know what's inside without opening it.
Pro Tips For Best Results
Use a handheld vacuum sealer or a reusable bag with a one-way valve. Don't overfill—leave a few inches of space at the top for a good seal. If you're reusing bags, wash and dry them thoroughly between uses to keep your supplies fresh.
14. Caddy for Under-Sink Organization
The space under your kitchen or bathroom sink can quickly become a black hole of half-used bottles and loose sponges. A divided caddy with a sturdy handle solves that by corralling everything into one portable unit. You just grab the handle, pull the whole caddy out, and have every cleaner and scrubber right at your fingertips.
When you're done, slide it back into place—no more digging around in the dark.
A divided caddy keeps products upright and separated, so bottles don't tip over and leak. The handle makes it easy to carry to other rooms when needed. Choose a caddy with adjustable dividers to fit tall spray bottles and short jars alike.
Look for one with a solid base and raised edges to catch drips.
Pick The Right Caddy Size
Measure your under-sink cabinet height and depth before buying. A caddy that's too tall won't fit under pipes, and one too wide will be hard to pull out. Clear plastic caddies let you see contents at a glance, while wire caddies allow airflow to prevent mildew.
Group By Task Or Room
Use one caddy for kitchen cleaners (degreaser, dish soap, scrub brushes) and another for bathroom supplies (toilet cleaner, glass spray, grout brush). Label each caddy with a simple tag so you can grab the right one fast. This also prevents cross-contamination between food and bathroom areas.
Maintain And Refresh Monthly
Once a month, pull out your caddy, wipe down the inside, and check for expired or nearly empty products. Replace anything that's leaking or past its prime. This keeps your under-sink area from getting cluttered again and ensures you always have what you need.
15. Spice Rack for Small Bottles
Those tiny bottles of essential oils, stain removers, and concentrated cleaners are notorious for tipping over and getting lost in the back of a cabinet. A simple spice rack solves that problem in seconds. Mount one on the wall or inside a cabinet door to create a dedicated home for these small containers.
They stay upright, visible, and easy to grab.
Pick The Right Rack
Look for a spice rack with angled shelves or a lip to keep bottles from sliding off. Wire racks are great because they let you see labels at a glance, but solid wood or acrylic works too. Measure your tallest bottle before buying to make sure it fits.
Where To Mount It
The inside of a cabinet door is a prime spot—keeps bottles hidden but accessible. Or mount it on a wall near your cleaning station, like above a laundry sink or beside the washing machine. Just make sure it's at eye level so you can read labels easily.
What To Store There
Essential oils, spray bottle concentrates, small stain removers, and even travel-size dish soaps are perfect candidates. Group them by use: all-purpose cleaners together, bathroom products separate. This way you grab what you need without rummaging.
16. Tension Rod for Hanging Cloths
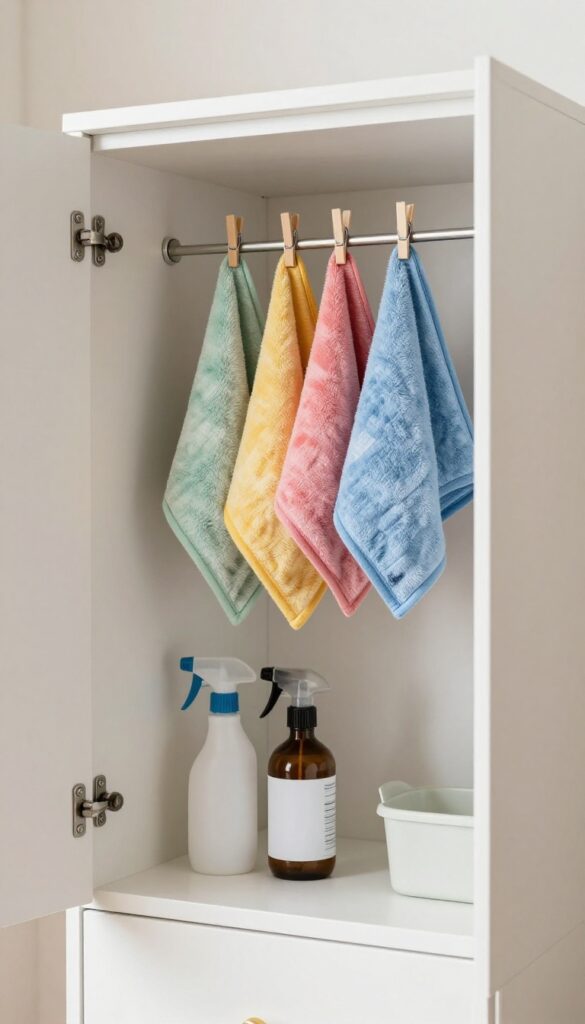
Microfiber cloths and dusters can turn into a tangled mess when tossed in a drawer or bin. A tension rod gives them a dedicated home where they can breathe and dry out properly between uses. This trick works especially well in shallow cabinets or narrow closets where you have a few inches to spare.
Why It Works
Hanging cloths instead of folding or stacking them prevents mildew and musty smells. Air circulates freely around each piece, so they dry faster after washing. Plus, you can see every cloth at a glance—no more digging through a pile to find the one you need.
Where To Install
Look for a spot that's at least 24 inches wide and 6 inches deep. Under the sink, inside a pantry, or on the back of a closet door are prime candidates. If you have a tall cabinet, install the rod at a height that leaves room for spray bottles or bins below.
Setup Tips
Choose a tension rod that's adjustable and has rubber ends to grip the walls without slipping. For heavy wet cloths, opt for a thicker rod rated for more weight. Use small binder clips or clothespins to hang individual cloths if you don't want to fold them over the rod.
17. Clear Shoe Boxes for Bulk Supplies
Bulk cleaning supplies are cost-effective, but they can quickly clutter your shelves. Clear shoe boxes offer a neat solution: they're stackable, see-through, and just the right size for refill packs, extra sponges, or cleaning tablets. You can grab what you need without rummaging through a messy pile.
These transparent boxes turn a pile of supplies into an organized system. Stack them high on a shelf or in a closet, and you'll always see what's inside. Label each box with a marker or sticker for even faster access.
Group By Category
Sort your bulk items into logical groups: one box for laundry supplies, another for all-purpose cleaners, and a third for sponges and scrubbers. This way, you know exactly where to look when you run out of something.
Maximize Vertical Space
Clear shoe boxes are designed to stack securely. Use them to build a tower in a deep cabinet or on a utility shelf. The uniform shape keeps everything stable and prevents toppling.
Easy Inventory At A Glance
When you can see through the box, you'll never accidentally buy a duplicate. Just glance at your stack to know when you're low on dishwasher pods or all-purpose cleaner refills.
18. Over-the-Toilet Storage Unit
Bathrooms are notorious for having zero extra storage, yet cleaning supplies always seem to end up there. The area above the toilet is prime real estate that usually sits empty. An over-the-toilet shelf unit turns that dead space into a dedicated cleaning caddy without taking up any floor area.
An over-the-toilet unit is essentially a narrow shelving rack that fits around or above your toilet tank. Most models have two to four tiers, giving you plenty of room for spray bottles, scrub brushes, extra sponges, and even a small caddy for daily toiletries. Since it's vertical, it doesn't make the bathroom feel cramped.
Choose a unit with adjustable shelves so you can fit taller bottles on the bottom and smaller items on top. Some even come with a built-in towel bar or hooks for hanging dusters or cloths. The key is to keep it organized—use small bins or baskets on each shelf to group like items together.
That way you can grab a spray and a cloth without knocking over a dozen bottles.
Choosing The Right Unit
Measure the space between your toilet and the wall or vanity before buying. Standard units are about 24 inches wide, but you can find narrower options for tight spots. Look for a sturdy metal or wood frame that won't wobble.
If your bathroom is humid, opt for a rust-resistant finish.
Organizing The Shelves
Use the top shelf for items you rarely use, like deep-cleaning products or backup supplies. The middle shelf is perfect for daily sprays and toilet bowl cleaner. Keep a small bin on the bottom shelf for scrub brushes and gloves so they're easy to grab but still out of sight.
Styling Tips
Add a small plant or a decorative basket on the top shelf to soften the utilitarian look. Stick with a cohesive color scheme—white or black shelves blend into most bathrooms. Avoid overcrowding; leave a little breathing room between items so the unit looks intentional, not cluttered.
19. Magnetic Spice Tins for Small Parts
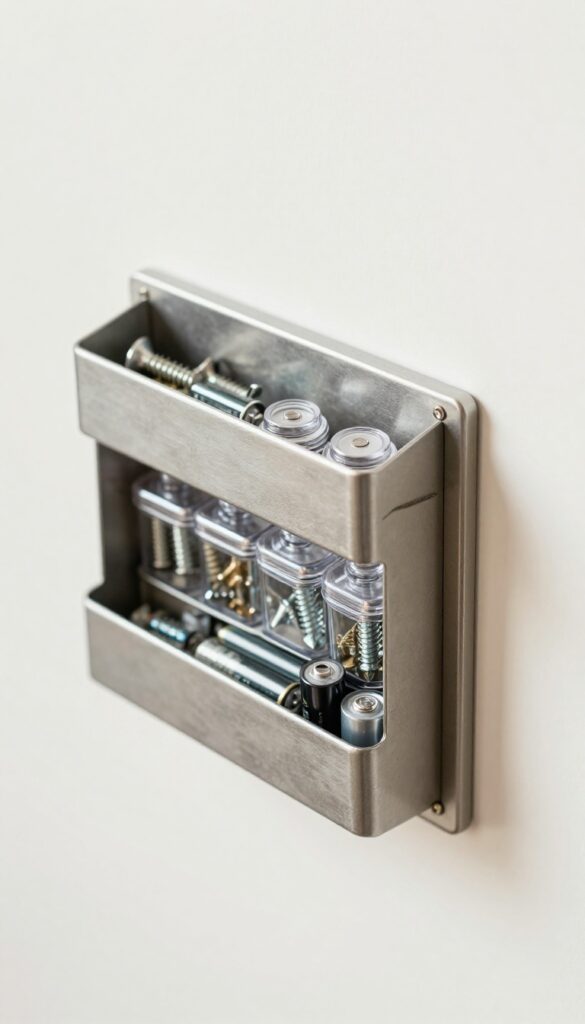
Those tiny screws, batteries, and small parts that come with cleaning tools always seem to vanish at the worst moment. A magnetic spice tin set solves that problem without taking up any shelf space. Stick them on a metal strip or the side of a fridge inside your utility closet, and suddenly every little piece has a home.
Repurpose small magnetic spice tins to hold screws, batteries, or small parts for cleaning tools. Stick them on a metal strip or fridge inside a utility closet.
Why Spice Tins Work
Spice tins are compact, magnetic, and often have clear lids so you can see what's inside. They're perfect for corralling tiny items that usually get lost in drawers. Plus, they're cheap and easy to find at kitchen supply stores or online.
How To Set It Up
Attach a magnetic strip to the inside of a cabinet door or on a wall in your utility closet. Arrange the tins with labels like "screws, " "batteries, " or "vacuum filters. " Keep them at eye level for quick access.
Bonus Tips
Use different colored tins to categorize items at a glance. If you need to store larger parts, look for slightly bigger magnetic containers. Clean the tins occasionally to prevent dust buildup.
20. Binder Clips for Cord Management
Vacuum cleaners and electric mops come with long cords that love to tangle into knots. You pull one out, and suddenly you're untangling a mess instead of cleaning. Binder clips offer a dead-simple fix that costs pennies and takes seconds to set up.
Clip a few binder clips onto the edge of a shelf or cabinet where you store your corded tools. When you put the vacuum away, wrap the cord loosely and hook it through the clip. The cord stays put, doesn't slip down, and won't get tangled with other items.
For thicker cords, use larger clips or double up two clips side by side.
Why It Works
Binder clips create a temporary but secure hold that's easy to release. Unlike twist ties or Velcro, they don't require any wrapping or fastening. You just slide the cord in and out.
The clip stays attached to the shelf, so you never lose it.
Where To Place Them
Attach clips to the underside of a shelf in your laundry room, inside a cabinet door, or along the back edge of a counter. Any spot where the cord can hang freely without getting in the way works perfectly. For tall tools like a stick vacuum, place the clip high enough so the cord doesn't drag on the floor.
Bonus Tip
Use a different color clip for each tool. A red clip for the vacuum, blue for the mop, green for the carpet cleaner. That way you can grab the right cord without guessing.
It's a small touch that makes a big difference when you're in a hurry.
21. Under-Bed Storage for Seasonal Items
Seasonal cleaning tools like window squeegees, carpet cleaners, and heavy-duty scrub brushes only get used a few times a year. Storing them in prime real estate just wastes space you need for everyday supplies. Under-bed storage bins offer a perfect out-of-sight solution for these occasional-use items.
Slide flat under-bed bins under your bed to stash seasonal cleaning gear. This keeps them accessible when needed but completely out of the way the rest of the year. Clear bins make it easy to see what's inside, while opaque ones hide the clutter.
Choose low-profile bins that fit standard bed clearance—usually 6 to 8 inches tall.
Choosing The Right Bins
Measure the gap between your bed frame and the floor before buying. Look for bins with wheels or handles for easy pulling. Stackable designs let you store multiple items vertically if you have taller clearance.
Avoid bins that are too deep, as they'll be hard to slide out.
What To Store Under The Bed
Reserve this space for items you use less than once a month. Think window squeegees, carpet shampooers, upholstery cleaners, and extra vacuum bags. Label each bin clearly so you don't have to dig through everything to find a specific tool.
Keeping It Clean Under There
Dust and pet hair collect under beds quickly. Use sealed bins to protect your cleaning supplies from dirt. Vacuum the area every few months to prevent buildup.
If you have allergies, consider using allergen-proof bags inside the bins.
22. Wall-Mounted Broom Holder
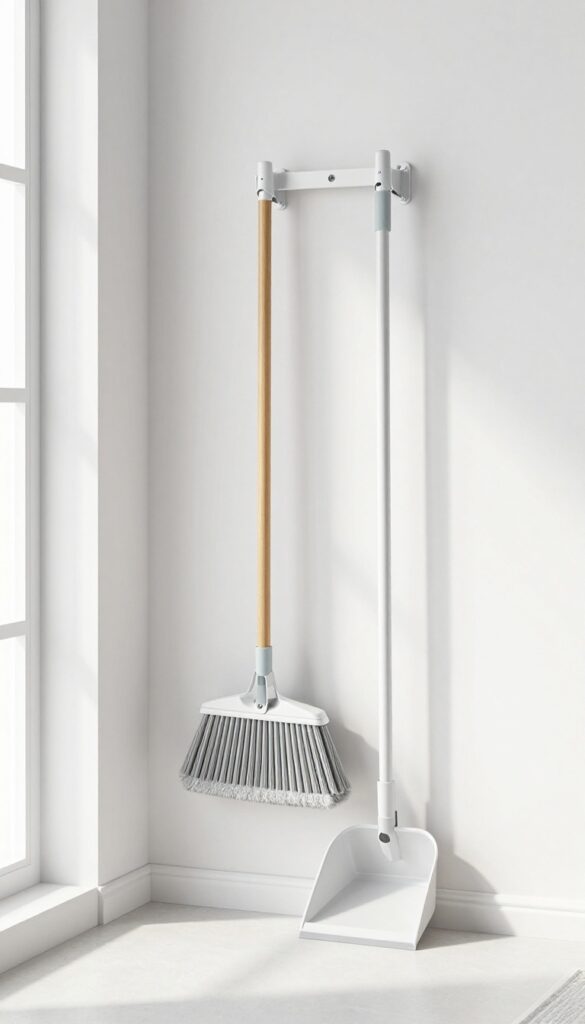
Mops, brooms, and dusters are some of the bulkiest items in your cleaning arsenal. They tend to lean against walls, fall over, and take up valuable floor space. A wall-mounted broom holder solves that by keeping them upright and out of the way.
Installing a wall-mounted broom holder is a quick weekend project that instantly clears floor clutter. Most models use clips or hooks that grip the handles securely, so nothing slips or topples. You can mount it in a pantry, laundry room, garage, or even inside a closet door.
The key is to place it at a height that lets you easily slide tools in and out without bumping heads. Some holders come with additional slots for smaller items like dustpans or spray bottles, maximizing your vertical real estate.
Choosing The Right Holder
Look for a holder with rubberized or padded clips to prevent scratches on handles. Adjustable spacing is a plus, so you can accommodate different handle thicknesses. If you have heavy tools like a wet mop, opt for a holder with reinforced mounting hardware.
For a rental-friendly option, consider a tension-mounted rod with hooks or a no-drill adhesive version.
Installation Tips
Mount the holder into wall studs for maximum stability. If studs aren't available, use heavy-duty drywall anchors rated for the weight. Measure the height so the longest tool clears the floor by at least an inch.
Use a level to keep everything straight. For a clean look, paint the holder to match the wall or choose a sleek metal finish.
Organization Beyond Brooms
Don't limit the holder to just brooms and mops. Use it for long-handled dusters, squeegees, reacher grabbers, or even yard tools like pruners. Group similar tools together for easy grab-and-go access.
Add a small bin at the bottom for dustpan or replacement heads.
23. Repurposed Mason Jars for Small Items
Mason jars are cheap, uniform, and look tidy lined up on a shelf. They're perfect for corralling the tiny odds and ends that always get lost in a cleaning caddy—think spare scrub brush heads, rubber bands, cloths, or even homemade cleaning tablets. Screw the lids on tight to keep dust out, and label each jar so you can grab what you need without rummaging.
Mason jars offer a simple, uniform storage solution for small cleaning items. Their clear glass lets you see contents at a glance, and the lids keep everything dust-free. Group jars by category (e. g. , brush heads, rubber bands, cloths) and line them up on a shelf or inside a cabinet door.
Use chalk labels or a label maker for a clean look.
Labeling For Quick Access
A label on each jar saves time when you're in the middle of cleaning. Use chalk labels, vinyl stickers, or a label maker. Write the contents clearly: "Scrub Brush Heads, " "Rubber Bands, " "Microfiber Cloths.
" If you're storing homemade cleaning tablets, include the recipe name and date.
Mounting Jars Under Shelves
Maximize vertical space by attaching mason jar lids to the underside of a shelf. Screw the jars onto the lids, and you've got hanging storage for small items. This works great inside a cabinet or on a wall-mounted shelf.
Just make sure the jars are securely fastened so they don't fall when you unscrew them.
Grouping By Task Or Frequency
Organize jars by how often you use the items. Keep frequently used supplies (like cloths or rubber bands) on an easy-to-reach shelf. Store seasonal or backup items (like extra brush heads) on a higher shelf.
This way, your daily cleaning routine stays smooth without digging through jars.
24. Tension Rod for Hanging Spray Bottles
Spray bottles are essential but always seem to take up prime shelf space. A tension rod gives them a dedicated home that's easy to reach and keeps your cabinet floor clear. This trick works especially well in deep cabinets where bottles get lost in the back.
Install a tension rod horizontally inside a cabinet, about halfway up. Hang spray bottles by their triggers so they dangle upside down. This keeps them off the shelf, saves space, and lets you see each bottle at a glance.
Plus, the nozzle stays primed and ready to use.
Choosing The Right Rod
Pick a tension rod that fits snugly between the sides of your cabinet. Measure the width first. A standard shower curtain rod works, but look for one with rubber ends to prevent slipping.
Avoid rods that are too thin—they might not support the weight of multiple bottles.
Arranging Your Bottles
Group bottles by frequency of use. Keep daily sprays like all-purpose cleaner and glass cleaner at the front. Store specialty sprays like oven cleaner or disinfectant farther back.
If bottles have different trigger sizes, space them out so they don't jam together.
Bonus: Under-sink Setup
This trick also works under the kitchen or bathroom sink. Use a shorter rod if needed. Just make sure the rod is high enough to clear items stored below.
It's a game-changer for that chaotic under-sink zone.
25. Label Maker for Everything
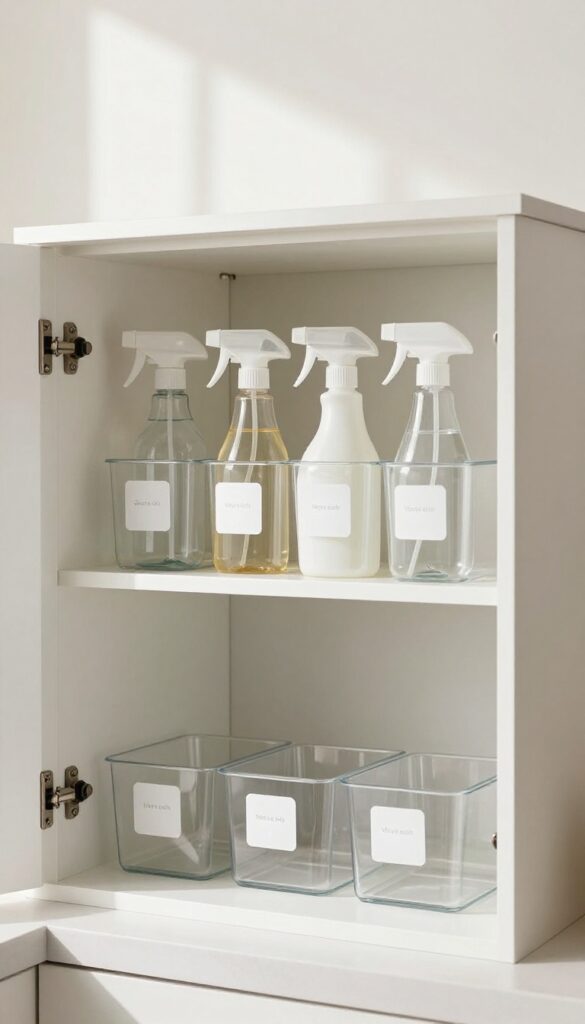
Labels are the unsung heroes of organized storage. A label maker helps you mark every bin, bottle, and shelf so everyone knows exactly where things go. No more guessing or shoving items into random spots.
This small investment pays off by keeping your system intact long after you set it up.
Labels turn good intentions into lasting habits. When each container has a clear, permanent label, family members and roommates can easily return items to their proper place. It also saves you time hunting for supplies—just read the label and grab what you need.
Choose a label maker that prints durable, waterproof labels. You'll want them to withstand occasional spills and cleaning product drips. Stick with a simple, readable font and keep the design consistent across all your bins and shelves.
Don't stop at storage bins. Label the sides of shelves, the fronts of drawers, and even the tops of spray bottles. The more specific you get, the easier it is to maintain the system.
Over time, labeling becomes second nature and your cleaning supply area stays tidy with minimal effort.
Where To Start Labeling
Begin with the areas that cause the most confusion. Under the sink, label each bin by category: all-purpose cleaners, glass sprays, scrub brushes, and gloves. In the laundry room, mark containers for detergent, stain removers, and dryer sheets.
Tackle one zone at a time so the task doesn't feel overwhelming.
Labeling For Long-term Success
Use a label maker with strong adhesive and waterproof tape. Cleaning supplies often get wet, so standard paper labels won't hold up. Also, consider adding a small icon or color code for quick visual recognition—especially helpful if kids help with chores.
Beyond Bins And Bottles
Labels aren't just for containers. Mark the inside of cabinet doors with a list of what's stored on that shelf. Label charging stations for cordless vacuums and mops.
Even label the hooks where you hang dusters and brooms. The more you label, the more intuitive your storage becomes.
FAQ
How do I store cleaning supplies in a small apartment with no storage closet?
Use vertical space like over-the-door organizers, wall-mounted pegboards, and rolling carts that can tuck into narrow gaps. Under-sink areas and the back of doors are prime real estate.
What is the best way to store cleaning supplies under the sink?
Install a tension rod for hanging spray bottles, use stackable bins or a lazy Susan for easy access, and add adhesive hooks on the door for small items. Keep heavier bottles on the bottom.
How can I keep cleaning supplies organized without spending much money?
Repurpose household items like shoe organizers, mason jars, and binder clips. Use cardboard boxes covered with wrapping paper as free bins. Label everything to maintain the system.
Should I store cleaning supplies in the bathroom or kitchen?
Store supplies near where you use them most. Keep bathroom cleaners in a caddy under the sink or in an over-the-toilet unit. Kitchen cleaners can go under the kitchen sink or in a nearby cabinet.
How do I prevent cleaning bottles from leaking and making a mess?
Store spray bottles upside down on a tension rod or in a hanging organizer so nozzles don't drip. Use trays or bins with raised edges to catch any leaks. Check caps regularly.
Conclusion
You don't need a massive budget or a walk-in pantry to get your cleaning supplies under control. Even one small change—like adding a tension rod under the sink or repurposing a shower caddy—can free up space and cut down on daily frustration. Start with the idea that feels easiest this weekend.
Over time, these little wins add up to a home that works better for you. The goal isn't perfection; it's a system that makes cleaning feel less like a chore. Pick one tip, give it a try, and see how much smoother your routine becomes.


