
You grab the spray bottle, and three more tumble out. The rag pile collapses, and you can't find the scrub brush. That chaotic cabinet under the sink is costing you time and patience every single chore day.
But it doesn't have to be that way. A few simple organization tweaks can turn your cleaning supply stash from a frustrating mess into a streamlined system that practically hands you what you need.
These 15 ideas are designed to make your cleaning routine faster, easier, and even a little more enjoyable. No more hunting—just grab, spray, and go.
1. Clear Caddy for Multi-Room Cleaning
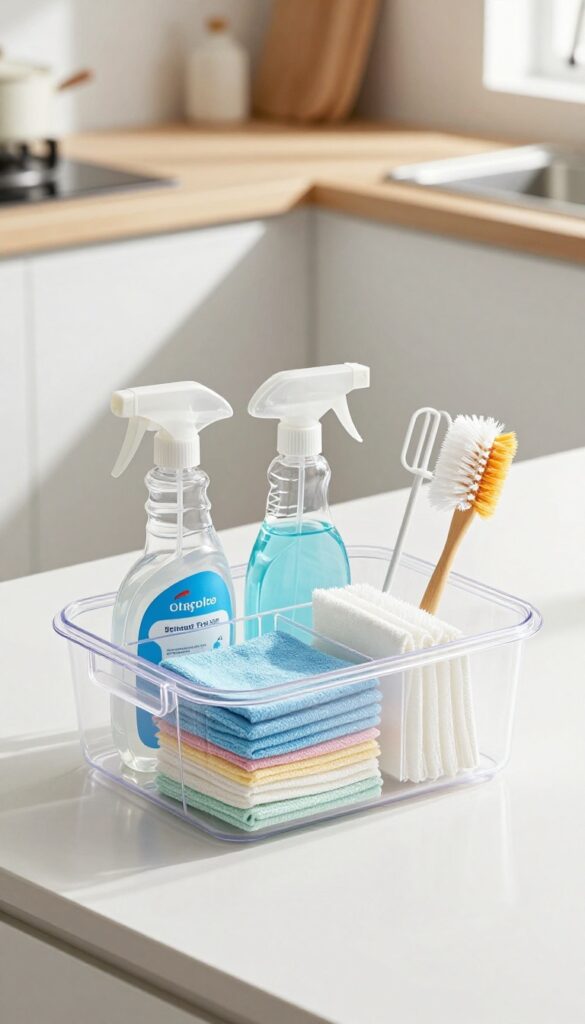
A portable caddy with a sturdy handle changes the game when you're moving from kitchen to bathroom to living room. Instead of running back for forgotten supplies, everything you need rides along with you. The clear design lets you spot the glass spray or scrub brush at a glance, so you never waste time digging.
Choose a caddy with compartments to keep bottles upright and cloths separate. Load it with your all-purpose cleaner, glass spray, microfiber cloths, and a scrub brush. Keep it stocked and ready to grab—no more hunting under the sink mid-chore.
What To Put Inside
Stick to the essentials: one all-purpose cleaner, one glass cleaner, a pack of microfiber cloths, a scrub brush, and maybe a small dusting wand. Avoid overloading—if it's too heavy, you'll leave it behind.
Where To Store It
Hang the caddy on a hook inside a cabinet door or place it on a shelf in the laundry room. The goal is easy access. When chore day hits, you grab the caddy and go.
Keep It Restocked
After each cleaning session, take two minutes to refill any empty bottles and swap used cloths for fresh ones. That way the caddy is always ready for the next round.
2. Under-Sink Pull-Out Drawers
The space under your sink is often a black hole of bottles, brushes, and mystery sponges. Installing a sliding drawer system changes everything. No more crouching and digging—pull out the drawer to see every item at a glance.
A pull-out drawer system turns wasted vertical space into organized storage. You can find what you need instantly and put things back without playing Tetris.
Easy Installation Options
You don't need to be a carpenter. Many pull-out drawer kits are designed for DIY installation with just a drill and a screwdriver. Look for models that attach to the existing cabinet floor or sides.
Some even come with pre-cut holes for plumbing pipes.
Customize Compartments
Once the drawer is in, add adjustable dividers or small bins to keep spray bottles upright, sponges separated, and scrub brushes from rolling around. This prevents the chaos that usually happens when you open the cabinet.
Maximize Vertical Space
If your sink has a deep cabinet, consider a two-tier pull-out system. The top tier holds everyday items like dish soap and all-purpose cleaner, while the bottom tier stores backups and larger bottles. Everything stays visible and accessible.
3. Wall-Mounted Spray Bottle Rack
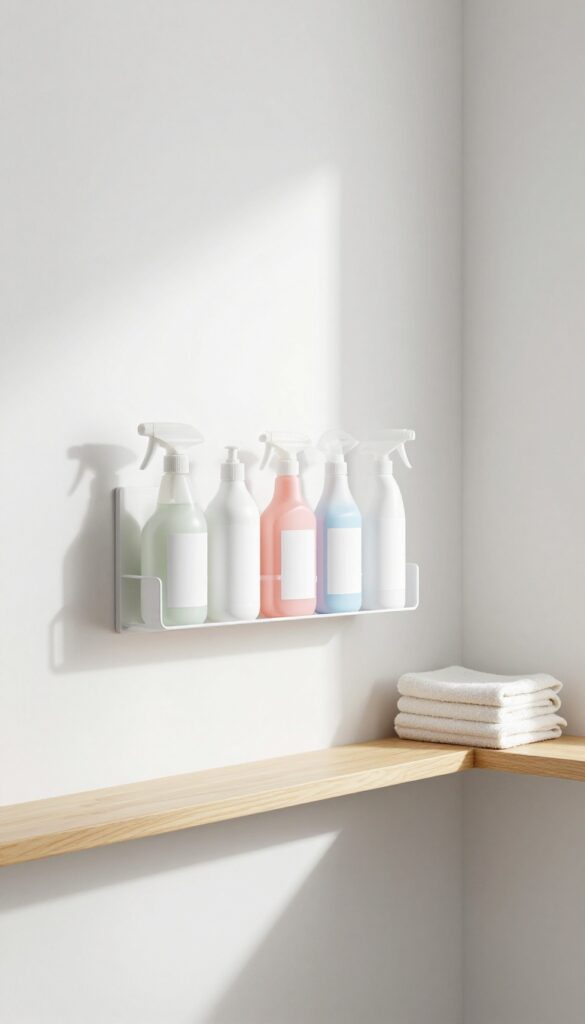
Spray bottles are the workhorses of any cleaning stash, but they always seem to tip over, leak, or hide behind other supplies. A wall-mounted rack solves that by keeping them upright and accessible. Mount one inside a cabinet door or on a laundry room wall, and you'll never have to dig for the all-purpose cleaner again.
This simple upgrade frees up shelf space and stops bottles from dribbling onto other items. Plus, seeing all your sprays at once makes it easy to grab the right one without pulling everything out.
Choose Your Rack Style
You can buy a dedicated spray bottle rack with slots that hold bottles by the neck, or use a pegboard with hooks. For a budget option, install a tension rod inside a cabinet and hang bottles by their triggers. Measure your bottle heights first to ensure they fit.
Mounting Tips
Mount the rack on the inside of a cabinet door or on a wall near your cleaning zone. Use screws or strong adhesive strips rated for the weight. Make sure the rack is level and the bottles are secure.
If mounting on a door, check that it closes fully without hitting shelves.
Label For Quick Grab
Once your bottles are hanging, label each one clearly. Use a label maker or simple tape and marker. Group them by room or task—kitchen sprays on one side, bathroom on the other.
This saves time and reminds you what you have.
4. Labeled Bins for Like Items
Grouping similar cleaning products into small bins is a game-changer for keeping your cabinet tidy. Instead of digging through a jumble of bottles, you can grab the whole bin for the task at hand. Labels make it obvious where everything belongs and when something runs low.
Start by sorting your supplies into categories: glass cleaners, disinfectants, floor care, bathroom sprays, and so on. Pick up a set of small, stackable bins that fit your shelf depth. Clear bins let you see contents at a glance, but opaque ones hide clutter if you prefer a cleaner look.
Label each bin clearly with a label maker or waterproof stickers. Stack them to maximize vertical space, and place the most-used bins at eye level. When you restock, just toss the new bottle into the right bin—no more rummaging.
Choose The Right Bins
Look for bins that are wide enough to hold spray bottles upright but shallow enough to stack without wobbling. Modular bins from container stores work well, but even shoebox-sized plastic tubs can do the job. Measure your shelf height before buying to ensure stacks fit.
Labeling That Lasts
Use a label maker for crisp, readable text, or write on chalkboard stickers for a reusable option. Waterproof labels are best because cleaning supplies can leak or create condensation. Place labels on the front of each bin, not the top, so they're visible when stacked.
Maintain The System
Once a month, pull out each bin and wipe it down. Toss empty bottles and return stray items to their proper bin. This quick habit keeps the system working and prevents clutter from creeping back in.
5. Over-the-Door Shoe Organizer for Supplies
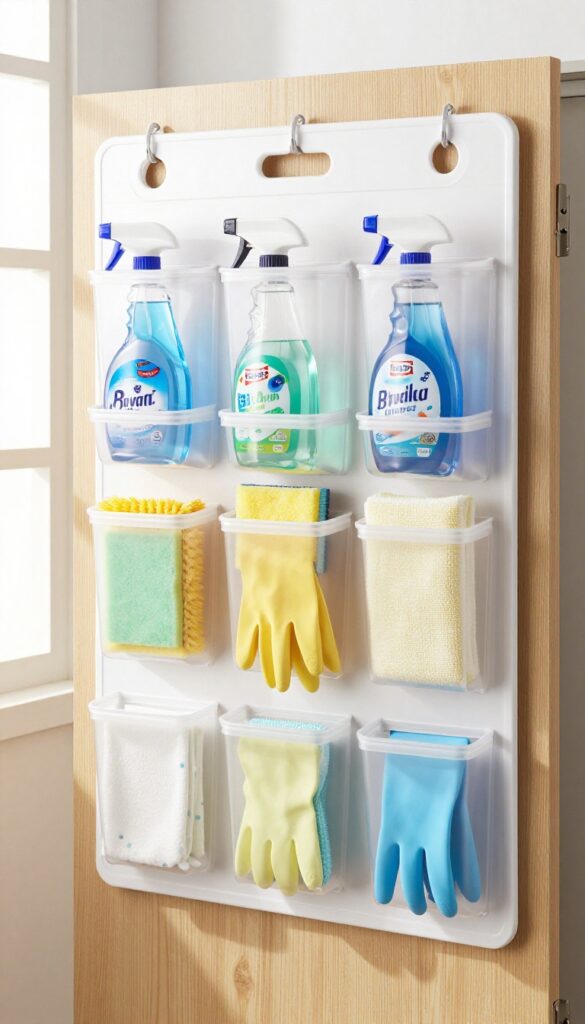
That unused over-the-door shoe organizer in your closet? It might be the best cleaning supply storage you never thought of. Clear plastic pockets let you see every bottle and tool at a glance, so you never dig through a dark cabinet again.
Hang it on the back of a pantry door, a utility closet door, or even inside a laundry room door—anywhere you need quick access to your cleaning gear.
What To Put In Each Pocket
Spray bottles fit perfectly in the larger pockets—tuck in all-purpose cleaner, glass cleaner, and disinfectant. Use medium pockets for scrub brushes, dusters, and microfiber cloths. The smallest pockets can hold sponges, gloves, and even a small bottle of stain remover.
Label each pocket with a marker or tape if you want to keep things extra tidy.
How To Hang It Right
Most shoe organizers come with metal hooks that slip over the top of a standard door. If your door is extra thick or has a glass panel, use adhesive over-the-door hooks instead. Make sure the organizer hangs straight and doesn't drag on the floor—trim the bottom loops if needed.
You can also mount it on a wall with command strips for a more permanent setup.
Bonus: Keep A Caddy Ready
Dedicate one pocket near the bottom for a small caddy or bucket. When it's time to clean a different room, grab the caddy, fill it with the supplies you need from the organizer, and go. This way you get the best of both worlds: visible storage and portability.
6. Magnetic Strip for Metal Tools
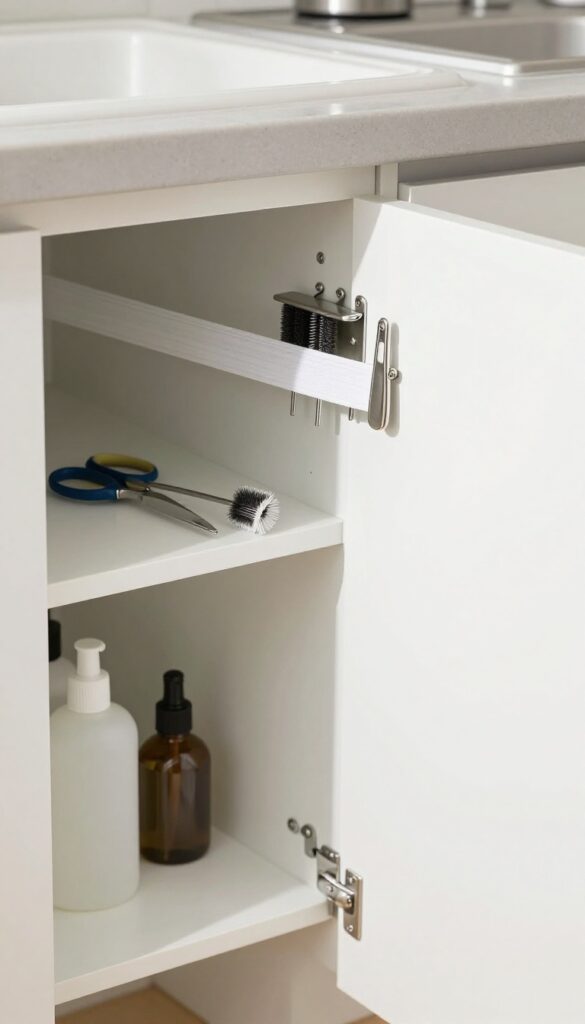
Scissors, tweezers, and small scrub brushes often end up buried in drawers or lost under the sink. A magnetic strip changes that by giving these metal tools a visible, grab-and-go home. Mount one inside a cabinet door or on a wall near your cleaning station, and you'll never dig for them again.
It's a low-cost upgrade that instantly clears clutter and speeds up your chore routine.
A magnetic strip is a simple solution for keeping metal cleaning tools organized and accessible. By mounting it inside a cabinet or on a wall, you free up drawer space and eliminate the frustration of hunting for small items. This works especially well for scissors, tweezers, small scrub brushes, and even metal spray bottle triggers if they're magnetic.
The key is to choose a strip with strong magnets that can hold multiple tools without slipping. Place it near your main cleaning area so you can grab what you need in seconds.
Where To Mount It
The best spots are inside a cabinet door under the sink, on the side of a utility cart, or on a wall in your laundry or mudroom. Avoid placing it where water might splash directly onto the tools, as moisture can cause rust over time. If you're mounting inside a cabinet, use strong adhesive strips or screws to ensure it stays put even when you pull off a heavy tool.
What To Store
Stick with metal items that you use frequently: scissors for cutting open boxes or trimming tags, tweezers for picking up small debris, metal scrub brushes for tough messes, and even small pliers or a screwdriver if you use them for cleaning tasks. Avoid storing wet or damp tools directly on the strip, as they can leave residue or rust. Let them dry first, then snap them back into place.
Pro Tip For Maximum Use
To make the strip even more versatile, attach a small metal hook or a magnetic clip to hold a lightweight spray bottle or a dusting wand. Some magnetic strips come with built-in hooks, but you can also buy separate magnetic accessories. This turns a simple strip into a mini command center for your most-used cleaning gear.
7. Tiered Shelf for Countertop Storage
Countertops are prime real estate, but they can also become clutter magnets. Instead of letting bottles pile up, a tiered shelf turns that flat surface into a mini storefront for your everyday cleaners. You see everything at a glance, and grabbing what you need takes one second.
A tiered shelf is a simple solution that works wonders in a laundry room, pantry, or even a kitchen counter. It lifts bottles off the surface, so spills and sticky rings are less likely to hide underneath. Plus, the stepped design means each product has its own spot, so you’re not shuffling through a lineup every time you need the all-purpose spray.
Choose The Right Size And Material
Measure your counter space before buying. A shelf that’s too wide will overhang and look messy, while a narrow one might not hold enough. Wire shelves are great for airflow and drainage if bottles drip, while bamboo or plastic options are easy to wipe down.
Look for one with raised edges or non-slip feet to keep bottles from sliding off.
Group By Frequency Of Use
Place your most-used products—like all-purpose cleaner, glass spray, and disinfectant wipes—on the top tier where they’re easiest to reach. Reserve the bottom tier for secondary items like stainless steel polish or specialty sprays. This way, you’re not bending or stretching for the daily drivers.
Keep It Minimal And Rotate Seasonally
Don’t overcrowd the shelf. Stick to five or six bottles max, and store the rest in a cabinet or closet. Rotate products based on the season—like adding a vinegar-based cleaner for windows in spring or a heavy-duty degreaser for holiday cooking.
A tidy shelf makes it easy to swap items in and out.
8. Vacuum Attachment Organizer
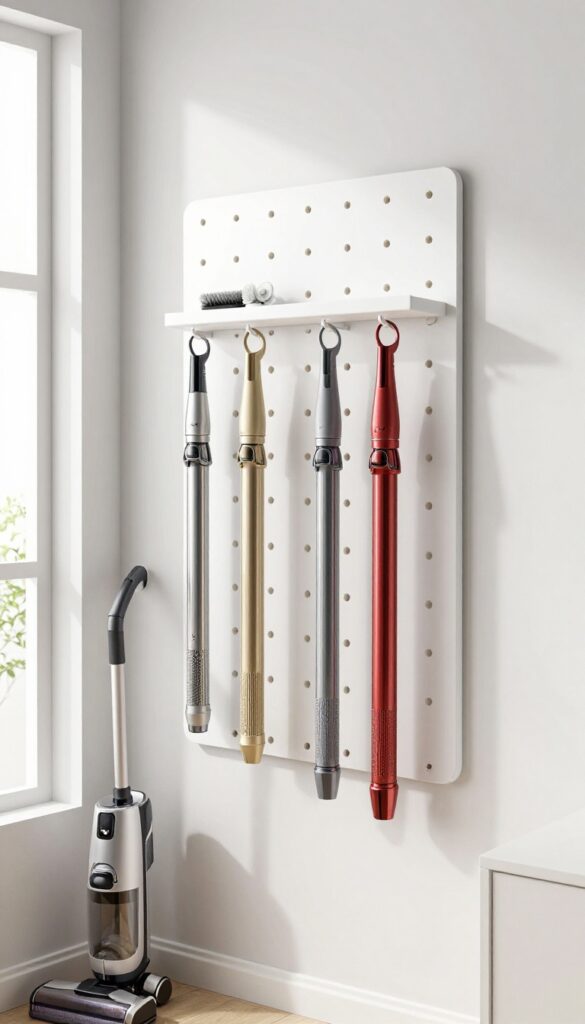
Vacuum attachments have a way of scattering across closets, under furniture, and into the abyss of the junk drawer. You know the struggle: you need the crevice tool, and it's nowhere to be found. A dedicated organizer puts every piece in its place, so you can swap attachments in seconds and get back to cleaning.
Mount a small pegboard or use a wall-mounted bracket to store vacuum attachments. No more untangling hoses or losing the crevice tool under the couch.
Pegboard Perfection
A small pegboard mounted inside a closet or on the wall of your laundry room gives you total flexibility. You can rearrange hooks as needed to fit different attachments. Hang each piece by its opening or loop, and you'll see everything at a glance.
Bonus: you can add a small shelf for extra brushes or filters.
Wall-mounted Brackets
If you prefer a sleeker look, use a wall-mounted bracket designed specifically for vacuum attachments. Many come with slots or clips that hold each tool securely. Install it near where you store your vacuum, and you'll never waste time digging through a drawer again.
Repurpose A Shoe Organizer
An over-the-door shoe organizer with clear pockets works surprisingly well for vacuum attachments. Just slip each tool into its own pocket. The clear material lets you see what's inside without opening anything.
Hang it on the back of a pantry or utility closet door for easy access.
9. Rolling Cart for Deep Cleaning Sessions
Deep cleaning days demand more gear than your regular wipe-down. Instead of shuttling armloads of supplies from room to room, a rolling cart keeps everything at your fingertips. Load it with heavy-duty cleaners, gloves, scrub brushes, and microfiber cloths, then wheel it wherever you're working.
When the job is done, roll it into a closet or corner—no more clutter.
A rolling cart turns deep cleaning into a mobile operation. You can prep it once and move methodically through the house without backtracking. The key is to stock it intentionally and keep it ready for those intense sessions.
What To Put On Each Tier
Think of your cart as a three-story workstation. The top tier is for your go-to spray bottles—degreaser, bathroom cleaner, glass cleaner. The middle tier holds gloves, scrub brushes, and a caddy of smaller tools like a grout brush or toothbrush.
The bottom tier is for heavy items: a bucket, rags, and maybe a portable steamer. Adjust based on your most common deep-cleaning tasks.
Choosing The Right Cart
Look for a cart with locking wheels so it stays put when you're scrubbing. A wire or plastic construction is easy to wipe down. Width matters—narrow enough to fit through doorways, but wide enough to hold a bucket.
A handlebar is a plus for steering with one hand. Don't overspend; a basic utility cart from a home store works perfectly.
Making It A Habit
After each deep cleaning session, restock the cart immediately. Replace used sprays, wash cloths, and check glove condition. Store it in a spot that's easy to grab—like a pantry or laundry room corner.
Over time, you'll reach for it automatically, and your cleaning routine will feel more like a system than a scramble.
10. DIY PVC Pipe Scrubber Holder
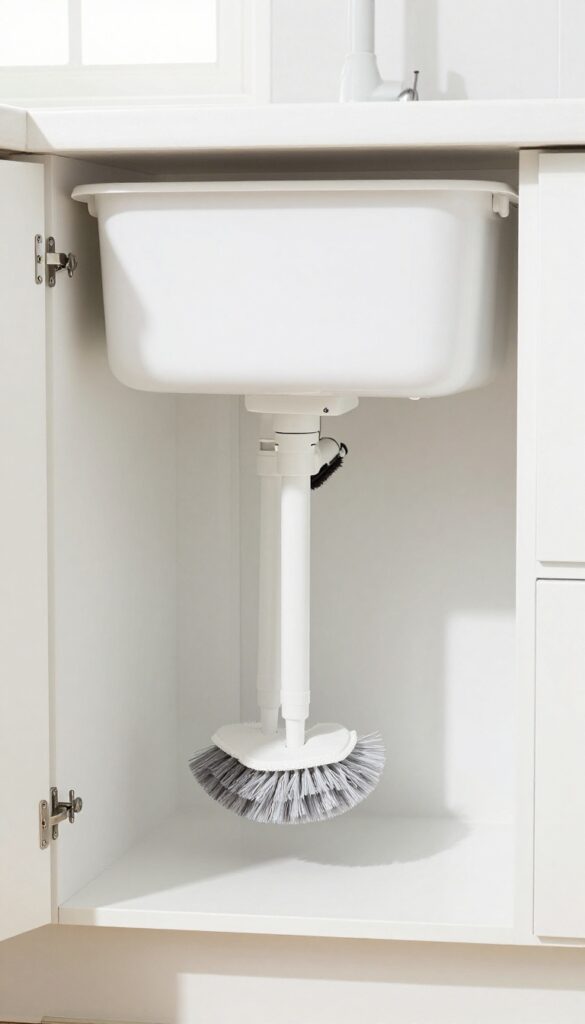
Long-handled scrub brushes and dusters are awkward to store. They slide around in drawers, fall over in buckets, and take up way too much space. A simple PVC pipe holder fixes that problem in about ten minutes.
This project costs a few dollars and uses basic tools. The result is a dedicated spot where each tool stands upright, easy to grab and put away. No more tangled handles or lost brushes.
Cut a piece of 4-inch diameter PVC pipe to the height of your tallest brush handle (usually around 18–24 inches). Sand the cut edges smooth. Mount the pipe vertically inside a cabinet using pipe straps or heavy-duty adhesive strips.
Drop in your scrub brushes, toilet brushes, and dusters. They stand upright, separated and ready to use.
Why It Works
PVC pipe is cheap, durable, and easy to work with. The vertical orientation keeps handles from tangling and makes each tool visible at a glance. You can group multiple pipes together for different tool categories—one for kitchen brushes, one for bathroom scrubbers.
Customizing Your Holder
Paint the pipe to match your cabinet interior or leave it white for a clean look. For a more finished appearance, glue a PVC cap to the bottom and drill a small drainage hole. If you don't want to mount it, place the pipe in a sturdy bin or bucket instead.
Where To Install
Under the kitchen sink is the most common spot, but this works great in a laundry room cabinet, a garage storage area, or even mounted on the inside of a pantry door. Just make sure the cabinet is tall enough to accommodate the pipe length.
11. Lazy Susan for Corner Cabinets
Corner cabinets are notorious for swallowing cleaning supplies whole. You spin the bottle you want, only to knock over everything else in the process. A large Lazy Susan changes that entirely.
By placing a sturdy turntable in that deep corner, you turn dead space into accessible storage. Every spray, bottle, and refill sits within a simple spin's reach. No more digging or playing hide-and-seek with your all-purpose cleaner.
A Lazy Susan makes the most of awkward corner cabinets by rotating your supplies to you. Choose a heavy-duty model with a non-slip surface to handle the weight of multiple bottles. Arrange items with the tallest in the back or center, and group by frequency of use—daily sprays forward, heavy-duty cleaners toward the back.
This simple spin saves time and keeps your cabinet orderly.
Pick The Right Size And Material
Measure your cabinet's depth and width before buying. A 12- to 16-inch diameter Lazy Susan fits most standard corner cabinets. Look for one with a raised edge or lip to prevent bottles from sliding off during rotation.
Metal or heavy-duty plastic options hold up better to spills and weight than cheap acrylic.
Group By Task Or Frequency
Organize your Lazy Susan by cleaning zone: all kitchen sprays together, bathroom cleaners on another tier if you have a two-level turntable. Alternatively, put everyday items like multi-surface spray and glass cleaner at the front, and specialty products like oven cleaner toward the back. This way you spin only when needed.
Add Trays Or Dividers For Small Items
If you store scrub brushes, sponges, or small refill bottles on the same turntable, use small removable trays or silicone cups to keep them contained. This prevents tiny items from tumbling off when you spin. Clear containers let you see contents at a glance.
12. Hanging Bucket for Rags and Sponges
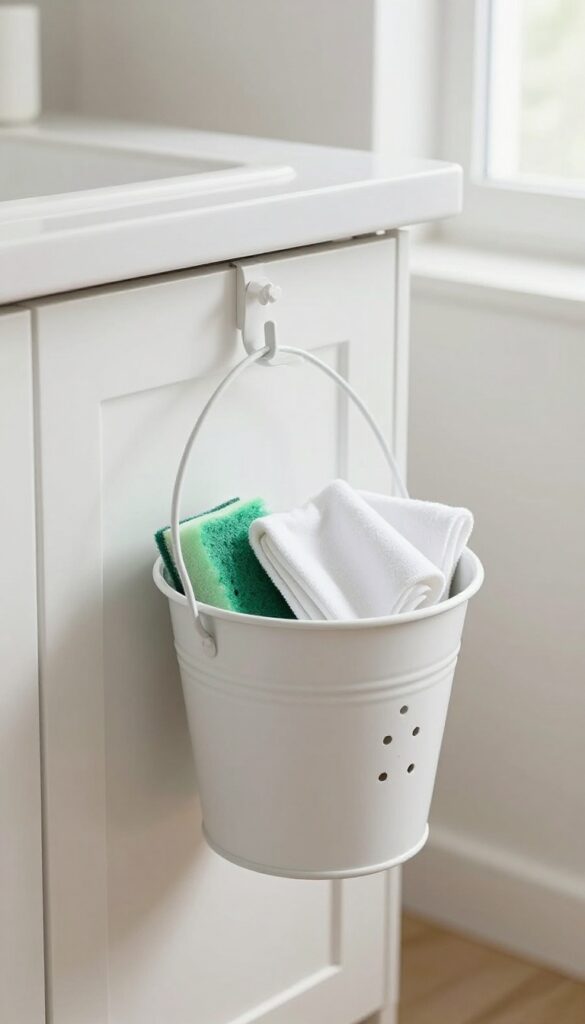
Wet rags and sponges left on the counter breed bacteria and create a messy pile you have to deal with later. A hanging bucket solves that by giving them a dedicated spot to air dry out of the way. It's a small change that keeps your sink area tidy and your cleaning cloths fresh.
Hang a small bucket or mesh bag on a hook near the sink. Toss in used rags and sponges so they dry quickly and don't pile up on the counter.
Choose The Right Container
A mesh bag or a bucket with drainage holes works best because air can circulate. Metal or plastic buckets are durable and easy to clean. Avoid solid-bottom containers that trap moisture and cause mildew.
Where To Hang It
Place the hook on the side of a cabinet, under the sink, or on a wall near the sink. Make sure it's within easy reach so you actually use it. A command hook works if you can't drill.
Keep It From Getting Stinky
Empty the bucket daily or every other day, and wash it weekly with hot water and vinegar. Rotate rags and sponges so they don't sit wet for too long. This simple habit prevents odors and extends the life of your cloths.
13. Drawer Dividers for Small Tools
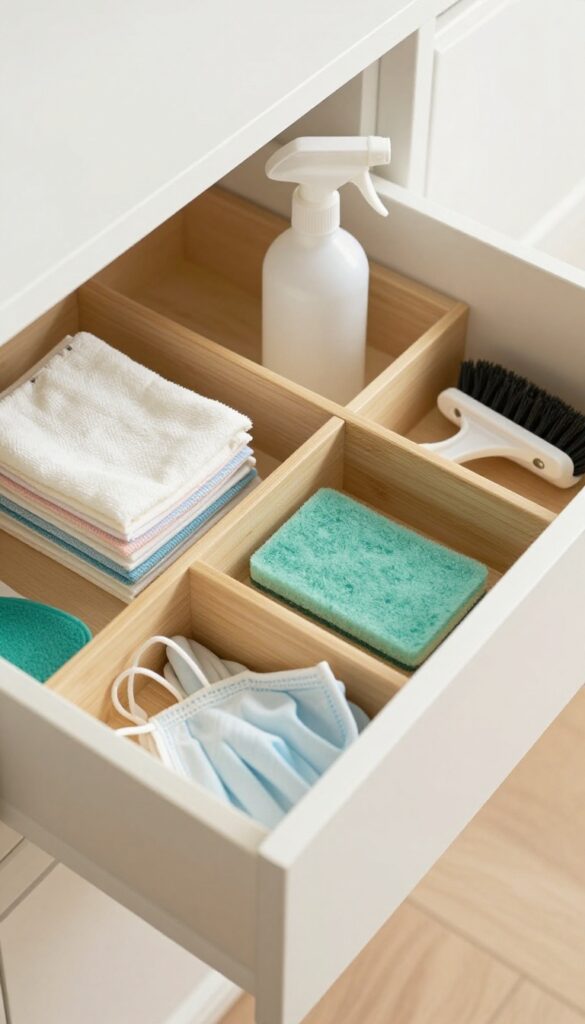
That utility drawer you keep shoving dusting cloths and sponges into? It's probably a jumbled mess. You dig for a scrub brush and end up pulling out three gloves and a dried-out sponge.
Drawer dividers fix that instantly. Adjustable dividers let you create custom compartments so every small tool has its own spot. No more digging, no more chaos—just open the drawer and grab exactly what you need.
Choose The Right Dividers
Not all dividers are the same. For a utility drawer, look for adjustable bamboo or plastic sets that expand to fit your drawer width. Bamboo looks nice and holds up to moisture, while plastic is easy to clean and cheap.
Measure your drawer depth first—some dividers are too tall for shallow drawers.
Group By Task
Think about how you clean. Keep dusting cloths and polish together in one compartment, sponges and scrub brushes in another, and gloves and masks in a third. This way, when you're dusting, you grab from the dusting zone.
When you're scrubbing, you reach for the scrub zone. No more hunting.
Label The Compartments
A small label maker or even a piece of washi tape with a Sharpie can save you time. Label each section: "Cloths, " "Sponges, " "Brushes, " "Gloves. " It takes five minutes and keeps everyone in the household from messing up your system.
Plus, it looks satisfyingly tidy.
14. Ceiling-Mounted Rack for Mops and Brooms
Mops, brooms, and dustpans are some of the bulkiest items in your cleaning arsenal. They always seem to fall over, tangle together, or take up precious floor space. A ceiling-mounted rack solves that by lifting them up and out of the way.
Installing a ceiling-mounted rack in a closet or laundry room is a game-changer. It uses vertical space that usually goes unused, freeing up wall space for other organizers. Plus, hanging tools upside down keeps handles from tangling and allows heads to dry completely, preventing mildew and odors.
Easy Diy Installation
You don't need to be a pro to install one. Most ceiling racks come with simple mounting hardware and can be attached to ceiling joists or drywall anchors. Just measure your space, mark the spots, and screw it in.
A single rack can hold up to a dozen tools.
Best Placement Options
A laundry room, utility closet, or garage are ideal spots. If you have a small pantry or a mudroom with high ceilings, that works too. The key is to place it where you can easily reach the handles without stretching.
What To Hang
Use the rack for mops, brooms, dustpans, long-handled scrub brushes, and even a squeegee. Some racks have hooks or clips that let you hang spray bottles or small buckets as well. Just avoid hanging wet items directly over stored supplies.
15. Clear Jars for Powder and Tablet Refills
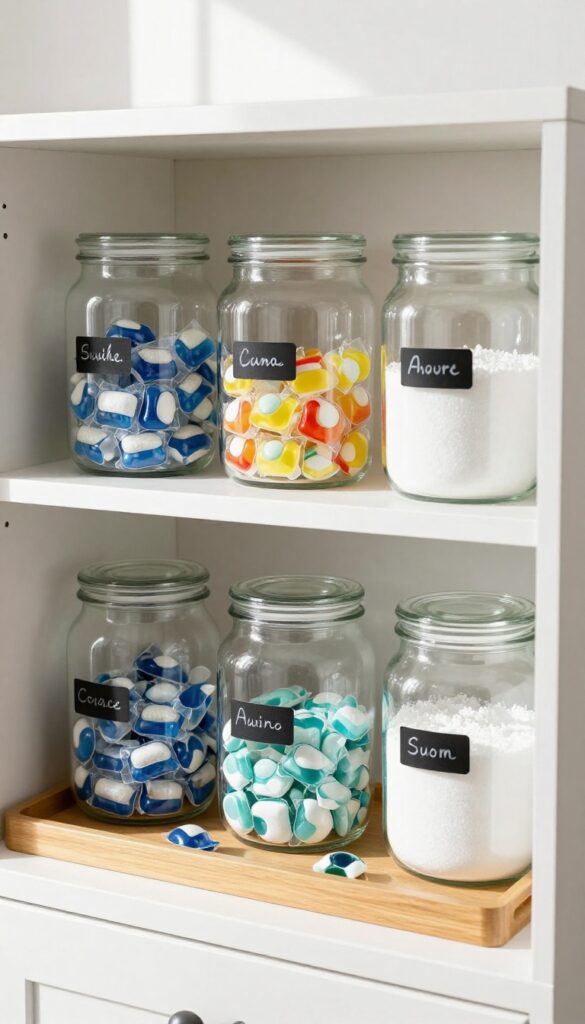
Dishwasher tablets, laundry pods, and cleaning powders often come in bulky, mismatched boxes that clutter your shelves. Transferring them into clear glass or plastic jars with airtight lids instantly creates a clean, uniform look. Plus, you can see at a glance when you're running low.
This simple swap does more than just look pretty. Airtight containers keep powders dry and prevent pods from absorbing moisture and sticking together. Label each jar clearly so everyone in the household can grab the right refill without guessing.
Stack them on a shelf or in a cabinet to maximize vertical space.
Choose The Right Jars
Go for wide-mouth jars so you can easily scoop out powder or grab a pod. Glass is great for visibility and easy cleaning, but plastic is lighter and less likely to break if dropped. Make sure the lids seal tightly to keep moisture out.
Label Like A Pro
Use a label maker or chalkboard labels for a crisp, uniform look. Write the product name and a simple usage reminder, like '1 tablet per load' or '2 scoops for heavy soil. ' This saves time and prevents mistakes.
Store For Easy Access
Place the jars near where you'll use them—dishwasher tablets next to the dishwasher, laundry pods near the washing machine. A small tray underneath catches any stray dust or spills, keeping the area tidy.
FAQ
What is the best way to organize cleaning supplies under the sink?
Use pull-out drawers or tiered shelves to maximize vertical space. Store daily-use items in a caddy for easy portability, and keep heavy bottles on the bottom.
How do I store cleaning supplies in a small apartment?
Utilize vertical space with wall-mounted racks, over-the-door organizers, and magnetic strips. A rolling cart can be tucked into a corner and moved as needed.
Should I keep all cleaning supplies in one place?
It's efficient to have a central storage area for most supplies, but consider a small caddy for each bathroom or a portable kit for multi-room cleaning to save steps.
How often should I declutter my cleaning supplies?
Every three months, check for expired products, empty bottles, and duplicates. Discard anything you haven't used in a year to keep your stash manageable.
Can I organize cleaning supplies without buying new containers?
Absolutely. Repurpose shoeboxes, mason jars, or old baskets. Use binder clips to hang spray bottles on a rod, or cut a cardboard box into dividers for a drawer.
Conclusion
Organizing your cleaning supplies doesn't require a big budget or a lot of space. A few simple changes—like a caddy, a wall rack, or labeled bins—can turn a chaotic cabinet into a calm, efficient system. The payoff is real: less frustration, faster cleaning, and more time for the things you actually enjoy.
Pick one or two ideas from this list and start small. Your future self will thank you every chore day.


