
A messy cleaning closet can turn a quick chore into a frustrating hunt. You waste time digging through bottles, untangling cords, and balancing items on overcrowded shelves. These 17 ideas transform your supply closet into a streamlined hub where everything has a place.
From adjustable shelving to magnetic strips, each solution is designed to maximize vertical space and improve visibility. You'll spend less time searching and more time cleaning.
Ready to open your closet door and find exactly what you need? Let's dive into these practical storage upgrades.
1. Install Adjustable Shelving for Custom Heights
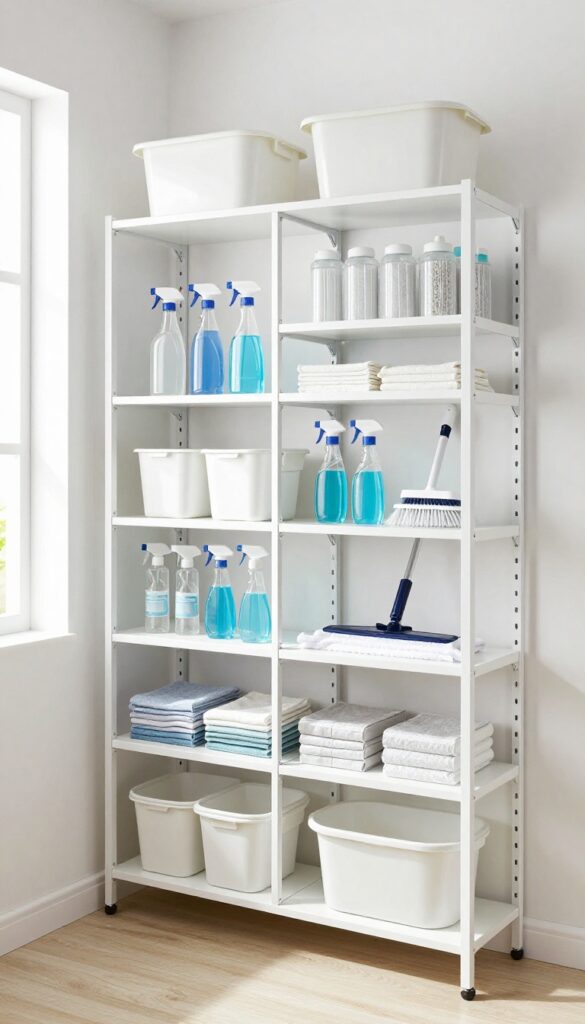
Standard fixed shelves force you to cram tall spray bottles sideways or stack small items in wasted vertical gaps. Adjustable shelving solves that by letting you raise or lower each shelf to match what you store. It’s one of the easiest upgrades for a supply closet because it adapts as your needs change.
Mount track‑based brackets on the back wall and clip shelves into the slots. This system supports heavy bottles and lets you rearrange in minutes without tools. You can create a tall section for mop buckets and a short section for scrub brushes all in the same closet.
Choose The Right Track System
Look for heavy‑duty metal tracks that can hold at least 50 pounds per shelf. Brands like Rubbermaid or ClosetMaid offer durable options at hardware stores. Measure your closet depth first so the shelves don’t stick out past the door frame.
Plan Shelf Spacing Before Installing
Stack your tallest bottles and containers next to the closet to see how much vertical room they need. Leave an extra inch above each item so you can grab them easily. Mark the track positions with a level to keep shelves straight.
Mix Shelf Depths For Awkward Spaces
If your closet is narrow, use 12‑inch‑deep shelves on one side and 16‑inch on the other. This gives you flexibility for both small cleaning cloths and large jugs of laundry detergent. You can also add a half‑shelf above a tall section for extra storage.
2. Use Clear Bins for Visible Grouping
Ever grab a bottle from the back of a shelf only to knock over three others? Clear bins solve that by corralling similar items into visible clusters. You see everything at once, so you grab what you need without disturbing the rest.
Label each bin, and you'll never play the guessing game again.
Clear bins turn a jumbled shelf into organized zones. Group all-purpose cleaners in one bin, glass sprays in another, and floor products in a third. The transparency means you can spot an empty bottle before you run out.
Labels take it a step further: a quick glance tells you where to return items, keeping the system intact.
Choose The Right Bin Size
Tall bins work for spray bottles; shallow bins fit sponges and scrub brushes. Measure your shelf height first. If bins are too tall, you waste vertical space; too short, and bottles tip over.
Aim for bins that leave a couple inches of clearance above the tallest item.
Label Like A Pro
Use a label maker or simple chalk labels. Write broad categories like "Surface Cleaners" or "Floor Care" rather than listing every product. That way, you can swap items without relabeling.
Stick labels on the front edge so they're visible even when bins are stacked.
Stack And Arrange Strategically
Put heavy bins on lower shelves and lighter ones up high. Stack smaller bins on top of larger ones if your shelves allow. Keep frequently used bins at eye level.
For deep shelves, use a lazy Susan inside a bin to access items at the back without digging.
3. Add a Tension Rod for Spray Bottles
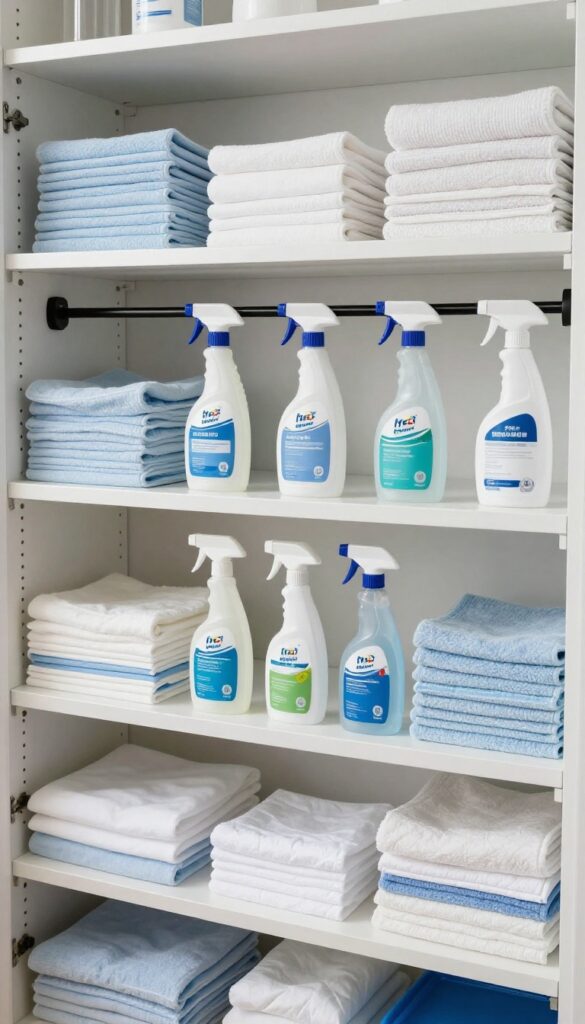
A tension rod isn't just for shower curtains. Mounted horizontally inside your cleaning closet, it becomes a clever rack for spray bottles. You simply hang each bottle by its trigger, and the rod keeps them secure and upright.
This simple trick frees up shelf space and stops bottles from toppling over every time you grab one.
Spray bottles are notoriously awkward to store. They're tall, top-heavy, and tend to roll around. A tension rod gives them a dedicated home that's easy to access and keeps your shelves clear for other items.
Why It Works So Well
The rod uses vertical space that's often wasted. You can install it between two walls or inside a cabinet. The bottles hang by their triggers, so you can see every label at a glance.
No more digging through a pile of bottles to find the glass cleaner.
How To Set It Up
Choose a tension rod that's sturdy enough to hold the weight of your bottles. Measure the width of your closet or cabinet and adjust the rod to fit snugly. Mount it at a height where the bottles hang clear of the shelf below.
For extra stability, you can add a second rod for a double row.
What To Hang And What To Skip
This works best for standard spray bottles with a trigger handle. Heavy-duty sprayers or bottles with narrow necks might not hang securely. Test a few bottles first to make sure they stay put.
You can also hang microfiber cloths or small scrub brushes from the rod for even more storage.
4. Mount a Magnetic Strip for Metal Tools
Scissors, tweezers, and small pliers tend to vanish into the depths of a cleaning closet. A magnetic strip on the wall keeps them visible and within arm's reach, freeing up drawer and shelf space. This simple trick works especially well for metal tools that are used regularly.
Choosing The Right Strip
Look for a magnetic strip rated for at least 10 pounds, with a strong neodymium magnet. A 12- to 18-inch strip is enough for most cleaning tools. Make sure the strip has a protective coating to prevent scratching your tools.
Placement Tips
Mount the strip on the inside of the closet door or on a wall near the door. Keep it at eye level so you can grab tools without bending. Avoid placing it directly above electrical outlets or near water pipes.
What To Hang
Scissors, tweezers, small pliers, and even metal measuring spoons work well. You can also hang a small spray bottle with a metal clip. Test each tool to ensure it holds securely before relying on the strip.
5. Hang a Pegboard for Customizable Storage
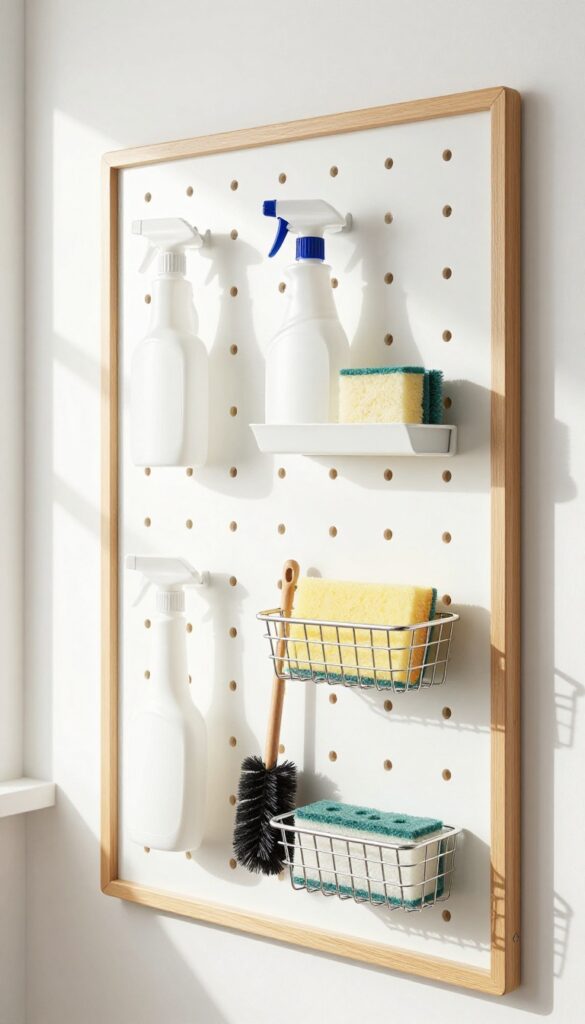
Standard fixed shelves force you to cram tall spray bottles sideways or stack small items in wasted vertical gaps. A pegboard changes the game by letting you position hooks, baskets, and shelves exactly where you need them. It’s a flexible system that grows with your collection of supplies.
Choose The Right Pegboard
Start with a durable material like tempered hardboard or metal. Hardboard is affordable and easy to cut, while metal handles heavier loads. Opt for a white or light finish to keep the closet feeling bright.
Measure your wall space and buy a board that fits snugly between studs.
Pick The Right Accessories
Mix hook sizes for different items. Use single hooks for spray bottles with trigger handles, and double hooks for buckets or dustpans. Add small wire baskets for sponges, scrub brushes, and microfiber cloths.
Shelf brackets let you hold larger bottles or a caddy. Pegboard bins keep loose items like rags tidy.
Arrange By Frequency Of Use
Place daily grab items like all-purpose spray and paper towels at eye level. Reserve lower hooks for heavier bottles and floor cleaners. Use the top row for seasonal supplies or rarely used attachments.
This layout saves you from bending or stretching every time you clean.
Add A Border For A Polished Look
Frame the pegboard with thin wood trim or metal edge strips. This hides raw edges and gives the installation a built-in feel. Paint the trim to match your closet walls for a seamless finish.
A clean border also prevents small items from slipping off the sides.
6. Use Over-the-Door Organizers for Extra Space
That empty space on the back of your closet door is prime real estate. An over-the-door shoe organizer or a clear pocket rack turns it into a storage powerhouse for small bottles, rags, and scrub brushes. You can grab what you need without moving anything else.
Over-the-door organizers are one of the easiest upgrades you can make. They install in seconds with no tools and instantly add dozens of pockets. Use them for spray bottles, dusters, gloves, and microfiber cloths.
Clear pockets let you see everything at a glance, so you never lose track of that glass cleaner again.
Choose The Right Style
Shoe organizers with mesh or clear vinyl pockets work best. Avoid fabric-only ones that hide your items. Look for a model with reinforced hooks that won't warp your door.
If your door is hollow, use adhesive hooks instead of over-the-door hooks to avoid damage.
Organize By Frequency Of Use
Put daily essentials like all-purpose spray and paper towels in the middle pockets where you can reach them easily. Store less-used items like carpet cleaner or specialty brushes in the top or bottom pockets. This keeps your most-used supplies front and center.
Label The Pockets For Quick Retrieval
Use a label maker or permanent marker to tag each pocket with its contents. This prevents the organizer from becoming a jumble of mismatched bottles. Labels also help other family members put things back in the right spot.
7. Install a Utility Hook for Brooms and Mops
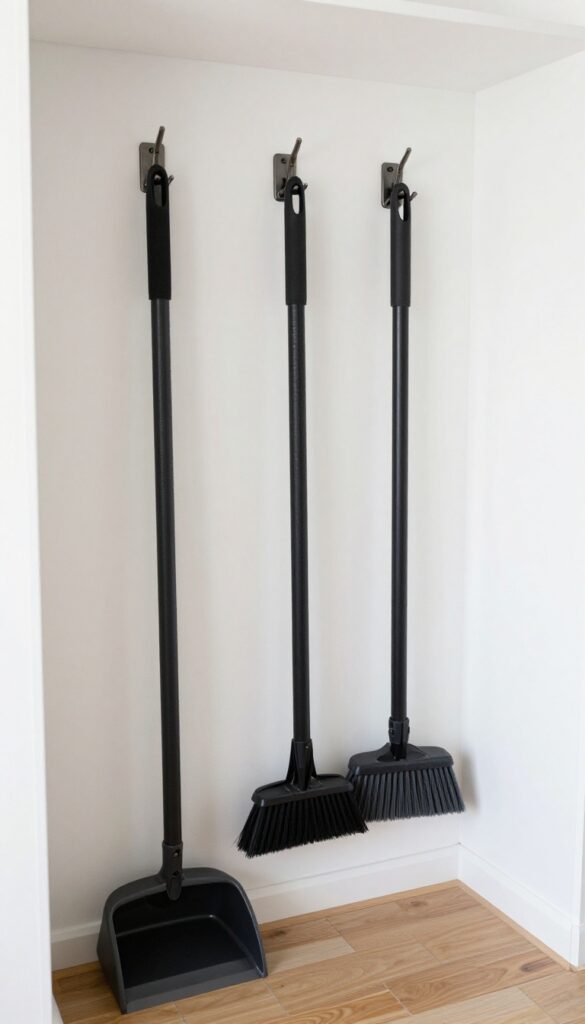
Nothing kills the vibe of a tidy closet faster than a broom that keeps sliding down or a mop that leaves a wet trail on the floor. Heavy-duty utility hooks solve that by getting everything off the ground and holding it securely in place. You can grab any tool without wrestling with the rest.
Wall-mounted hooks are a simple upgrade that makes a big difference. Choose hooks rated for the weight of your tools—plastic ones might snap under a heavy mop head. Position them at a height that lets the longest handle clear the floor by a few inches.
That way, dirt and moisture don't collect on the ends.
Pick The Right Hook Style
Not all hooks are created equal. For brooms and mops, look for J-hooks or loop hooks with a rubberized coating. The coating prevents handles from slipping and protects the finish.
Avoid basic metal hooks that can scratch or let tools slide off.
Spacing Matters
Leave enough room between hooks so tools don't crowd each other. A good rule is 6 to 8 inches apart. If you have multiple brooms, stagger them slightly so the heads don't tangle.
You can also group similar tools together—dust mops on one hook, wet mops on another.
Mounting Tips For Stability
Use wall anchors if you're not hitting a stud. Drywall alone won't hold the weight of a loaded hook over time. Screw into studs when possible.
For heavy tools like a wet mop or a shop broom, consider a hook with two screws instead of one.
8. Add a Small Shelf Above the Door
That gap above your closet door is just collecting dust. A narrow shelf there turns dead air into prime storage for items you don't need every day. It's a simple DIY that takes minutes but adds serious capacity.
Install a slim shelf (6-8 inches deep) above the door frame. Use sturdy brackets rated for at least 20 pounds. Store rarely used supplies like extra vacuum bags, backup sponges, or seasonal cleaning products.
Keep a small step stool nearby so you can reach them safely. This spot is also great for bulky items like a carpet cleaner attachment or a spare mop head.
What To Store Up High
Reserve this shelf for items you grab only once a month or less. Think: extra trash bags, specialty cleaners for appliances, or holiday-specific supplies. Avoid storing heavy bottles or fragile glass containers that could fall and break.
Installation Tips
Use a stud finder to locate solid wood above the door frame. If there's no stud, use heavy-duty toggle bolts rated for at least 50 pounds. Paint the shelf the same color as the wall or trim so it blends in and doesn't feel cluttered.
9. Use a Lazy Susan for Corner Access
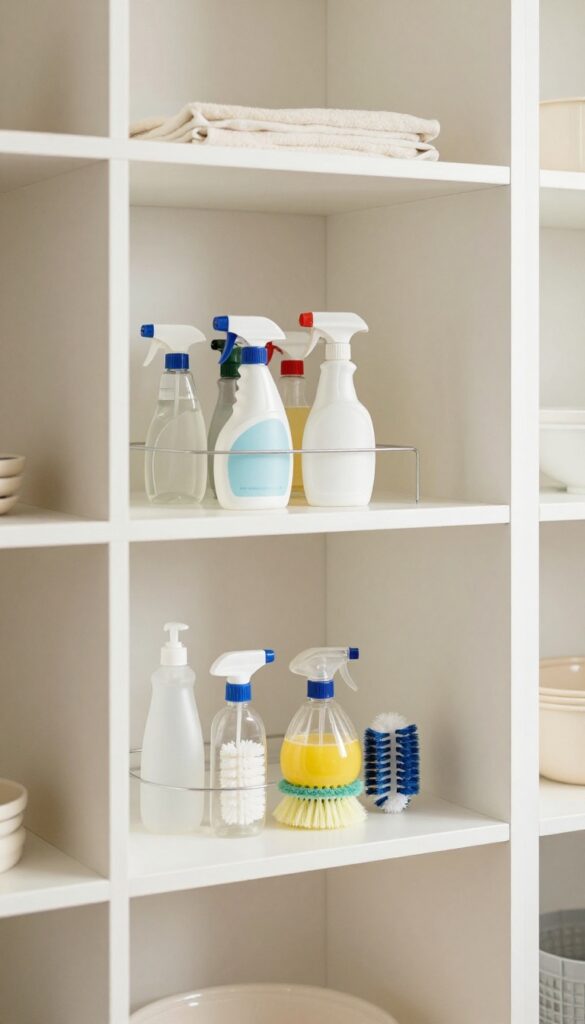
Corner cabinets and deep shelves are notorious black holes for cleaning supplies. Bottles get pushed to the back, forgotten, and eventually expired. A lazy Susan spins everything into view, so you can grab what you need without playing hide-and-seek.
This simple turntable eliminates the need to reach behind tall bottles or dig through clutter. It works especially well for round or awkwardly shaped items like spray bottles, scrub brushes, and polish cans. You can install one on a shelf or inside a base cabinet.
For heavy-duty use, opt for a metal or heavy-duty plastic version with a non-slip surface. If your closet has deep shelves, consider stacking two lazy Susans on different levels to double your accessible storage.
Choose The Right Size
Measure your cabinet or shelf depth and width before buying. A 12-inch lazy Susan fits most standard cabinets, but larger corners may need a 16- or 20-inch model. Make sure the turntable clears the door when closed.
Group By Frequency Of Use
Place daily-use items like all-purpose cleaner and glass spray on the lazy Susan. Reserve static storage for rarely used supplies like carpet shampoo or specialty stain removers. This way, the spin works for you, not against you.
Add Dividers For Stability
Tall bottles can tip during spinning. Use adjustable dividers or small tension rods to keep them upright. Alternatively, store bottles in a small bin on the lazy Susan so they stay put when you rotate.
10. Group Items by Task in Separate Caddies
When you're scrubbing the bathroom, the last thing you want is to dig through kitchen degreasers and floor polish. Task-specific caddies solve this by keeping every room's supplies together. Grab one caddy, clean one room—no extra trips, no rummaging.
This system works because it mirrors how you actually clean. Instead of a single messy bin, you have a dedicated caddy for each major area: bathroom, kitchen, living room, and general all-purpose. Each caddy holds exactly what you need for that space, plus a few microfiber cloths and gloves.
When you're done, just wipe down the caddy and put it back. It's simple, portable, and prevents cross-contamination between rooms.
Pick The Right Caddies
Look for caddies with a sturdy handle and compartments that keep bottles upright. Plastic tool totes work great—they're lightweight, easy to clean, and often have a divided interior. Avoid flimsy baskets that tip over when loaded.
A caddy with a wide base and non-slip bottom is ideal.
Label Each Caddy Clearly
Use a label maker or adhesive tape to mark each caddy with its designated room. Stick the label on the outside where it's visible even when stacked. This saves time when you're in a hurry and helps family members return items to the right spot.
Stock Smartly, Not Heavily
Don't overfill caddies—only include the products you use regularly for that room. For the bathroom, that might be toilet cleaner, glass spray, a scrub brush, and a squeegee. For the kitchen, dish soap, all-purpose cleaner, and a sponge.
Keep a backup stash on a shelf above for refills.
11. Label Everything Clearly
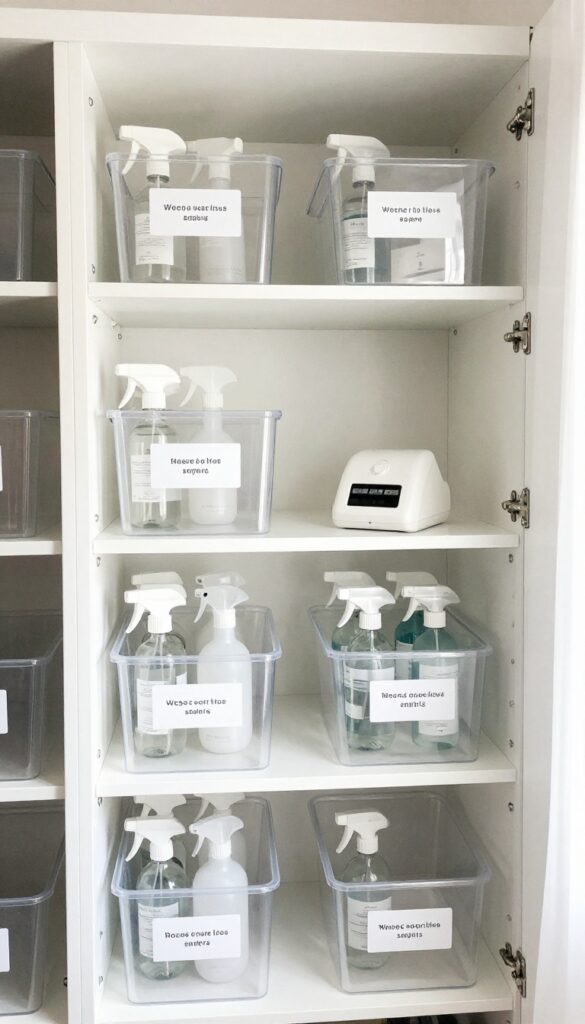
Labels turn chaos into order. When every shelf, bin, and bottle has a clear label, anyone in the household can find what they need and put it back in the right spot. No more guessing or piling things where they don't belong.
A label maker is a small investment that pays off every time you open the closet. Print legible, durable labels for each zone—all-purpose cleaners, glass sprays, scrub brushes, and so on. If you prefer a rustic look, chalkboard tags let you update labels as your supplies change.
Stick them on bins, baskets, and even directly on shelves to create a visual map of your cleaning arsenal.
Choose The Right Labeling Tool
A handheld label maker produces crisp, waterproof labels that stick firmly to plastic, metal, and wood. For a more flexible option, use chalkboard labels or write-on stickers that you can erase and rewrite. Whichever you pick, make sure the labels are large enough to read at a glance.
Label By Category, Not By Brand
Group similar items together and label the group rather than each individual product. For example, a bin labeled "Kitchen Cleaners" can hold spray bottles, wipes, and degreasers. This system makes it easy to grab a whole category and restock without confusion.
Involve The Whole Family
When everyone knows the system, everyone can help keep the closet tidy. Teach kids to match labels when putting things away. Use picture labels for younger children so they can participate too.
Consistency turns labeling from a one-time task into a lasting habit.
12. Store Microfiber Cloths in a Rolled Bundle
Microfiber cloths are essential for streak-free cleaning, but they can quickly become a tangled mess if tossed into a bin. Rolling them tightly not only saves space but also makes it easy to grab one without disturbing the rest. This simple method keeps your cloths organized and ready to use.
Rolling microfiber cloths is a game-changer for your cleaning closet. Instead of folding and stacking, which often leads to toppling piles, roll each cloth tightly and stand them upright in a bin or drawer. This way, you can see all your cloths at a glance and pull one out without unstacking or unfolding.
It also maximizes vertical space, allowing you to fit more cloths in a smaller area.
How To Roll Microfiber Cloths
Lay the cloth flat, fold it in half lengthwise, then roll from one end to the other. For a tighter roll, smooth out wrinkles as you go. Once rolled, place them side by side in a container.
You can also separate clean and dirty cloths by using two bins or color-coded rolls.
Best Storage Containers
Use a shallow bin, a drawer organizer, or even a repurposed tissue box. Clear containers work best so you can see what's inside. If you have a deep drawer, a divided insert keeps rolls from toppling.
For a quick DIY, cut a cardboard box to size and cover it with contact paper.
Labeling For Quick Identification
To avoid mixing up cloths for different tasks, label your bins. Use simple categories like “Glass & Mirrors, ” “Countertops, ” or “Dusting. ” You can also use colored cloths and match them to colored labels. This system saves time and prevents cross-contamination between surfaces.
13. Use a Tiered Shelf for Small Bottles
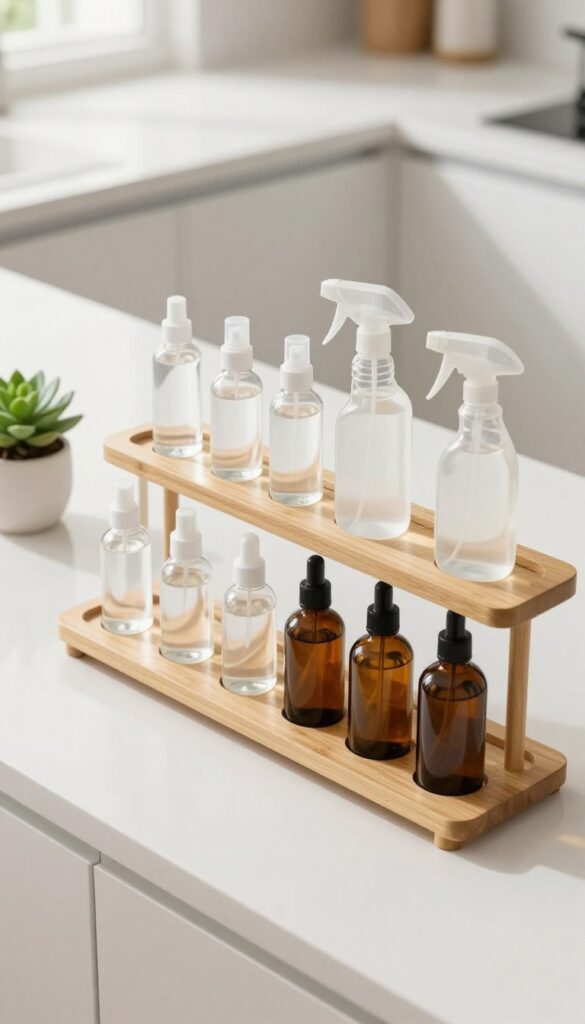
Small bottles of cleaning concentrate, essential oils, or spray refills tend to get lost behind taller containers. A tiered shelf or riser brings them front and center, so you can see every option at a glance. No more knocking over items while searching for that tiny bottle of bleach alternative.
Tiered shelves work especially well on countertops or in shallow cabinets where stacking isn't practical. They turn a flat surface into stadium seating for your supplies, making each bottle equally visible and accessible. You can find them in plastic, bamboo, or wire styles to match your closet's vibe.
Pick The Right Size
Measure your shelf depth before buying a riser. A standard two‑tier shelf works for most cabinets, but three‑tier versions are better for very small bottles like sample sizes or travel sprays. Leave a couple inches of clearance above the top tier so you can grab bottles without knocking them over.
Group By Use
Arrange bottles by category—all‑purpose cleaners on one tier, glass cleaners on another, and specialty products like granite polish on the third. This way you grab the right bottle without scanning every label. If you have a lot of similar bottles, add a small label on the shelf edge for extra clarity.
Diy Option
If you don't want to buy a riser, make one from a sturdy cardboard box cut at an angle. Cover it with contact paper or paint to match your closet. It won't last forever, but it's a quick fix that costs nothing and works surprisingly well.
14. Keep a Trash Can Inside the Closet
A small trash can tucked inside your cleaning closet is a game-changer. Instead of carrying empty bottles or used rags to the kitchen bin, you can toss them immediately. This simple addition prevents clutter from piling up and keeps your closet tidy between restocks.
Placing a trash can inside the closet makes disposal effortless. You'll find yourself more likely to throw away empties right away rather than setting them aside. Over time, this habit keeps shelves clear and your space organized.
Choose The Right Size
Pick a can that fits your closet's floor space without blocking access. A 2- to 4-gallon can works well for most closets. If you have a narrow closet, consider a slim rectangular can that slides into a gap.
Use A Lid For Odor Control
Cleaning rags and used wipes can get smelly. A can with a lid, especially a step-open model, keeps odors contained. It also hides the trash from view, maintaining a neat appearance.
Line It For Easy Emptying
Always use a liner bag so you can grab and go when it's full. Small kitchen bags or grocery bags work perfectly. Tie it off and toss it in your main bin without any mess.
15. Install a Power Strip for Charging Vacuums
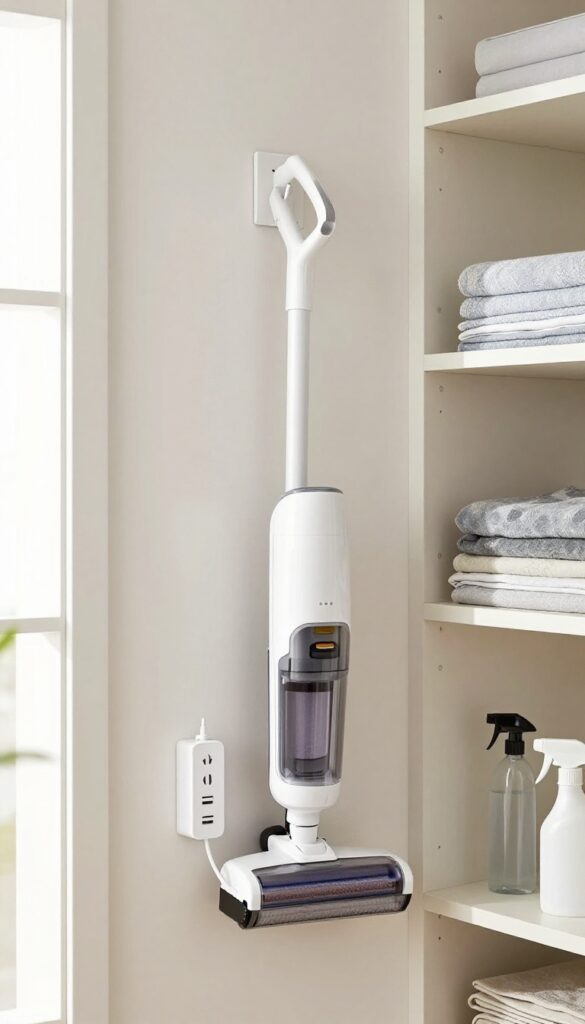
Cordless vacuums and rechargeable scrubbers are convenient, but only if they're ready when you need them. A power strip mounted inside your closet keeps batteries topped off without trailing extension cords across the hallway. It's a small upgrade that eliminates the annoyance of a dead tool mid-cleaning.
Mount a power strip on the inside wall of your closet, near a shelf or hook where you store the vacuum. Choose a strip with USB ports for charging smaller devices like handheld vacuums or cordless dusters. Keep the cord tidy with cable clips or a short extension that runs to the nearest outlet.
This setup ensures every rechargeable tool is always powered and ready to go.
Pick The Right Location
Install the strip at a height that's easy to reach but out of the way of hanging items. Near the bottom of a tall shelf or on the side of a cabinet works well. Avoid placing it where water from wet mops or spray bottles could drip onto it.
Manage The Cords
Use a short, heavy-duty extension cord to connect the power strip to the wall outlet if the closet lacks a nearby plug. Secure the cord along the baseboard with adhesive clips. For a cleaner look, run it through a cable management sleeve.
Safety First
Only use a power strip rated for the total wattage of your devices. Avoid daisy-chaining multiple strips. If your closet is damp or near a washer/dryer, opt for a GFCI-protected strip to prevent electrical hazards.
16. Use a Hanging Shoe Organizer for Sprays and Rags
A clear hanging shoe organizer on the wall or door holds spray bottles, rags, and sponges in individual pockets. Everything is visible and easy to grab. It's a simple, low-cost solution that instantly clears off shelves and makes use of vertical space.
Hanging shoe organizers are incredibly versatile. They turn an overlooked area into prime storage real estate. The transparent pockets let you see exactly what you have without digging.
Plus, they keep bottles upright and rags separated, so nothing gets lost or spills.
Choose The Right Organizer
Look for a clear, over-the-door or wall-mounted shoe organizer with pockets large enough to hold standard spray bottles. Avoid fabric ones that hide contents. Opt for one with reinforced stitching to handle the weight of multiple bottles.
Organize By Task Or Frequency
Group all-purpose cleaners in one column, glass sprays in another, and bathroom products in a third. Place rags and sponges in lower pockets for quick reach. This system makes it easy to grab what you need without rummaging.
Install On The Inside Of The Closet Door
If you have a closet door, use the back side. This keeps the organizer hidden when the door is closed but instantly accessible when open. It also frees up wall space for other storage solutions.
17. Add a Small Broom and Dustpan Set for Quick Sweeps
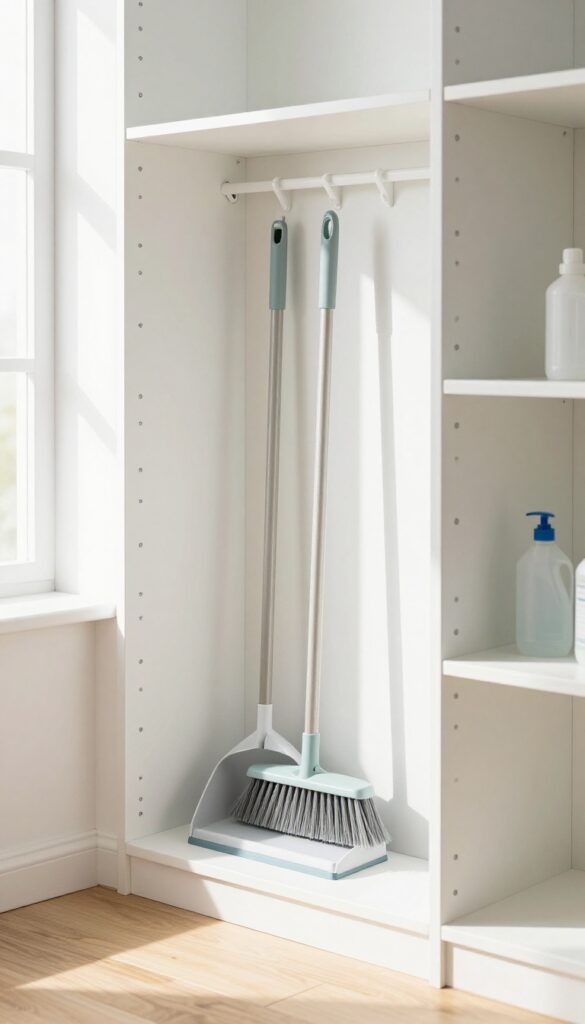
Not every mess calls for the big vacuum. A compact broom and dustpan set tucked into your closet lets you handle crumbs, dust bunnies, or spilled cereal in seconds. It's one of those small additions that saves you from dragging out heavy equipment for minor cleanups.
A dedicated broom and dustpan set in your cleaning closet encourages quick action. When you see a small mess, you grab it and sweep without hesitation. Choose a set that hangs flat against the wall or fits neatly into a narrow gap.
This keeps the closet organized and the tools always at hand.
Pick The Right Size And Style
Look for a set with a dustpan that has a rubber lip to catch fine dust. A broom with soft bristles works on both tile and hardwood. Consider a wall-mounted holder to keep the broom and dustpan together, off the floor, and easy to grab.
Placement Matters
Mount the set near the front of the closet or on the inside of the door. This way you can grab it without moving other items. If your closet is deep, attach it to a side wall so it's visible the moment you open the door.
Keep It Clean And Ready
After each use, tap the broom outside or over a trash can to remove hair and dust. Wipe the dustpan with a damp cloth occasionally. A clean set is more inviting to use and lasts longer.
FAQ
How do I start organizing my cleaning supply closet?
Start by taking everything out and sorting items by category. Discard expired or empty products, then group similar items together. Measure your space and choose storage solutions like shelves, bins, or hooks that fit your layout.
What is the best way to store spray bottles?
Hanging spray bottles by their triggers on a tension rod or using a pegboard with hooks keeps them upright and accessible. You can also store them in a clear bin with a lid if you prefer to keep them out of sight.
How can I make the most of a small cleaning closet?
Use vertical space with shelves, hooks, and over-the-door organizers. Choose clear bins to see contents, and consider a lazy Susan for corner access. Keep only essentials to avoid overcrowding.
Should I label everything in my cleaning closet?
Yes, labeling shelves, bins, and bottles helps everyone find and return items correctly. It also makes it easier to maintain the organization over time.
How often should I reorganize my cleaning supply closet?
Aim to do a quick tidy every few months. Remove expired products, wipe down shelves, and adjust storage as your supply needs change. A seasonal reset can keep things from getting cluttered.
Conclusion
Your cleaning supply closet doesn't need to be a chaotic jumble. Even one or two of these ideas—like adding a door rack or grouping like items—can make a real difference in your daily routine. Start with the change that feels simplest, and you'll quickly see how much easier it is to grab what you need.
A well-organized closet saves you time and frustration, especially during deep cleans. You don't have to overhaul everything at once. Pick one tip, implement it this weekend, and enjoy the satisfaction of a neatly accessible space that actually works for you.


