
Shower tiles take a beating. Between soap scum, hard water stains, and everyday grime, they can lose their shine fast. But you don't need harsh chemicals or expensive products to get them looking like new again.
These 25 tips are built around real-world cleaning—what actually works without wrecking your budget or your weekend. Some are quick daily habits, others are deeper scrubs for when things get rough.
Whether you're dealing with stubborn grout or just want to keep things fresh, this list has you covered. Let's dive into the simple, effective ways to keep your shower tiles spotless.
1. Squeegee After Every Shower
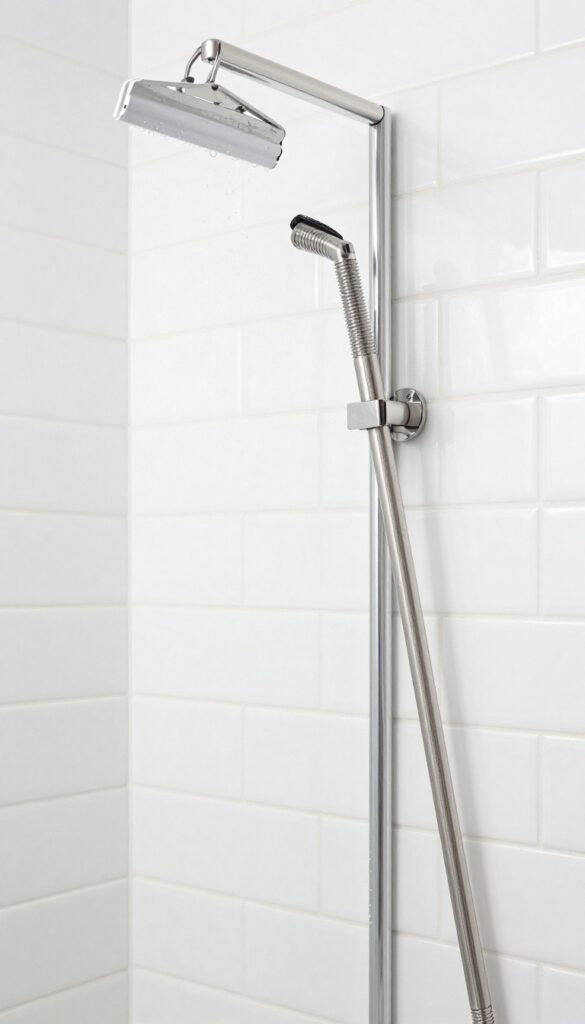
Grab a squeegee and make it part of your post-shower routine. A quick swipe across the tiles takes just 30 seconds but does a ton of heavy lifting. It stops water from pooling on the surface, which means fewer water spots and less soap scum buildup over time.
Think of it as a tiny daily effort that saves you from scrubbing sessions later.
Why It Works So Well
Hard water contains minerals that leave white deposits when they dry. Soap scum is basically soap mixed with those minerals and body oils. By removing the water immediately, you're cutting off the drying process.
Less drying equals fewer stains. It's that simple.
Best Squeegee For The Job
Get a squeegee with a rubber blade and a hook so you can hang it right inside the shower. Stainless steel or plastic handles both work fine. The key is to keep it accessible.
If you have to dig it out from under the sink, you won't use it. Hang it on the shower caddy or a suction hook on the tile.
How To Squeegee Effectively
Start at the top of the tiled wall and pull down in overlapping strokes. Work your way across the whole wall. Don't forget the glass door if you have one.
Finish by wiping the blade with a towel every few strokes to keep it dry. One pass is usually enough, but for stubborn water, go over it twice.
2. Use a Daily Shower Spray
A daily spray is the easiest way to stay ahead of buildup. It takes 30 seconds and stops soap scum from ever getting a foothold. The best part?
You probably already have the ingredients in your kitchen.
Mix equal parts water and white vinegar in a spray bottle. After your shower, mist the tiles and grout. Let it sit—no wiping needed.
The vinegar cuts through soap residue and hard water deposits before they harden. For sensitive grout, test a small area first. If you dislike the vinegar smell, add a few drops of essential oil.
This habit alone can cut your deep cleaning frequency in half.
Why Vinegar Works
Vinegar is acidic enough to dissolve alkaline soap scum and mineral deposits but gentle on tile. Spraying it daily prevents buildup, so you rarely need harsh scrubbing. Just avoid it on natural stone like marble or travertine.
How To Make It Smell Better
Add 10–15 drops of lemon, tea tree, or lavender essential oil to the spray bottle. Shake well before each use. The oils also add mild antibacterial properties.
When To Spray
Right after your last rinse, while the tiles are still wet. That way the spray spreads evenly. Leave the bathroom fan on or door open for airflow.
3. Tackle Soap Scum with Dish Soap
Soap scum is that stubborn white film that builds up on tiles and glass doors. It's a mix of soap residue and minerals from hard water. While it looks tough, a simple kitchen staple can break it down fast.
Dawn dish soap is designed to cut through grease, and soap scum is basically greasy residue. A little bit goes a long way.
Why Dish Soap Works
Dish soap contains surfactants that break down oils and fats. Soap scum is largely composed of calcium and fatty acids from soap reacting with hard water. The surfactants surround and lift these particles, making them easy to rinse away.
Unlike harsh chemicals, dish soap is gentle on tile surfaces and safe for daily use.
How To Apply It
Squeeze a small amount of Dawn onto a damp sponge or soft cloth. Work it into a lather and scrub the tiles in circular motions. Focus on areas where scum is thickest, like the bottom rows or corners.
Let it sit for a minute or two to break down the grime, then rinse thoroughly with warm water.
Rinsing For A Streak-free Finish
After scrubbing, it's crucial to rinse well. Any leftover soap residue can attract more dirt and leave streaks. Use a handheld showerhead or a bucket of warm water to rinse from top to bottom.
For extra shine, follow up with a clean, dry microfiber cloth to buff the tiles dry.
4. Make a Baking Soda Paste for Grout
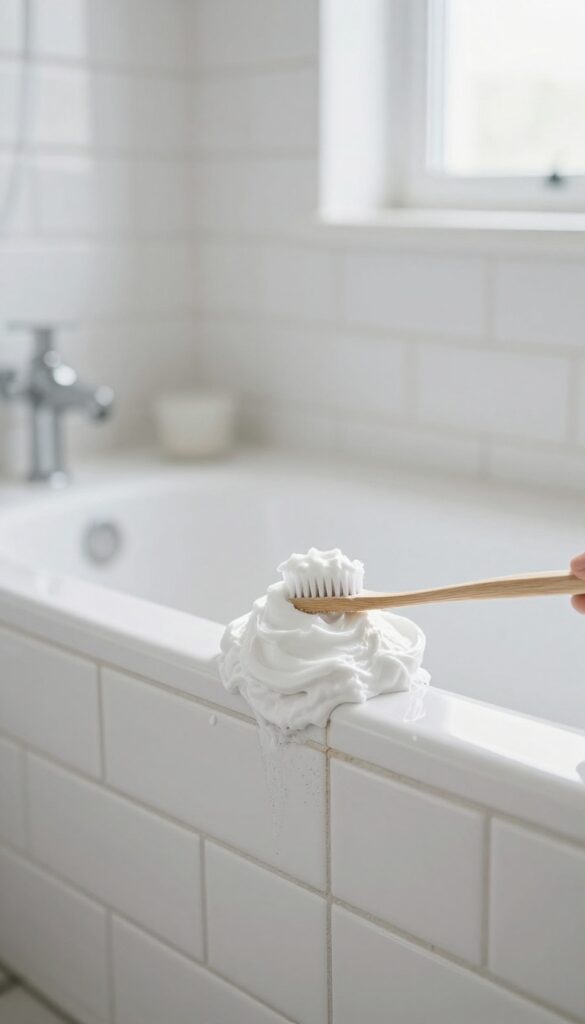
Grout lines are often the first place to show dirt and discoloration. A simple baking soda paste can tackle that grime without harsh chemicals. It's gentle enough for regular use but effective at brightening the grout between your tiles.
Baking soda is a mild abrasive that lifts dirt without scratching tiles. When mixed with water, it forms a paste that clings to vertical grout lines, giving it time to work. This method is cheap, non-toxic, and safe for all tile types.
How To Make The Paste
In a small bowl, combine three parts baking soda with one part water. Stir until it forms a thick, spreadable paste. Add a few drops of dish soap for extra grease-cutting power if needed.
Application Tips
Use an old toothbrush or a grout brush to apply the paste directly onto the grout lines. Work it into the grooves, then let it sit for 10 minutes. This dwell time allows the baking soda to break down embedded dirt.
Scrubbing And Rinsing
After the wait, scrub the grout with the brush using small circular motions. Rinse thoroughly with warm water. For stubborn stains, repeat the process or add a little white vinegar to the paste (but test on a small area first).
5. Use Vinegar for Hard Water Stains
Hard water stains are those stubborn white or cloudy deposits that cling to tiles and glass. They come from mineral-rich water and won't budge with regular cleaners. White vinegar cuts through them naturally because its mild acid dissolves the calcium and lime buildup.
It's cheap, non-toxic, and already in your pantry.
For best results, use undiluted white vinegar. Spray it directly on the stains and let it sit for about 15 minutes. The waiting time lets the acid work on the minerals.
Then scrub with a soft brush or sponge. Rinse thoroughly with water afterward to remove any vinegar residue. If the stains are heavy, you can repeat the process or let the vinegar sit longer.
Avoid using vinegar on natural stone tiles like marble or travertine, as the acid can etch them. For those, use a stone-safe cleaner instead.
Why Vinegar Works
Vinegar contains acetic acid, which reacts with the alkaline minerals in hard water stains. This reaction breaks down the deposits, making them easy to wipe away. It's a gentle but effective cleaner that won't damage most tile surfaces when used correctly.
Step-by-step Application
Start by spraying undiluted white vinegar onto the stained areas. Let it sit for 15 minutes—longer for tough stains. Scrub with a non-abrasive sponge or brush.
Rinse with warm water and dry with a microfiber cloth to prevent new spots. For vertical surfaces, use a spray bottle and let the vinegar cling.
Safety Tips And Precautions
Always test vinegar on a small hidden area first. Do not mix vinegar with bleach or other cleaners, as it can create harmful fumes. Wear gloves to protect your hands.
Ventilate the bathroom while working. For stubborn stains, a paste of baking soda and vinegar can boost cleaning power.
6. Try a Pumice Stone for Tough Spots
Some stains just won't budge no matter how hard you scrub. That's where a pumice stone comes in handy. It's a simple, low-tech tool that works wonders on ceramic and porcelain tiles.
A pumice stone is essentially a abrasive sponge made from volcanic rock. When wet, it gently grinds away mineral deposits, soap scum, and even rust stains without scratching the tile surface. It's especially effective on hard water rings and stubborn residue that have built up over time.
How To Use It Safely
First, soak the pumice stone in water for a few minutes. Then, wet the tile surface as well. Gently rub the stone over the stain using light pressure—let the stone do the work.
Keep both the stone and tile wet to prevent scratching. Rinse frequently to check your progress.
Where It Works Best
Pumice stones are ideal for glazed ceramic and porcelain tiles. Avoid using them on unglazed, polished, or natural stone tiles like marble or granite, as they can cause scratches. Test on an inconspicuous area first if you're unsure.
Maintenance Tips
After use, rinse the pumice stone and let it air dry. It will naturally wear down over time, so replace it when it becomes too small to hold comfortably. Store it in a dry place to prevent mold growth.
7. Steam Clean for Deep Grout Cleaning
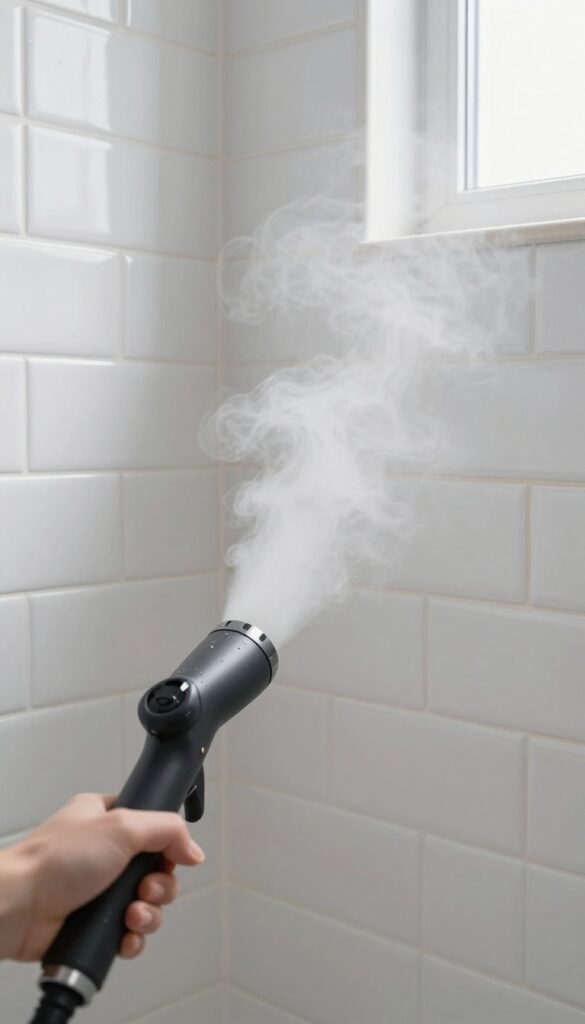
Grout lines are notorious for trapping dirt and discoloring over time. While scrubbing with a brush works for surface grime, a handheld steamer takes things to the next level. The high-temperature steam penetrates porous grout, loosening embedded dirt without any chemicals.
It's a game-changer for a periodic deep clean that restores grout to its original color.
A handheld steamer is a powerful tool for deep cleaning grout. The heat softens and lifts grime that scrubbing alone can't reach. Simply direct the steam along grout lines, let it sit for a few seconds, then wipe away with a microfiber cloth.
For stubborn spots, follow up with a stiff brush. This method is especially effective for white or light-colored grout that has darkened over time. Use it every few months to keep grout looking fresh.
Why Steam Works So Well
Steam cleaning uses heat to break down soap scum, mildew, and mineral deposits without harsh chemicals. The steam penetrates grout's porous surface, forcing out trapped dirt. It also kills mold and bacteria, making it a hygienic choice for bathrooms.
Plus, it's eco-friendly—no need for bleach or other strong cleaners.
How To Steam Clean Grout
Start by wiping away loose debris. Fill your steamer with water and let it heat up. Work in small sections, holding the steamer nozzle close to the grout.
Move slowly to allow steam to penetrate. After steaming, wipe the area with a dry cloth to remove loosened grime. For extra dirty grout, use a grout brush while the surface is still damp.
When To Use This Method
Steam cleaning is ideal for a deep clean every two to three months. It's also great for tackling grout that has become discolored from mold or hard water. Avoid using it on damaged or cracked grout, as the moisture can worsen the issue.
Always test on an inconspicuous area first to ensure your tiles can handle the heat.
8. Use Hydrogen Peroxide on Mold
Mold in the shower is not just unsightly—it can also be a health concern. Before you reach for bleach, consider hydrogen peroxide. It's a gentler alternative that still packs a punch against mold and mildew, breaking down into harmless water and oxygen after use.
This makes it safer for your family and the environment.
Hydrogen peroxide is a powerful oxidizer that kills mold spores on contact. Unlike bleach, which can release toxic fumes and damage grout over time, peroxide is milder and won't discolor most surfaces. It's also effective at penetrating porous grout and caulk where mold likes to hide.
For best results, use a 3% solution—the standard concentration found in most drugstores. Always test on an inconspicuous area first, especially on colored grout, to ensure it doesn't cause fading.
How To Apply It
Start by spraying the hydrogen peroxide directly onto the moldy areas. You'll notice it fizzing as it reacts with organic matter. Let it sit for about 10 minutes—this gives it time to penetrate and kill the mold.
Then, scrub with a soft brush or an old toothbrush. Rinse thoroughly with water. For stubborn spots, you can repeat the process or let it sit longer.
When To Use It
Hydrogen peroxide works best on surface mold and mildew. It's ideal for routine maintenance or for tackling small patches before they spread. If you have a major mold infestation or if the mold has penetrated deep into the grout, you may need a stronger treatment or professional help.
Use it weekly to keep mold at bay, especially in humid bathrooms.
Safety Tips
While hydrogen peroxide is safer than bleach, it can still irritate skin and eyes. Wear gloves and avoid splashing. Keep the bathroom ventilated by opening a window or running the fan.
Never mix hydrogen peroxide with bleach or ammonia—this can create dangerous gases. Store it in a dark bottle away from light, as light breaks down the solution.
9. Seal Grout Annually
Grout is porous by nature, which means it soaks up moisture, soap scum, and stains like a sponge. Over time, that leads to discoloration and mold growth that's tough to reverse. Sealing creates a protective barrier that keeps grout looking fresh and makes cleaning much easier.
It's a small task once a year that saves you hours of scrubbing later.
Applying a penetrating sealer is straightforward. Clean the grout thoroughly first, let it dry completely, then apply the sealer with a small brush or applicator bottle. Wipe away any excess from the tile surface before it dries.
The sealer soaks into the grout and bonds from within, so it won't change the appearance or leave a shiny film. Most sealers need a few hours to cure, so plan to keep the shower dry for the rest of the day.
Why Annual Sealing Matters
Even the best grout eventually loses its factory seal. Without a fresh layer, moisture seeps in and creates the perfect environment for mildew and staining. Annual sealing is cheap insurance—a bottle costs about the same as a couple of specialty cleaners, but it protects your grout for a full year.
Choosing The Right Sealer
Look for a penetrating sealer designed for natural stone or cement-based grout. Avoid film-forming sealers that can peel or yellow over time. Water-based sealers are low-odor and easy to apply, while solvent-based ones offer deeper penetration.
For most bathrooms, a quality water-based sealer works great.
Quick Application Tips
Work in small sections so the sealer doesn't dry before you can wipe off the excess. Use a grout sealer pen for tight corners and vertical lines. If you're sealing a large shower, consider a spray applicator for even coverage.
Always test in an inconspicuous spot first to make sure the sealer doesn't darken the grout.
10. Clean with a Magic Eraser
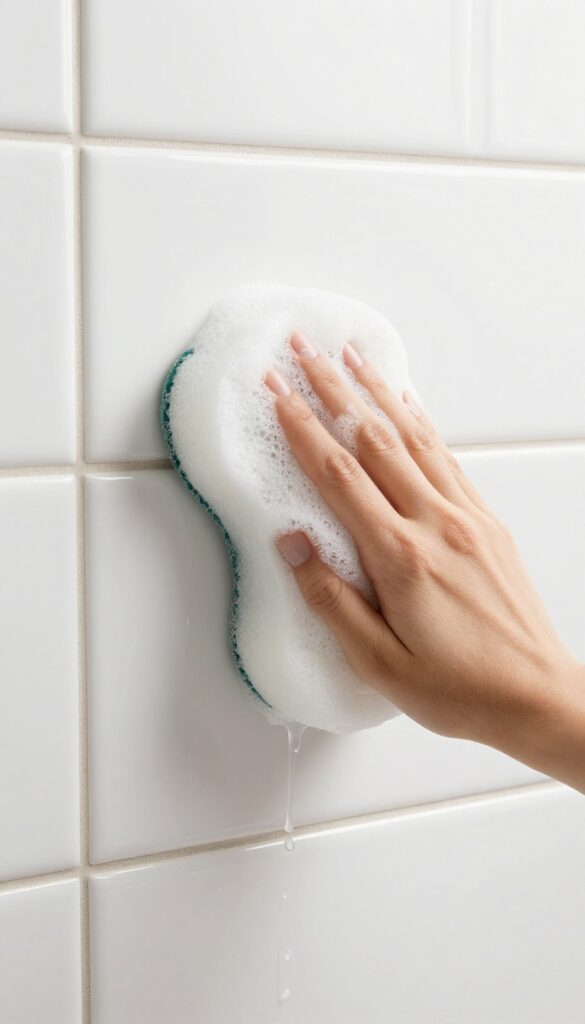
Melamine foam sponges—often sold as Magic Erasers—are a surprisingly effective tool for cleaning shower tiles. They work with just water to lift soap scum, hard water spots, and everyday scuffs without the need for extra chemicals. The foam is gentle enough for daily use but tough enough to tackle buildup that other cleaners leave behind.
Magic Erasers are made of melamine foam, which acts like a super-fine sandpaper. When wet, it creates a mild abrasive action that polishes away grime. They're especially good on glossy tiles where you want to restore shine without scratching.
Just wet the sponge, wring it out, and gently scrub the tile surface. Rinse the sponge often to avoid redistributing dirt. For best results, use a light touch—the foam does the work for you.
Where Magic Erasers Shine
These sponges excel on smooth, non-porous tiles like ceramic, porcelain, and glass. They remove soap scum rings around the tub, water spots on shower doors, and even light mildew stains. They're also great for wiping down tile after a shower to prevent buildup.
Just avoid using them on natural stone (like marble or granite) or unsealed grout, as the abrasiveness can damage the surface.
How To Use Them Without Wasting Product
Magic Erasers can wear down quickly if you're not careful. Cut the sponge into smaller pieces before use—this gives you more scrubbing surface and extends its life. Always start with a clean sponge and wet it thoroughly.
Squeeze out excess water so it's damp, not dripping. After scrubbing, rinse the tile with plain water to remove any foam residue. Store the sponge in a dry place between uses to prevent bacteria growth.
A Budget-friendly Alternative
Name-brand Magic Erasers work well, but generic melamine sponges are just as effective and cost less. You can buy them in bulk online or at discount stores. Some people even cut large sheets of melamine foam into custom sizes.
The key is to use them with water only—no soap or cleaner needed. This makes them a safe, non-toxic option for households with kids or pets.
11. Use a Toothbrush for Corners
An old toothbrush gets into tight corners and edges where sponges can't reach. Dip in vinegar or baking soda paste for targeted cleaning around fixtures. This simple trick makes a big difference in those neglected spots.
Why A Toothbrush Works Best
The bristles are stiff enough to scrub grime but soft enough to avoid scratching tile or grout. The small head lets you maneuver around faucet bases, shower caddies, and tile edges with ease. Plus, you can angle it to get into corners that a sponge or cloth would miss entirely.
Best Cleaning Solutions To Use
For soap scum and hard water stains, dip the toothbrush in white vinegar. For mold or mildew, make a paste with baking soda and a little water. You can also use a drop of dish soap for everyday grime.
Apply the solution directly to the brush or dip it in a small bowl.
Target Areas For Maximum Impact
Focus on the corners where tiles meet the wall, around the showerhead and handles, and along the bottom edge of the shower door or curtain. Don't forget the grout lines near fixtures—they often collect the most buildup. A quick scrub once a week keeps these spots looking fresh.
12. Try a Vinegar and Dawn Soak
When soap scum and grime have built up into a stubborn film, a simple spray might not cut it. That's where a vinegar and Dawn soak comes in—a powerful one-two punch that breaks down residue without harsh scrubbing. The combination of acidic vinegar and grease-cutting dish soap creates a solution that tackles even the toughest shower tile messes.
Mix equal parts white vinegar and Dawn dish soap in a microwave-safe bowl. Heat the mixture for about 30 seconds until it's warm, not boiling. Apply it generously to the tiles using a sponge or spray bottle, making sure to coat the affected areas.
Let the solution sit for 30 minutes to allow the vinegar to dissolve mineral deposits and the Dawn to break down soap scum. After the soak, scrub with a soft brush or sponge, then rinse thoroughly with warm water. The grime should lift away easily, leaving tiles looking refreshed.
Why This Combo Works
Vinegar is acidic, which helps dissolve hard water stains and mineral buildup. Dawn dish soap is a degreaser that cuts through oily soap scum. Together, they create a solution that's more effective than either alone.
The heat helps activate the ingredients, making them penetrate the grime faster.
How To Apply For Best Results
For vertical tiles, use a spray bottle to avoid drips. For horizontal surfaces, you can pour the mixture directly. Make sure the solution stays wet for the full 30 minutes—if it dries, it can leave a residue.
Cover with plastic wrap or a damp cloth if needed.
Safety Tips
Avoid using this mixture on natural stone tiles like marble or travertine, as the acid can etch the surface. Test on a small, hidden area first. Wear gloves to protect your skin, and ensure good ventilation while working.
13. Use a Squeegee on Glass Doors Too
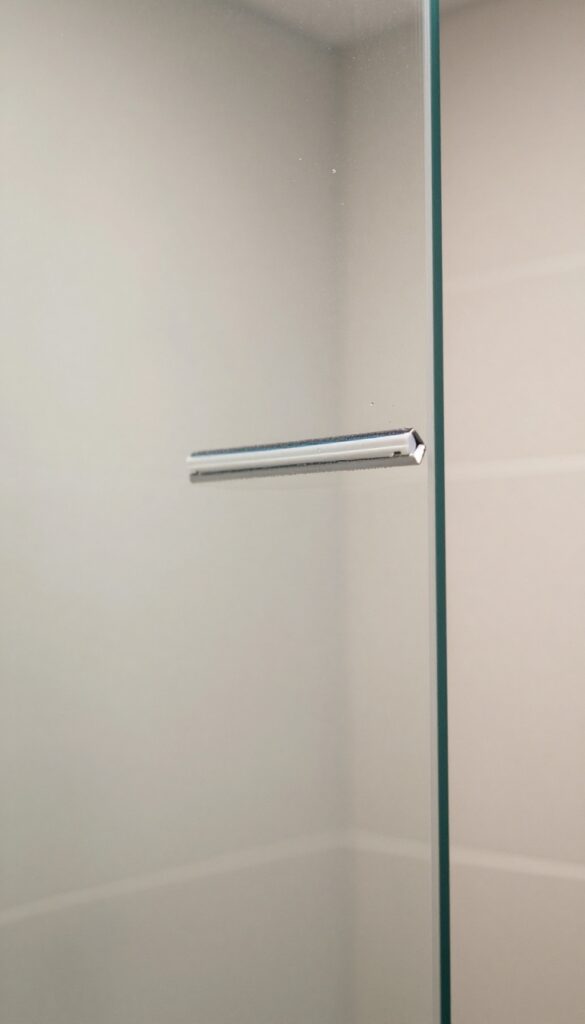
Glass shower doors look sleek when they're clean, but water spots and hard water stains can ruin that look fast. The good news is you can prevent most of that buildup with a simple tool you probably already have in your kitchen: a squeegee. Spending just 30 seconds after each shower keeps your glass clear and cuts down on the need for harsh chemical cleaners.
Squeegeeing your glass doors after every use is one of the easiest habits to adopt. It removes the water droplets that cause spots and scaling before they have a chance to dry. Over time, this simple routine can save you hours of scrubbing and keep your doors looking brand new.
Why It Works So Well
Hard water contains minerals like calcium and magnesium. When water evaporates on glass, those minerals are left behind as cloudy residue. A squeegee wipes away the water before evaporation happens, so the minerals never get a chance to settle.
It's the same reason you wipe down your car after a wash—prevention is way easier than removal.
Best Technique For Streak-free Glass
Start at the top corner and pull the squeegee across in a straight, overlapping stroke. Wipe the blade with a microfiber cloth after each pass to keep it dry. Then do the same for the next section, working your way down.
Finish by wiping the bottom edge where water pools. For extra shine, follow up with a dry microfiber cloth.
Don't Forget The Door Frame And Track
Water also collects in the bottom track and along the frame. After squeegeeing the glass, use a small towel or an old toothbrush to soak up moisture in the track. This prevents soap scum and mold from building up in those hard-to-reach spots.
A quick wipe now saves a deep clean later.
14. Clean with Lemon Juice for Fresh Scent
Sometimes the best cleaners are sitting right in your kitchen. Lemon juice is a natural degreaser that cuts through soap scum and leaves behind a bright, fresh scent. It's gentle enough for daily use but strong enough to handle buildup when combined with other pantry staples.
Plus, it's cheap and chemical-free.
Lemon juice works wonders on shower tiles because its acidity breaks down mineral deposits and grease. You can use it straight from the bottle or squeeze fresh lemons for a more potent solution. The citrus smell instantly freshens up the bathroom, making the chore feel less like work.
For best results, apply it to tiles and let it sit for a few minutes before scrubbing.
Lemon And Baking Soda Paste
Mix lemon juice with baking soda to form a thick paste. This combo creates a gentle abrasive that scrubs away grime without scratching tiles. Apply it to problem areas like grout lines or soap scum rings, let it sit for 10 minutes, then scrub with a soft brush.
Rinse thoroughly to reveal clean, shiny tiles.
Straight Lemon Spray
For a quick daily cleaner, fill a spray bottle with lemon juice (or a mix of lemon juice and water). Spray directly onto tiles after each shower to prevent soap scum buildup. The acidity helps dissolve residue before it hardens, and the scent lingers pleasantly.
Just be careful on natural stone—test a small area first.
Lemon And Vinegar Boost
Combine equal parts lemon juice and white vinegar in a spray bottle for an extra-strength cleaner. This mixture tackles tough hard water stains and mildew stains. Spray it on, let it sit for 15 minutes, then scrub and rinse.
The lemon masks the vinegar smell, leaving your bathroom smelling like a citrus grove.
15. Use a Grout Pen for Stained Lines
Grout lines are often the first place to show wear. They trap dirt, soap residue, and moisture, turning from light to dingy gray or brown over time. A deep clean can help, but it's not always enough to restore the original color—especially if the grout is old or porous.
That's where a grout pen comes in. It's a simple marker-like tool that applies a thin layer of color over the grout, covering stains and evening out the tone. It won't replace a proper scrubbing, but it gives your tiles a fresh, uniform look with minimal effort.
Grout pens are a quick cosmetic fix for discolored grout lines. They work best on clean, dry grout, so wipe down the area first and let it dry completely. Shake the pen well, then run the tip along the grout line, applying even pressure.
The ink dries quickly and bonds to the grout surface, creating a consistent color that hides stains and yellowing. Keep in mind that a grout pen is not a permanent solution. The coating can wear off over time, especially in high-moisture areas or with frequent scrubbing.
You may need to reapply every few months. Also, choose a color that closely matches your original grout—white or light gray for most bathrooms, or a darker shade if your grout is charcoal or beige. Test on an inconspicuous spot first to ensure the color blends well.
Choose The Right Shade
Grout pens come in several standard colors: white, bright white, almond, gray, and charcoal. If your grout is a custom color, you might not find an exact match. In that case, go a shade lighter or darker—lighter can brighten the tile, while darker creates contrast.
Always test on a hidden area before committing.
Prep The Surface First
For the pen to adhere properly, the grout must be clean and dry. Use a grout brush or an old toothbrush with a mild cleaner to remove loose dirt. Rinse well and let it dry for at least an hour.
Any moisture trapped under the ink can cause peeling or bubbling.
Apply With Steady Strokes
Hold the pen at a slight angle and run it along the grout line in one smooth motion. Don't press too hard—the tip should glide without squeezing out excess ink. If you make a mistake, wipe it off immediately with a damp cloth.
Let the ink dry for 10–15 minutes before touching the area.
Seal For Longer Life
After the pen dries, consider applying a grout sealer over the top. This adds a protective layer that resists moisture and stains, helping the color last longer. Reapply sealer every six months to maintain the look.
16. Try a Commercial Grout Cleaner for Stubborn Stains
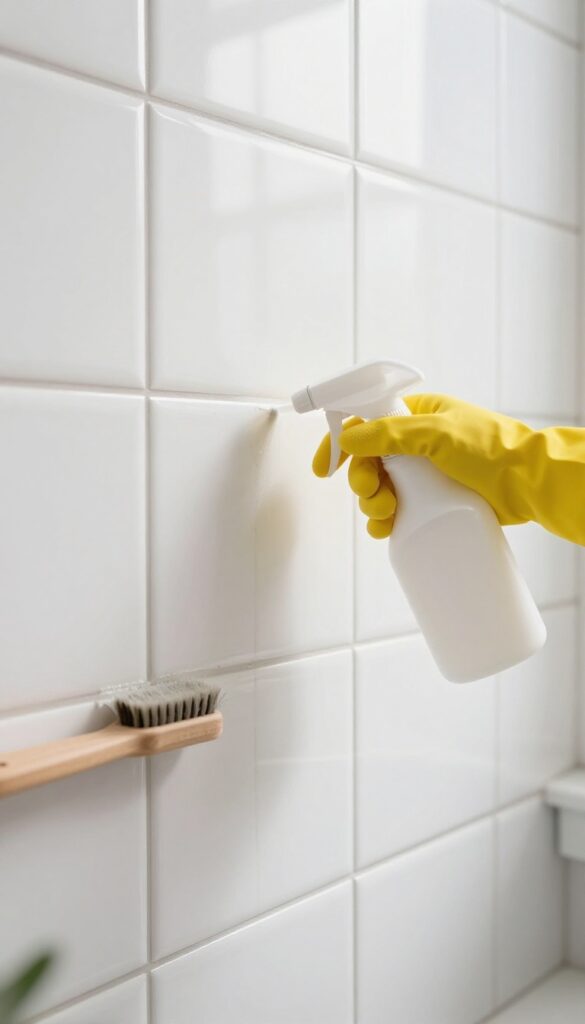
Sometimes a DIY paste just won't cut it. When grout stains have been baked in for months or years, a heavy-duty commercial cleaner can be the solution. Products like Zep Grout Cleaner or CLR are formulated to break down mineral deposits and deep-set grime that home remedies leave behind.
Commercial grout cleaners are powerful, so use them with care. Always read the label and follow the instructions precisely. Most require you to spray or apply the product, let it sit for a few minutes, then scrub with a stiff brush.
Rinse thoroughly afterward. Because these cleaners contain strong chemicals, open a window or run the exhaust fan to keep the bathroom ventilated. Wear gloves to protect your hands.
If you have colored grout, test the cleaner on a small hidden area first to make sure it doesn't bleach or discolor the surface.
Choosing The Right Product
Look for a cleaner specifically labeled for grout. Zep is great for general grime, while CLR excels at removing calcium, lime, and rust stains. For mold and mildew, a product with bleach might be better.
Avoid using acidic cleaners on natural stone tiles like marble or travertine, as they can etch the surface.
Application Tips For Best Results
Apply the cleaner generously to the grout lines, not the tile surface. Let it dwell for the recommended time—usually 5 to 10 minutes. Use a grout brush or an old toothbrush to work the cleaner into the pores.
Rinse with clean water and wipe away any residue with a damp cloth. If stains remain, repeat the process.
Safety First
Always wear rubber gloves and safety goggles. Keep the bathroom well-ventilated. Never mix different cleaners, especially those containing bleach and ammonia, as this can create toxic fumes.
Store cleaners out of reach of children and pets.
17. Use a Soft Bristle Brush for Textured Tiles
Textured or matte tiles add a nice look to your shower, but they can be a pain to clean. The rough surface traps grime and soap scum in ways smooth tiles don't. Using the wrong brush can scratch or dull the finish, making things worse.
A soft bristle brush is the answer. It gets deep into the texture without damaging the surface. Here's how to make it work for you.
Grab a nylon scrub brush with soft bristles. Avoid wire brushes or stiff scrubbers that can scratch. Wet the tile, apply your cleaner, and scrub in a circular motion.
The bristles will lift dirt from the crevices without harming the finish. Rinse thoroughly and let air dry.
Why Soft Bristles Matter
Hard bristles or abrasive pads can scratch textured tiles, especially matte or stone finishes. Once scratched, they become even harder to clean. Soft nylon bristles are gentle yet effective, reaching into the texture without causing damage.
Best Brush Types To Use
Look for brushes labeled "soft" or "gentle. " A long-handled brush helps you reach high or low tiles without straining. For small textured areas, a soft toothbrush works great.
Avoid brushes with metal bristles or stiff plastic.
Technique For Best Results
Wet the tiles first to loosen dirt. Apply a mild cleaner or a DIY solution of vinegar and water. Scrub gently in circular motions, focusing on one section at a time.
Rinse with warm water and wipe dry with a microfiber cloth to prevent water spots.
18. Rinse Thoroughly After Cleaning
You scrub and scrub, and the tiles look great—until they dry. Then you notice a hazy film or streaks that weren't there before. That's leftover cleaner residue doing its thing.
Rinsing thoroughly after cleaning is the step that makes all your hard work actually pay off.
Leftover cleaner residue can attract dirt and leave a dull film on your tiles. Always rinse tiles with warm water after scrubbing to leave them streak-free and clean. This simple step ensures your shower stays fresh longer and prevents buildup from returning faster than it should.
Why Residue Is A Problem
Cleaning products contain surfactants and chemicals that are great at breaking down grime. But if you don't rinse them off completely, they dry into a sticky layer that grabs onto new dirt and soap scum. That's why sometimes your shower looks worse a day after cleaning.
The Best Way To Rinse
Use a handheld showerhead or a bucket of warm water to rinse from top to bottom. Warm water works better than cold because it dissolves leftover cleaner more effectively. Make sure to hit every surface, including grout lines and corners where residue likes to hide.
Don't Forget The Squeegee
After rinsing, use a squeegee to remove excess water from tiles and glass. This prevents water spots and helps the surfaces dry faster, leaving a streak-free shine. It's a quick habit that keeps your shower looking clean longer.
19. Dry Tiles with a Microfiber Cloth
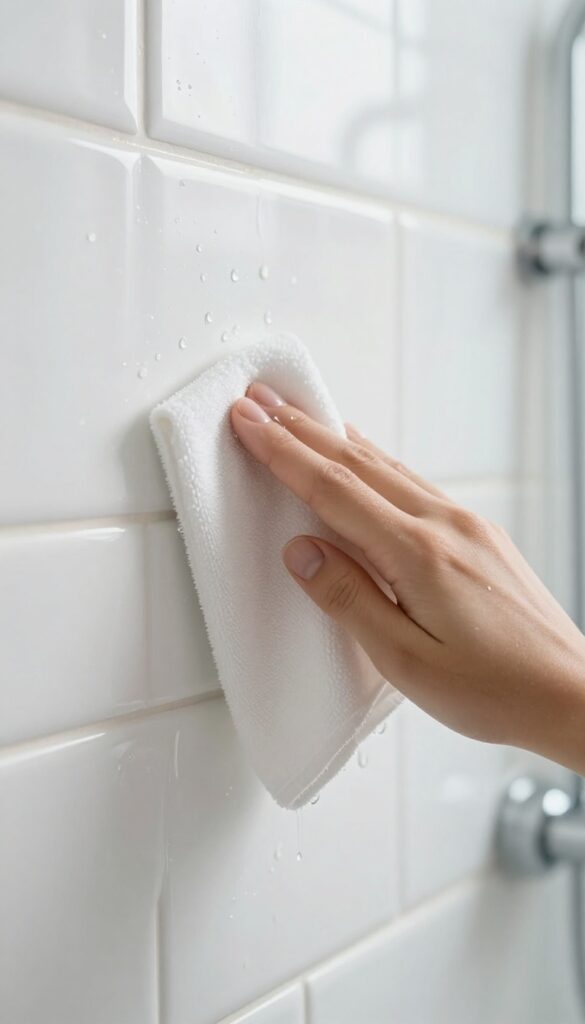
You scrub and scrub, and the tiles look great—until they dry. That's when water spots and streaks show up, making all that effort feel wasted. A simple microfiber cloth can fix that in seconds.
Drying your shower tiles after each use is one of the easiest ways to keep them looking fresh without extra scrubbing. It prevents mineral deposits from forming and keeps the shine intact between deep cleans.
Grab a clean, dry microfiber cloth and wipe down the tiles and glass after your shower. Focus on areas where water pools—corners, shelves, and around the faucet. This quick habit takes less than a minute but dramatically reduces buildup over time.
Microfiber is ideal because it absorbs water without leaving lint or streaks. It also traps tiny particles that can scratch surfaces if left to dry. Keep a dedicated cloth in the bathroom and swap it out weekly for best results.
Why Microfiber Works Best
Regular towels often leave lint or smears, especially on glass doors. Microfiber has ultra-fine fibers that grab water and minerals, pulling them away from the surface. It dries quickly and doesn't hold onto odors like cotton can.
For tiles, a 300-400 GSM cloth is a good balance of absorbency and softness.
Quick Daily Routine
After your last rinse, give the tiles a quick once-over with a microfiber cloth. Start at the top and work down, so drips don't ruin already-dried areas. Pay extra attention to grout lines—they hold moisture longer.
If you have a squeegee, use it first on glass, then follow with the cloth for a streak-free finish.
When To Wash Your Cloths
Dirty microfiber loses its effectiveness. Wash cloths after every few uses in warm water with mild detergent—no fabric softener, as it clogs the fibers. Air dry or tumble dry on low.
If cloths start leaving streaks, it's time for a fresh one.
20. Use a Fan or Open a Window
Moisture is the enemy of clean shower tiles. It creates the perfect breeding ground for mold and mildew, which can turn your sparkling tiles into a grimy mess. Good ventilation is your first line of defense, and it doesn't cost a thing.
Why Ventilation Matters
After a hot shower, the air is thick with moisture. Without proper airflow, that moisture settles on every surface—including your tiles. Over time, this leads to mold growth, soap scum buildup, and even damage to grout.
Running the fan or opening a window pulls that damp air out, helping tiles dry faster and stay cleaner longer.
Best Practices For Using Your Fan
Turn the bathroom fan on before you step into the shower. That way, it starts pulling moisture out right away. Keep it running for at least 20 minutes after you finish showering.
If your fan is weak or noisy, consider upgrading to a more powerful model—it's a small investment that pays off in less scrubbing.
When A Window Works Better
If your bathroom has a window, crack it open during and after showers. A cross breeze is even more effective than a fan at clearing out humidity. Just make sure the window is positioned to let steam escape, not blow it back into the room.
In colder months, a short post-shower air-out can still help without freezing you out.
21. Try a DIY Oxygen Bleach Soak
If your shower tiles are looking dingy but you want to avoid the harsh smell of chlorine bleach, oxygen bleach is a game-changer. It lifts stains and whitens grout without the fumes or the risk of damaging your tile finish. The best part?
You probably already have it in your laundry room.
Oxygen bleach, like OxiClean, works by releasing oxygen bubbles that break down organic stains and dirt. It's safe for most tile types and grout, and it's much gentler than chlorine bleach. To use it as a soak, mix the powder with warm water according to the package directions—usually about 1 scoop per gallon.
Apply the solution generously to your tiles and grout, let it sit for 15 minutes, then scrub lightly and rinse. The results are often surprisingly bright.
Why Oxygen Bleach Works
Unlike chlorine bleach, which can yellow grout over time, oxygen bleach is color-safe and won't weaken grout. It's also non-toxic, so you don't need to worry about fumes in a small bathroom. The oxygen bubbles penetrate porous surfaces, lifting dirt from deep within grout lines.
How To Apply It Right
For best results, make sure your tiles are dry before applying the solution. Use a spray bottle or a sponge to coat the tiles evenly. Let it sit for a full 15 minutes—don't rush it.
If the solution starts to dry, spritz with a little water. After soaking, scrub with a soft brush and rinse thoroughly.
When To Use This Method
This soak is perfect for monthly deep cleans or when you notice grout starting to look gray. It's also great for tackling soap scum that's built up over time. Just avoid using it on unsealed natural stone like marble or travertine, as oxygen bleach can etch the surface.
22. Use a Scrub Brush with a Long Handle
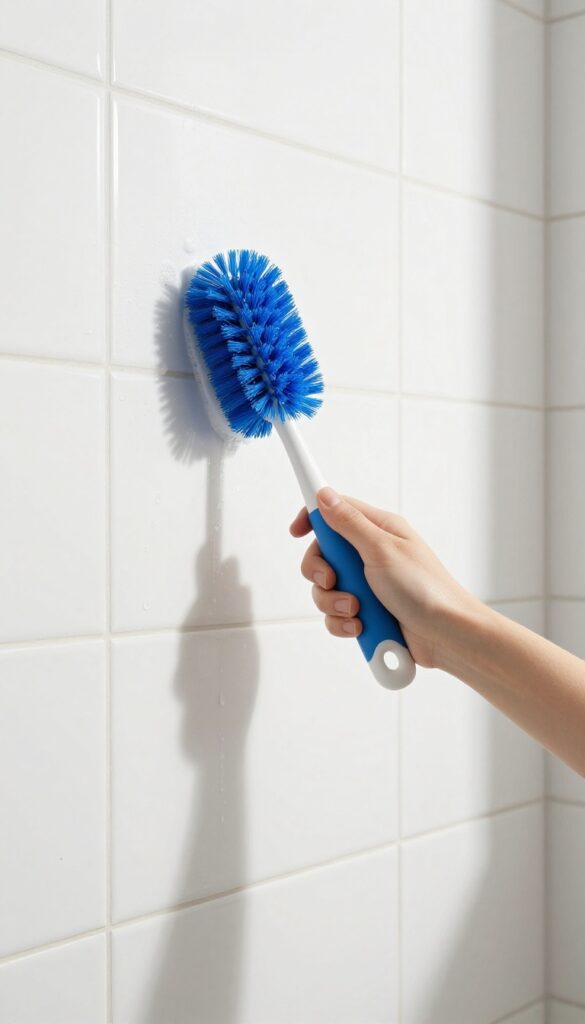
Bending over to scrub floor tiles or low walls can leave your back aching before you even finish. A long-handled scrub brush puts you in a comfortable standing position while still delivering the scrubbing power you need. It's a simple tool that makes a big difference, especially for larger showers or those with hard-to-reach corners.
Save Your Back And Knees
Nobody enjoys kneeling on a wet shower floor. A long handle keeps you upright, so you can scrub without straining. Look for a brush with an ergonomic grip and a handle that extends at least 30 inches.
That way you can reach the back of a tub or the lowest wall tiles without hunching over.
Pair With Your Go-to Cleaner
The brush itself is just a tool—what really matters is the cleaner you use. Squirt your favorite tile cleaner or a DIY vinegar solution directly onto the brush head or the tiles. Then scrub in circular motions, letting the bristles work into grout lines and textured surfaces.
Rinse thoroughly with the showerhead.
Choose The Right Bristle Stiffness
Soft bristles are gentle on delicate tiles like marble or polished stone, while medium or stiff bristles handle ceramic, porcelain, and grout better. Many long-handled brushes come with interchangeable heads, so you can swap between soft and stiff depending on the job. Keep a dedicated head for grout cleaning only.
23. Clean Caulk with Bleach Gel
Moldy caulk around your shower tiles is an eyesore, but you don't have to replace it just yet. A bleach gel—like Clorox Gel—can bring it back to life with minimal effort. The thick formula clings to vertical surfaces, so it stays put and works its magic overnight.
Bleach gel is a targeted solution for mold stains on caulk lines. Unlike liquid bleach that runs off, the gel consistency keeps the bleach in contact with the mold long enough to kill it and bleach out the discoloration. This method is especially effective for silicone or latex caulk around tubs, sinks, and tile edges.
After an overnight treatment, a simple rinse reveals noticeably whiter, fresher caulk.
Why Bleach Gel Works Best
Regular bleach sprays evaporate or drip away too quickly. Bleach gel is thick enough to stay on the caulk for hours, giving the active ingredients time to penetrate mold spores. It also reduces the risk of splashing onto nearby surfaces, making it safer for surrounding tiles and grout.
How To Apply It
Start by wiping the caulk dry with a cloth. Then, squeeze a thin, continuous bead of bleach gel directly onto the moldy caulk line. Spread it slightly with a disposable brush or gloved finger to ensure full coverage.
Let it sit for at least 6 to 8 hours—overnight is ideal. Rinse thoroughly with warm water and dry the area.
Safety And Precautions
Always wear gloves and eye protection when handling bleach gel. Ensure the bathroom is well-ventilated by opening a window or running the exhaust fan. Avoid mixing bleach with other cleaners, especially ammonia or vinegar, as this creates toxic fumes.
Keep the gel away from colored grout, as it may cause fading.
When To Replace Instead
If the caulk is cracked, peeling, or pulling away from the tile, cleaning won't fix the underlying damage. In that case, remove the old caulk completely and reapply fresh caulk. Bleach gel is a maintenance step, not a repair for compromised seals.
24. Use a Toothpaste for Metal Marks
That dark gray streak on your tile from a razor or shampoo bottle isn't permanent. It's just metal transfer, and you can fix it with something already in your bathroom cabinet: non-gel toothpaste. It works as a mild abrasive to buff away those marks without damaging the tile surface.
Grab a soft cloth and a pea-sized dab of white, non-gel toothpaste. Rub it gently over the mark in small circles for about 30 seconds. Wipe away the residue with a damp cloth, then dry.
The mark should be gone or significantly faded. Repeat if needed.
Why Toothpaste Works
Toothpaste contains mild abrasives like calcium carbonate or silica. These are fine enough to polish metal stains off glazed tiles without scratching them. It's a gentle way to erase scuffs without reaching for harsh chemicals.
What To Avoid
Stick to plain white toothpaste—no gel, whitening, or baking soda formulas. Gel toothpaste is too smooth to abrade the mark, and whitening pastes can be too harsh. Also, test on an inconspicuous spot first, especially on natural stone tiles.
When It Won't Work
If the metal has actually scratched the tile surface, toothpaste won't erase the groove. In that case, you might need a ceramic touch-up kit. But for surface-level marks, toothpaste is a quick, cheap fix.
25. Schedule a Monthly Deep Clean
A quick daily wipe is great, but it won't cut through the buildup that settles into grout lines and tile surfaces over time. That's where a monthly deep clean comes in. Setting aside just 30 minutes once a month keeps your shower from ever reaching that grimy, neglected state.
Think of it as a reset button for your shower. When you deep clean regularly, you're not just scrubbing away visible dirt—you're preventing soap scum and mildew from taking hold. This habit turns a potential weekend project into a quick, manageable task.
What A Monthly Deep Clean Includes
Start by spraying down all tiles and grout with a cleaner suited to your tile type—something like a baking soda paste for ceramic or a pH-neutral cleaner for natural stone. Let it sit for 5-10 minutes to loosen grime. Then scrub with a stiff brush, focusing on grout lines and corners.
Rinse thoroughly with warm water and dry with a microfiber cloth to prevent water spots.
Stick To A Schedule That Works
Pick a day that's easy to remember, like the first Sunday of the month. Set a reminder on your phone or mark it on a calendar. Consistency is key—once it becomes a routine, it takes almost no mental effort to keep your shower tiles looking fresh and bright.
FAQ
How often should I clean shower tiles?
For best results, do a quick wipe-down or squeegee after each use, and a deeper clean weekly. Monthly deep cleaning of grout and caulk helps prevent stubborn buildup.
What is the best homemade cleaner for shower tiles?
A mix of equal parts white vinegar and water works well for daily cleaning. For tougher grime, combine baking soda and water into a paste, or use a vinegar and Dawn dish soap soak.
Can I use bleach on shower tiles?
Bleach can be used on grout and caulk but avoid it on colored or natural stone tiles, as it can discolor or damage them. Always dilute bleach and rinse thoroughly.
How do I prevent mold on shower tiles?
Reduce moisture by using a squeegee after showers, running the fan, and opening a window. Regular cleaning with vinegar or hydrogen peroxide also helps prevent mold growth.
What should I avoid when cleaning shower tiles?
Avoid abrasive scrubbers on glossy or natural stone tiles, as they can scratch. Also, don't mix bleach with ammonia or vinegar, as it creates toxic fumes.
Conclusion
Keeping your shower tiles spotless doesn't require expensive products or hours of scrubbing. A few smart techniques, like using a squeegee after each shower or tackling grout with a baking soda paste, can make a huge difference. The trick is finding a routine that fits your lifestyle and sticking with it.
Start with the methods that feel most manageable and build from there. Even small changes, like switching to a daily spray or wiping down tiles weekly, will keep that fresh scrubbed look lasting longer. Your bathroom will feel cleaner with less effort over time.


